Odoo 18’s eLearning module provides a complete solution for effectively and quickly handling online certifications and courses. Streamlining the entire certification process, from design to completion, ensures that learners are quickly recognized for their achievements. Rather than managing paperwork, educators and trainers can focus on creating high-quality material using customized templates, automated publication, and real-time tracking. To guarantee that certifications are given based on performance, the module also permits integration with tests and quizzes.The eLearning certification management system in Odoo 18 streamlines processes while improving the entire experience of learners, whether for training, academic learning, or skill development programs.
From the Odoo 18 dashboard, choose the eLearning module.

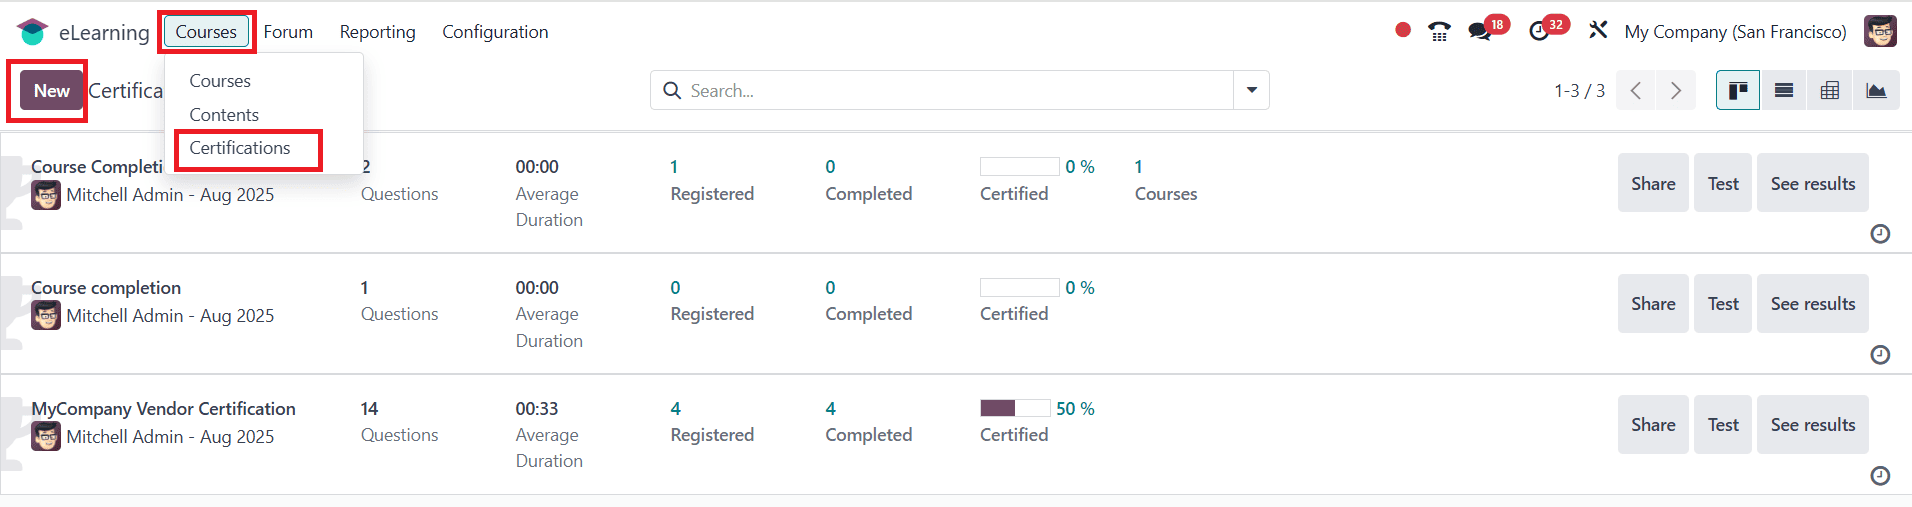
From the Courses menu, open Certification and click the New button to create a new certification.
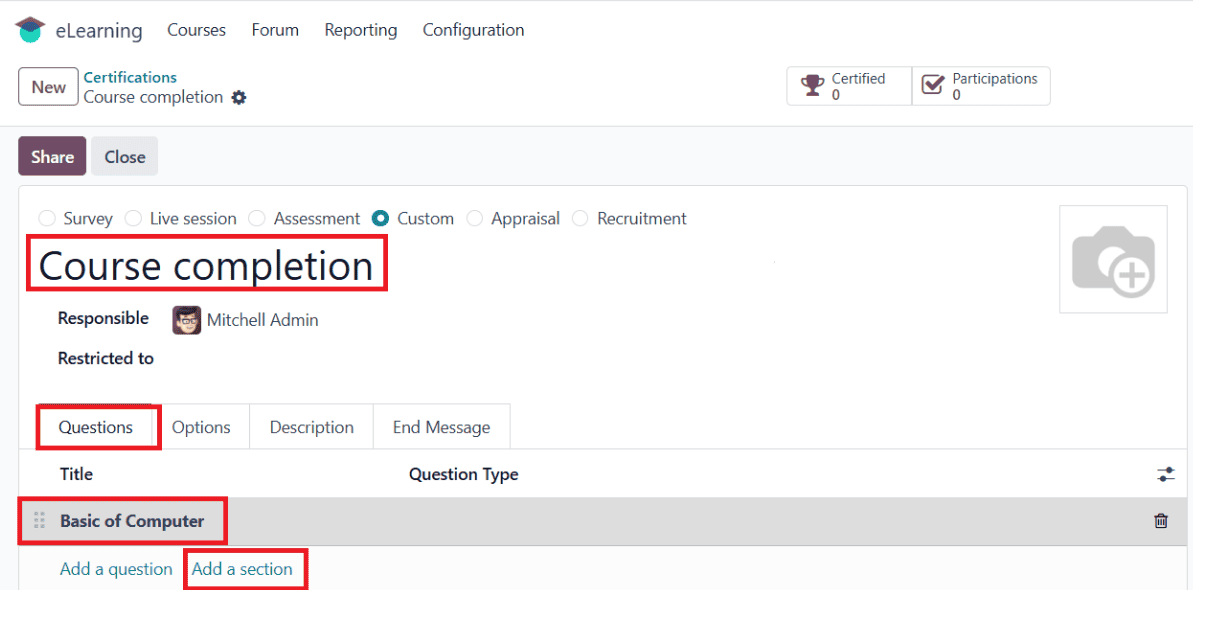
You can then specify a title for your certification. Under the Questions tab, you have options such as Add Section and Add Content. As shown below, you can add a section to your certification by clicking Add a section.
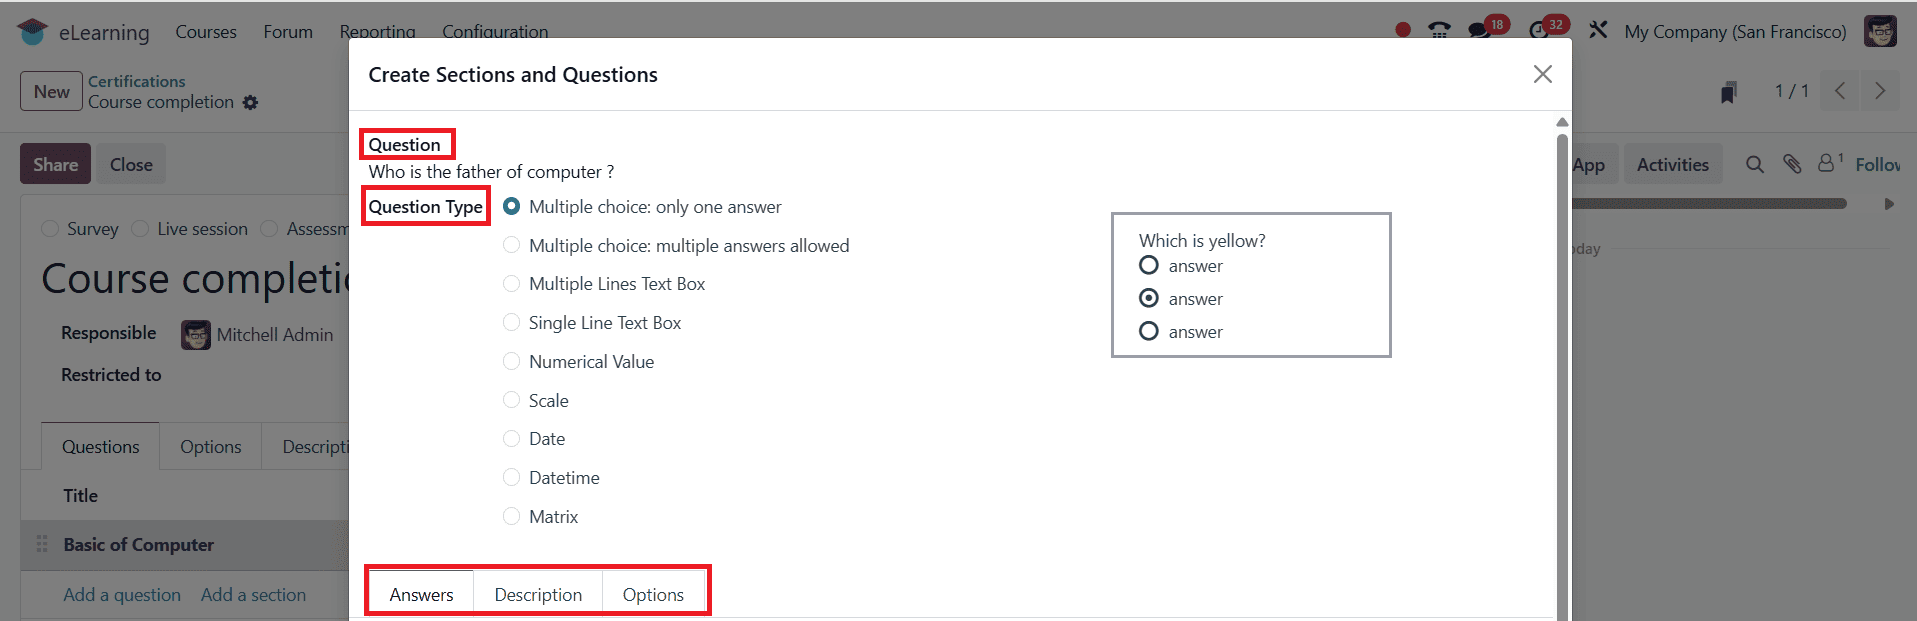
Then, select Add a question, and a pop-up screen will be displayed. Under the Question option, add a question for your certification. Under the Question Type, select a multiple-choice question type from the list. Here, you can see three tabs: Answers, Description, and Options.
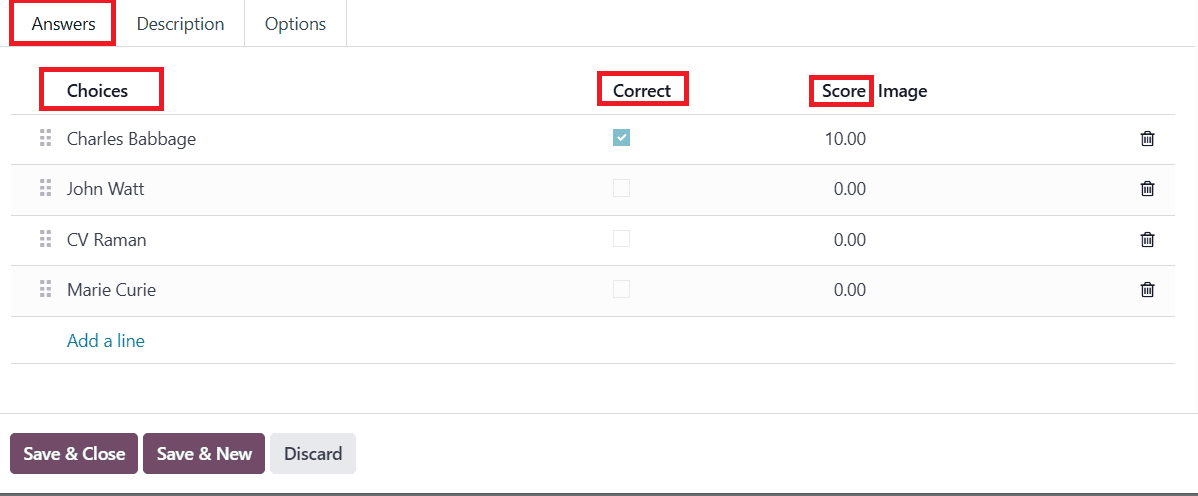
Under the Answers tab, add several options under the Choices option by clicking Add a line. Then mark the correct answer under the Correct option and add a score for the correct answer under the Score option.
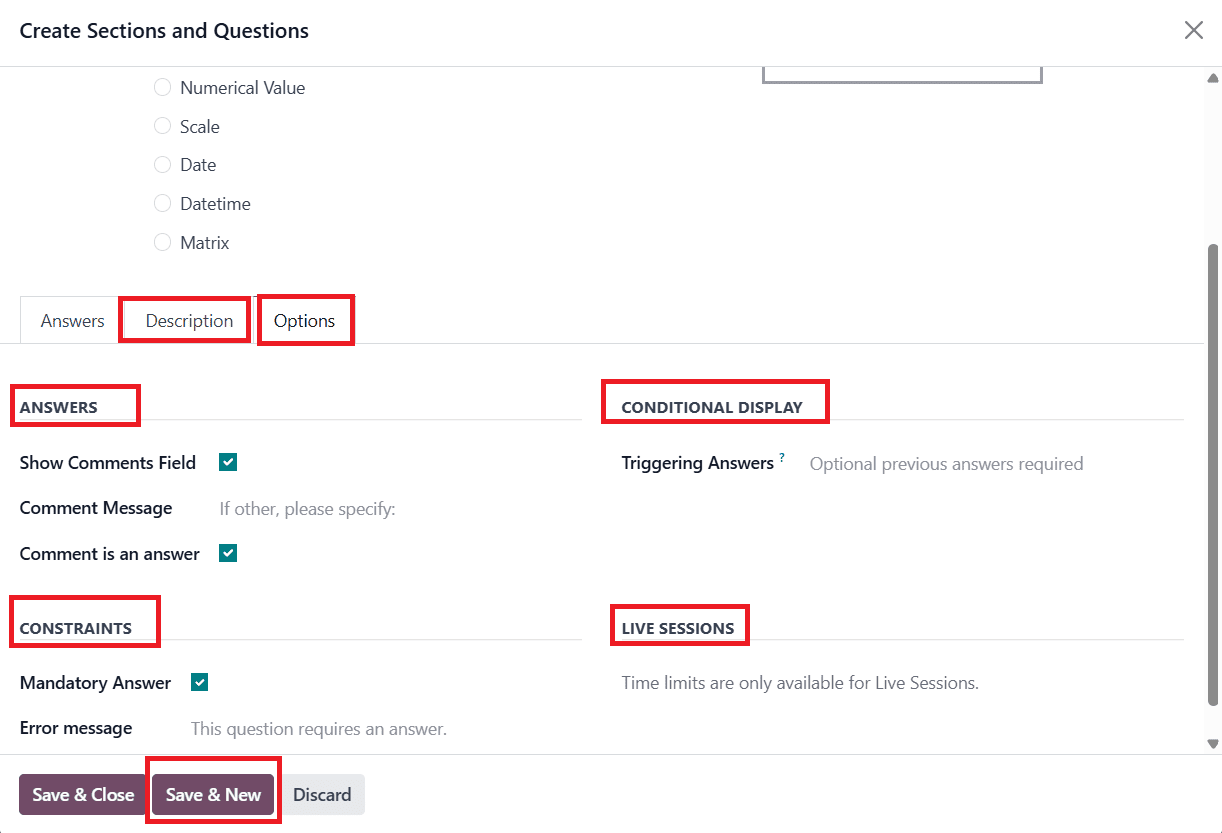
The Description tab allows you to include concise details about your question. In the Options tab, enable the Show Comment field under the Answers section. Then, two fields will appear: Comment Message (add a message that helps the participant to answer) and Comment is an answer (Odoo considers the participant’s comment as an answer). Under the Constraints section, enable Mandatory Answer, which indicates that the question needs to be answered. In the Error Message field, you can add a message that shows when the participant does not answer. Under the Conditional Display, you can add a previous question’s answer in the Triggering Answers field. Under Live Sessions, you can add a time limit for live sessions. Then click on the Save & New button to create another question.
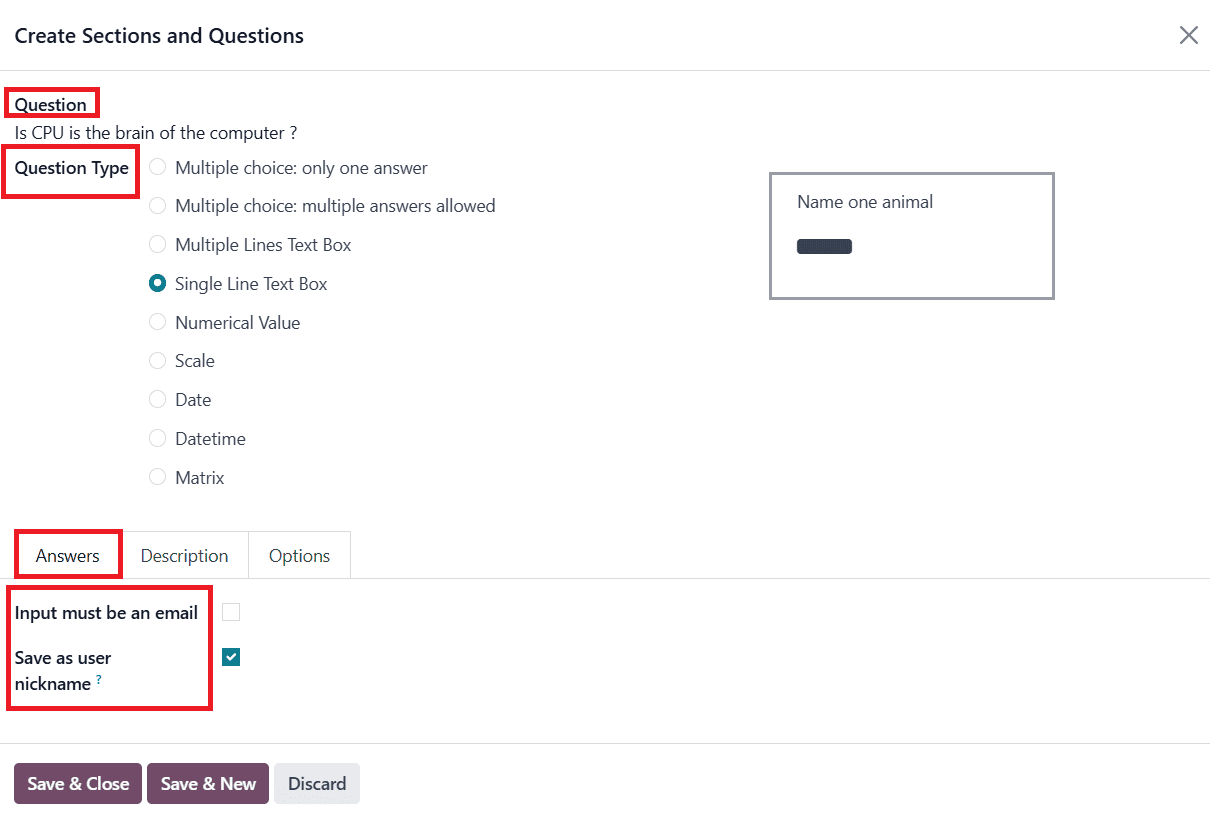
Under the Question option, you can add another question for your certification and select a Question Type. Under the Answers tab, you can also enable Input must be an email (Odoo saves the answer as the participant’s email ID) and Save as user nickname (Odoo saves the answer as the user nickname).
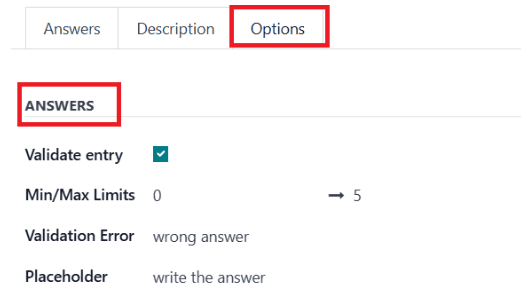
Under the Description tab, you can add a description of your questions. When you select the question type as Single Line Text Box, Numerical Value, Date, and Datetime, you can see two options: Validate entry and Placeholder under the Answers section in the Options tab. When you enable Validate entry, two options will appear: Min/Max Limits (add the minimum and maximum number of quantities that can be added for the question) and Validation Error (add a message that will appear when the answer is wrong). Under the Placeholder option, you can add a message that helps participants write their answers. Then click on the Save & Close button.
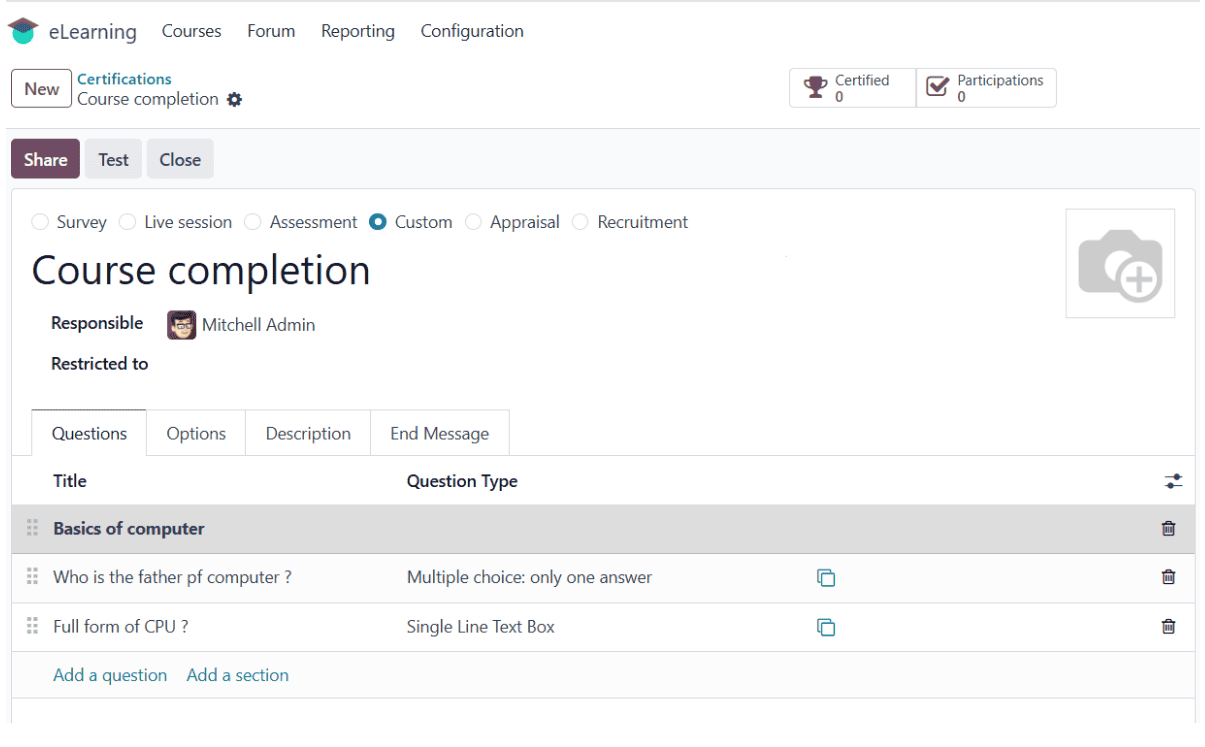
Here, you can see the created questions under the Question tab.
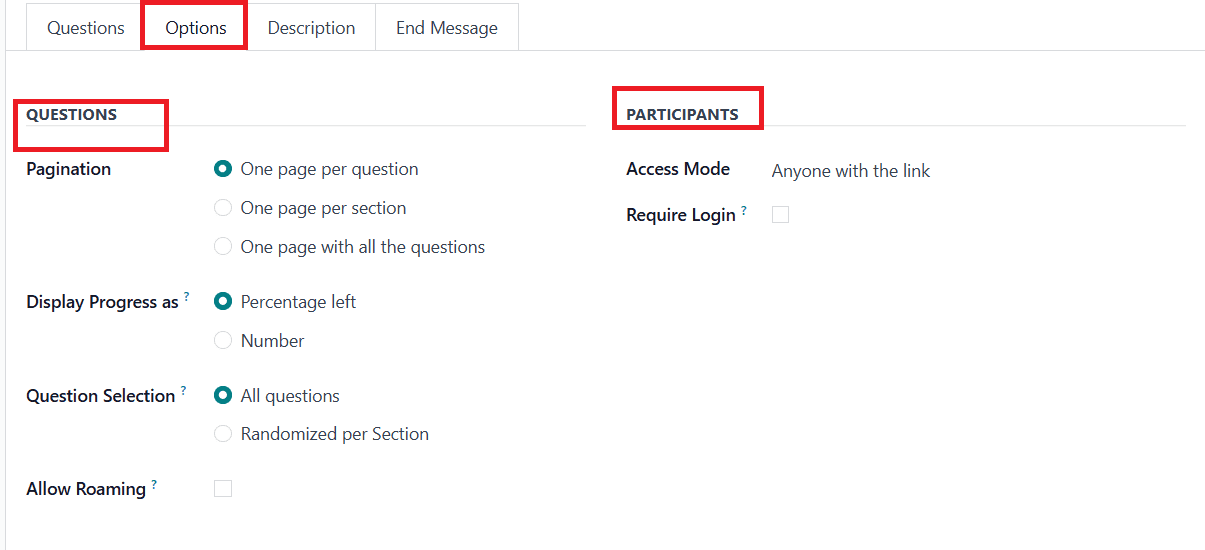
Under the Options tab, you can see three sections: Questions, Participants, and Time & Scoring. The Questions section allows you to choose Pagination options such as One page per question, One page per section, or One page with all questions. In the Display Progress, you can choose either Percentage left (you can see the number of remaining questions to answer or answered questions in percentage) or Number (you can see the number of remaining questions to answer or responded to questions in number). In the Question Selection, you can select either All questions or Randomized per Section to choose the questions for participants. Enable Allow Roaming for participants to return to the previous page. In the Participants section, you can define Access Mode to allow either Anyone with the link or Invited people only. Enable the Require Login option to require participants to log in when answering the questions.
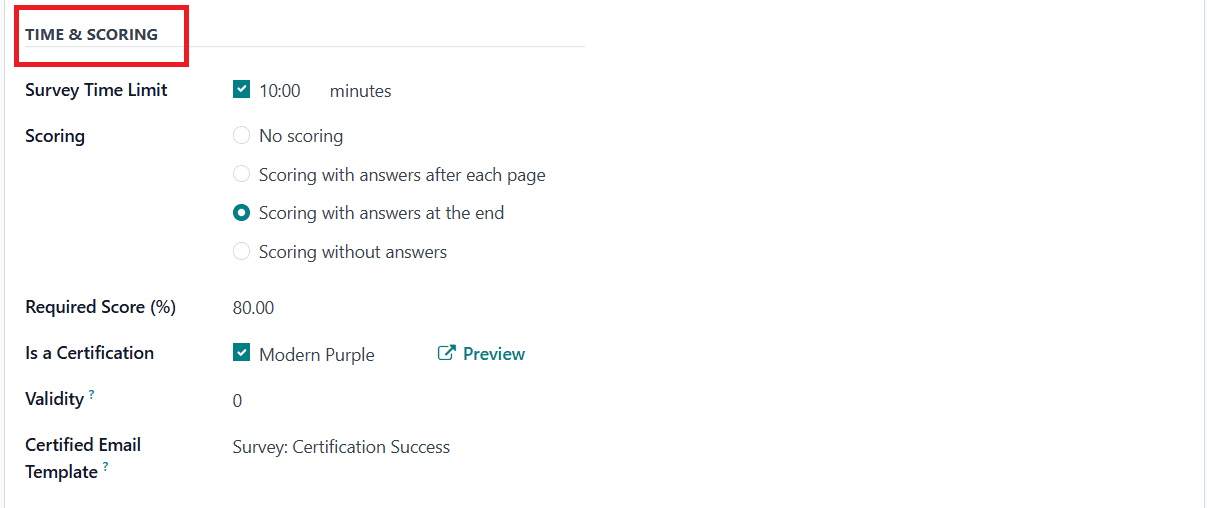
Under the Time & Scoring section, add a time limit under the Survey Time Limit option. For Scoring, you can choose No scoring, Scoring with answers after each page, Scoring with answers at the end, or Scoring without answers. Under the Required Score (%), add the percentage score for attaining the certificate. In the Is a Certification option, you can select the theme of the certificate from the list. Use the Validity option to define how many months the certificate will remain valid. From the Certified Email Template option, select a preconfigured email template to be automatically sent after completion. Then save it, and the certification is ready.
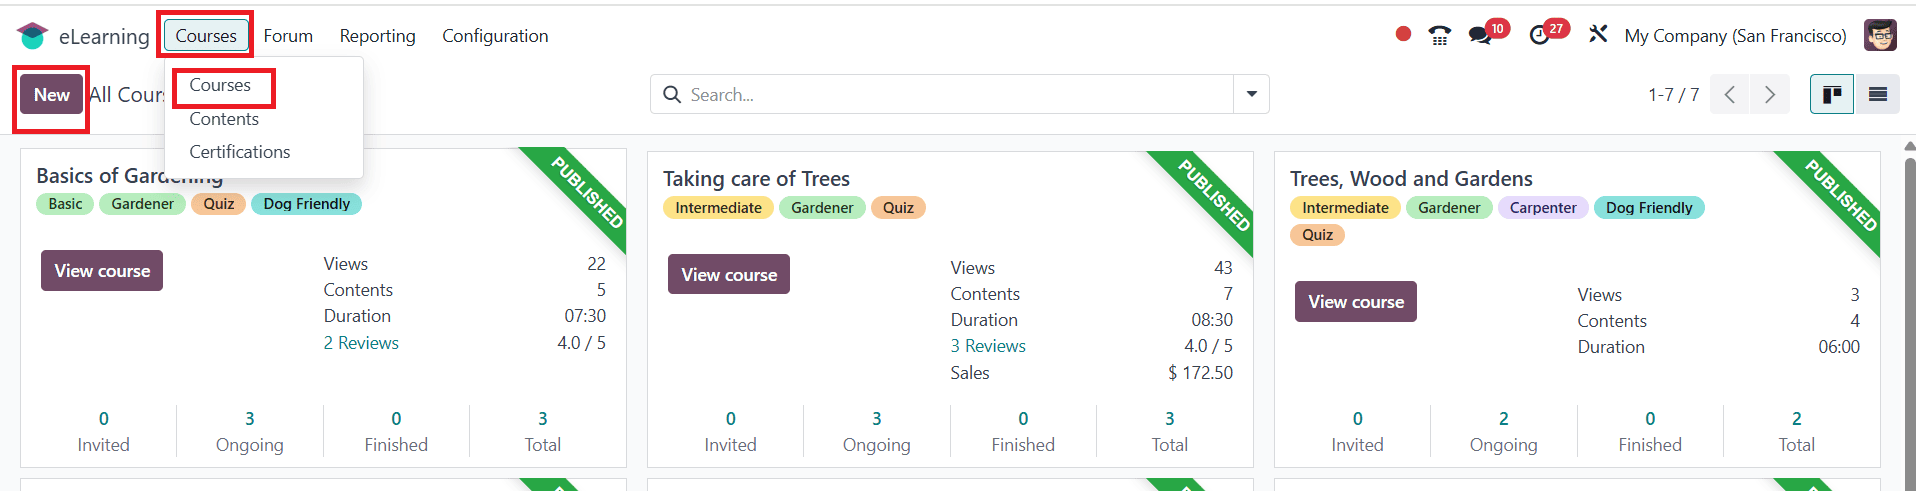
Navigate to the Courses > Courses and click on the New button to create a new course.
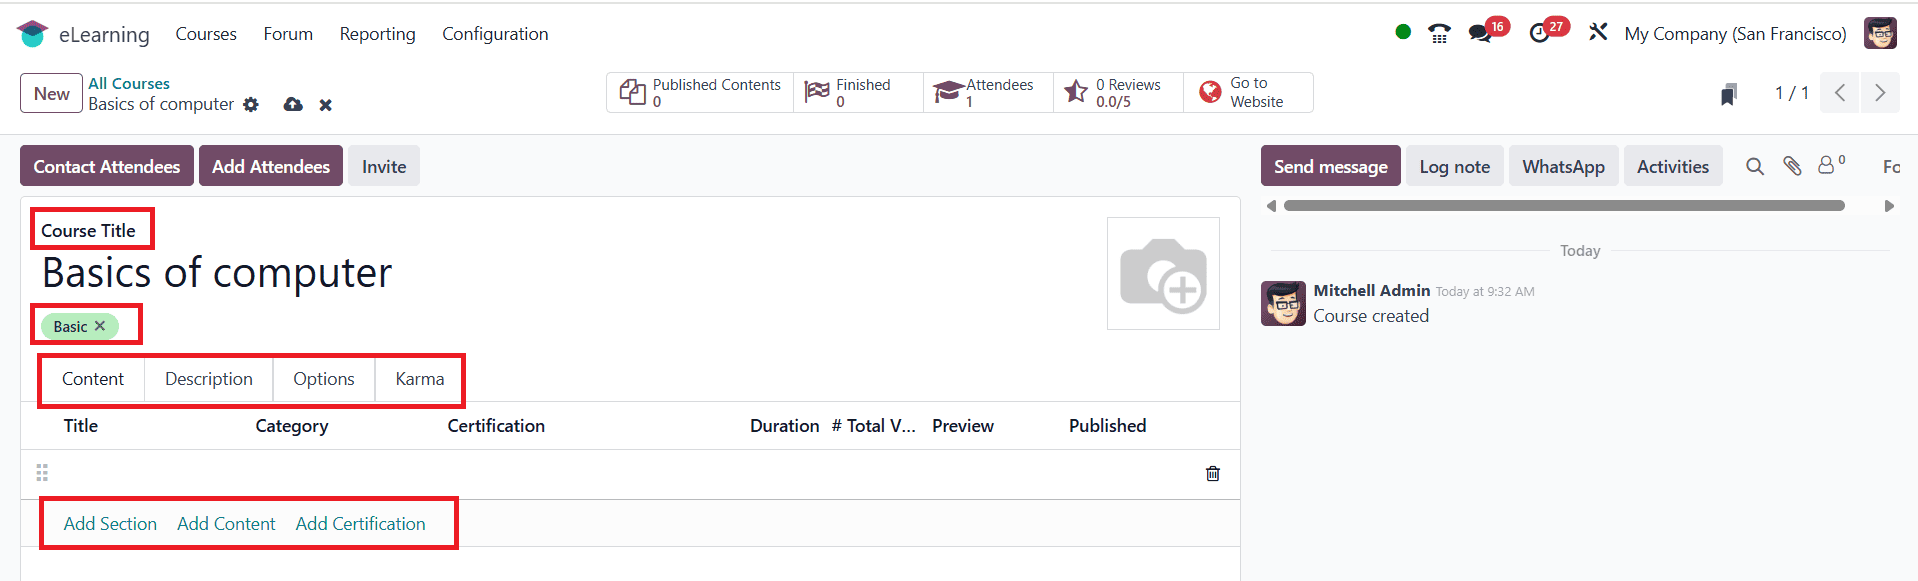
Enter a course name in the Course Title field. You can add suitable tags for your course from the list. Here, you can see four tabs: Content, Description, Options, and Karma. Under the Content tab, you can choose three options: Add Section, Add Content, or Add Certification. Click the Add Section to create a new section.
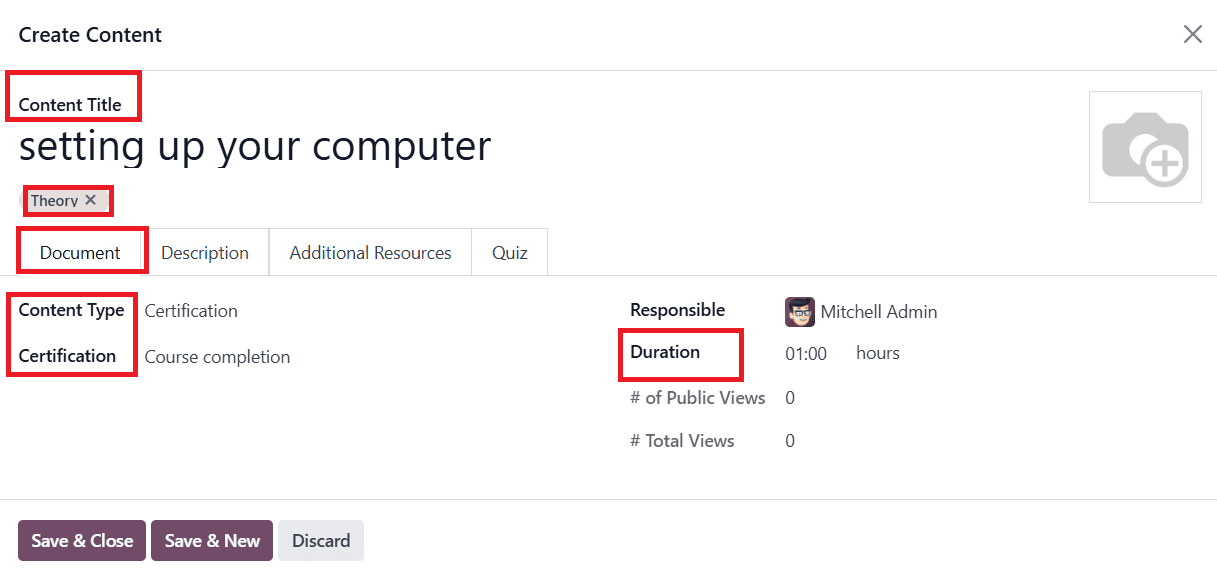
Clicking the Add content option will open a pop-up window. There, you can add a Content Title and Tags for your content. Under the Document tab, select Content Type as Certification. Then select the created certification from the list under the Certification option.. You can also assign a Responsible and specify the content Duration. Under the Description tab, add a description about your content. In the Additional Resources tab, you can attach extra resources as a File or a Link.
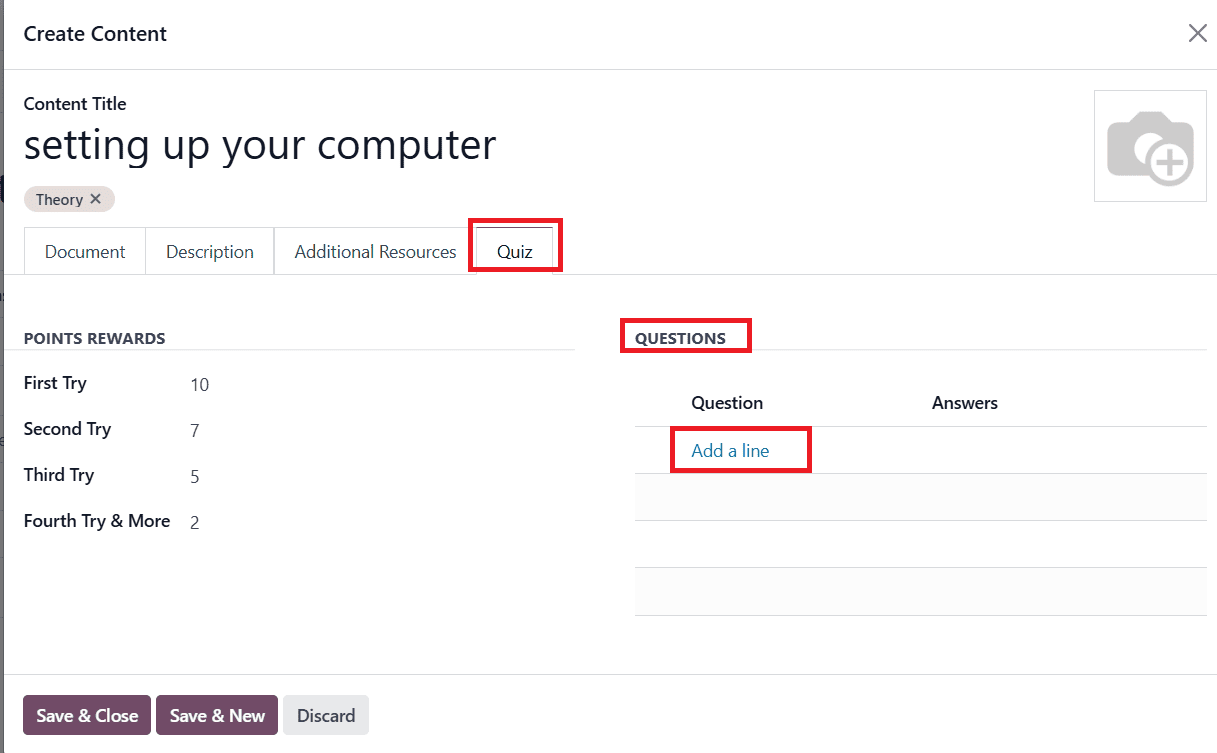
In the Quiz tab, click Add a line in the Question section to create a new question.
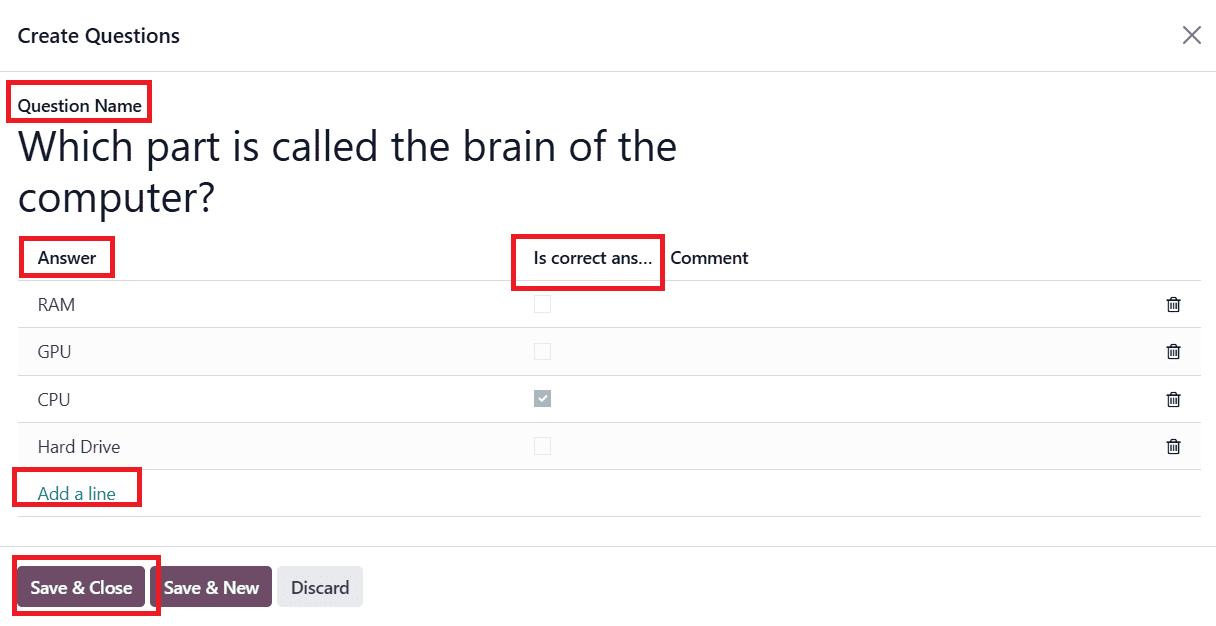
Enter the question under the Question Name field. Under the Answer option, add the list of answers by clicking Add a line, and mark the correct answer under the Is correct answer option. To create another question, click on the Save & New button or close the section by clicking the Save & Close button, as shown below:
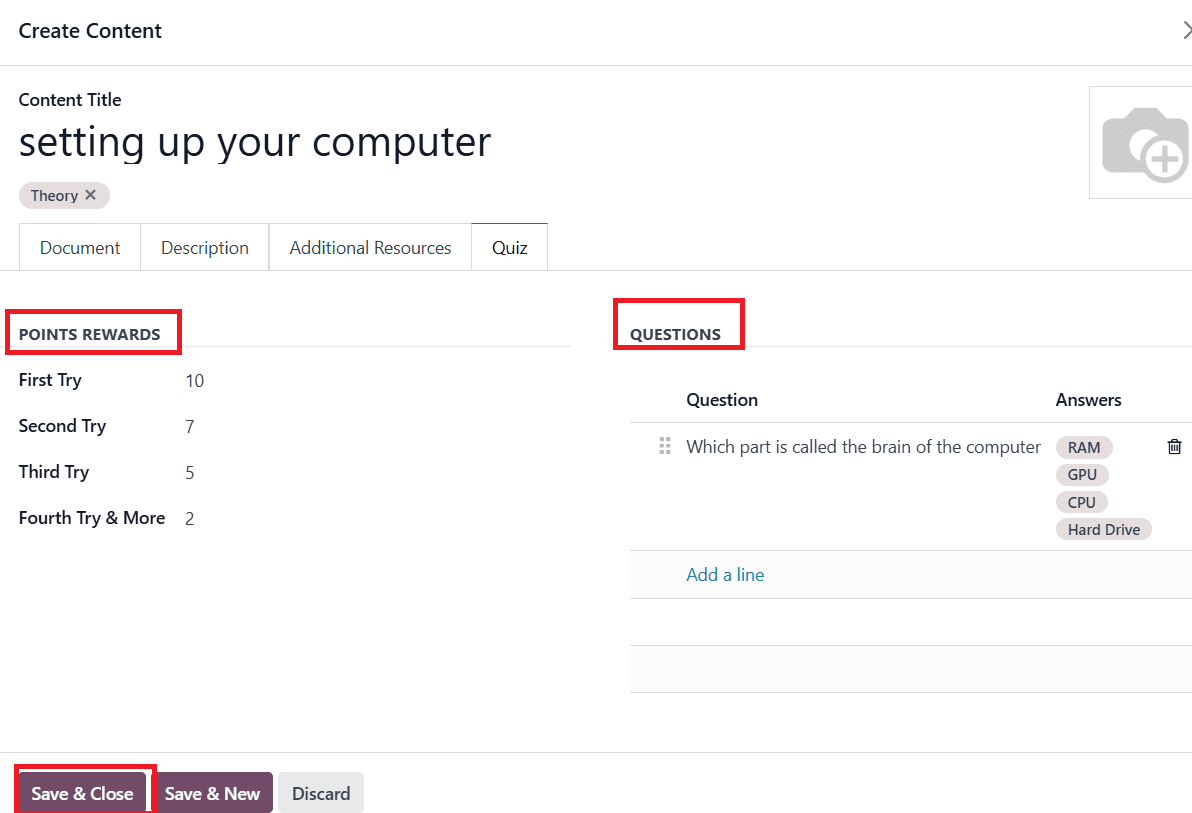
Here, you can see the score for each try under the Points Rewards section. You can also see the created question under the Questions section. To add more content, click the Save & New button or click on the Save & Close button as shown below:
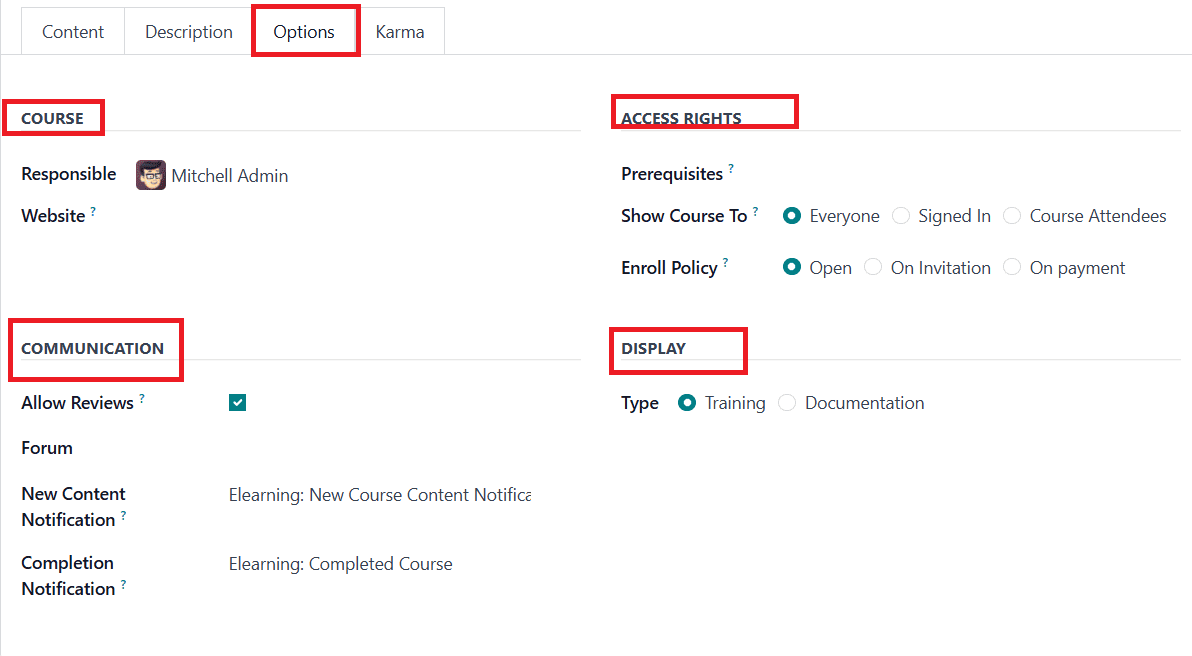
The Options tab contains four sections: Course, Communication, Access Rights, and Display. You can add a Responsible for the course and Website to restrict other websites under the Course section. Under the Communication section, enable Allow Reviews to allow participants to like, comment, and review the course. You can add a preconfigured or newly created forum under the Forum option. You can also set a notification for uploading new content or completion of the content under the New Content Notification or Completion Notification. Under the Access Rights option, you can set a prerequisite course before attending this one under the Prerequisites section. In the Show Course To option, you can select Everyone, Signed, or Course Attendees to access the course. In the Enroll Policy settings, you can allow enrollment as Open, On Invitation, or On Payment in the course. Under the Display section, you can select Type as Training or Documentation.
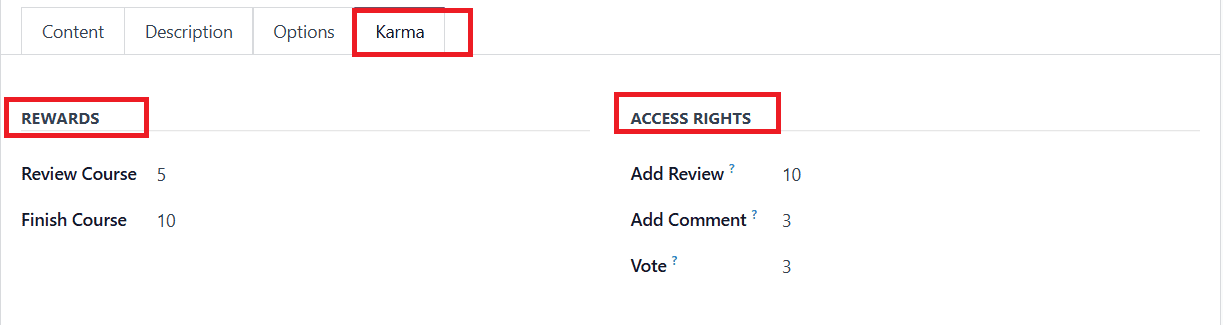
Under the Karma section, you can see the score for reviewing and finishing the course under the Rewards section. In the Access Rights section, scores for Add Review, Add Comment, and Vote are displayed.
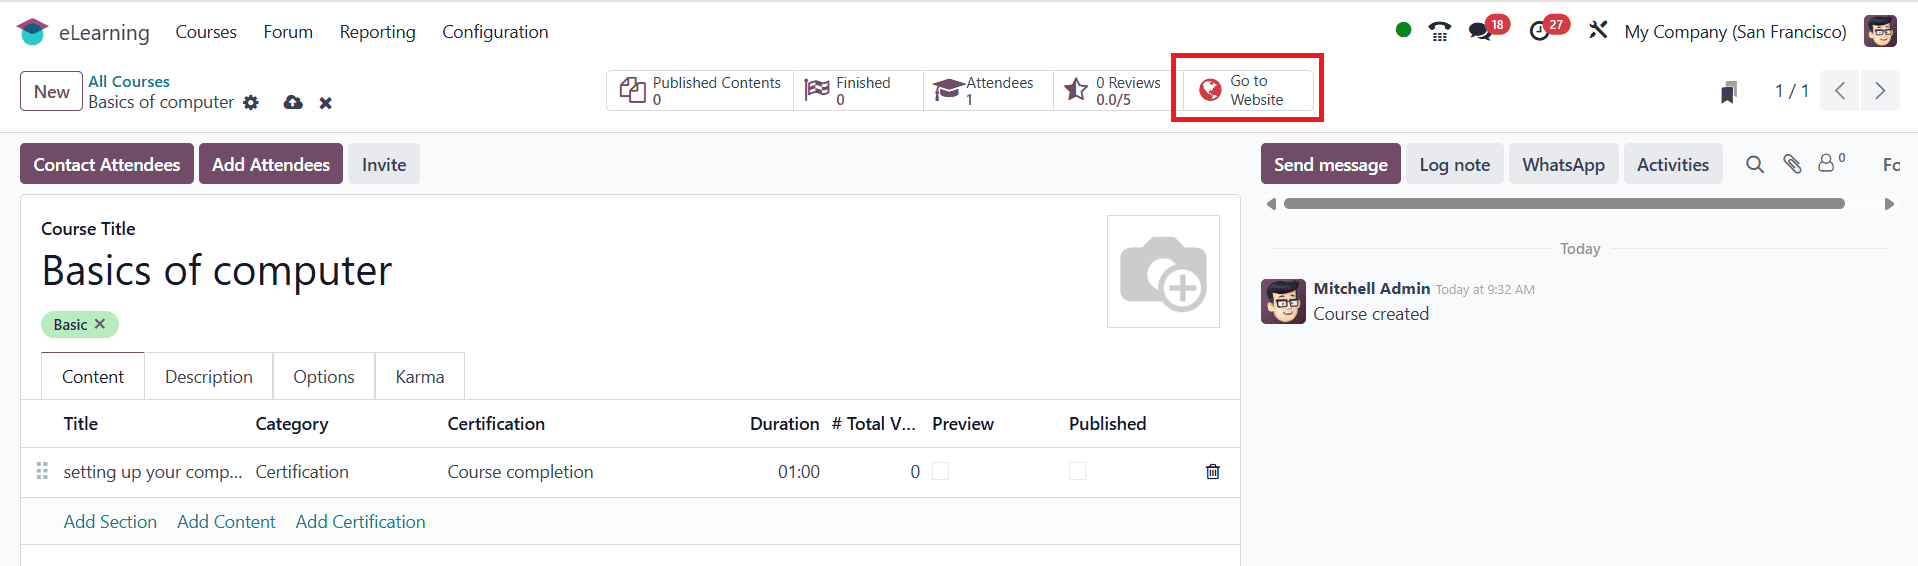
To publish the course, click on the Go to Website button as shown below:
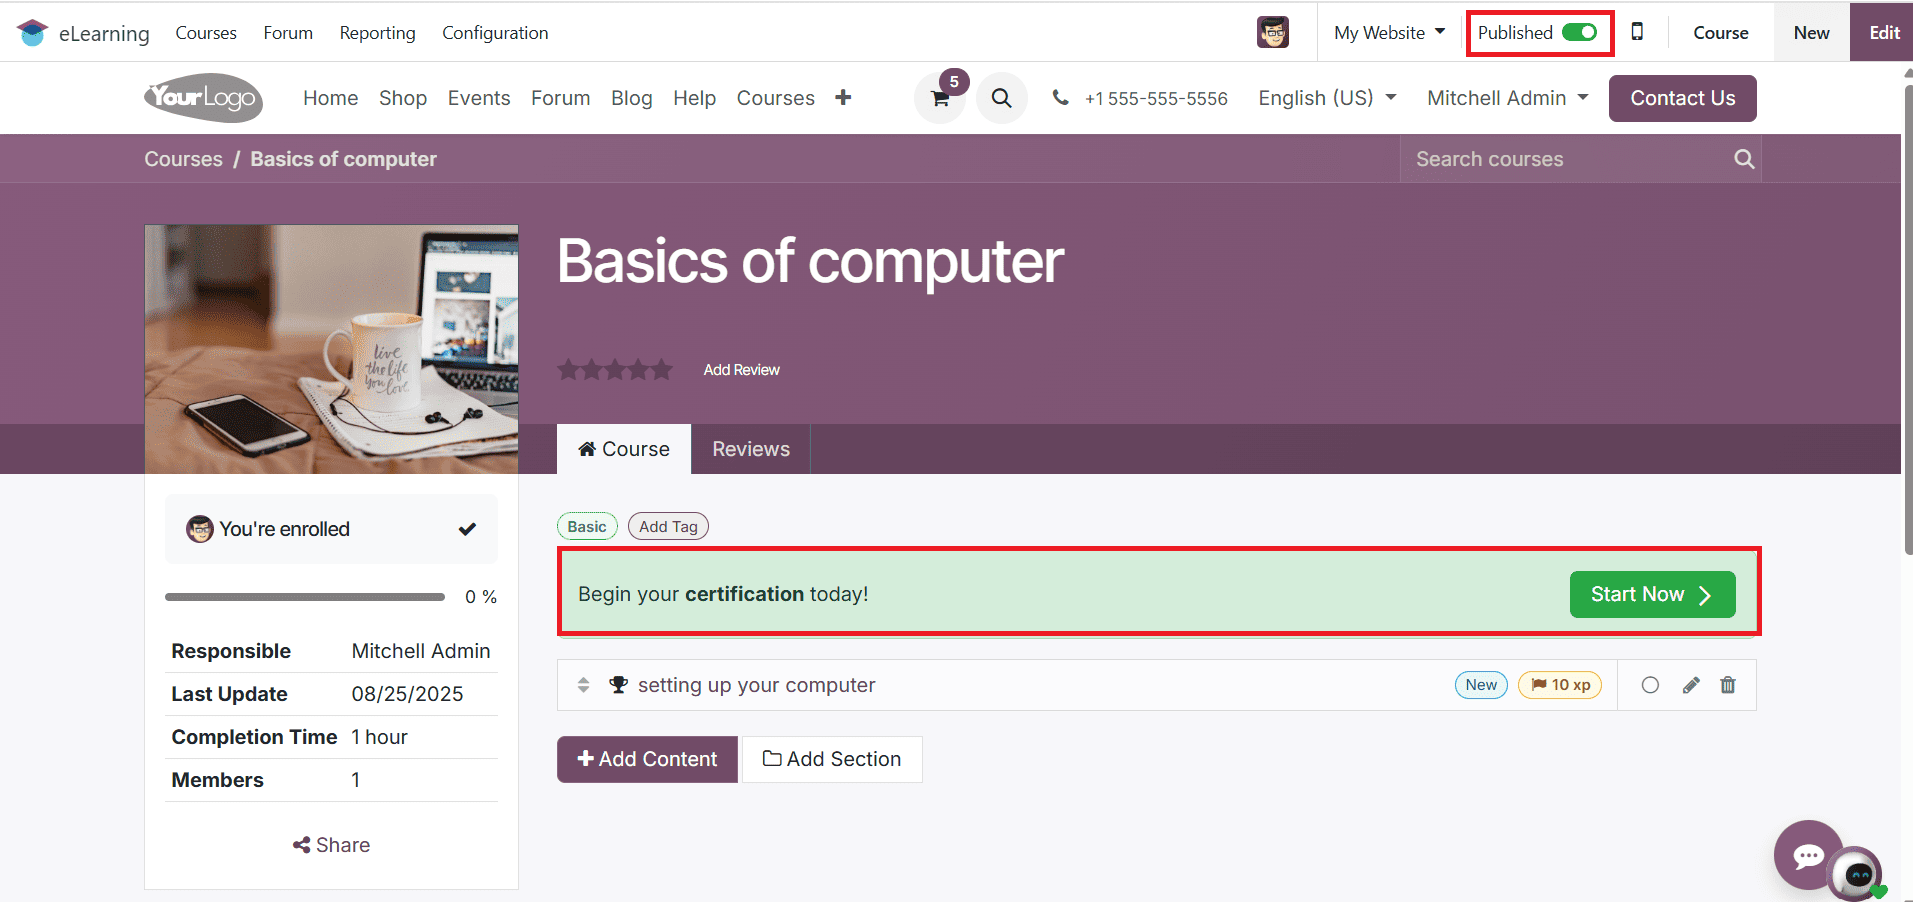
Next, enable the Published button to publish the course on the website. The course content can also be published. Next, click Start Now button to begin the certification.
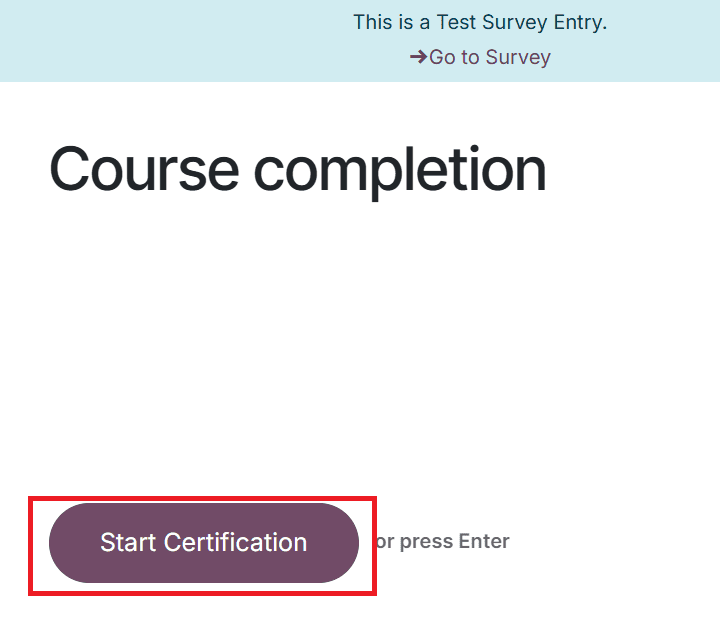
Click on the Start Certification button to test the certification.
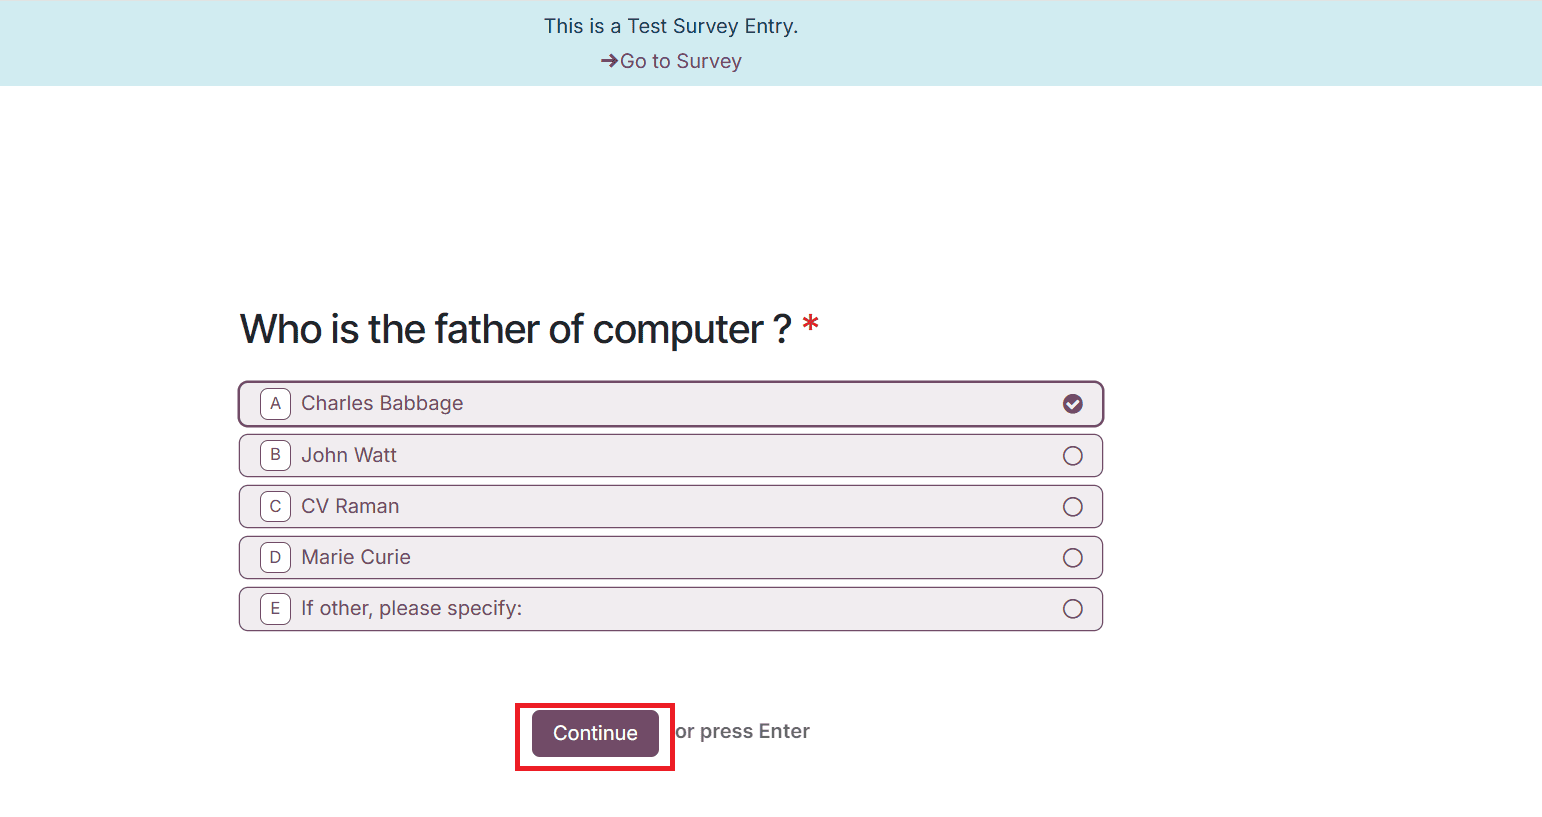
Here, you can see the created questions. Mark the answer and click on the Continue button as shown below:
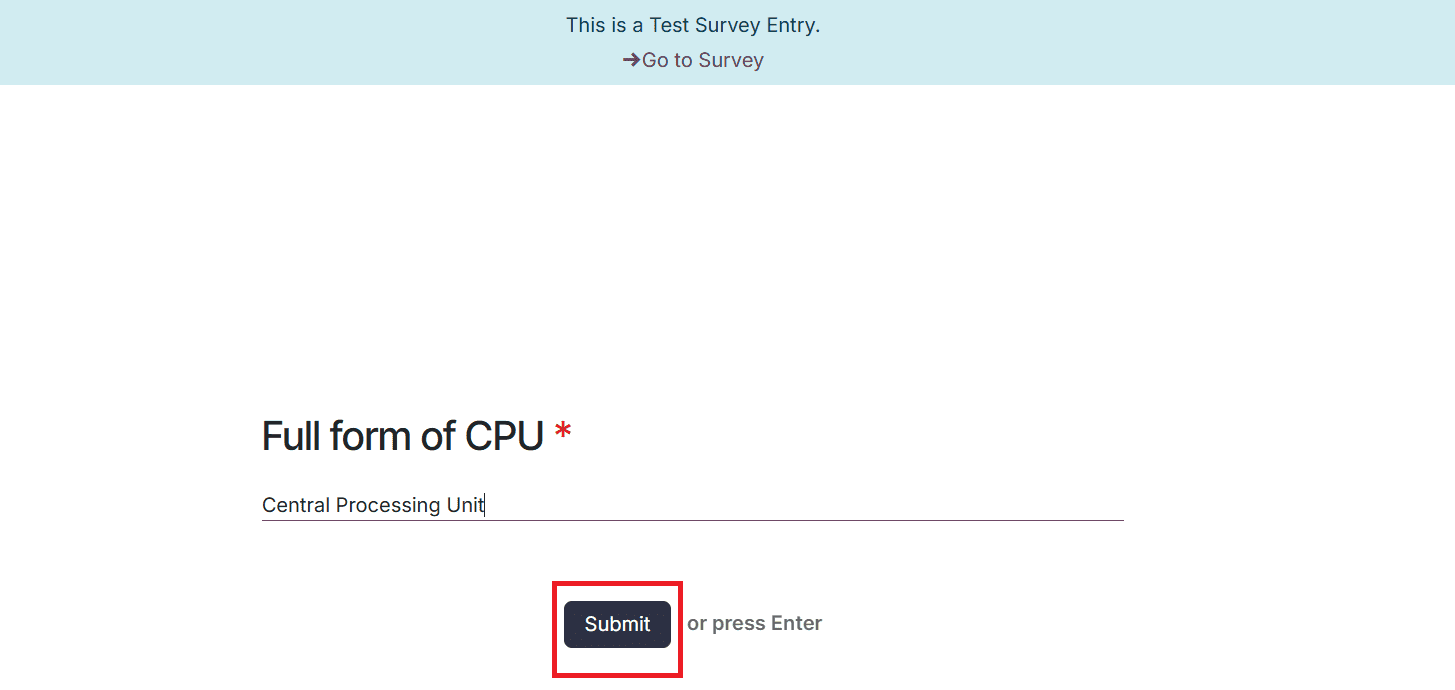
After answering all the questions, click on the Submit button as shown below:
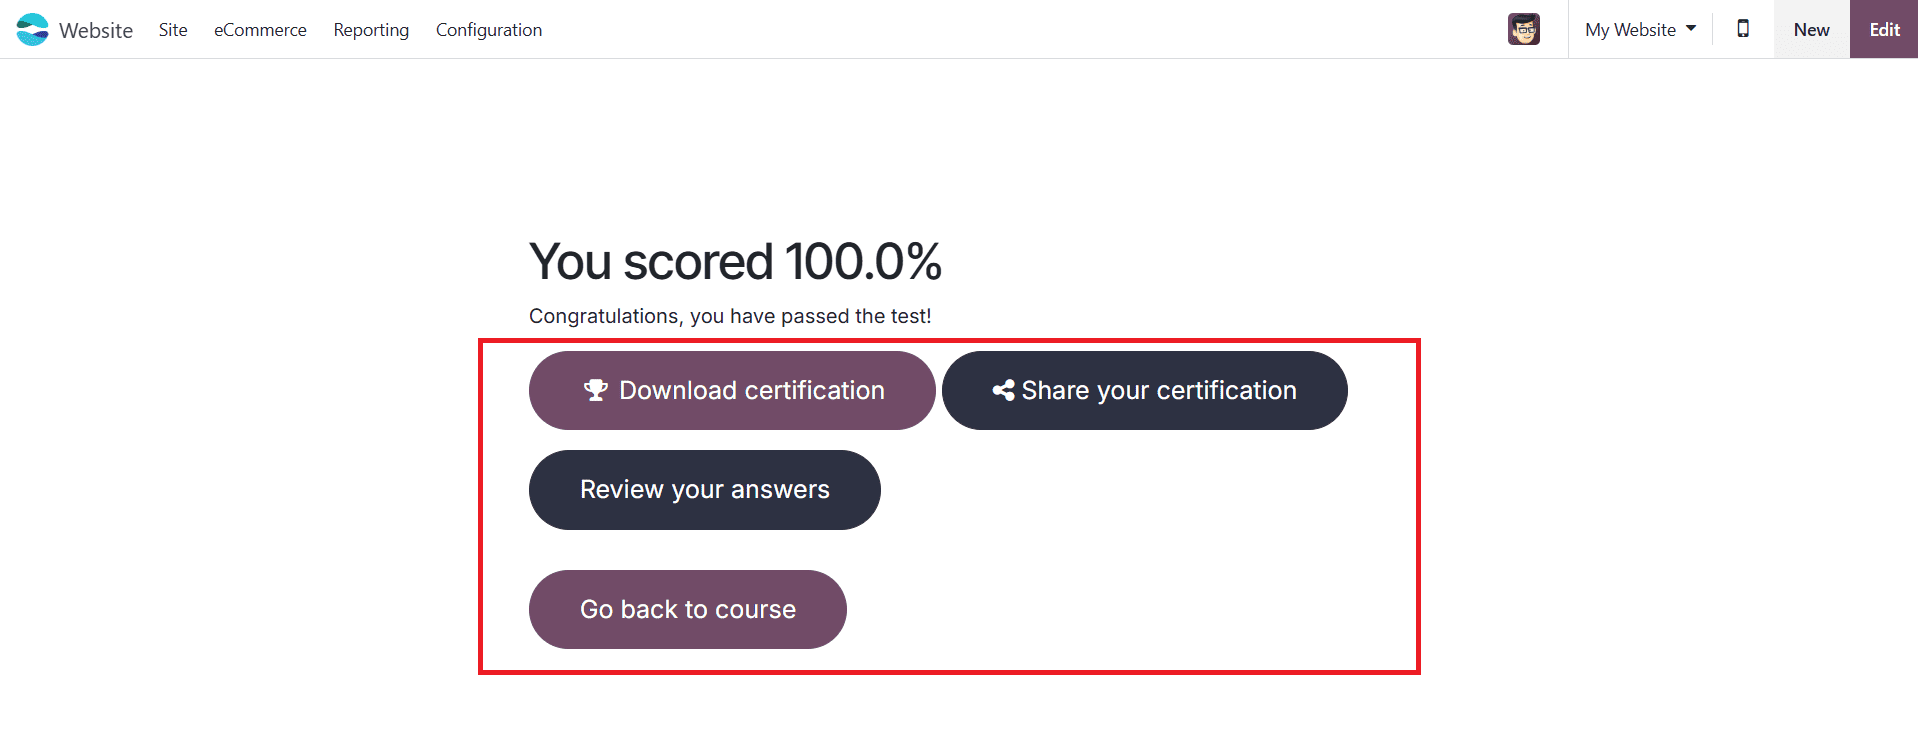
After the completion, you can see the percentage of your score. Here, you can see four options: Download certification, Share your certification, Review your answers, and Go back to course.
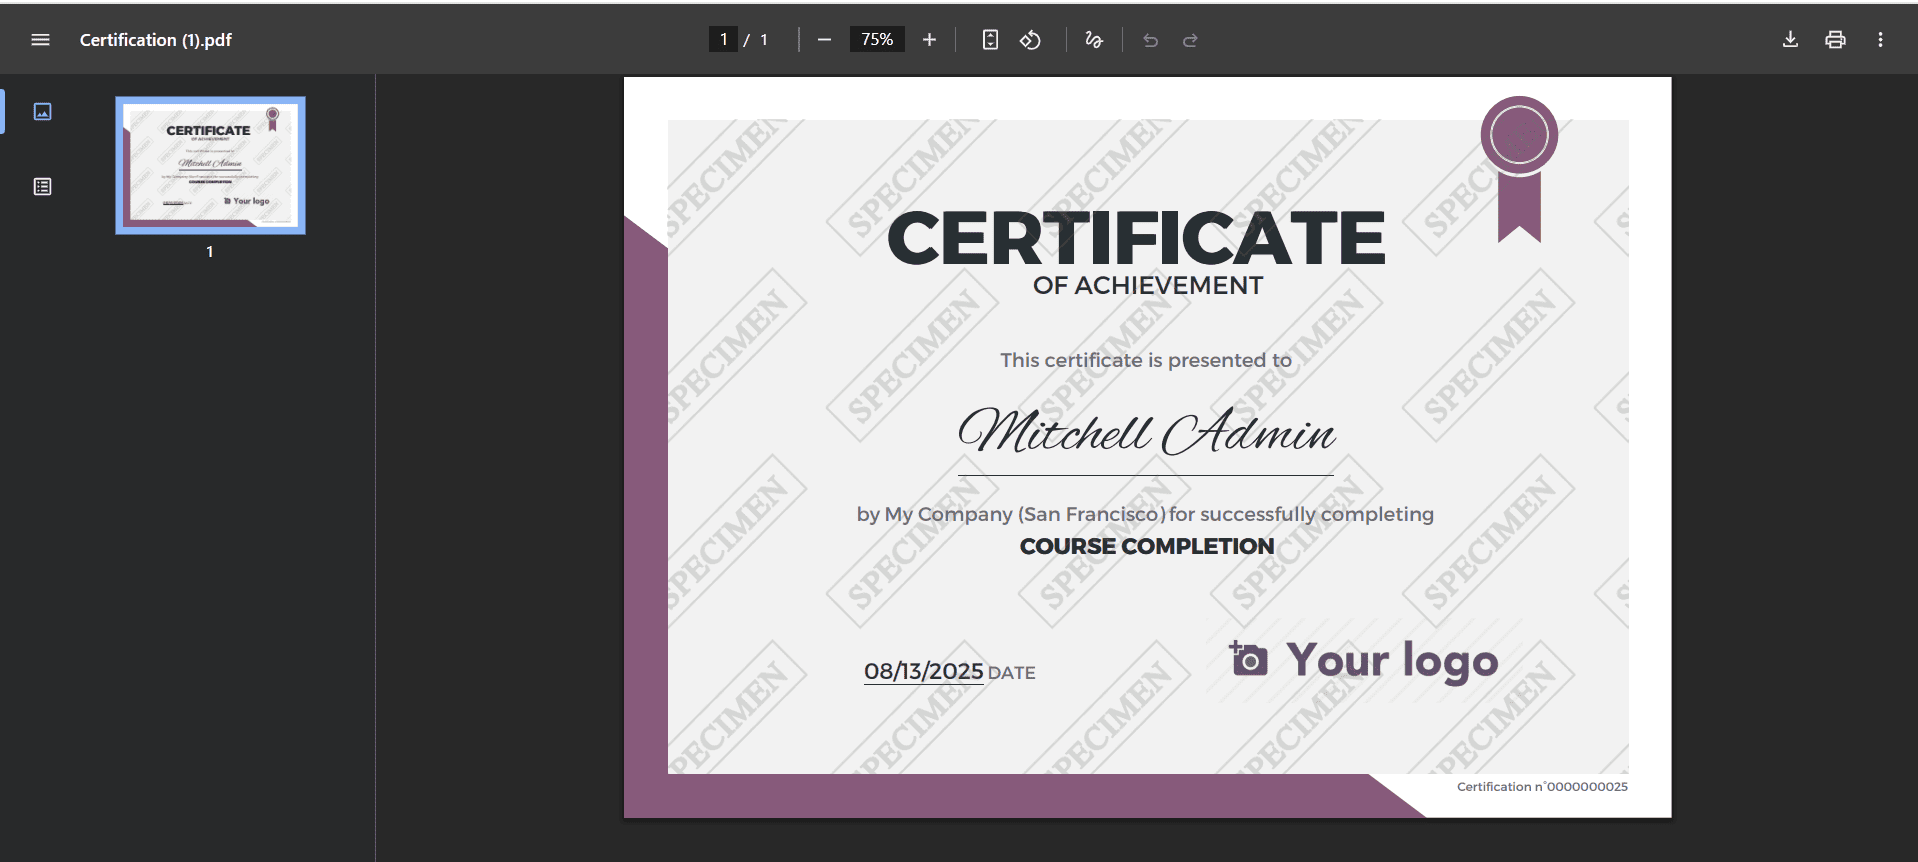
Click on the Download certification option to download the certificate. Here, you can see the downloaded certificate for completing the course.
To share the certification, click on the Share your certification option. When the pop-up window opens, enter the certification link in the Share Link field. You can choose the social media platform where you want to share the certification under the Share on Social Media option. You can also choose an email ID to send certification under the Share by Email option. Then click on the Close button.

Click on the Review your answers button to review your performance. Here you can see the Overall Performance in a pie chart as shown below:

You can also analyze the Performance by Section in a bar chart, as shown below:

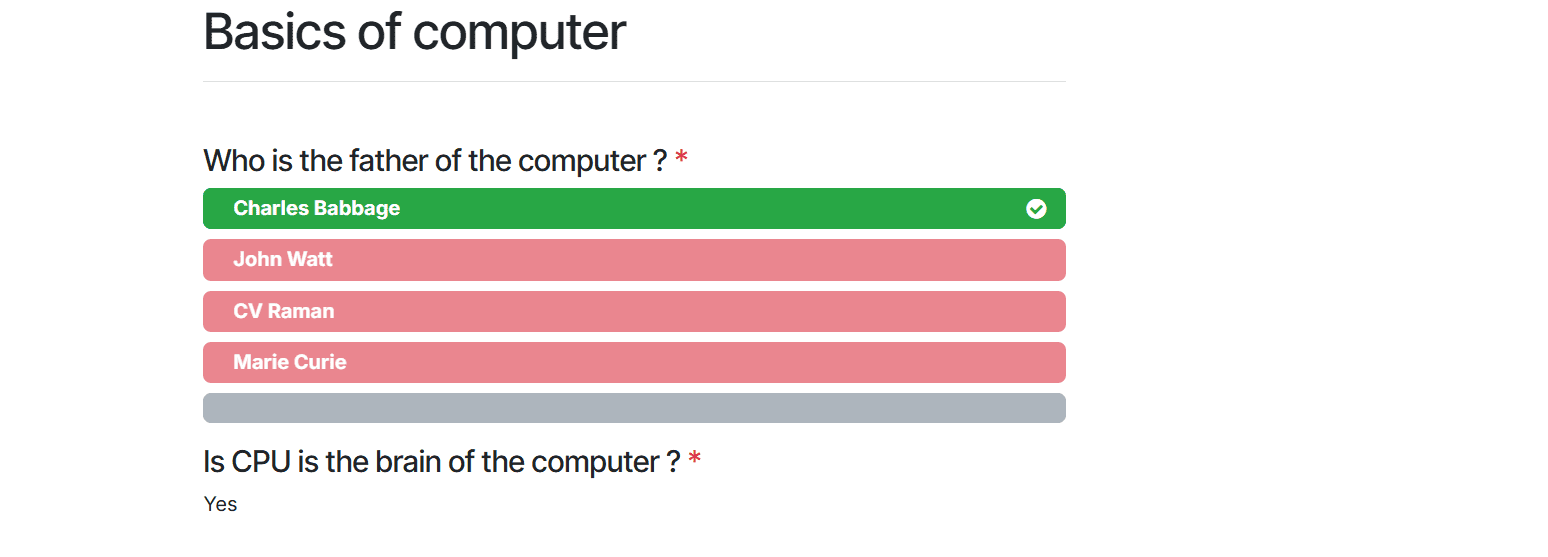
You can also see the correct answers for the questions and check your answers.
The eLearning module of Odoo 18 provides a strong and adaptable way to create and deliver online courses. Supporting both independent learning and organized programs, it delivers practical tools for building courses, managing materials, and monitoring learner’s progress. The integration of gamification, forums, certifications, and quizzes guarantees users an engaging experience. Odoo offers all the necessary functionality in one location, whether you’re training employees or addressing a larger audience. You may increase your course offerings with confidence and control, and optimize your educational operations from a single, centralized platform by setting up an eLearning module in Odoo 18.
To read more about Overview of Launching Online Courses in Odoo 18 e-Learning, refer to our blog Overview of Launching Online Courses in Odoo 18 e-Learning.