Connecting Odoo’s ERP data with n8n’s automation engine is one of the most effective ways to streamline operations. But to get the most out of it, the integration needs to be solid. This guide covers connecting Odoo and n8n, helping you move past the basics to build workflows that handle actual business logic.
What is N8N?
N8N (short for “node-to-node”) is an open-source workflow automation tool that allows you to connect apps, services, and APIs without writing complex code. It acts as a bridge between different systems, enabling data to flow automatically based on triggers and conditions.
Unlike traditional automation platforms, n8n is highly flexible and developer-friendly while still being accessible to non-technical users.
Key Features of n8n
- Open-source & self-hostable: You can run n8n on your own server for full control over data and security, or use n8n Cloud for faster setup.
- Visual workflow builder: Workflows are created using a drag-and-drop interface where each step is represented as a “node” (e.g., HTTP Request, Webhook, Odoo API call).
- Powerful integrations: n8n supports hundreds of integrations out of the box and can connect to virtually any system using REST APIs, making it ideal for ERP systems like Odoo.
- Advanced logic & customization: You can add conditions, loops, expressions, and even custom JavaScript to handle complex business logic.
- Event-based and scheduled automation: Workflows can be triggered by webhooks, scheduled times (cron), or events from external systems.
Why Use n8n with Odoo?
Odoo is a feature-rich ERP, but many businesses need to connect it with external tools such as CRMs, payment gateways, email platforms, or analytics systems. n8n fills this gap by acting as the automation layer between Odoo and other applications.
With n8n, you can:
- Sync data between Odoo and third-party apps
- Automate repetitive ERP tasks
- Trigger workflows based on Odoo events
- Build custom integrations without modifying Odoo core code
Setting up N8N
Before setting up N8N, the first step is to install Docker on your system. Docker provides an official, user-friendly platform that includes everything you need to build, run, and manage containers.
To install Docker, visit the official Docker website
Verify installation by running:
docker -version
Now we can create a file named compose.yml to host n8n locally.
services:
  postgres:
    image: postgres:15
    restart: unless-stopped
    environment:
      POSTGRES_USER: n8n
      POSTGRES_PASSWORD: n8n
      POSTGRES_DB: n8n
    volumes:
      - ./db_data:/var/lib/postgresql/data
  n8n:
    image: n8nio/n8n:1.123.5
    restart: unless-stopped
    ports:
      - 5678:5678
    environment:
      - DB_TYPE=postgresdb
      - DB_POSTGRESDB_HOST=postgres
      - DB_POSTGRESDB_PORT=5432
      - DB_POSTGRESDB_DATABASE=n8n
      - DB_POSTGRESDB_USER=n8n
      - DB_POSTGRESDB_PASSWORD=n8n
      - N8N_PORT=5678
      - N8N_PROTOCOL=http
      - WEBHOOK_URL=http://localhost:5678/
      - GENERIC_TIMEZONE=Asia/Kolkata
      - N8N_GIT_NODE_DISABLE_BARE_REPOS=true
      - N8N_RUNNERS_ENABLED=true
      - N8N_BLOCK_ENV_ACCESS_IN_NODE=false
      - N8N_ENFORCE_SETTINGS_FILE_PERMISSIONS=true
    volumes:
      - ./n8n_data:/home/node/.n8n
    depends_on:
      - postgres
This Docker Compose configuration runs two services:
- PostgreSQL
Acts as n8n’s persistent database
Stores workflows, credentials, and execution history
Data is persisted using a local volume db_data
- n8n
Runs the n8n automation platform
Connects to PostgreSQL instead of the default SQLite database
Persists configuration and encryption keys using n8n_data
Now we can start the N8N using:
docker compose up
This will create the two new directory db_data and n8n_data. And we need to set permissions for directories to make this work.
sudo chown -R 1000:1000 n8n_data
sudo chmod -R 755 n8n_data
Now we can run the service in background using command:
docker compose up -d
Now we can go to http://localhost:5678 to set up n8n.
Odoo N8N Workflow
After basic configurations, you will be redirected to the home page below.
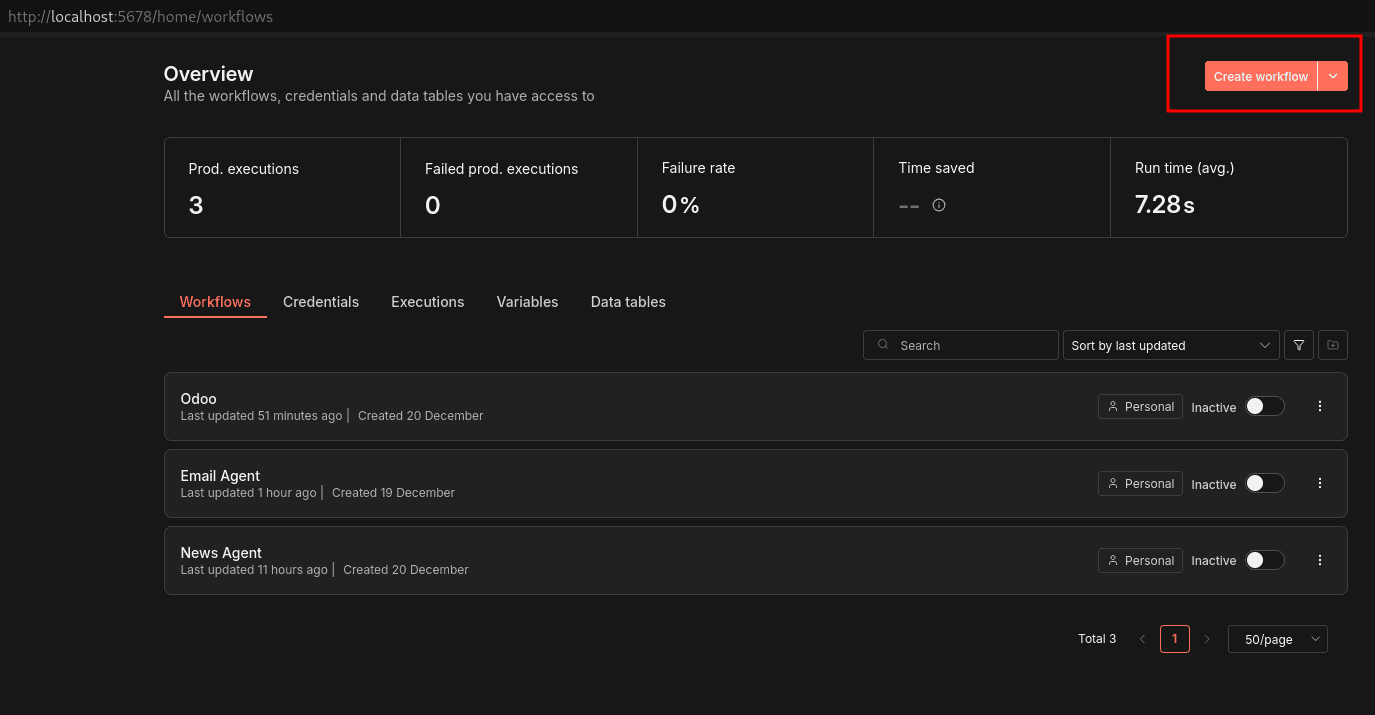
By clicking the Create workflow button, we can start building our Odoo N8N workflow. N8N has mainly two types of nodes: trigger nodes and action nodes.
Trigger nodes start a workflow. They define when the automation should run. Action nodes define what happens next after a trigger fires. These nodes perform operations such as fetching data, transforming it, or sending it to another system.
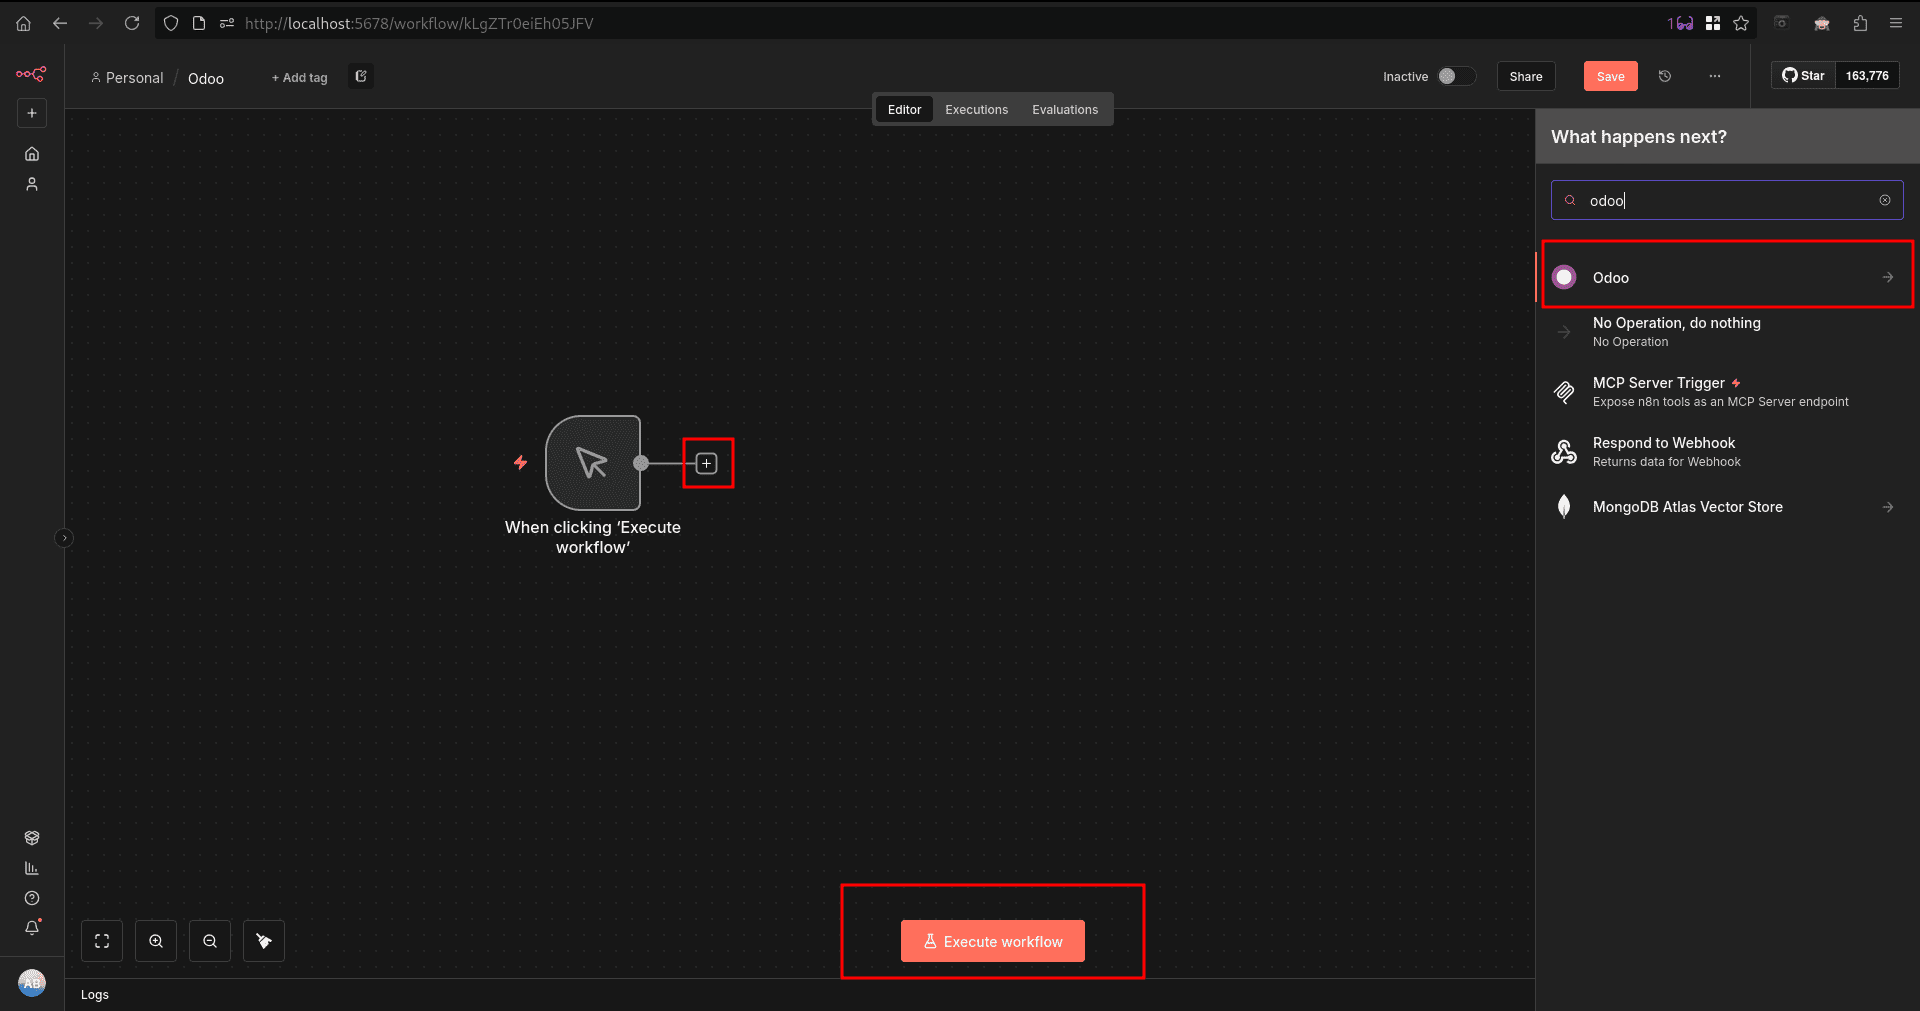
For our first workflow, we will use a simple manual trigger node. We can add a node in our workflow sheet by clicking the ‘+’ and selecting the desired node from the right side tab.

After adding a manual trigger node, we will get an execute workflow button to execute the workflow manually. Now, with the ‘+’ button on the side of the node, we can add an Odoo node to connect and complete a workflow.
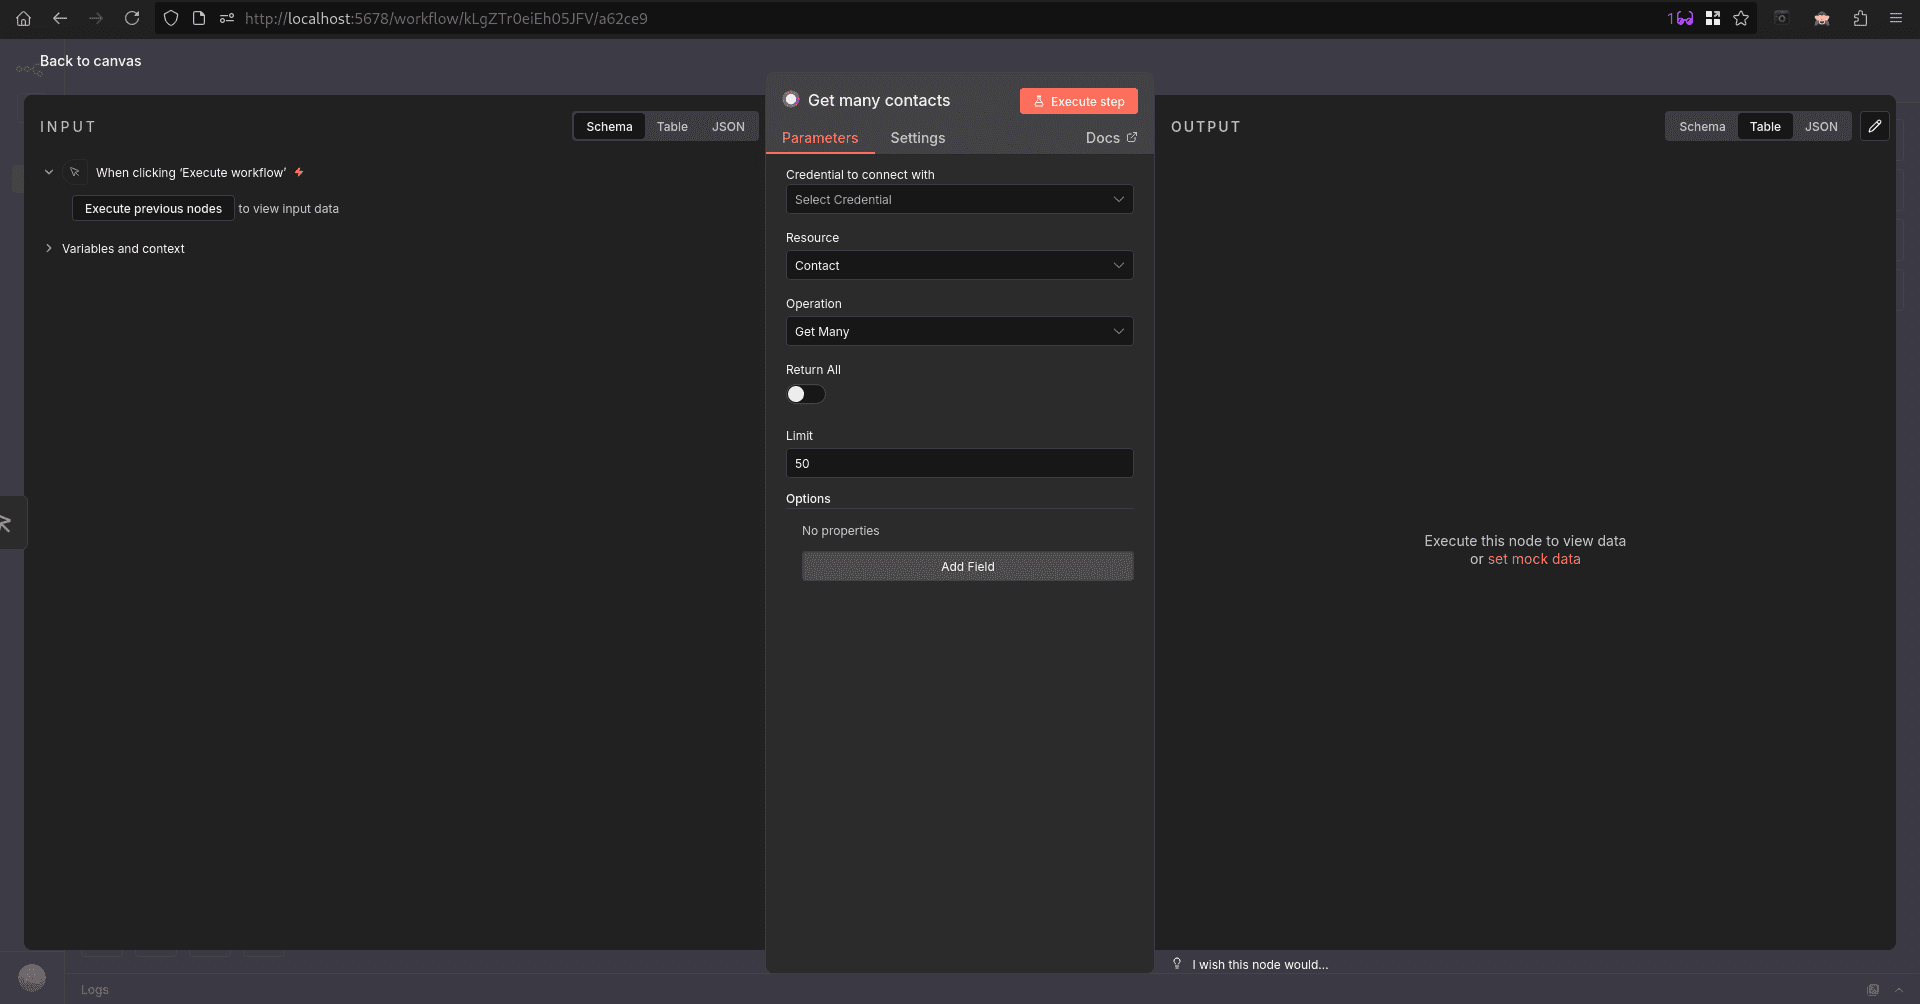
For our workflow, I chose ‘get many contacts’ from the Odoo options available. It will open a configuration window, and we need to set up our Odoo from here.
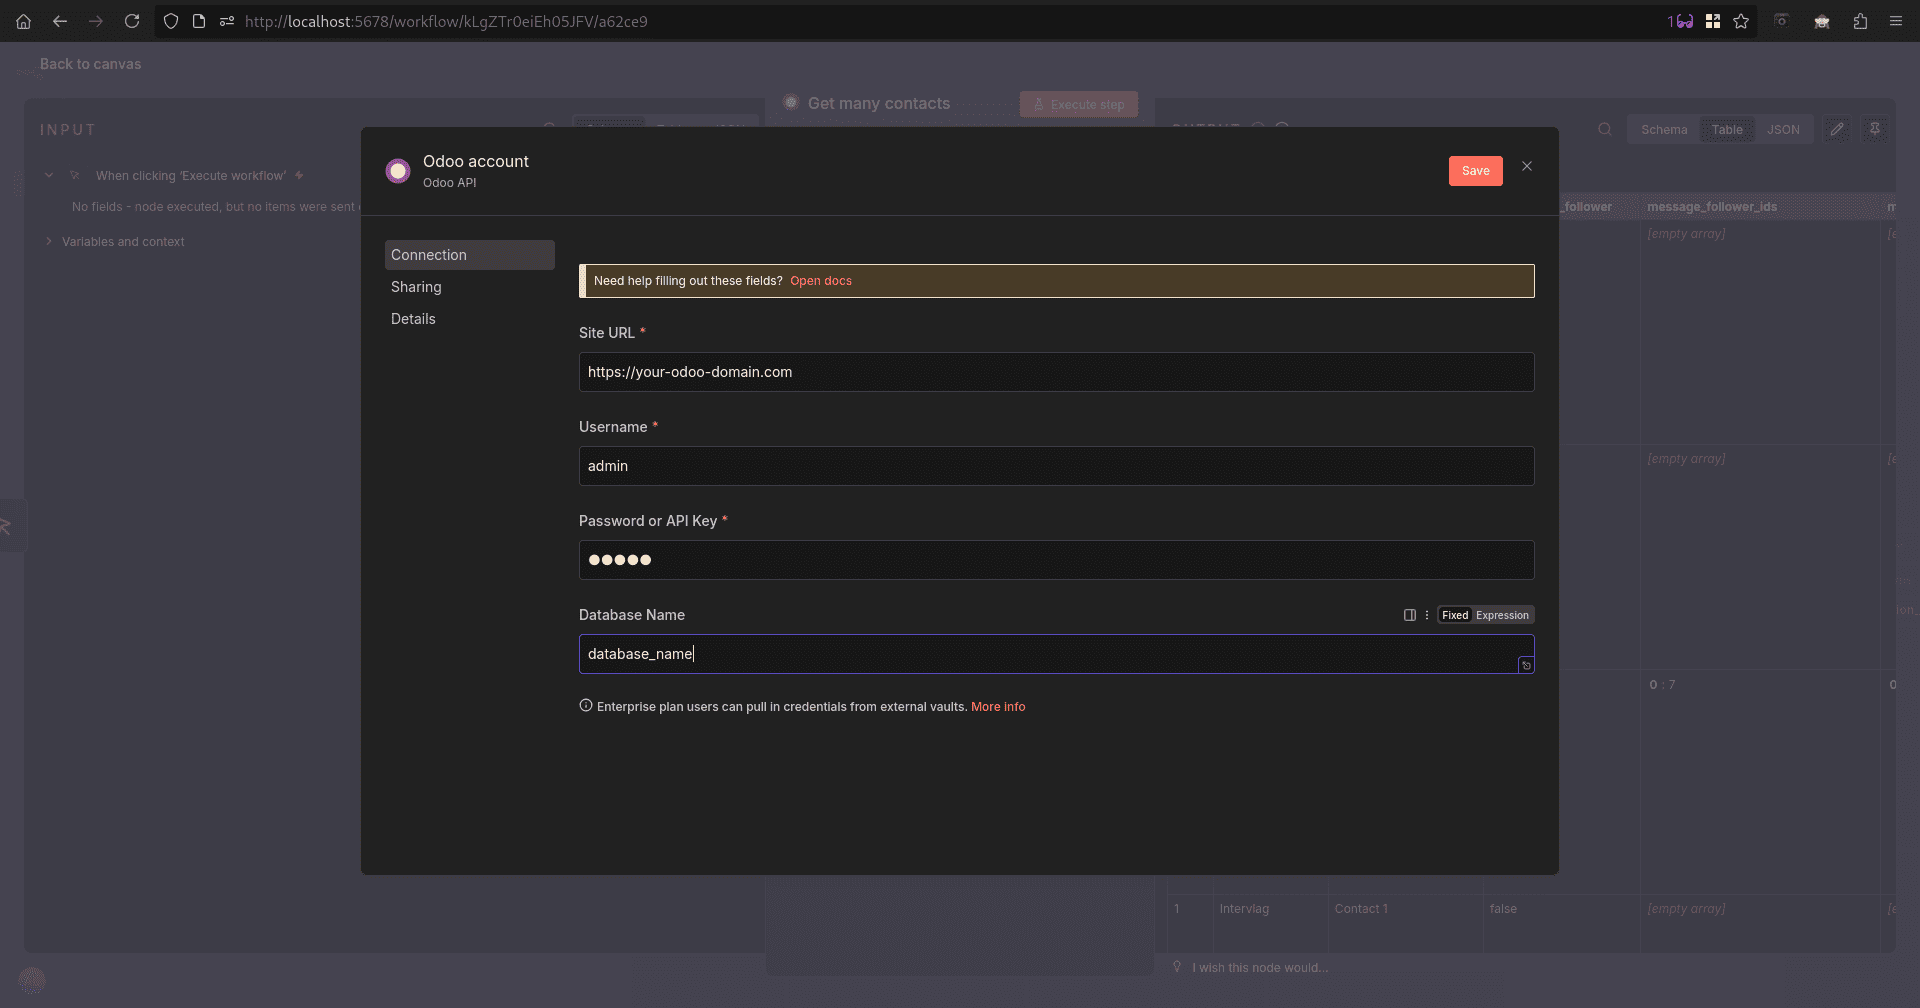
First, we can create a credential, which we can reuse from the first option, which will lead you to a credential configuration window.
Now we can run our workflow by clicking on the execute workflow button in the workflow sheet. And we can see the output from Odoo in the logs tab.
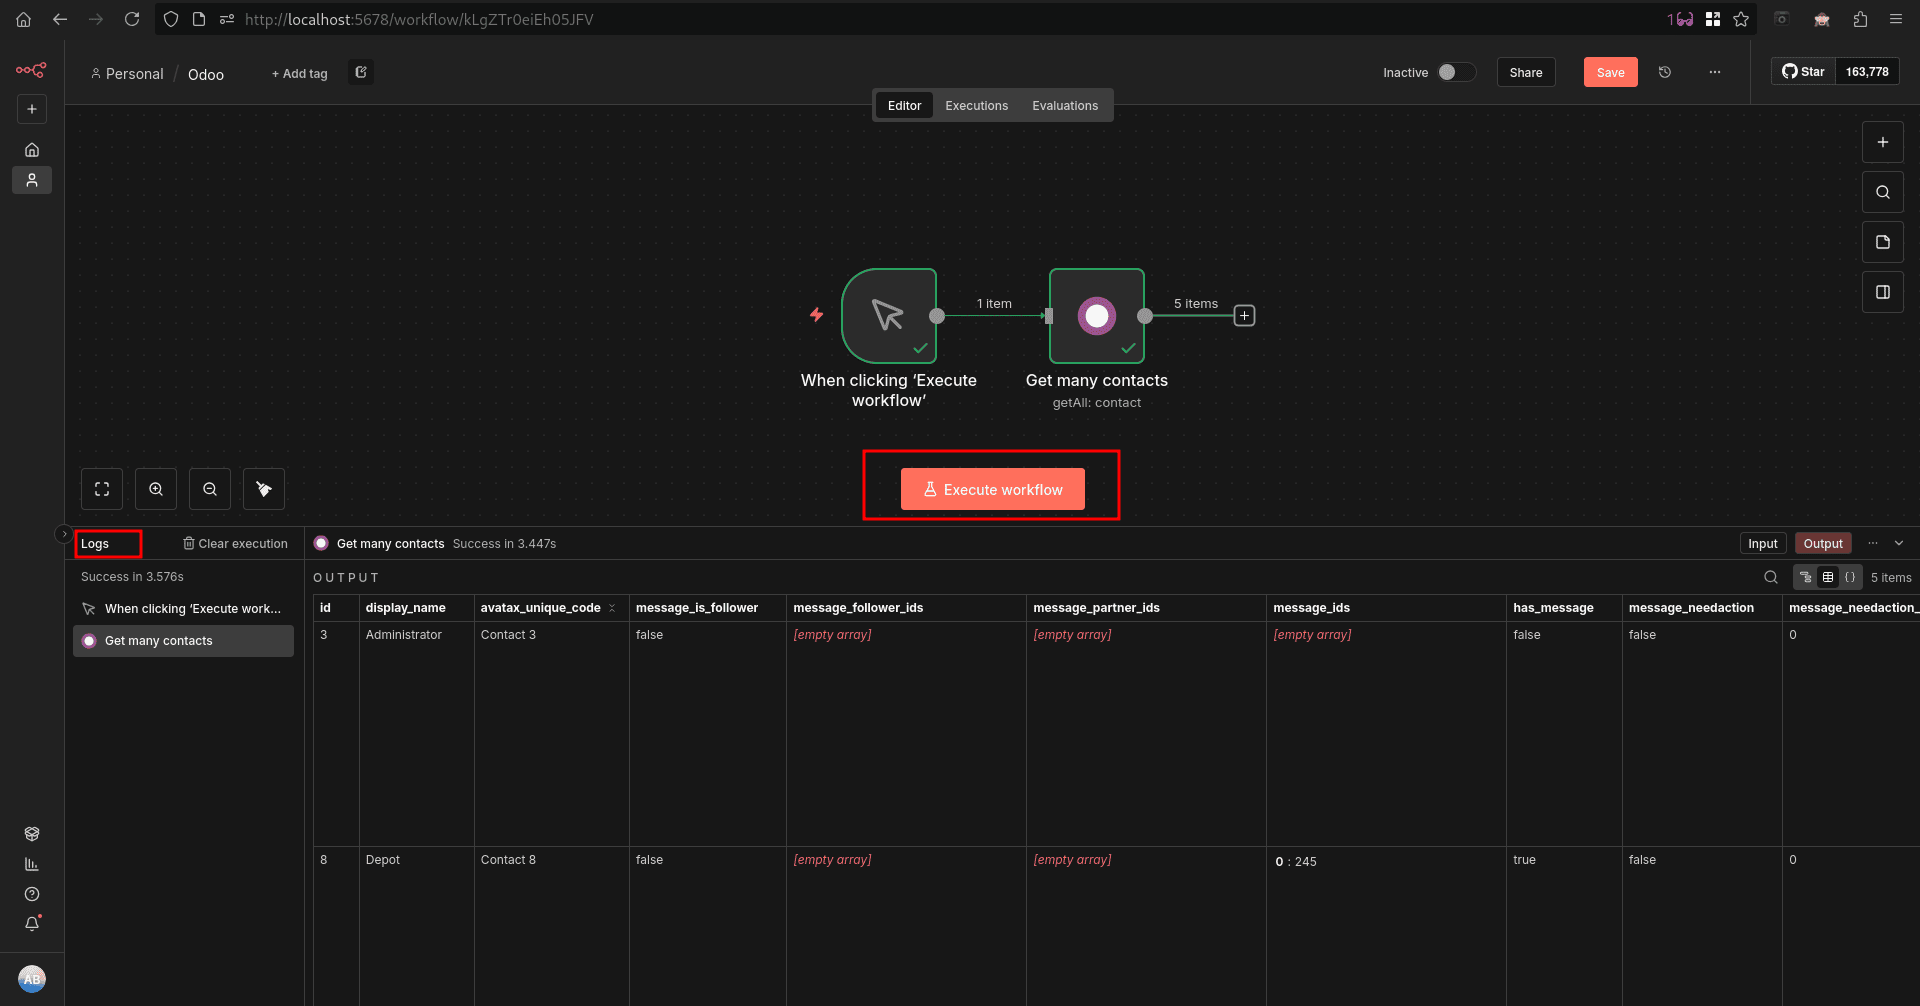
We can pass the output from the Odoo node to another node by simply connecting additional nodes to it, allowing the data to flow through the workflow. This makes it easy to process, transform, or send Odoo data to other applications, enabling end-to-end automation and more advanced business workflows without manual intervention.
To read more about How to Configure Automated Actions in Odoo 18, refer to our blog How to Configure Automated Actions in Odoo 18.