Odoo 15 has a set of advanced features dedicated to invoicing management, making it more easy and accessible for the users. It is extremely easy to set up, design, configure and manage invoices easily with the Odoo 15. Accounting module.
This blog will give you a note on design and managing Invoices efficiently with the Odoo 15 Accounting module.
Design your own invoices
To begin with, you have to create a unique invoice design matching the theme and nature of your business. Invoices are easily accessible in Odoo. They come in many formats and styles and you can customize your invoices easily with the advanced invoice designing, customization features of Odoo.
To design and create a completely personalized invoice exclusive to your company go to the Accounting module and configure the Company data to include in the invoice from the Invoicing tab under the Dashboard of the Accounting module. After the configurations, you can move to the next step of Designing a new Invoice as shown below.
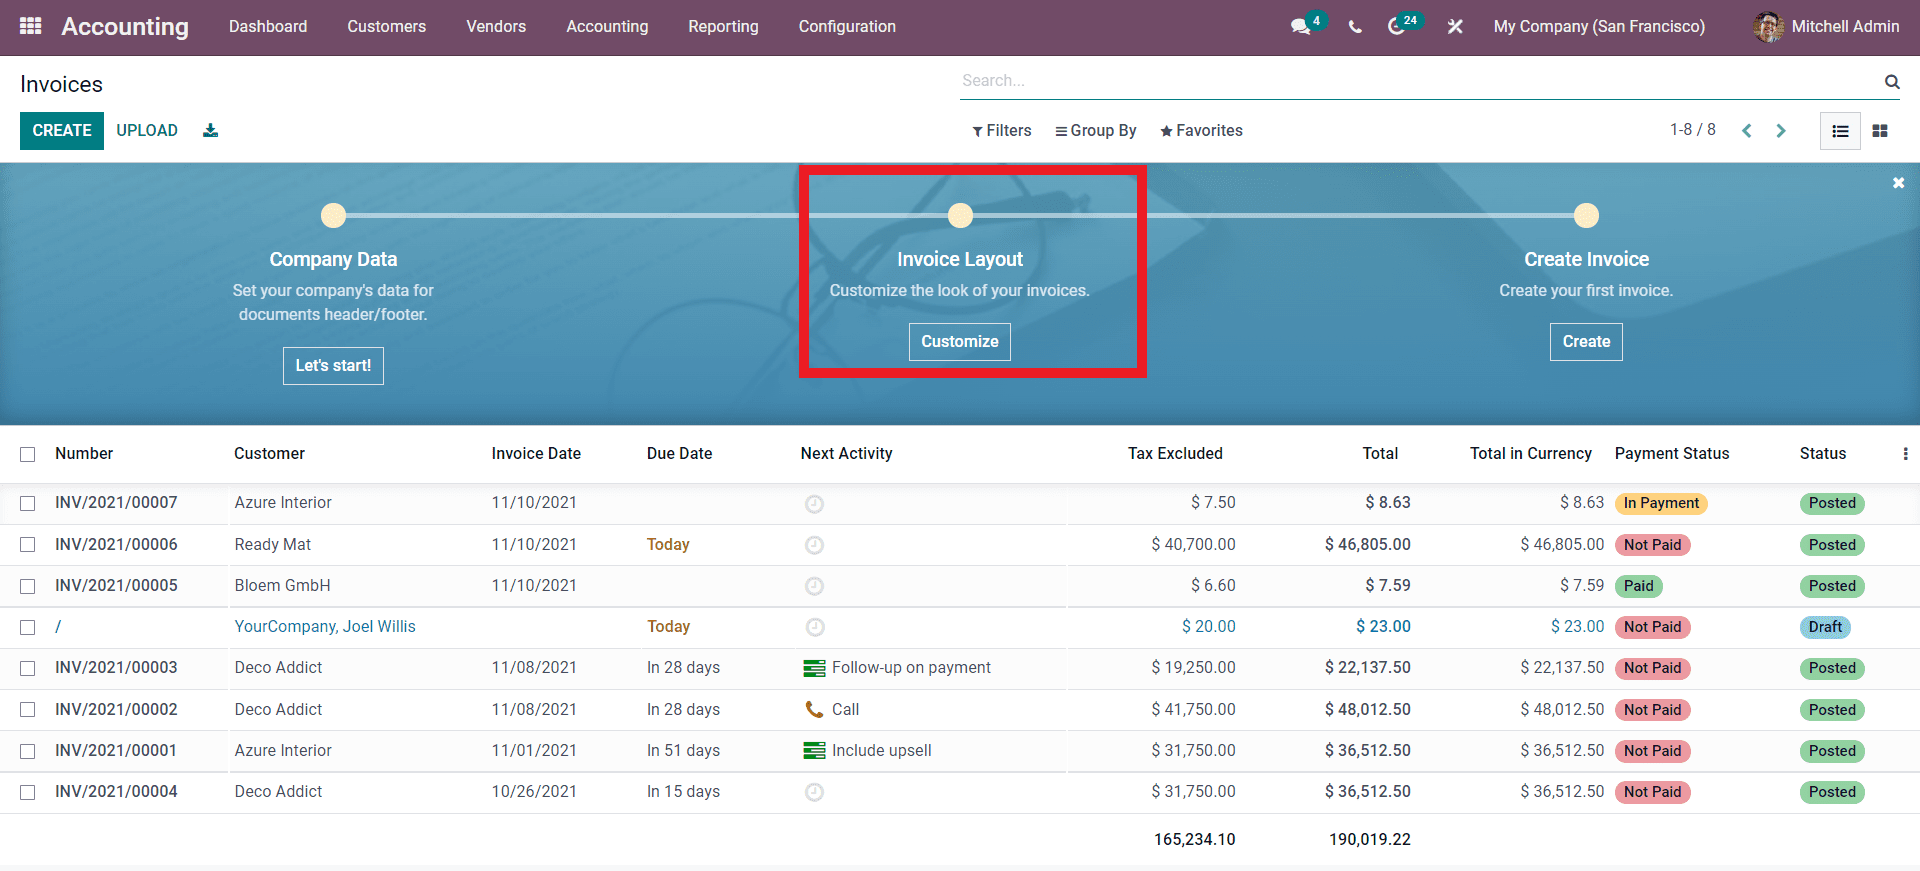
Designing an invoice layout is easy with Odoo. It is an essential part of invoice management as the layout often represents a business or a company and its professionalism in invoice management.
Odoo will let you craft professional-level invoices effortlessly with the invoice layout configurations as shown below.
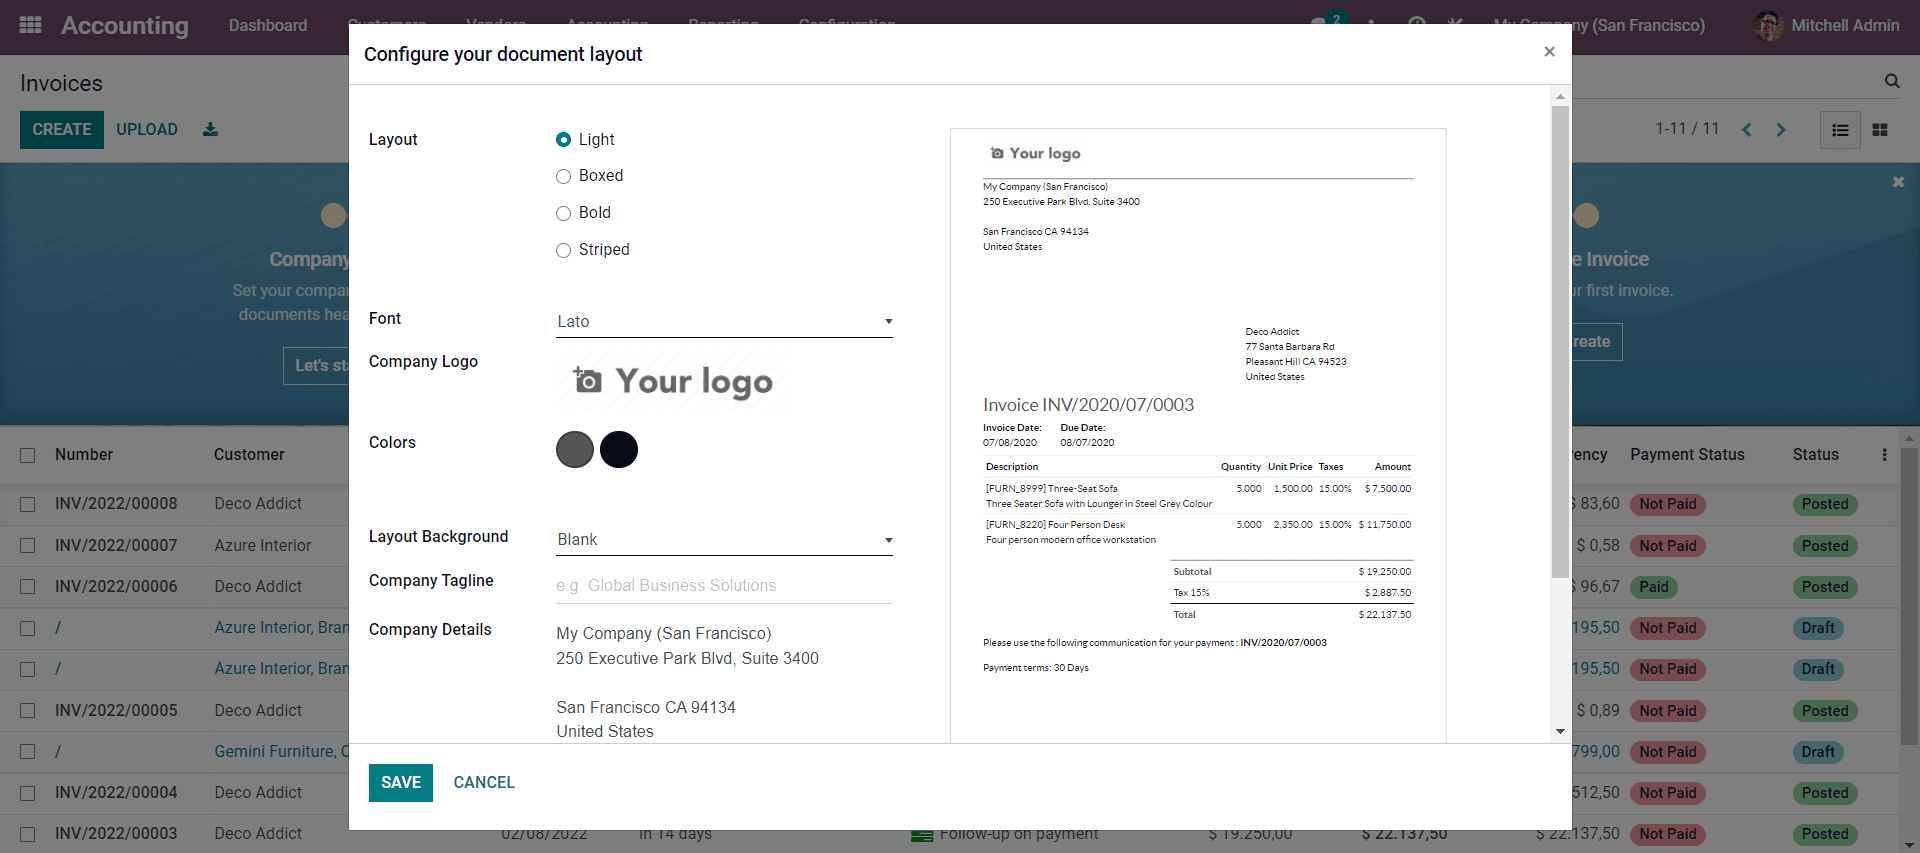
This is the configuration page for designing the layout of the Invoice. There are multiple advanced pre-installed features available on the configuration page. To begin with, you have multiple options to choose from for setting up the layout. The options include Light, Boxed, Bold, and Striped.
You can see the real-time change in the Invoice from the right side of the screen as shown below.

Choose between the layout and look at the real-time changes to create the perfect layout for your invoice. After choosing the layout style you can select the Font in which the invoice should be printed. You will have multiple Fonts to choose from to craft your Invoice layout.
After choosing the Font you can select and upload the logo of the company in the company section and it will be shown in the invoice. Choose the color from the color section and the color you choose will be the color in which the content will be shown. The content includes the invoice number and other details will be displayed in the color that you have chosen. You can choose from the hundreds of color options as shown below.
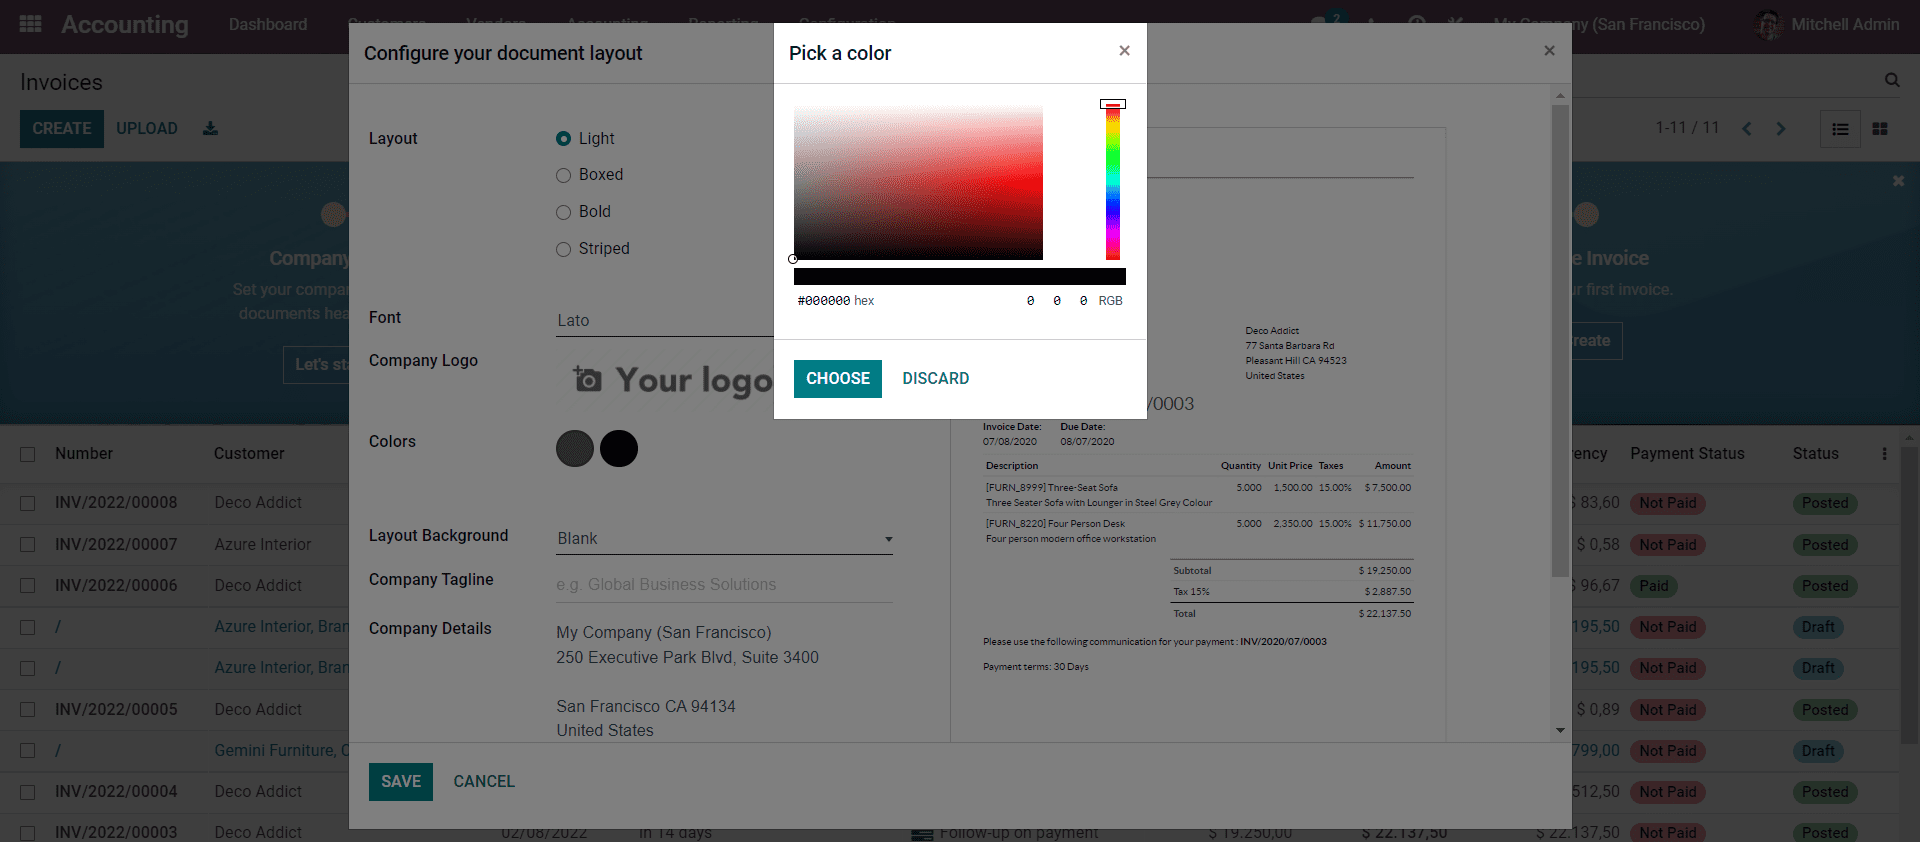
You can choose from the colors from this section.
Choose the layout background from the drop-down options as shown below.
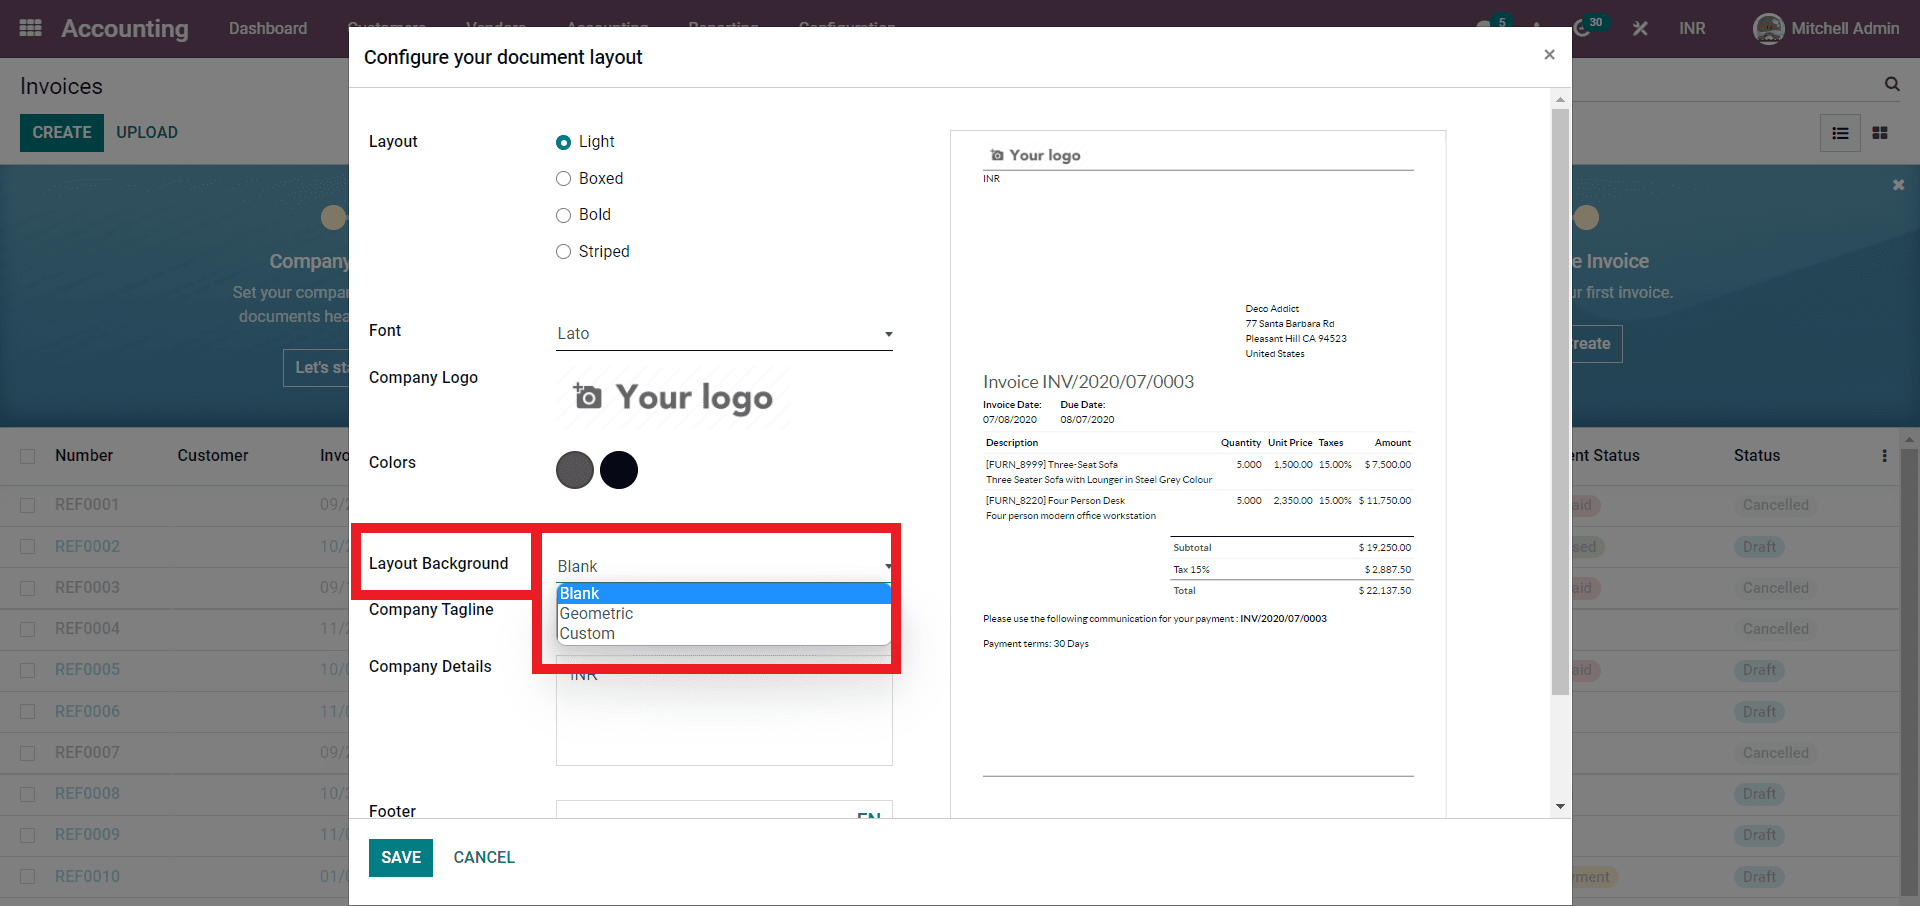
Click on the layout background to set the layout background for your invoice. After choosing the layout background enter the Company tag line. This will put your company tagline in the invoice. The next option is to enter the company details. From the company details section. After this, You can enter the footer and it will be displayed as a footer in the invoice.
After the invoice configurations, you can download the invoice as a preview by clicking on the Download PDF preview. Note that you have to double-check the details that you have entered in the configuration section as the invoice is automatically generated by Odoo.
Sending Invoices to the customer
You can access the Invoices from the Customer tab of the Accounting module. Click on Invoices from the drop-down menu under the Customer tab. A page with a list of previously created invoices will open up as shown below.
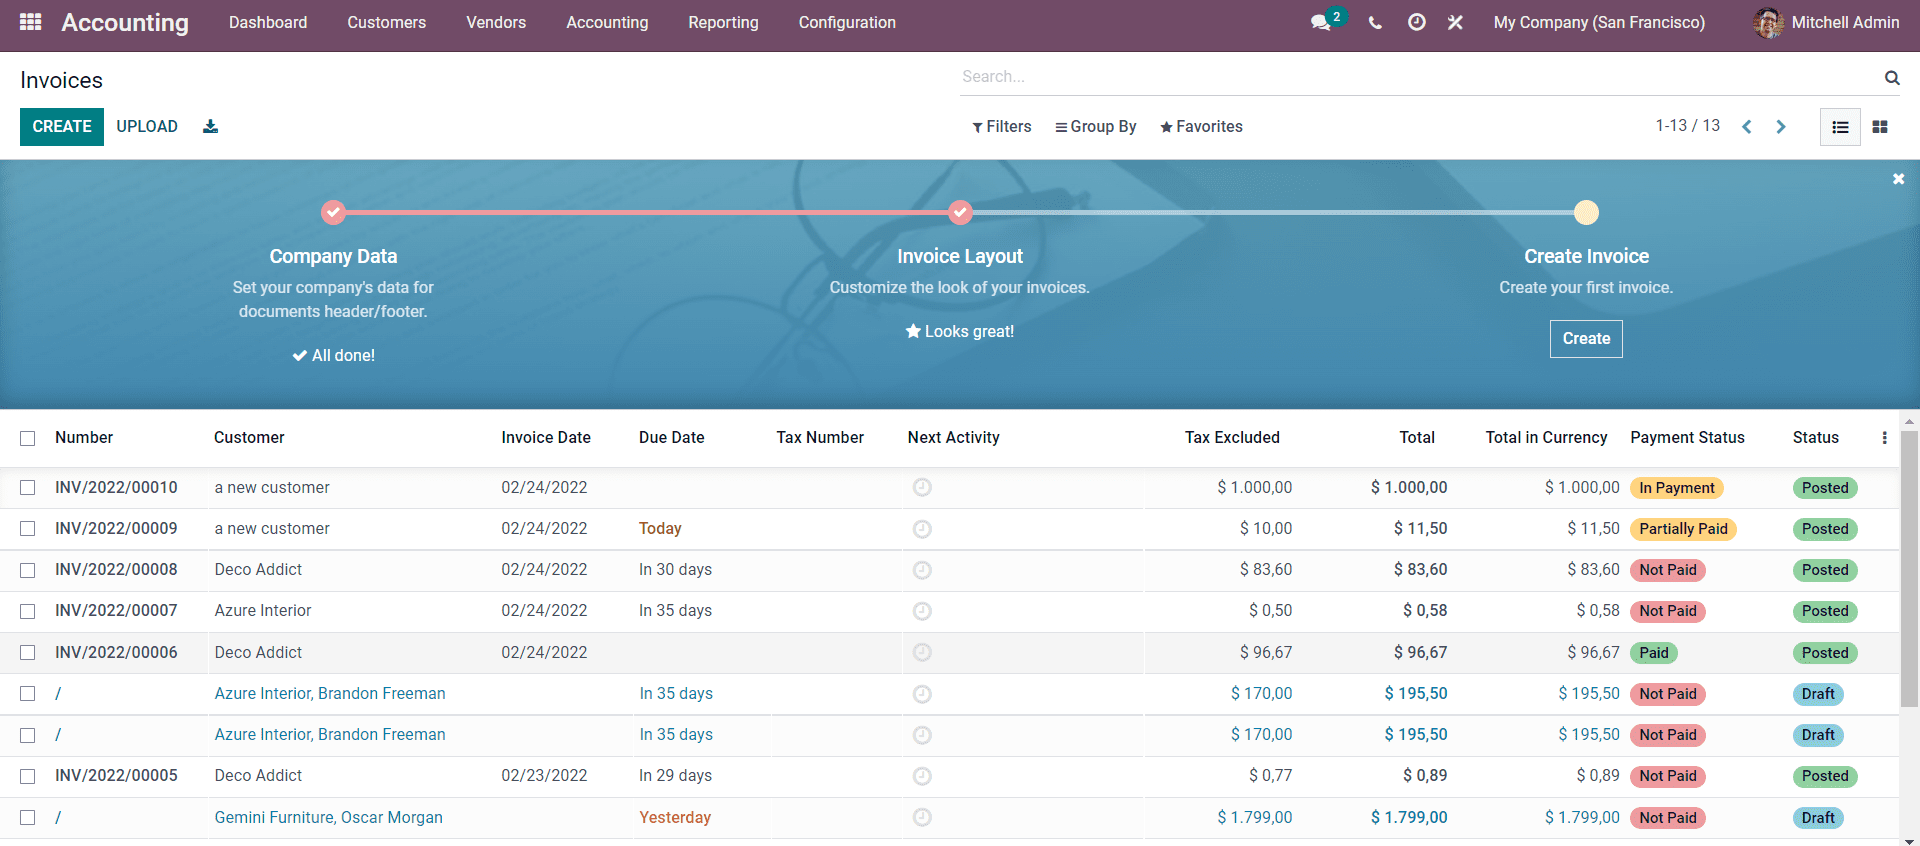
All of the customer invoices under the Accounting module will be displayed over here. You can use the Filters and the Grouping options for maximum flexibility in viewing the Invoices and will also reduce Invoice clutters.
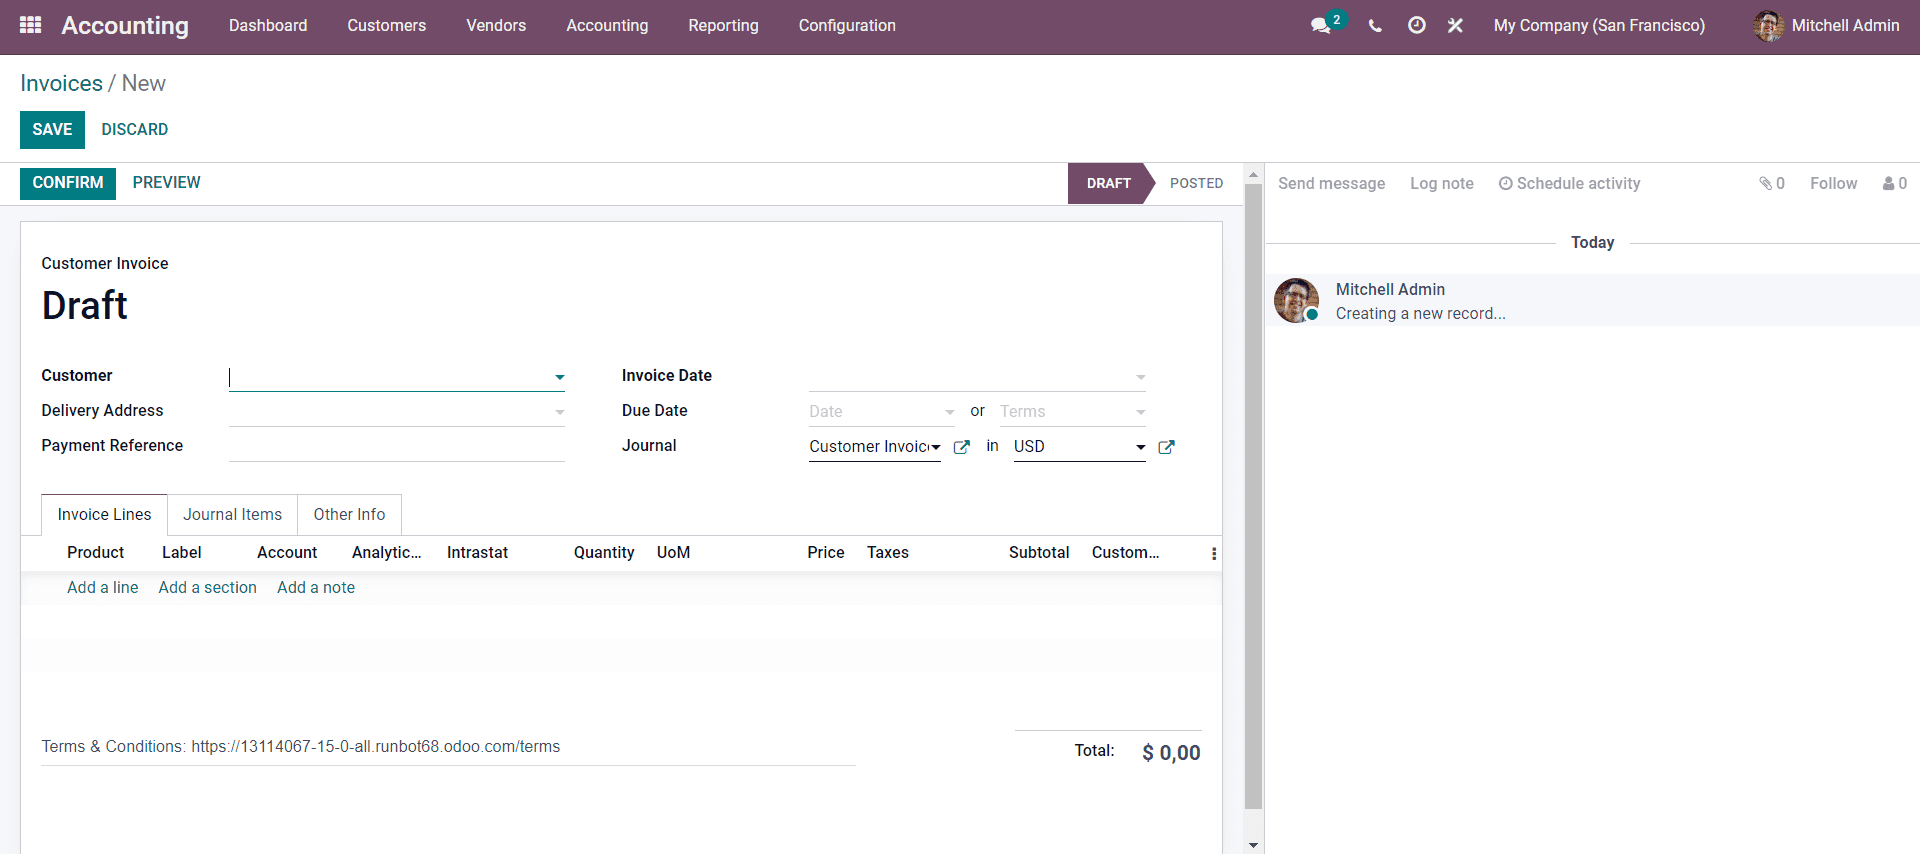
To create a new Invoice Click on the CREATE button and a configuration page will open up as shown below.
Enter the customer in the customer field. Click on the Field next to ‘Customer’ and a drop-down list of customers will appear as shown below.
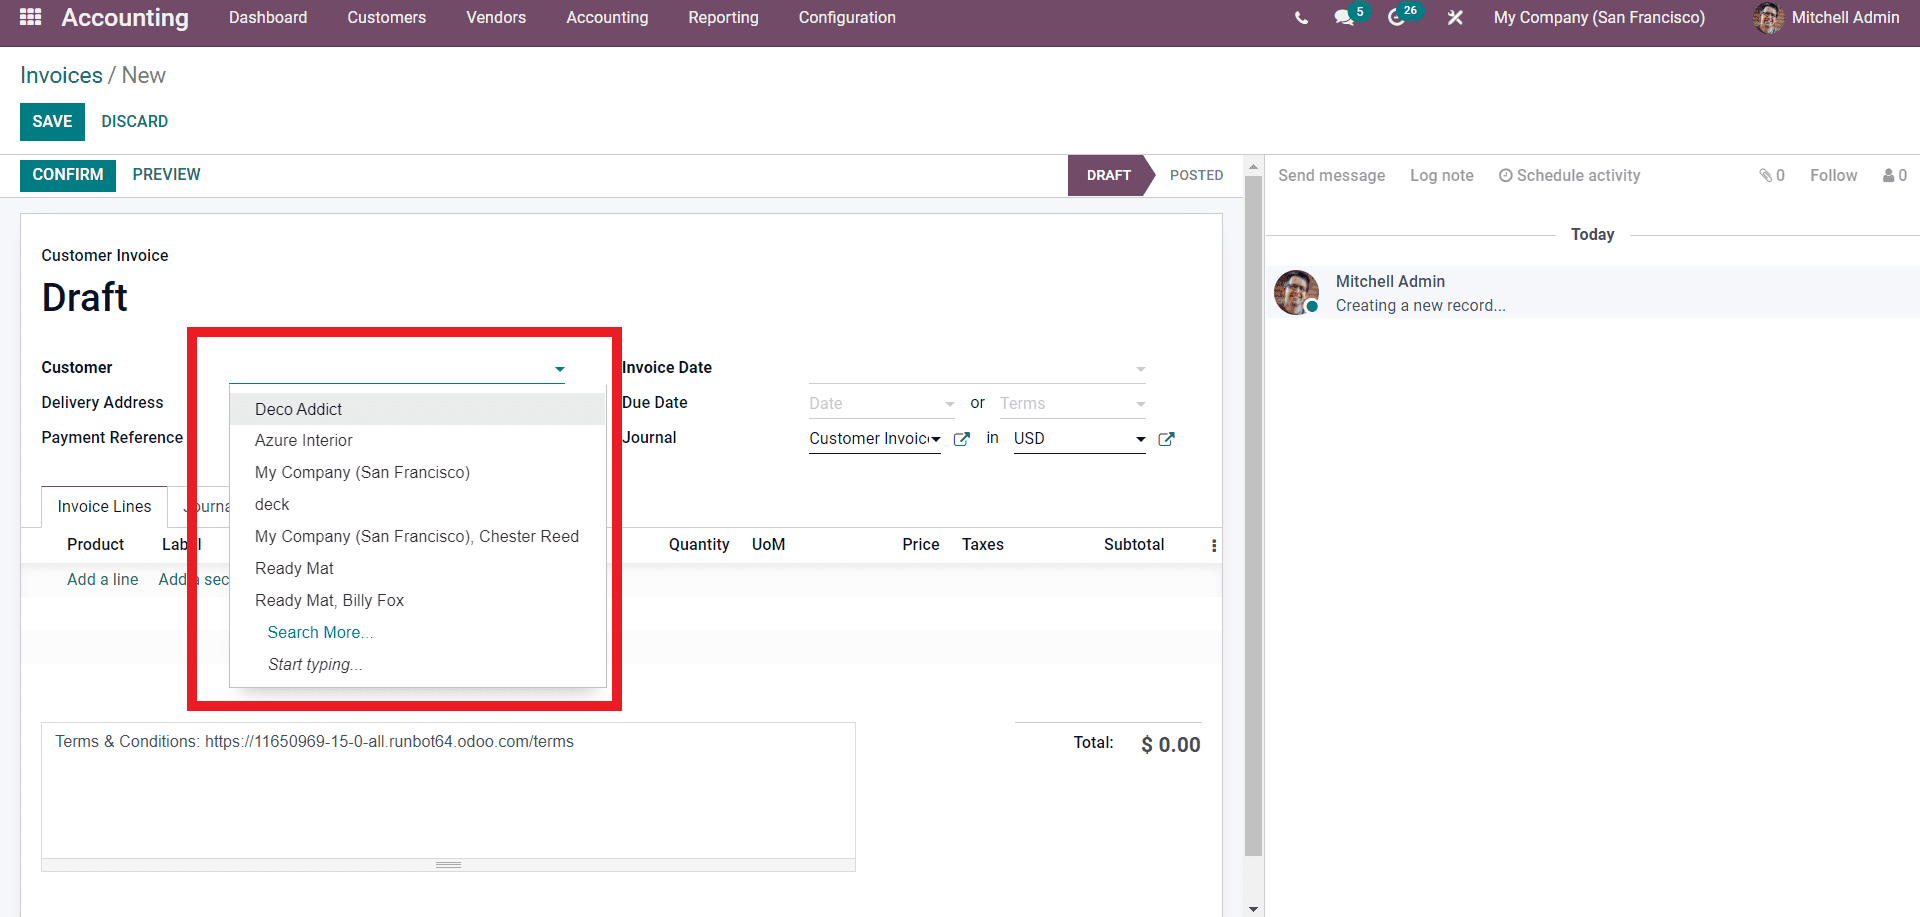
Click on Search more from the drop-down option to view more customers as shown below.
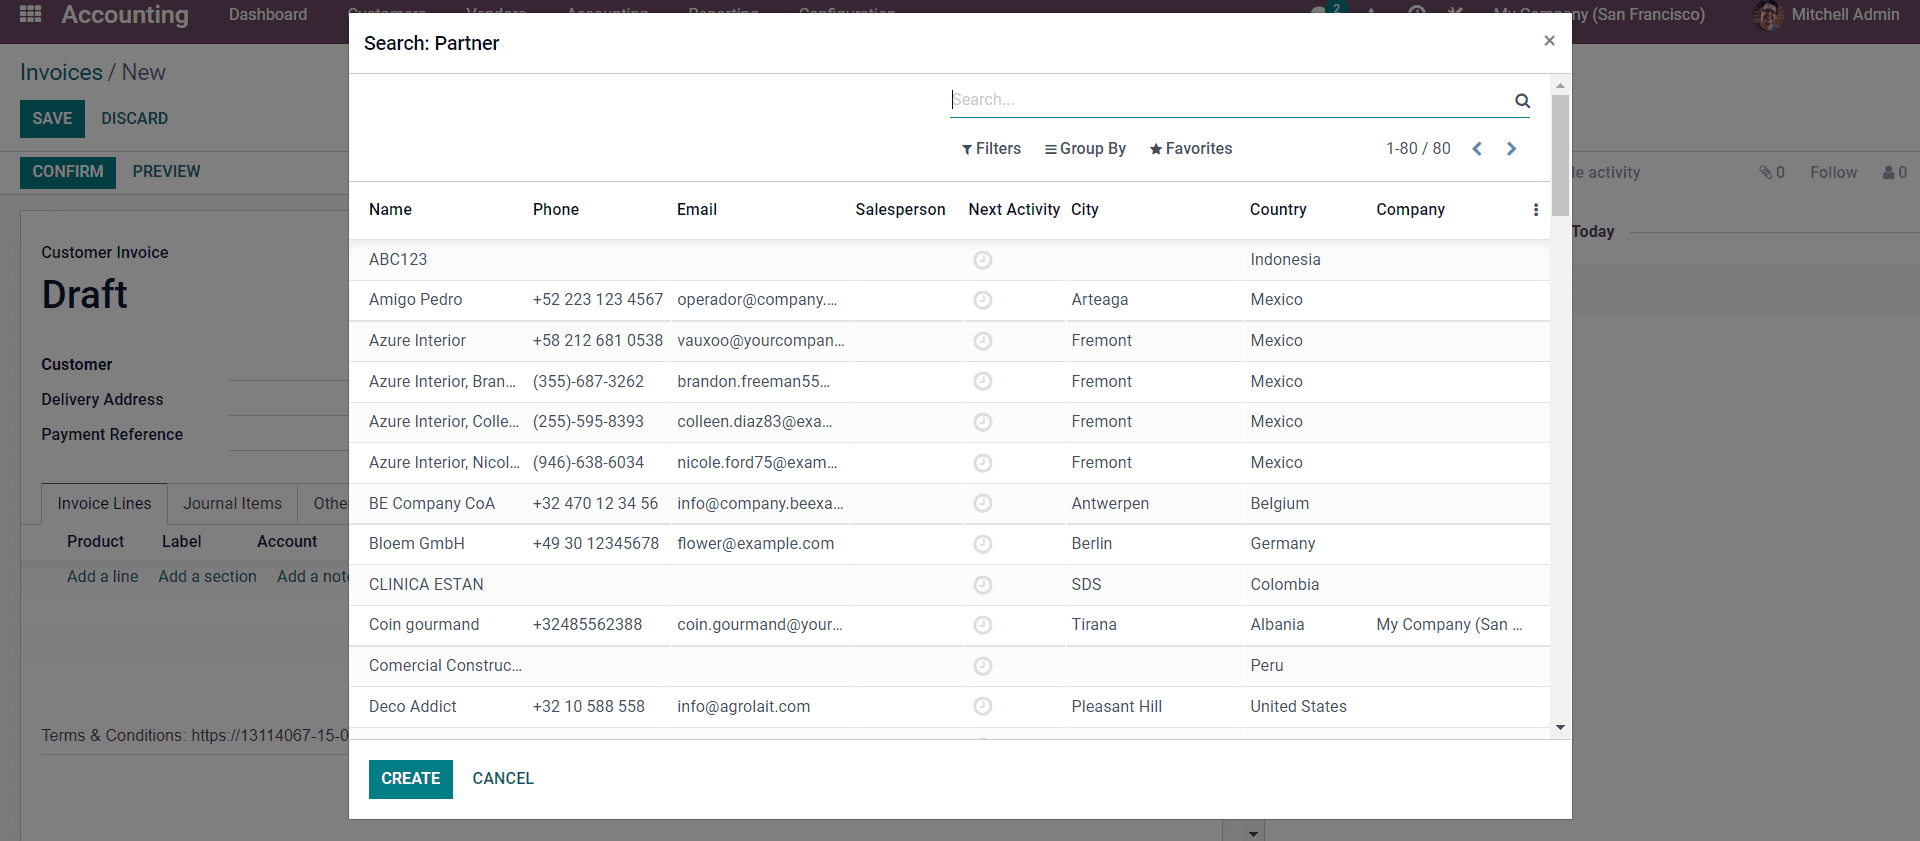
You can choose from the list and if the customer is new, click on the CREATE button and create the customer. After adding the customer you can add the Invoicing date as shown below.
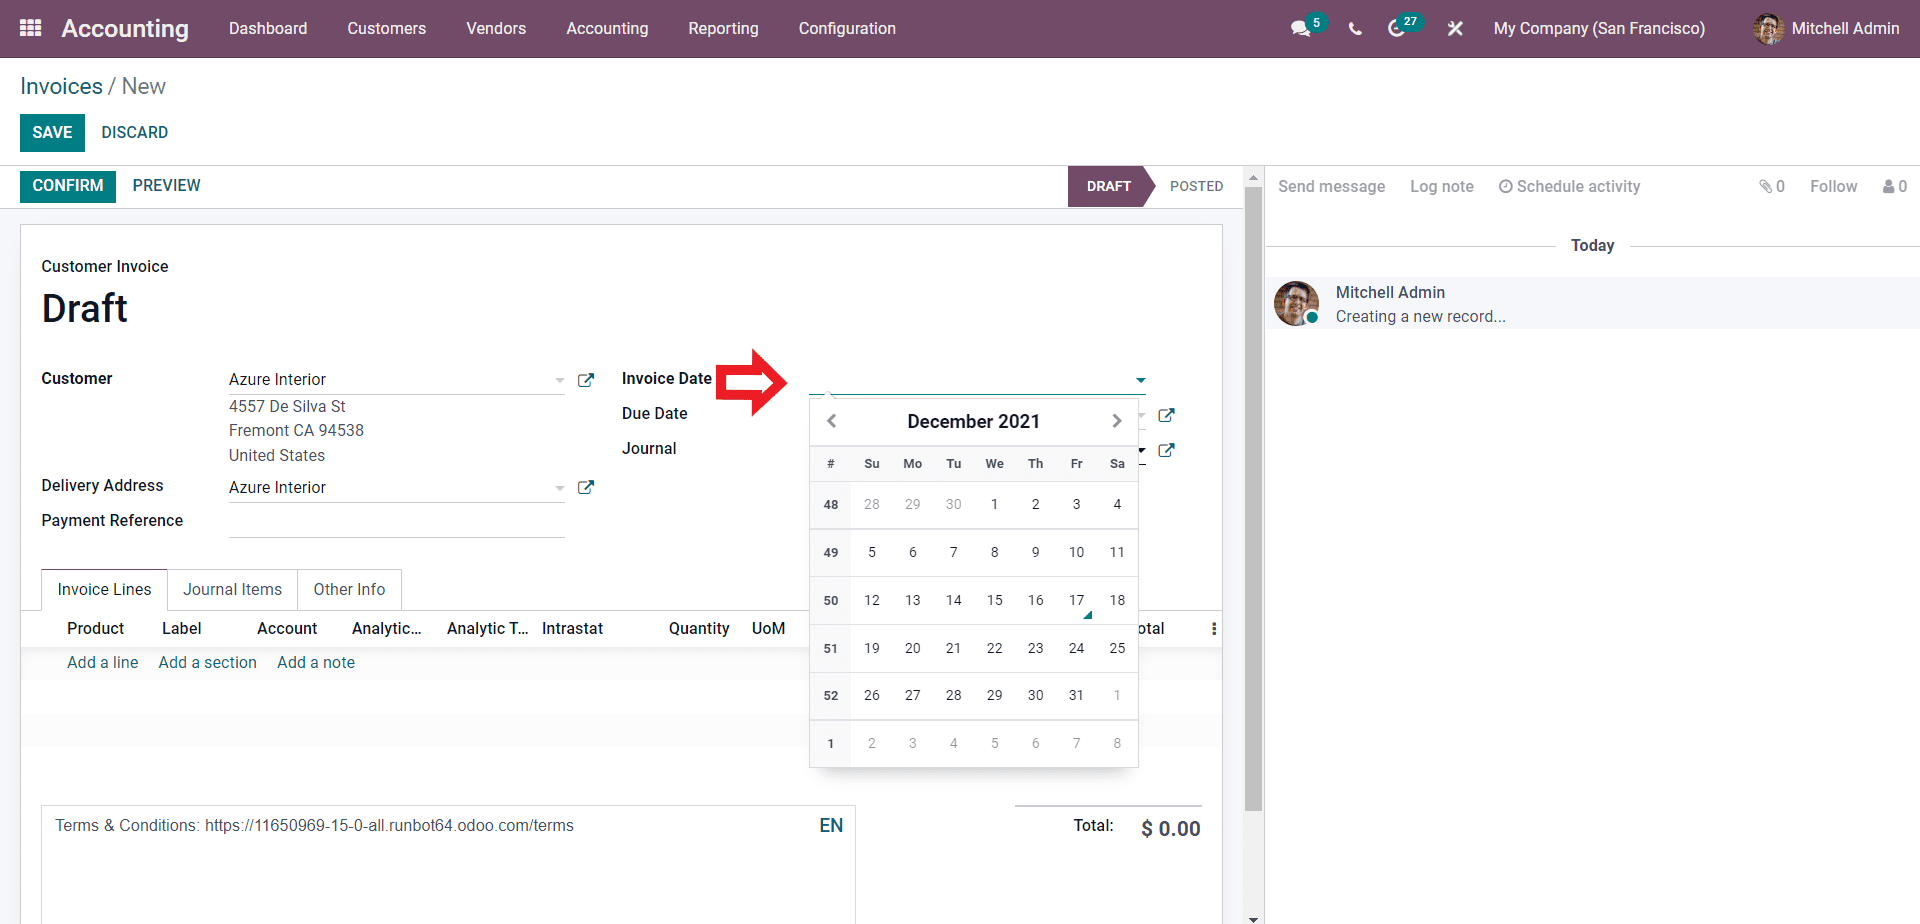
Select the invoicing date from here. Invoicing date plays a huge role in invoice management. Odoo calculates invoice-to-customer interactions based on the invoice dates. You can also set the Due date for the Invoice. Setting Due dates allows you to efficiently collect revenues on time and with the advanced follow-up features of Odoo you can efficiently follow up on your customer regarding the Invoice dues automatically.
You can assign or add a journal to carry the entry of the Invoice. Setting customs journals according to the nature of the Invoice will allow you to easily manage and edit the Invoices. You have the option to add the Payment reference if it is necessary for the ‘Payment Reference’ field.
Finally to add the products to the Invoice go to the Invoice tab and click on ‘Add a line’. A new field or line will be created and click on the Product line and a drop-down list of products will appear as shown below.
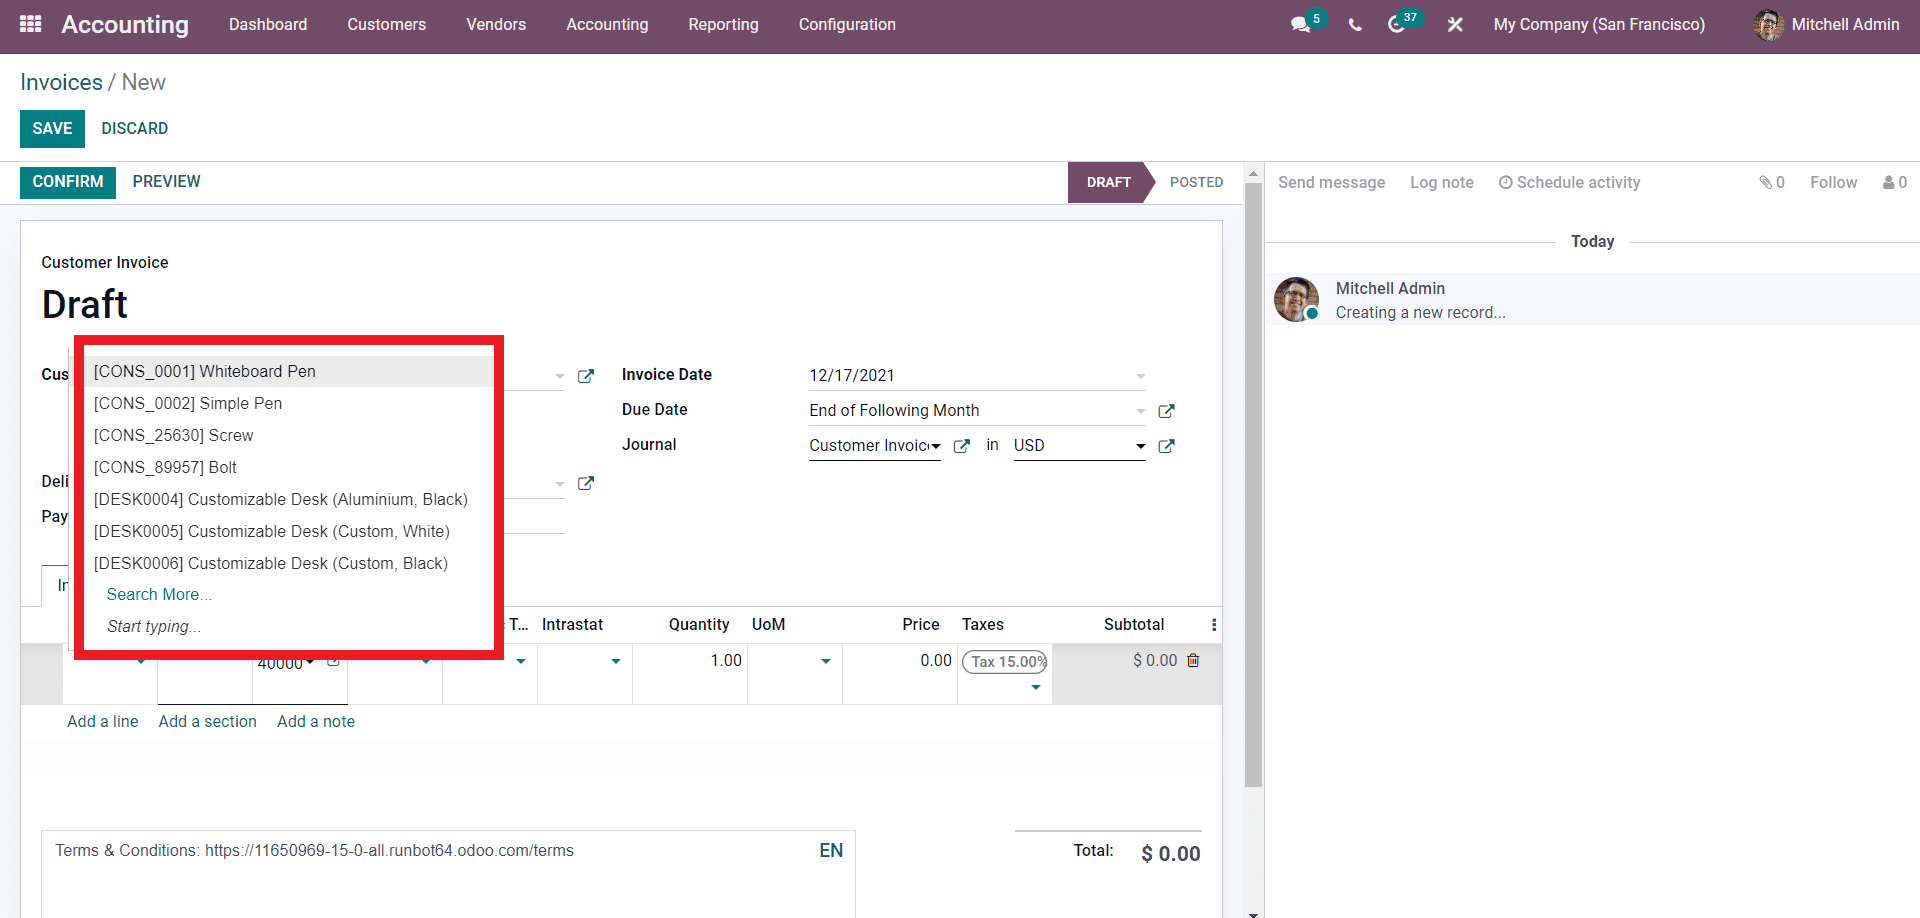
Click on Search more for products. Just click on the product that you want to the Invoice and it will be automatically added. You can change the quantity that must be delivered to the customer and the price and the tax details on the product with respect to the deal that you have established with the customer.
After the configurations click on the CONFIRM button to proceed to the next stage of the Invoicing process as shown below.
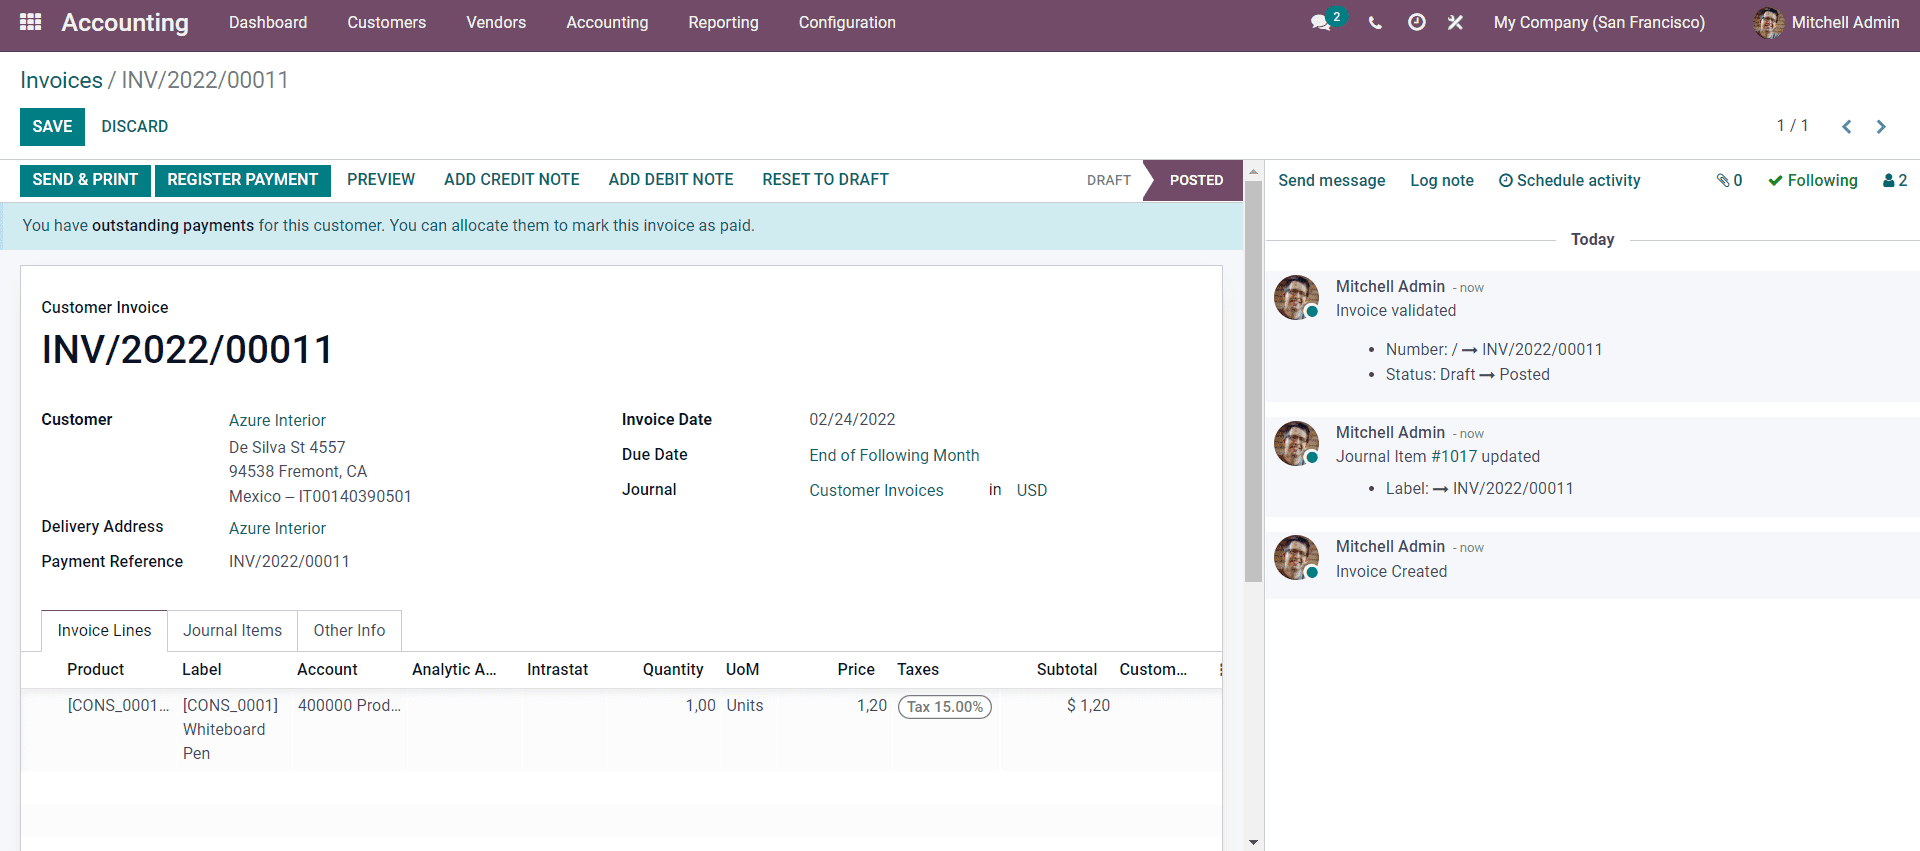
This is the Payment registration page. You can confirm the payment from the customer form here. Click on the REGISTER PAYMENT button after confirming customer payment.
Odoo allows you to set the payment terms with your invoices to ensure that you receive payments on time. Setting up payment terms is easy with Odoo.
Payment Terms
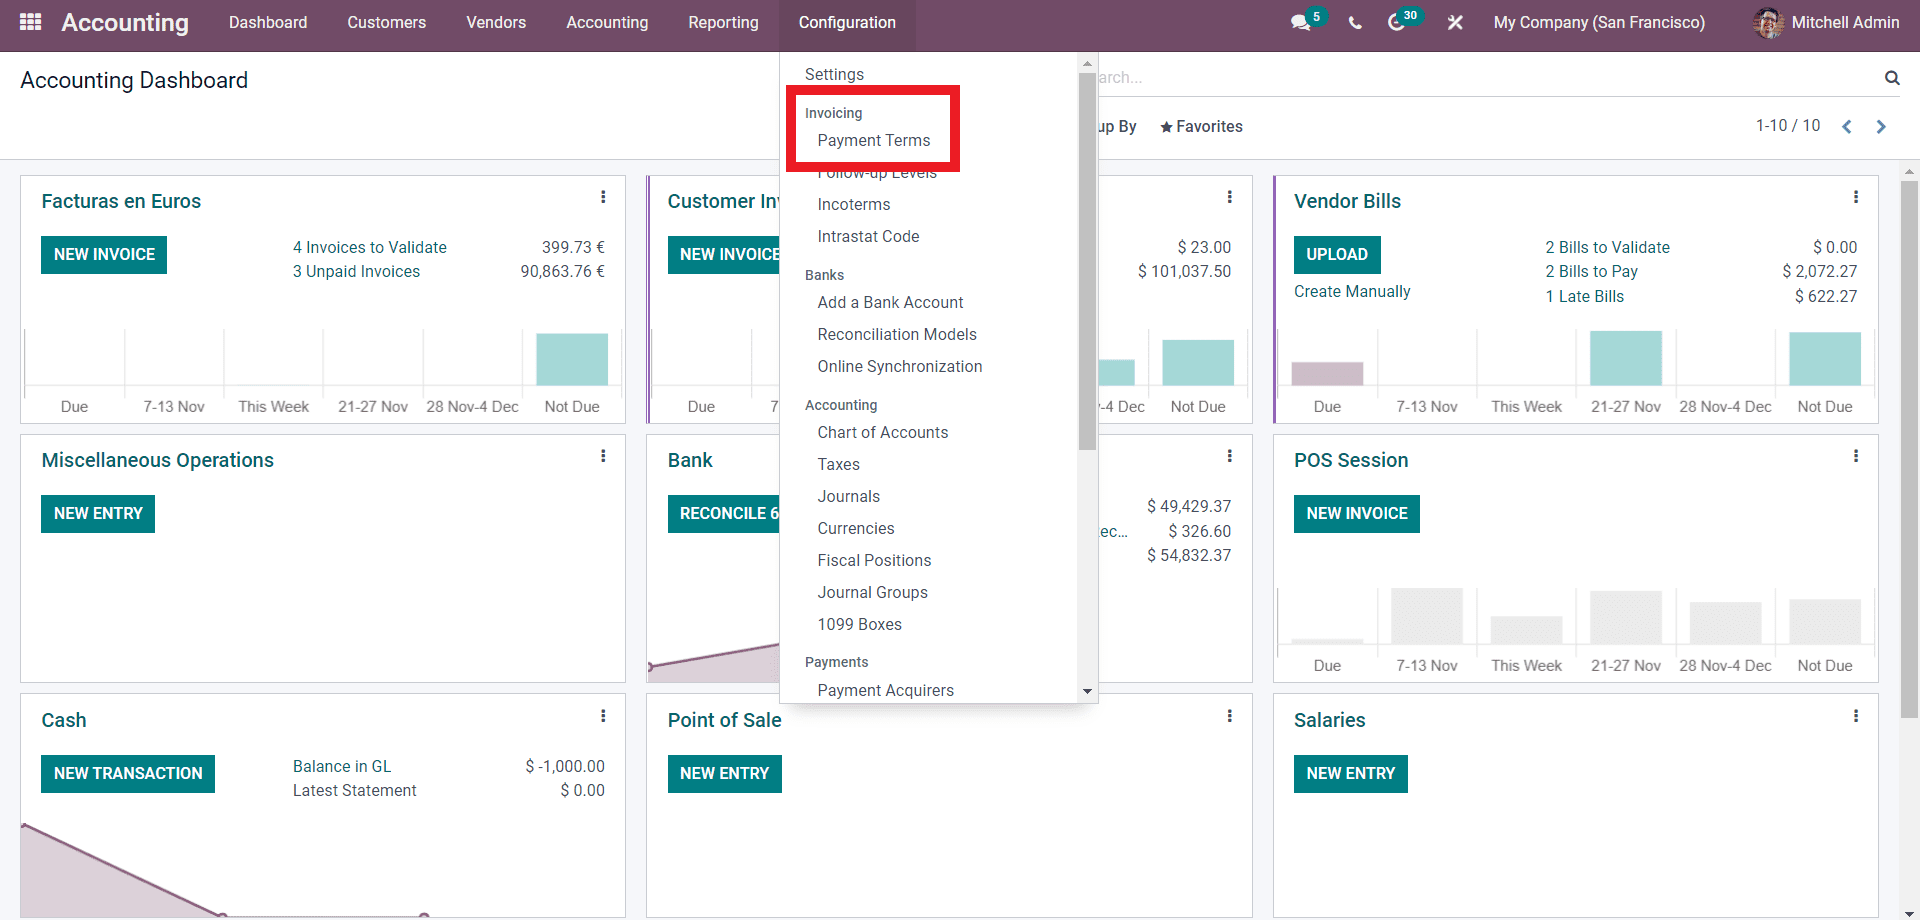
Payment Terms are rules that you can set on an invoice regarding the time allotted to the customer to pay for the product or services you have provided them or give them through invoices professionally. This often allows you to get paid faster and will help your customers to all their purchases quickly. You can easily set this feature up from the Accounting module. Click on the Configuration tab from the module’s dashboard and the drop-down under the Invoice section, click on Payment Terms as shown below.
This will take you to the Payment Terms page, which will display all of the previously created payment terms to overview and use, as shown below.
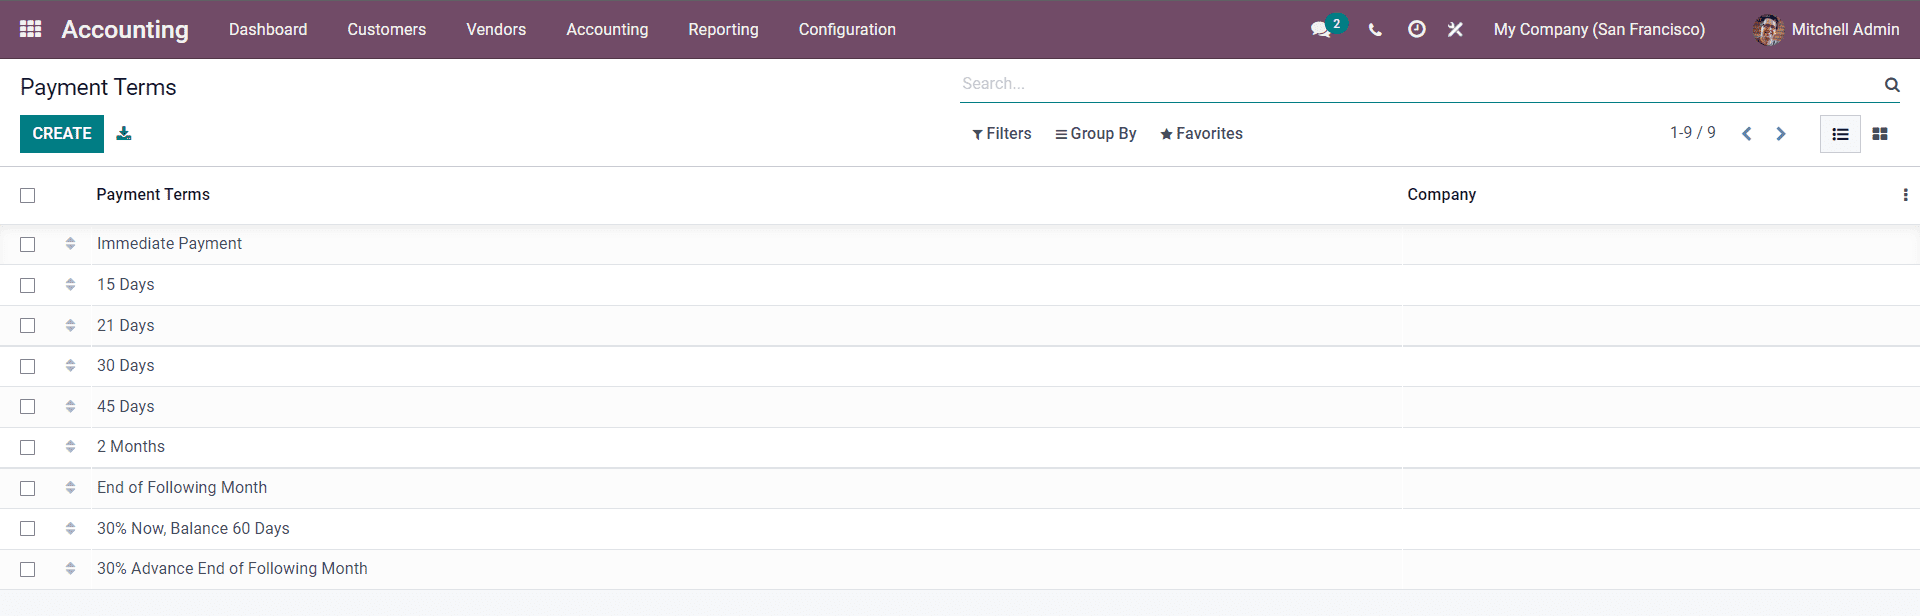
From here, click on the Create button to configure and set up a new Payment Term, as shown below.
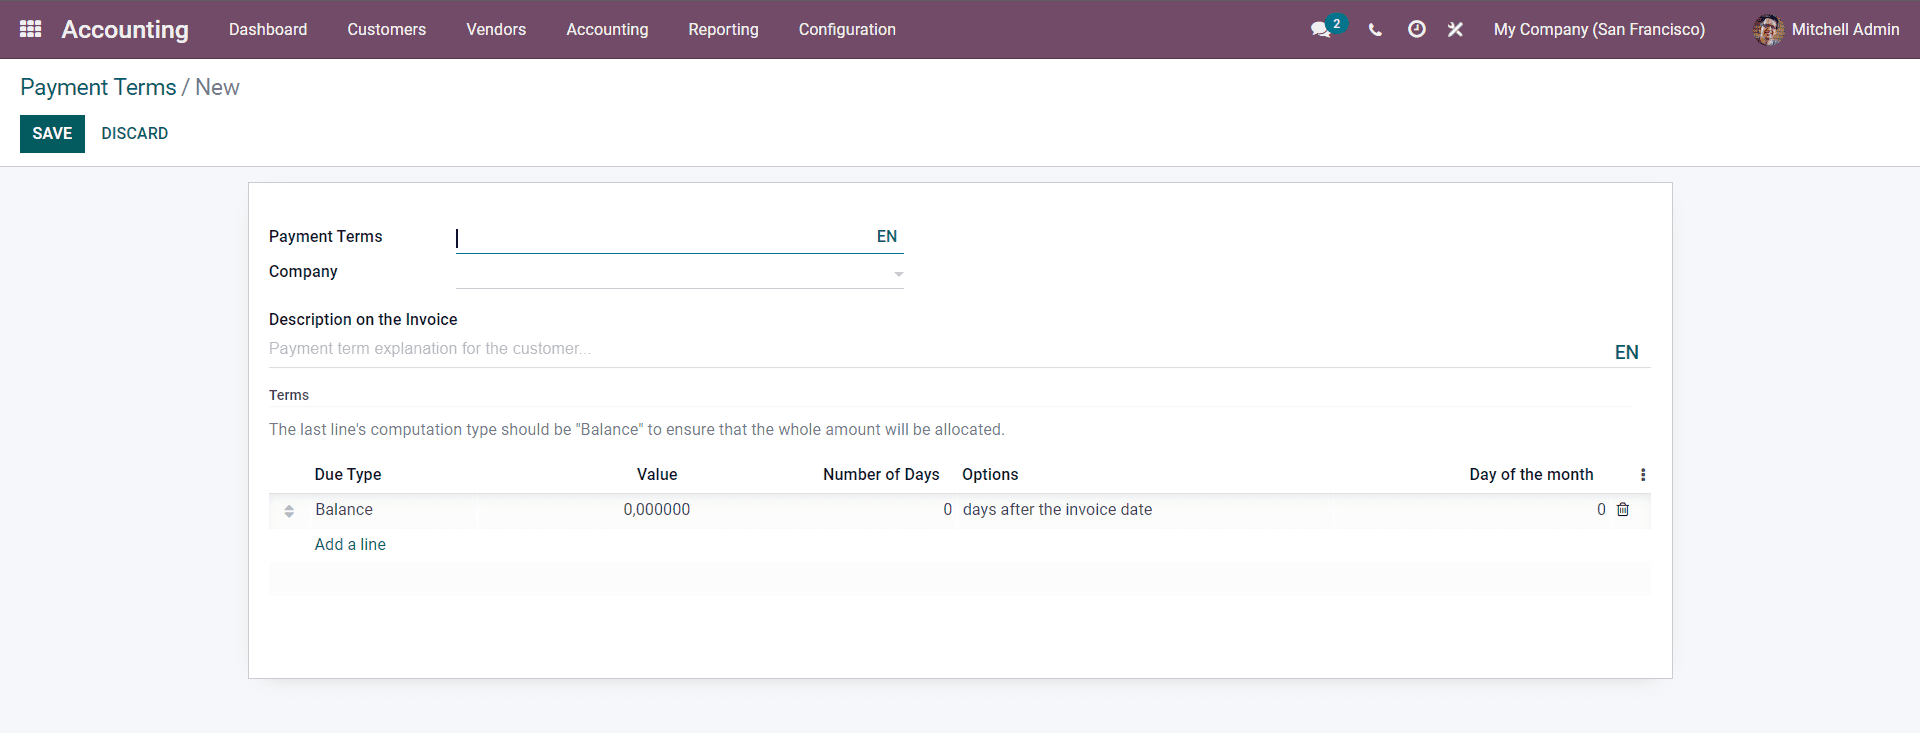
You can create a new Payment Term effortlessly from here. The first step of Creating a new Payment term is to name it. From the Payment, Terms section, enter the Term and select the Company. The Term should justify the purpose of the Payment Term. This allows you to manage the Payment Terms effortlessly. Choose the company from the Company section.
With the Description on the Invoice option, you can quickly write up a description printed with the Invoice. The description space can be used to explain the Payment Term. The report must be short and precise for the customers to understand in a single glance, or you can elongate it concerning the Payment Term. After giving the description, go to the Tab below for advanced configurations on the Payment Term. The configuration section is reserved for configuring the Due date specification on the Payment term, as highlighted in the image given below.
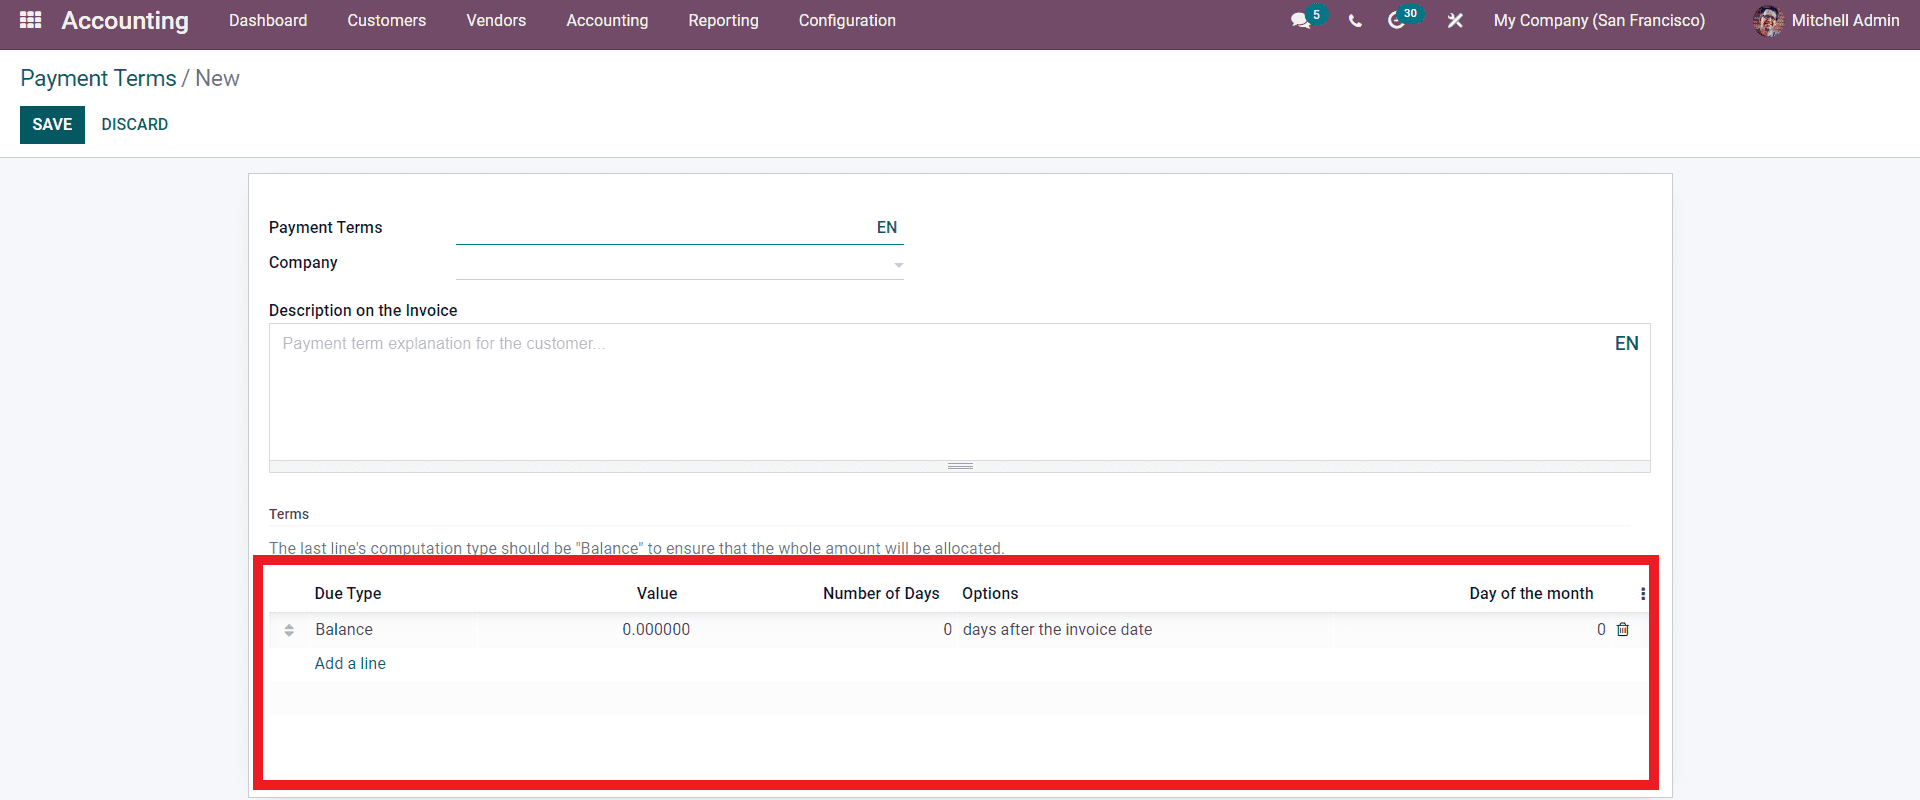
Click on the Add a line button as highlighted in the section of the image given above. This will let you set a Term. A configuration tab for configuring the term will open up as shown below.
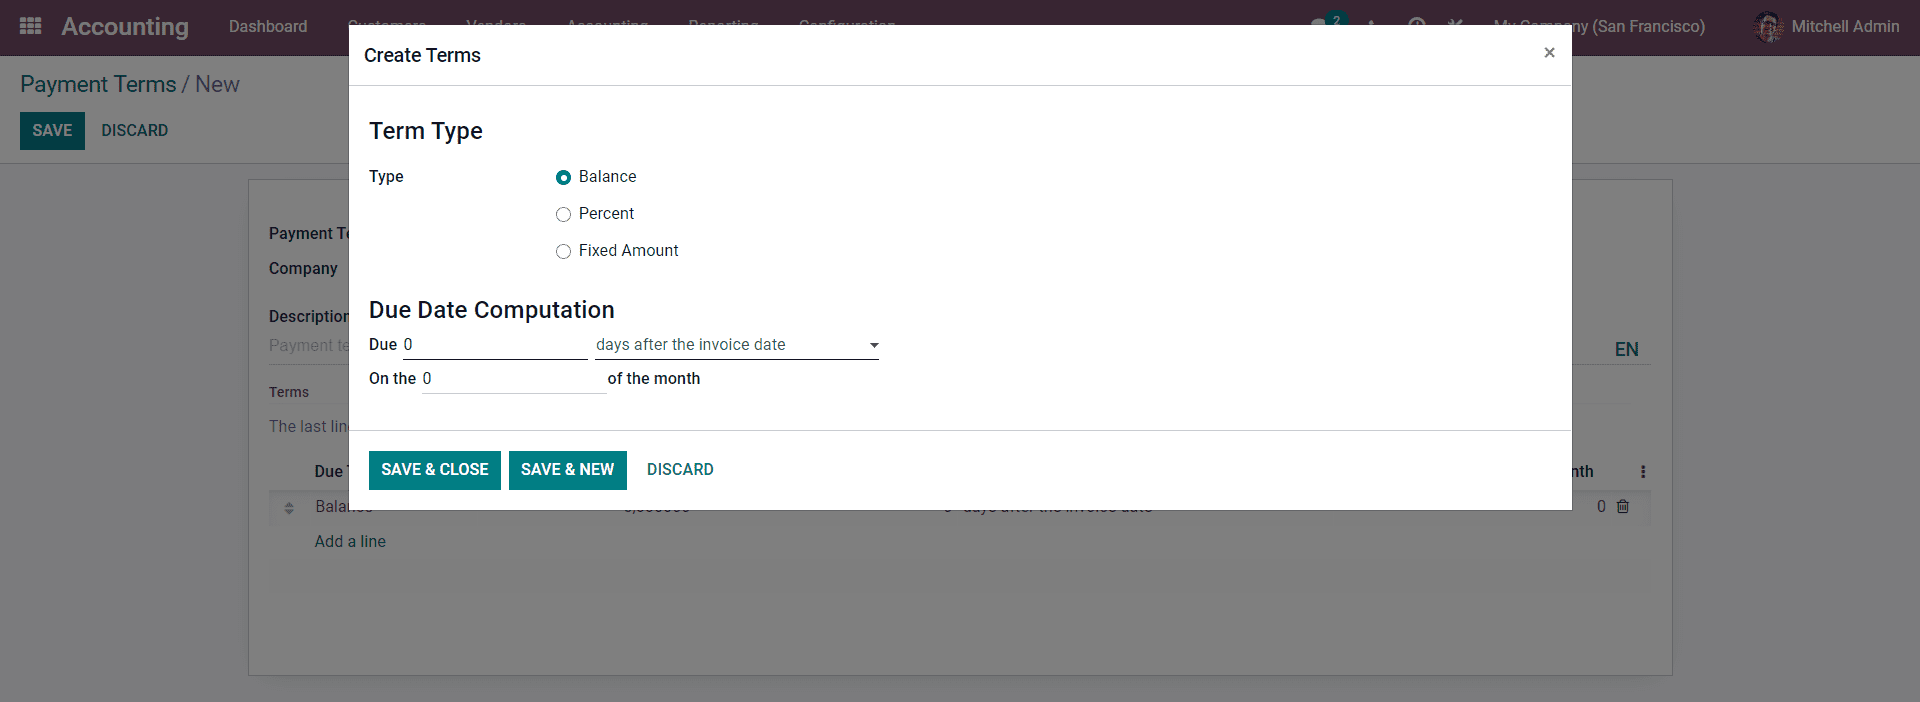
You can create a Term form here. The first step is to set the term Type. There are three options available to choose from to set the Type. Balance, Percent, and Fixed Amount. Note that for each type, the configuration changes accordingly. Select the Term type according to the nature of the invoice that you are sending. If you pick the Percent from the options, a new Value line will appear as shown below.
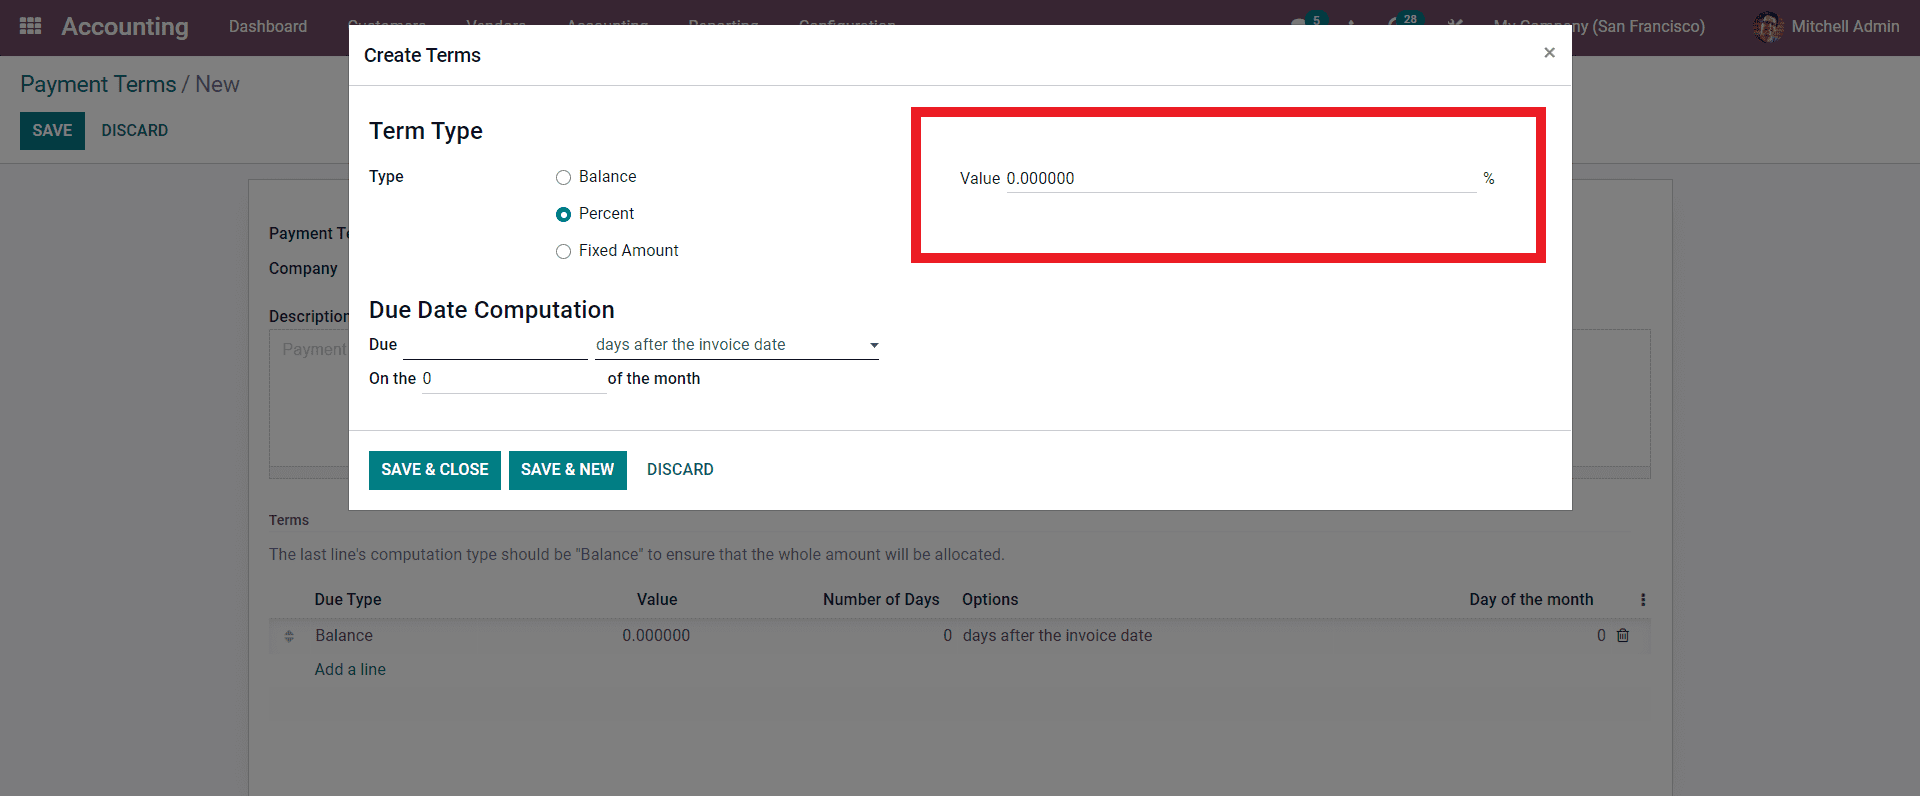
You can enter the Value in percentage here. If you choose the Fixed amount from the options, you can enter the Value in Fixed amount under the Value section. So you can type in the amount or a percentage of the total amount here.
The next step is to configure the Due date computation. The first section under the Due date computation section is the Due. Over here, you have to enter the number of days and the Due, And from the Dropdown options under the Days After the Invoice Date, choose the most appropriate option. The possibilities include Days after the End of the Invoice Month, the following month, or the Current month. After the configuration, use SAVE & CLOSE to continue making the Payment Terms.
You can find the new line under the Terms section as shown below after the configurations on them.
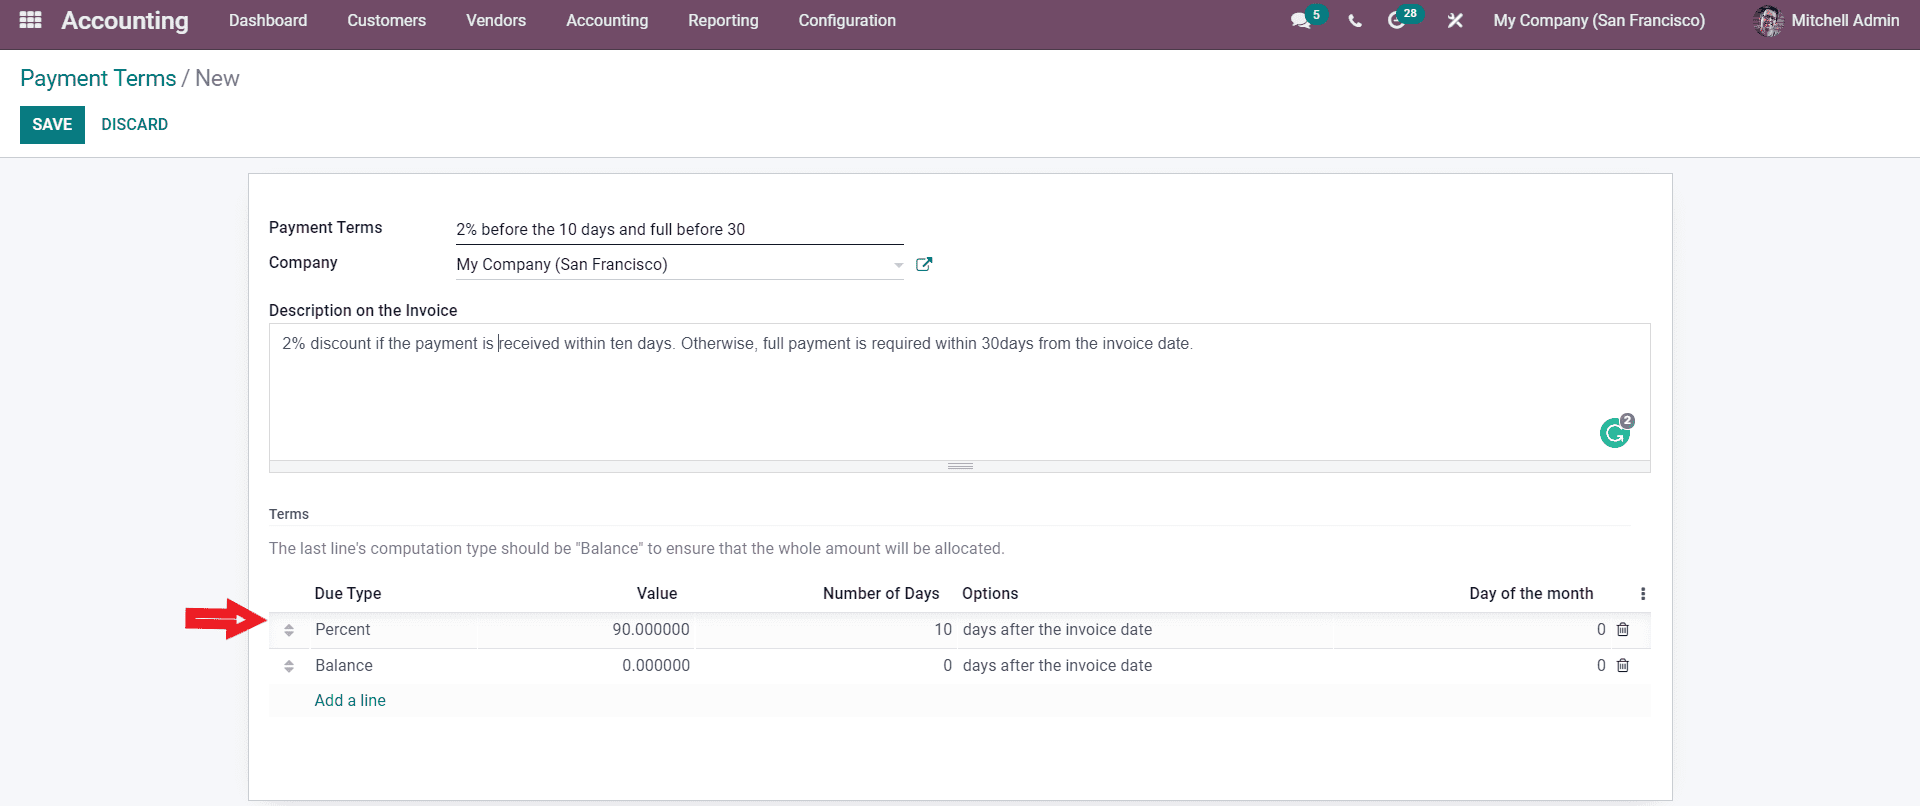
Note that you have to always keep the Balance at the low level of the line or the list. The newly created condition will be automatically placed under the balance line, drag it to the top, and ensure that the whole amount of the invoice is allocated. You can also edit the Balance, simply Click on it, and you will be taken to the configuration tab as mentioned earlier for configurations After the configuration, you can proceed with the invoicing process.
From the Customer tab in the accounting Dashboard, click on Invoices from the drop-down options. The CREATE button will give you a new page for Creating the invoice, as shown below.
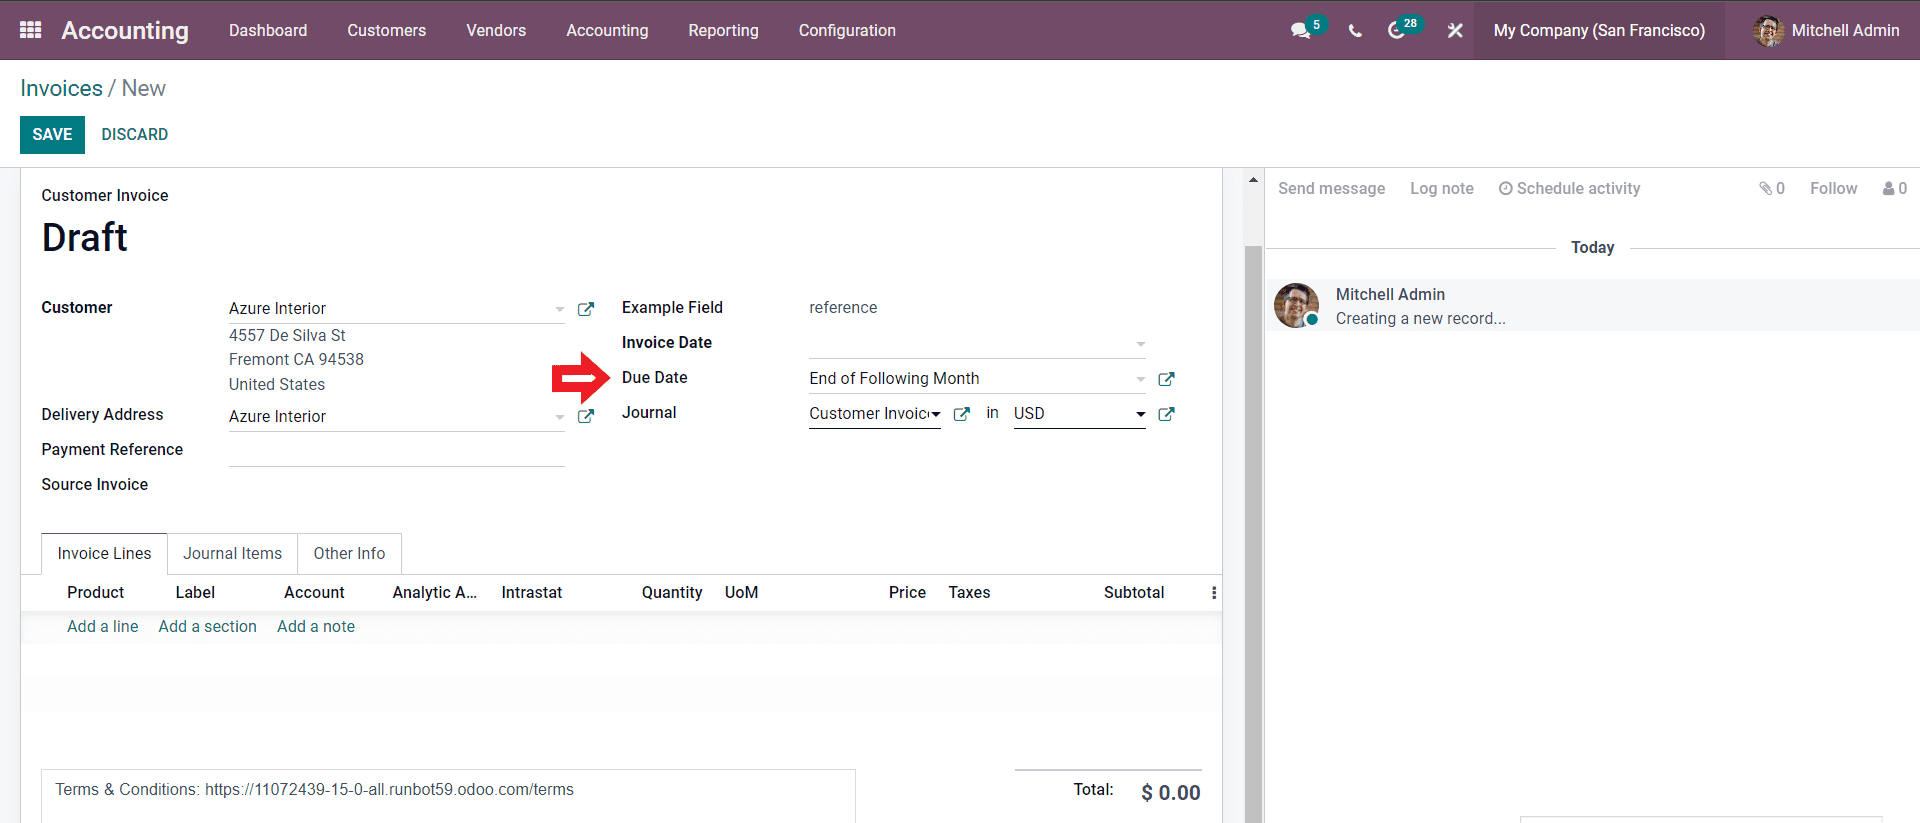
Enter the details on the Invoice, and from the Due date field as marked above, choose your payment term as shown below.

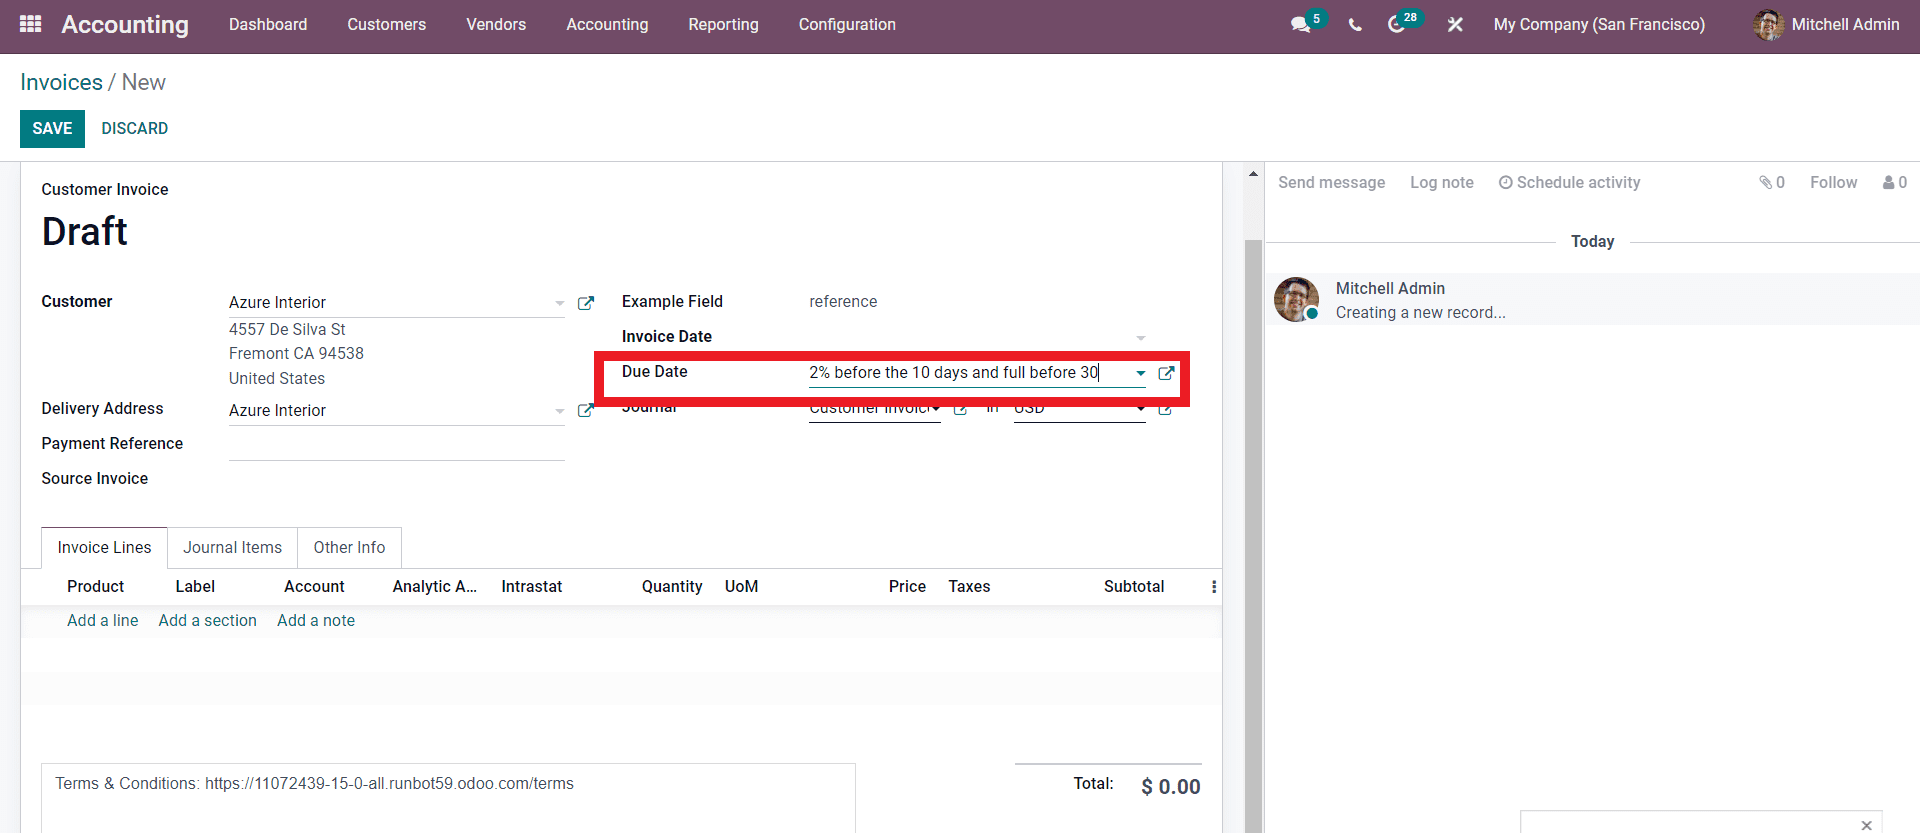
Note that Odoo allows you to create Payment terms from the Invoices instantly. Click on the CREATE button, and Odoo will give you the configuration tab as sanctioned earlier for creating the new Payment Term.
As highlighted in the image given above, choose the Payment Term, and it will be automatically added to the invoice as shown below.
This will be displayed on the invoice so that the customer can act on the payment accordingly, as shown in the invoice preview below.
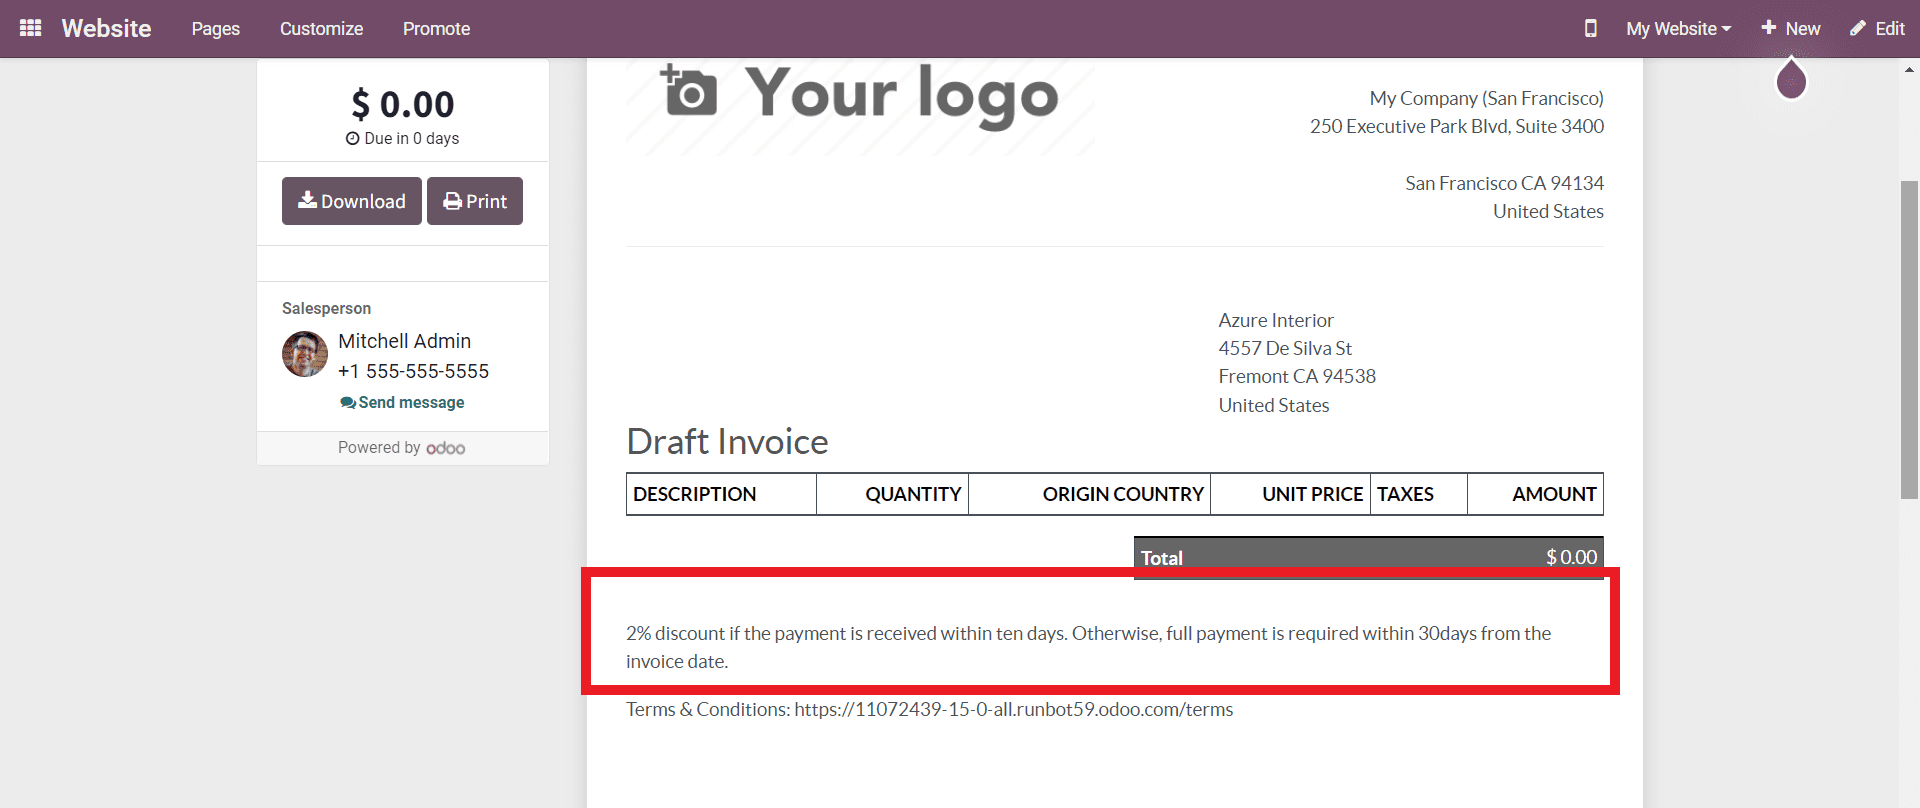
The highlighted section above shows the applied Payment Term. This allows your customers to get a quick look at the Terms and will also act as a quick reminder on the important Payments.
With Odoo you can set up unique Payment terms for individual customers. You can do this by going to the Customers options under the Customers tab on the Accounting dashboard. This will show your customers as shown below.
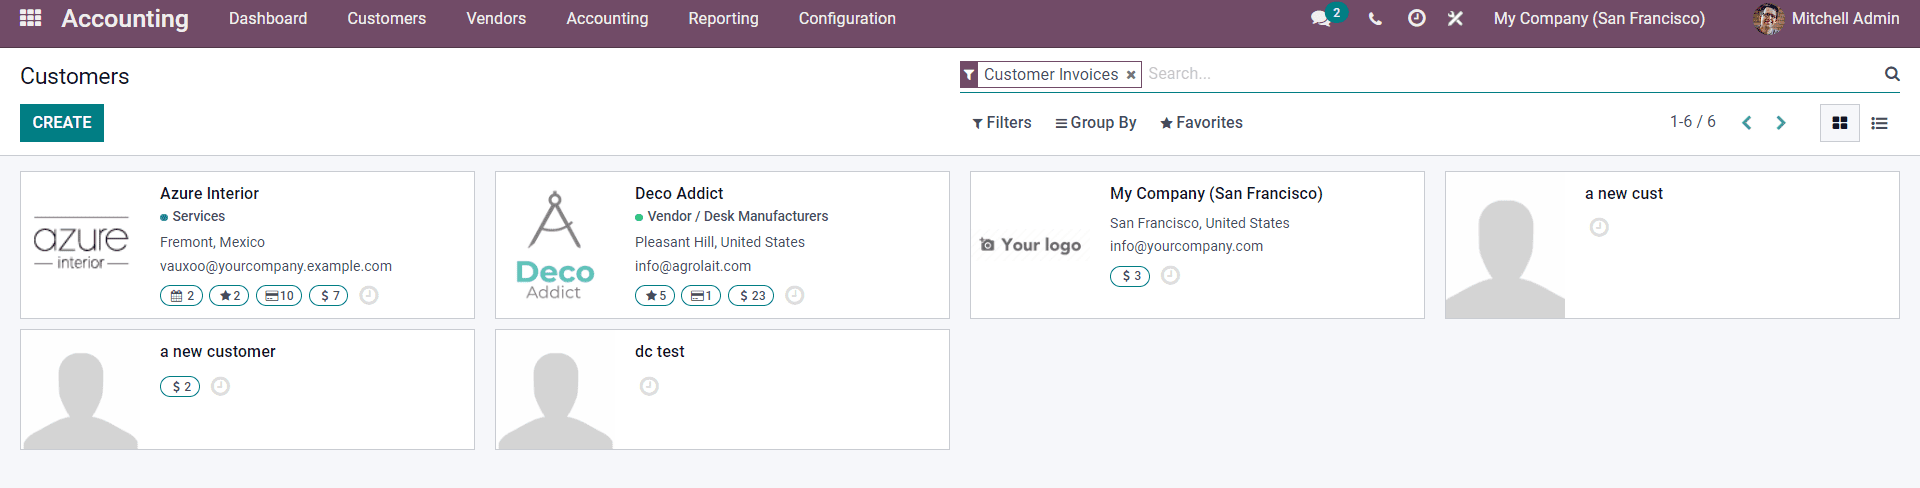
Select the customer that you want to add the Payment Terms to from the Options and the configuration page on the selected customer will open up as shown below.
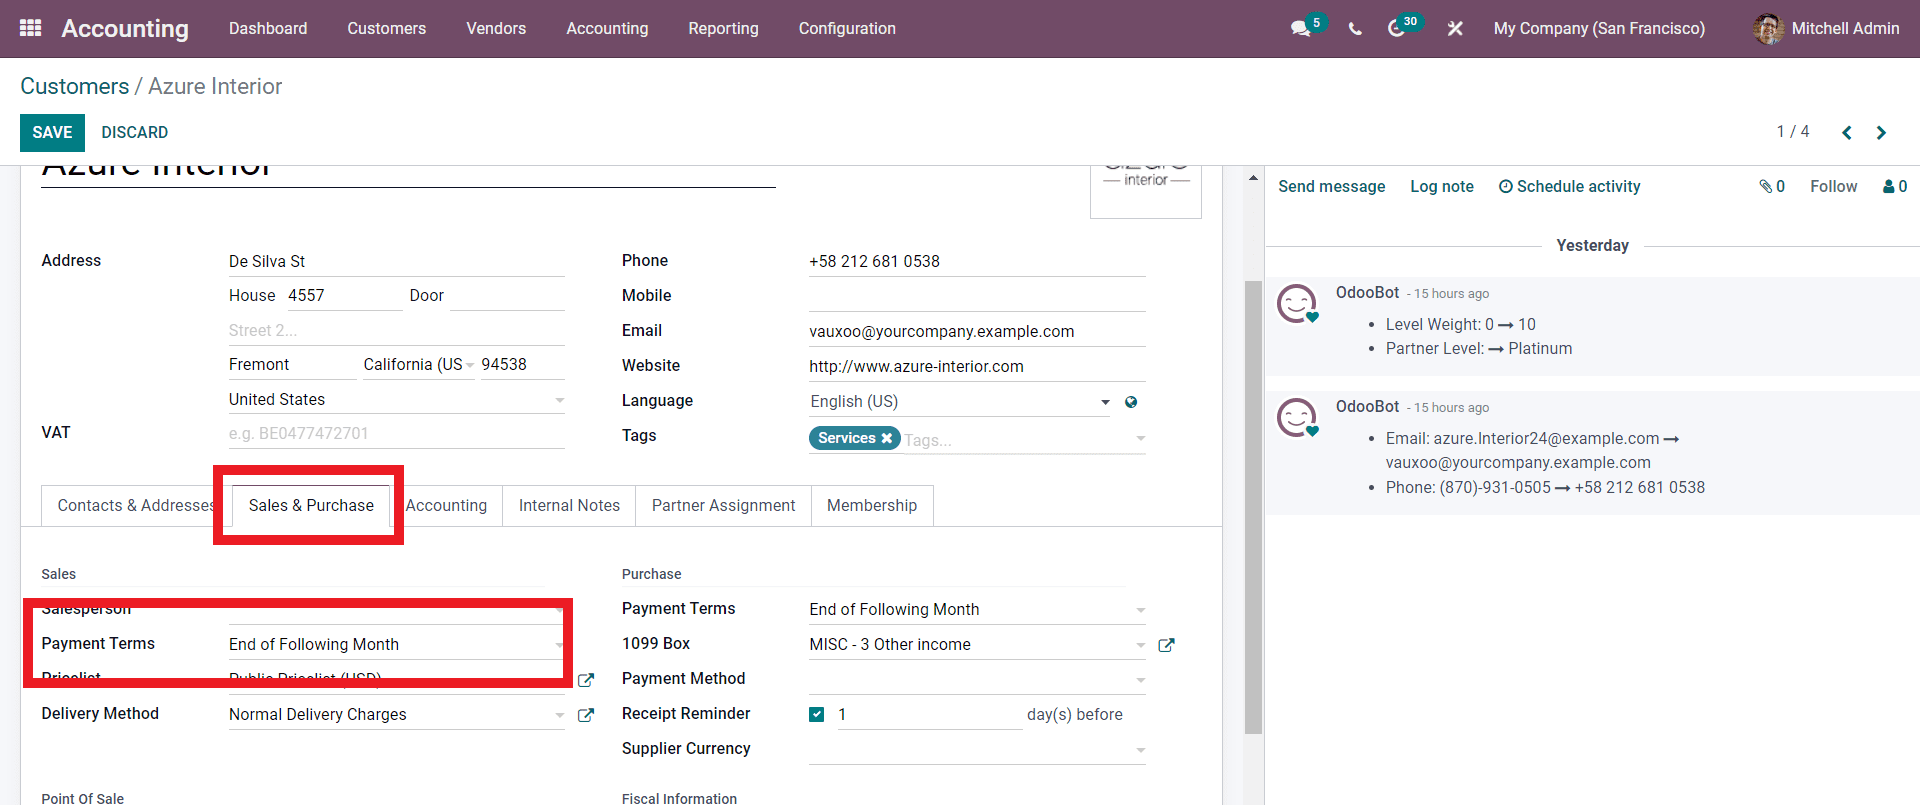
Click on the Edit button and as Marked above, under the Sales & Purchase section, you can find the Payment terms. Click on the field, and from the drop-down options select the payment term. Odoo will recognize this and include the Payment term for the future invoices to be sent to the customer. Payment terms play an important role in efficient invoice management.
Similar to the payment terms there are multiple features integrated into Odoo to work with the Invoicing process.
Note that the feature of the Invoice varies with respect to the type of invoice you are making. But the basic structure of the invoice is the same across all of the modules of Odoo. Go through more of our blogs to know more about invoicing with Odoo.