Odoo 19 is powerful business management software that integrates sales, CRM, inventory, accounting, and many other applications. Because of its scalable and adaptable architecture, it aids businesses seeking to improve productivity and streamline operations. One of its most prominent user-focused features is the Customer Portal, which provides external users like clients and vendors with a secure space to access vital information and communicate directly with the business.
This blog focuses on how developers and functional users can change Odoo 19's Customer Portal's default menus and views. Examine the options for renaming menu items, adding new sections such as purchase orders or delivery slips, and changing tree or form views to display business-specific data to better align the portal with an organization's objectives and brand.
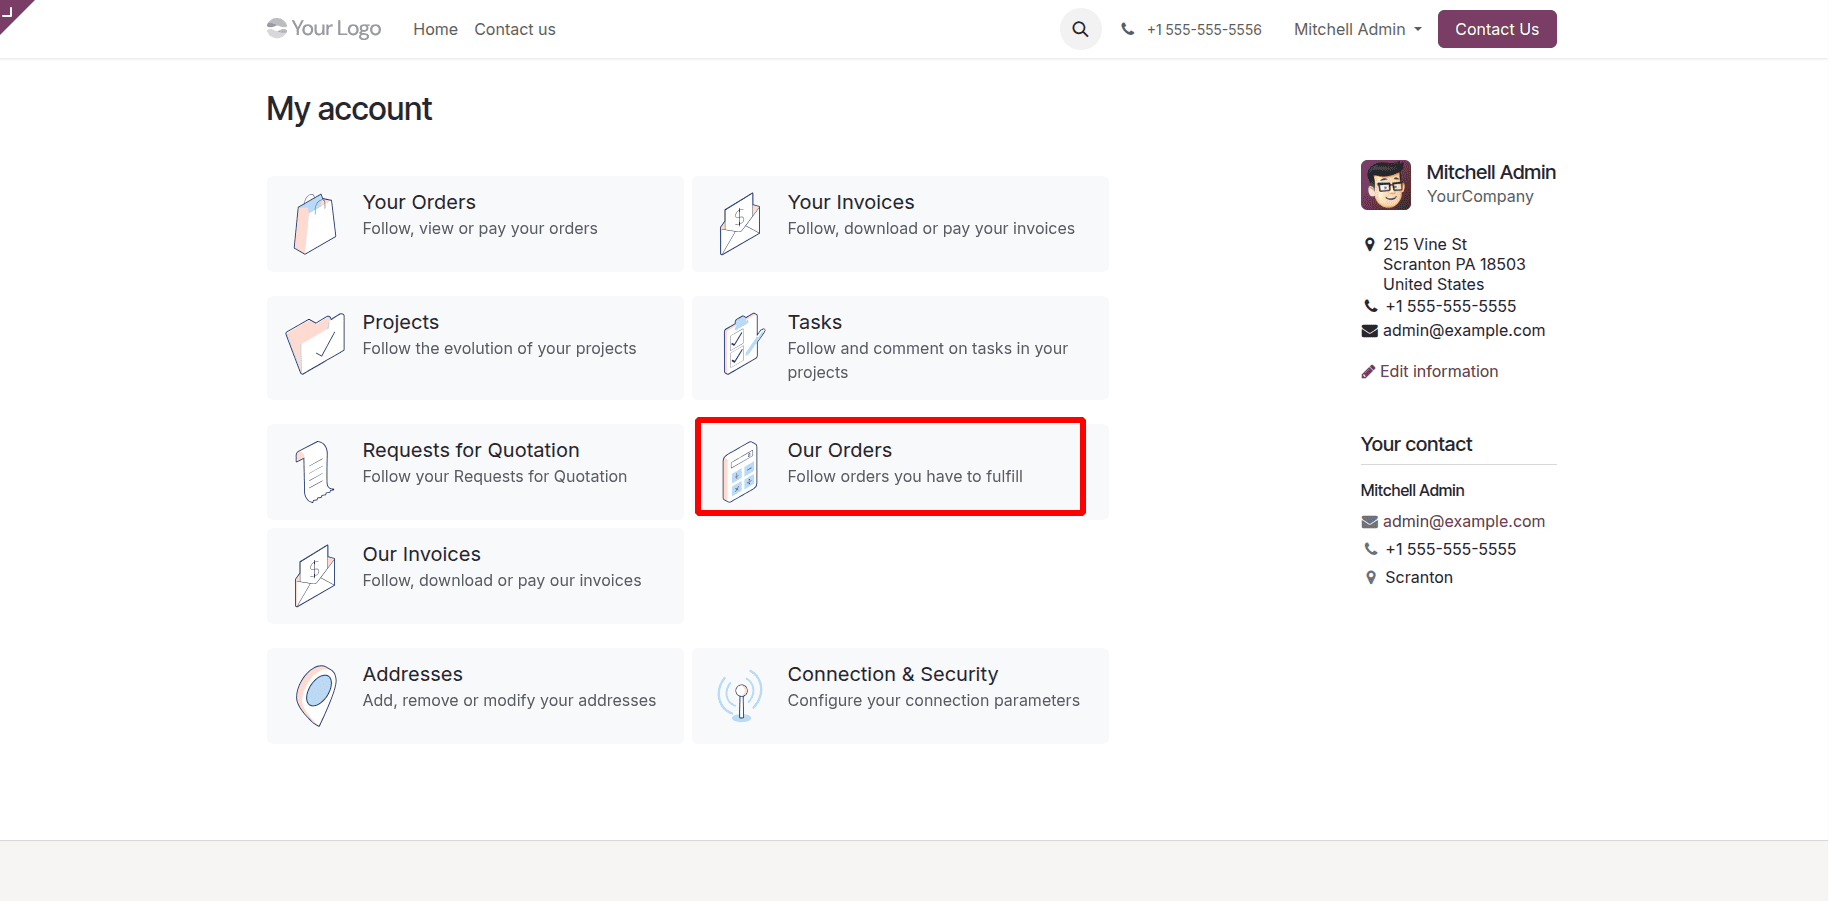
Odoo 19's Customer Portal offers an easy-to-use dashboard for external users, like clients or vendors, to monitor documents like purchase orders and quotes. As seen in the graphic below, the default display has sections like Our Orders and Requests for Quotation. Purchase orders are represented by the Our Orders block, which can be altered to better suit company requirements.
Menu Updation:
The default QWeb template can be inherited and changed to alter the menu label on the portal. Here's an example of updating the menu language and renaming the "Our Orders" block to "Our Purchase Orders".
<?xml version="1.0" encoding="utf-8"?>
<odoo>
    <template id="portal_my_home_purchase_custom"
              inherit_id="purchase.portal_my_home_purchase"
              priority="50">
        <!-- Replace RFQ entry -->
        <xpath expr="//div[@id='portal_vendor_category']/*[1]" position="replace">
            <t t-call="portal.portal_docs_entry">
                <t t-set="icon" t-value="'/web/static/img/rfq.svg'"/>
                <t t-set="text">Follow your Requests for Quotation</t>
                <t t-set="title">Requests for Quotation</t>
                <t t-set="url" t-value="'/my/rfq'"/>
                <t t-set="placeholder_count" t-value="'rfq_count'"/>
            </t>
        </xpath>

        <!-- Replace PO entry -->
        <xpath expr="//div[@id='portal_vendor_category']/*[2]" position="replace">
            <t t-call="portal.portal_docs_entry">
                <t t-set="icon" t-value="'/purchase/static/src/img/calculator.svg'"/>
                <t t-set="text">Follow orders you have to fulfill</t>
                <t t-set="title">Our Purchase Orders</t>
                <t t-set="url" t-value="'/my/purchase'"/>
                <t t-set="placeholder_count" t-value="'purchase_count'"/>
            </t>
        </xpath>
    </template>
</odoo>
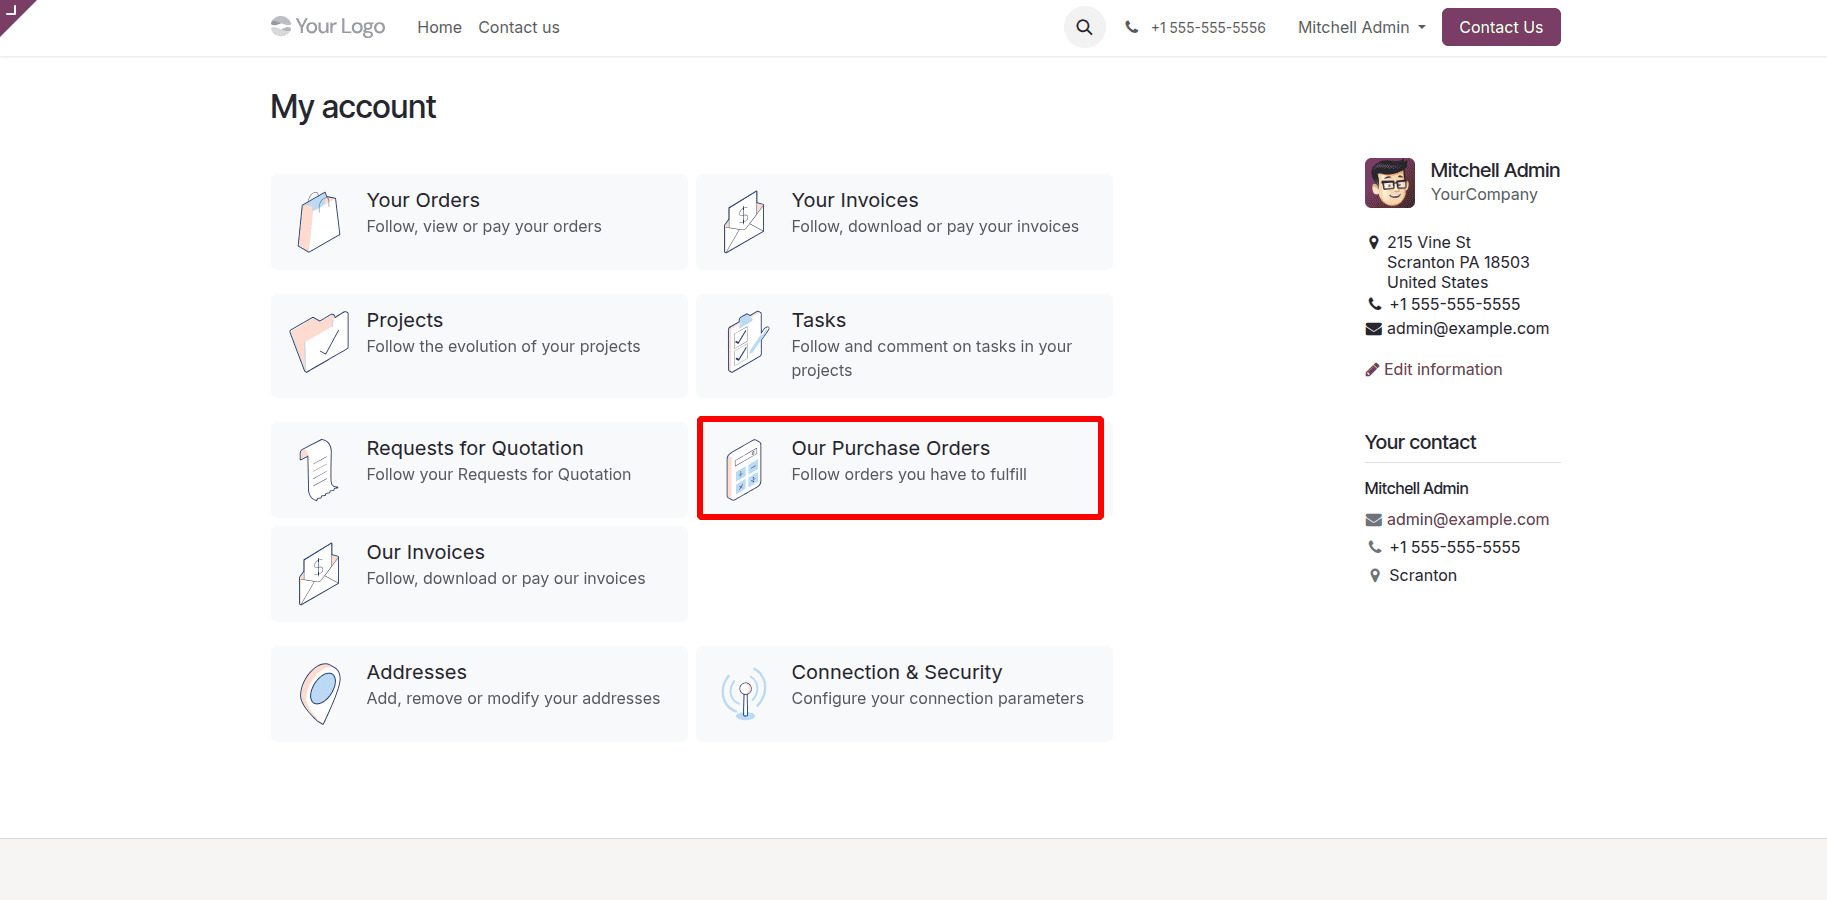
This sample of code shows how to inherit and modify an already-existing QWeb template in Odoo 19. It takes over the original purchase.portal_my_home_purchase template and substitutes the ID portal_vendor_category for the block. The two portal menu entries are redefined within this block. For "Requests for Quotation," the first entry stays the same, while the second entry changes the menu name and description from "Our Orders" to "Our Purchase Orders." This method ensures a clean and upgrade-safe customization by changing the visible text and titles without changing the original template structure. The gateway layout view after this customization is applied is shown in the following image.
List Page View Updation: Adding Source (Origin) to Purchase Orders
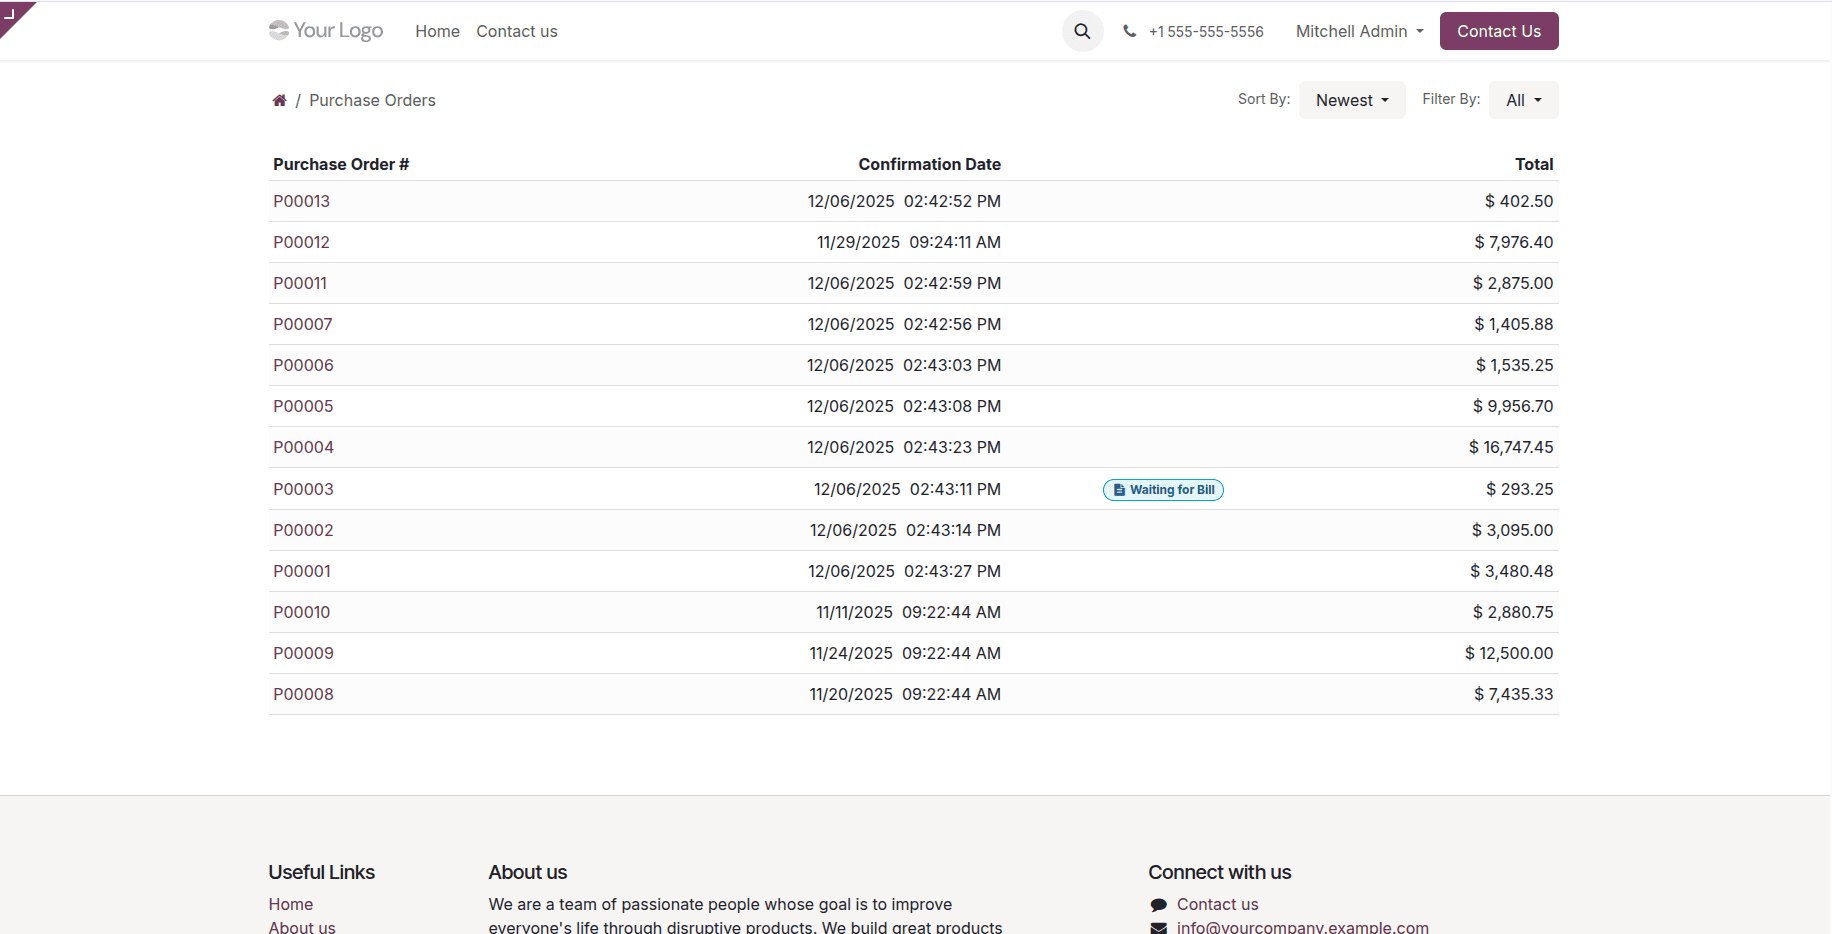
The Purchase Orders list view in the customer portal's default layout, prior to any modifications, is depicted in the figure below.
The initial QWeb template can be extended and inherited to alter the gateway view layout. Here is an example of how to make the Purchase Orders list view in the customer portal more user-friendly by adding a new Source column to the table.
<?xml version="1.0" encoding="utf-8"?>
<odoo>
    <template id="portal_my_purchase_orders_add_source"
              inherit_id="purchase.portal_my_purchase_orders"
              name="Add Source Column in Purchase Orders Portal View">
        <!-- Add SOURCE Header before Confirmation Date -->
        <xpath expr="//thead/tr/th[2]" position="before">
            <th class="text-end">
                <span class="d-none d-md-inline">Source</span>
                <span class="d-block d-md-none">Src</span>
            </th>
        </xpath>
        <!-- Add SOURCE Value before Confirmation Date Value in the row -->
        <xpath expr="//t[@t-foreach='orders']/tr/td[2]" position="before">
            <td class="text-end">
                <span t-esc="order.origin"/>
            </td>
        </xpath>
    </template>
</odoo>
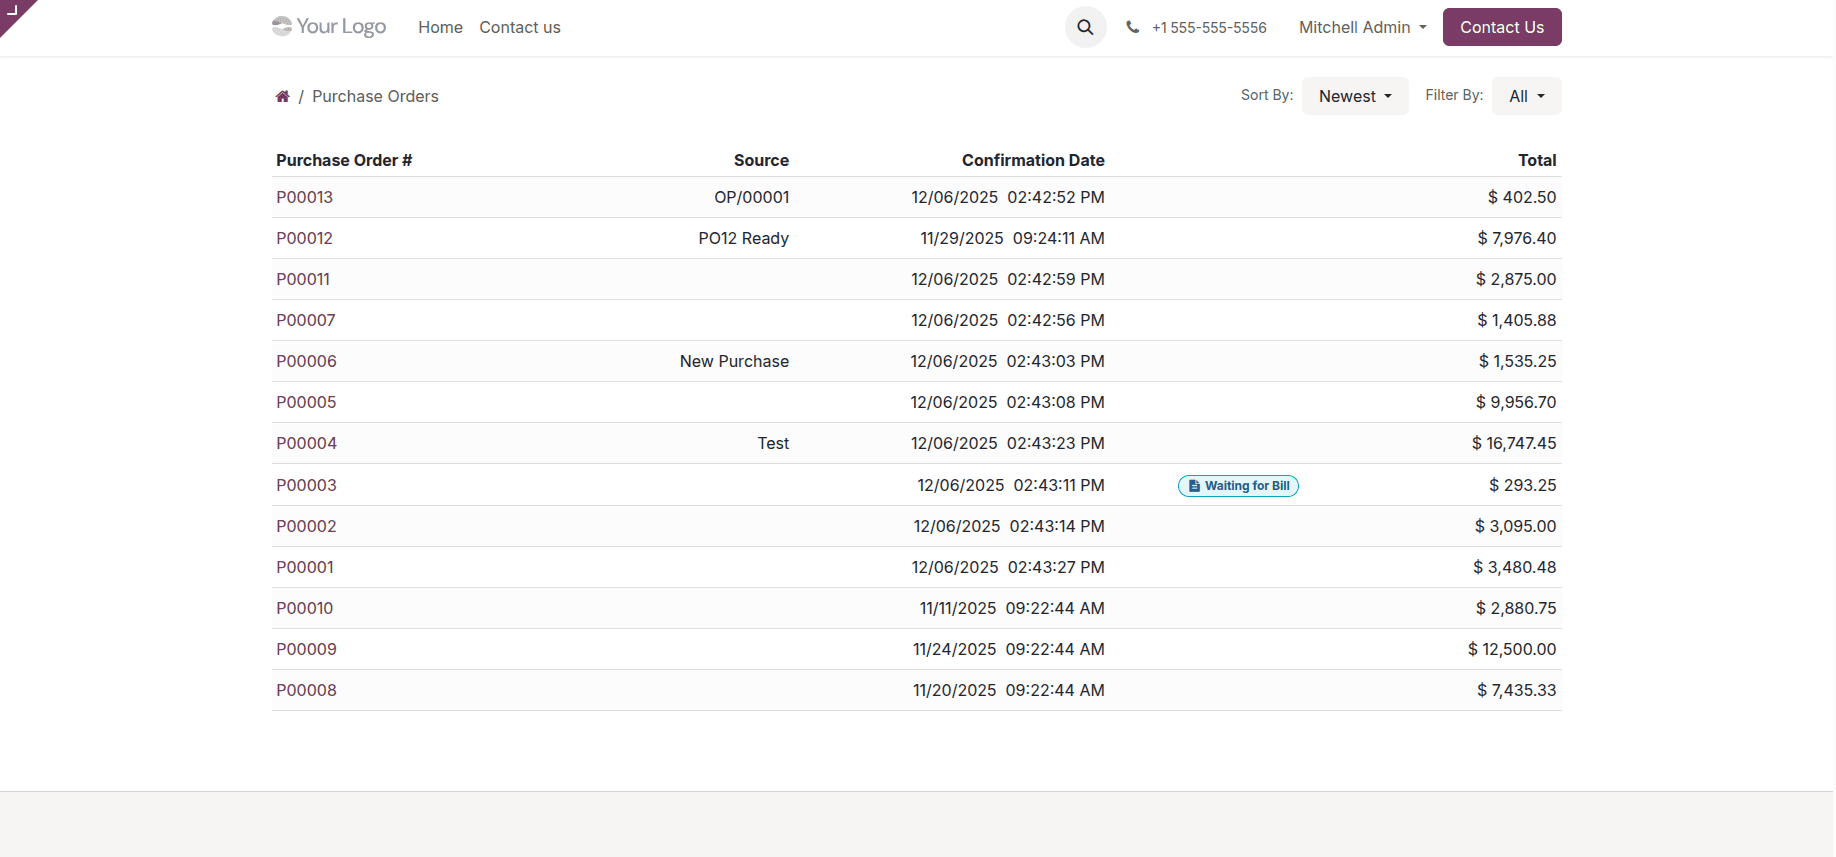
This code inherits the original QWeb template and adds a new "Source" column to the Purchase Orders list view in the customer portal. It displays the matching origin for each record in the same location and inserts the "Source" heading before the current "Confirmation Date" header. By giving consumers more source-related information without changing the original structure, this improves the list view. The personalized Purchase Orders list view in the portal layout is shown in the following image.
For a thorough tutorial on adding a download button to the portal list view, see this blog:
How to Add a PDF Report Download Button to the Odoo 19 Customer Portal
Form Page View Update:
Adding Source Reference to Purchase Order Portal View:
The original design of the Purchase Order form view as it appears in the user interface is displayed below, unaltered.
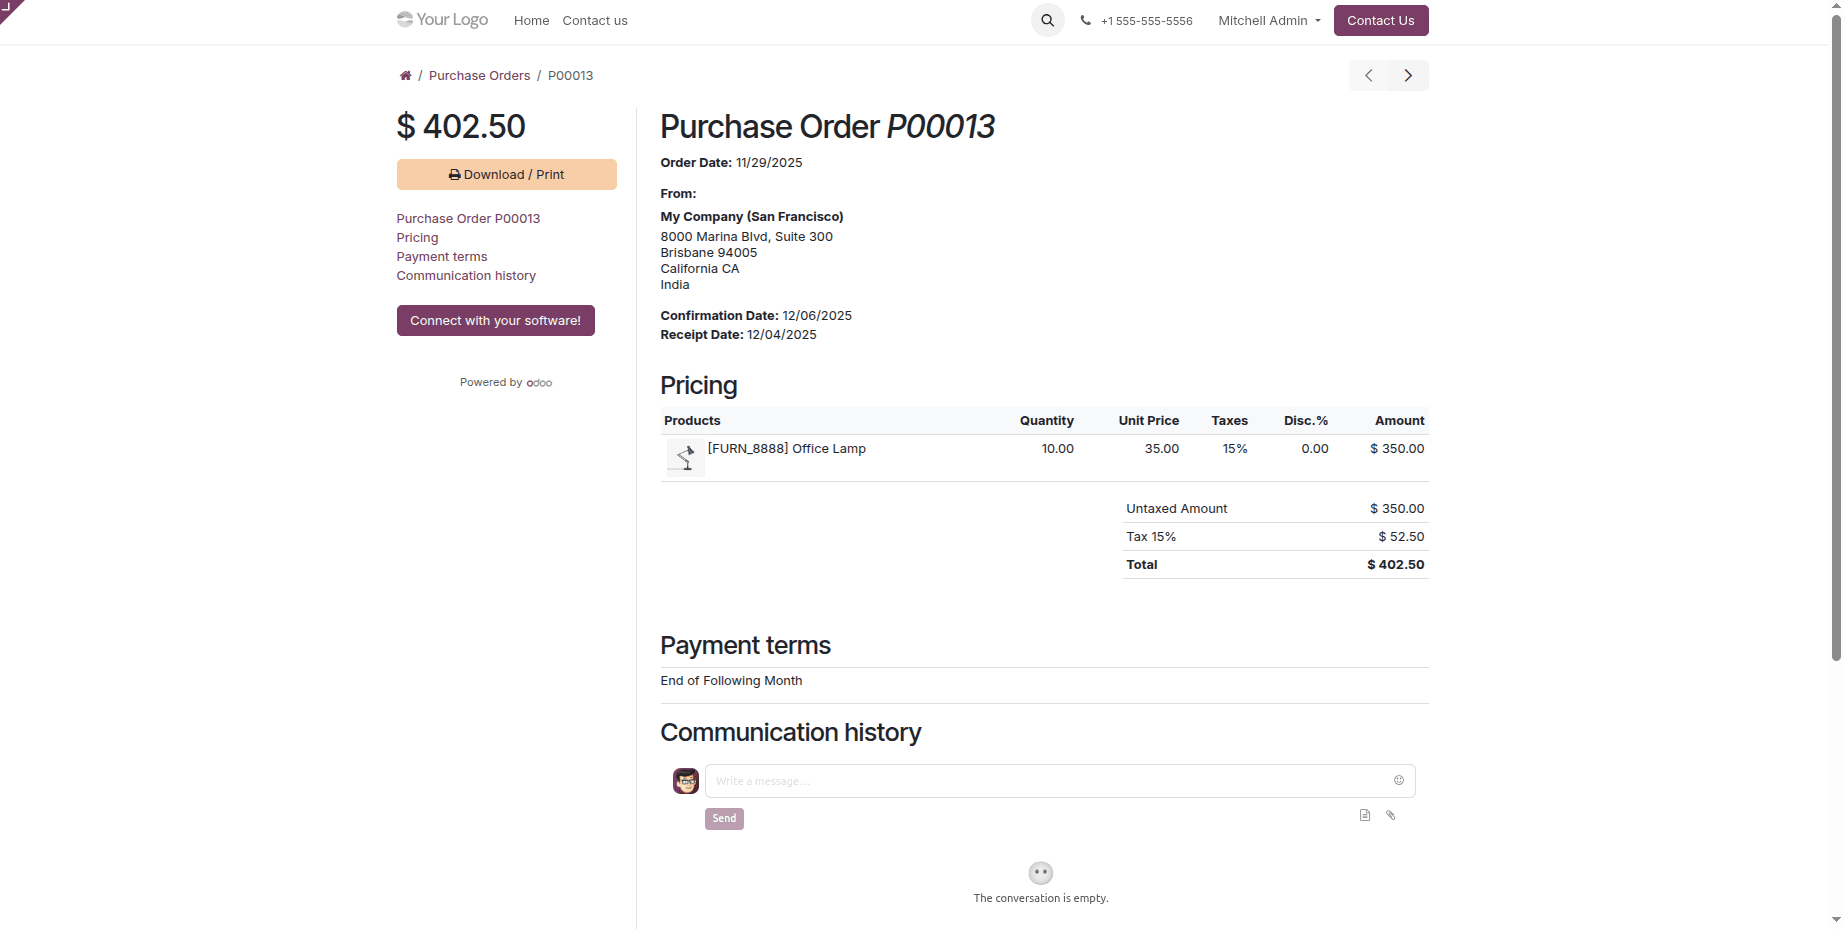
By placing the Source Reference field just beneath the Receipt Date, the following customization improves the purchase order form view in the customer portal. This is accomplished by utilizing XPath to insert the field after inheriting the original QWeb template, giving users greater clarity and reference when examining purchase orders.
<?xml version="1.0" encoding="utf-8"?>
<odoo>
    <template id="purchase_order_portal_add_source"
              inherit_id="purchase.purchase_order_portal_content"
              name="Add Source to Purchase Order Portal">
        <!-- Insert Source after Receipt Date -->
        <xpath expr="//strong[contains(text(), 'Receipt Date:')]/parent::div" position="after">
            <div t-if="order.origin" class="mt-1">
                <strong>Source:</strong>
                <span class="ms-1" t-esc="order.origin"/>
            </div>
        </xpath>
    </template>
</odoo>
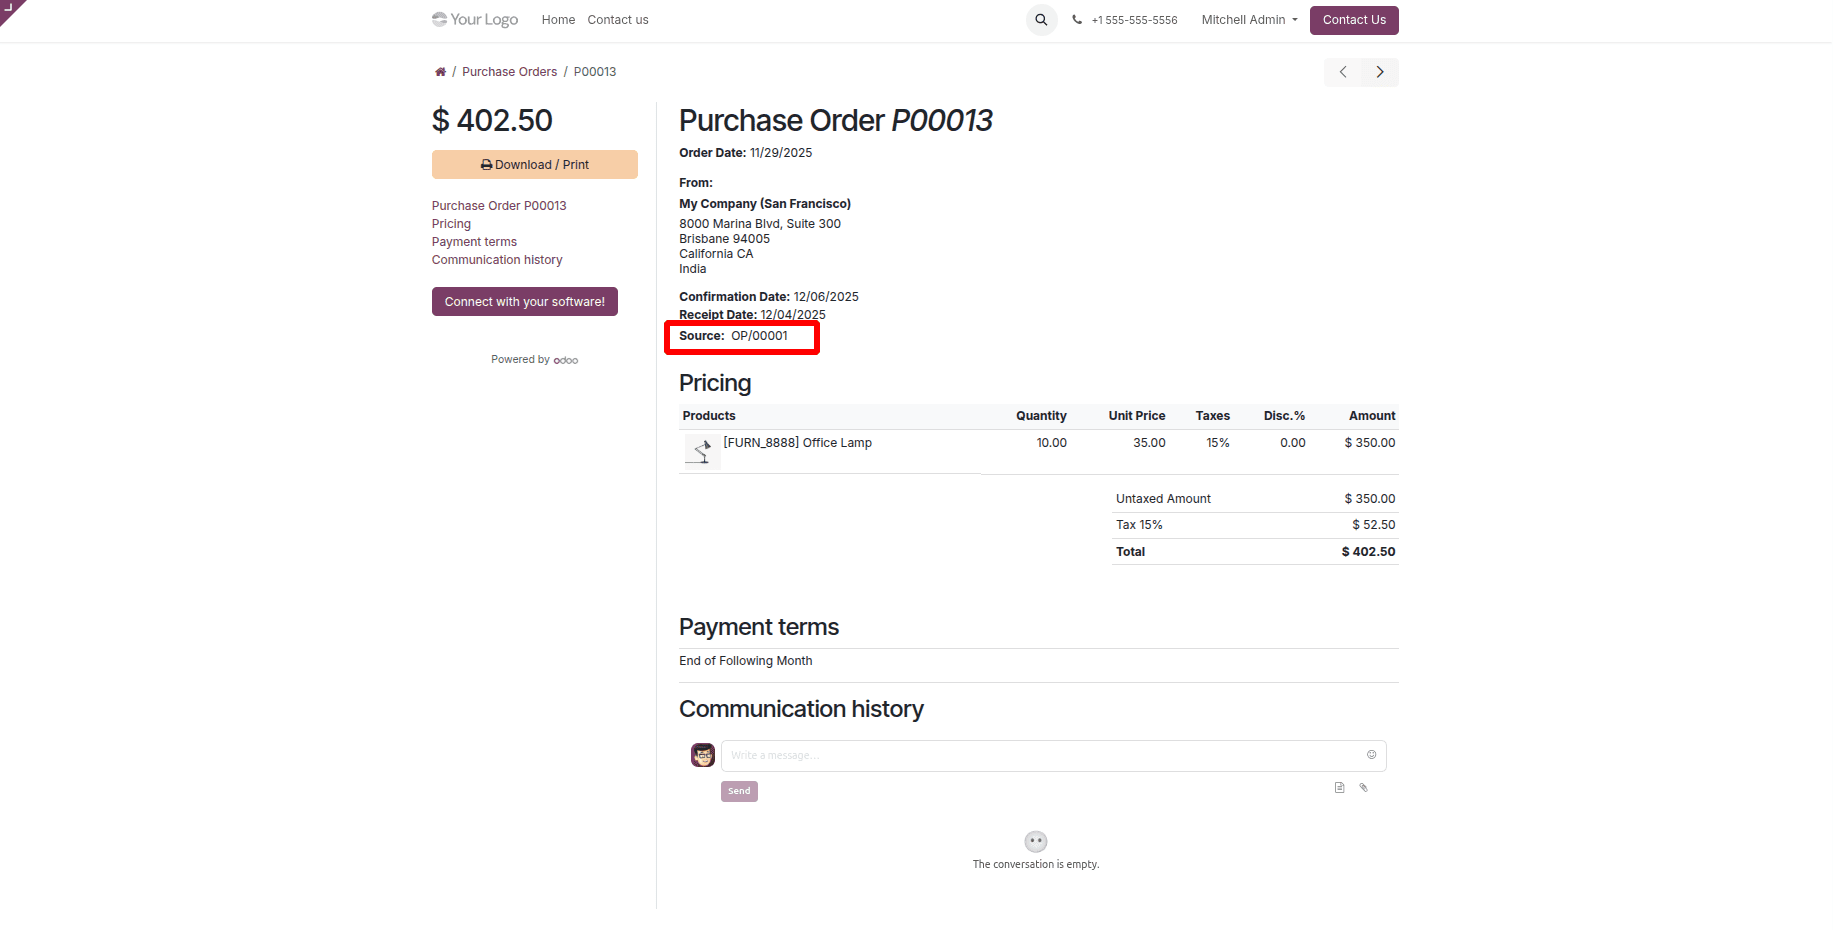
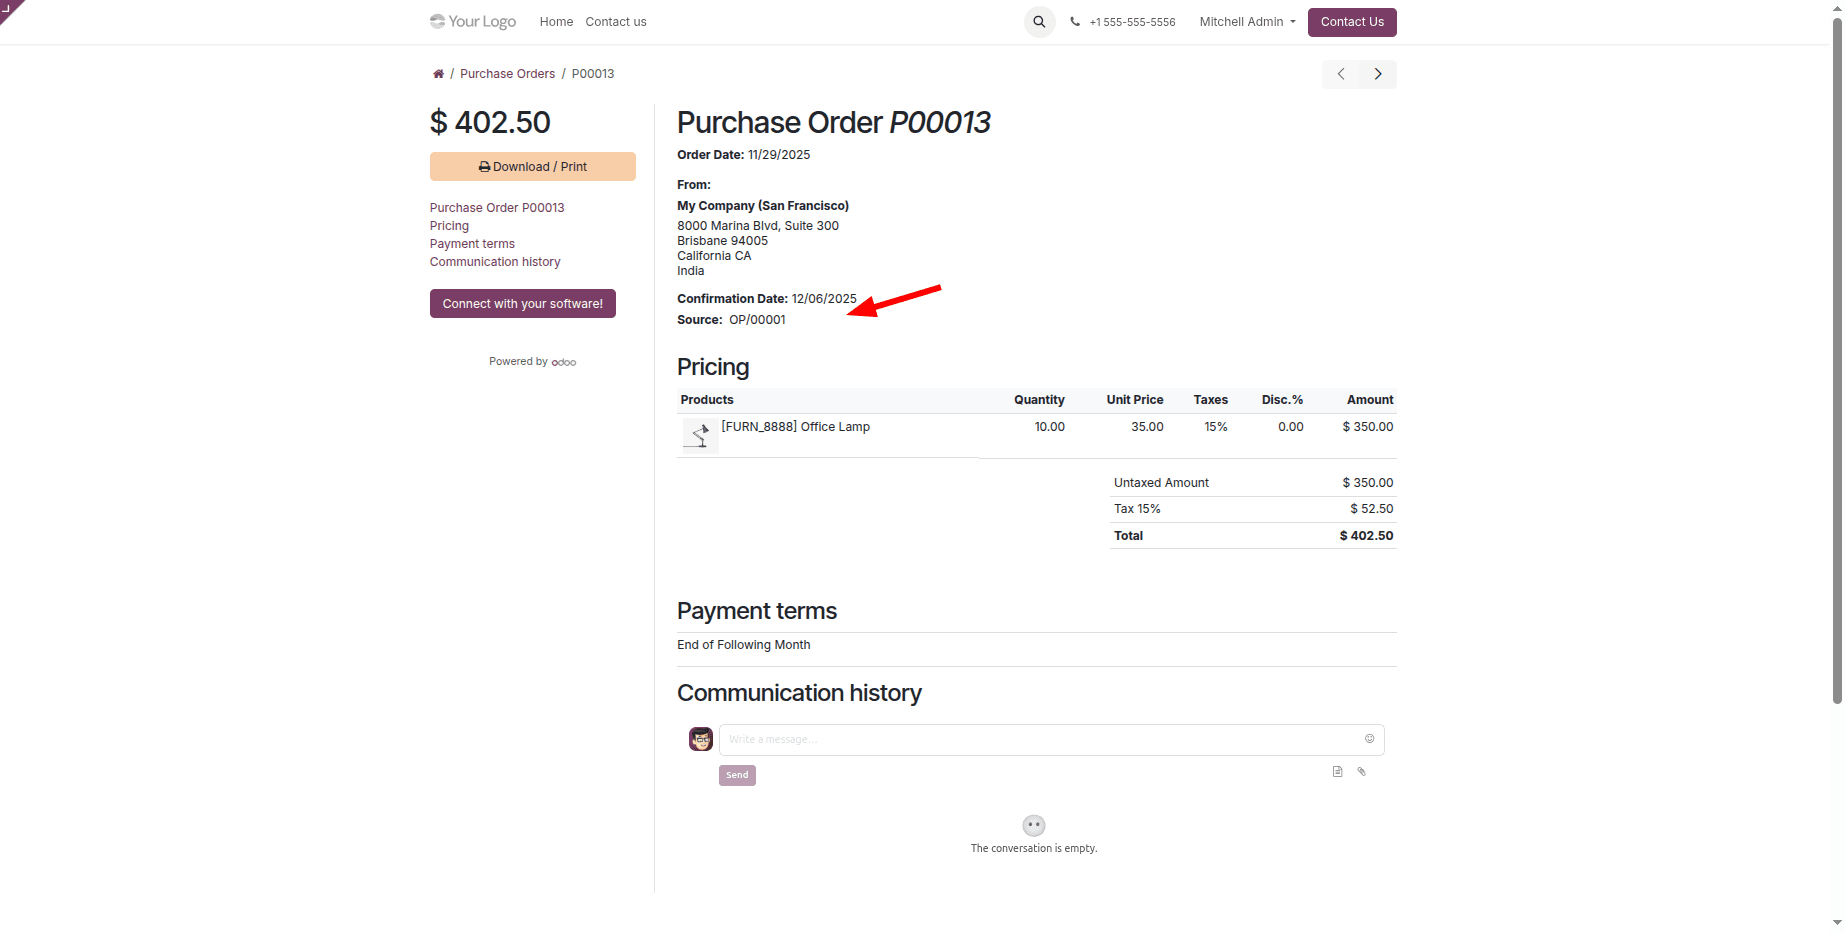
The Purchase Order form in the client portal will look like the figure below when the view customization is applied.
Remove Receipt Date in Purchase Order Portal Form Page:
For another example, we may use an XPath expression in a custom inherited QWeb template to eliminate the "Receipt Date." portion from the Purchase Order page in the customer portal. This method completely eliminates the "Receipt Date" from the page view by focusing on the div element that contains it.
<?xml version="1.0" encoding="utf-8"?>
<odoo>
    <template id="purchase_order_portal_remove_receipt_date"
              inherit_id="purchase.purchase_order_portal_content"
              name="Remove Receipt Date in Purchase Order Portal">
        <!-- Remove the entire Receipt Date div -->
        <xpath expr="//strong[contains(text(), 'Receipt Date:')]/parent::div" position="replace">
        </xpath>
    </template>
</odoo>
Whether it's the default menus, list views, or form views, customizing the Odoo 19 customer portal is a potent way to enhance your clients' user experience. You can simply modify portal elements to display just pertinent information, streamline navigation, and match the portal's appearance with your business needs by utilizing XML inheritance and XPath approaches. These modifications ensure that the portal represents your brand, facilitates effective client engagement, and improves usability. Odoo's adaptable architecture makes it easy and effective to customize the portal to your specific requirements. You just need to find and inherit the appropriate portal templates in your custom module, then use XPath to adjust the structure as necessary to implement these modifications.
To read more about How to Customize the Customer Portal Default Menus & Views in Odoo 18, refer to our blog How to Customize the Customer Portal Default Menus & Views in Odoo 18.