In Odoo 18, communication between team members and departments is more streamlined than ever. To help users stay on top of important updates, the system offers flexible options to control how chat messages and notifications are received. This feature allows each user to decide whether they want to handle notifications directly within Odoo or through their email inbox.
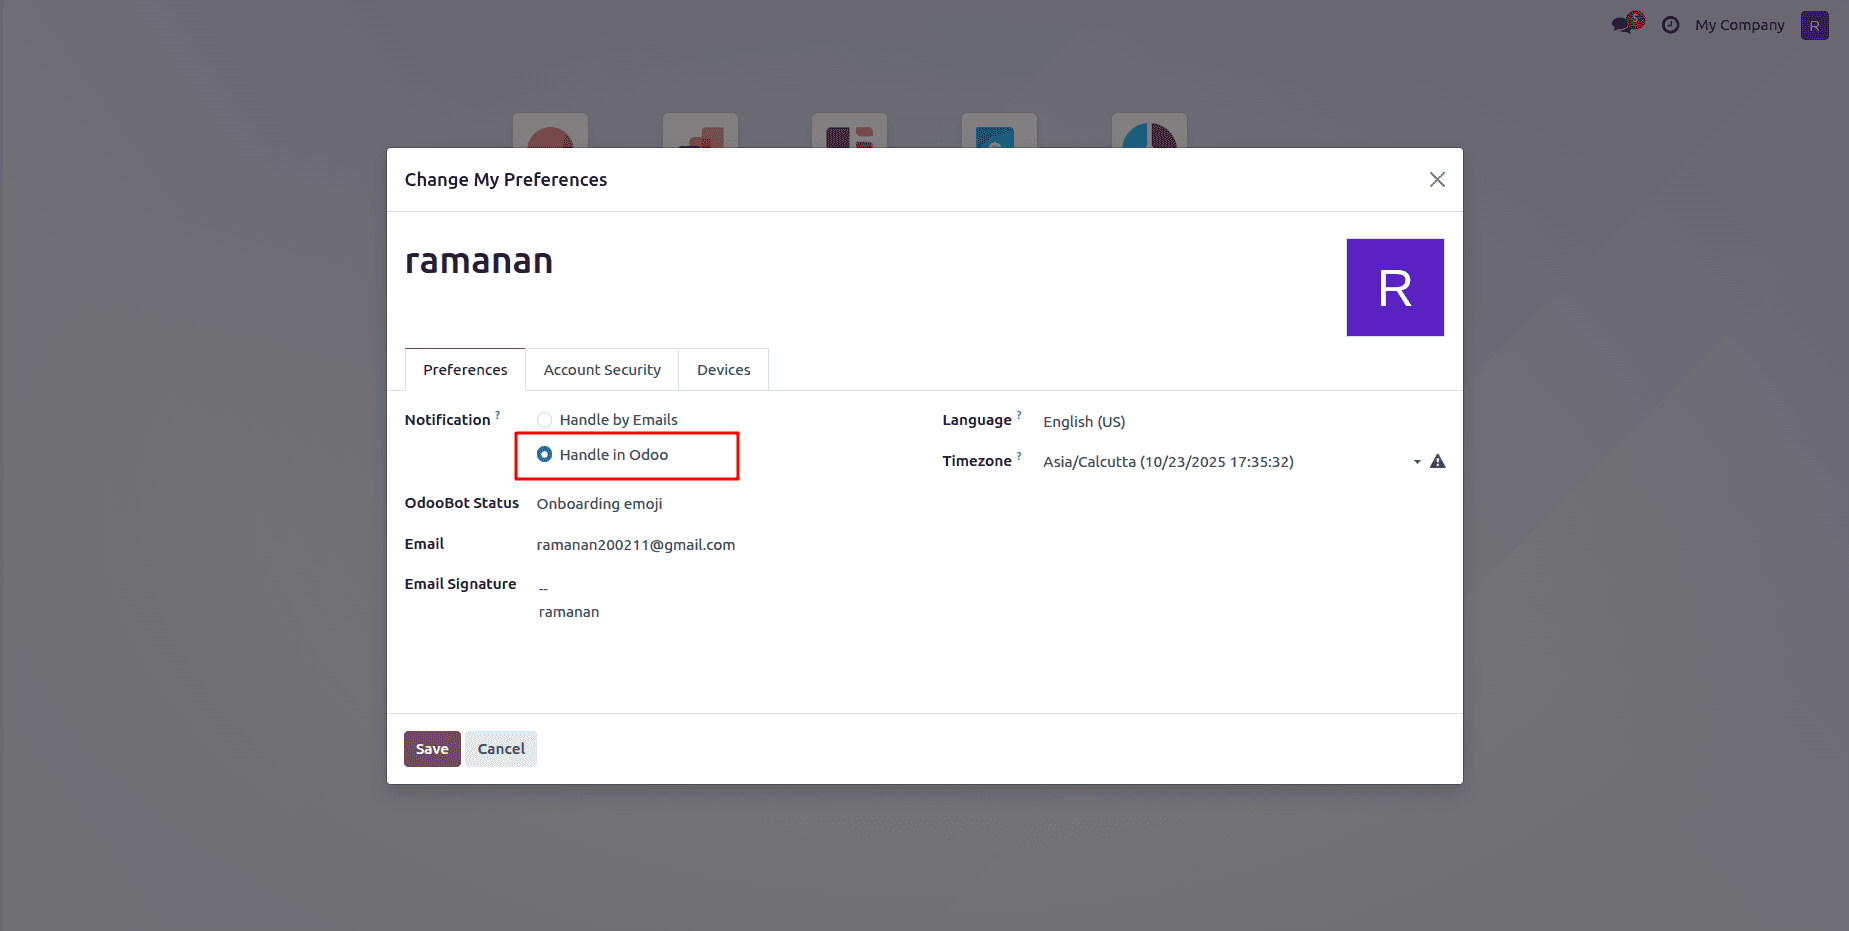
Go to Settings > Users, select a user, and open the Preferences tab. Here you will see the Notifications section with two options:
- Handle by Email
- Handle in Odoo
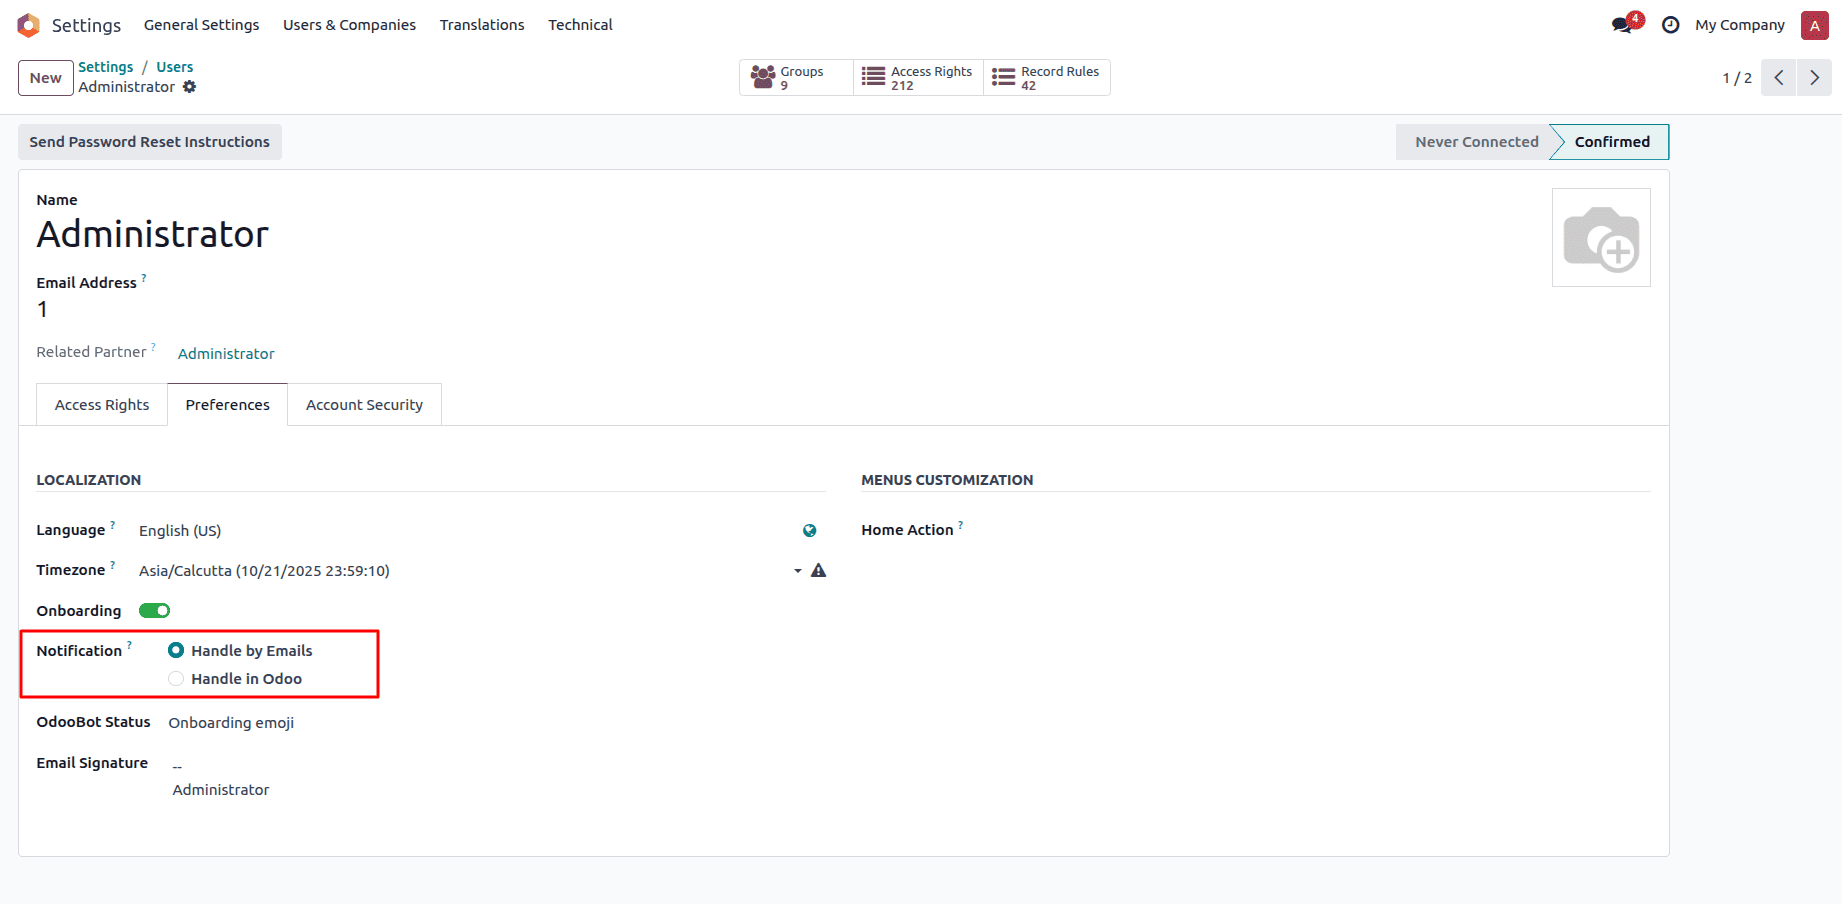
By selecting “Handle by Emails,” notifications are sent directly to the user’s email inbox, making it easy to stay informed even when not logged into Odoo. On the other hand, choosing “Handle in Odoo” allows users to view all their messages and alerts within the Odoo interface, keeping their workflow centralized and distraction-free.
Now, let’s take a closer look at how the “Handle by Emails” option works and how Odoo delivers notifications through email when this setting is enabled
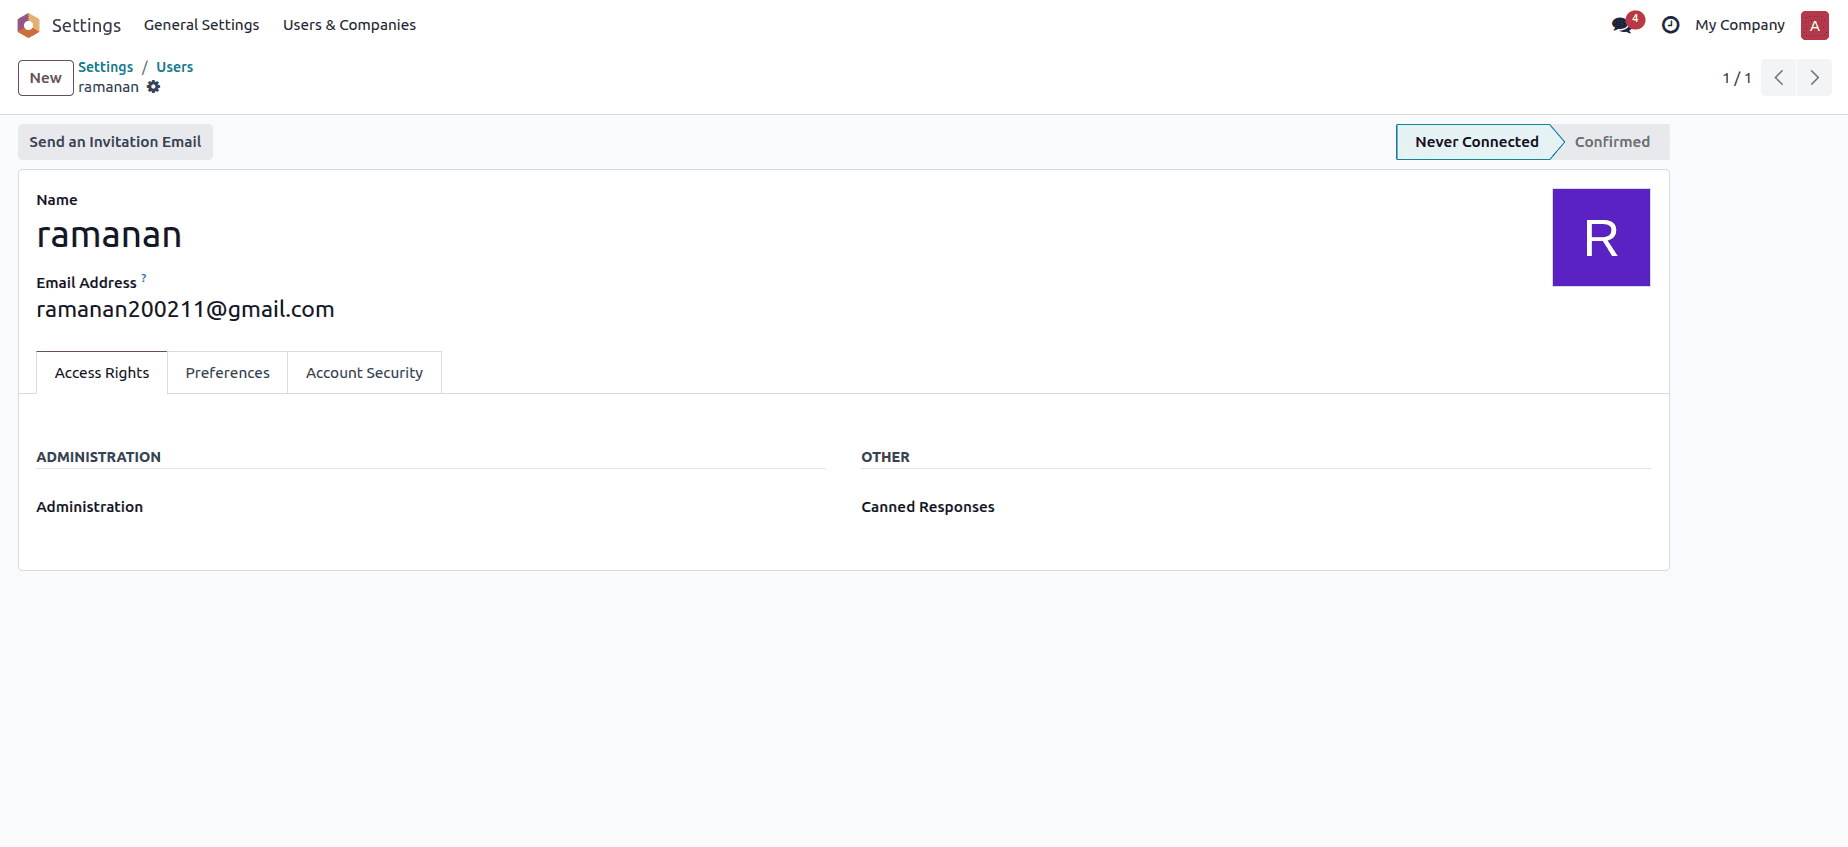
Before testing this feature, make sure to create a user with a valid email address, as Odoo will use this email to send notifications.
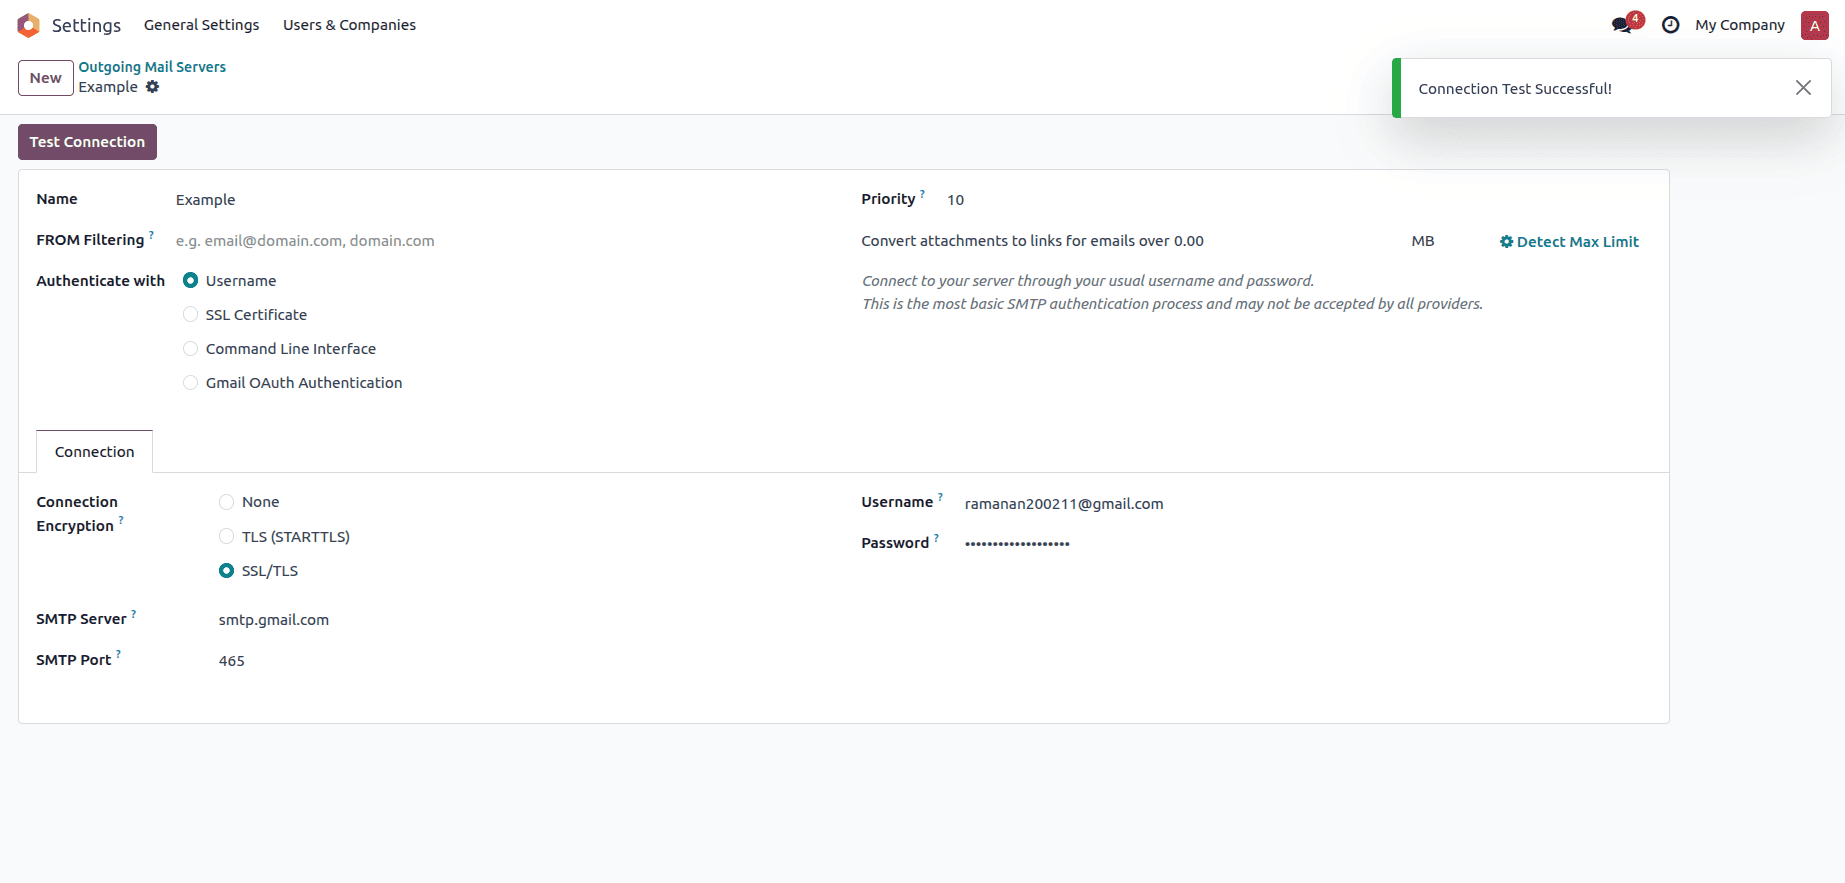
After setting up a user with a valid email, configuring an Outgoing Mail Server will enable Odoo to deliver notifications via email.
This mail server is essential because it allows Odoo to send notifications and messages externally through email. Without it, Odoo won’t be able to deliver messages to users’ inboxes.
To set up the Outgoing Mail Server:
- Go to Settings > Technical > Email > Outgoing Mail Servers
- Create a new outgoing mail server using the email credentials of the user you configured earlier. Make sure the connection details—such as SMTP server, port, and authentication—are correctly entered so Odoo can successfully send emails through that account.
Once the Outgoing Mail Server is set up, you can test it by sending a message. To do this:
Option 1: Test via the Chatter
- Open any record in Odoo.
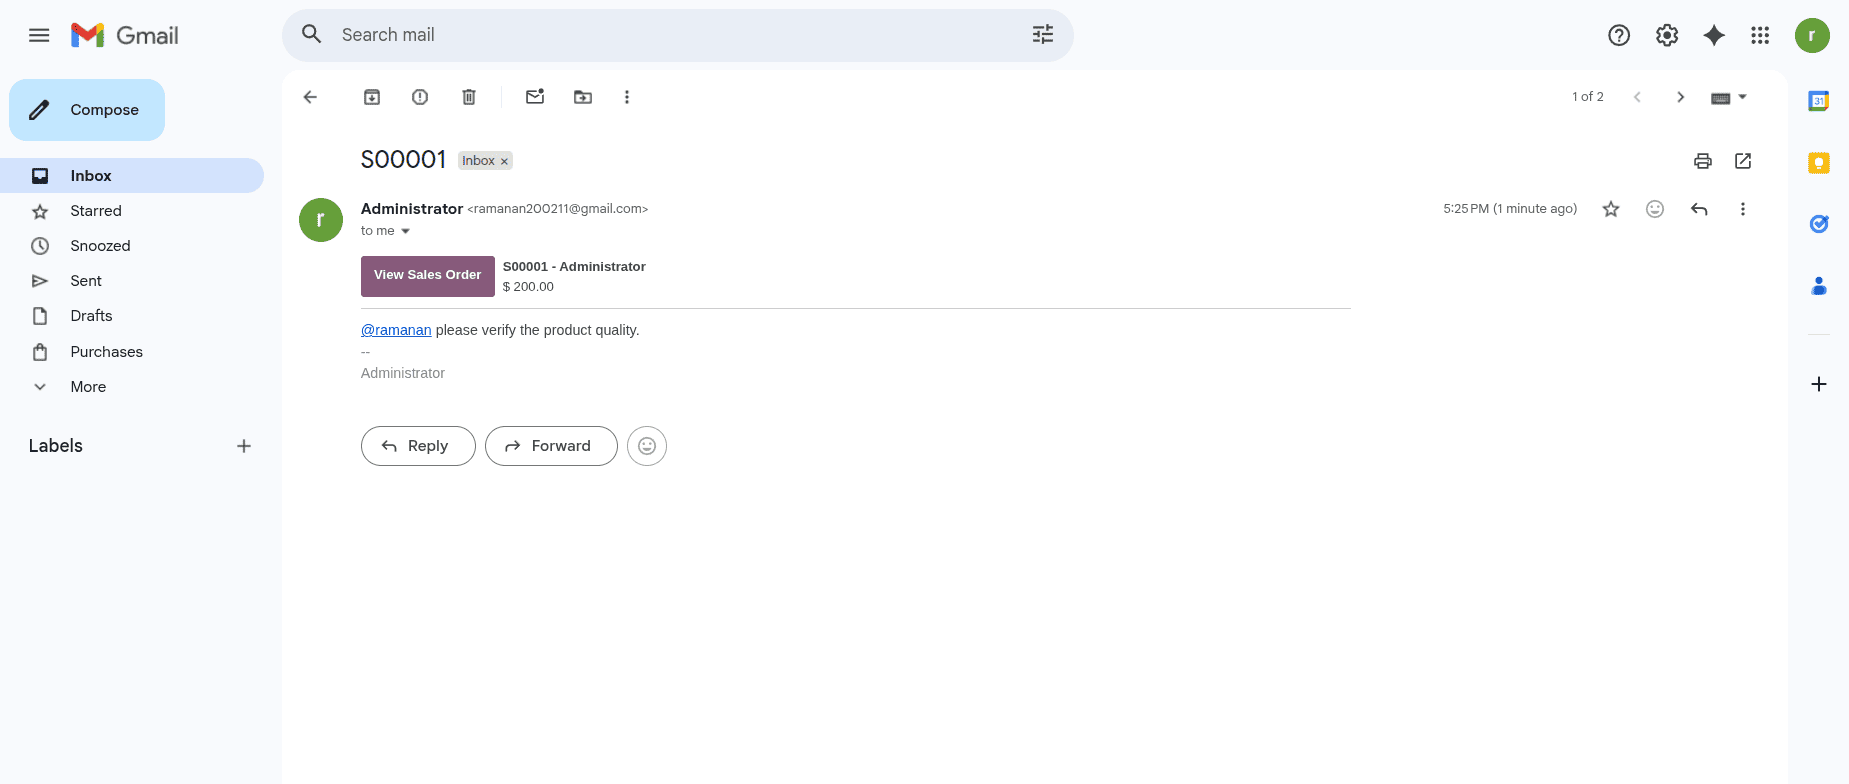
- In the Chatter section, write a message and mention the user you created earlier with a valid email address.
- Click Send.
- Odoo will use the configured Outgoing Mail Server to deliver this message directly to the mentioned user’s email inbox.
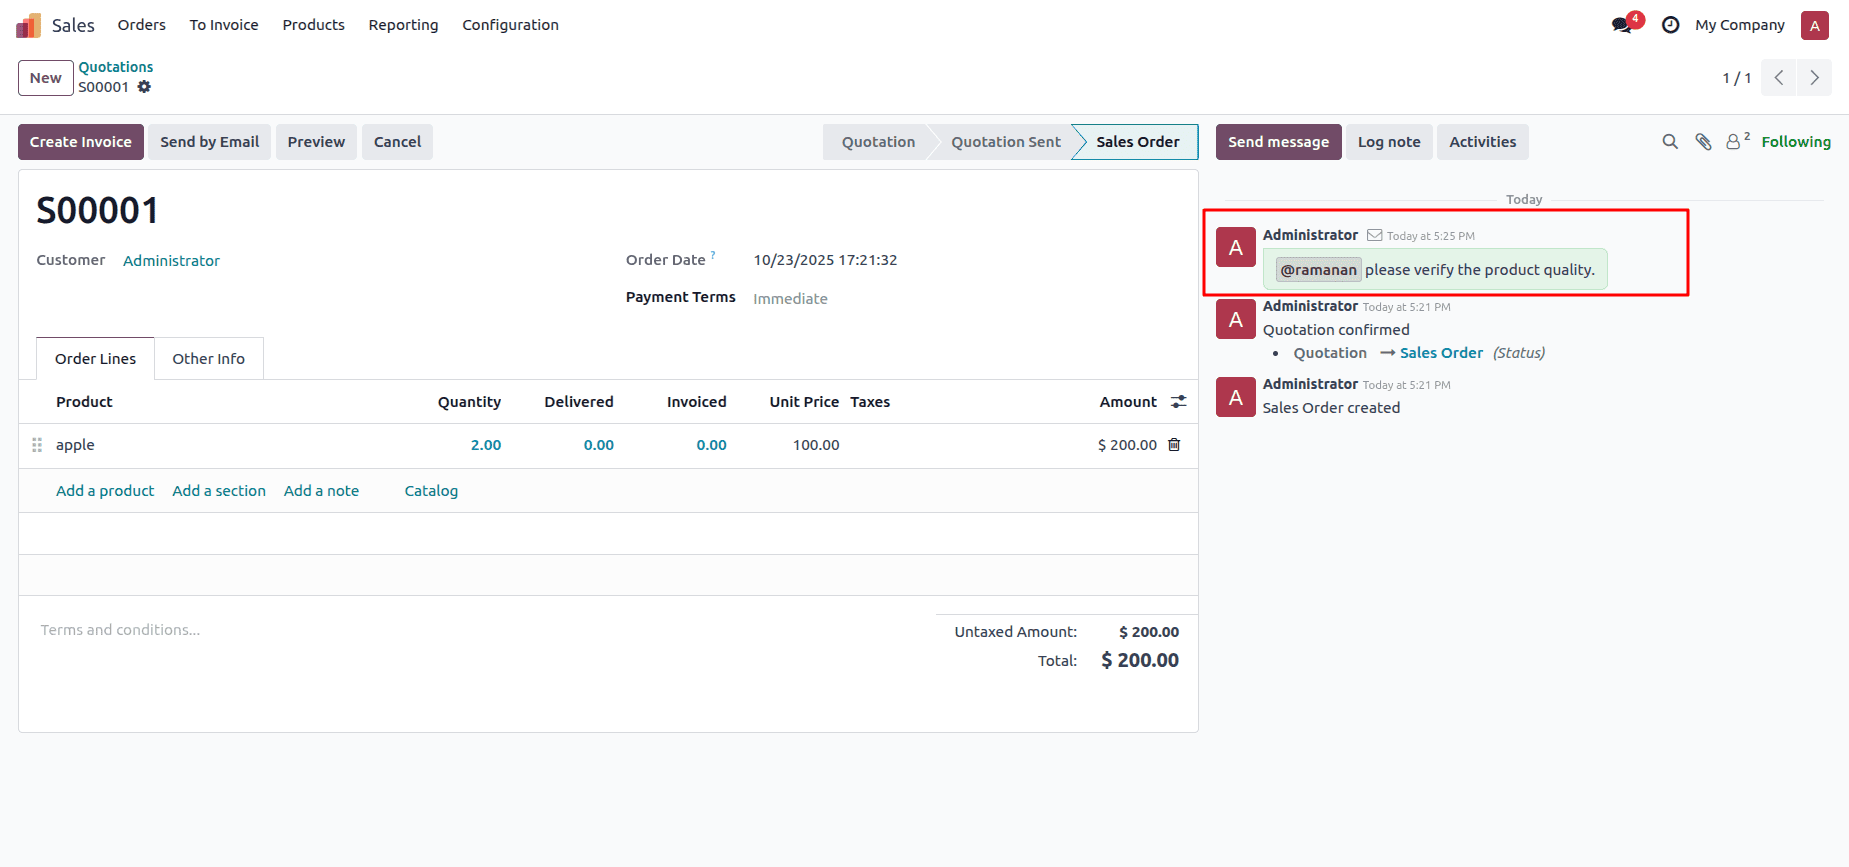
The highlighted area shows the message that was sent through the Chatter.
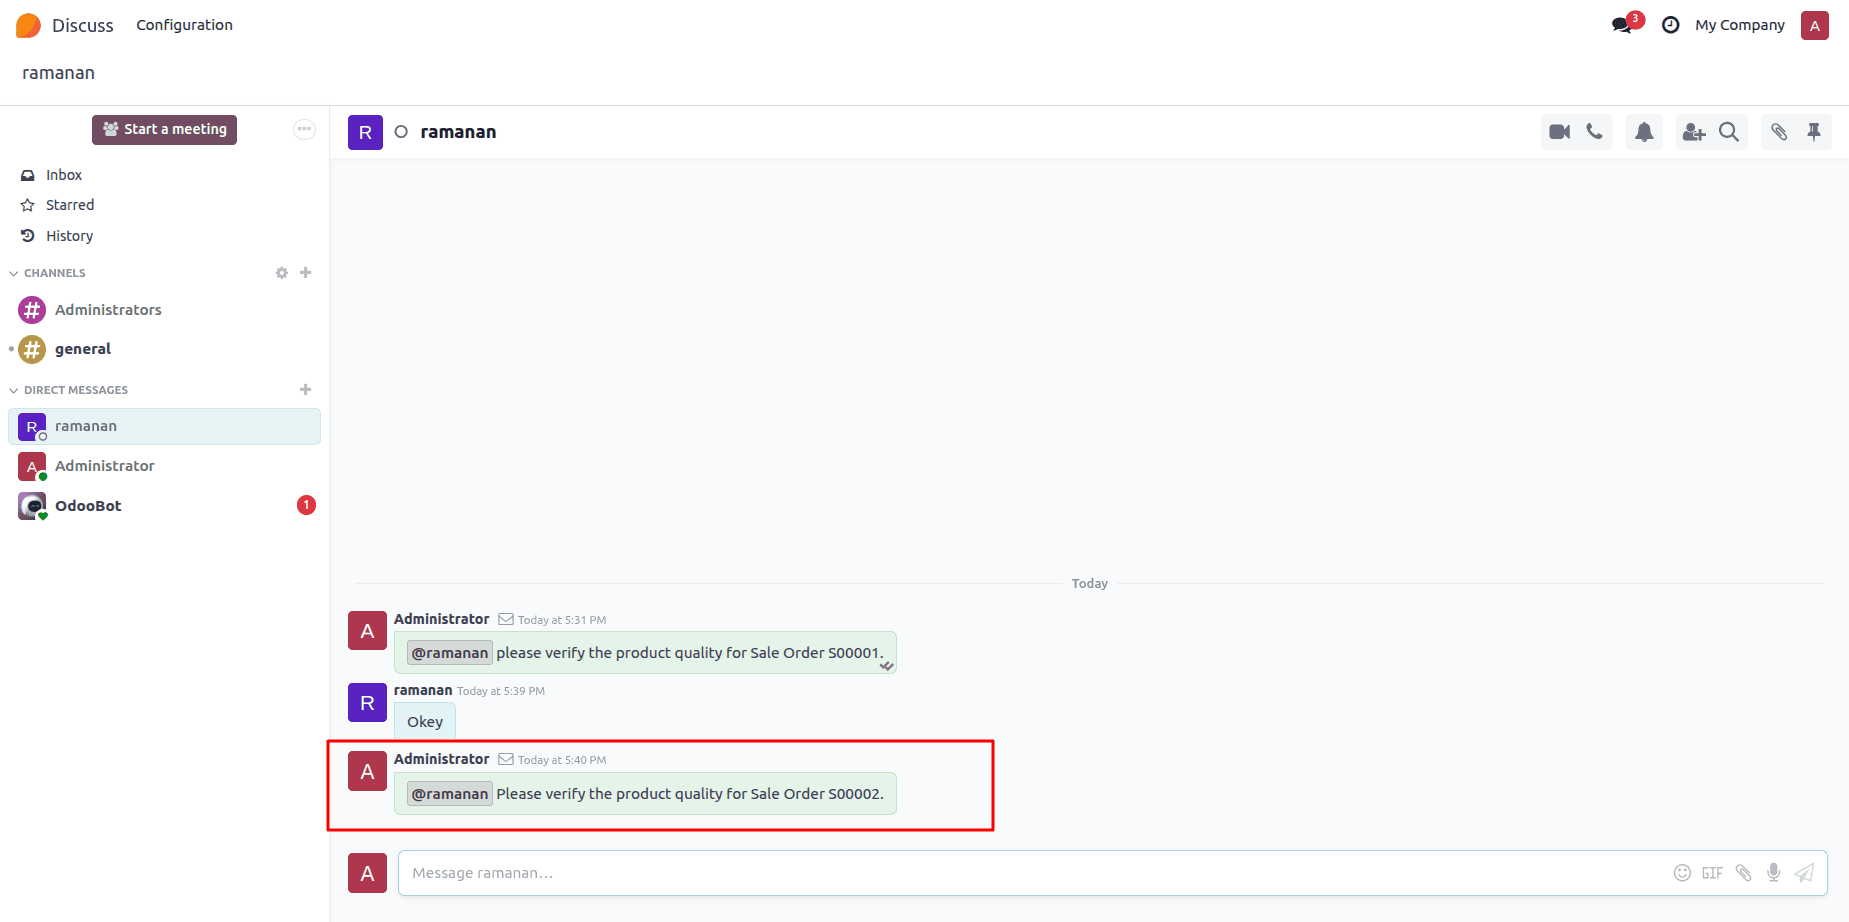
Option 2: Test via the Chat Notification Icon
- Click the Chat Notification icon located at the top-right corner of your Odoo interface.
- Start a new chat with any user, and again mention the user who has a valid email address.
- Send the message.
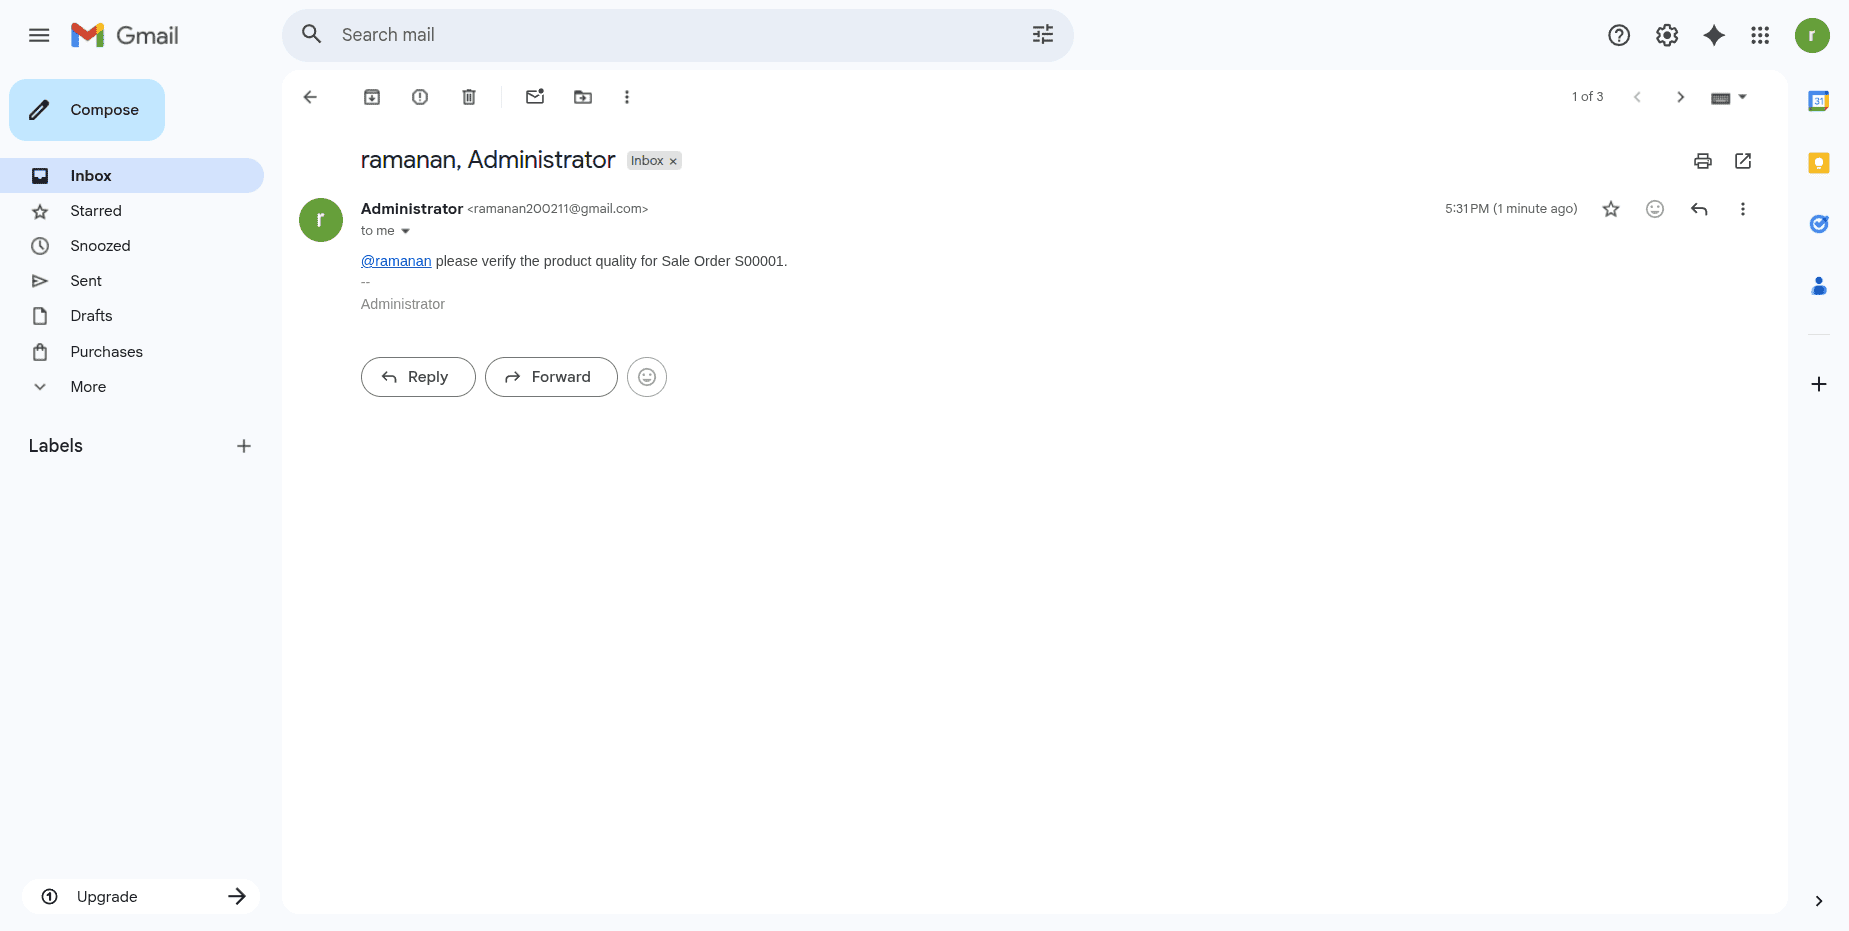
- Odoo will send the message to the user’s email inbox through the configured Outgoing Mail Server.
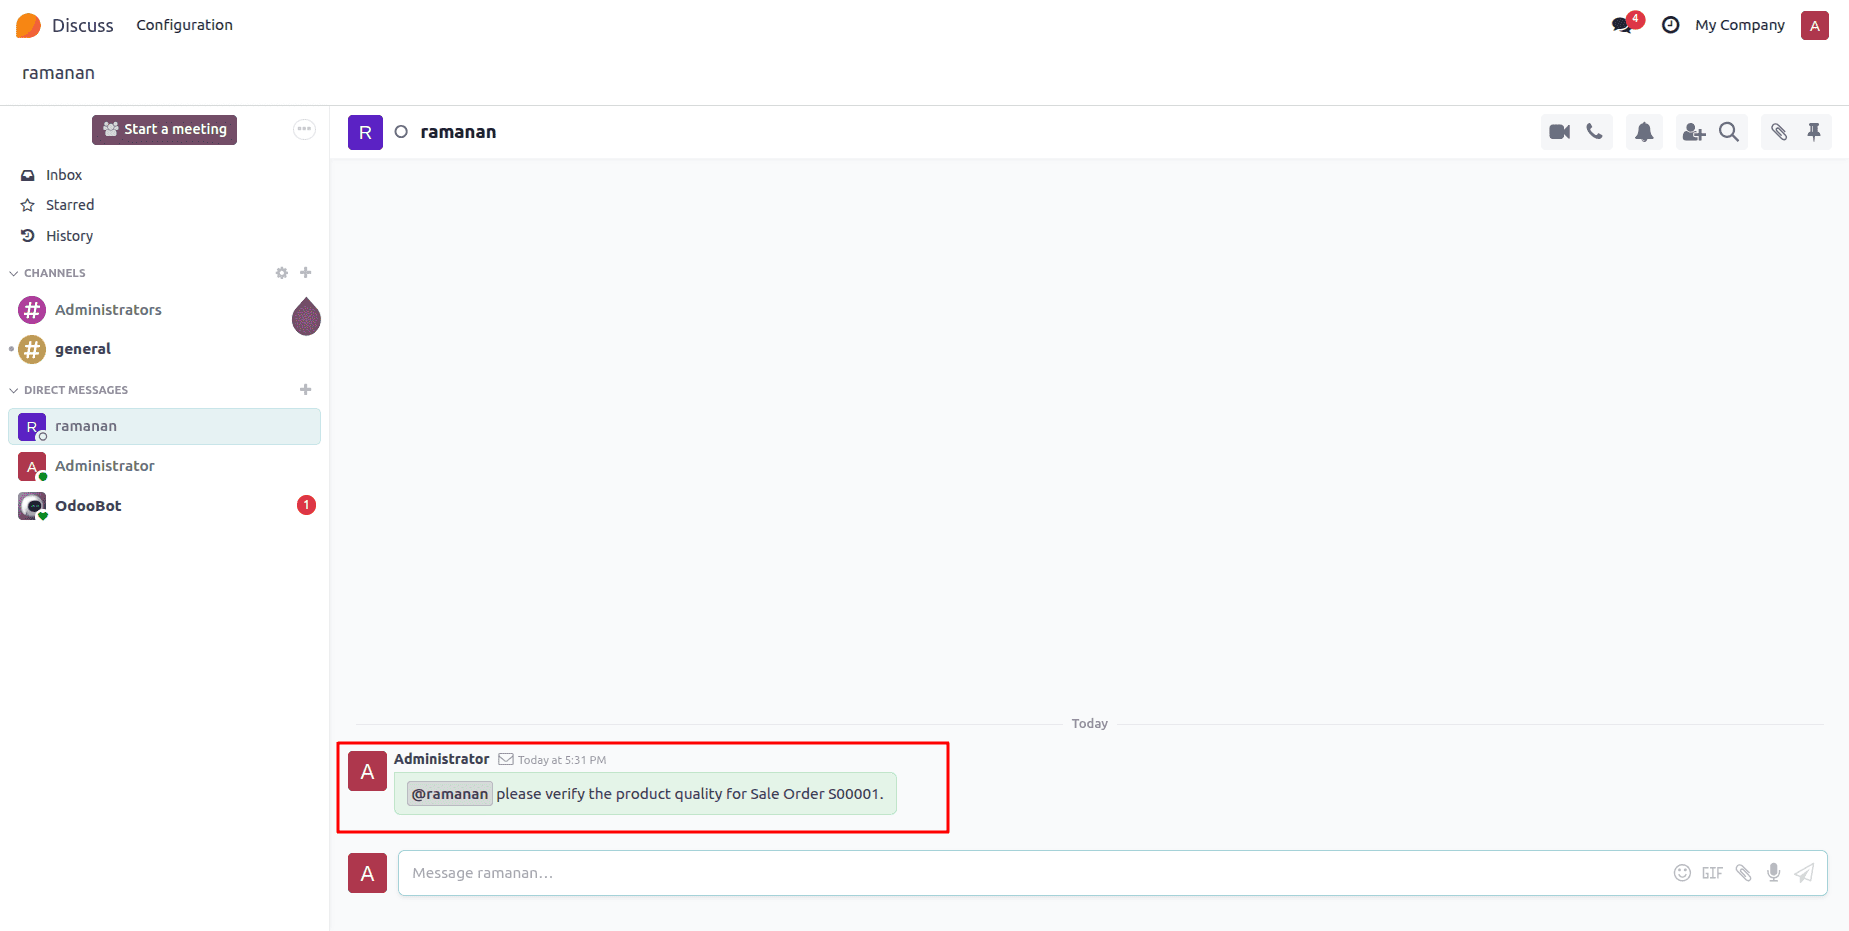
The highlighted area shows the message that was sent through the Chat.
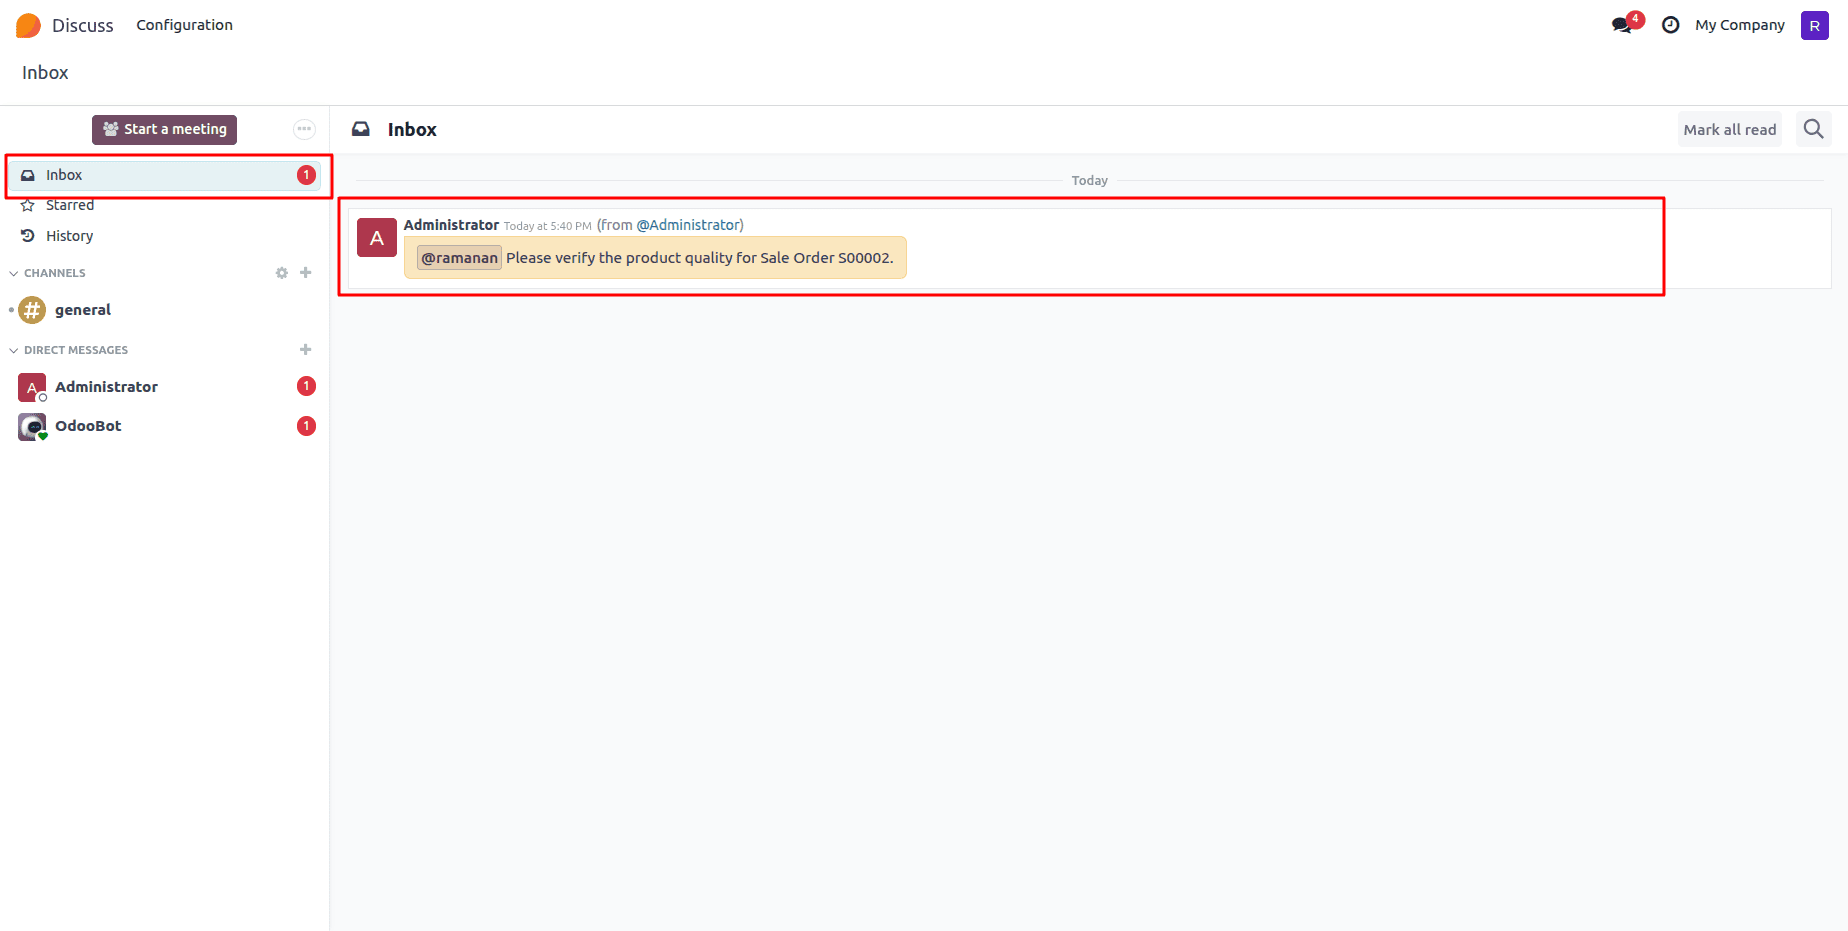
Let’s discuss the “Handle by Odoo” option. This feature allows users to receive all their chat messages and system notifications directly within Odoo, instead of by email. This helps keep communication centralized inside the Odoo interface, making it easier to manage conversations without leaving the platform.
To enable this for a specific user, go to the user’s Preferences tab and change the Notifications setting to “Handle by Odoo”.
Try sending a chat message and mention the user you set to “Handle by Odoo.” This will ensure their notifications appear directly within Odoo.
After sending the message, log in as the user you mentioned. Open the Discuss app and check the inbox—there you will see the message you mentioned appearing in the user’s inbox.
By completing these steps, you’ve configured how Odoo delivers chat notifications—either through email or directly within the system. This setup helps each user stay informed in the way that best suits their workflow and keeps communication across your organization efficient and reliable.
To read more about How to Create Display Notification in Odoo 17, refer to our blog How to Create Display Notification in Odoo 17.