The payroll module of Odoo is the most advanced solution to efficiently manage Payroll activities. The Module is highly integrated with the other HR management modules of Odoo making it a powerful tool for payroll management.
This blog will give you a detailed note on how to create and manage Payslips with the Odoo 15 Payroll module
Payslip
Payslip or Salary slip plays an important role in business management. The salary slip is considered as legal proof of income. The slip includes all of the details on the Employee’s salary. All of the details and the amounts that make up the employee’s salary will be listed in the slip.
Payslip is a crucial document that is essential for defining the tax that an employee has to pay income tax. The document is essential for the employee to apply for a loan and it can be used to apply for mortgages. The document can be used as back support for negotiating a better salary. If the employee is looking for better opportunities it is often common for the HR of the new company to ask for the payslip from the employee to finalize the salary package of the employee. Salary slips are important documents that have legal rights of their own and the employee can use the payslip as proof of their salary scheme and payment details. Payslips make it easy to track tax cuts and other deductions from the salary.
Payslip configuration in the Payroll module of Odoo
Configuring and managing payslips is easy with the Odoo 15 Payroll module. To configure the payslips go to the dashboard of the payroll module and from the dashboard, under the Payslip tab, you can see all of the payslip operations as shown below.
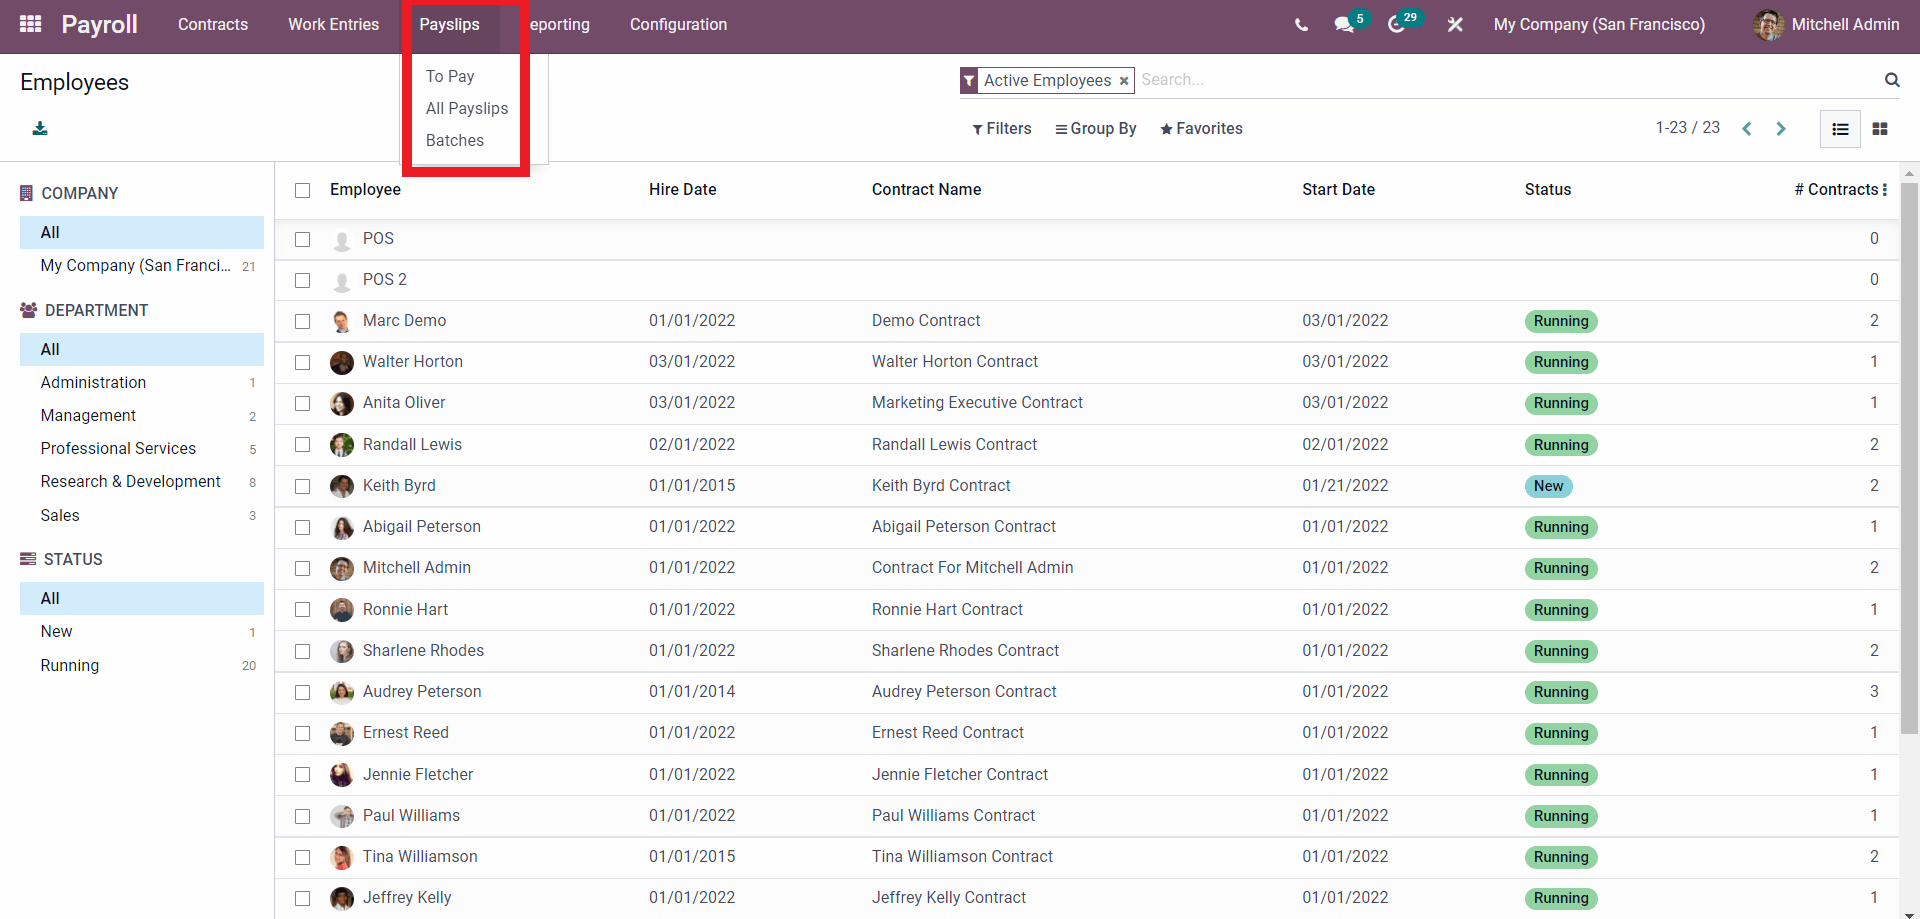
The Payslip options include To pay, All Payslips, and Batches. To understand how payslips work in the odoo environments we have to go through each of these options one by one.
To Pay
Click on the To Pay option from the dropdown options and the page on it will open up as shown below.

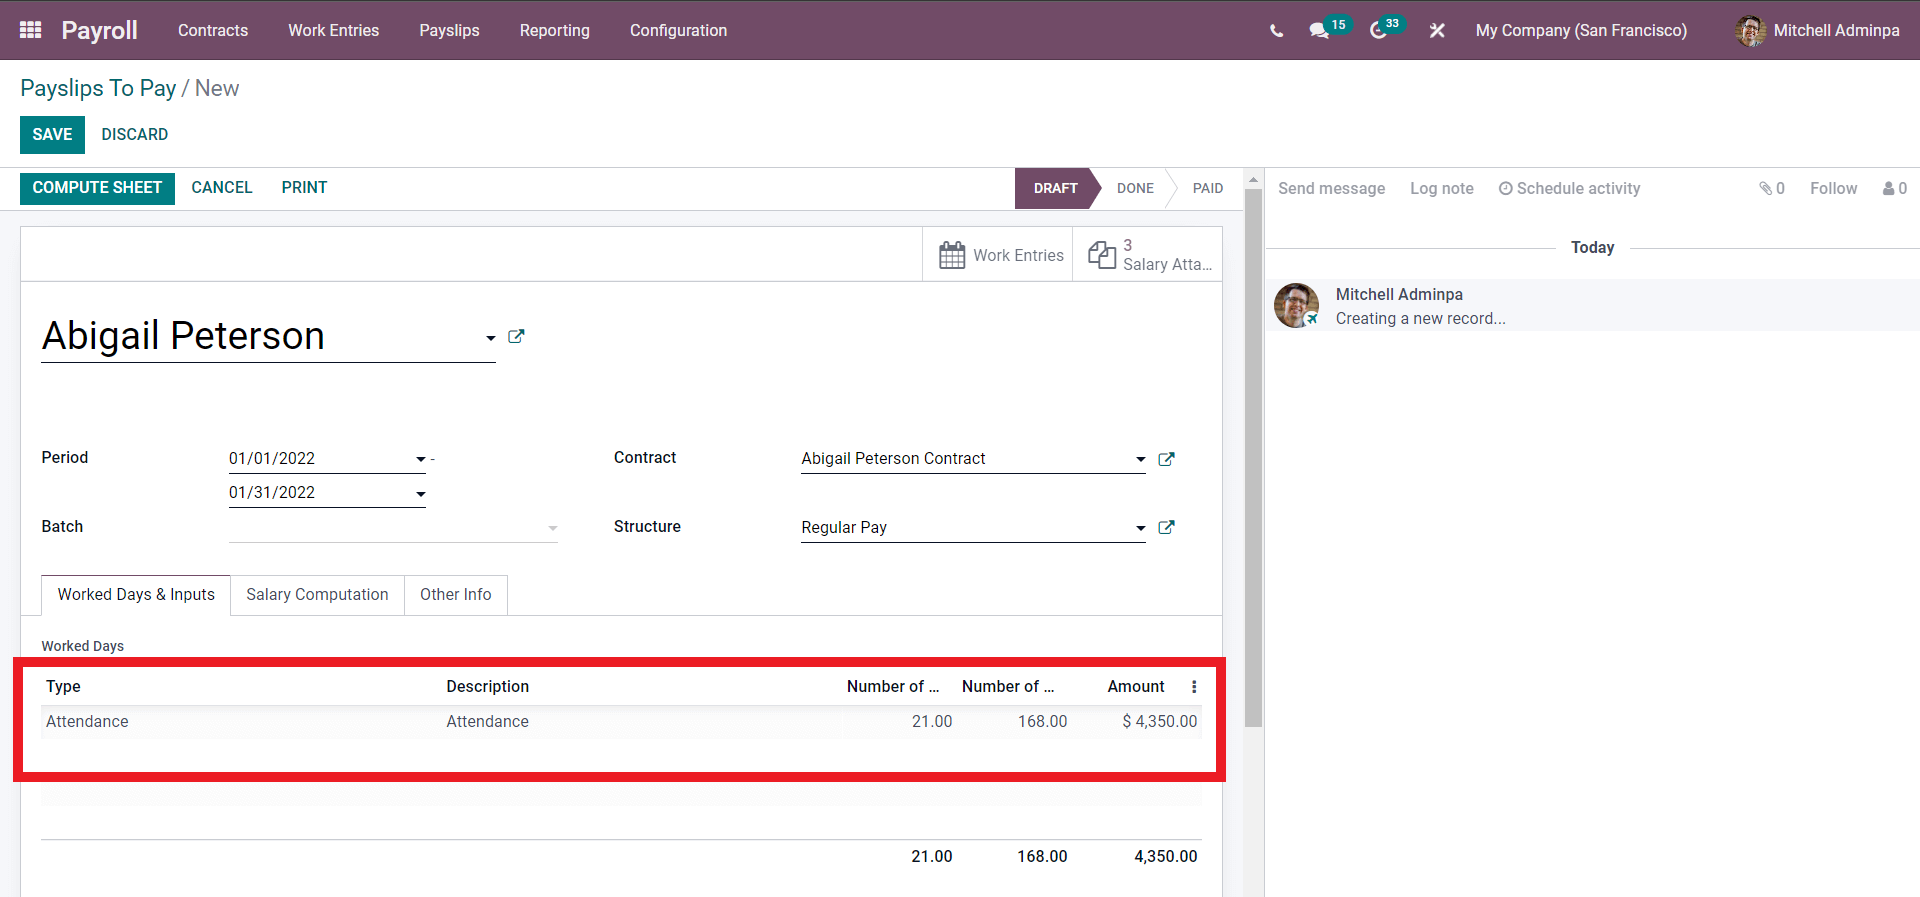
The To pay page will list down all of the Payslips to be paid. You can create payslips by clicking on the CREATE button. A new configuration page will open up to create the new Payslip as shown below
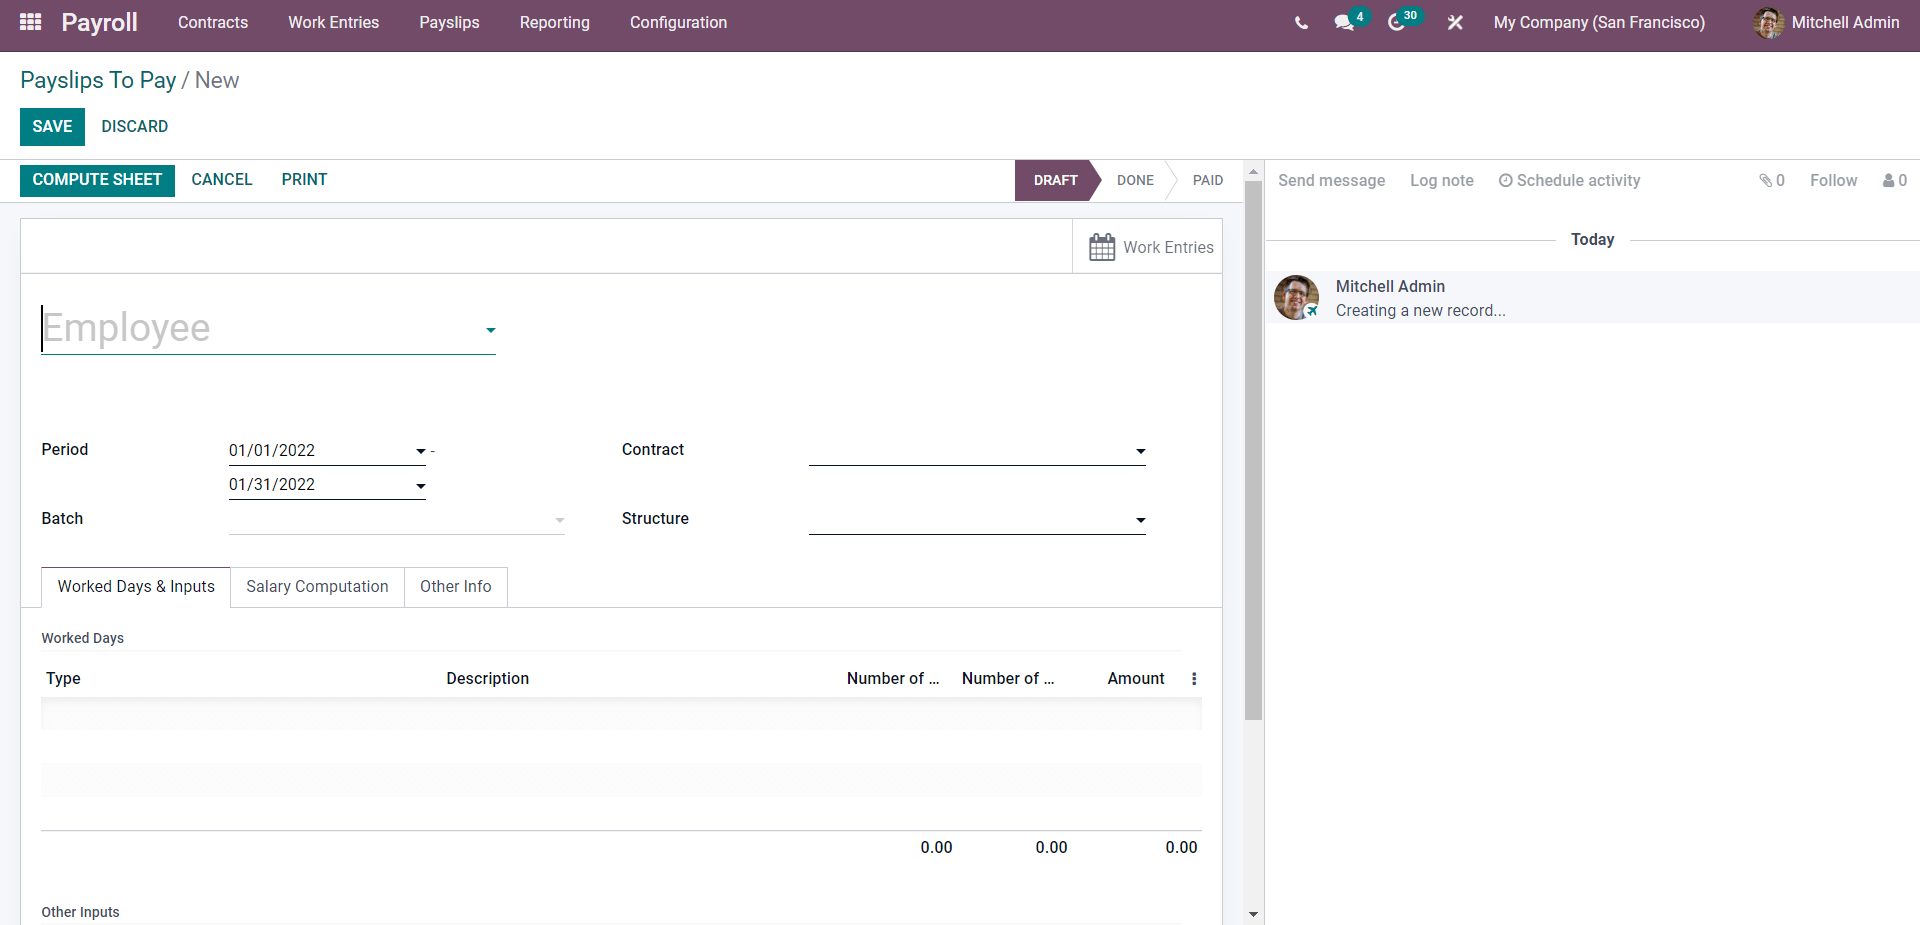
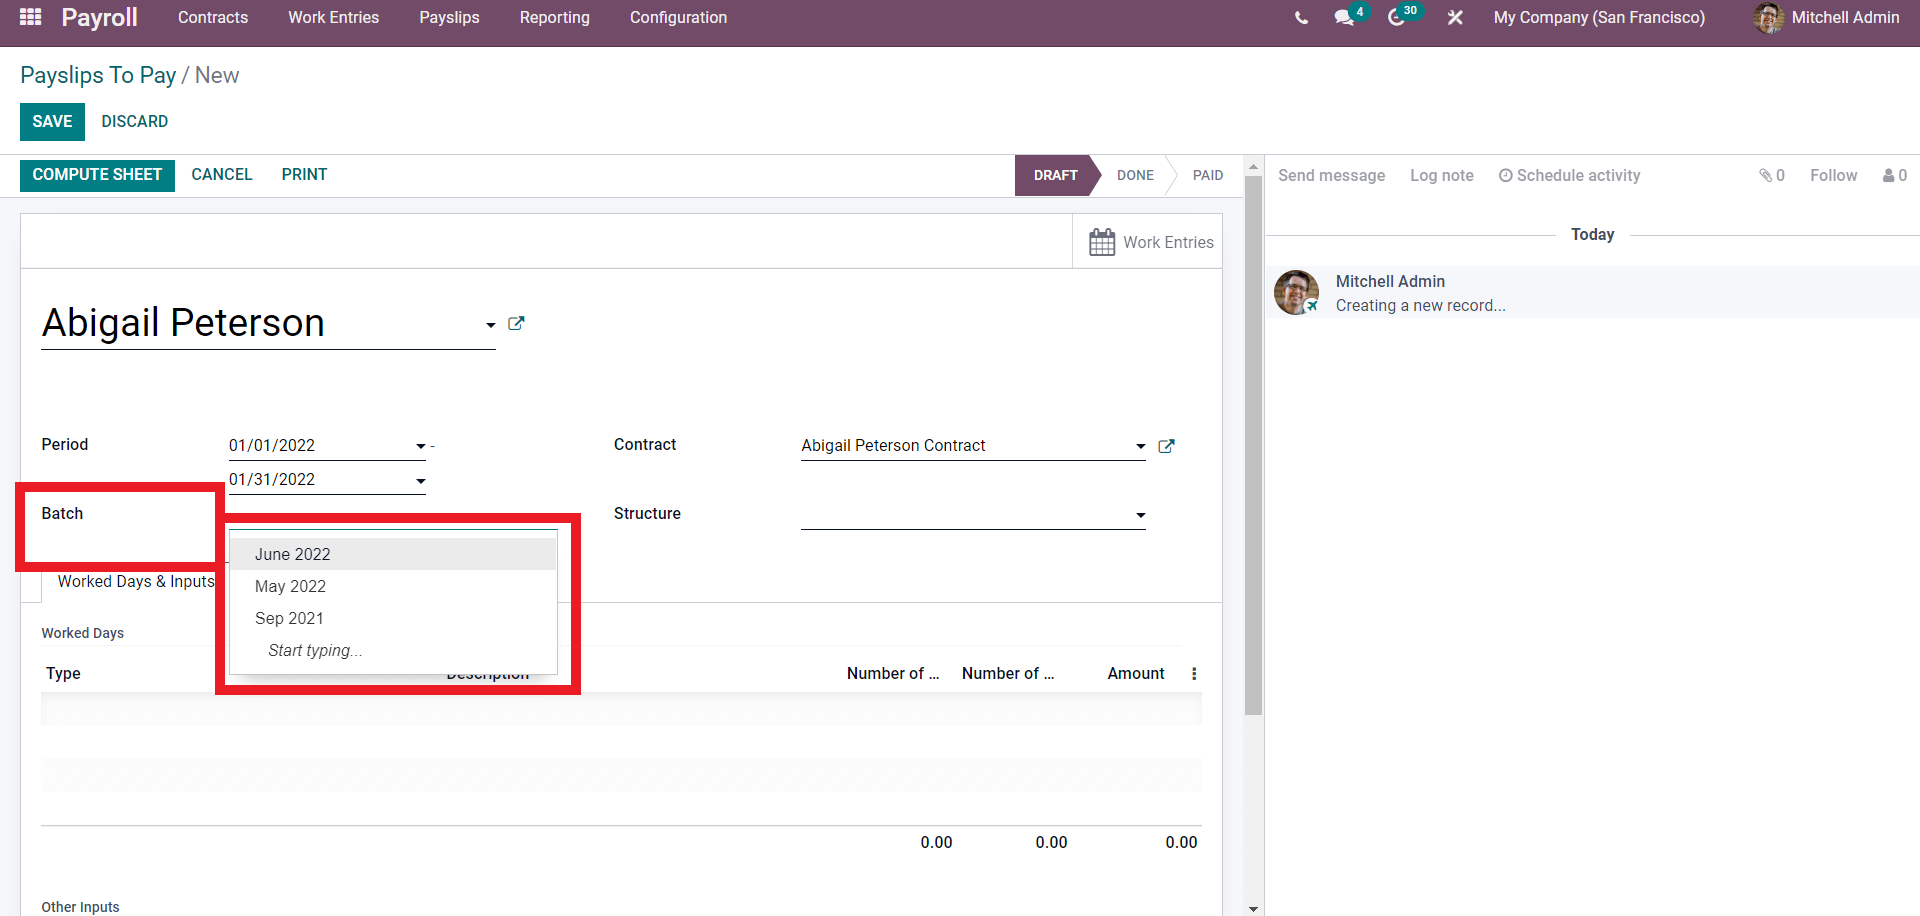
Select the employee from the Employee field. Add the employee and the employee contract will be automatically updated on the contract filed in the payslip Configuration page. In the period filed you can add the Period on the payslip. In the Batch field, you can choose the batch year as shown below.
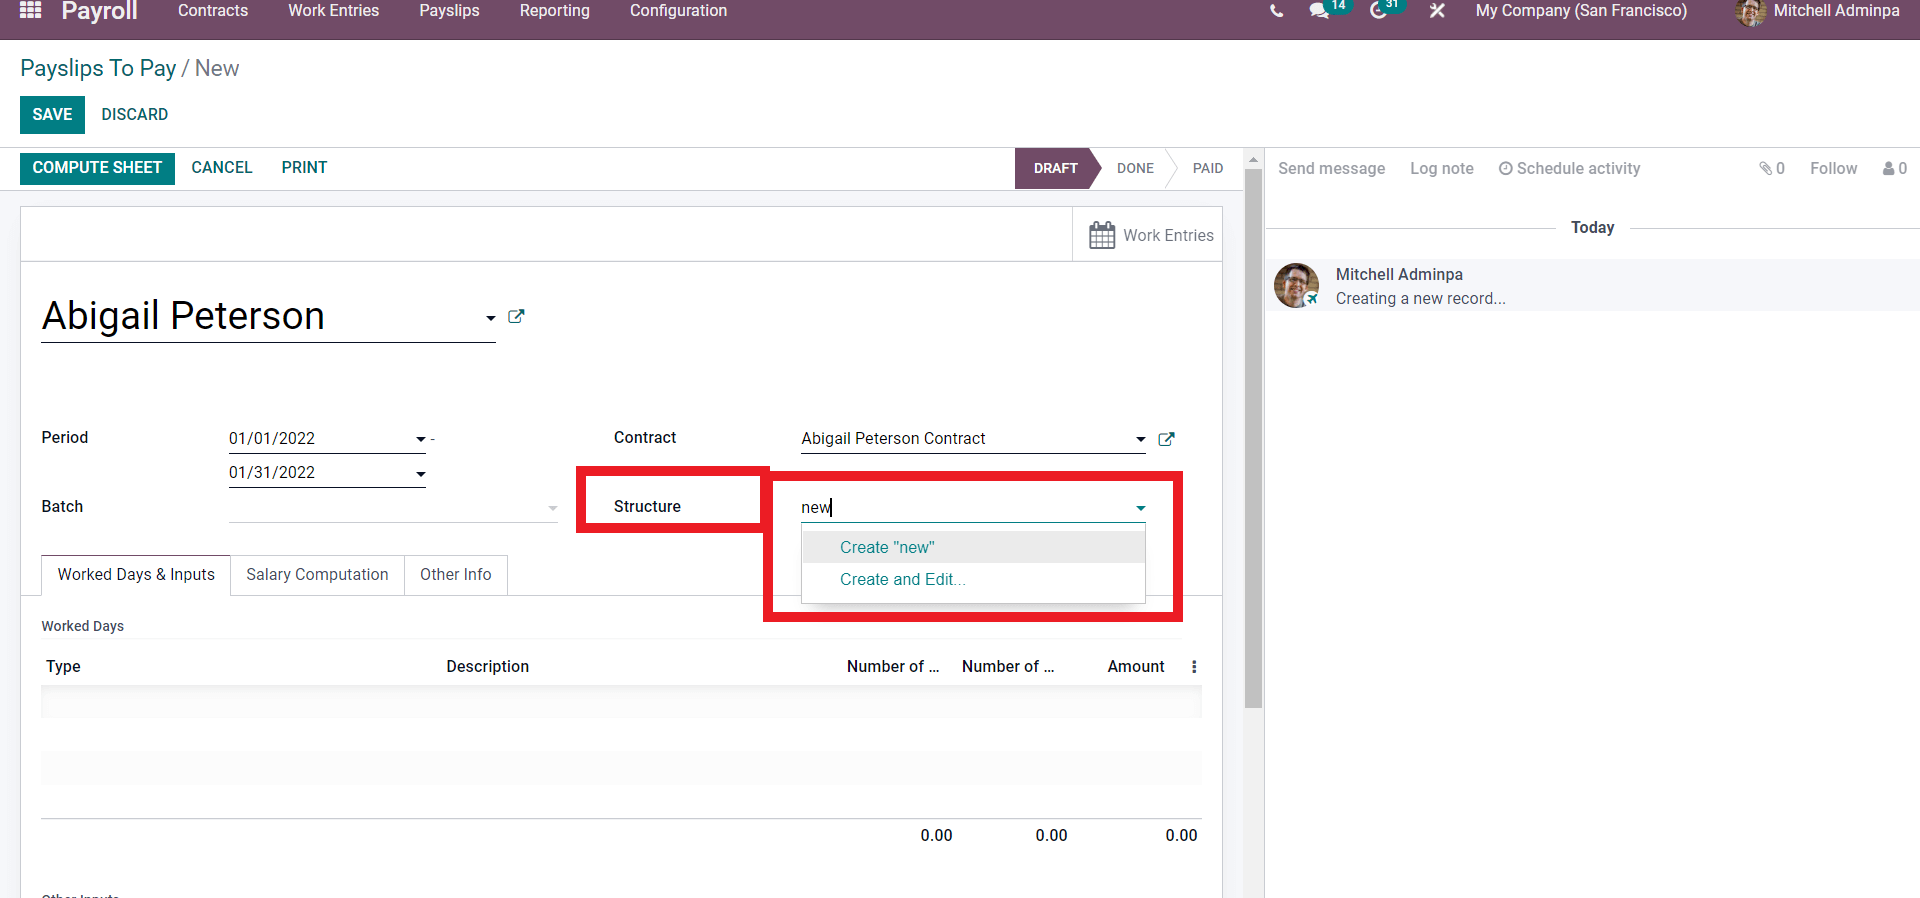
The structure field will allow you to add the Structure as shown below.
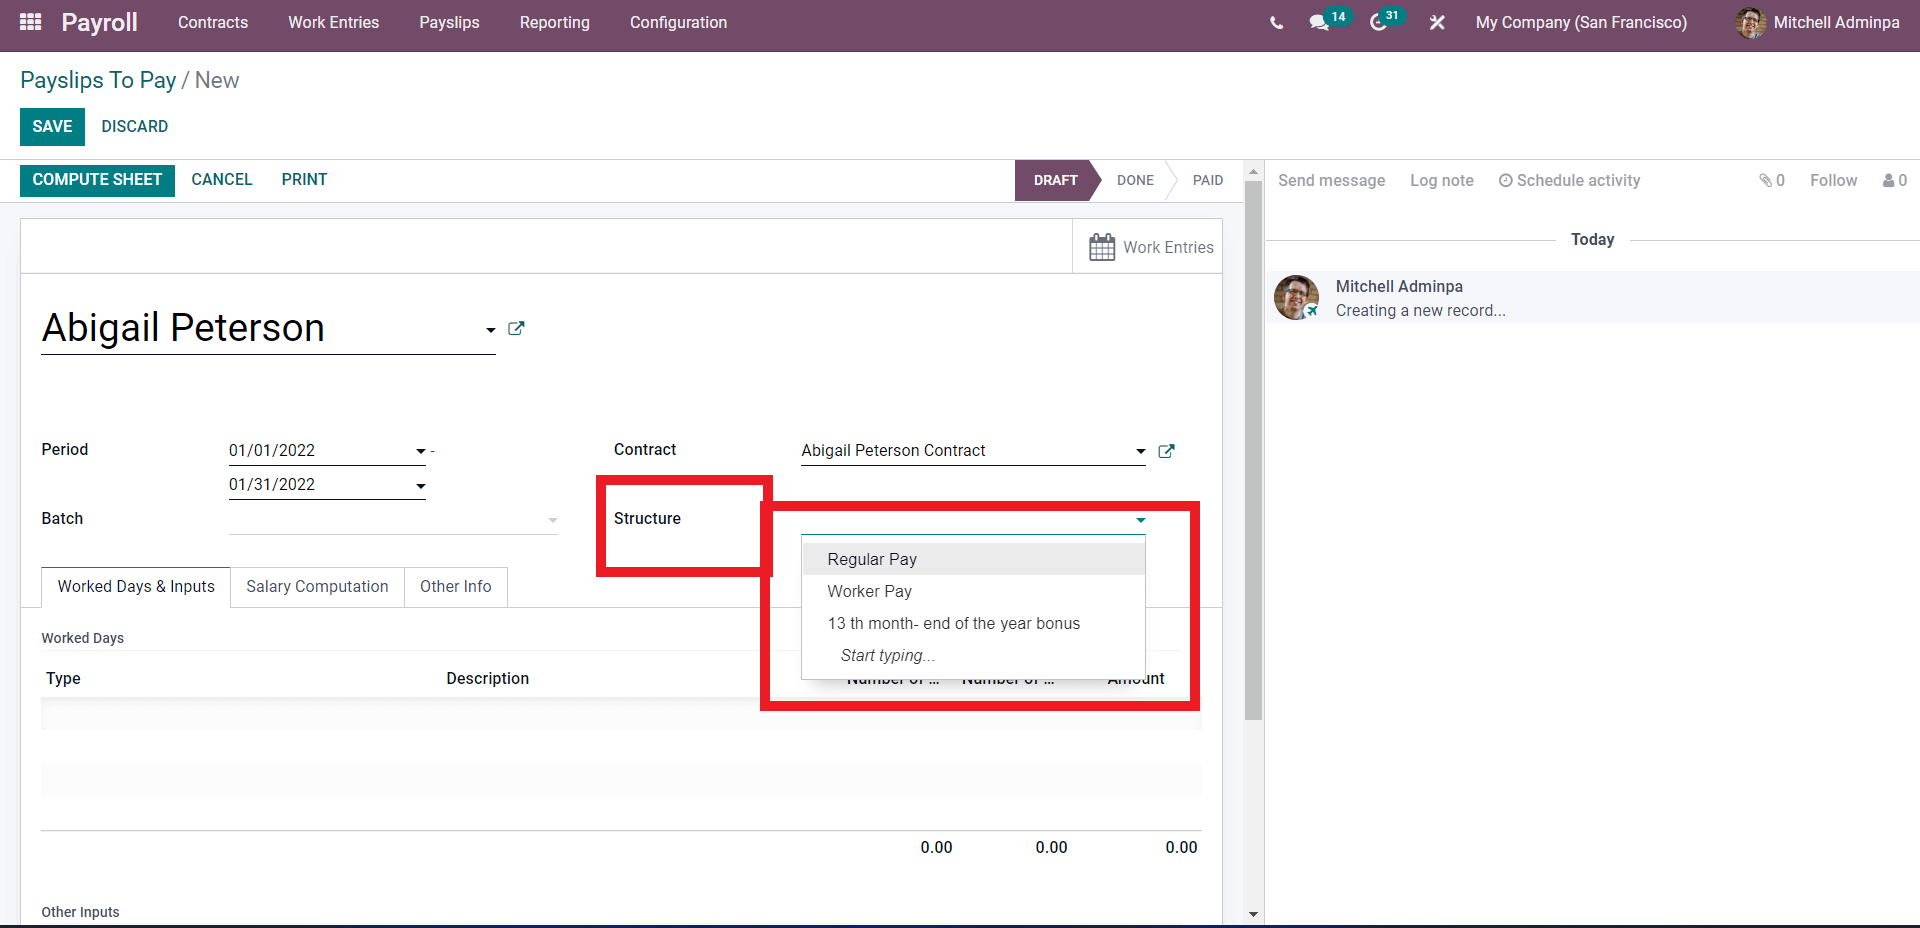
Choose from the list or type in the structure to choose it. You can instantly create a salary structure from the payslip configuration page. Type in the name of the new structure and a Create and Edit window will open up as shown below.
Click on the Create and Edit window and the configuration page to create the new structure will open up as shown below.
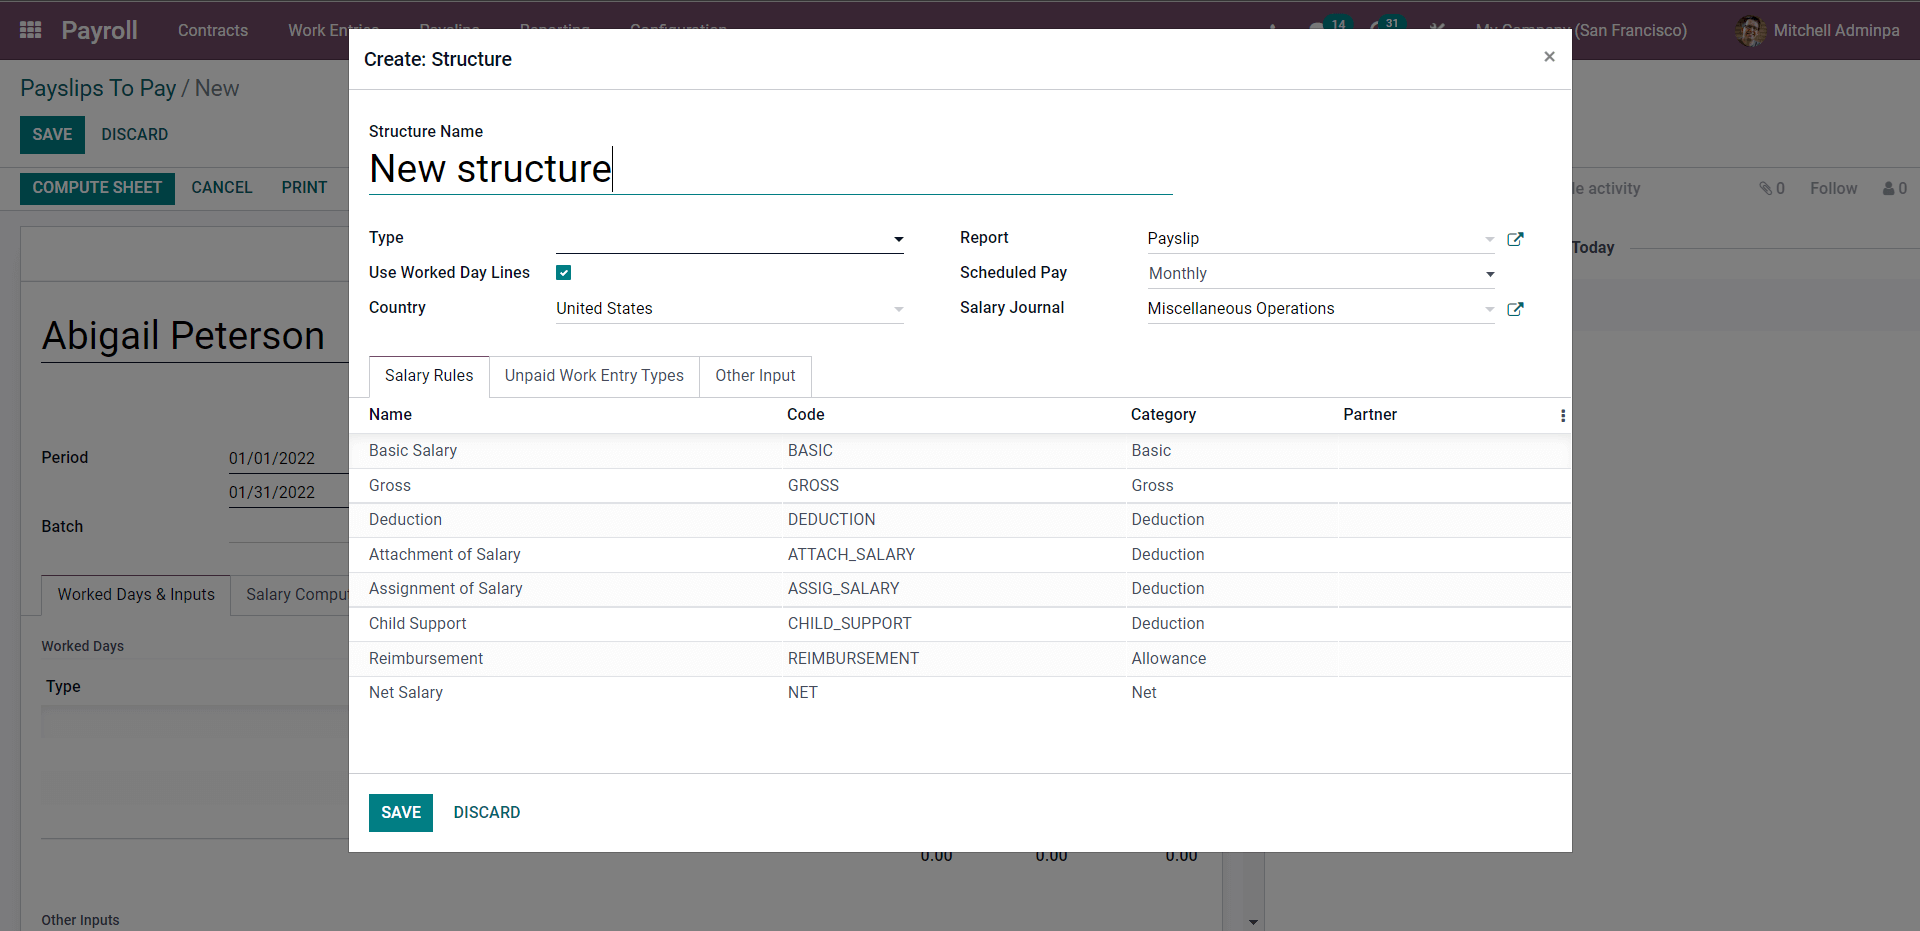
Enter the name of the new salary structure and choose the type from the Type field. A drop drop-down menu of options will appear as shown below for you to choose the type from.
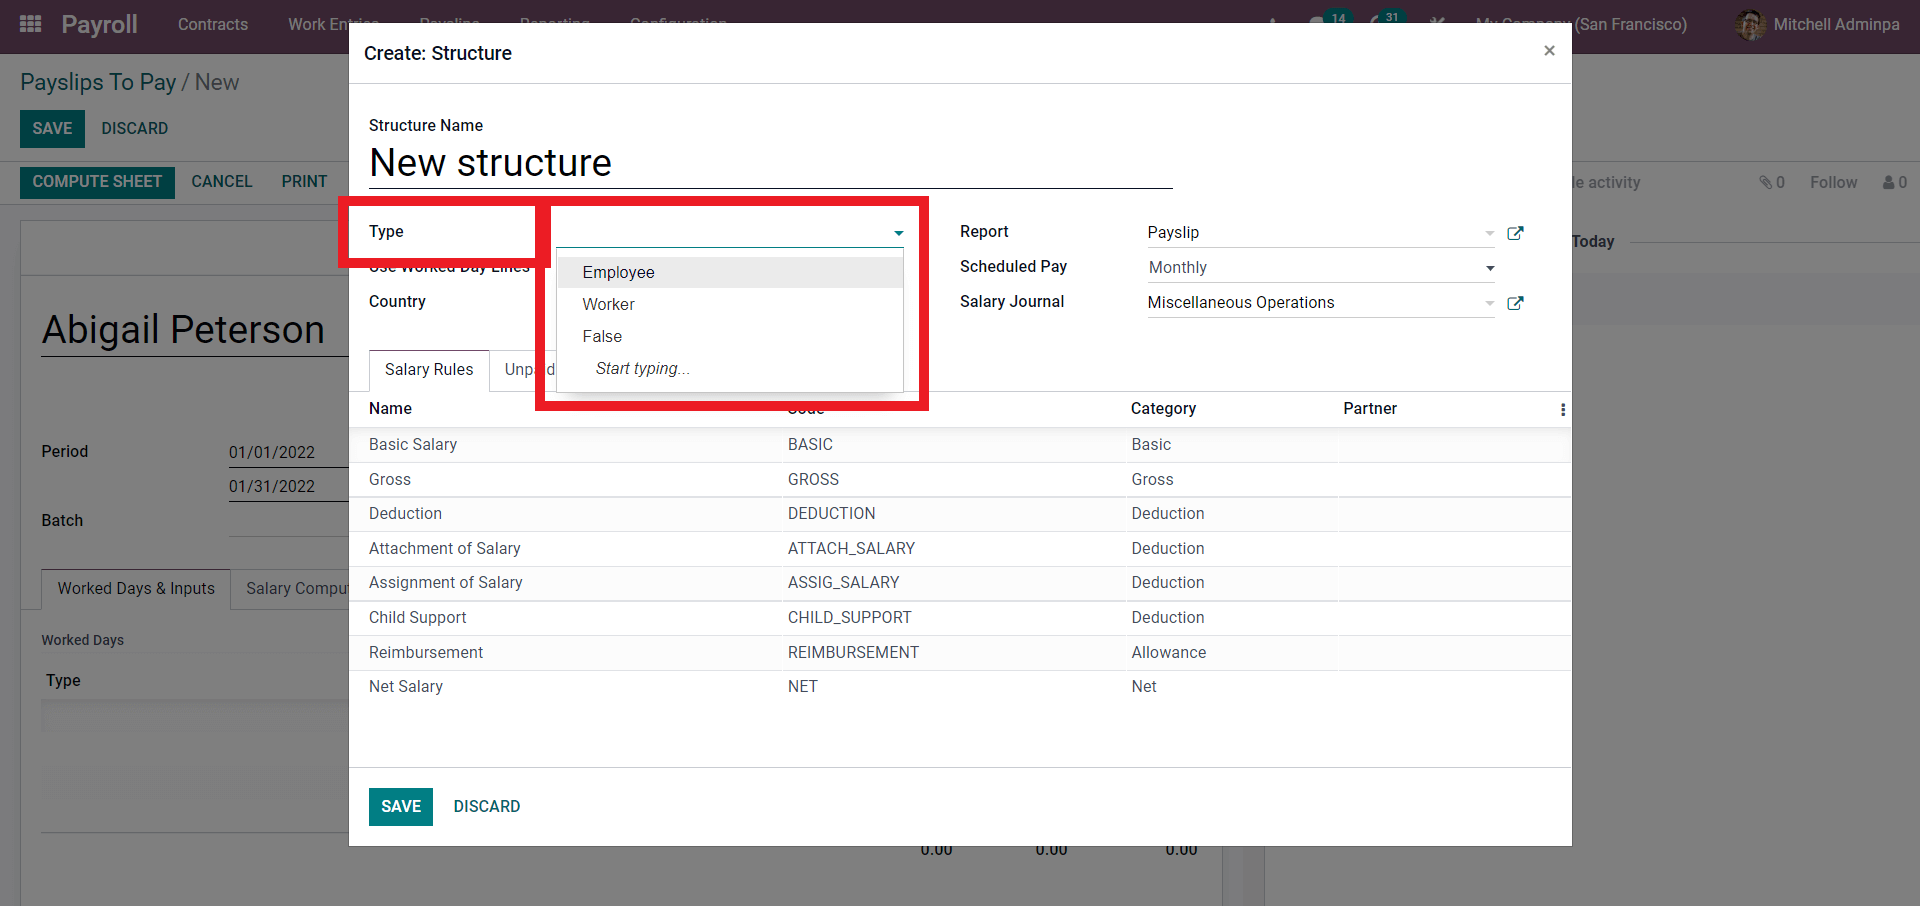
If you wish to create a new type then just type in the name of the new type and as Odoo is unfamiliar with the Type a Create and Edit window will open up. Click on it and the configuration page to create the new Type will open up as shown below.
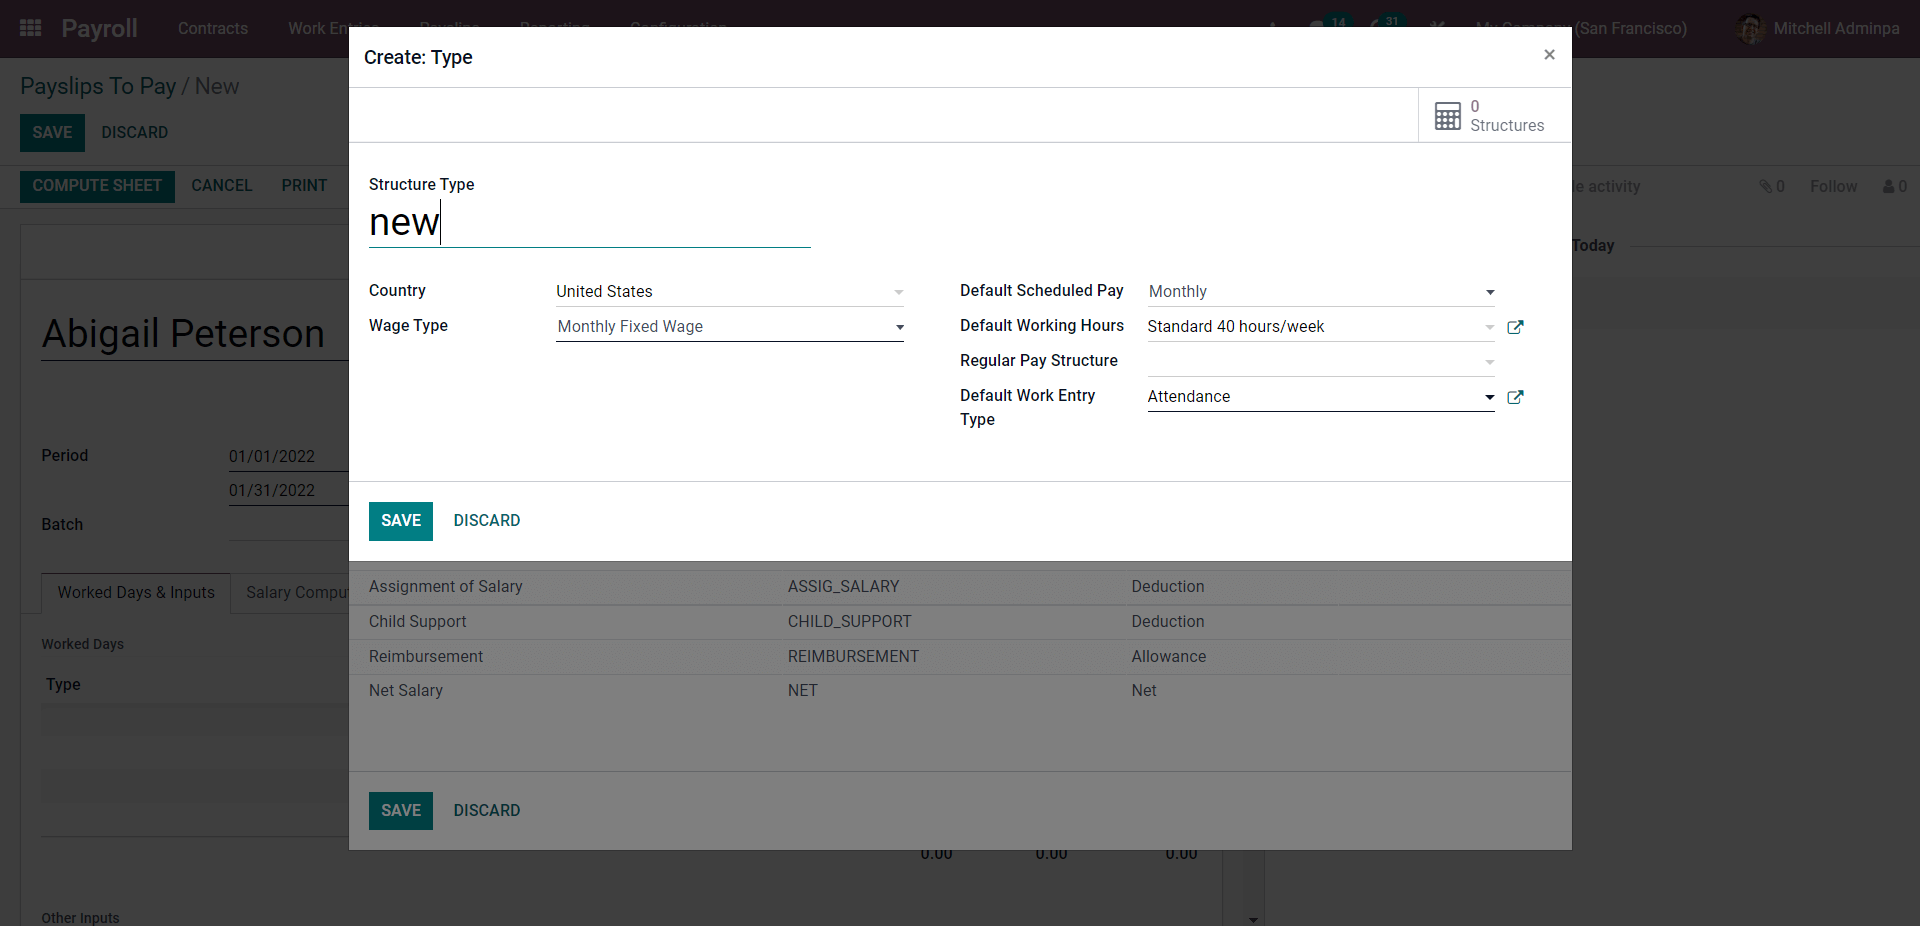
Type in the name of the new Structure type and choose the wage type from the respective fields. You can configure the default monthly pay and the working hours for the structure type. The pay structure and the default work entry type can also be configured from this page. After the configuration click on the SAVE button. From the Structure configuration page, the newly created structure will be available to choose from.
As you update, the salary structure of the Worked days and Input tab will be automatically configured as shown below.
In the salary computation, the tab will be automatically filled as soon as you compute the sheet by clicking on the COMPUTE SHEET button. This will compute the salary and the data will be given in the Salary computation section as shown below.
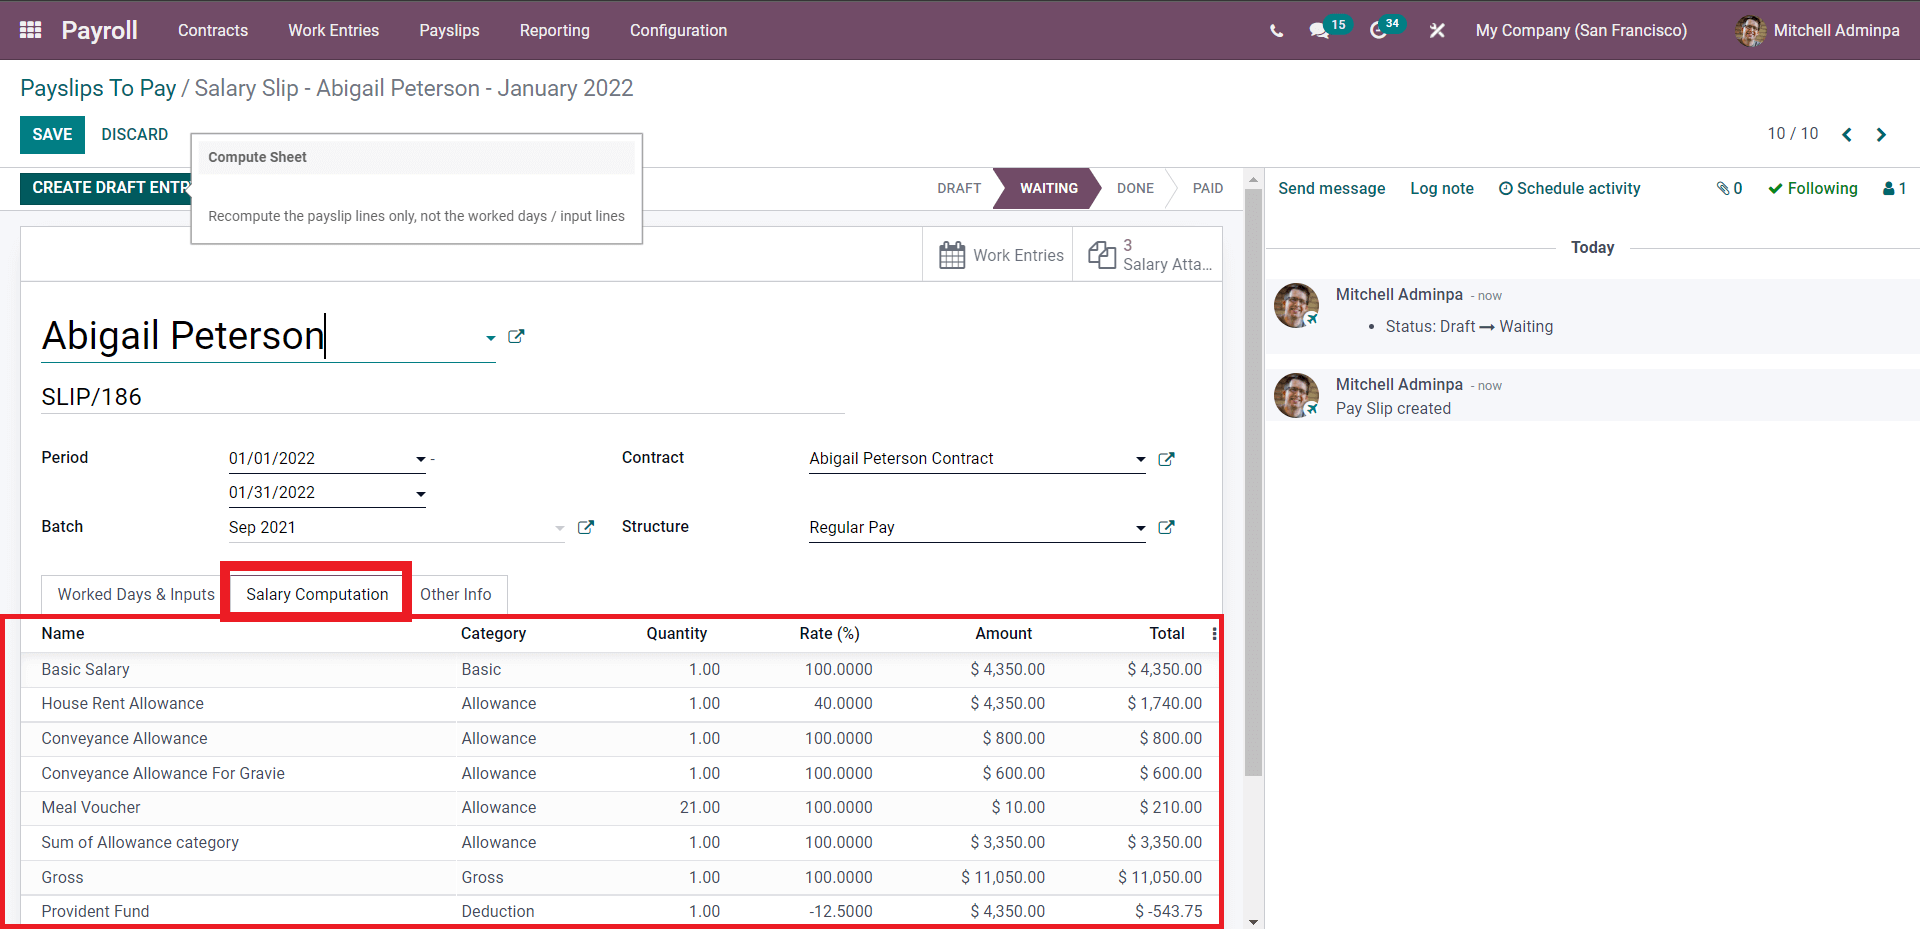
Note that the COMPUTE SHEET Button is the end button for the first stage of the Payslip configuration page.
Under the Other info tab, you can find more options on configuring the payslip as shown below.

The payslip name and the company will be automatically filled and you can use the additional options for more configurations on the Payslip. You can change or choose the company from the company field. Click on the check box near the Has negative Net To Report to activate it. Click on the Made payment Order to activate the function. You can choose the date of the account from the Date account field. The salary journal will be automatically chosen based on the selected salary structure. Click on the Journal to view or edit it. Here click on Salary from the Salary Journal field and a page on the Journal will open up as shown below
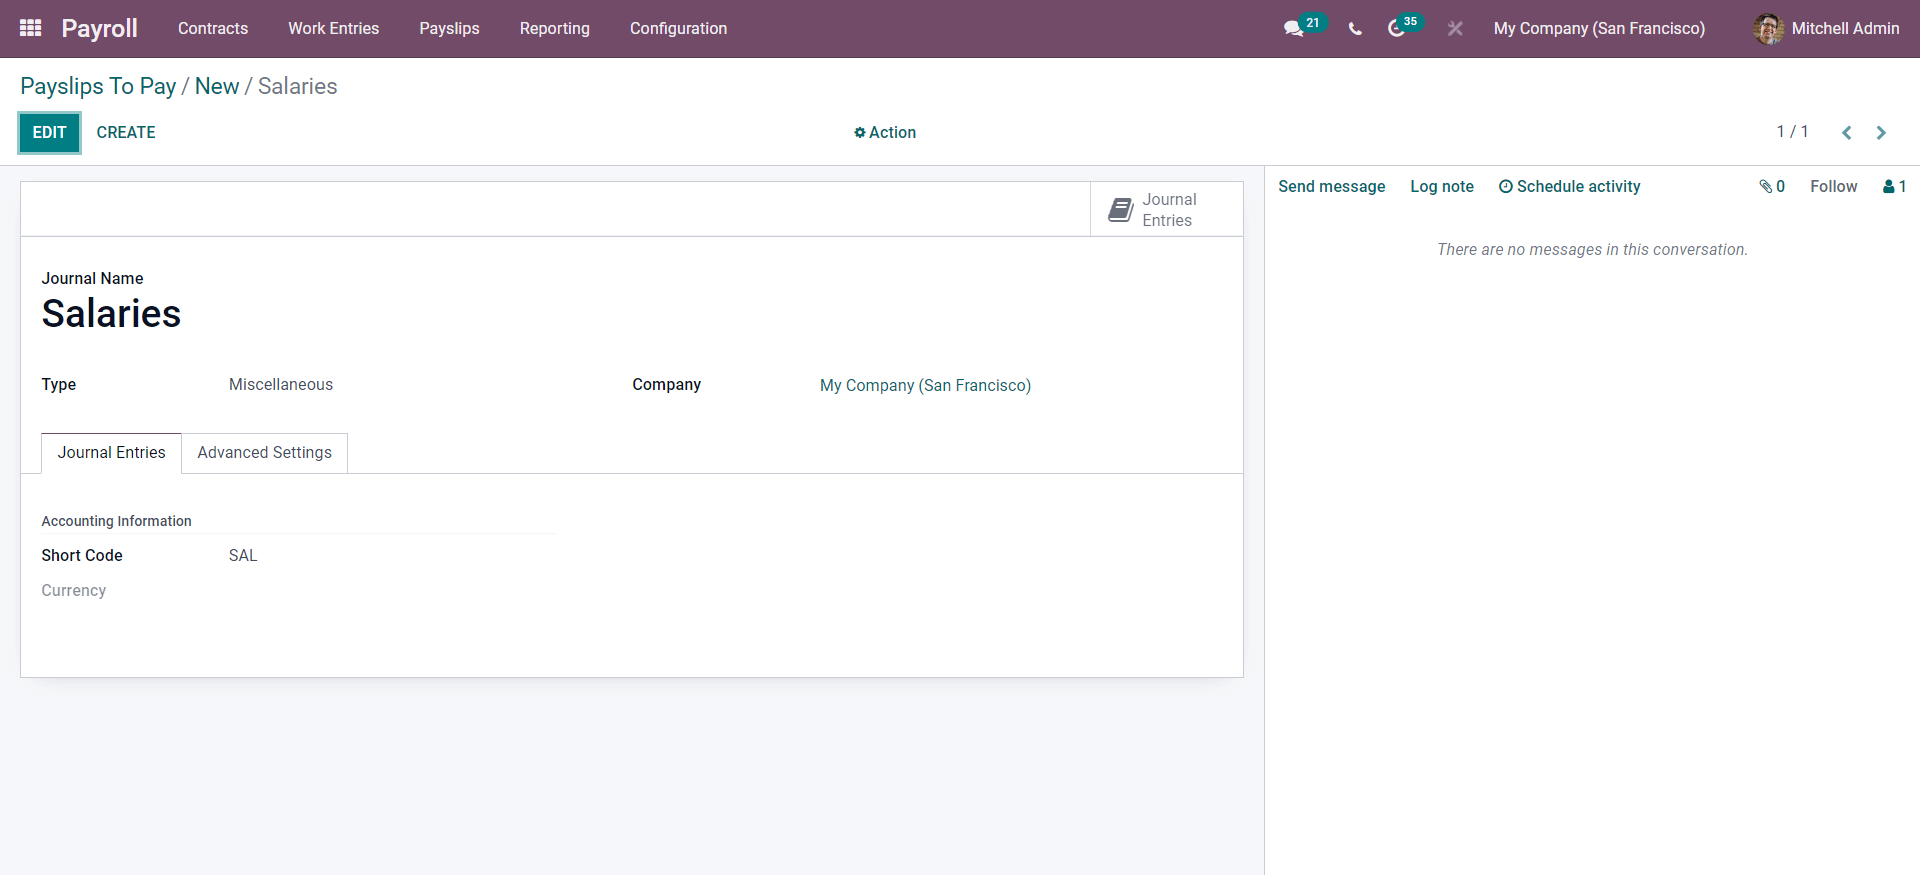
Click on the EDIT button to edit the Journal and after the configurations click on the SAVE button. After the configuration click on the SAVE button from the Payslip configuration page to save the newly created payslip. As mentioned earlier click on the COMPUTE SHEET button to compute the salary. A CREATE DRAFT ENTRY button will open up as shown below.
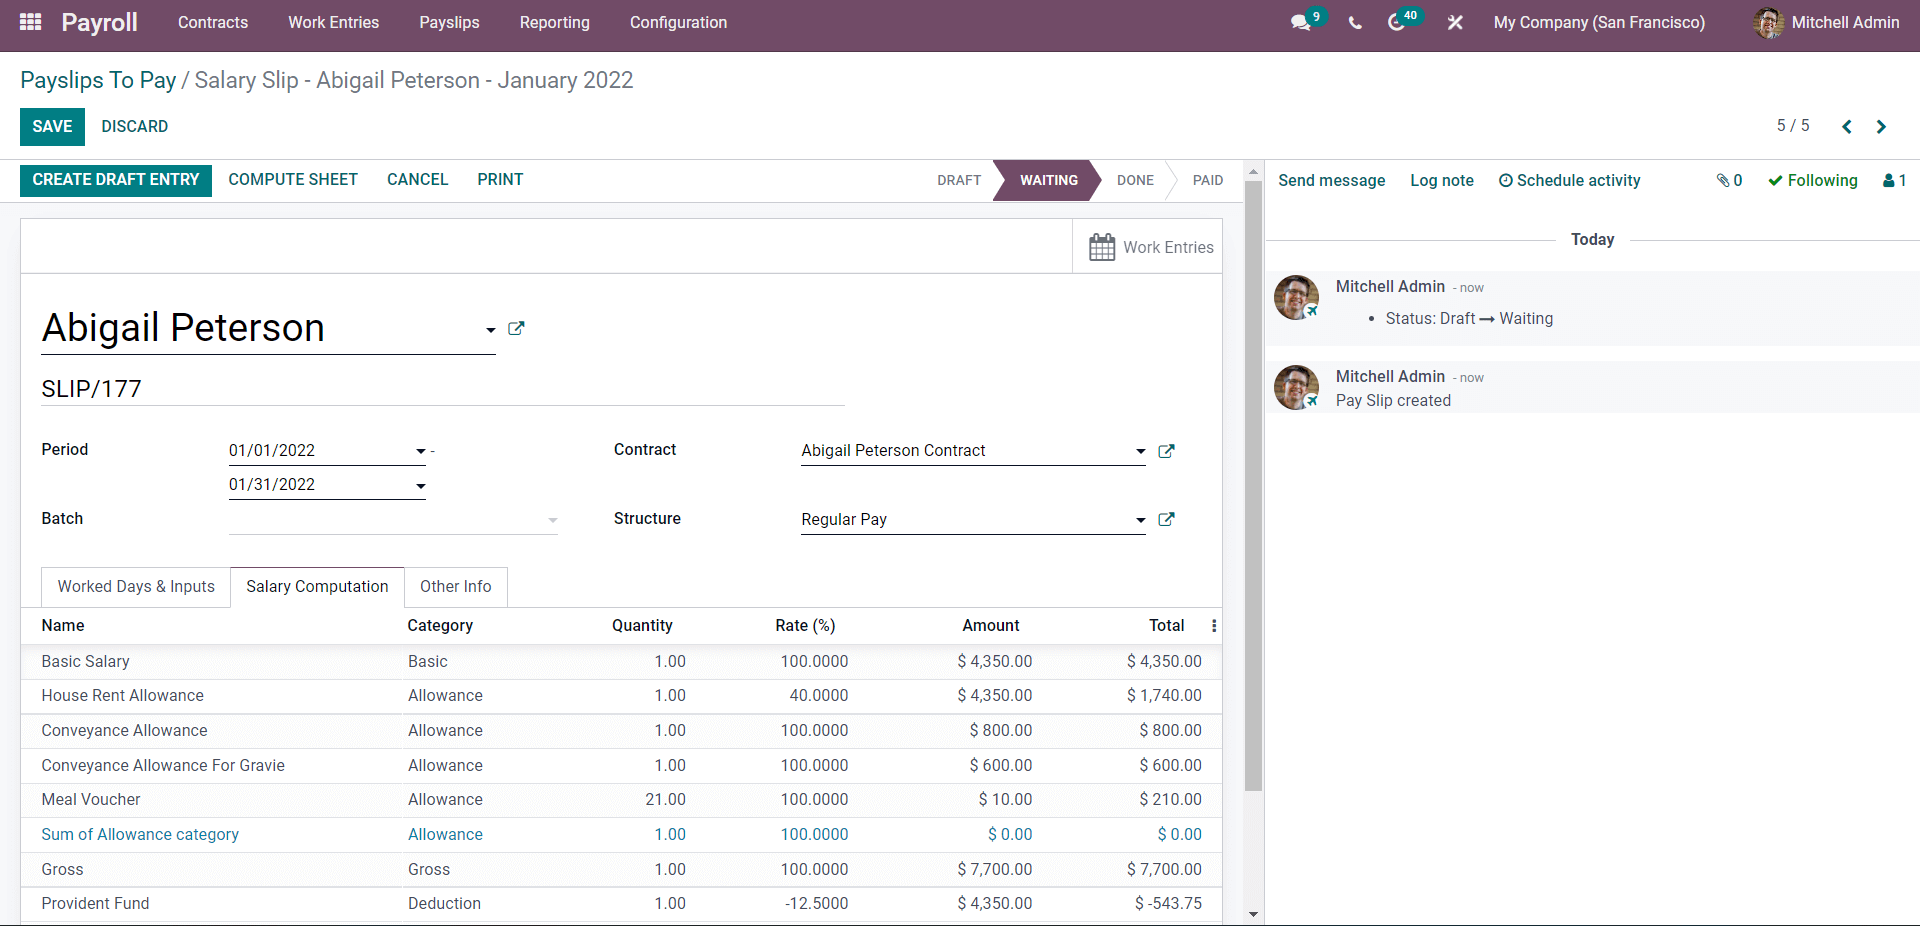
Hereunder the Salary Computation tab the data is divided into various columns. This is basically the detailed and structured note of the salary of an employee. All of these categories add up to form the final salary of the Employee. In the Other info tab, you will be able to find the Accounting information. Click on the CREATE DRAFT ENTRY button to create the draft entry. A draft entry page will open up as shown below
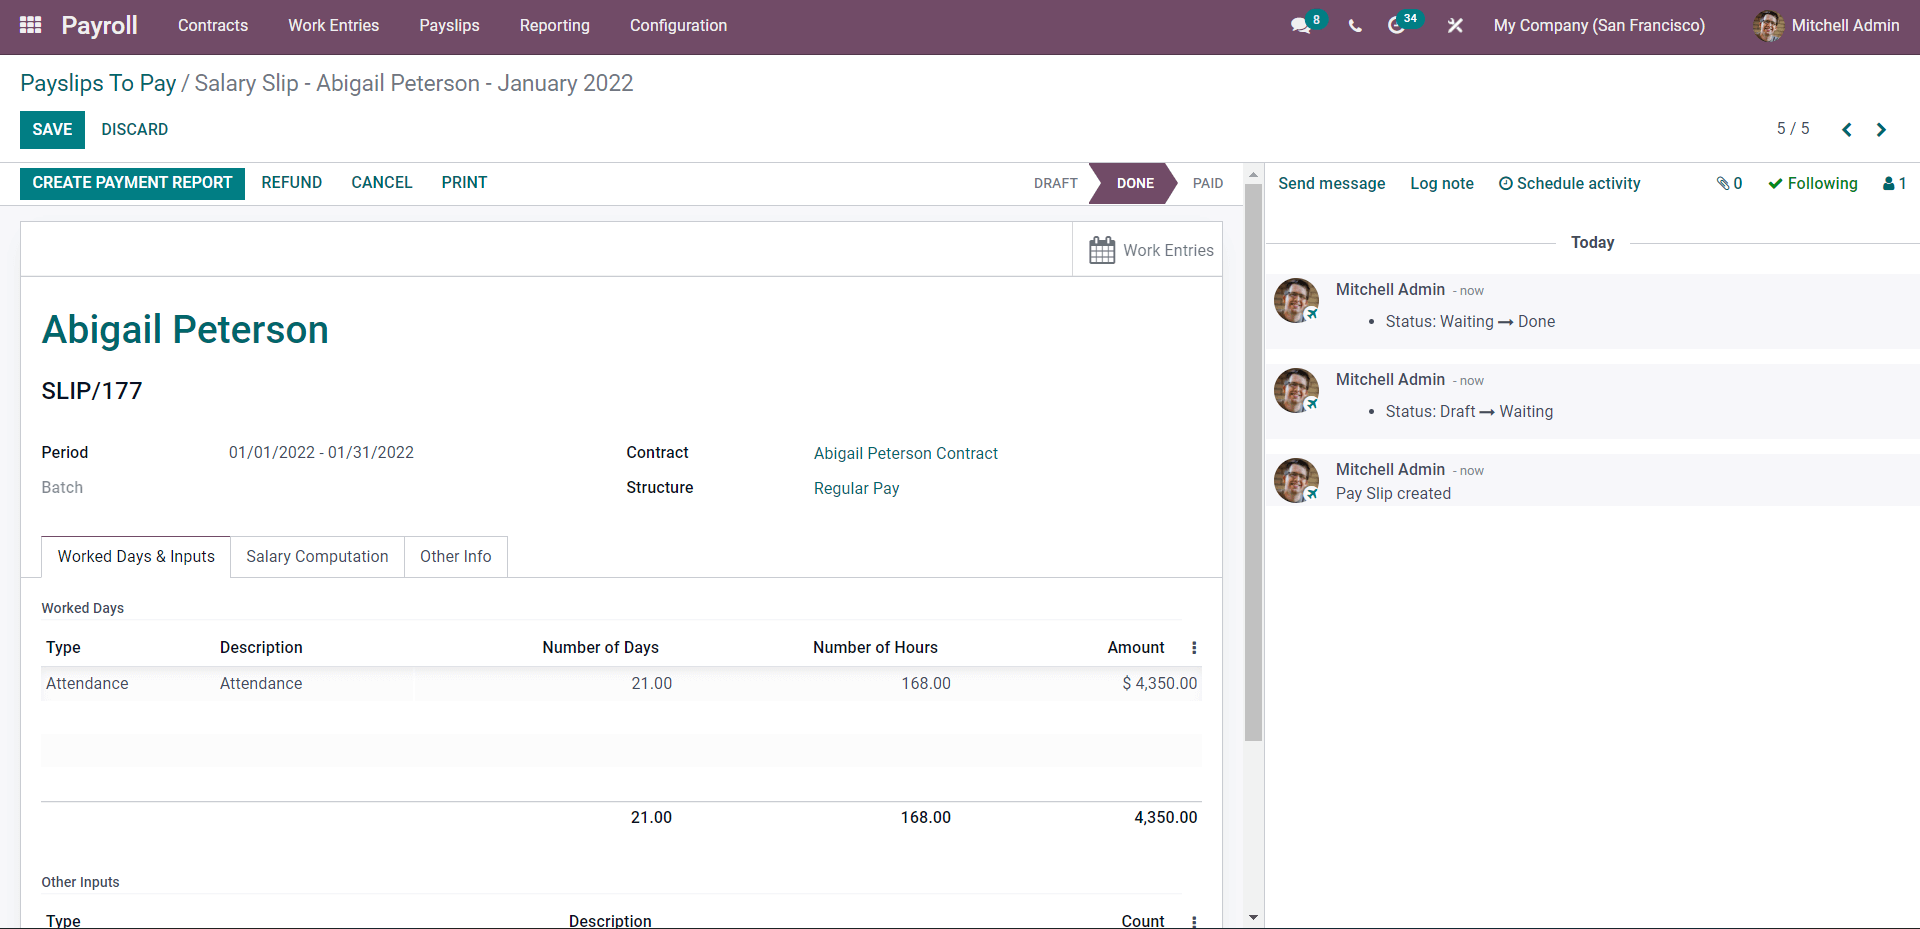
You can finalize the Payslip configuration from this. Go through the page and confirm it as error-free click on the CREATE PAYMENT REPORT button and as the name suggests the button will generate the Payment report on the employee. A tab to select the Bank Journal will open up as shown below.
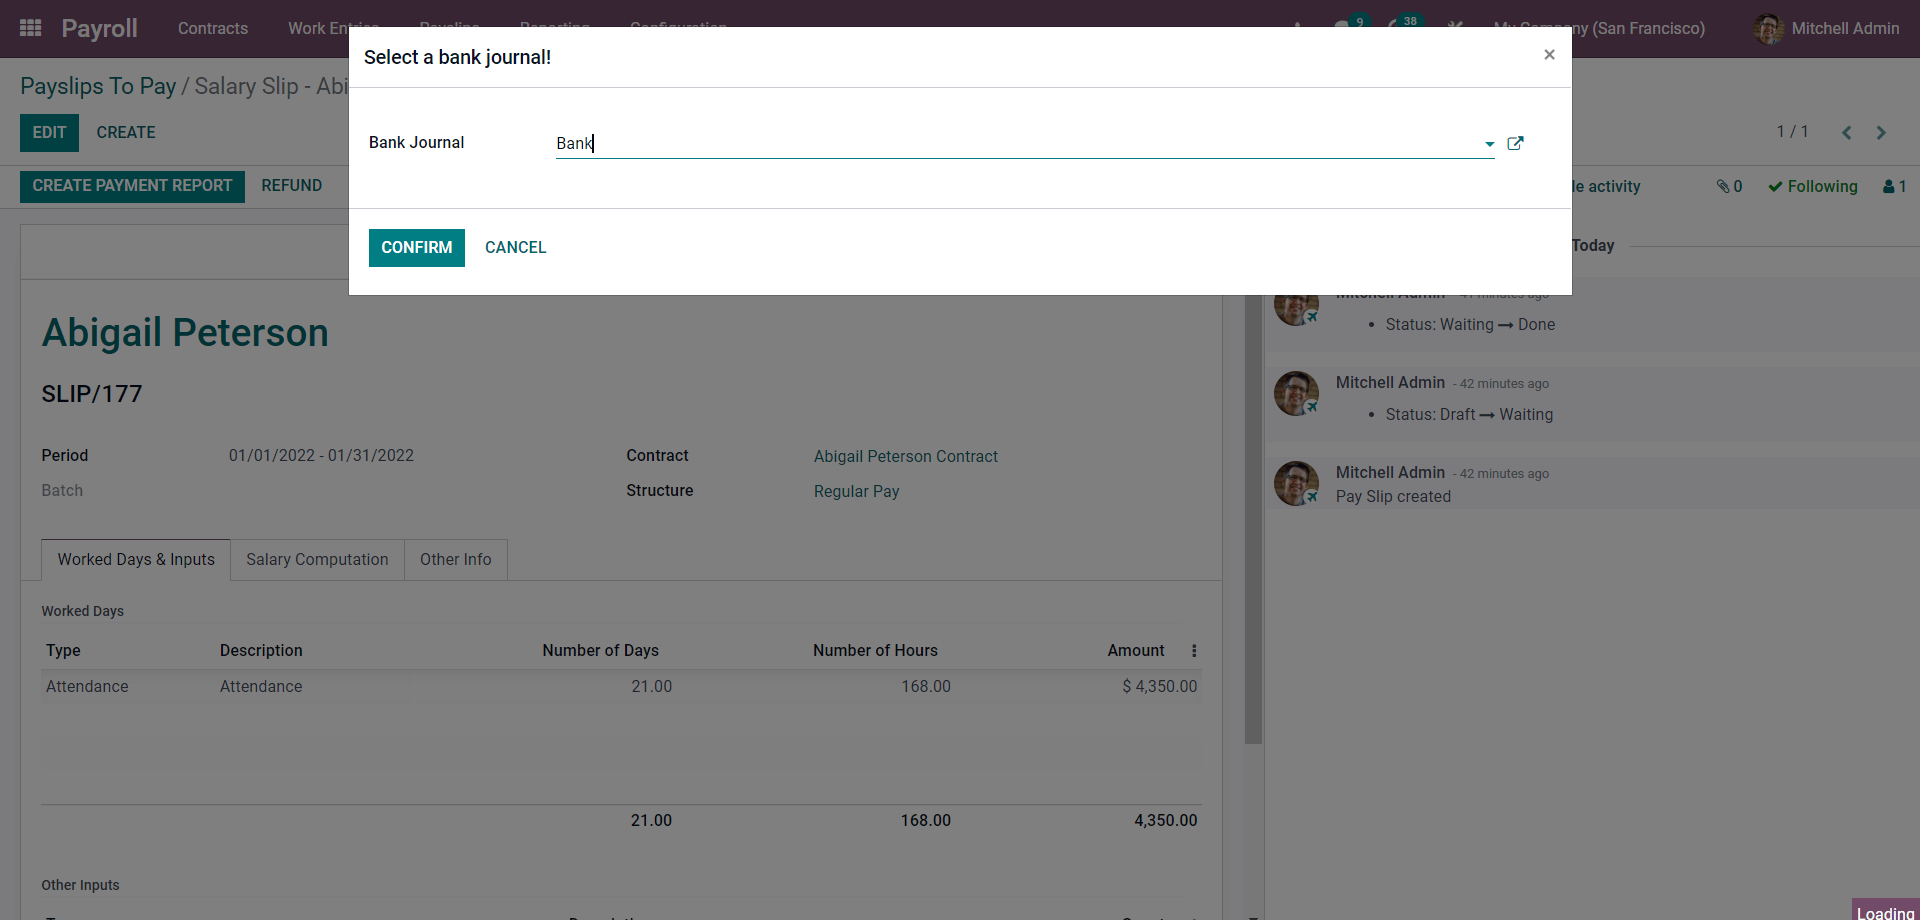
Note that if Odoo doesn't allow you to choose the Journal account then go to your employee profile to configure the bank account details. To go to the employee profile click on the Name of the employee from the Payslip configuration page and under the Personal Information tab of the employee profile you will be able to find the Account field as given below.
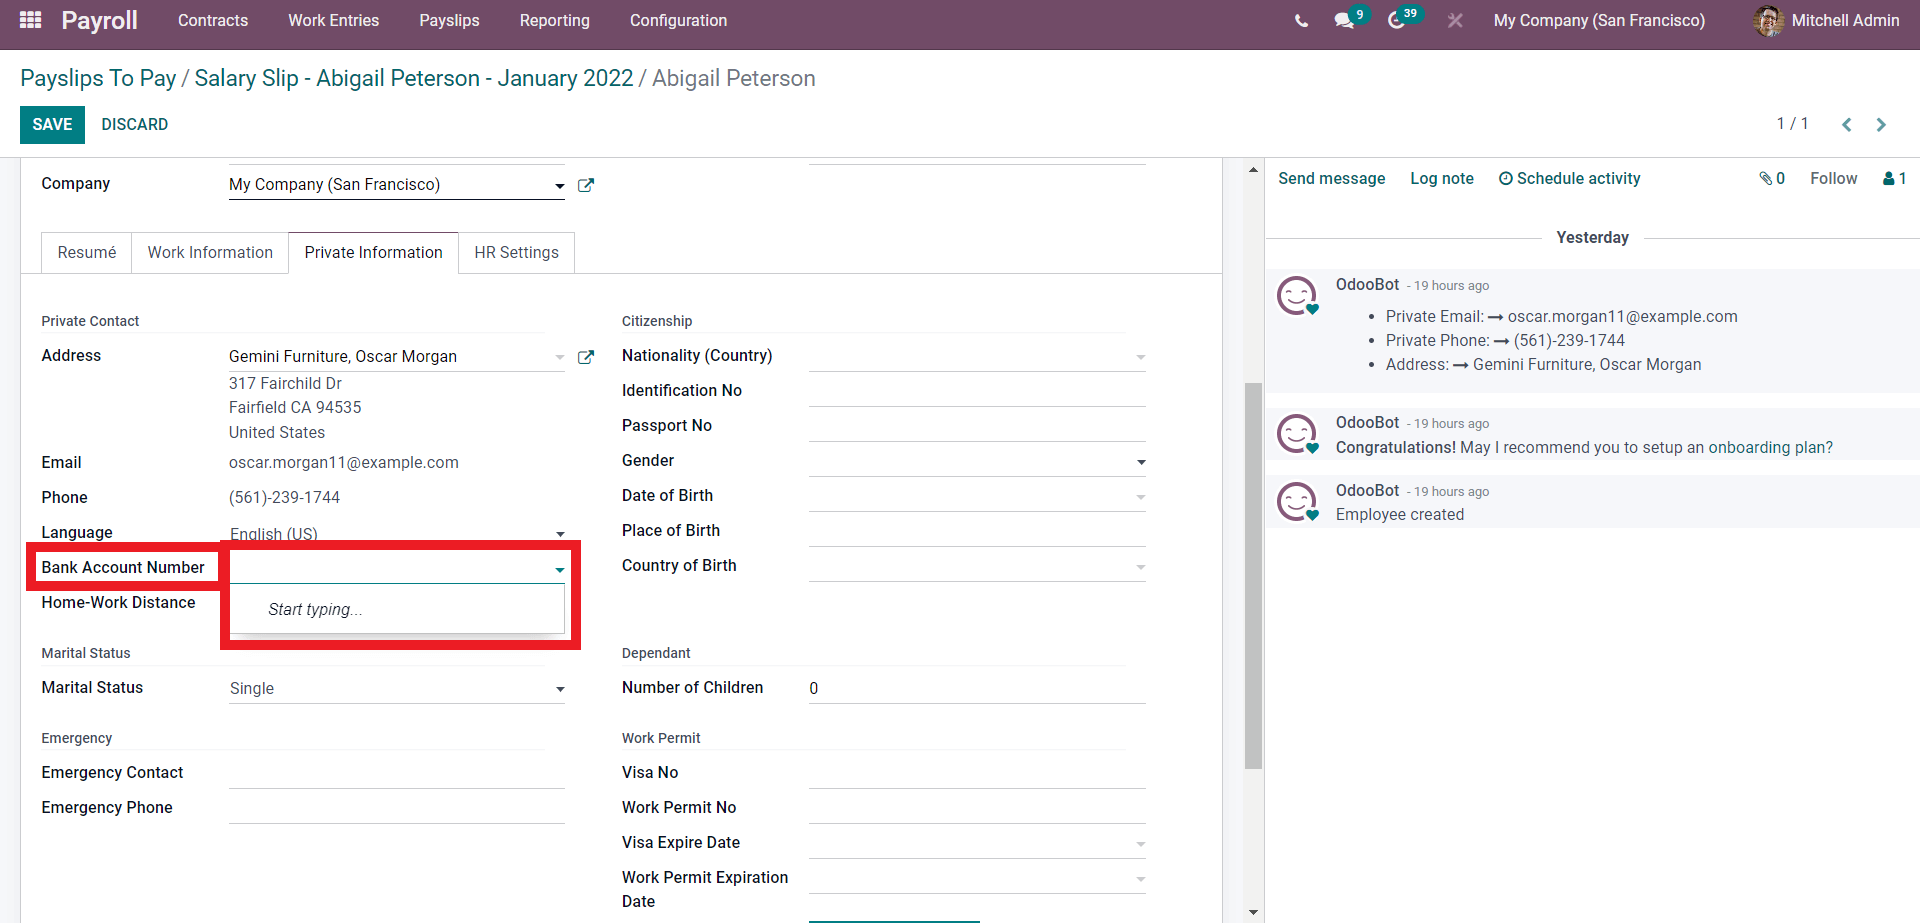
Enter the Account number and a Create and Edit window will open up, click on it, and a tab to create the new bank account will open as shown below.
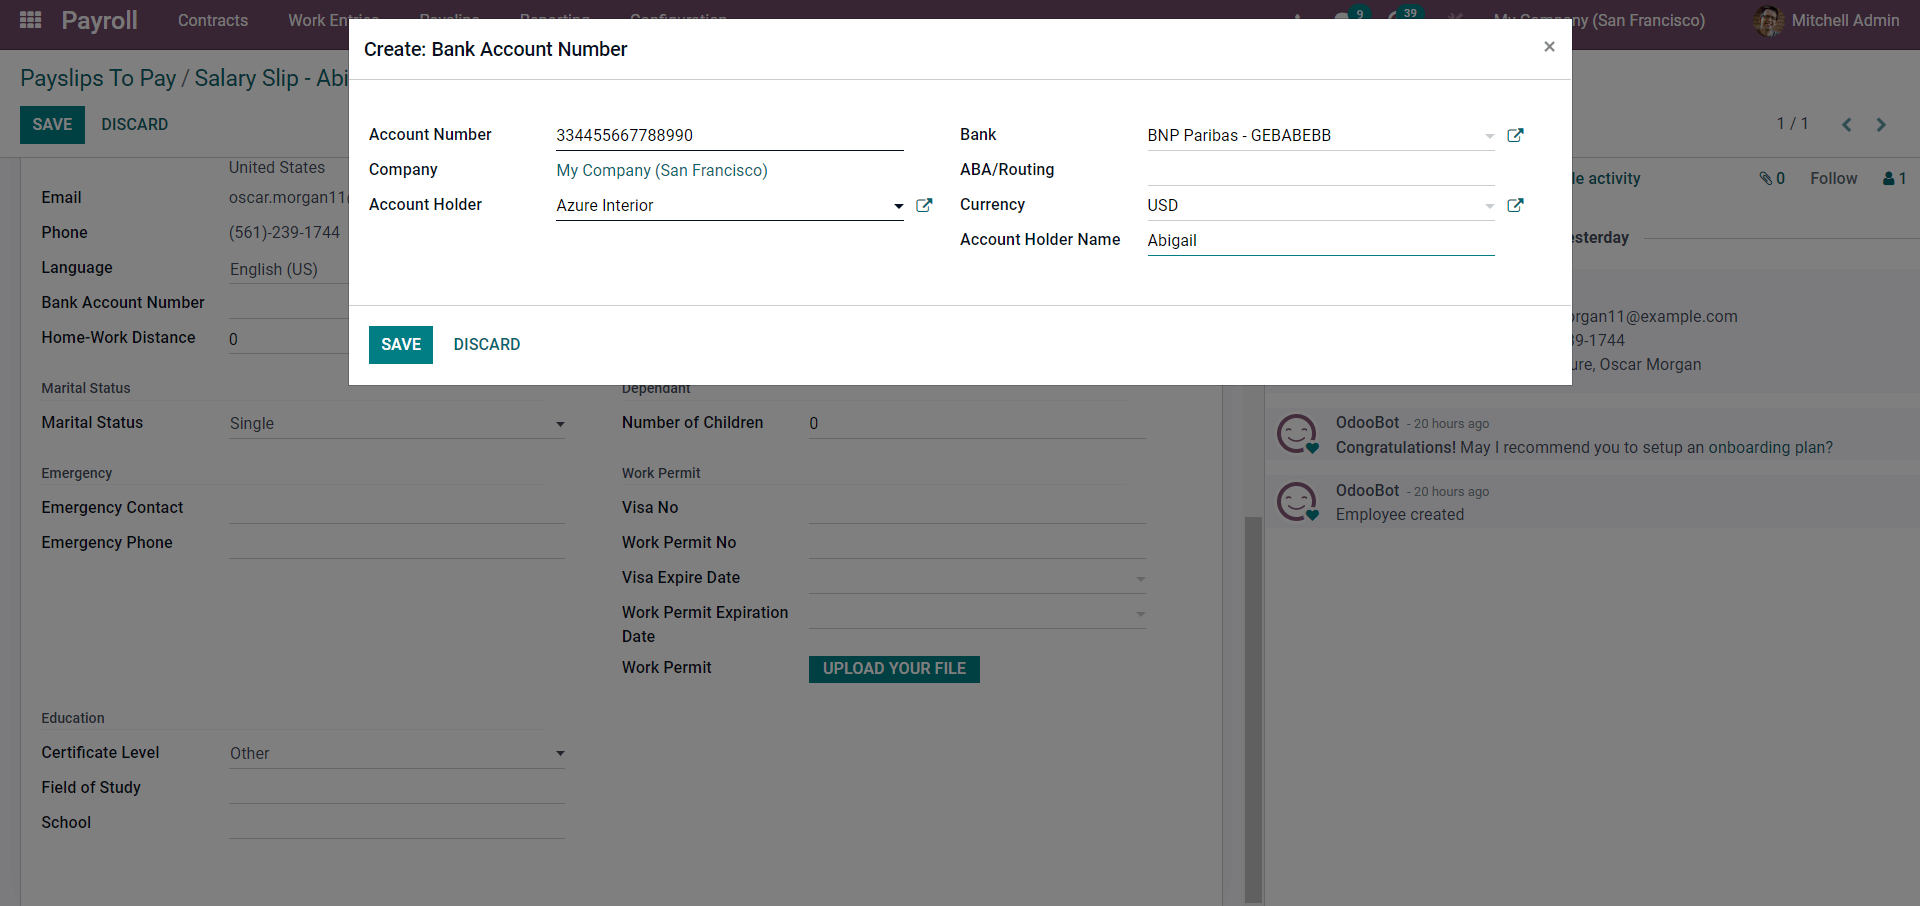
Enter the Account number, choose the bank along with the currency, the account holder’s name, and the account holder from their respective fields. Click on the SAVE button to save the configurations and the Bank account. After this go back to the Payslip configuration page and proceed with the Bank account. The processed Payslips will be listed in the All Payslip tab. Click on it and the payslips will open up as shown below
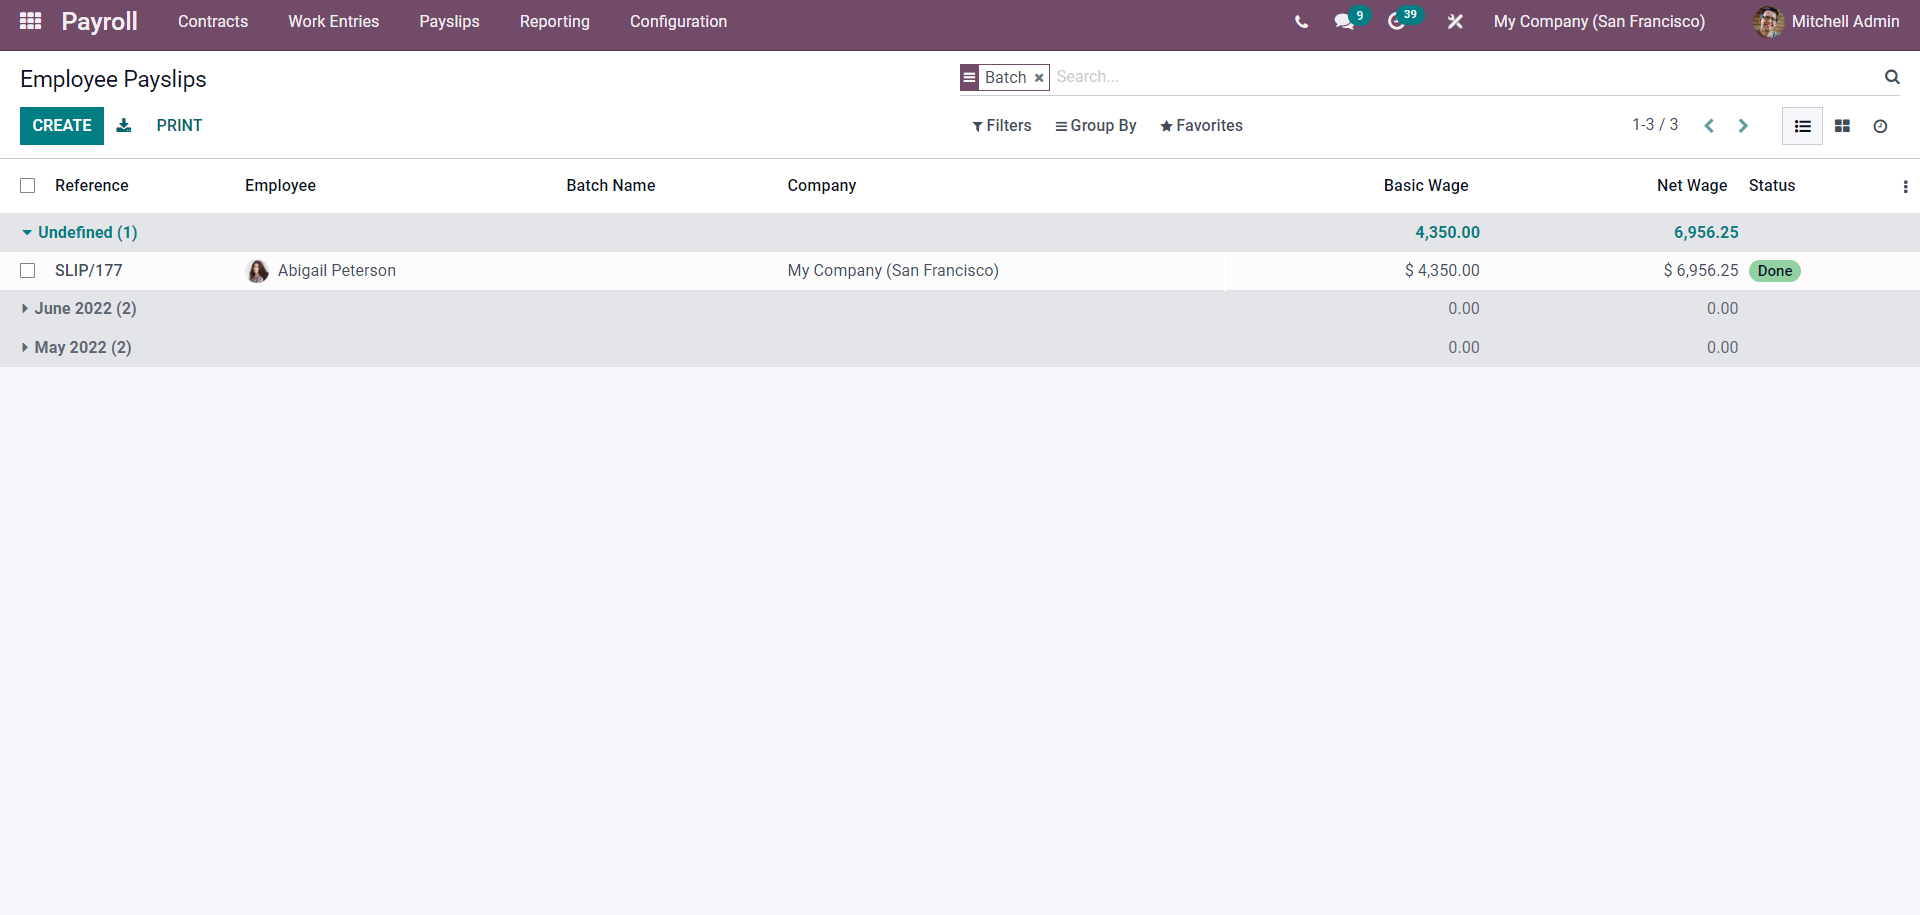
This is how you create Payslips for employees. With the Odoo 15 Payroll module, you can also create Payslips as batches. For this go to the Payslip tab from the dashboard of the module and in the drop-down click on Batches and the page will open up. Form the page click on the CREATE button and the tab to configure the new batch will open up as shown below.
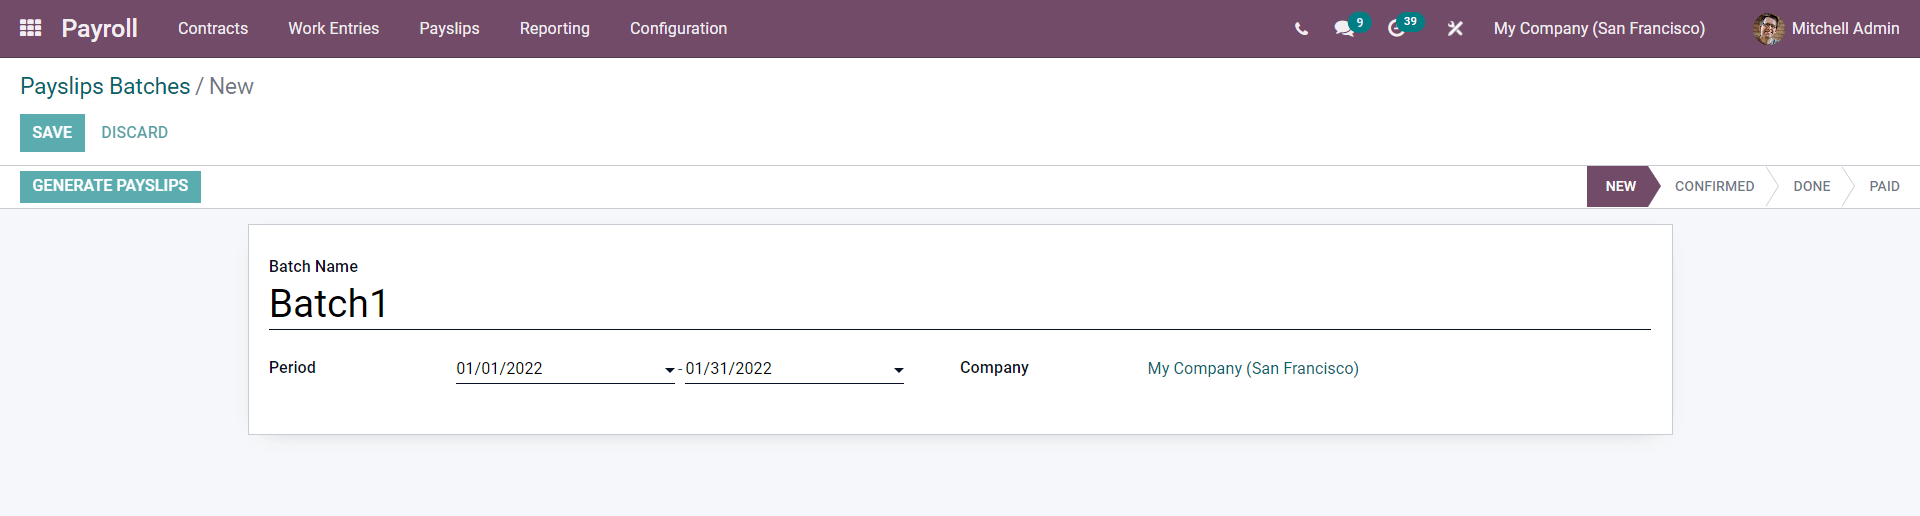
Click on the GENERATE PAYSLIPS button and the page for configuring the Batch payment will open up as shown below.
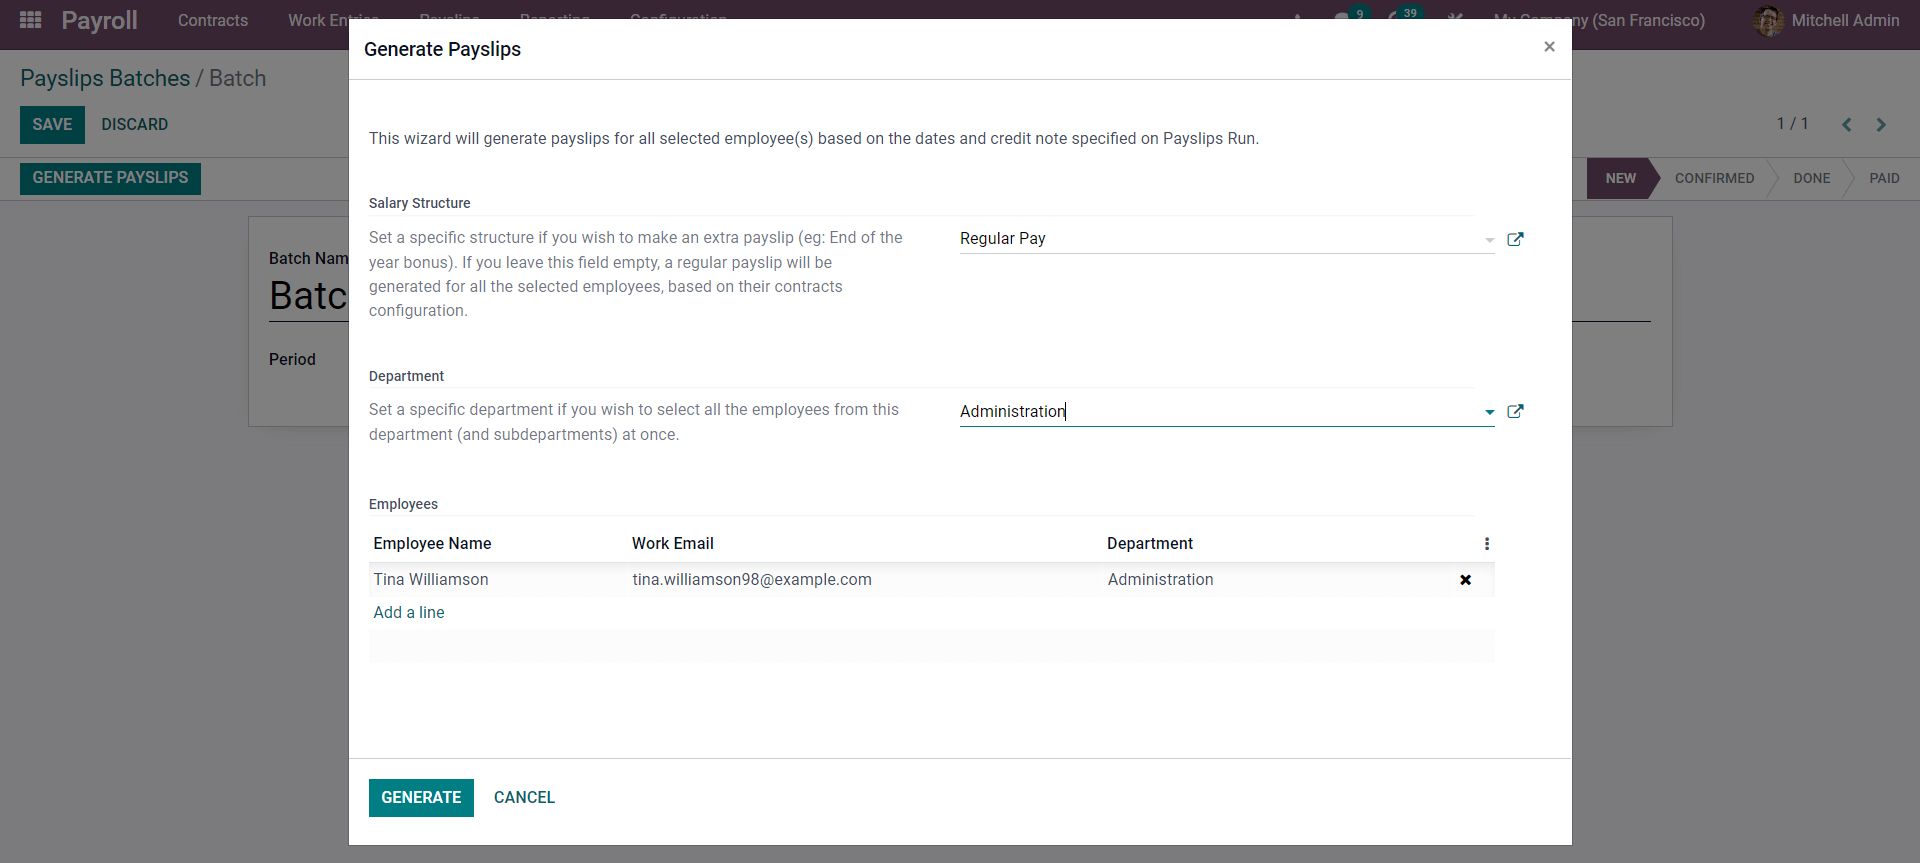
Select the Salary Structure and the Department and the employees will be filled. Click on the GENERATE button to generate the payslip. A page with the newly created batch will open up as shown below.
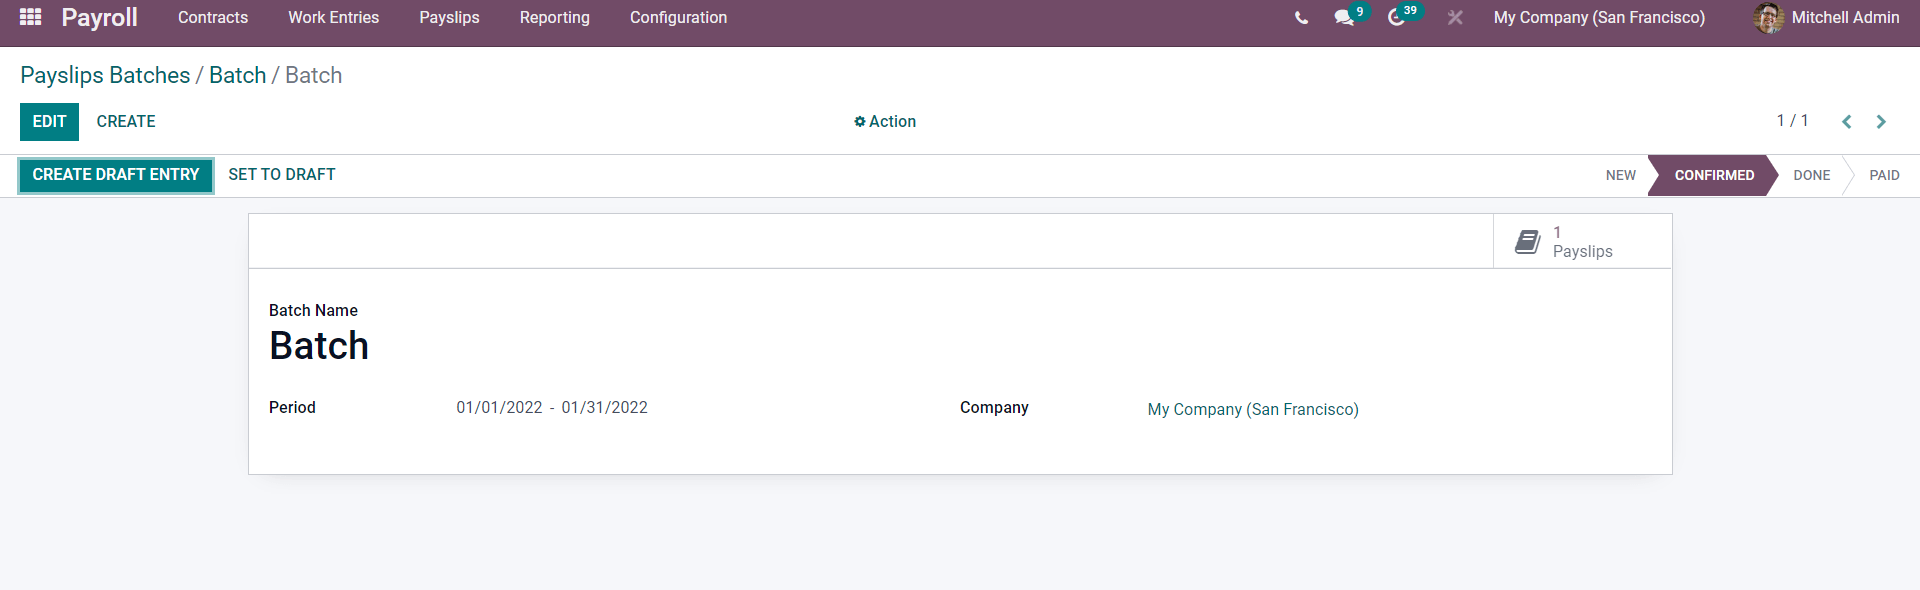
This is how you create and manage payslips with the Odoo 15 payroll module. The modules are highly integrated into the other HR management Applications of Odoo giving you instant access to the Employees easily. The Payslip feature in the module is highly convenient to use and easy to manage.