Odoo 19 offers a powerful and flexible Time Off module that allows organizations to configure customized Time Off Types based on their operational requirements. Whether you need to define paid leave, sick leave, maternity leave, or unpaid absences, Odoo provides structured configuration options to manage approvals, allocations, accruals, and validation workflows. Properly setting up Time Off Types ensures accurate leave tracking, balanced allocations, and seamless integration with payroll and attendance modules. By understanding how each configuration option works—such as approval methods, negative caps, and public holiday inclusion—HR teams can automate leave management and reduce administrative errors. This guide walks you through the complete setup process, helping you configure Time Off Types in Odoo 19 efficiently and correctly for your organization’s needs.
Firstly, select the Time Off module from the Odoo 19 dashboard.
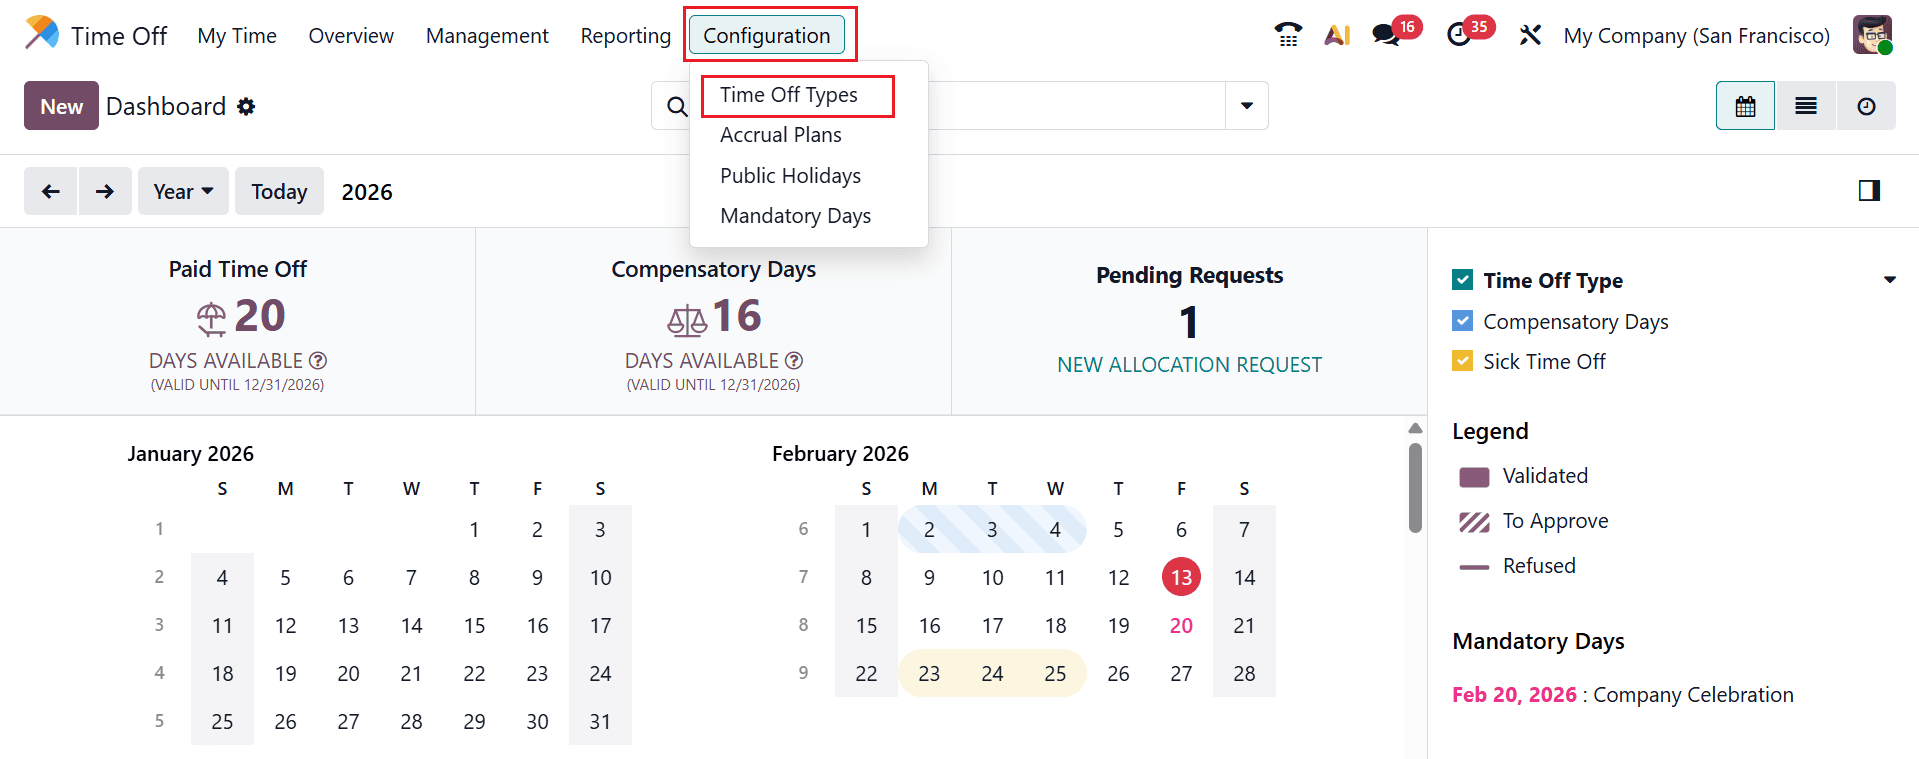
To access the time off types, move to the Configuration > Time Off Types as shown below:
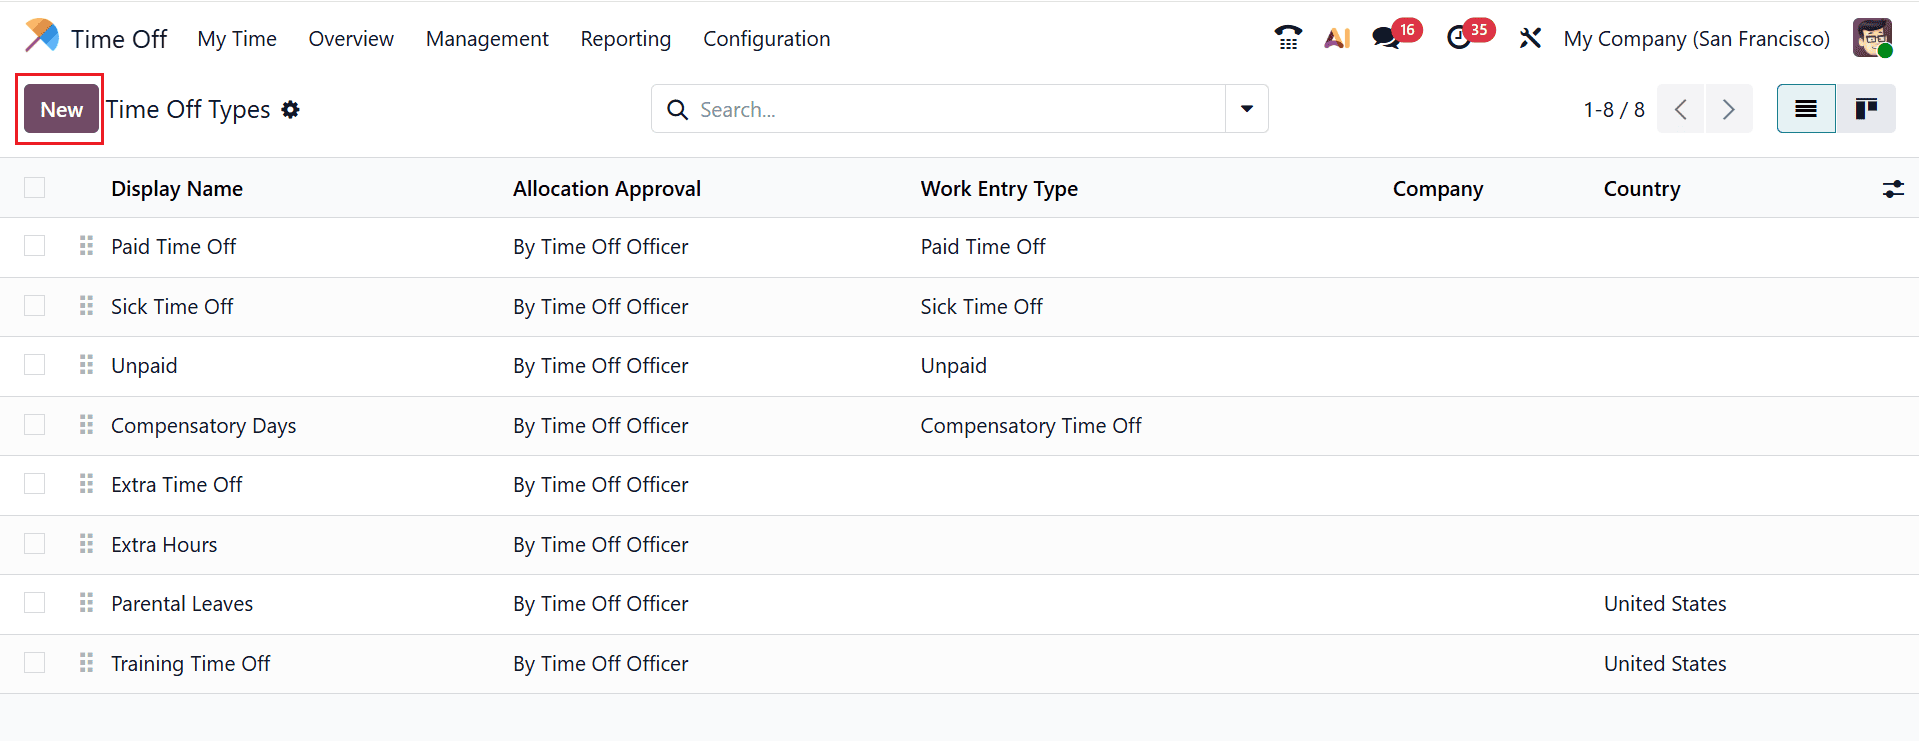
Here, you can see a list of time off types with details such as Display Name, Allocation Approval, Work Entry Type, Company, and Country. Create a new time off type by clicking New button.
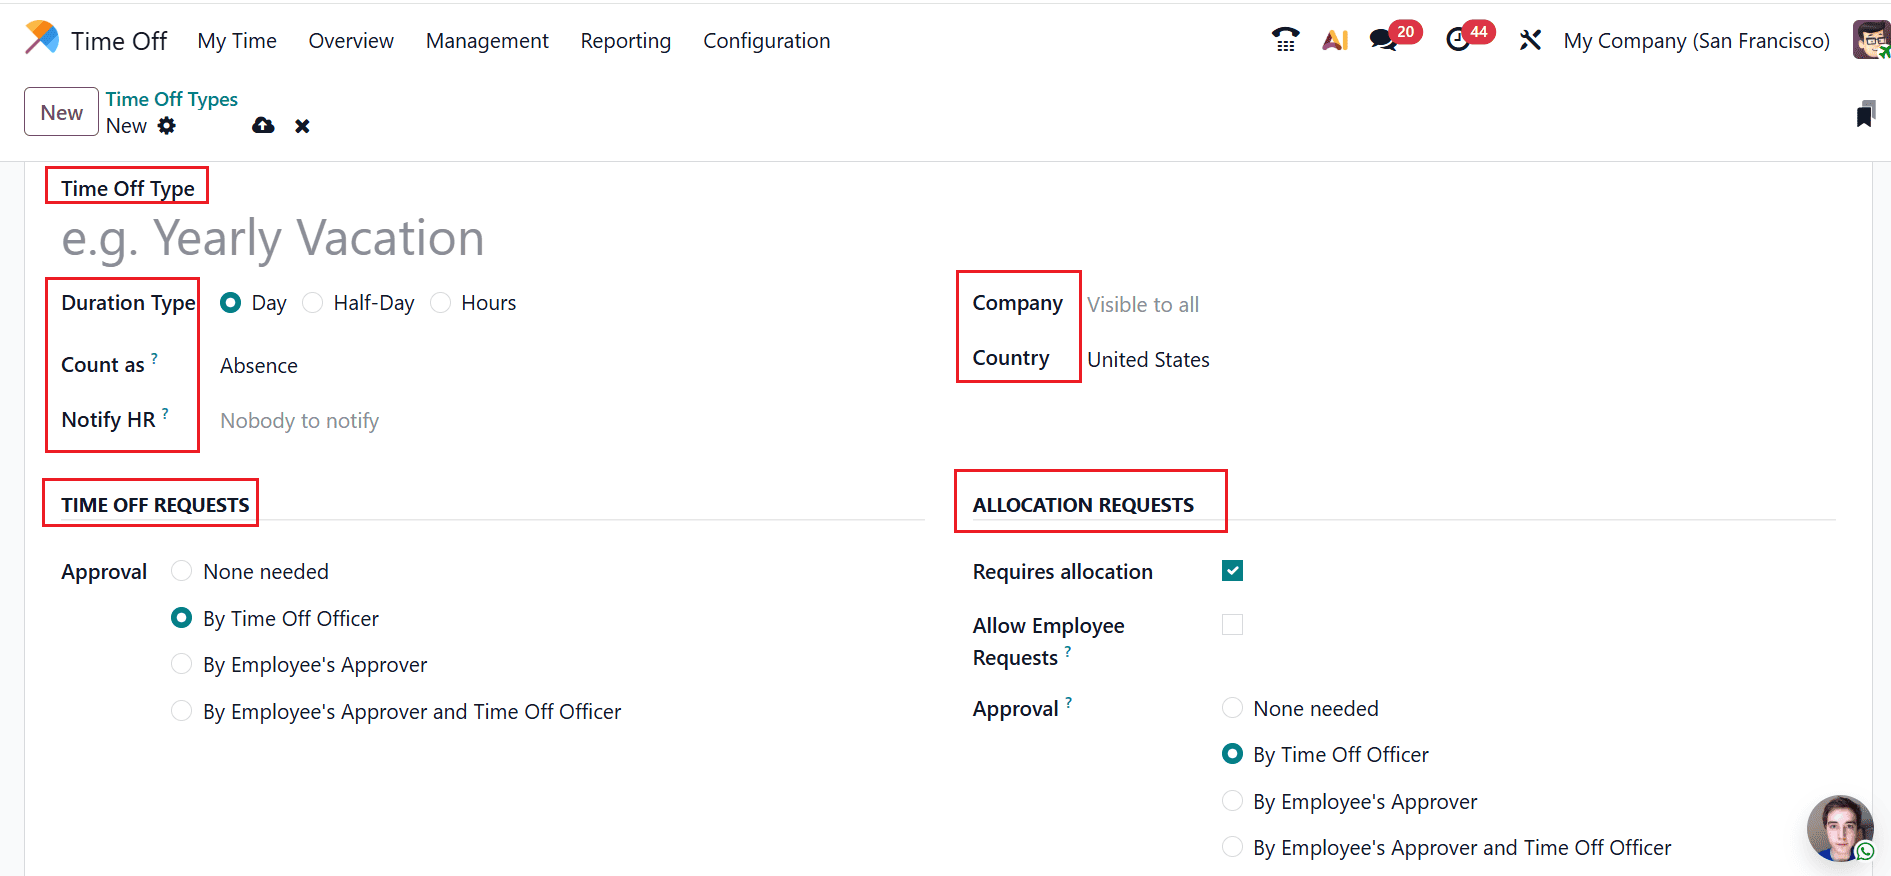
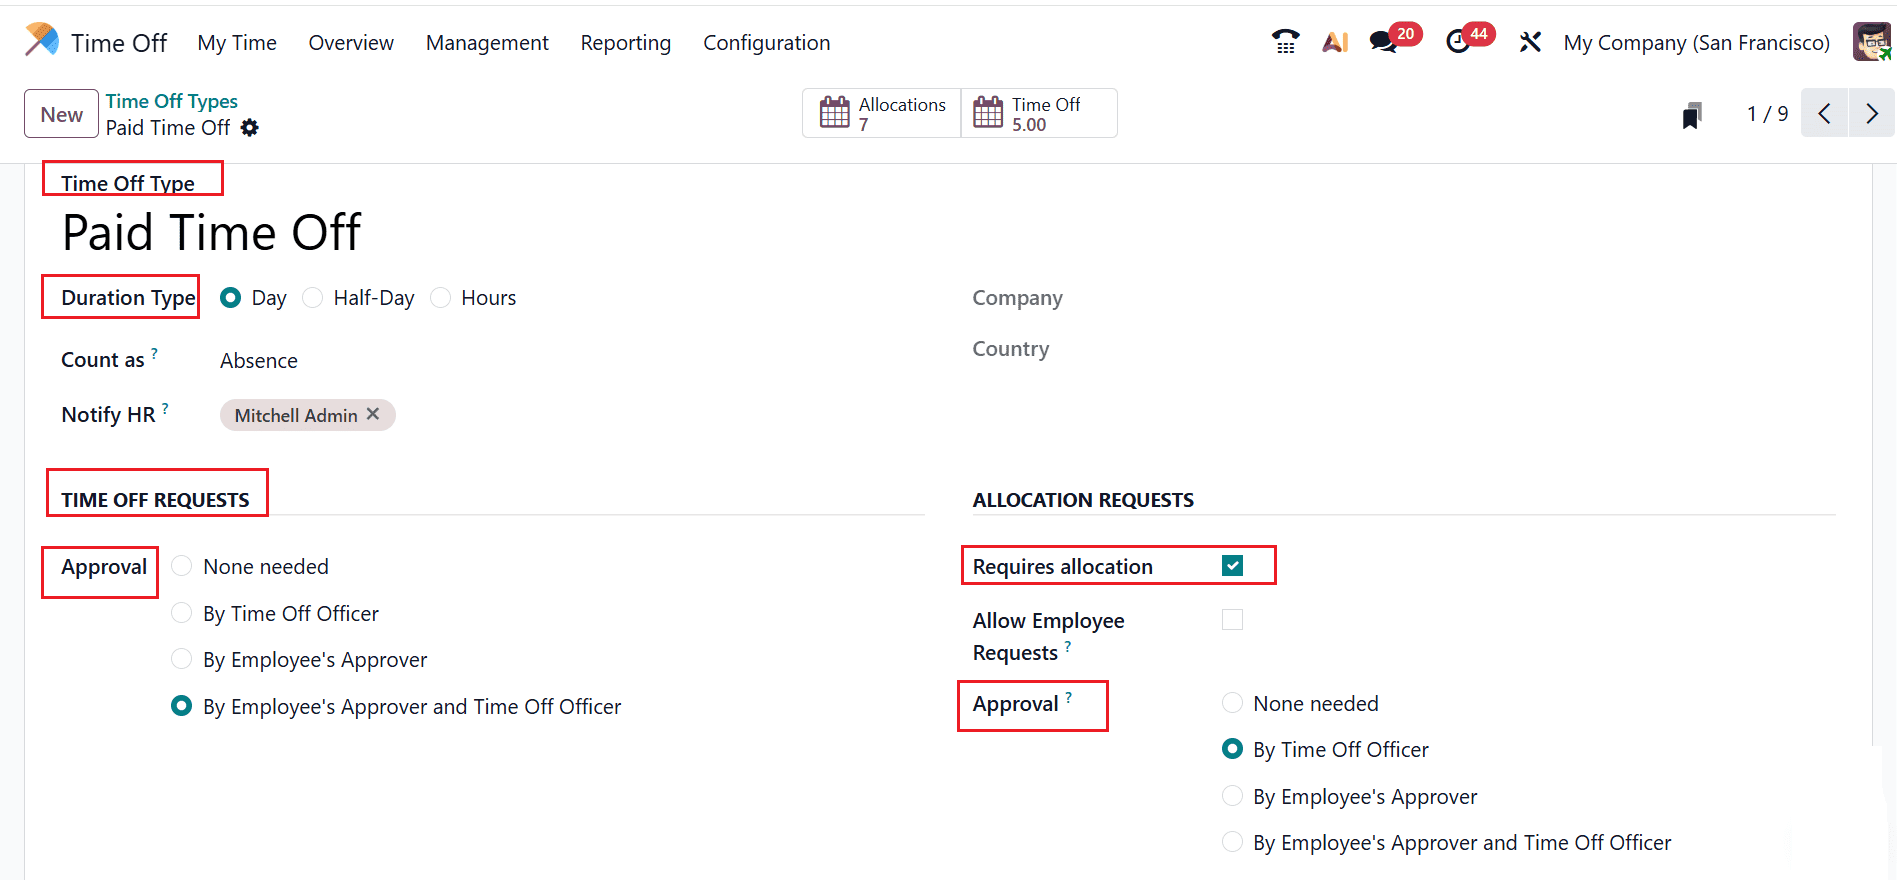
Firstly, add a title for the time off types under the Time Off Type field. Under the Duration Type, select the leave duration as Day, Half-Day, or Hours. Under the Count as field, select either Absence or Working Time to compute the accrual plan rate. Use the Notify HR field to designate a Time Off Officer who will approve the allocation or time off request.
Under the Time Off Request section, select the level of approval under the Approval field:
- None needed: The time off request is automatically approved as soon as the employee submits it. No manager or HR officer needs to review or confirm the request.
- By Time Off Officer: The request must be approved by a Time Off Officer (usually an HR representative). The leave is not validated until this responsible officer reviews and approves it.
- By Employee’s Approver: The employee’s direct manager (as set in the employee form) must approve the request. The time off is confirmed only after the manager validates it.
- By Employee’s Approver and Time Off Officer: The request must be approved by two separate approvers. First, the employee’s manager approves it, and then the Time Off Officer gives final validation.
Under the Allocation Requests section, activating Requires Allocation prevents employees from requesting leave without a predefined balance. The Allow Employee Requests field allows employees to submit their own time off requests for that specific leave type. If disabled, time off requests can only be created on behalf of employees by managers or HR officers. You can select an appropriate Company and Country.
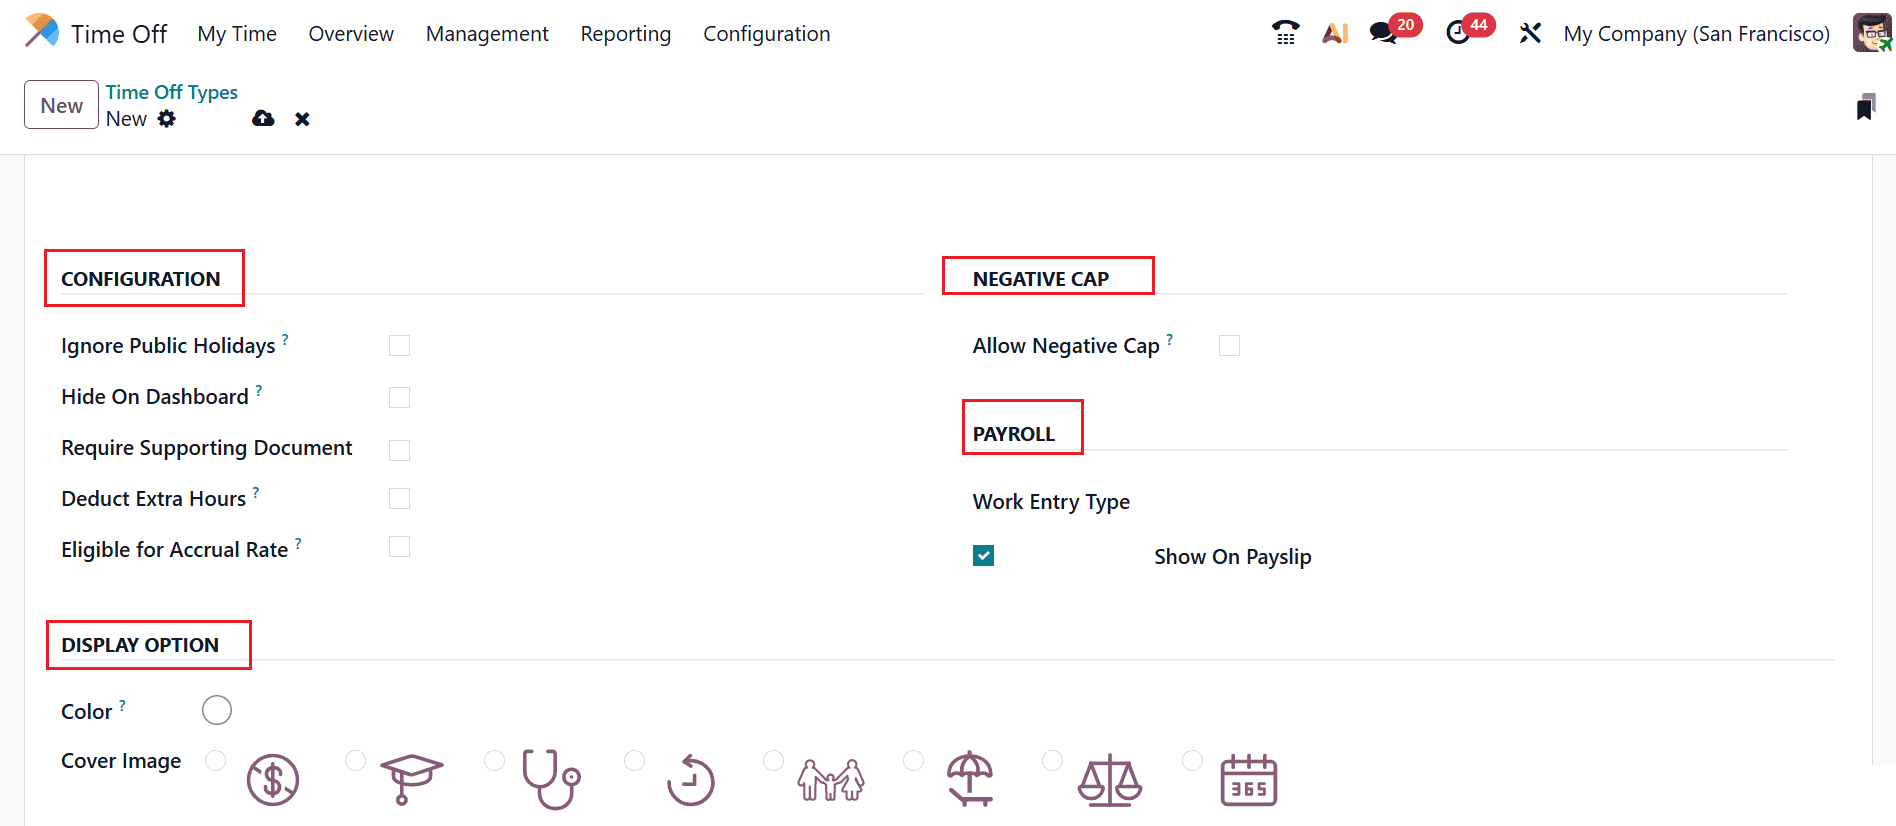
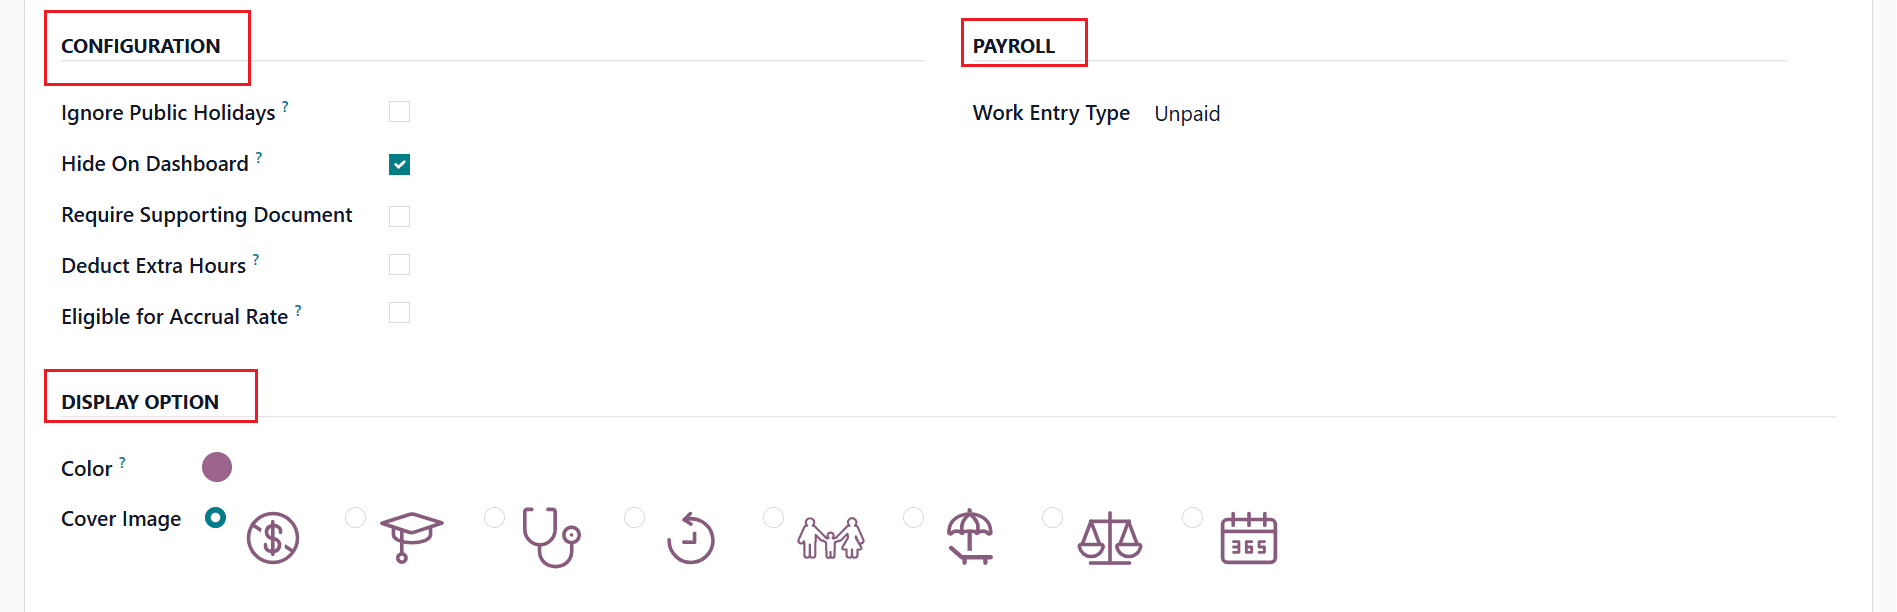
Under the Configuration section, you can enable the options such as;
- Ignore Public Holidays: When enabled, public holidays are not counted within the requested leave period. The system excludes official holidays from the total number of deducted days.
- Hide On Dashboard: When enabled, it hides the specific time off type from the employee’s Time Off dashboard. It remains available in the system but is not visibly displayed to employees.
- Require Supporting Document: When enabled, employees must upload a document (such as a medical certificate) when submitting the leave request.
- Deduct Extra Hours: When enabled, the system deducts leave from extra hours first before reducing the allocated leave balance.
- Sandwich Leaves: When enabled, non-working days that fall between two leave days are included in the leave calculation.
- Limited to Optional Holidays: When enabled, it restricts the leave type to a predefined list of optional holidays. Employees can only select from those allowed optional holiday dates.
- Eligible for Accrual Rate: When enabled, this leave type can accrue over time based on an accrual plan.
Under the Negative Cap section, enable the Allow Negative Cap field allows employees to submit leave requests even if their leave balance is insufficient. If disabled, employees cannot submit a request that exceeds their available allocated days.
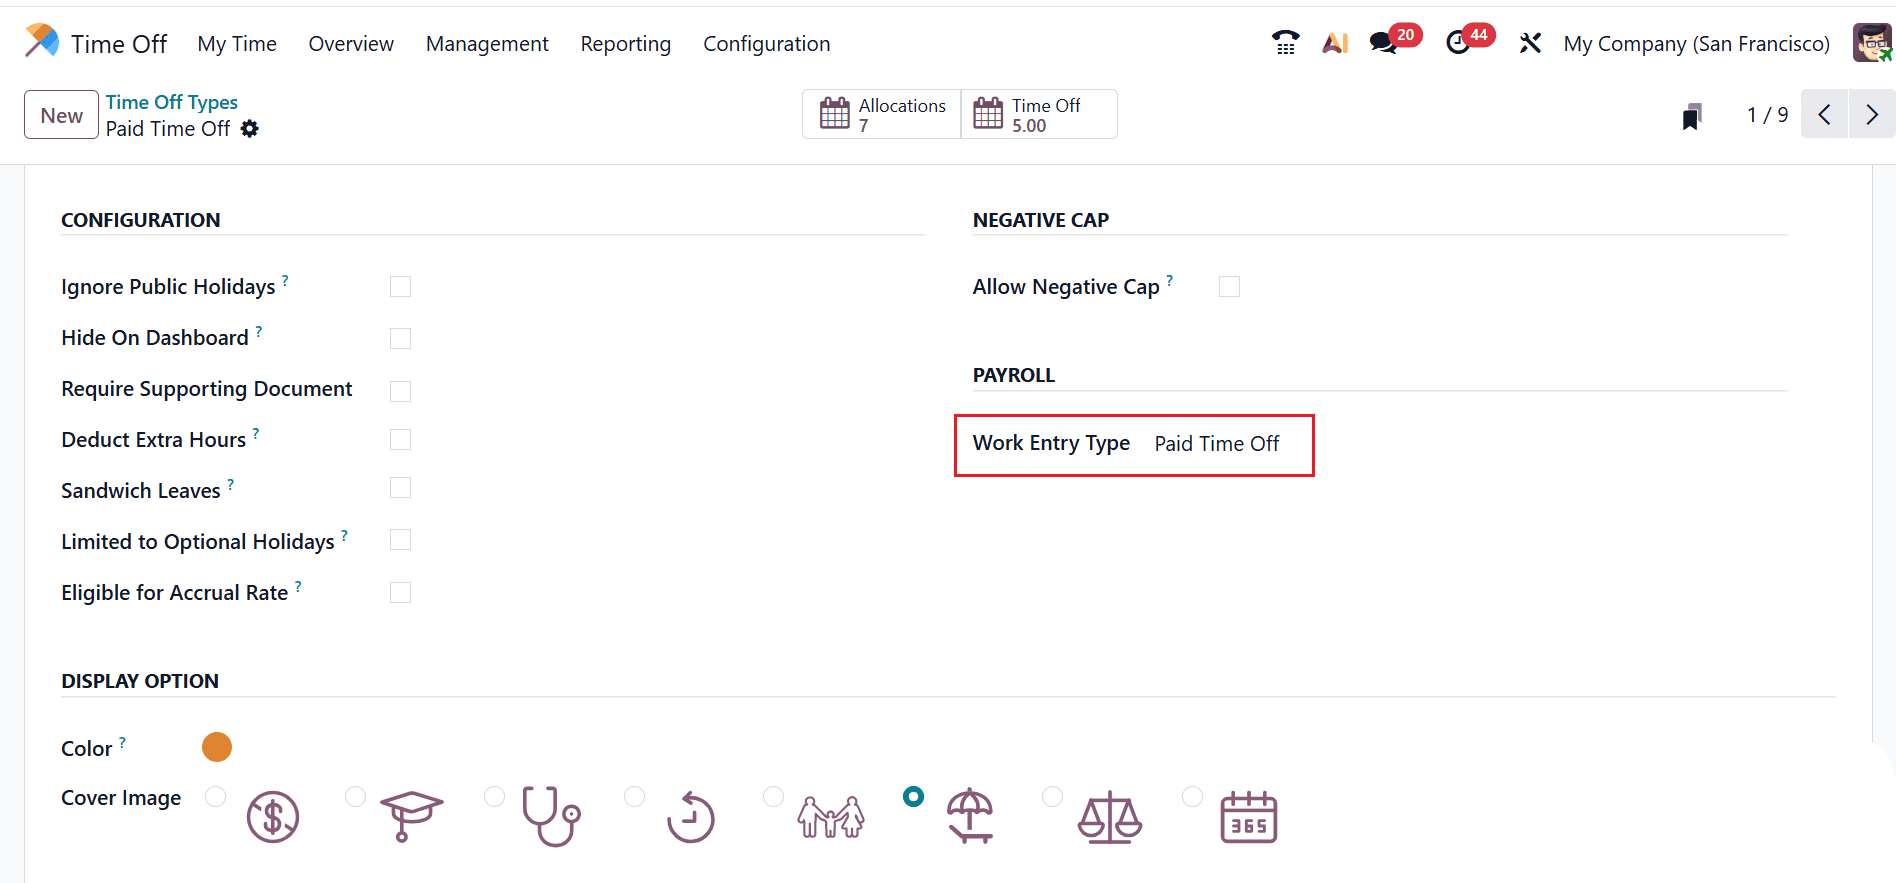
Under the Payroll section, Work Entry Type links a time off type to Payroll work entries. Under the Display Option field, you can set a color and cover image for the time off type.
Configuring a Paid Time Off Type
Complete the fields below to set up a paid time off type, including:
- Display Name: Paid Time off
- Duration Time: Day
- Time Off Requests (Approval): By Employee’s Approver and Time Off Officer
- Requires Allocation: Enabled
- Allocation Requests (Approval): By Time Off Officer
- Work Entry Type: Paid Time Off
Configure the time off type with a Paid Work Entry Type to ensure employees receive their regular salary while on approved leave, improving satisfaction and compliance with labor policies.
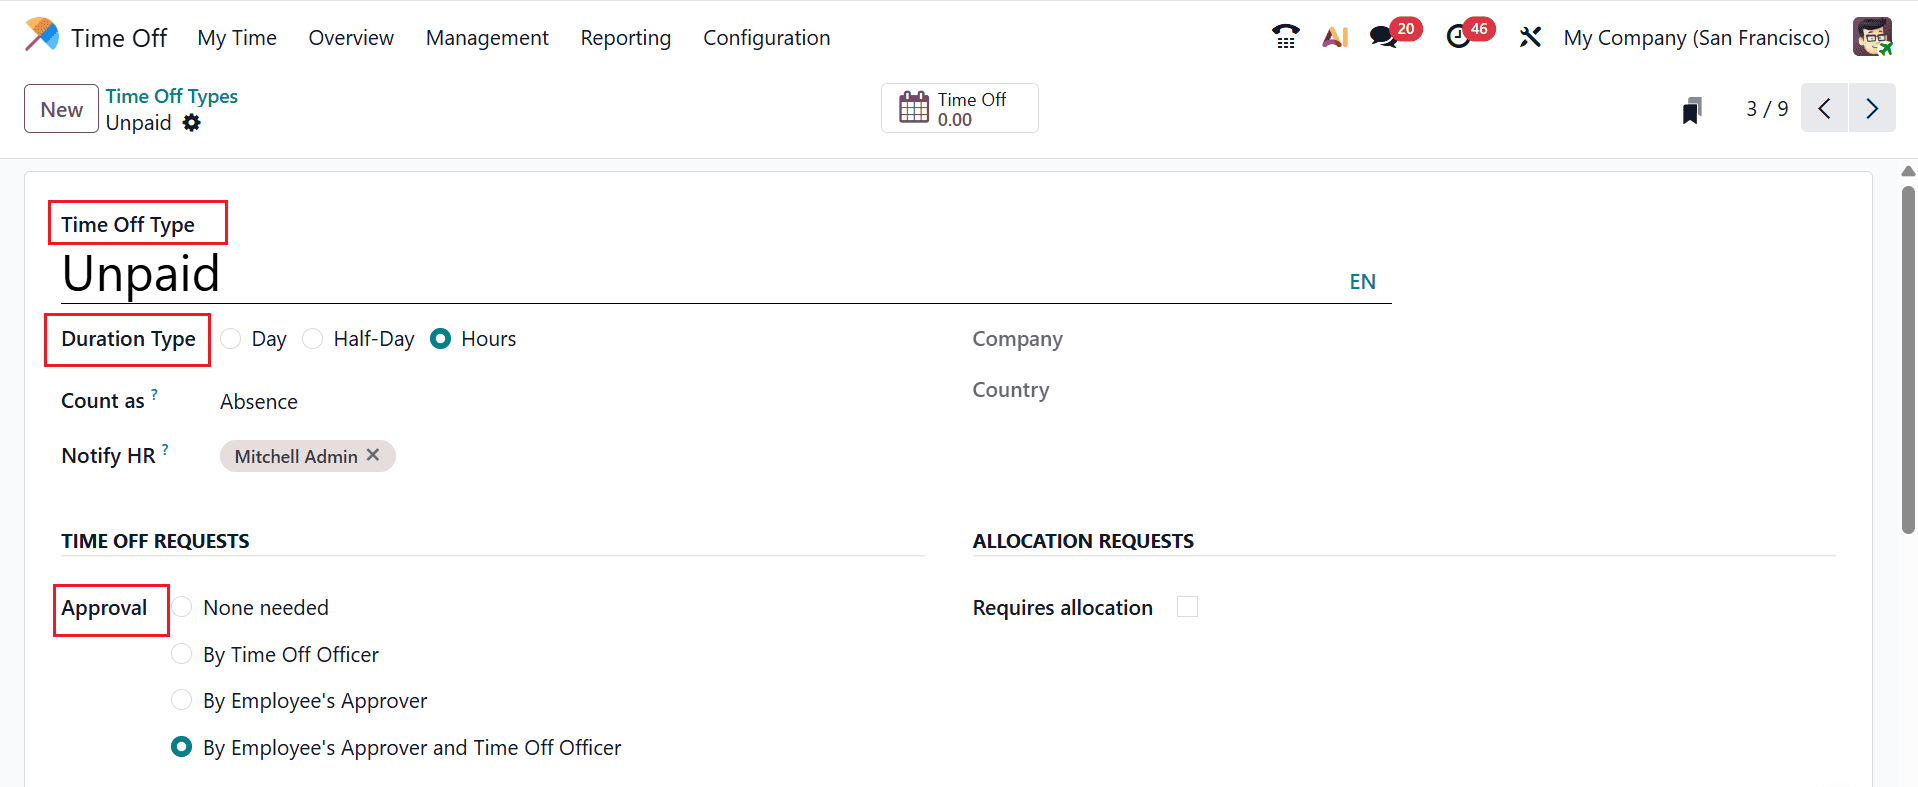
Configuring an Unpaid Time Off Type
Add the following details to set up an unpaid time off type, such as:
- Display Name: Unpaid
- Duration Time: Hours
- Time Off Requests (Approval): By Employee’s Approver and Time Off Officer
- Hide On Dashboard: Enabled
- Work Entry Type: Unpaid
Configure the time off type with an Unpaid Work Entry Type to allow employees to take additional leave when needed while enabling the company to accurately adjust payroll and control labor costs.
Configuring Time Off Types in Odoo 19 is a crucial step toward building a transparent and automated leave management system. By carefully defining approval workflows, allocation requirements, working time calculations, and optional settings like negative caps or supporting documents, businesses can ensure consistency and fairness in leave policies. Odoo’s flexibility allows HR managers to adapt configurations to different departments, contract types, or company branches within a multi-company environment. Once properly configured, the Time Off module reduces manual intervention, improves reporting accuracy, and enhances employee self-service capabilities. Taking the time to set up each Time Off Type correctly will help prevent balance discrepancies, approval delays, and policy misunderstandings. With the right configuration strategy, Odoo 19 becomes a powerful tool for simplifying leave administration and supporting overall HR efficiency across the organization.
To read more about How to Configure Time Off Types in Odoo 18, refer to our blog How to Configure Time Off Types in Odoo 18.