Keeping track of your finances is not only a good idea, but also necessary in the fast-paced world of business. One of the most critical tasks in accounting is reconciliation, which ensures that the payments you've made and received actually match up with your invoices and bills. Correct reconciliation aids in error prevention, fraud detection, and bookkeeping, regardless of your role as a finance manager or small business owner.
Odoo 18 makes this process easier than ever. With its intuitive interface and powerful reconciliation tools, you can match transactions with just a few clicks. In this blog, we’ll walk you through how to efficiently reconcile your invoices and bills in Odoo 18, step by step.
To create an Invoice, navigate to Accounting > Customers > Invoices.

From there, click on the New button to generate a new customer invoice.

Fill in the Invoice Details
On the invoice creation form:
- Select the Customer from the dropdown menu.
- The Customer’s address will auto-fill if already configured. Otherwise, you can manually enter it.
- Under the Invoice Lines section, click Add a line:
- Choose the Product or service.
- Enter the Quantity and Unit Price.
- Fill in all other necessary fields like Invoice Date, Due Date, and Payment Terms.
Once all the information is filled in, Confirm the invoice.

Pay the Invoice
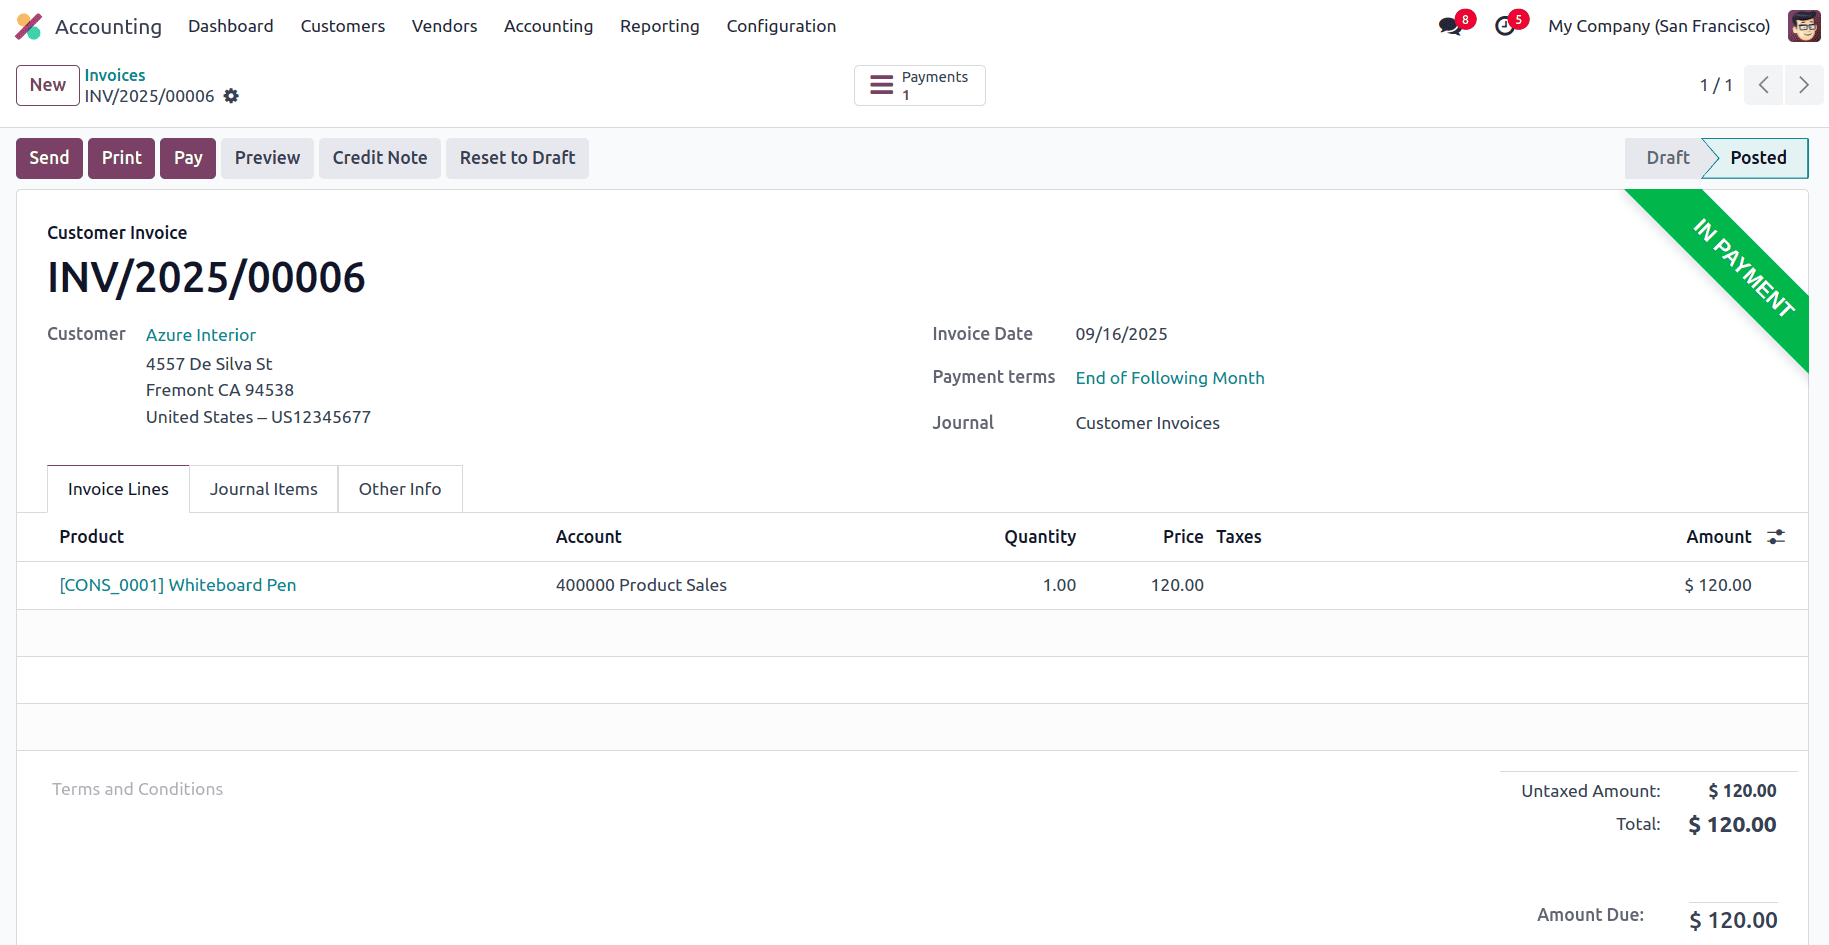
- After filling out all invoice details, click Confirm to validate the invoice. The invoice will move from draft to posted status.
- To register the payment, click on the Pay button.

Choose the Payment Journal (e.g., Bank, Cash). Enter the Amount, Payment Date, and Memo if needed. Click on the Create Payment to complete the payment.
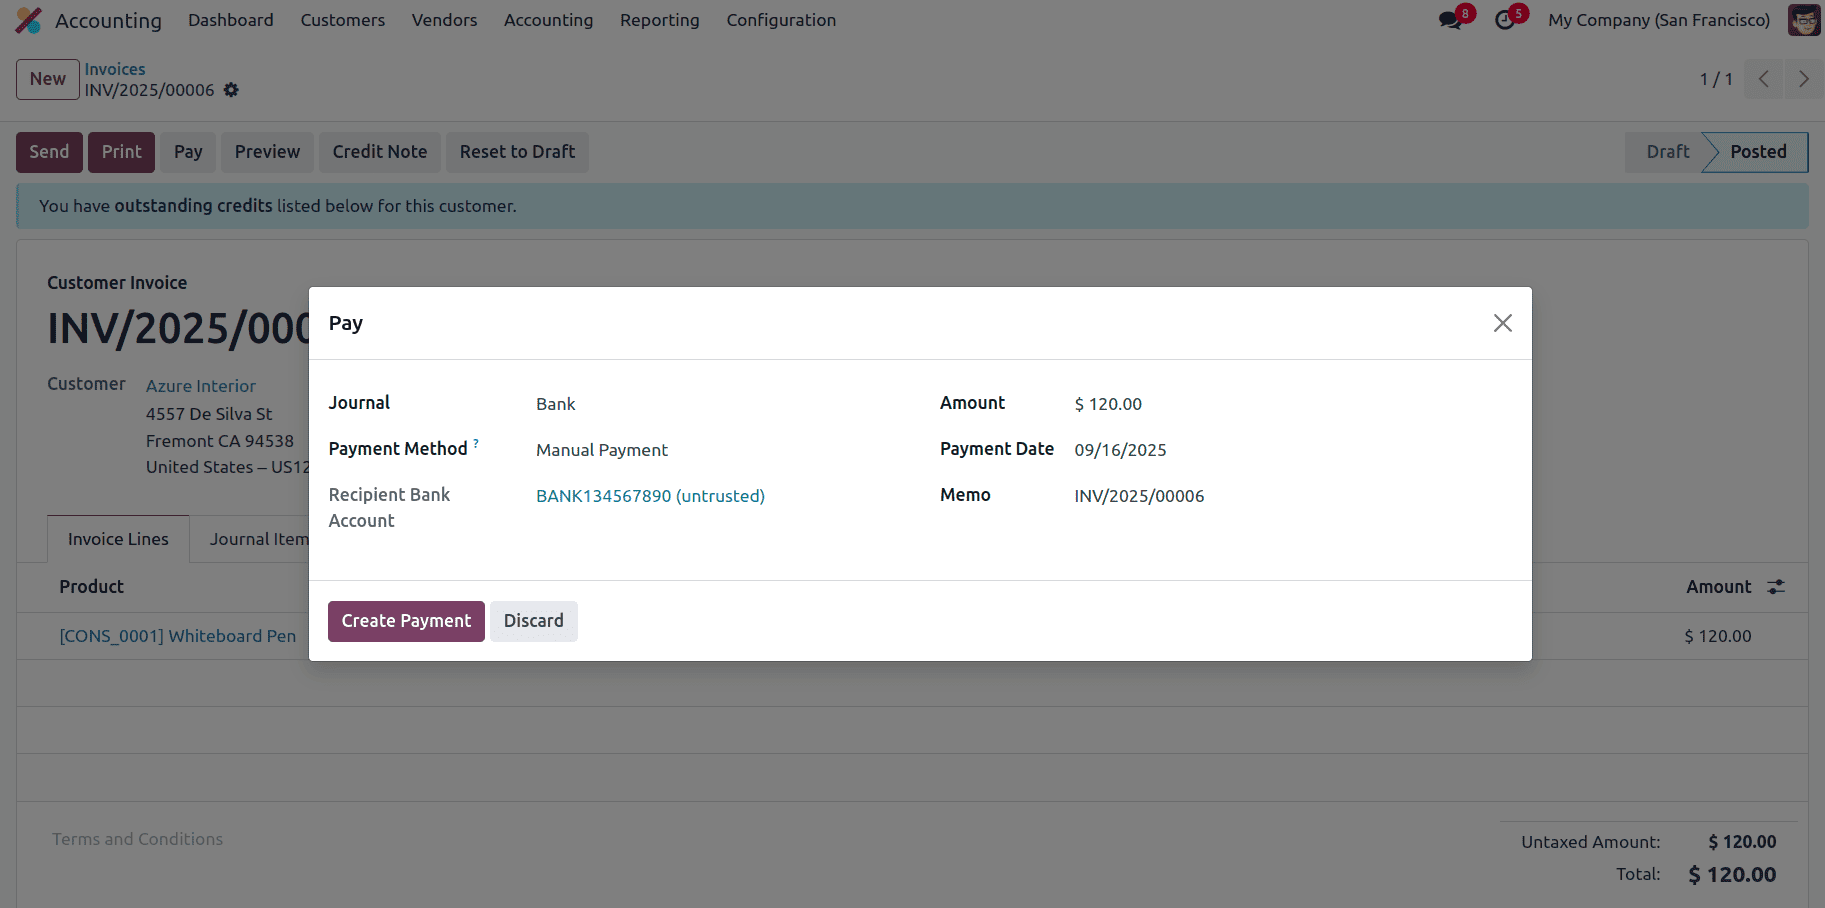
The invoice status will change to ‘In Payment’ after it is finished.
Go to the Bank Dashboard for Reconciliation
- After the invoice is paid, go back to the Accounting Dashboard.
- Choose the bank account where the payment was received in the Bank section.
- Click on Reconcile to view the bank statement lines and match them with the corresponding customer invoice payment.

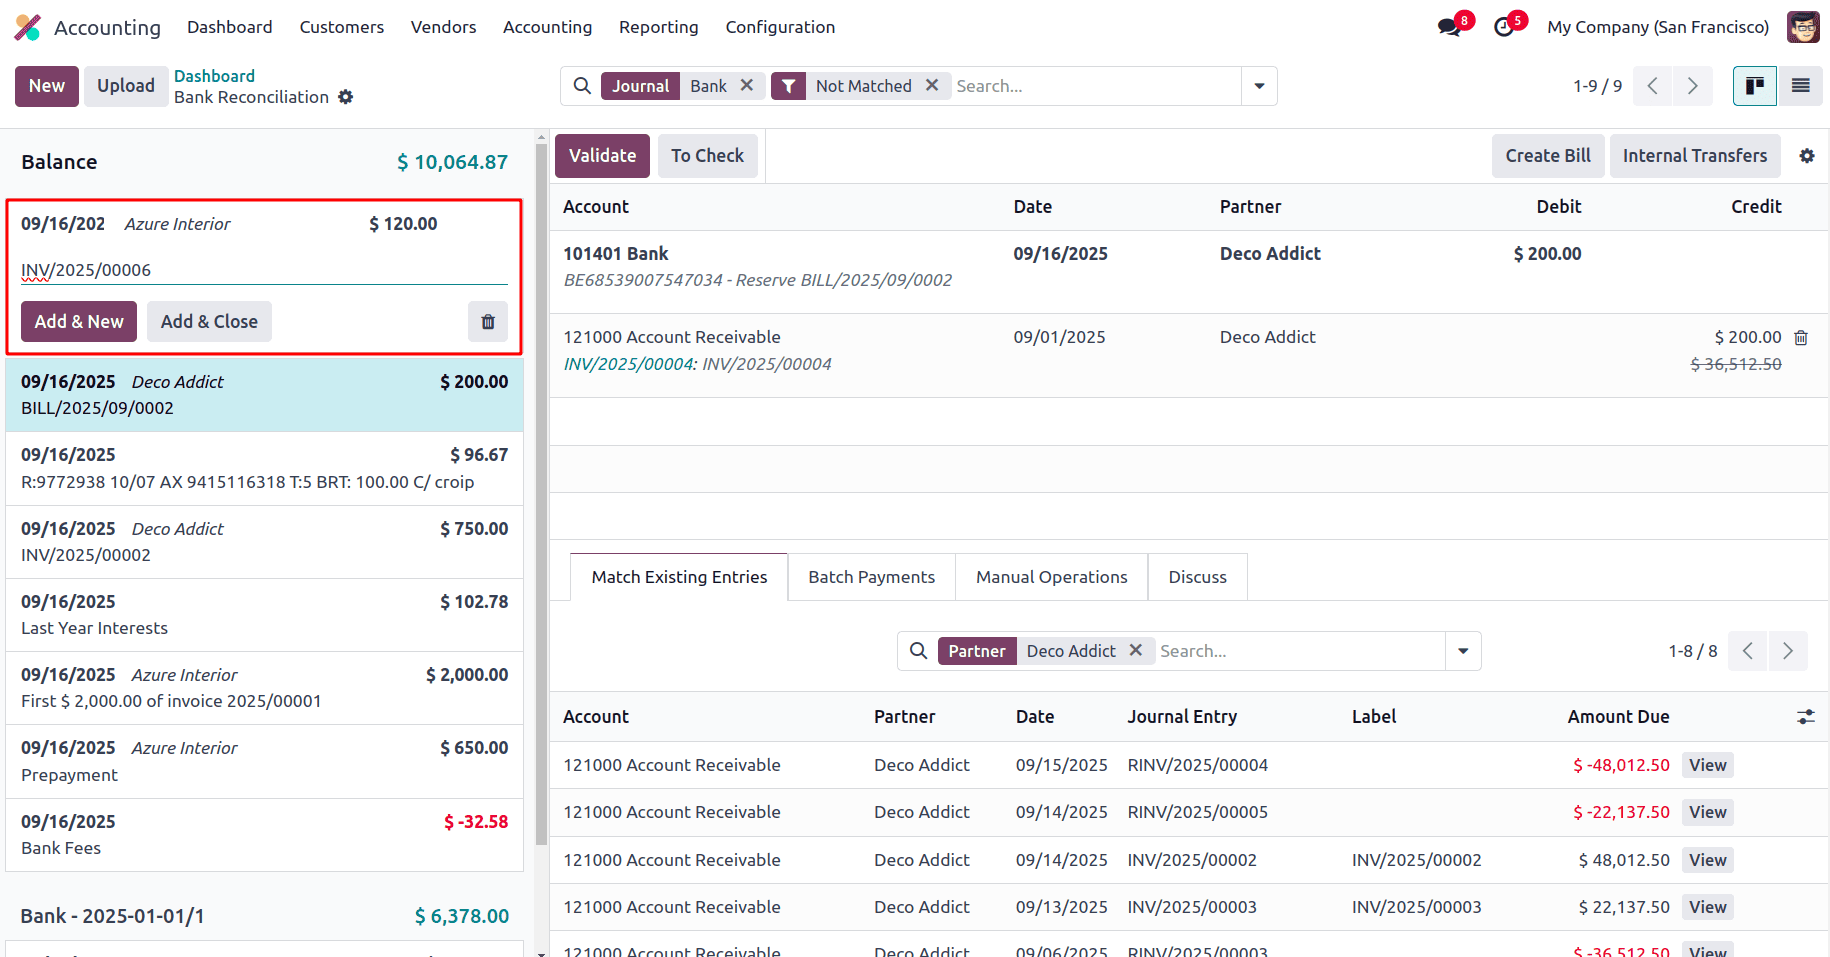
Create a Bank Statement Line Manually
- Click New to create a manual bank statement line in the Bank Journal view.
- Fill in the following details:
- Partner: Select the customer name.
- Label/Memo: Enter a description (e.g., Invoice Payment).
- Date: Enter the date of the payment.
- Amount: Enter the exact amount received.
- Click Add & Close to add the statement line.
This entry will now be available for reconciliation against the paid invoice.
Reconcile the Invoice
- Select the bank statement line you generated on the Bank Reconciliation screen.
- On the other side, Odoo will suggest matching entries.
- Select the corresponding invoice line (the one you confirmed and paid earlier).
- Ensure the amounts match.
- Click Validate to complete the reconciliation.
Once validated, the invoice and the payment will be fully reconciled in your books.

Verify the Reconciliation
- Go back to the Customers > Invoices, and select the Invoice you created earlier.
- You'll notice that the invoice status has now updated from In Payment to Paid.
- This attests to the successful completion of the reconciliation and the complete accounting of the payment in Odoo.

Reconciling a Vendor Bill in Odoo 18 Accounting
Now that we’ve completed customer invoice reconciliation, let’s move on to reconciling a vendor bill. This process helps accurately match your payables with the corresponding payments.
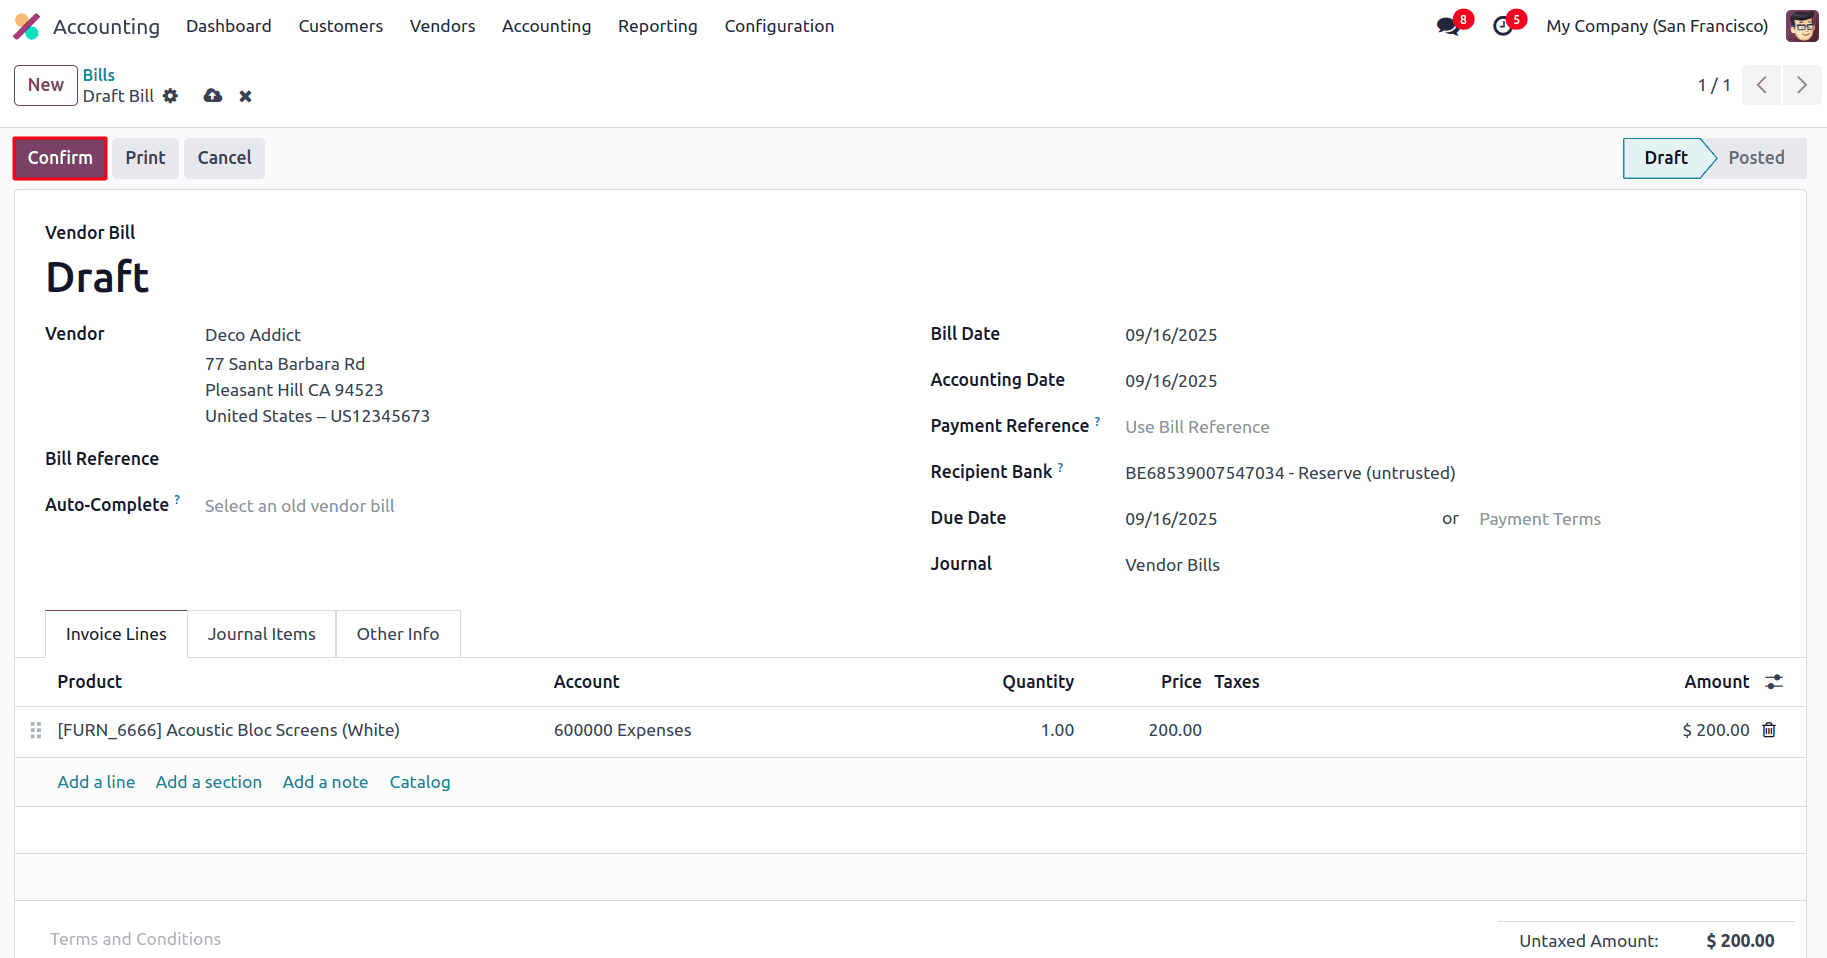
Create a Vendor Bill
- Navigate to the Vendors tab and click on Bills.
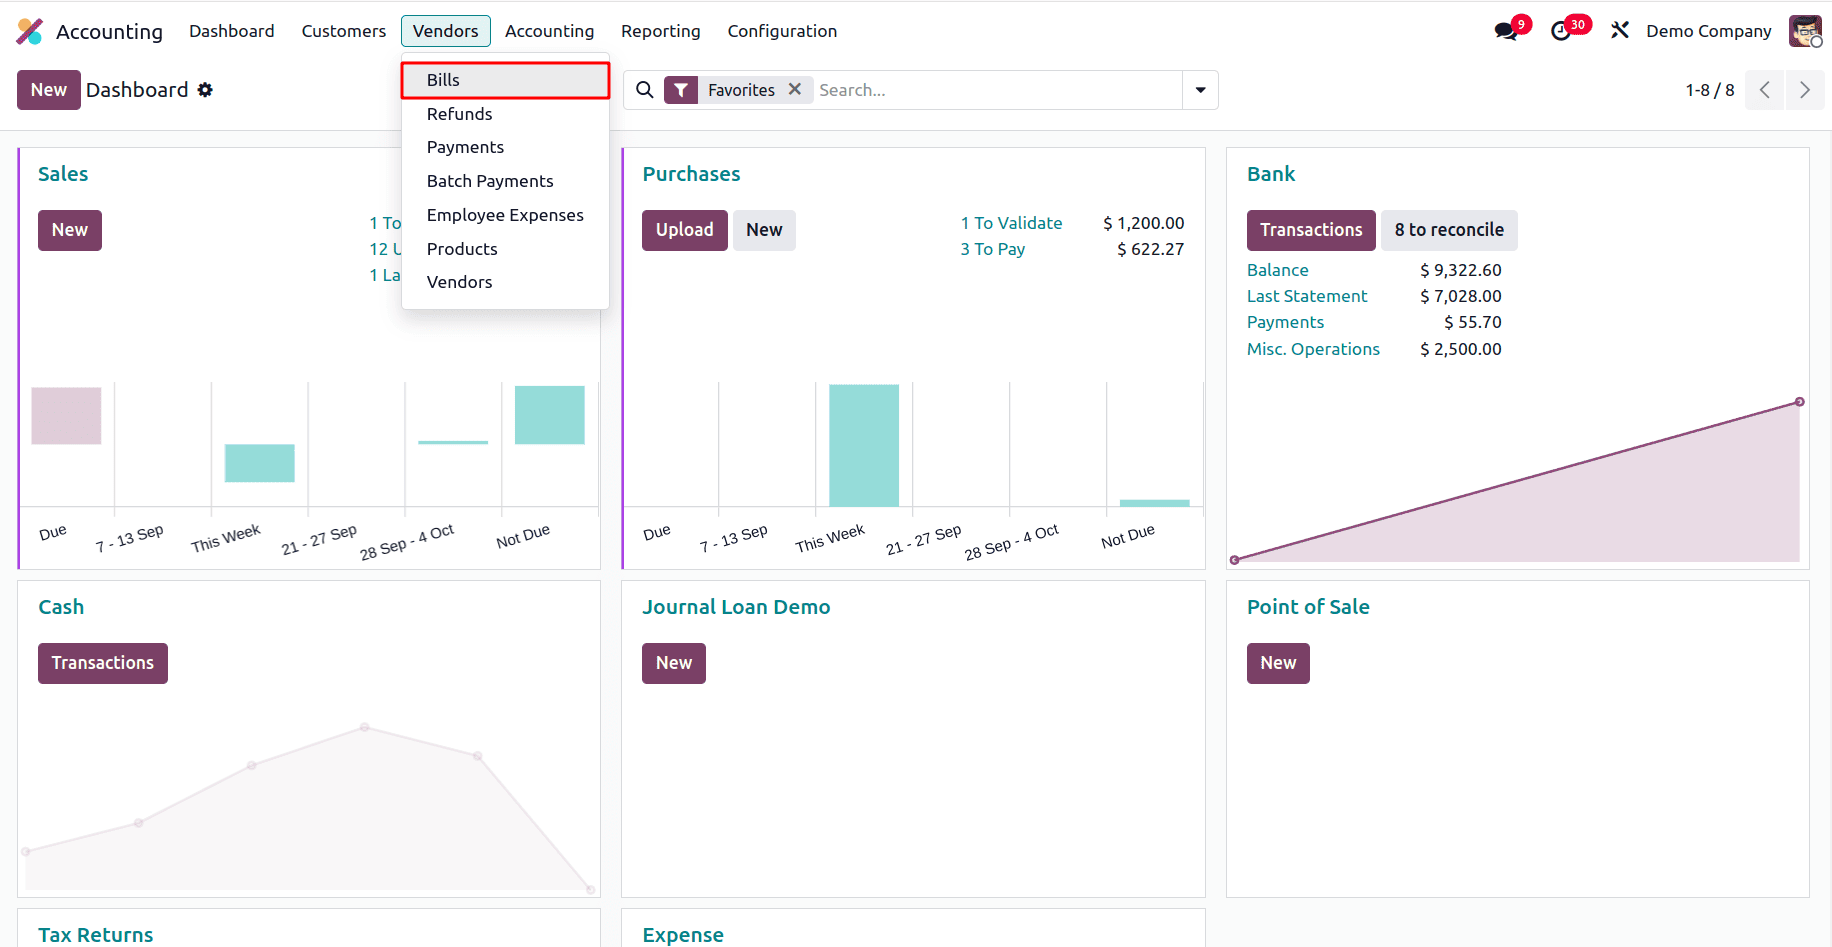
- Click the New button to open a new bill form.

- Enter the following details:
- Vendor: Choose the appropriate supplier.
- Bill Date, Due Date, and Reference (if available).
- In the Bill Lines section, enter the Product/Service, Quantity, Unit Price, and Taxes.
- Once done, click Save, then Confirm the bill.
Register Payment
- Once the bill is confirmed, click on the Pay button.
- Choose the Payment Journal (e.g., Bank).
- Enter the Amount, Payment Date, and optional Memo.
- Click on the Create Payment button to complete the payment.
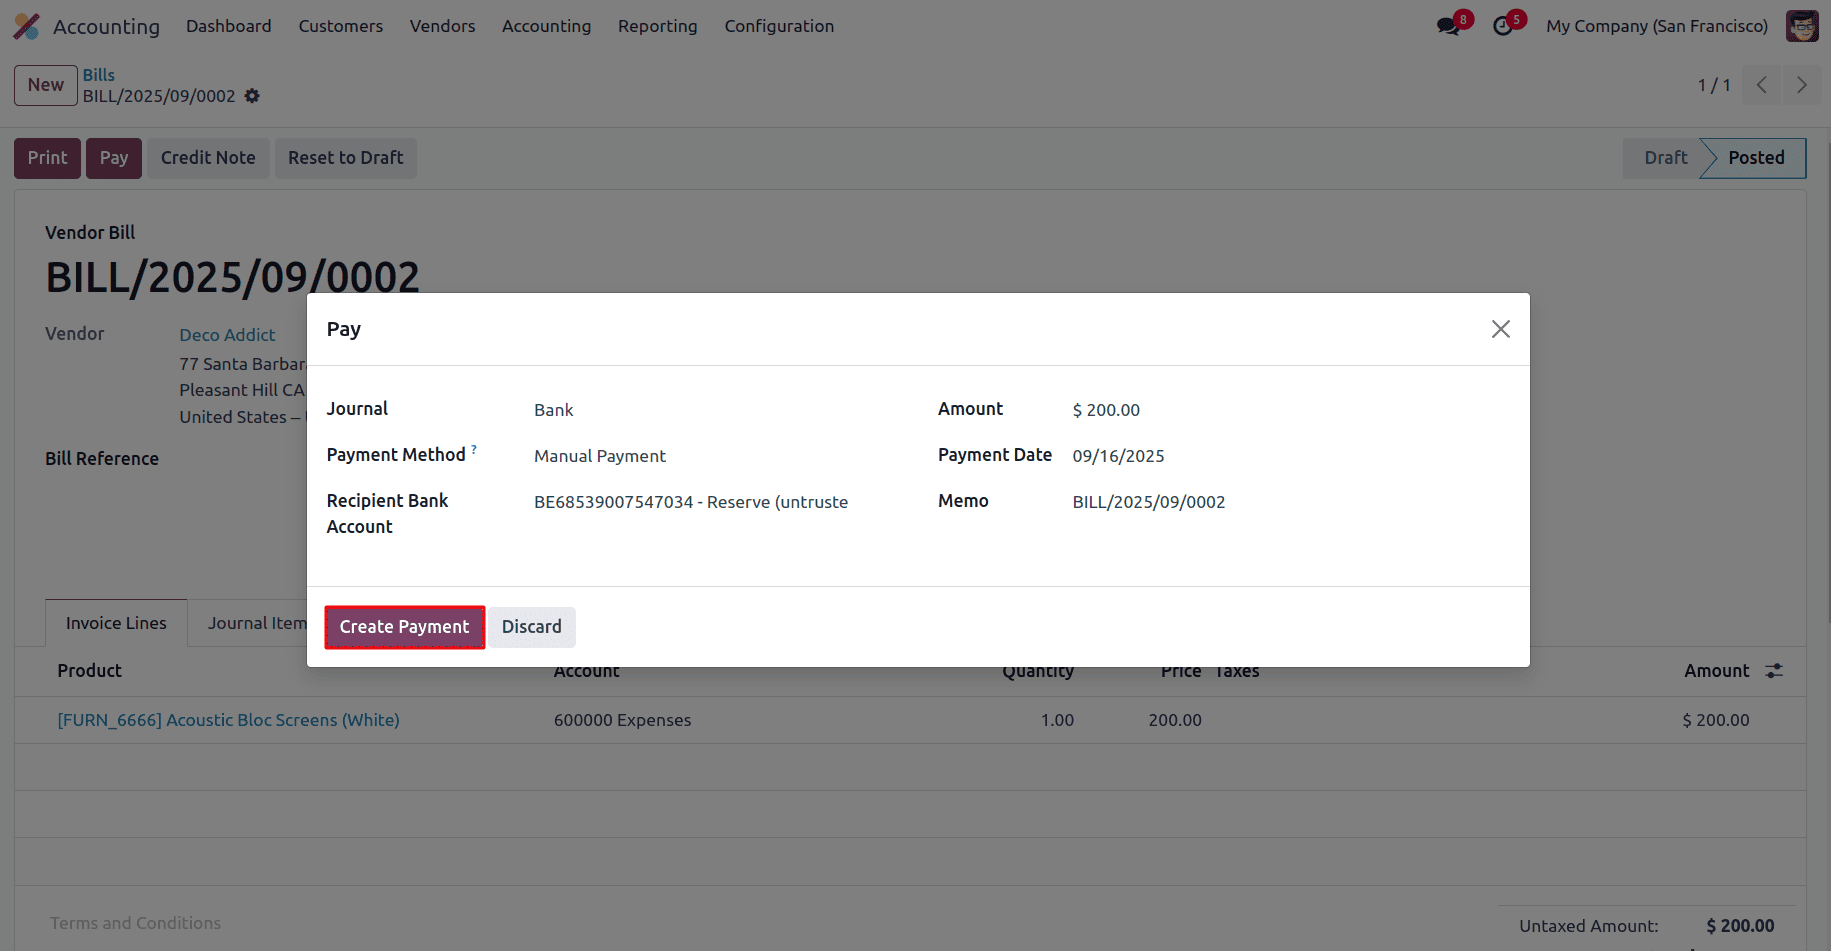
- The bill status will update to In Payment.

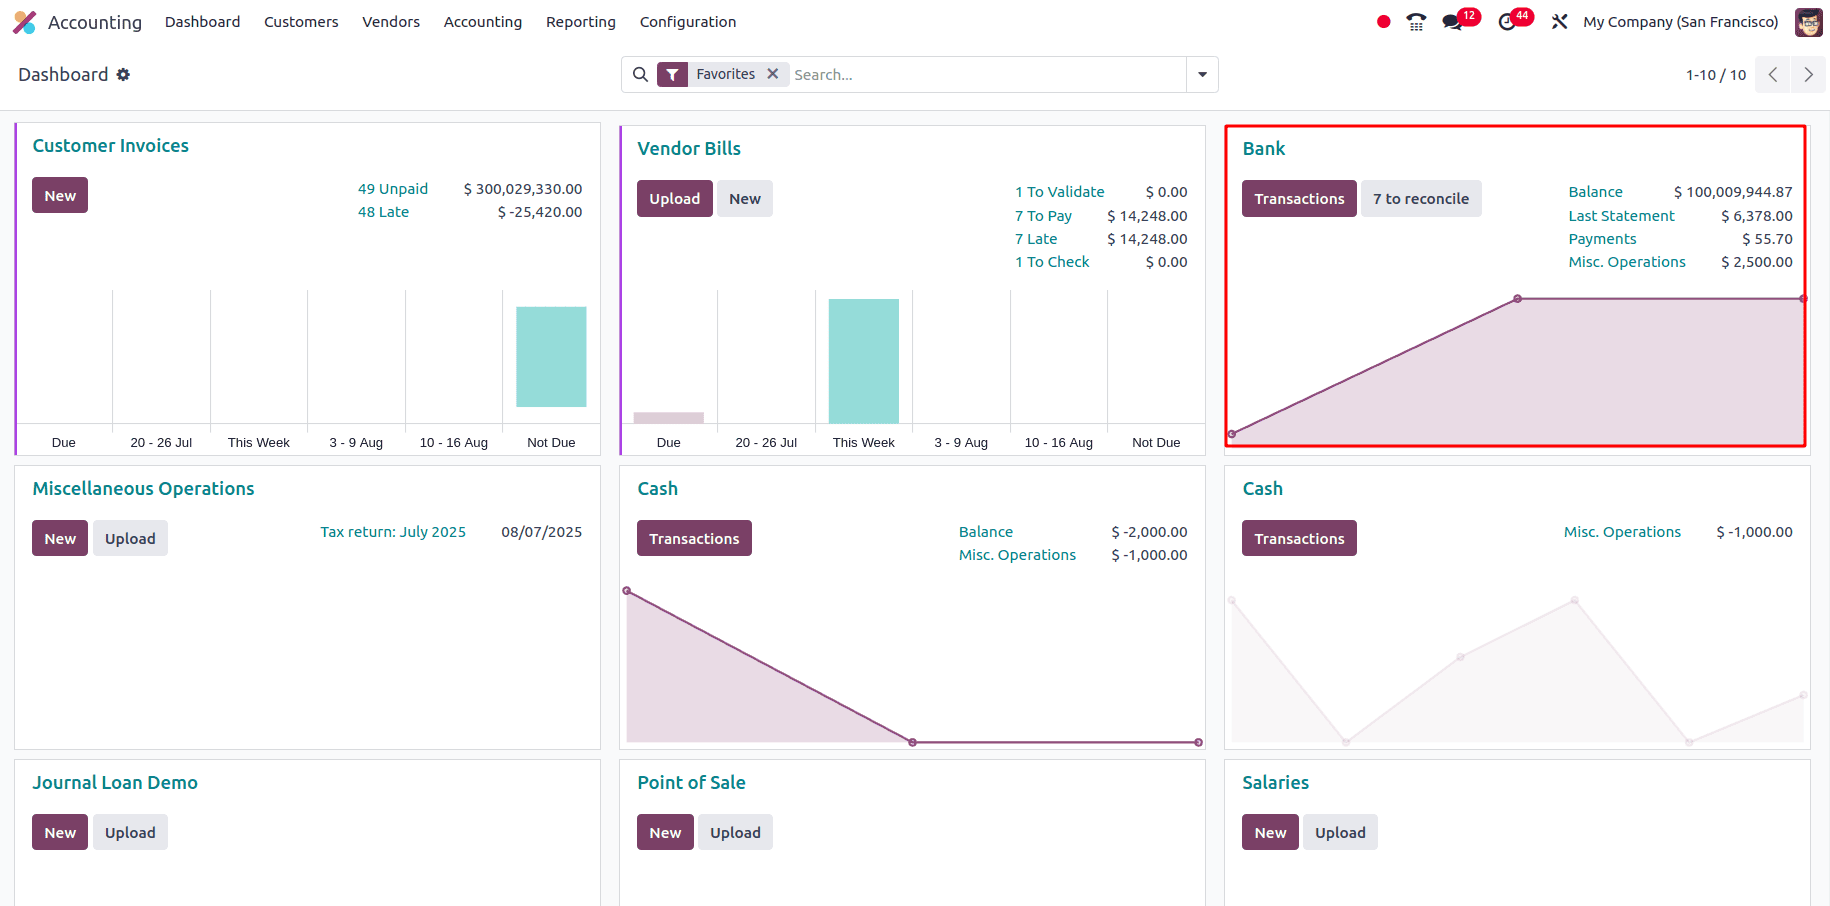
Go to the Bank Dashboard for Reconciliation
- After the bill is paid, go back to the Accounting Dashboard.
- In the Bank section, select the bank account where the payment was debited
- Click Reconcile to view the bank statement lines and match them with the corresponding vendor bill payment.
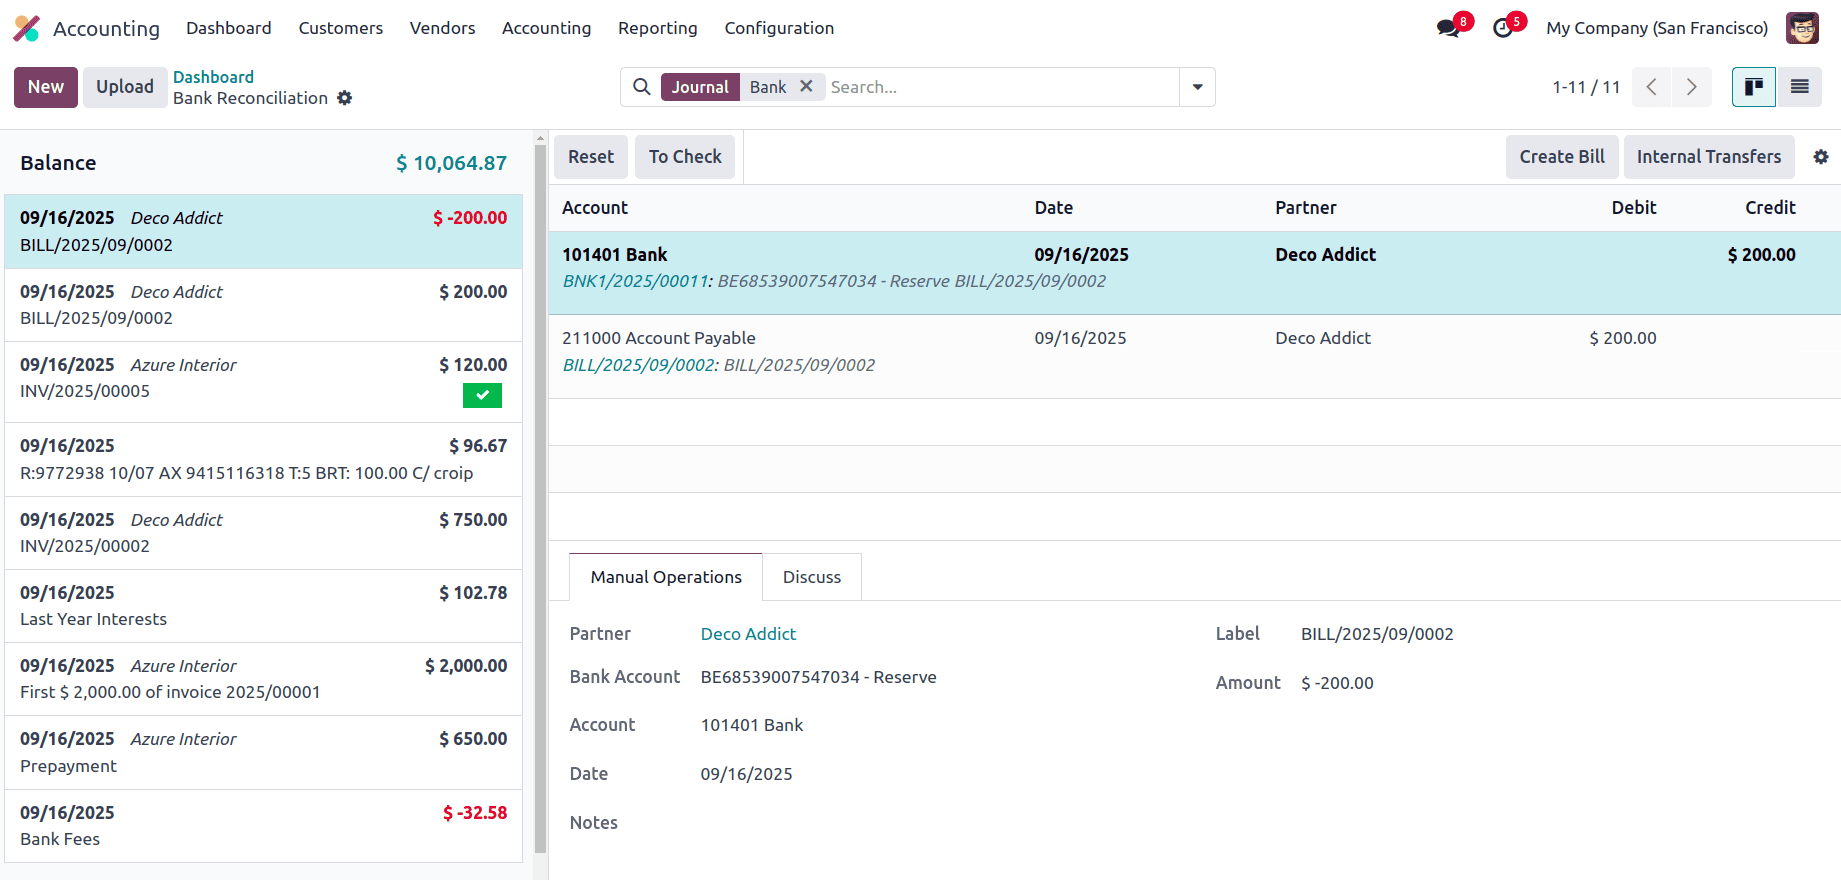
Manually Create the Vendor Payment Statement Line
- In the Bank Reconciliation screen, if the vendor payment is not already imported, click New to create a bank statement line manually.
- Fill in the details as follows:
- Partner: Select the Vendor Name.
- Label/Memo: Enter a description (e.g., Vendor Bill Payment).
- Date: Enter the payment date.
- Amount: Enter the payment amount as a negative value (e.g., -200), since it represents a payment made and should be deducted from the bank.
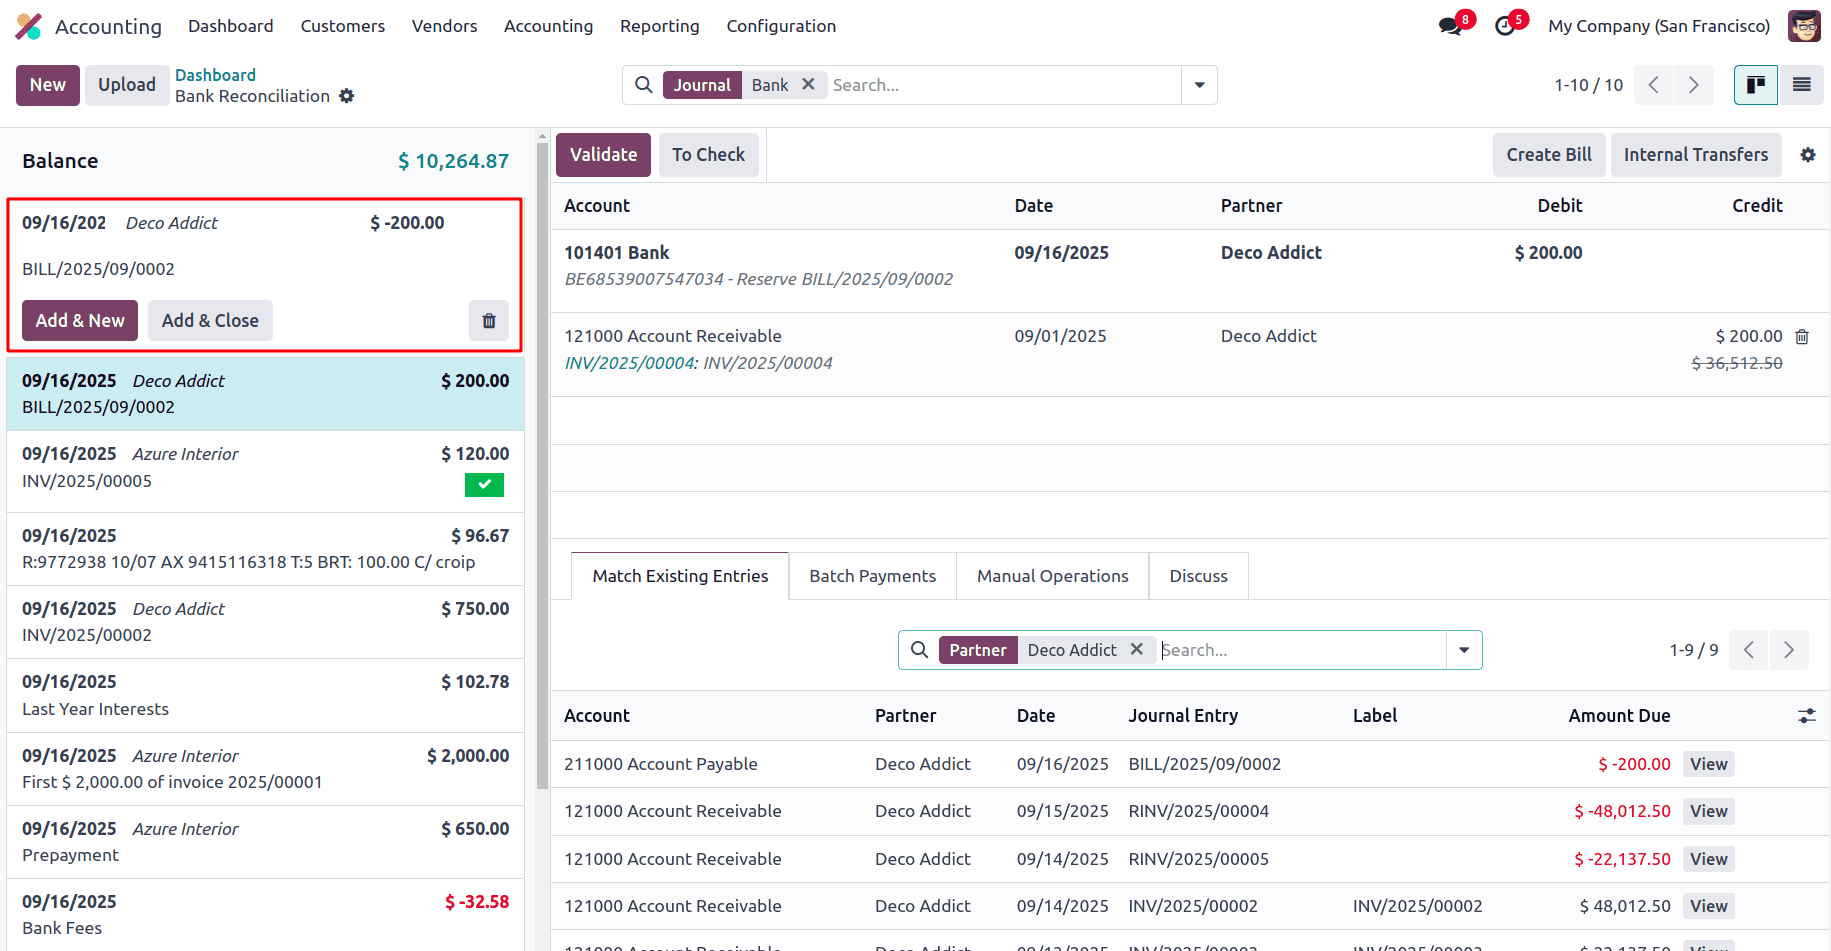
- Click Add & Close to add the statement line and match it with the bill for reconciliation.
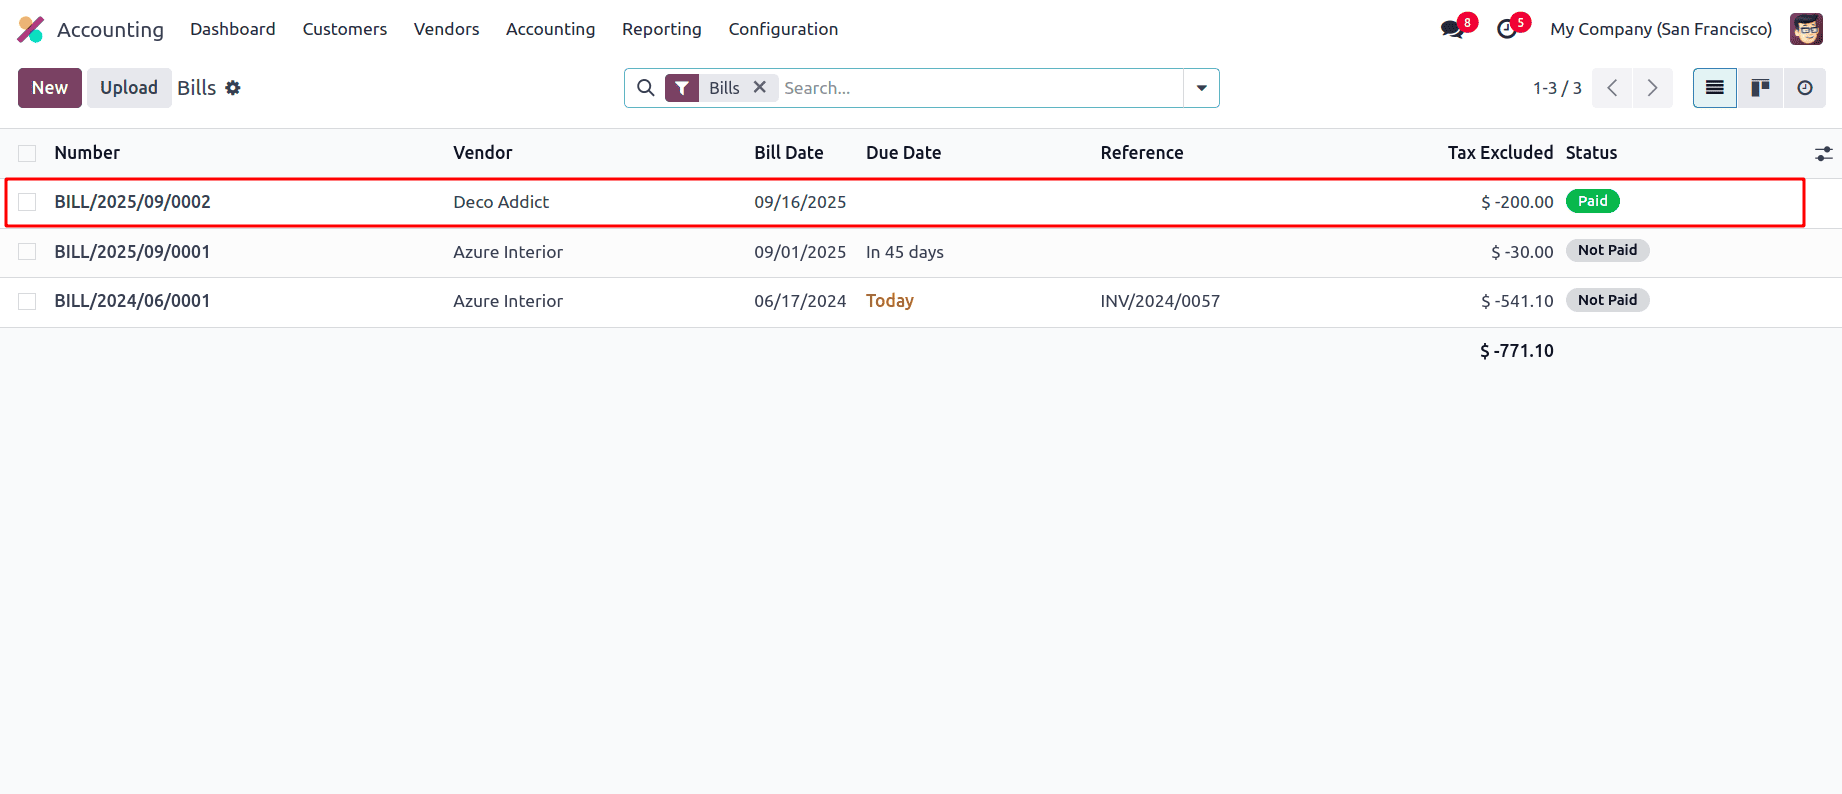
Verify the Vendor Bill Status
- After reconciliation is completed, go back to the Vendor Bill.
- You will now see that the bill status has changed from In Payment to Paid.
- This indicates that the payment has been successfully matched with the bank transaction.
Reconciling invoices and bills in Odoo 18 Accounting becomes much more efficient with features like manual reconciliation, payment matching, and especially Reconciliation Models. These models help automate and standardize the process, saving valuable time and reducing manual errors.
Whether it's for bank fees, interest charges, commission income, salaries, or loan repayments, reconciliation models ensure that recurring transactions are handled smoothly and consistently.
By using these tools effectively, businesses can maintain accurate financial records and streamline their accounting operations with ease in Odoo 18.
To read more about Overview of Odoo 18 Accounting Reconciliation Models, refer to our blog Overview of Odoo 18 Accounting Reconciliation Models.