Odoo field service management is a complete platform to perform all the detailed things about field services and tasks. In order to effectively manage and track a variety of onsite fieldwork and services, including diverse field works, repair services, installation works, building works, product deliveries, etc., Odoo Field Service is a collection of service management solutions.
This field service management offers a number of functions, including
1. Create and arrange for services and tasks.
2. Task assignment
3. Track the amount of time spent on each task.
4. Making original worksheets
5. Efficient stock management and automatic stock update
6. Providing Quotations
7. Making a service bill
8. Electronic signing
Now we can talk about the process of scheduling a task through the Odoo field service module and seeing it through to completion. Let us also put the various features listed above into action.
Creating a Task Schedule
The process of organizing, managing, and optimizing work and workloads in a manufacturing or production process is referred to as "scheduling." Scheduling is used to allocate resources for equipment and buildings, plan for human resources, organize work processes, and purchase materials, etc.
Task Scheduling in Odoo Field Services
In the Odoo field service module, "task scheduling" refers to the process of creating, assigning, managing, and correcting a specific task or service provided by customers, which includes various provider services, installations, repairs, etc. This procedure can only be carried out after a new task has been created. The newly created task will appear in the "My Tasks" section.
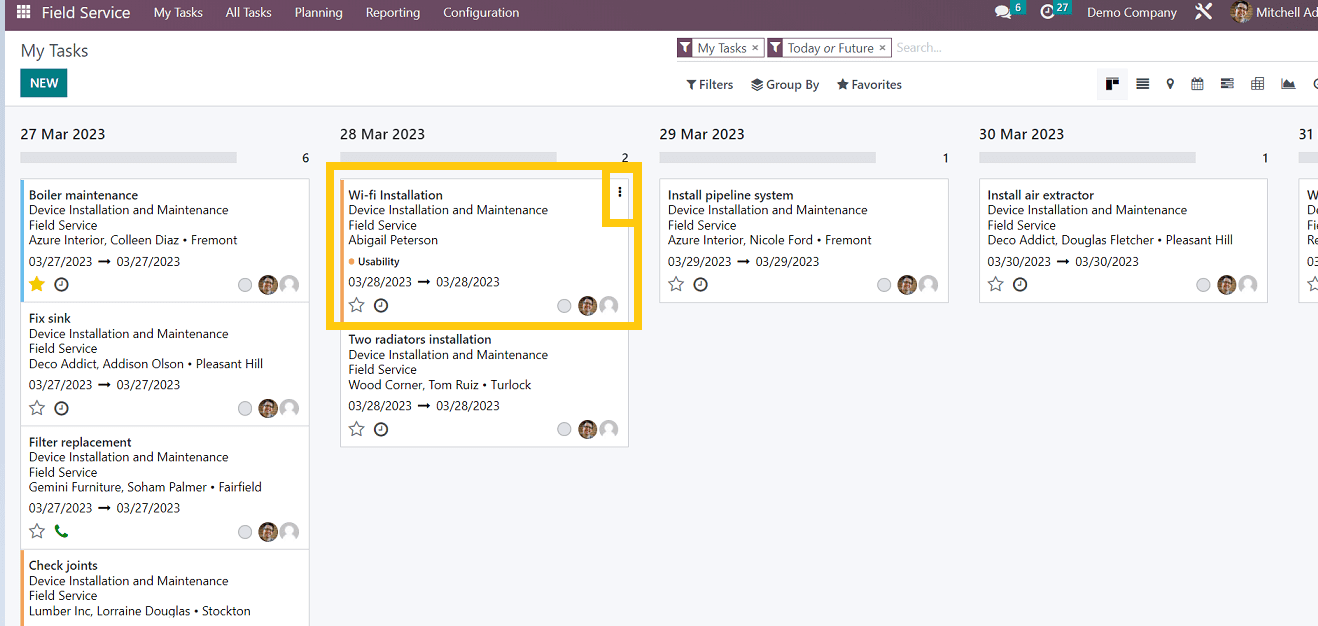
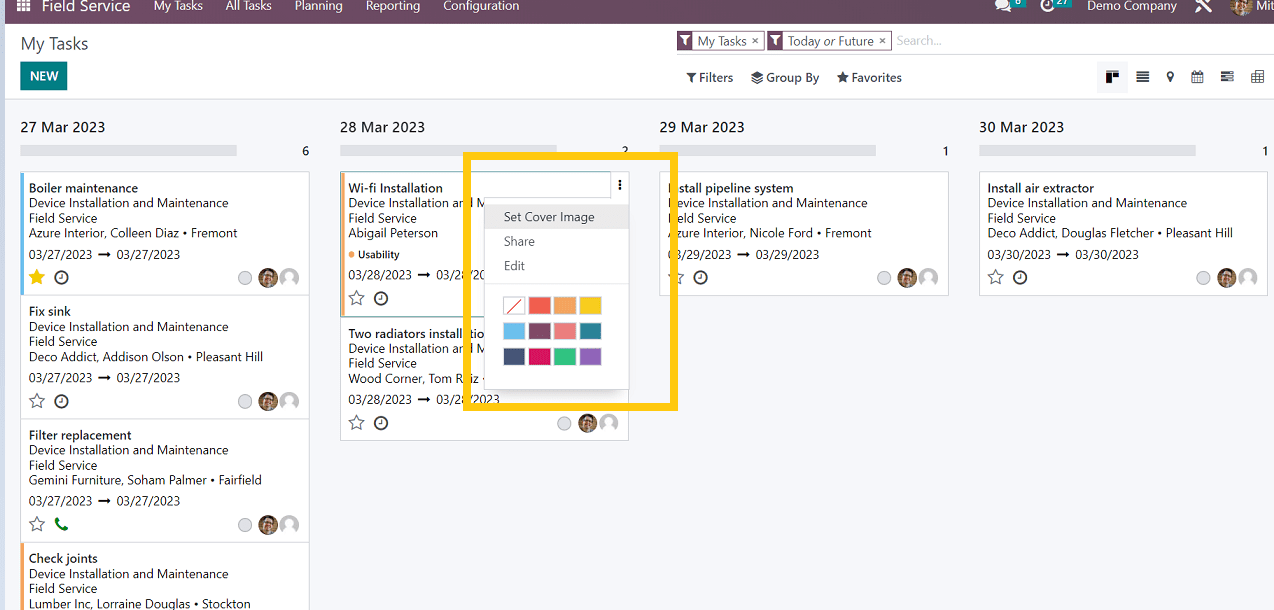
Here, from the drop-down menu given in the right corner of the task description, we can set the cover image and mark the task as important for easy identification according to the importance and emergency of the service or task, as shown in the screenshot below.
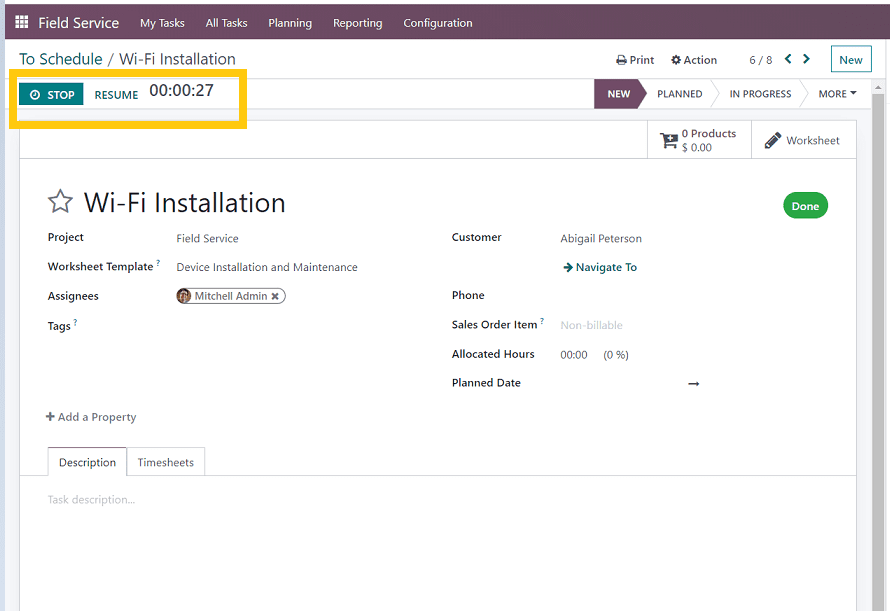
Then, click on the task view to open the task form view. Now that we've created and assigned a task, we can set a timer to track how long it takes to complete it, from planning to execution, so that users can easily manage the overall efficiency of their company's performance as well as customer satisfaction and reviews.
‘My Tasks’ Menu

From this menu, we can manage our tasks and set up the map view of the service location, etc.
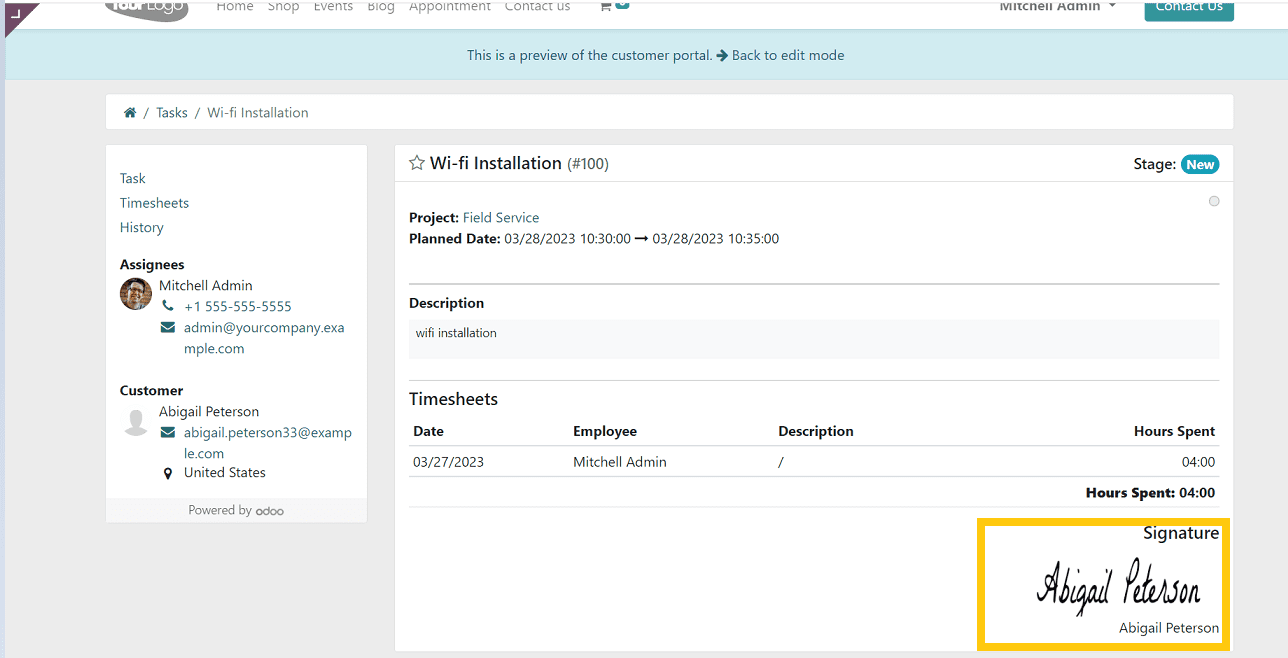
On my tasks page, we can update the task, sign the report, send the task report to the customer, and mark it as done, as shown in the below screenshot.
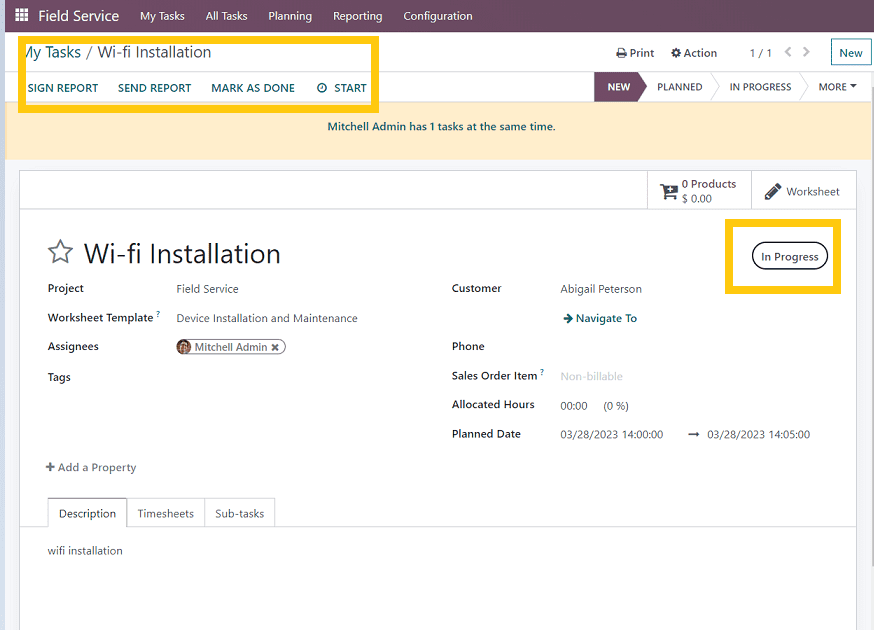
The task's status is shown as "in progress" in this instance. Users can send the work report to the specific customer, as shown in the screenshot, and the authorized user can sign the report and mark it as finished. By selecting the "Start" option next to the timer image, we can also configure the timer to track the duration of the work on a specific task. As a result, the task's invoice can be generated using the timesheet that was created.
SIGN REPORT
The Assigned employee can collect signs from the customer in the work report, so it will open an online webpage where the customer can put their signs digitally.
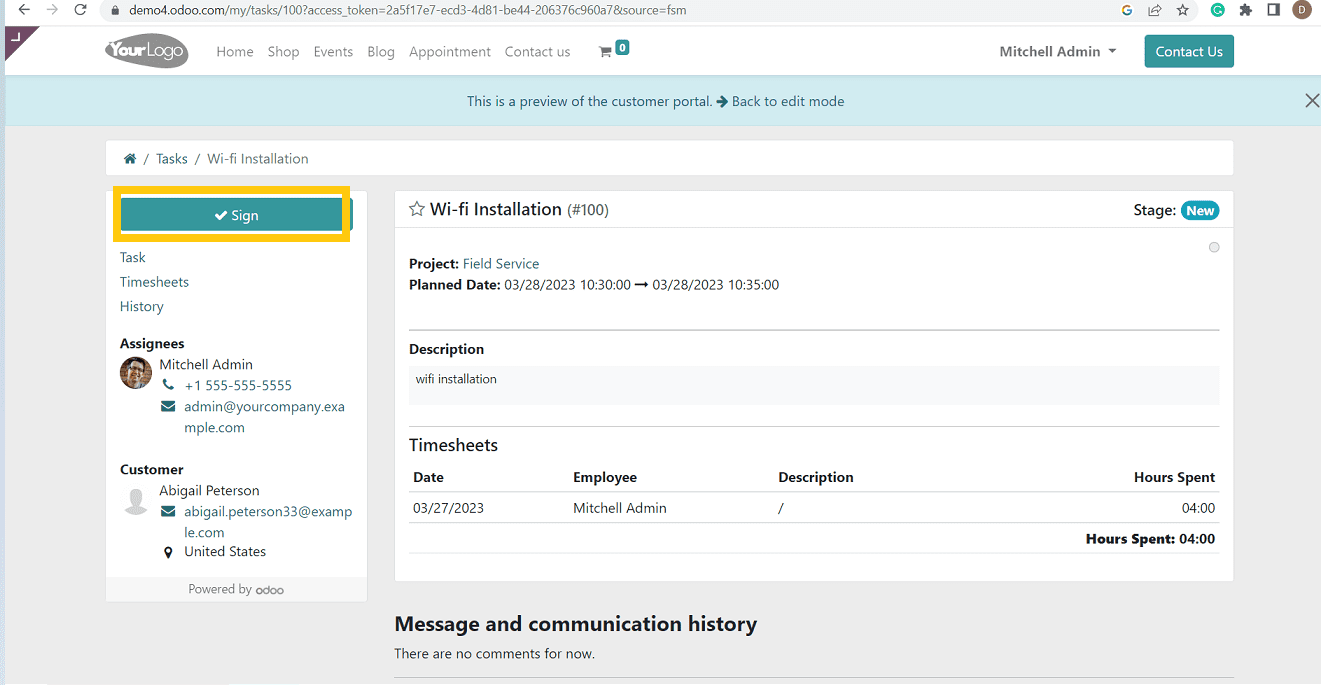
By clicking on the "Sign" button from the left side, it will open an interactive page where the customer can manually sign and click on the "Sign" button.
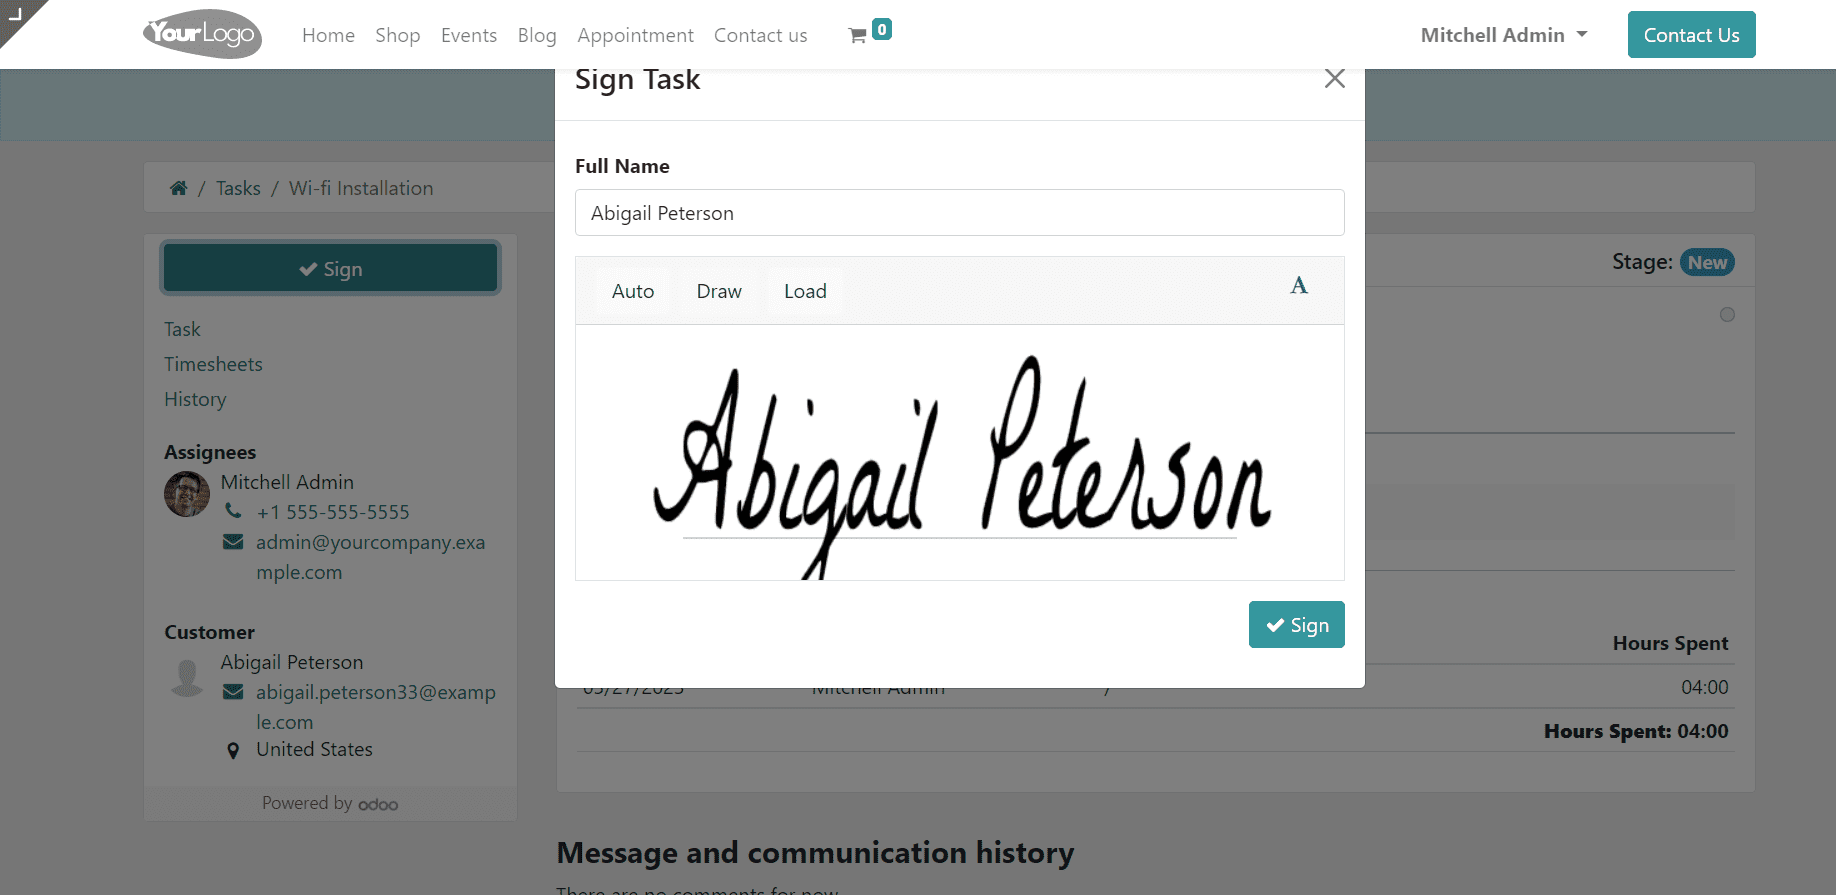
So the customer sign will be automatically uploaded to the time sheet.
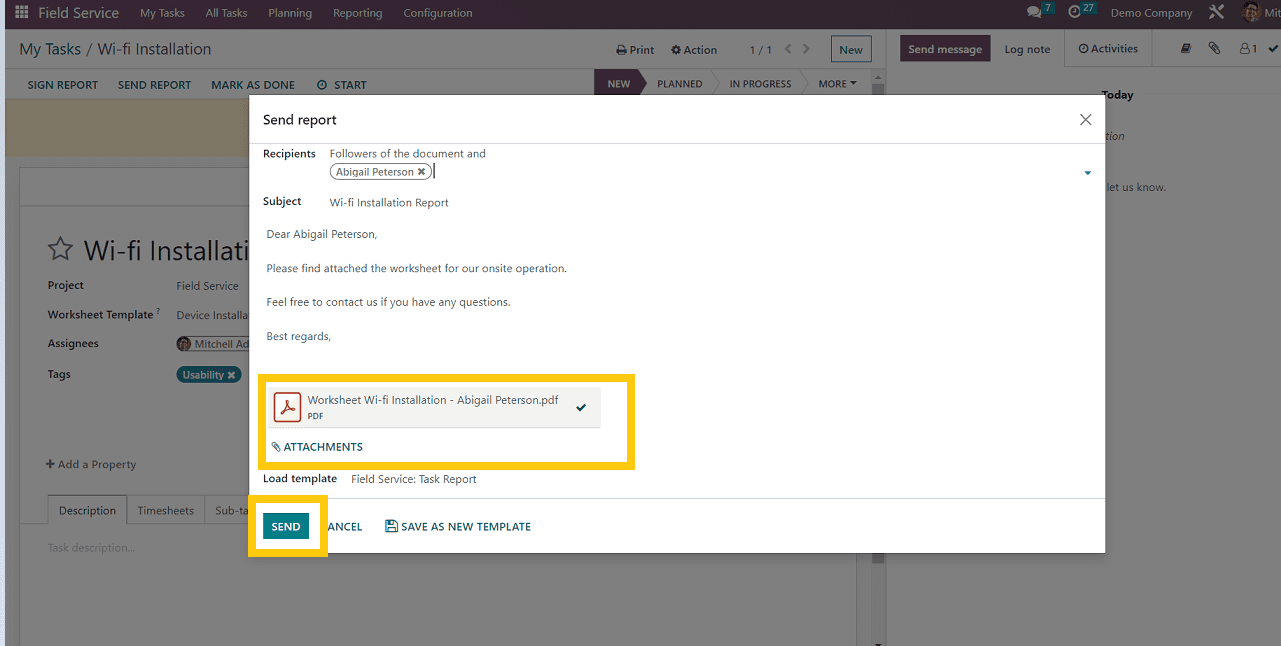
SEND REPORT
The user or assignee can send the work report to the customers using this "Send Report" button. So it will open an email draft page where they can send the message regarding the task/service, attach any files, etc., as shown in the screenshot below.
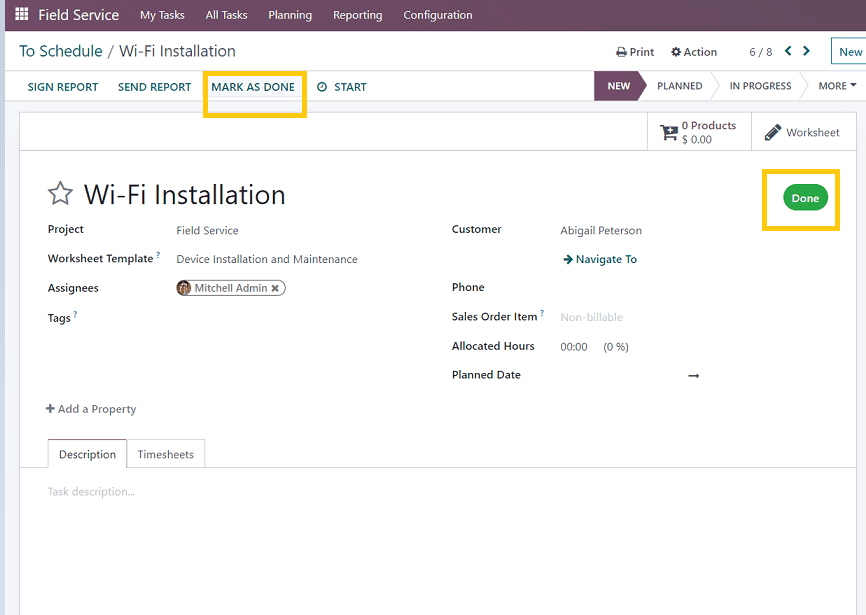
MARK AS DONE
The user or the assigned employee can use this option once the task is completed by clicking on the "mark as done" option. Now you can see the status of the tasks that have been completed on the right side of the page, as shown in the screenshot below,
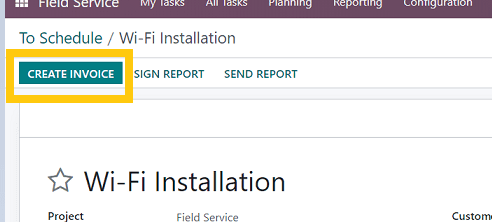
An option to create the invoice will show on the form view. We can use the "Create Invoice" button to generate a sheet of invoices regarding the completed task or service.
The "Create invoice" button will open an invoice draft format where the users can edit invoices, add details, add payment details, etc., as shown in the screenshot below.
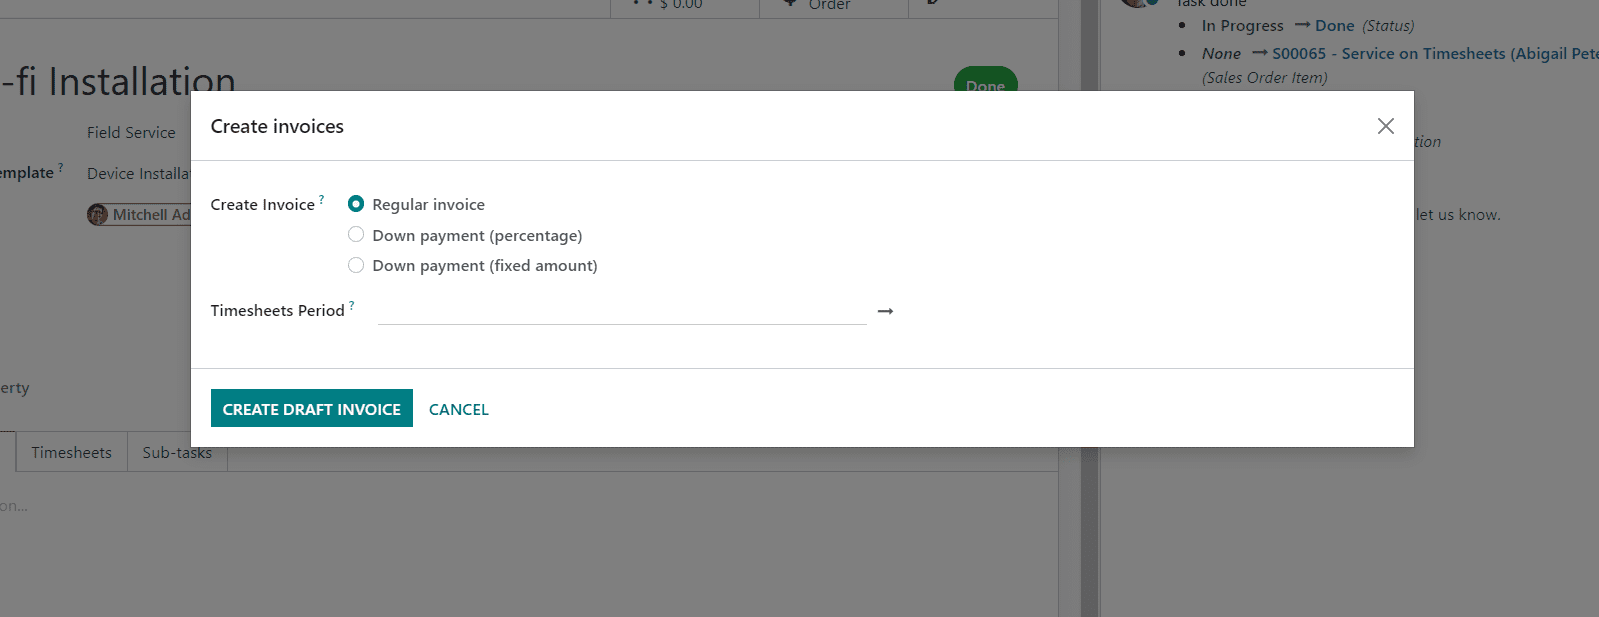
We can make changes to the invoice by clicking the 'CREATE DRAFT INVOICE' button. So it will open a new form view where we can create the invoice.

As we can see, this form contains three sections, such as invoice lines, journal items, and Other
Information
1. Invoice lines section: Provide the details of service hours, bill details, product charges, and so on, and it will automatically add the basic taxes based on the services
2. Journal Items: account details, debits, and credits can be entered in this section.
3. Other info: Customer reference, Salesperson details, Sales team name, Company name, International commercial terms(used for international transactions), Fiscal positions(Used to adapt taxes and accounts for particular customers) Accounting details have to be filled in.
Once the details are completed, save the details and click on the “create draft invoice” option.
we can see the invoice details in the newly opened form view, as shown below.
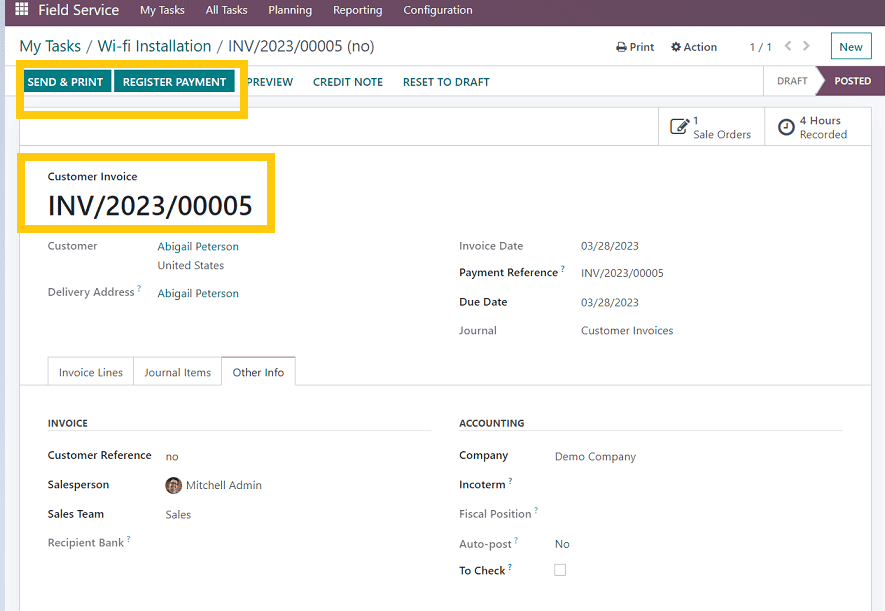
Then click on the Register payment option so we can provide the payment information, such as the payment journal, amount, payment method, etc., in the new popup page, as shown in the screenshot below.
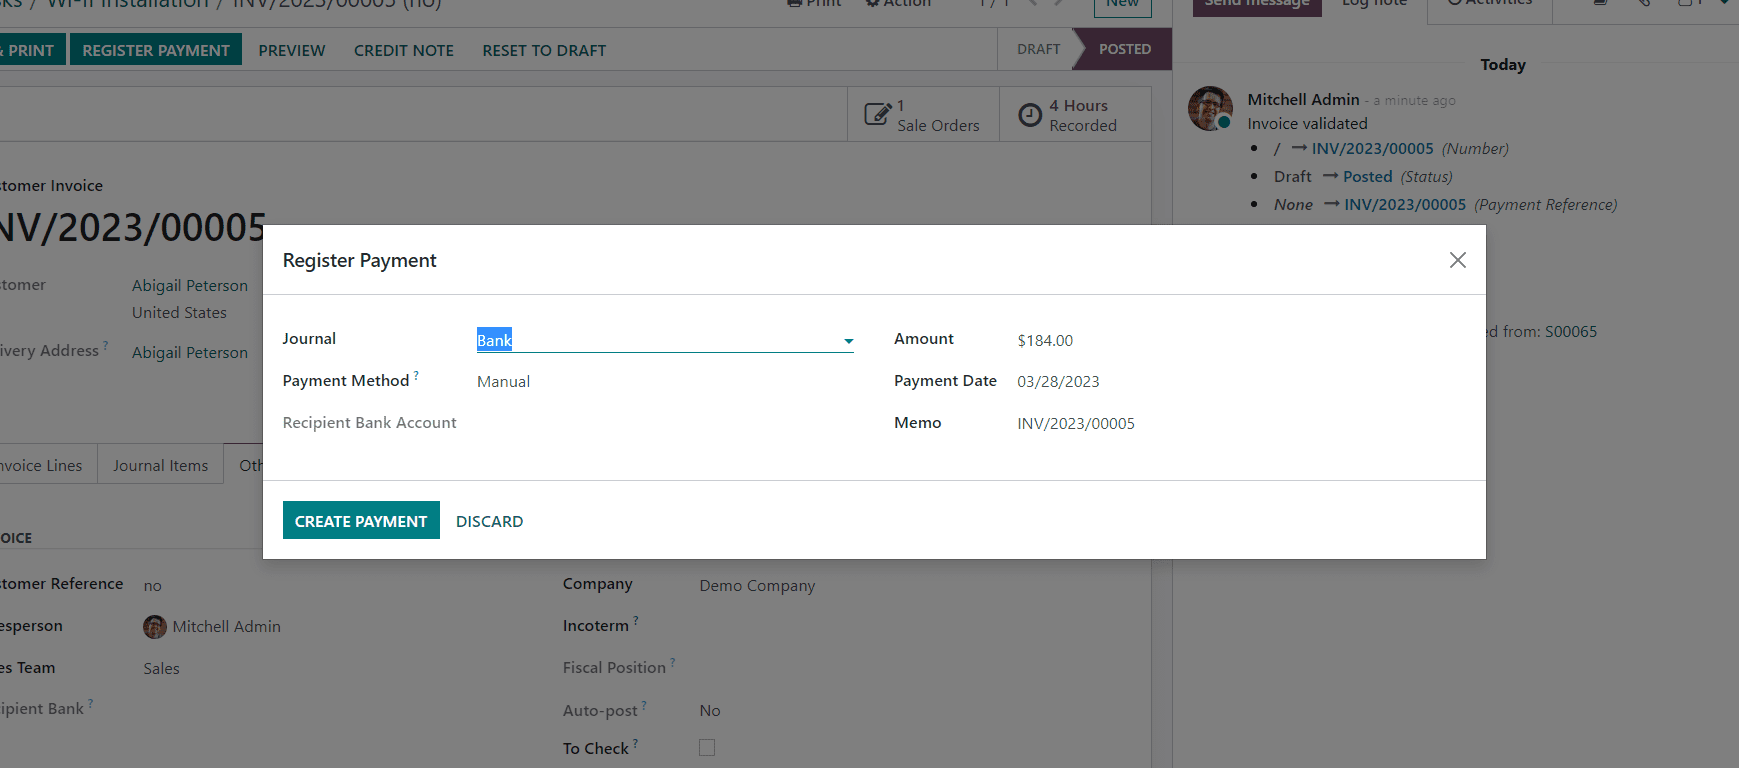
Once the payment procedures are complete, click on the “Create payment” option. Now we can see the status of the service as “In payment” as a green badge on the page.
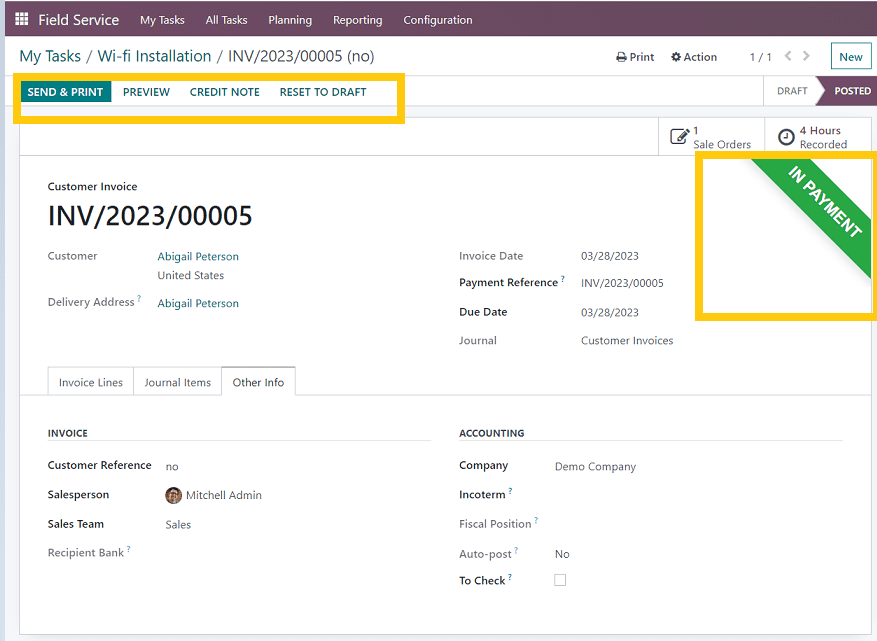
After processing the payment, users can send the invoice as mail, print, preview the invoice, add credit notes, and reset to the draft mode by using the menu buttons as shown in the above screenshot.
The user can print the invoice by clicking on the “Send and Print” button, and it will open the invoice format, where we can also configure the invoice format settings as shown in the below screenshot.
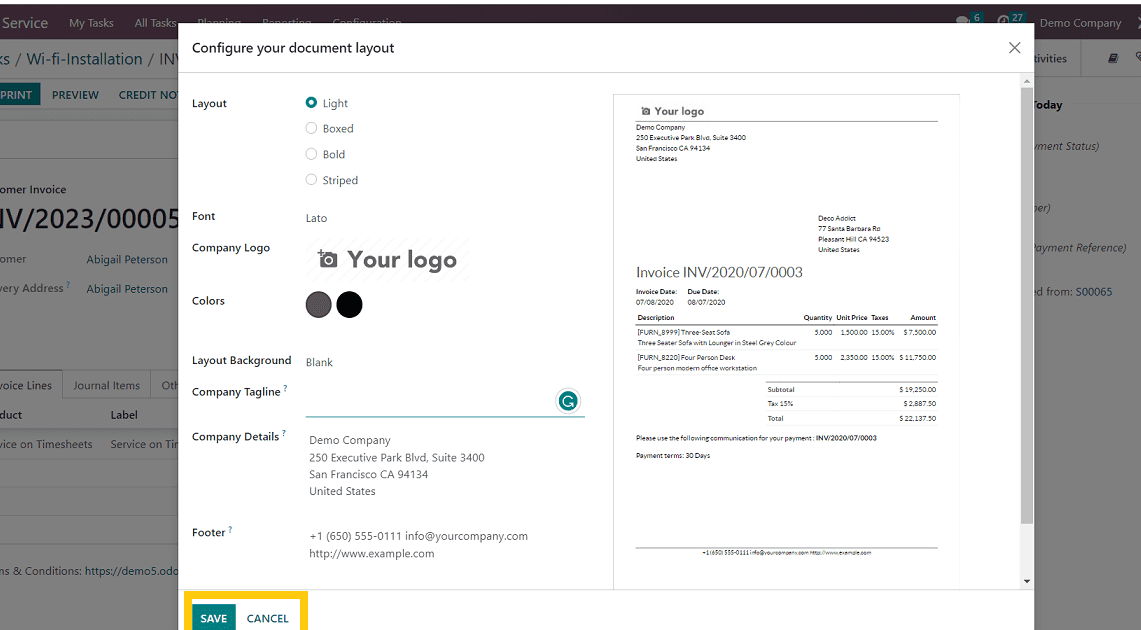
Once we complete the print settings, save the details by clicking the appropriate button. It will lead to a page from which we can send the email with the invoice attachment.
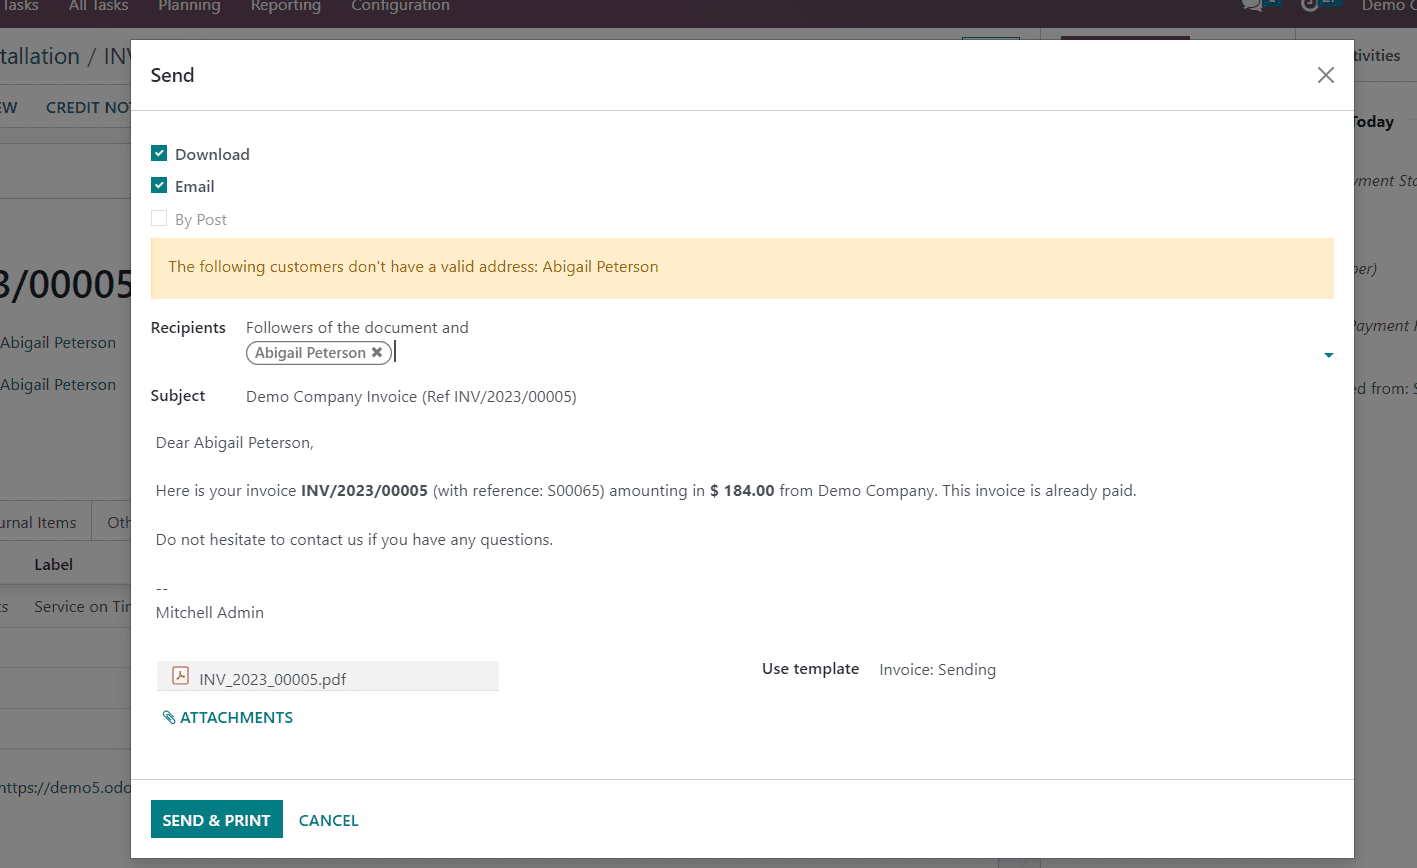
By using this interface, users can select multiple recipients, add attachments according to the business requirements, and click “Send & Print.”
After completing these steps, come back to the “My Tasks” section. There we can see the status of our task as "completely done."
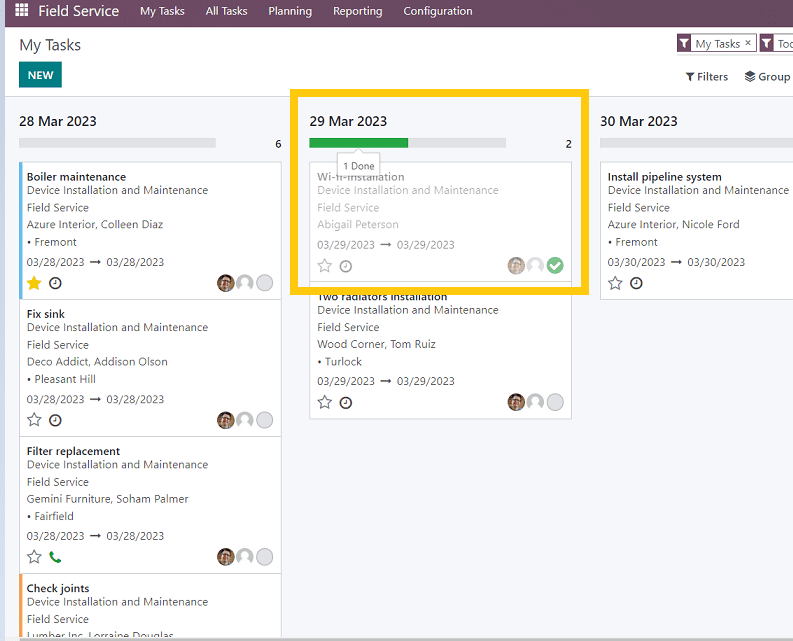
We can easily understand the status of the tasks with this kind of Kanban view, as shown in the above snapshot. Once the task is fully completed green tick mark button will be shown inside the task view.
START
As shown in the screenshot below, the Start button is used for setting the timer feature after creating a new task. So the users can track the progress of the particular task, its execution time, etc. This feature is very helpful for improving their service quality as well as customer goodwill.
Map View
This option is also located inside the “My Task” menu, from which the users can see the location of their upcoming onsite services.
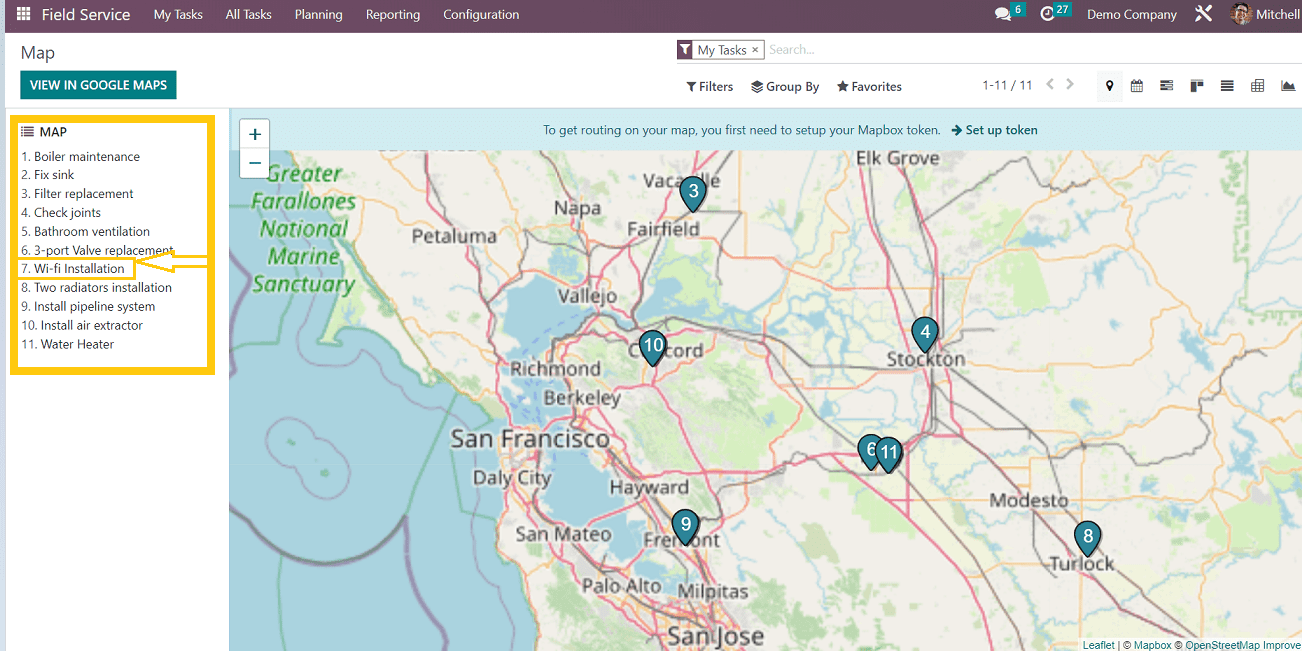
The screenshot above depicts a list of tasks and services organized by number. In the map view, we can see the location of the specific task. As a result, by utilizing this feature, the assigned employee and the user can track the locations, improving time management and ensuring that the process is completed on time.
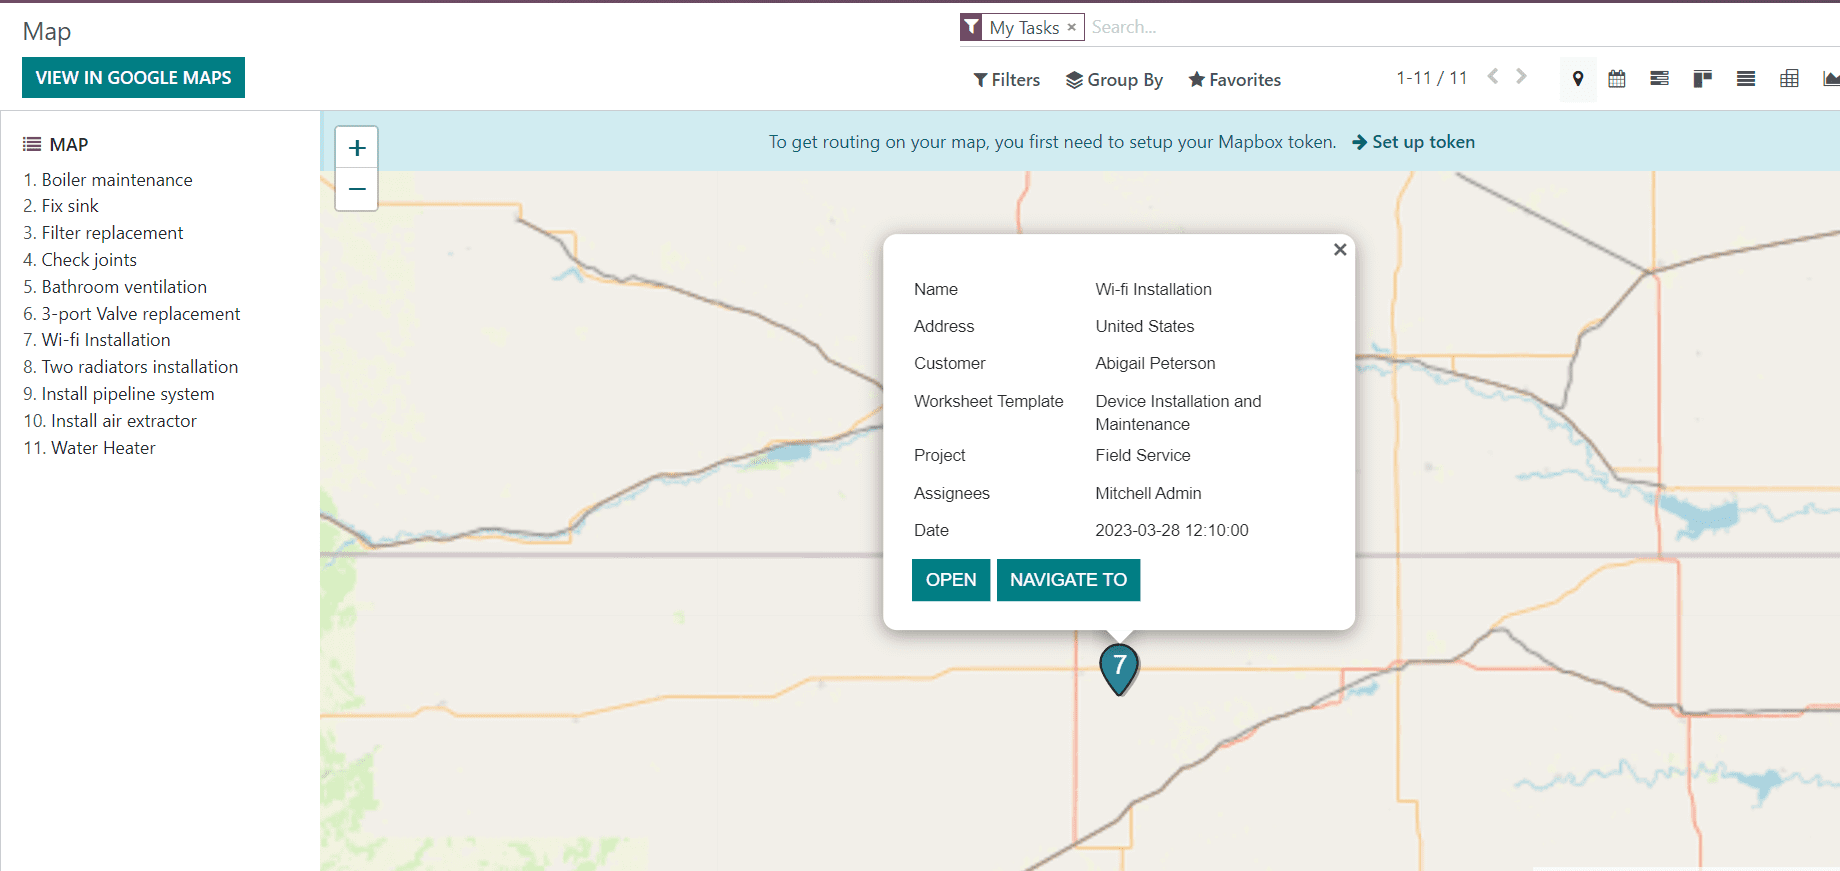
The map view can be expanded to see the exact location, as shown in the below screenshot.
In this blog, we discussed some of the features of the Odoo 16 field service module, such as timesheets, digital signs, location tracking, time tracking, and so on, and we also saw the scheduling process from task creation to task execution and completion.