Odoo is a comprehensive business management platform designed to help organizations of all sizes manage their daily operations more efficiently. With a wide range of modules covering areas such as sales, inventory, CRM, accounting, and human resources, Odoo centralizes all business information in one place, simplifying processes and improving overall efficiency. Its flexibility and scalability make it an ideal solution for businesses looking to optimize operations and grow seamlessly.
One standout feature of Odoo is its ability to automate routine tasks, ensuring that essential processes are completed consistently without manual intervention. In Odoo 19, the Automated Actions functionality has been significantly enhanced, providing even more options for creating customized workflows across different modules. These workflows can automatically trigger tasks such as sending notifications, updating records, or initiating more complex operations based on specific conditions, helping businesses maintain smooth operations with minimal effort.
By leveraging automation, companies can save time, reduce errors, and improve productivity. In this article, we’ll explore how Automated Actions in Odoo 19 function, how to customize them according to your requirements, and how they can streamline processes in areas ranging from sales and customer management to inventory and HR.
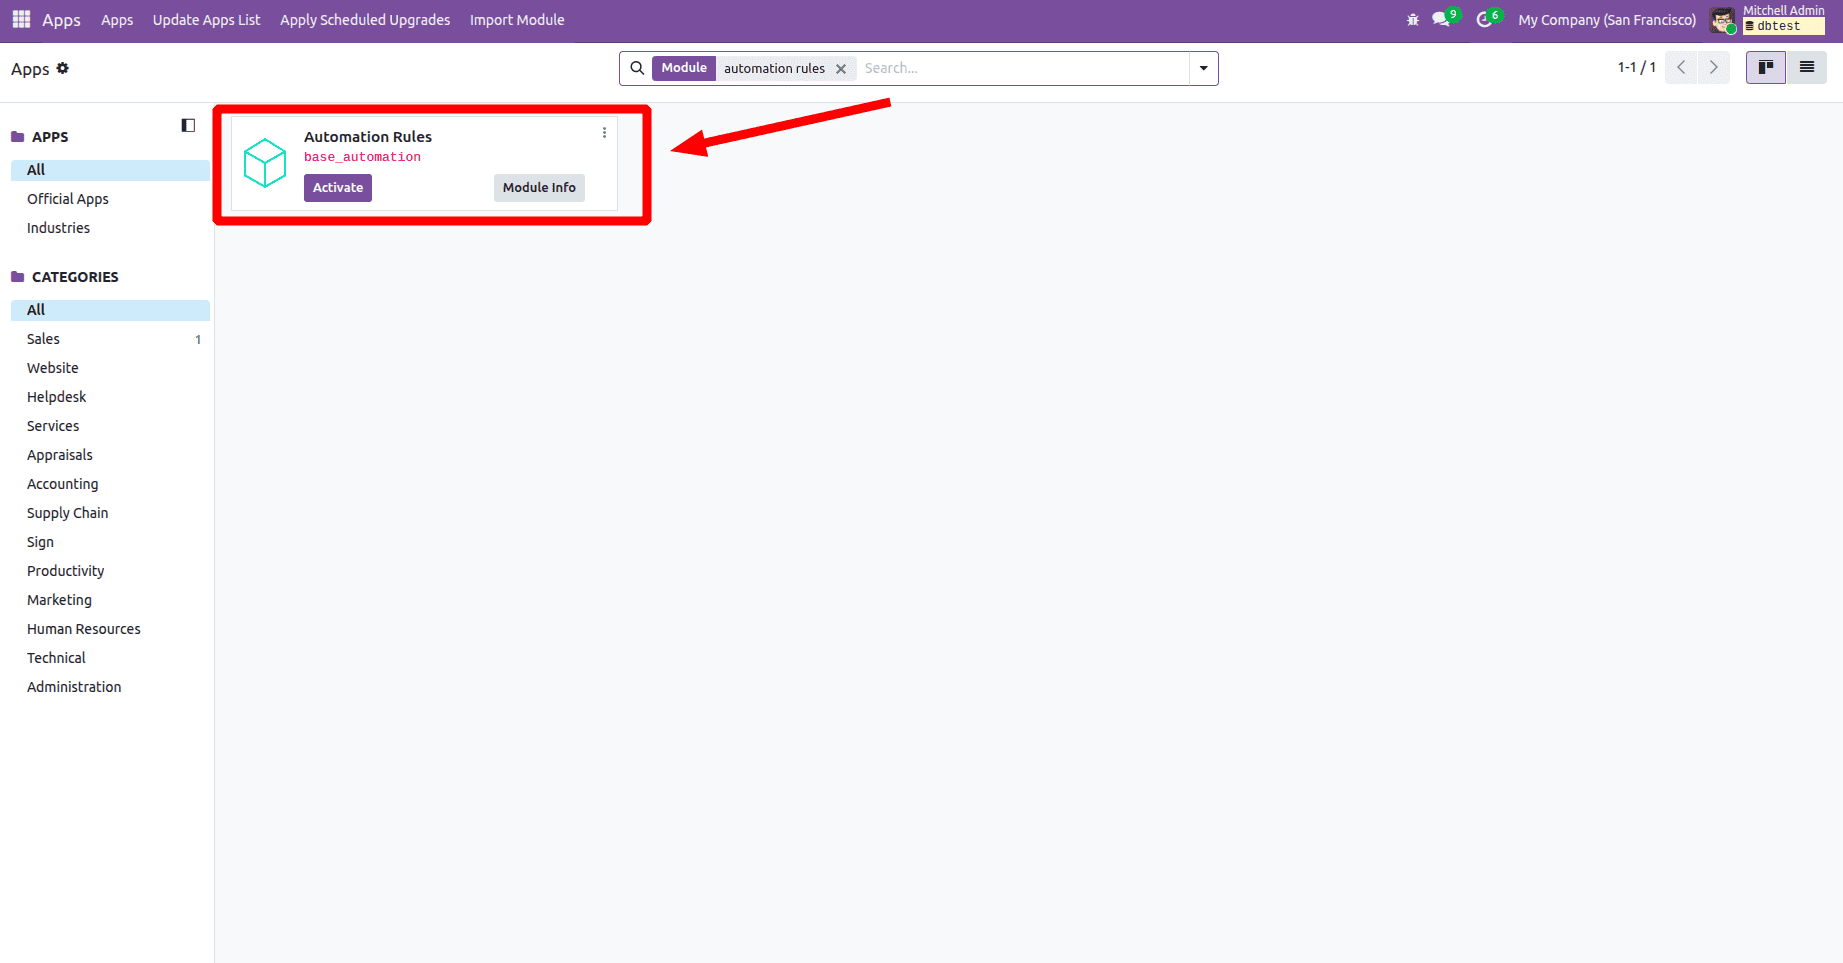
To set up Automated Actions, you need to install the Automatic Action Rules feature. Specifically, the base_automation module must be installed, as shown in the figure below.
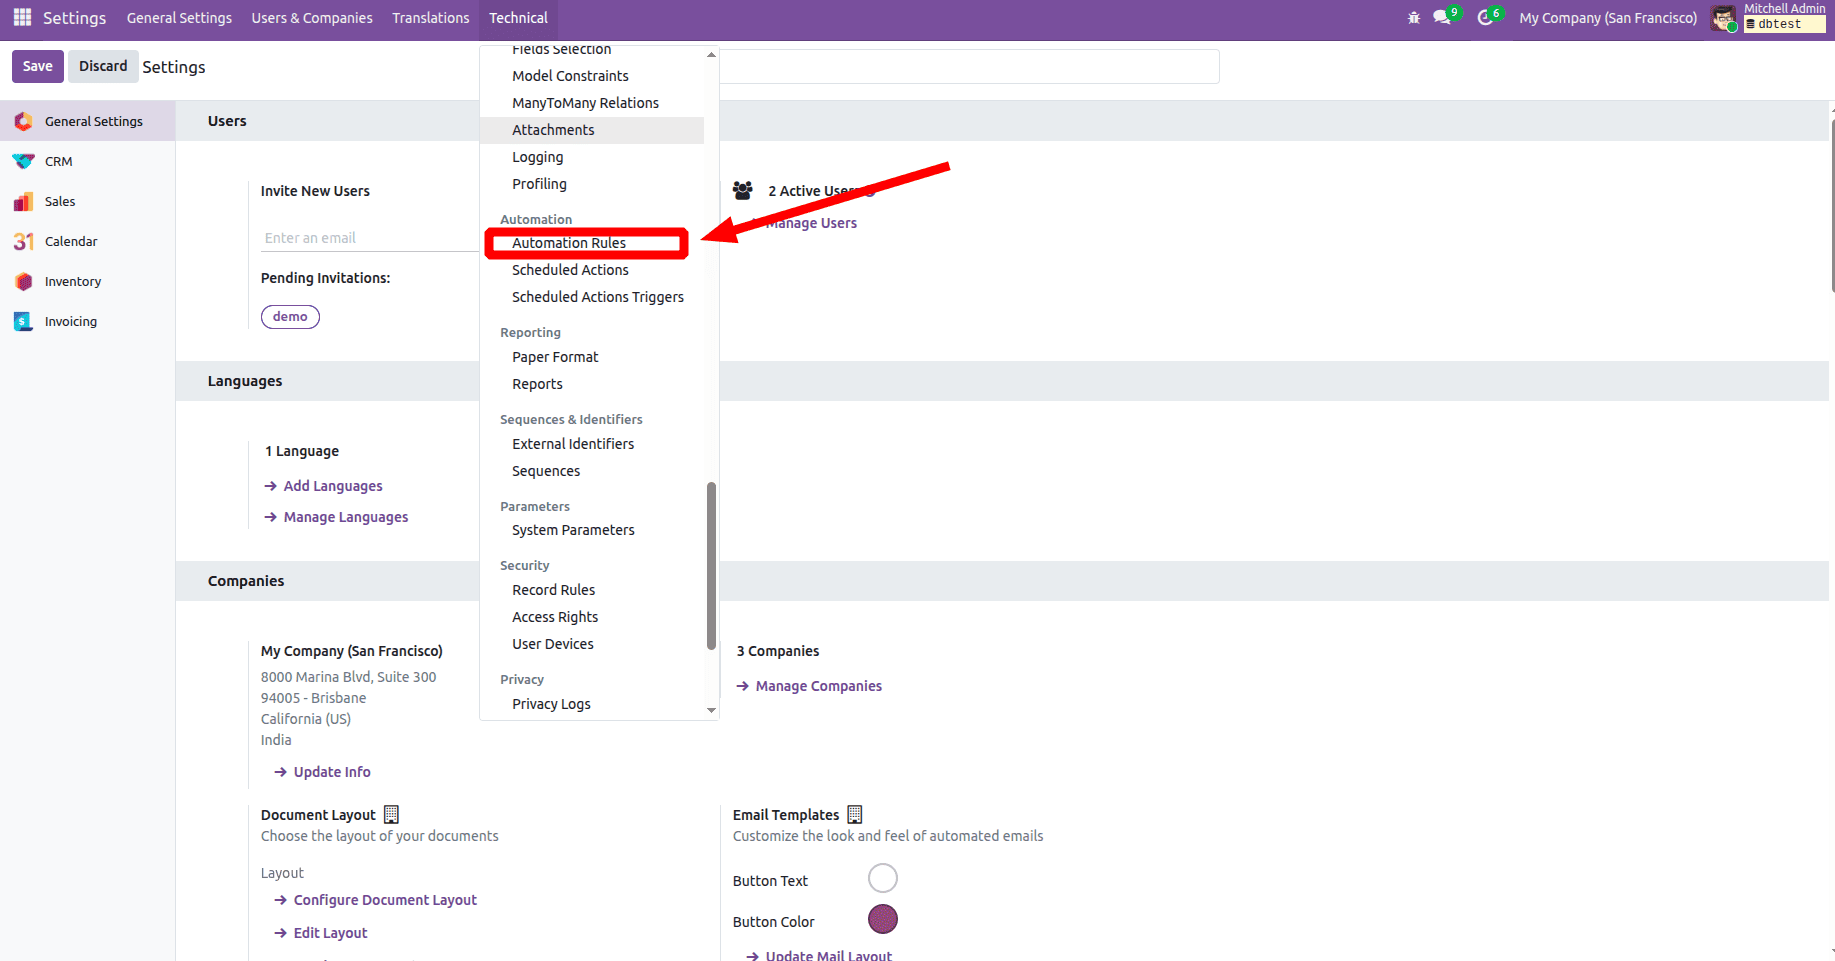
To configure automated actions, start by activating developer mode in Odoo. Next, navigate to Settings > Technical > Automated Actions. In this section, you can define rules and set conditions that will trigger automated actions, allowing you to streamline workflows and maintain accurate data. This process is illustrated in the figure below.
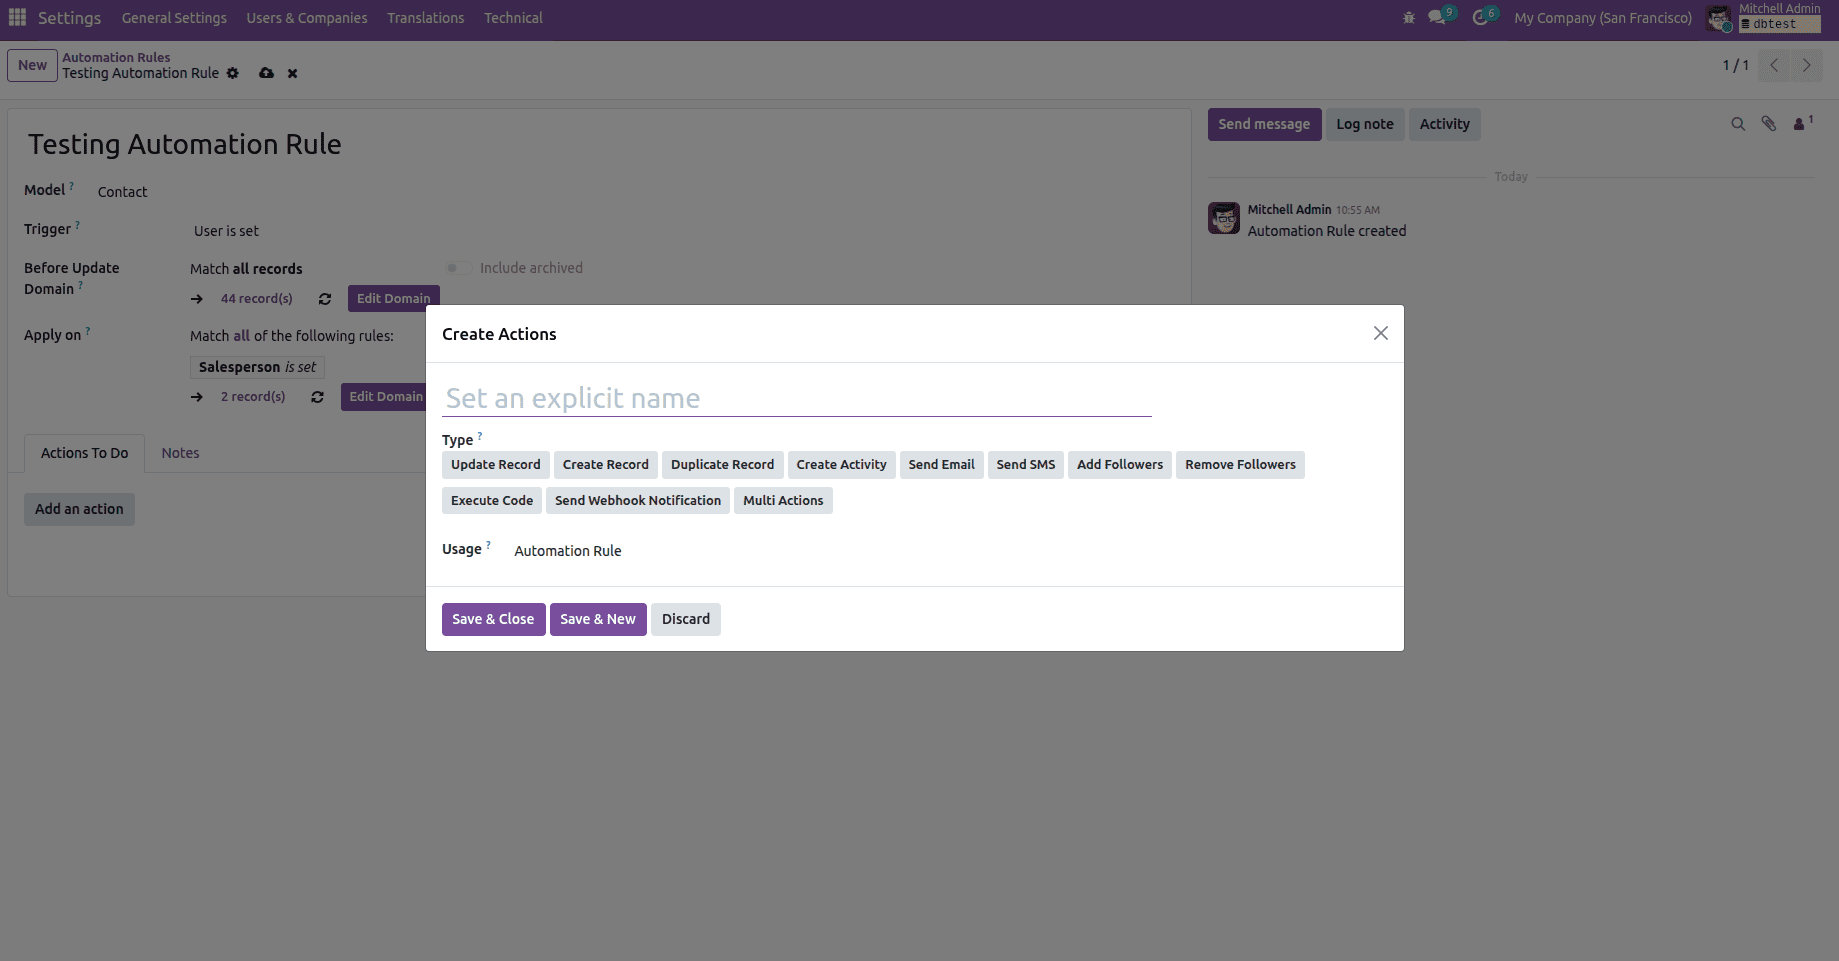
To create an automated action with specific trigger conditions and domain filters in Odoo 19, follow the steps outlined below (an example is shown in the figure):
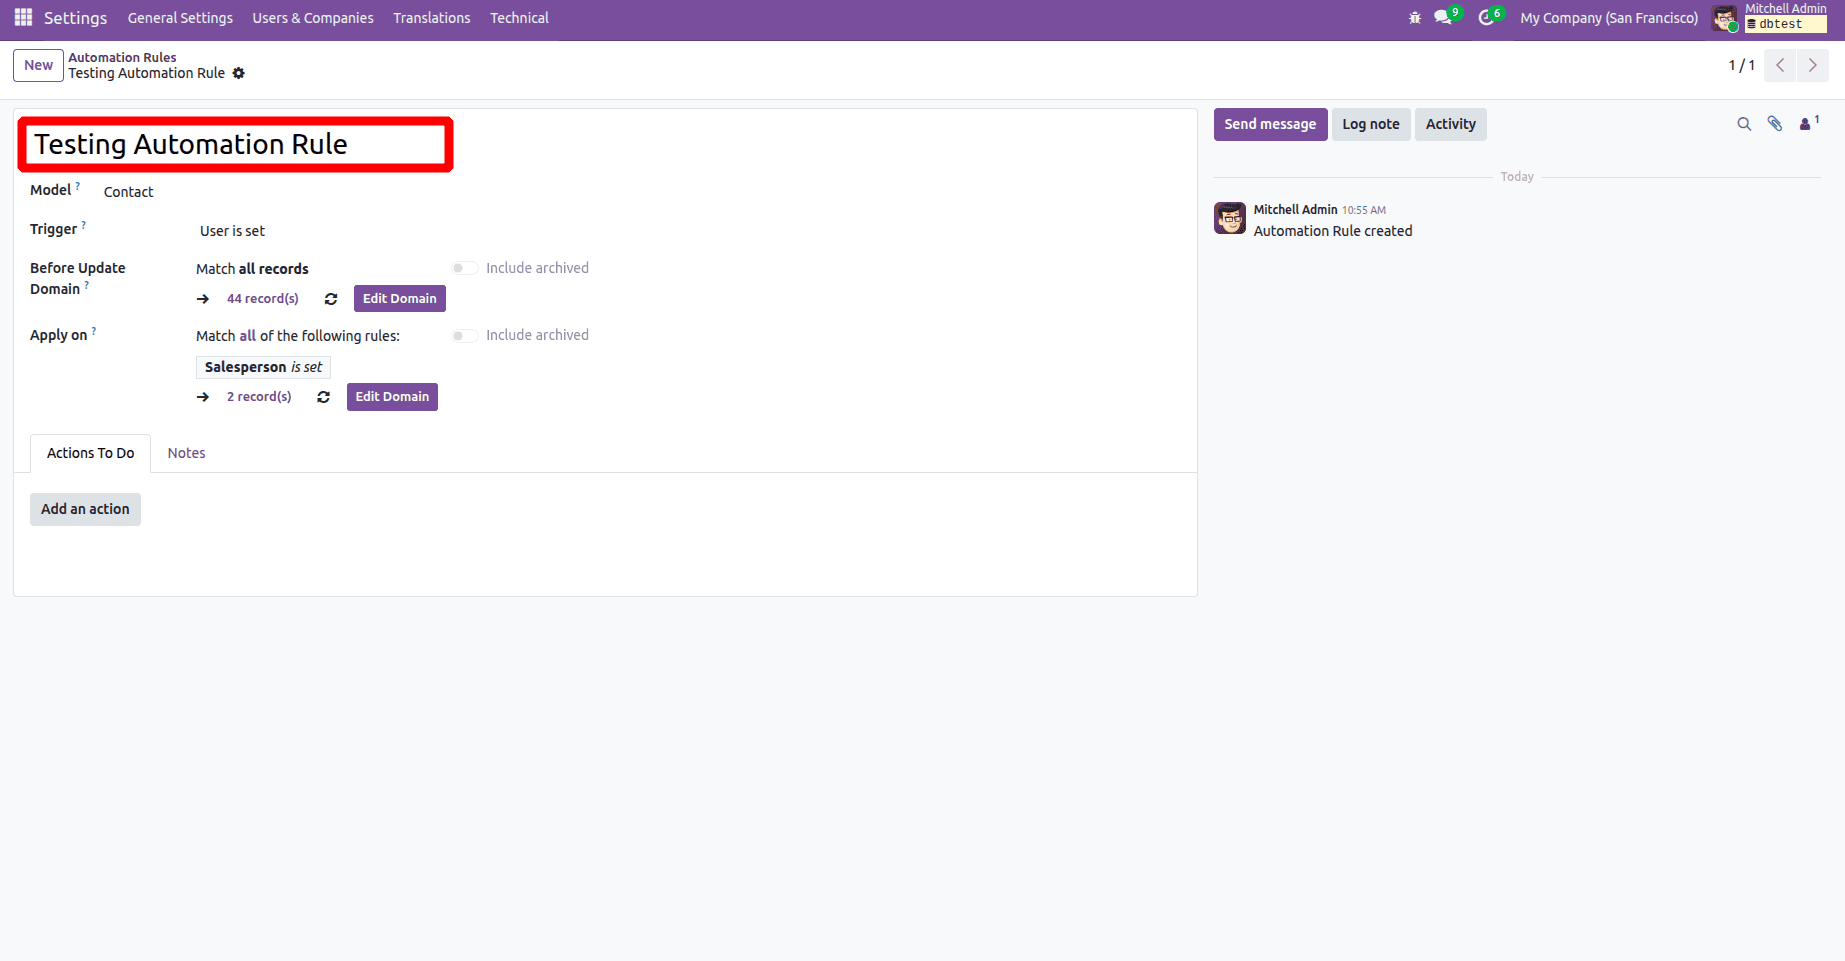
Name
Here, you can specify the name for your automated action.
Model
First, choose the model on which you want the automated action to operate (for example, Contact).
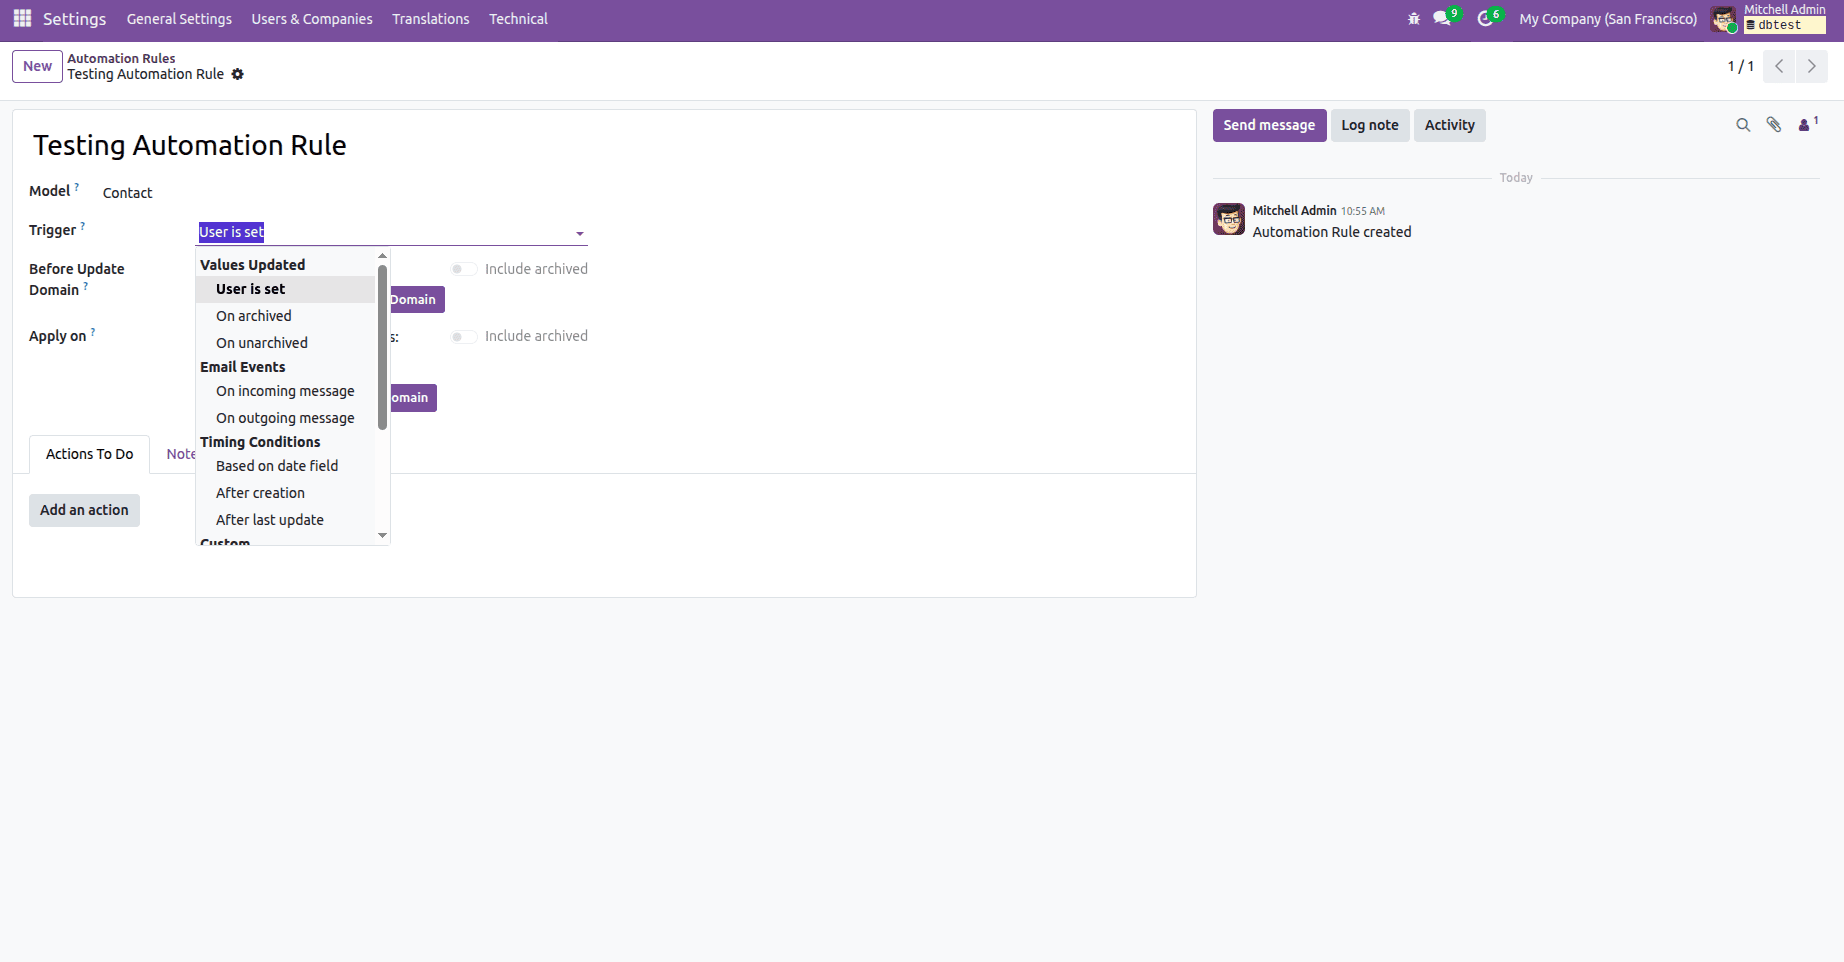
Triggers
- Values Updated: Automated actions are triggered when certain changes occur, such as:
- A user is assigned to a record.
- A tag is added to an item.
- The state or status of a record is updated (for example, from "Draft" to "Confirmed").
- Upon Update: The automation activates when particular changes take place, including:
- On Incoming Email: Receiving a new email can activate automation, allowing you to convert the email into a lead or update related records automatically.
- On Outgoing Email: When an email is sent from Odoo, automation can run, such as sending a follow-up or logging the communication in the corresponding record.
- Timing conditions: You can set automation triggers to respond to different time-based events, such as:
- Based on Date Field: Automation runs at a specific time relative to a record’s date field(for example, a due date or deadline).
- After Creation: Executes the action for a defined period following the creation of a record.
- After Last Update: Executes the automation for a specified period following the record’s most recent update.
- Custom: This trigger can be set for particular events, such as:
- On Save: Runs the automation whenever a record is saved, allowing actions to respond to new or updated data.
- On Deletion: Triggers automation upon record deletion, allowing actions such as sending alerts or recording the event.
- On UI Change: Activates automation in response to UI changes, including updates to fields or form selections.
- External: You can configure automation triggers to activate on specific events, for example:
- On Webhook: Activates automation in response to incoming webhooks, allowing Odoo to handle events from external systems.
The various types of triggers are illustrated in the figure below:
Before Update Domain
In Odoo 19, automation refers to the capability to define conditions that must be met before a record is updated. This allows you to use domain filters to ensure that updates only occur when specific criteria are satisfied.
You can specify the conditions for applying the automated action to records within the chosen model. Filters can be used to target only those records that meet the defined requirements.
Action To Do
Specify the type of automated action (server action) you want to execute. Odoo provides ten different types of actions:
- Execute Python Code: This option allows you to execute custom Python code. You can write the code in the Python Code tab, which also lists the available variables you can use.
- Create a New Record: With this action, a new record can be generated automatically in any model.
- Update the Record: With this action, you can set field values in the current record to update information automatically.
- Send Email: With this action, an email is sent to a contact linked to the record, using either a predefined template or a custom one you create.
- Add Followers: This action automatically adds selected contacts as followers of the record.
- Remove Followers: This action allows you to automatically unsubscribe specific contacts from the record as followers.
- Create Activity: This action lets you schedule a new activity linked to the record. You can set this up in the Activity tab, where you also assign the user responsible for it. If the same user should always be assigned, select ‘Specific User’ and choose the designated person. Alternatively, to assign the user dynamically based on the record, choose ‘Dynamic User From Record’ and specify the relevant field.
- Send SMS: This action sends an SMS to a contact associated with the record. You can either use an existing SMS Template or create a new one.
- Send Webhook Notification: Sends a POST request to an external system, commonly known as a webhook.
- Execute Existing Actions: Defines an action that can trigger multiple other server actions.
Allowed Groups
Specify the user groups allowed to execute the server actions. Automated actions can only be triggered by users who belong to the specified groups.
Action Details
Here, you specify what the automated action will perform when the defined conditions are met. This determines the result once the action’s criteria are satisfied.
Automated Actions Executed via Code:
First, create an XML file. For example, you can define an automated action to generate an invoice whenever a stock picking linked to a sale order is marked as complete. The generated invoices should initially be in the draft state.
<?xml version="1.0" encoding="utf-8"?>
<odoo>
  <data noupdate="1">

    <!-- Server Action: Create Invoice from Sale Order -->
    <record id="action_create_invoice_on_sale_done" model="ir.actions.server">
        <field name="name">Create Invoice from Sale Order</field>
        <field name="model_id" ref="stock.model_stock_picking"/>
        <field name="state">code</field>
        <field name="code">
sale_order = record.sale_id
if sale_order and sale_order.invoice_status == 'to invoice':
    sale_order._create_invoices()
        </field>
    </record>
     <!-- Automated Action: Trigger on Picking Done -->
    <record id="automated_action_create_invoice_on_sale_picking_done" model="base.automation">
        <field name="name">Create Invoice on Sale Picking Done</field>
        <field name="model_id" ref="stock.model_stock_picking"/>
        <field name="trigger">on_write</field>
        <field name="filter_domain">[('state', '=', 'done')]</field>
        <field name="action_server_ids" eval="[(4, ref('action_create_invoice_on_sale_done'))]"/>
    </record>
</data>
</odoo>
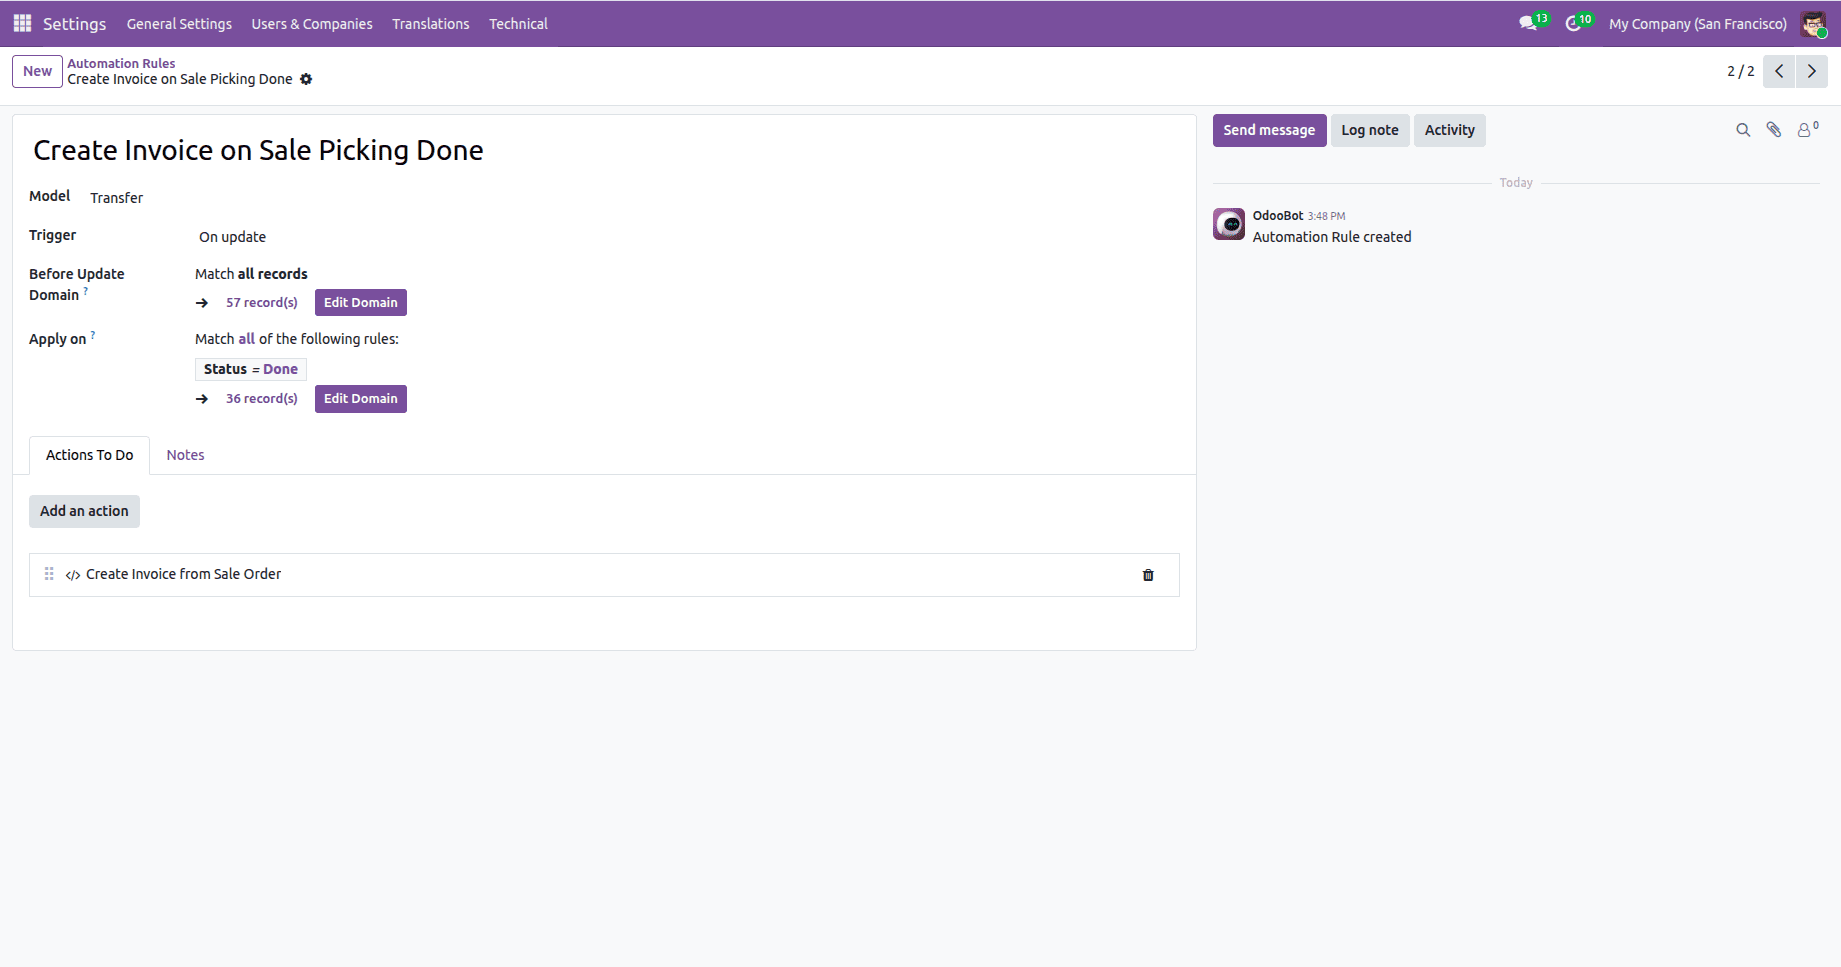
Once the custom module with this functionality is installed, the automated action will be created, as shown in the figure.
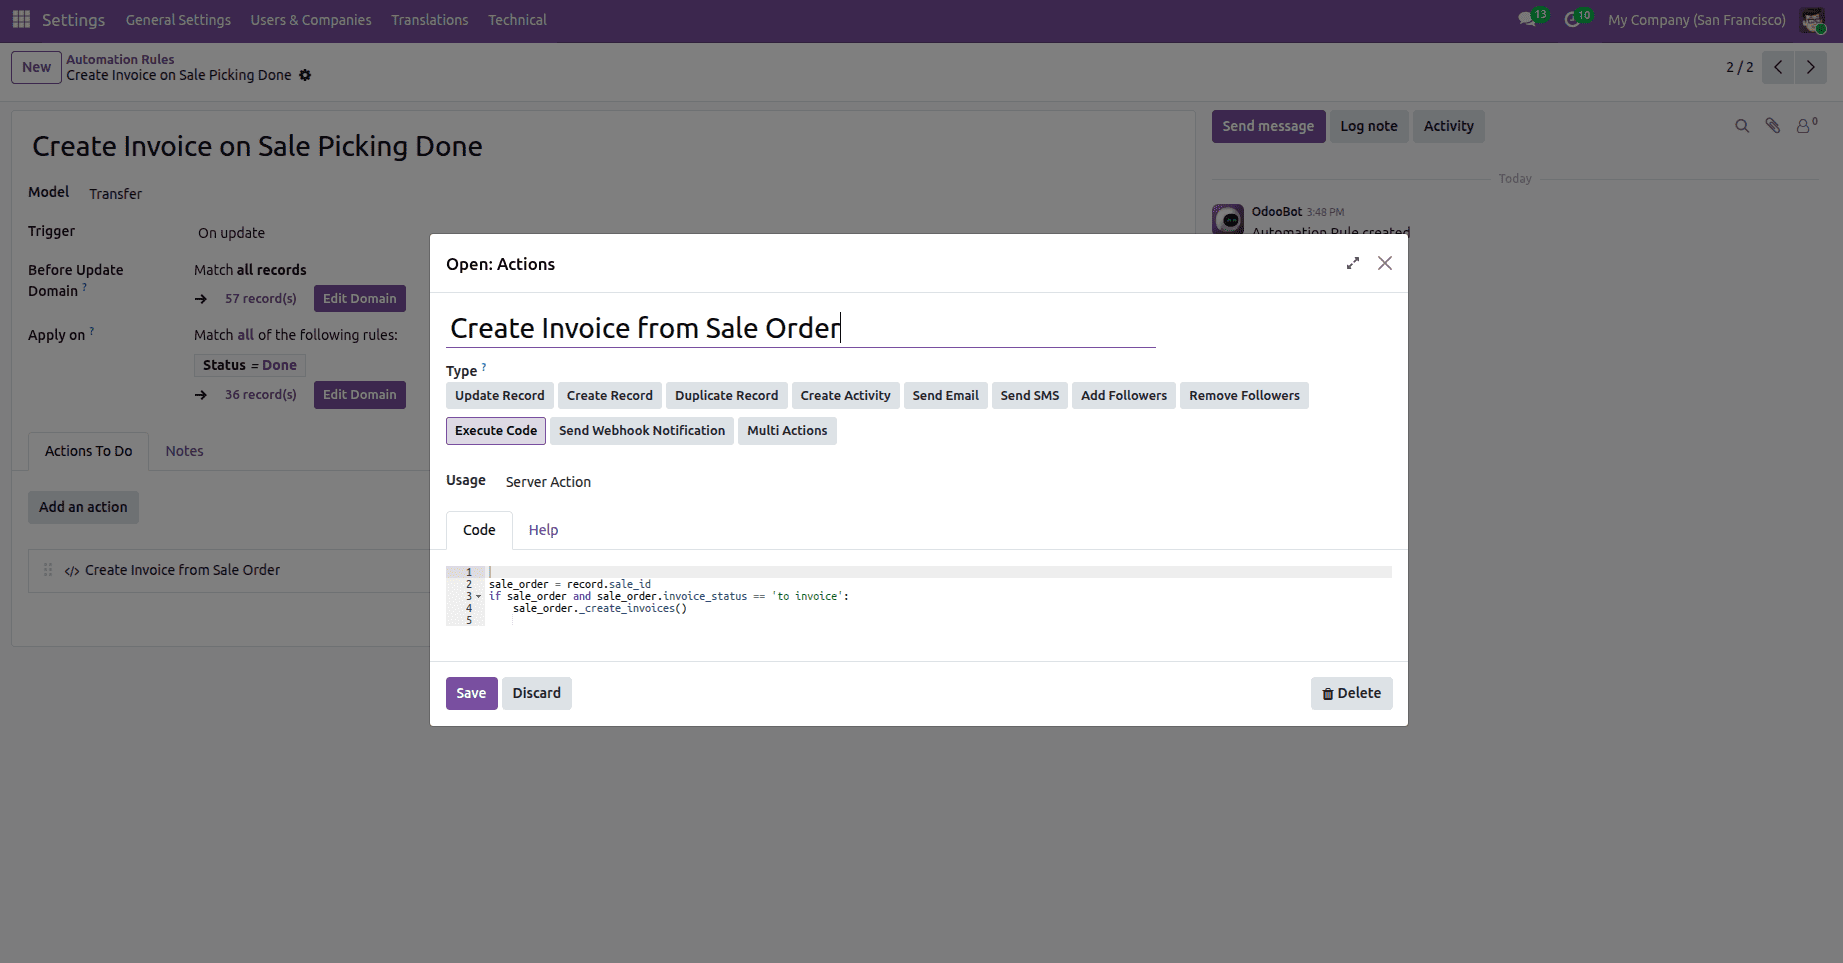
When clicking the action it will show the action wizard as shown below.
Automated Actions in Odoo 19 offer businesses an excellent way to improve efficiency by automating routine tasks and streamlining workflows. By defining specific triggers and actions, users can save time and minimize errors. Odoo’s use of Server Actions and XML configurations enables customized automation tailored to the unique requirements of each organization. This allows teams to focus on high-value work, fostering growth and innovation, instead of spending time on repetitive tasks. Overall, these features help businesses run more smoothly and effectively.
To read more about How to Configure Automated Actions in Odoo 18, refer to our blog How to Configure Automated Actions in Odoo 18.