Project scheduling, production planning, and task timelines are just a few of the time-sensitive tasks that can be easily and visually managed with Odoo 19's Gantt views. This view, which is accessible in the Enterprise version via the web_gantt module, shows tasks as horizontal bars, making it simple to quickly comprehend start dates, durations, and dependencies. Project managers and planners may maintain control over their workflows with the Gantt view's features, which include grouping, filtering, and progress tracking.
Businesses frequently want extra interaction or specific behavior, even though the typical Gantt view satisfies many conventional requirements. Customization of JavaScript becomes crucial in this situation. Developers can add new user interface components, manage unique events, or alter task interactions by extending pre-existing JavaScript classes. This enables the Gantt view to better match certain business processes and operational requirements in real time.
This example will show you how to extend the AppointmentBookingGanttRenderer class in order to add a custom button. We'll use Odoo's patching system (patch()), which enables us to change current behavior without altering the core code, to maintain the solution clean and upgrade-safe. This method preserves long-term maintainability while guaranteeing flexibility.
Javascript
/** @odoo-module **/
import { patch } from "@web/core/utils/patch";
import { _t } from "@web/core/l10n/translation";
import { AppointmentBookingGanttRenderer }
    from "@appointment/views/gantt/gantt_renderer";
/**
 * Extends the Appointment Gantt popover by calling the original
 * `getPopoverProps` method and adding a custom action button.
 */
const originalGetPopoverProps =
    AppointmentBookingGanttRenderer.prototype.getPopoverProps;
patch(AppointmentBookingGanttRenderer.prototype, {
    /**
     * @param {Object} pill
     */
    async getPopoverProps(pill) {
        // Call ORIGINAL core method
        const props = await originalGetPopoverProps.call(this, pill);
        const { record } = pill;
        // Safety: ensure buttons array exists
        props.buttons ||= [];
        // Add custom button
        props.buttons.push({
            class: "btn btn-sm btn-danger",
            text: _t("Delete Appointment"),
            onClick: async () => {
                if (
                    this.model?.metaData?.canEdit &&
                    record?.appointment_status
                ) {
                    await this.orm.unlink("calendar.event", [record.id]);
                    await this.model.fetchData();
                }
            },
        });
        return props;
    },
});
By adding a unique delete button to the Gantt view pop-up, this code improves the AppointmentBookingGanttRenderer class. When the button is pressed, the associated appointment is deleted and the data is reloaded.
Code Breakdown:
patch(): This function is used to enhance or change the functionality of Odoo classes that already exist. Here, we're utilizing it to add our own functionality and change how the AppointmentBookingGanttRenderer class behaves..
Custom Delete Button: This custom button causes the chosen appointment to be removed from the calendar. In order to guarantee that the Gantt view is updated, the deletion causes a data refresh.
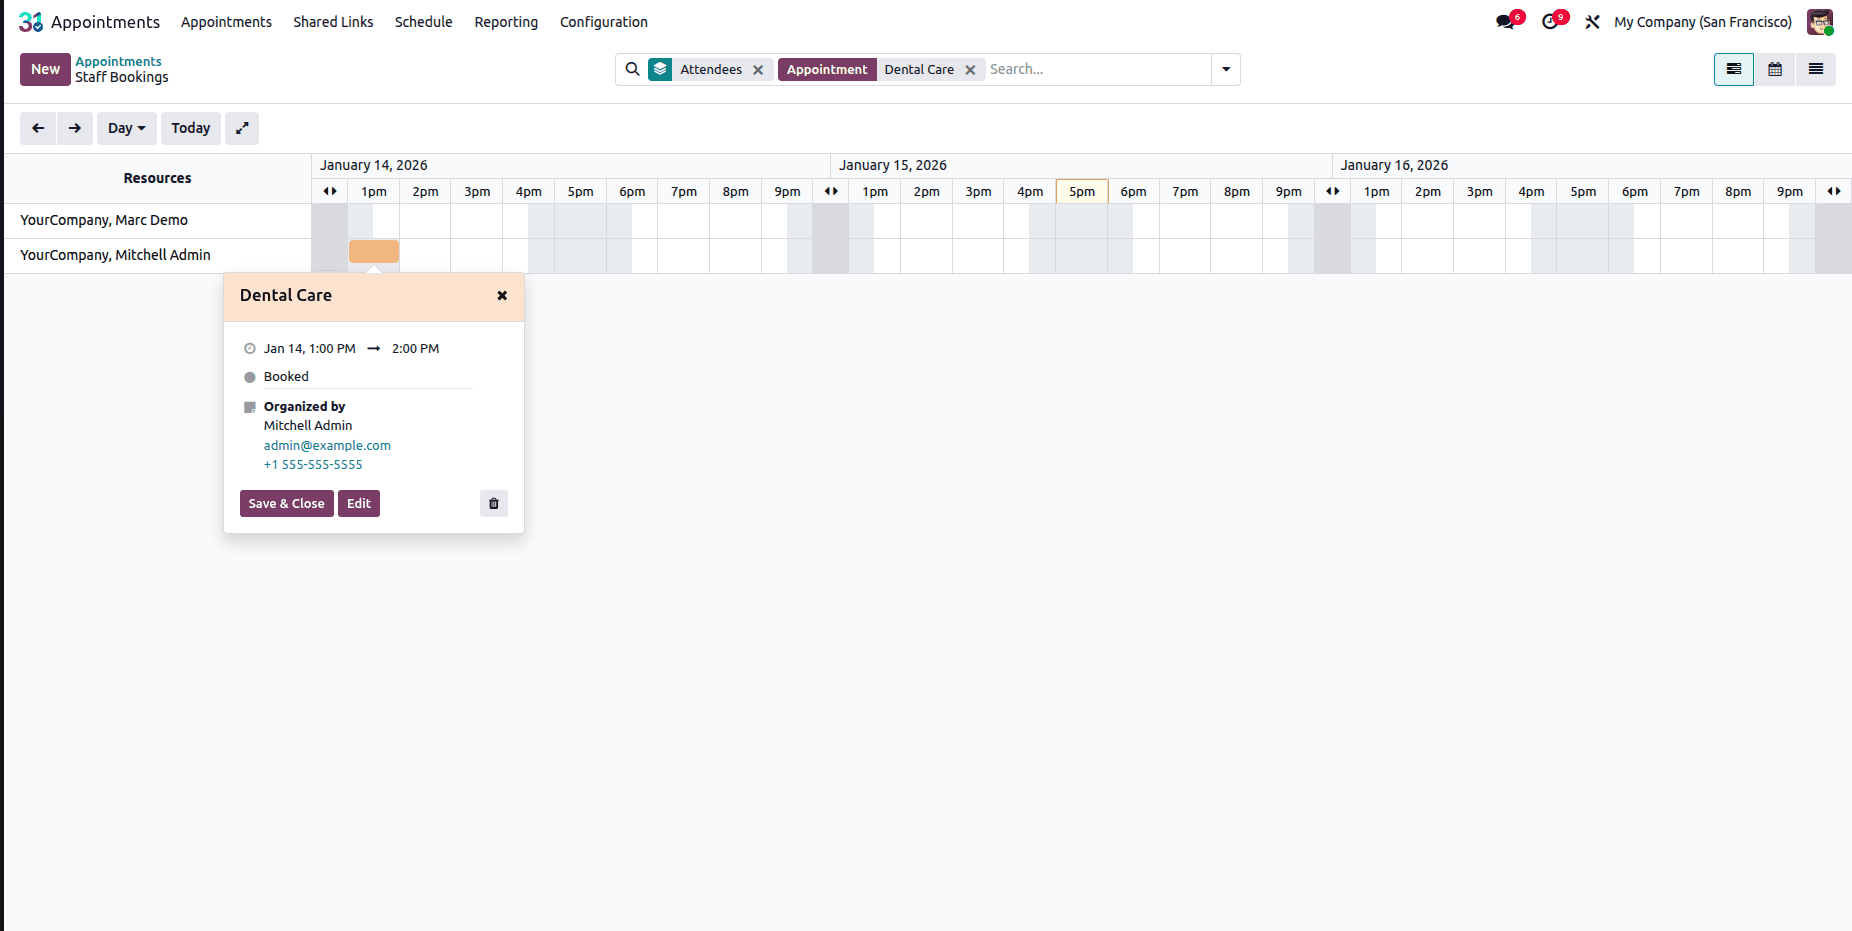
The "Edit" and "Close" buttons are visible in the Gantt view of appointments before the module is installed, as seen in the figure below.
The Gantt view popup will have a new button called "Delete Appointment" after the matching custom module with the supplied JavaScript is installed, as seen in the picture below.
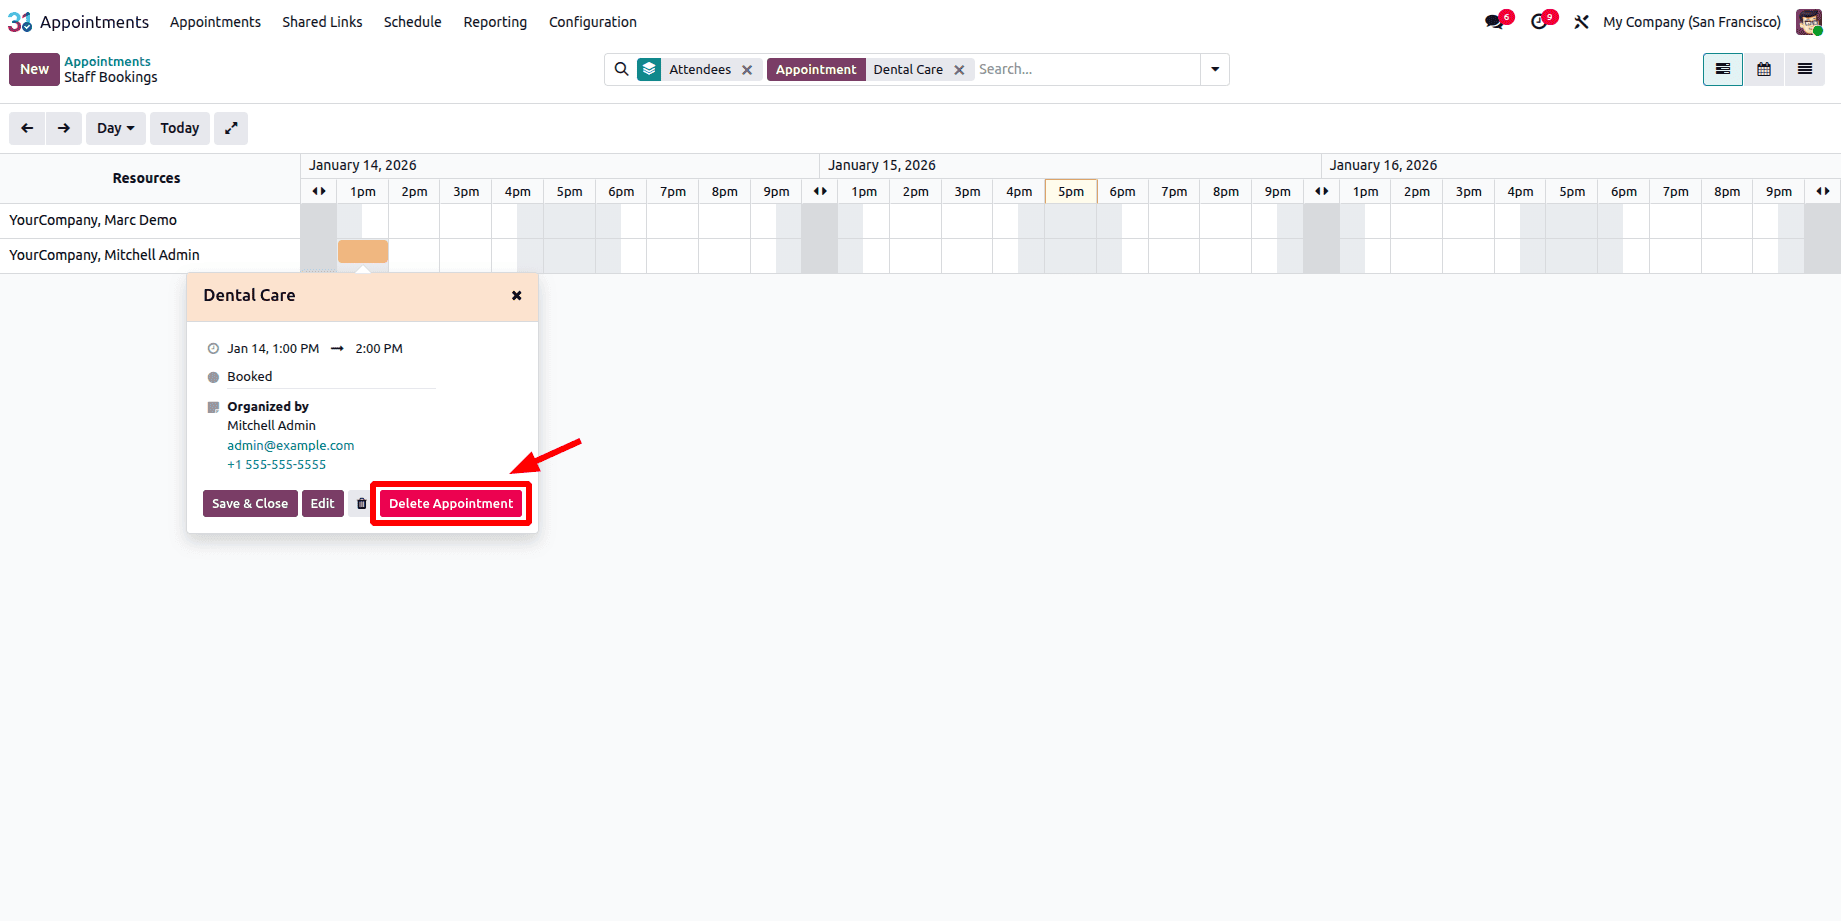
The matching appointment will be deleted after you click the "Delete Appointment" button. In a similar vein, we may modify any button or view as required by extending the JavaScript class for the Gantt view.
Odoo 19 JavaScript class extensions offer a quick and easy approach to modify the system to meet specific business needs. Developers can add custom features without changing the underlying codebase by using the patch() method to intercept and change the behavior of existing components. This makes it possible to incorporate unique buttons, actions, or improved features, such as more interaction in Gantt charts or other modules.
Businesses wishing to customize Odoo to their unique requirements while preserving the stability of the default functionality will find this method especially beneficial. Without running the risk of interfering with essential system upgrades or functionality, it enables developers to add new workflows, modify current views, and produce a more user-centric experience. This kind of system extension gives organizations more freedom to modify Odoo to fit their particular goals and procedures. Patching JavaScript classes guarantees the smooth integration of new features, whether they are optimizing current functionality or introducing custom tools.
To read more about How to Use JS Class in Gantt Views in Odoo 18, refer to our blog How to Use JS Class in Gantt Views in Odoo 18.