Odoo studio module is actually a boon to customization to some extent. Typing codes are tiring work for the developers as it consumes a lot of their productive and precious time. Studio module can be defined as a tool that allows users to add, modify features and even create new apps without any coding experience and knowledge. Studio module is available in enterprise version. Odoo 14 mainly focuses on usability and stability.
One can install the Studio module from apps. A customization tool will appear at top of screen when installation of the studio module is completed.
Basically the studio tool will help to create custom views and modify the existing one without using XML code.
One can create new modules with existing views and add new fields or the module with entirely a new model. So once you click on the studio tool, it provides three options for customization:
1. Change background
2. Import
3. Export
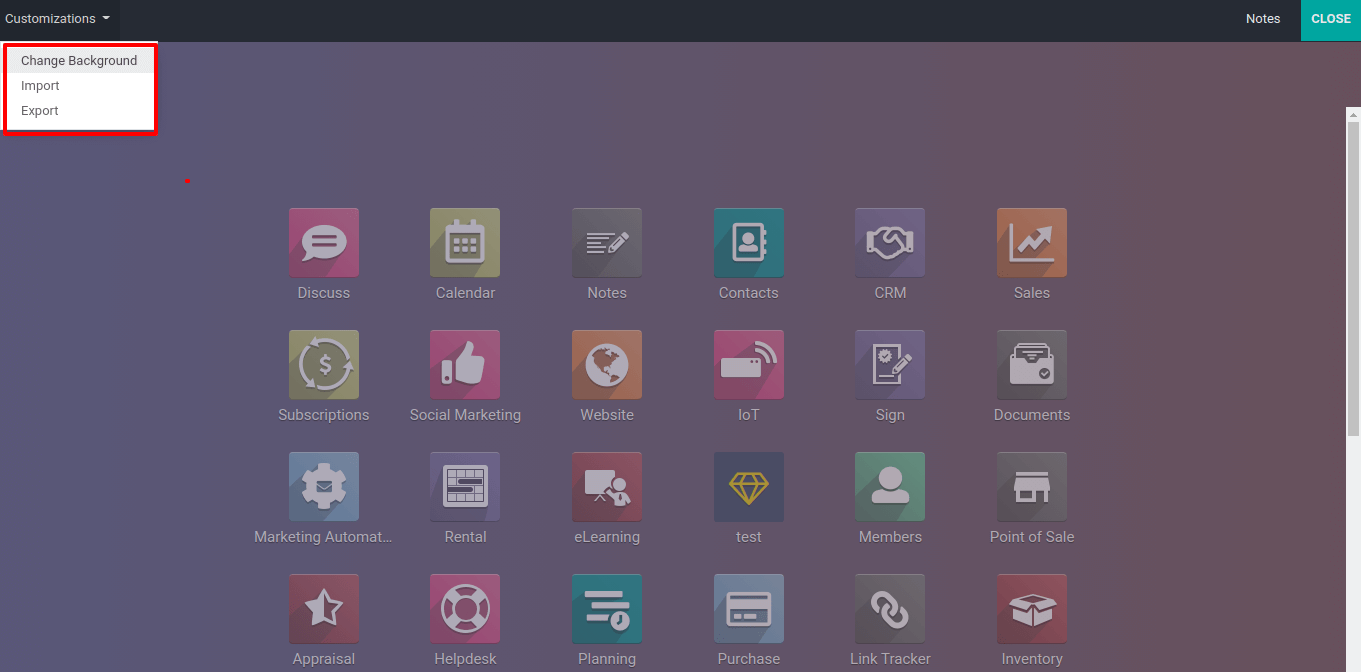
One can change the background, using the ‘change background’ option under customization. So it will ask you to choose the background image from your system. Also modules can be exported and custom modules can be imported using ‘export’ and ‘import’ options under customization respectively.
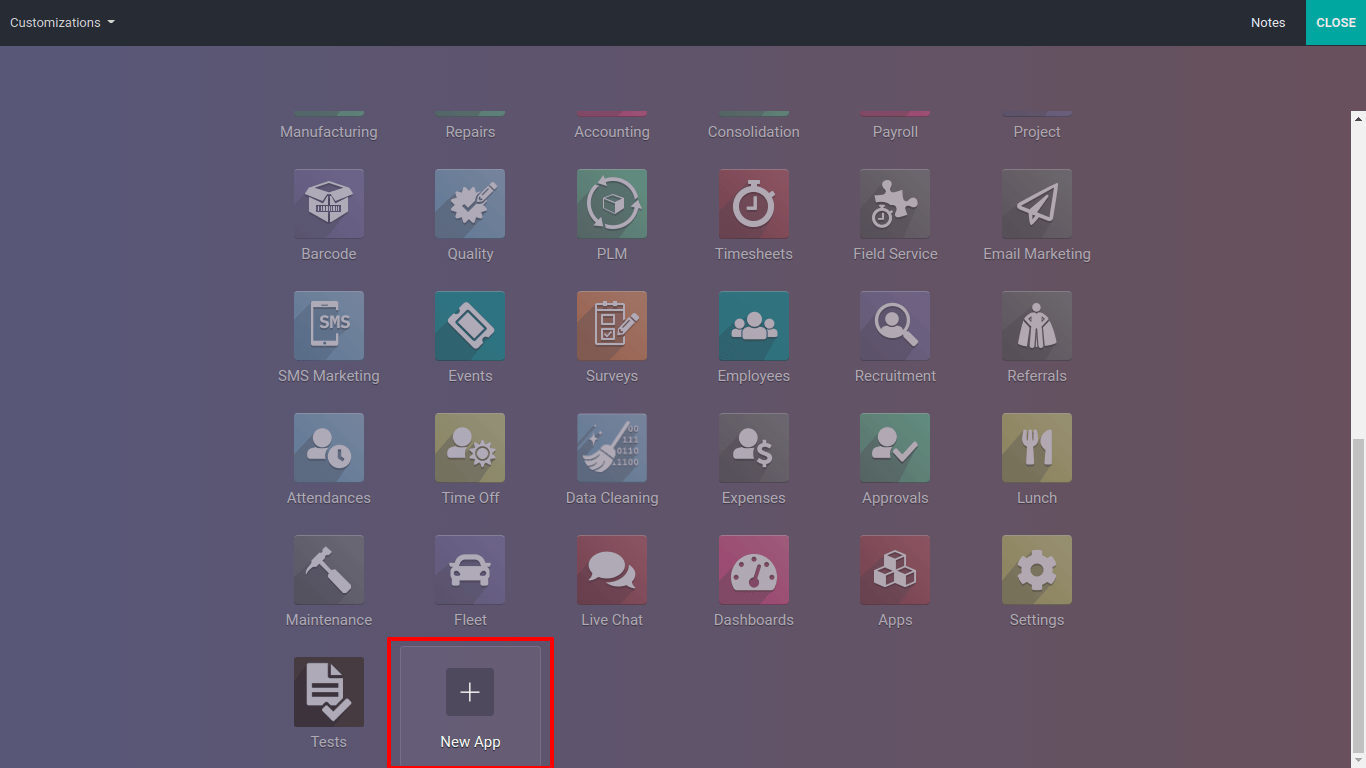
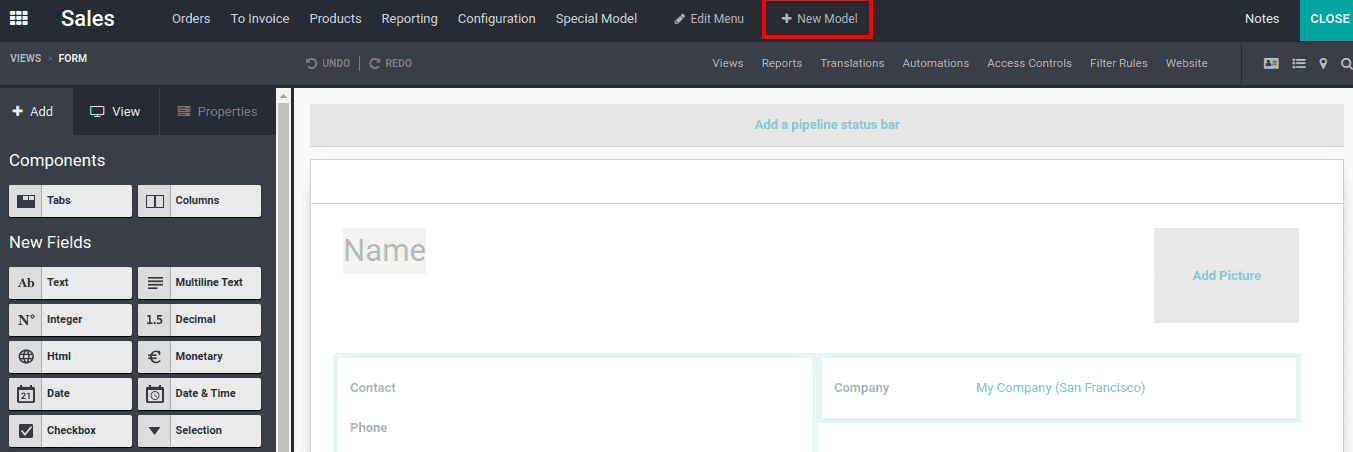
Now one can modify any existing application or can create even a new one. You will have an ‘New App’ at the last in the screen to create a new App.
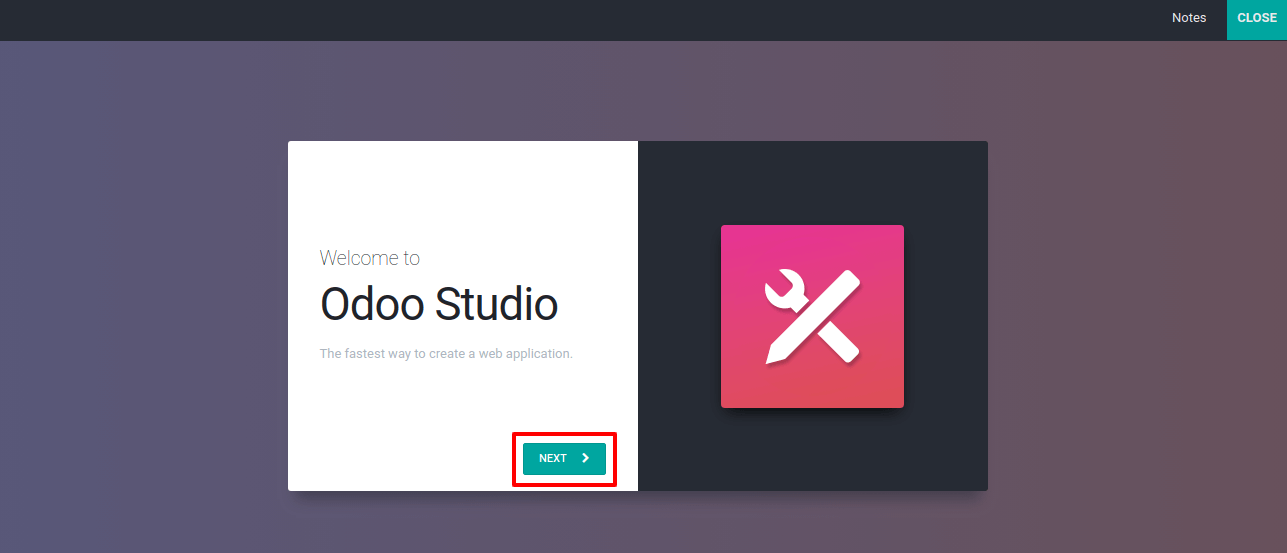
Once ‘New App’ is clicked, it will display a message. Proceed with the ‘Next’ button.
Then it will ask to enter the details of the new application that you are going to create.
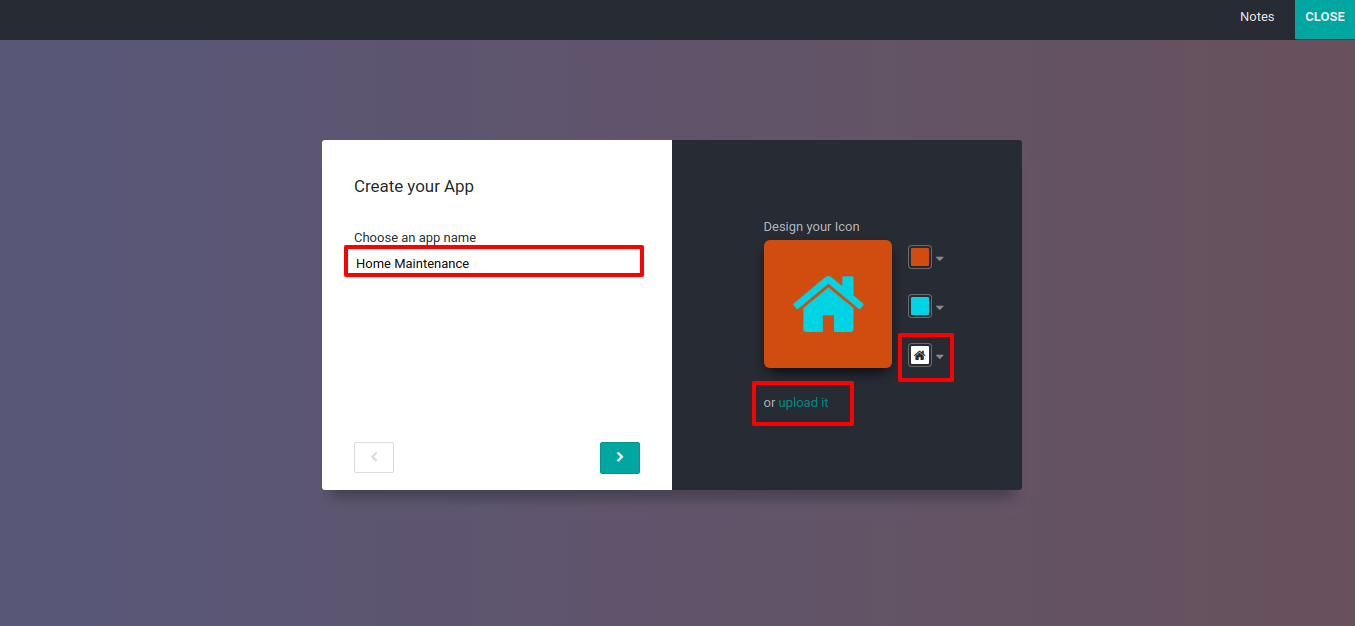
Add the name of the application at the specified field and can design icons for the application either from the tray or upload it from the system. Now add the name of ‘Menu’ at specified field and also the ‘Model’ .
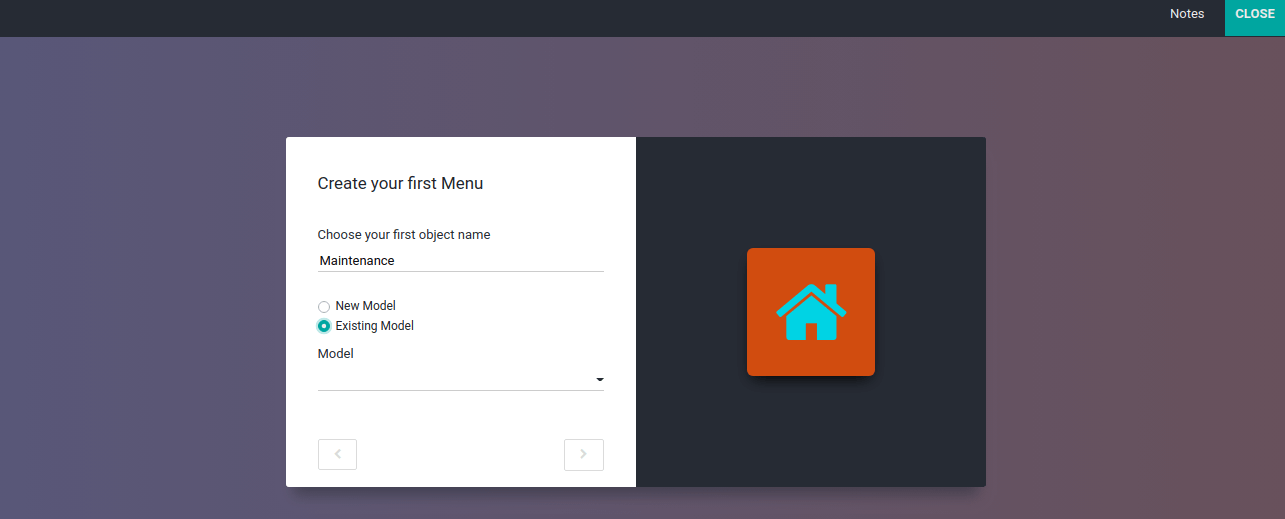
Here one can add a new model or an existing one. If it is an existing one choose the model. If it is a new model, another form will appear suggesting features to that model.
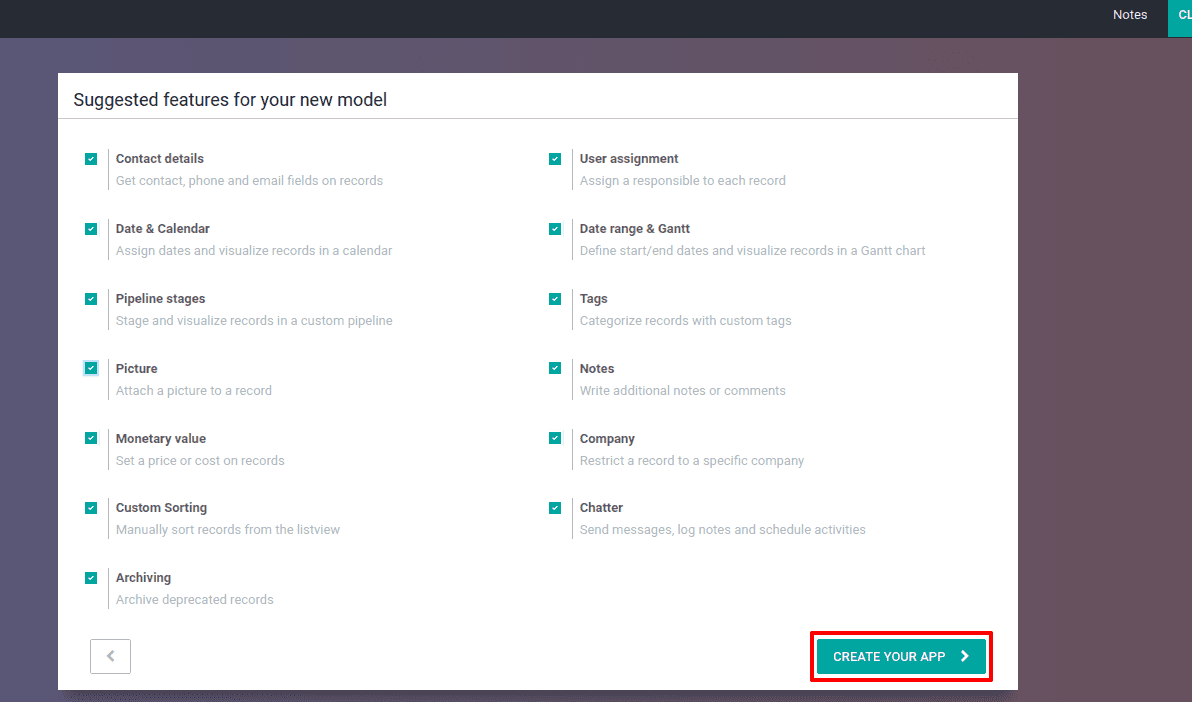
So once the menu is added and features like contact details, date, user assignment, Notes, Chatter, company, etc are chosen according to requirement. Then click on ‘CREATE YOUR APP’.

The different views can be chosen from the top right corner of the screen. Using ‘Add’, one can add new fields to the model.
A model defines the logical structure of the database, which determines how the data is organized and stored in the database. Model may consist of many fields and these fields are classified as basic fields (or scalar fields) and relational fields. Basic fields are fields like normal text fields or integer fields. Relational fields are those having relations between models.
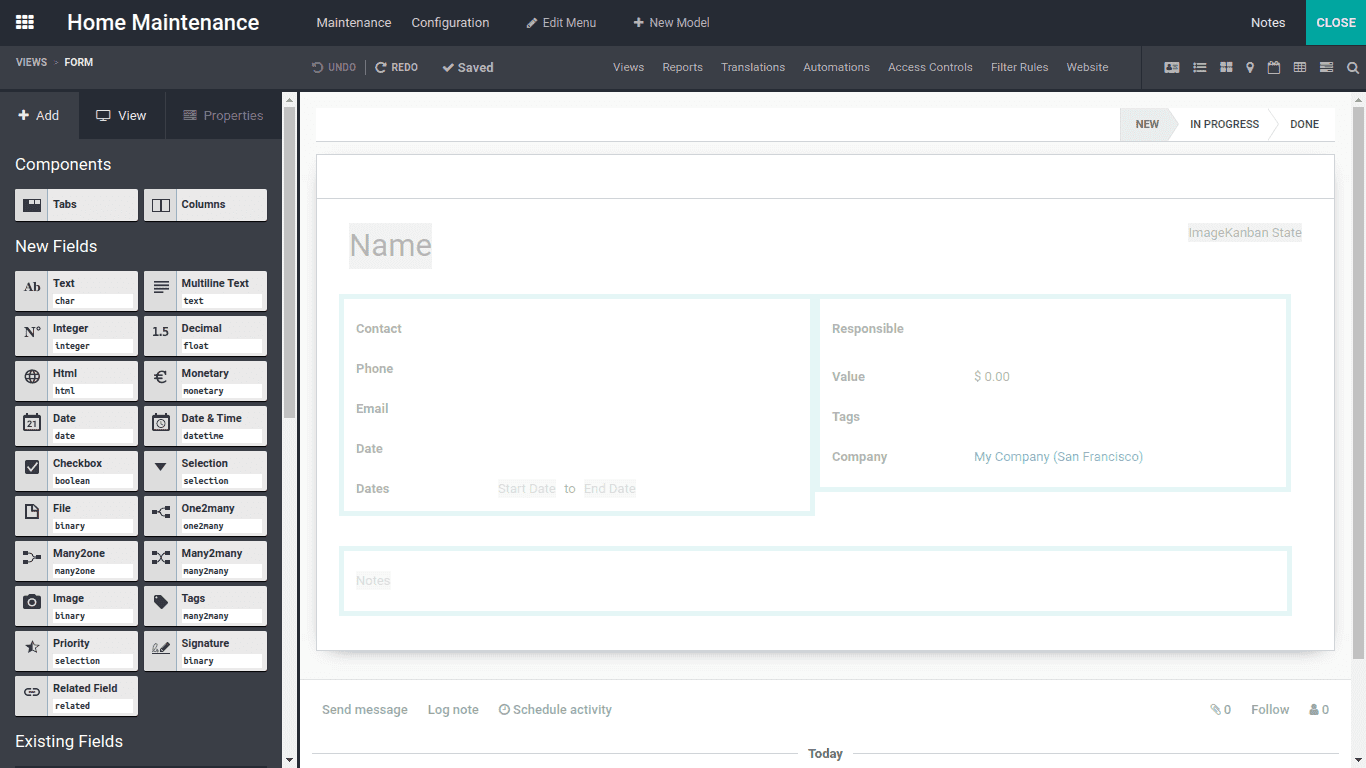
One can add the fields by dragging them and drop to the form. The fields can be One2many, Many2many, Many2one and related fields.
Now let us add a new field ‘Priority’. The field name can be set at ‘Label’ under properties. Then properties for the field can be set whether invisible ,required or read only mode.
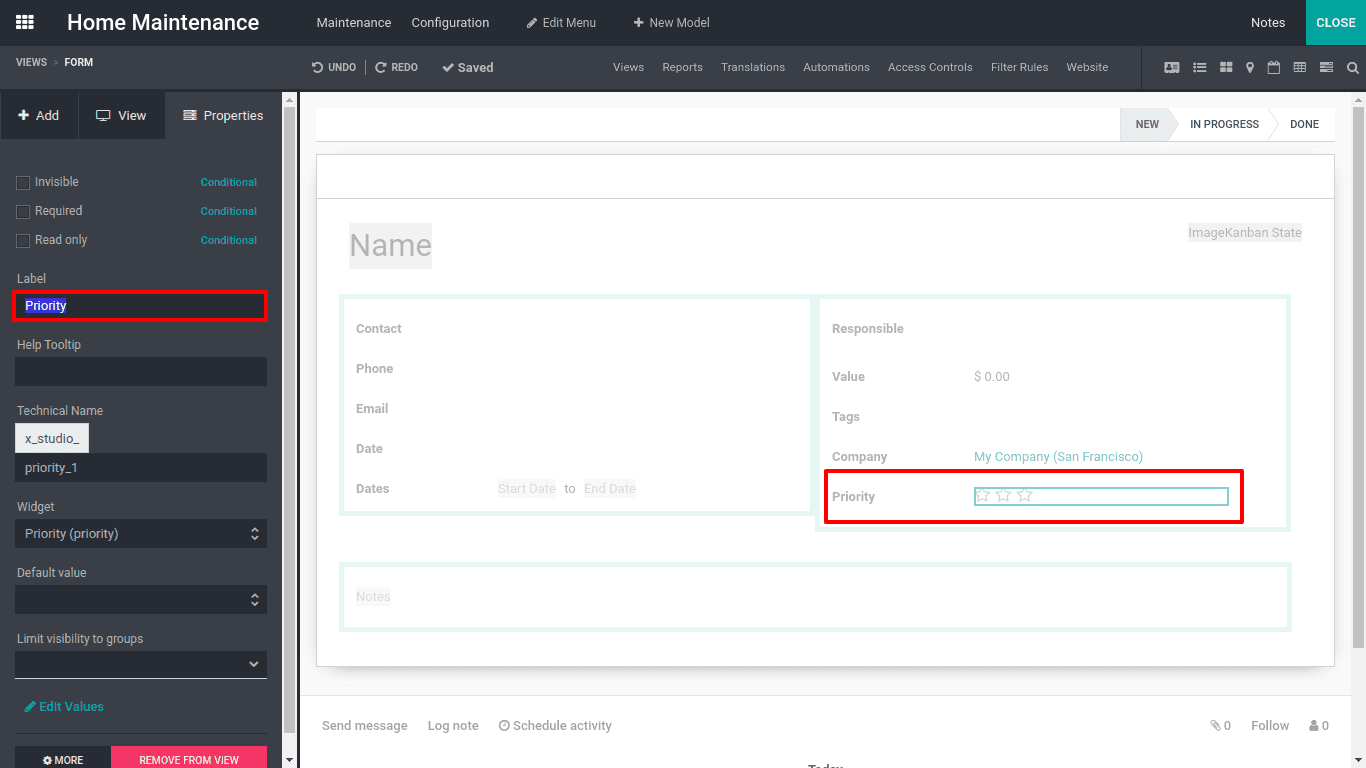
If you want to modify or remove the existing fields from the form, you can use the ‘Remove from View’ option.
Now discuss the fields:
The One2many field is a one-way directional field for which it chooses multiple records from the table. For example, a Sale order can obtain multiple sales order lines.
The Many2one field is a one-way directional field for which it chooses one record from the table. Product category is an example for Many2one field. Each of the products belongs to only one category.
The Many2many field is a two-way directional field for which it chooses records from the table. Example: multiple tags used in lead’s form.
One can drag the required components and fields like Text, Multiline text etc to the form as per need. Suppose when a Many2one field is dropping to your form. It will ask to choose the relation as shown below.
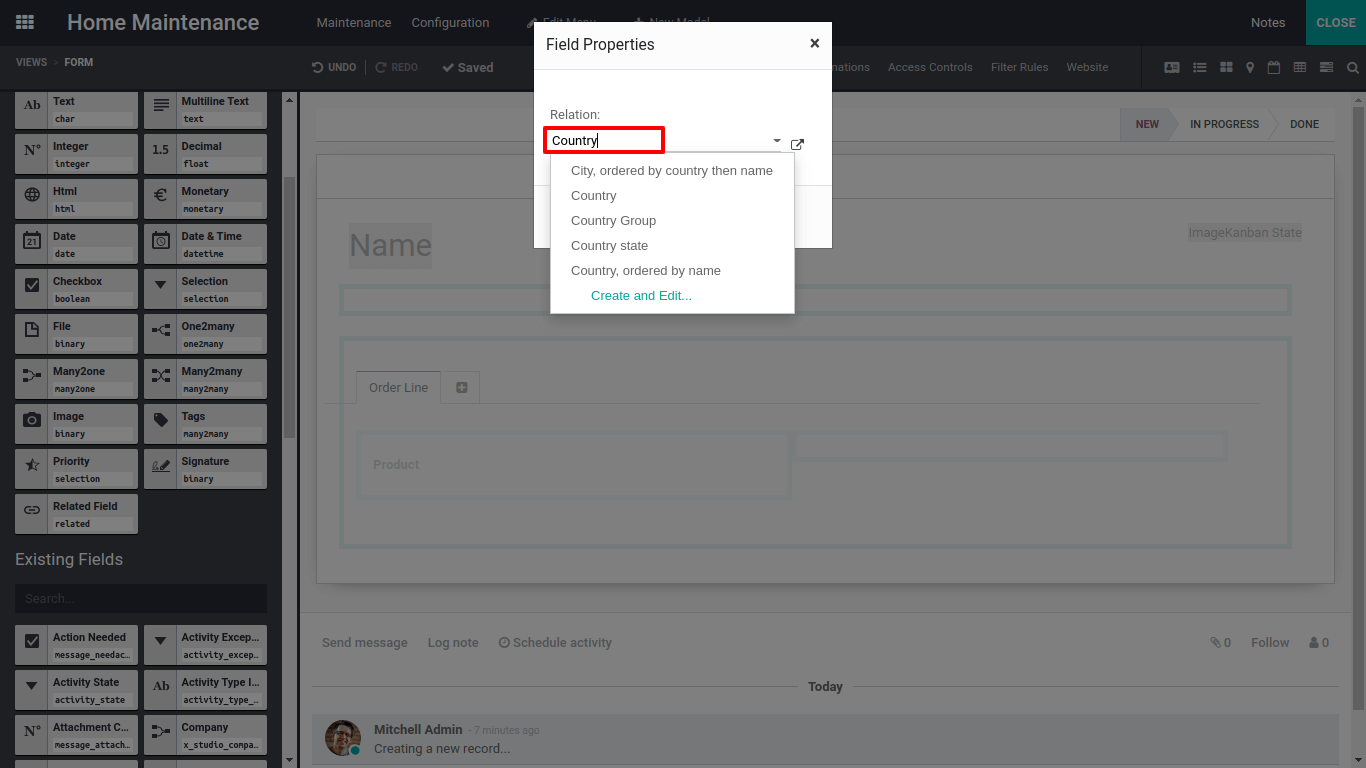
Choose the relation from the dropdown. For each field one can change the Label, set a placeholder text if needed. One can set a help message for the field using ‘Help Tooltip’, so that the message will be displayed when the user put the cursor at that field in form.
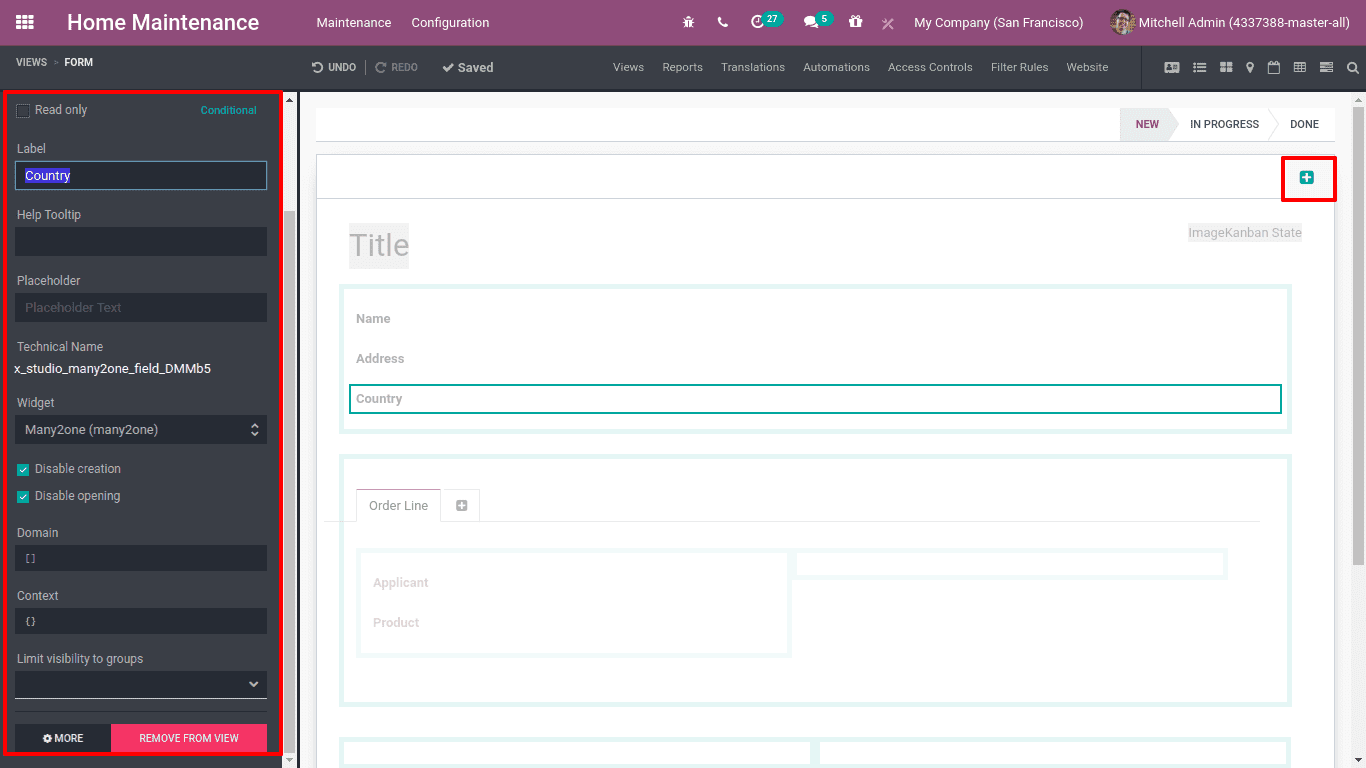
Also below the widget , there are two options: Disable creation and Disable opening. So using this , for field ‘country’ you can set in such a way that to enable and disable new country creation in the form. One can also set domain, contact and even limit the visibility to groups by choosing the required group.
Smart buttons can also be added to the form using ‘+’ at the right top corner. Once you click on them, it will ask for the Label(Name of smart button), icon and the related field.
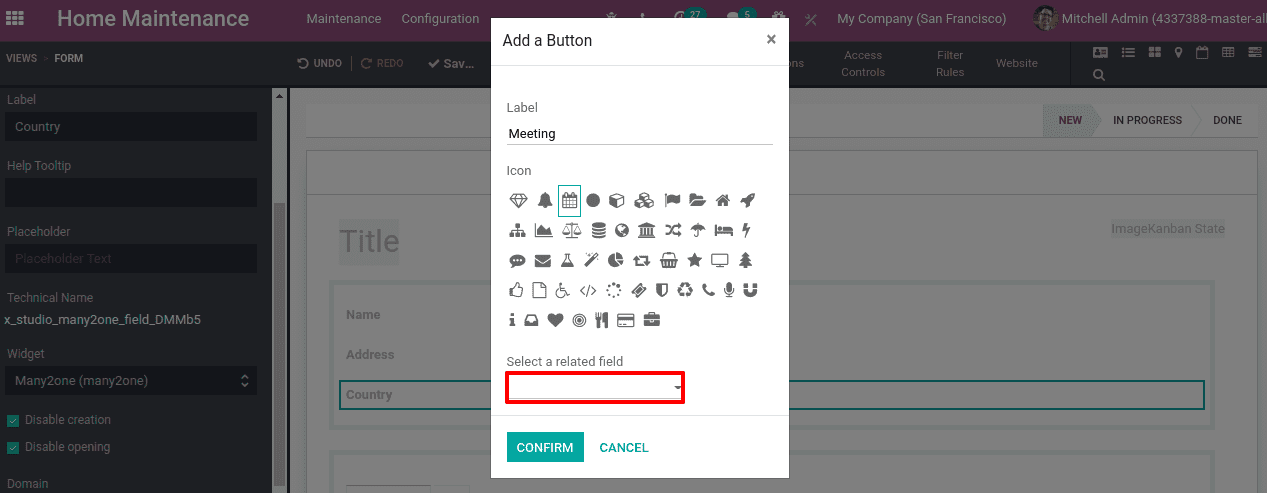
Once they set smart buttons in that name will be displayed in the form.
One can also set checkboxes and selection boxes. When the selection box is dragged to the form, It will ask for the possible values for selection.
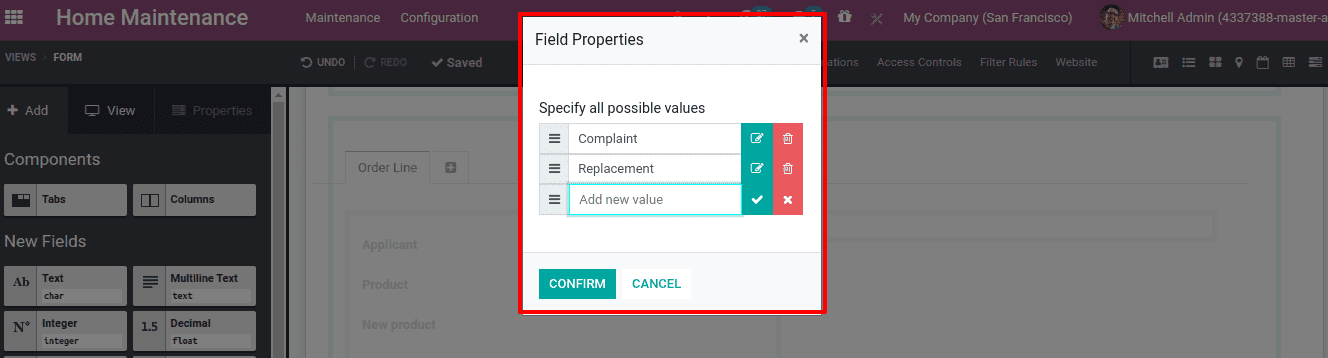
Click on confirm after adding the values for the selection box. After that can change the label for the field and also edit the values.
Another new feature in Odoo 14 is the ‘New model Configurator’. The Model also be added to an existing application too.
We can add the model using ‘New Model’. Thus it will ask for the model name and model features.
Customizing Rainbow man and Approval
Now let us see how the existing features can be changed. So first go to any of the modules, Say Sales module. Then open the form in which you need to customize and click on the studio tool at the top. Now you can add or modify features to an existing module. Let’s see how rainbow man appears in the sales when an sale order confirms. So let us edit the feature.
Rainbow man is the animated picture that appears on completion of certain tasks or on some clicks. We have seen a rainbow man appear when an CRM opportunity is marked as won. We can set the same for sale order confirmation, finish the reconciliation process or for payment done etc.
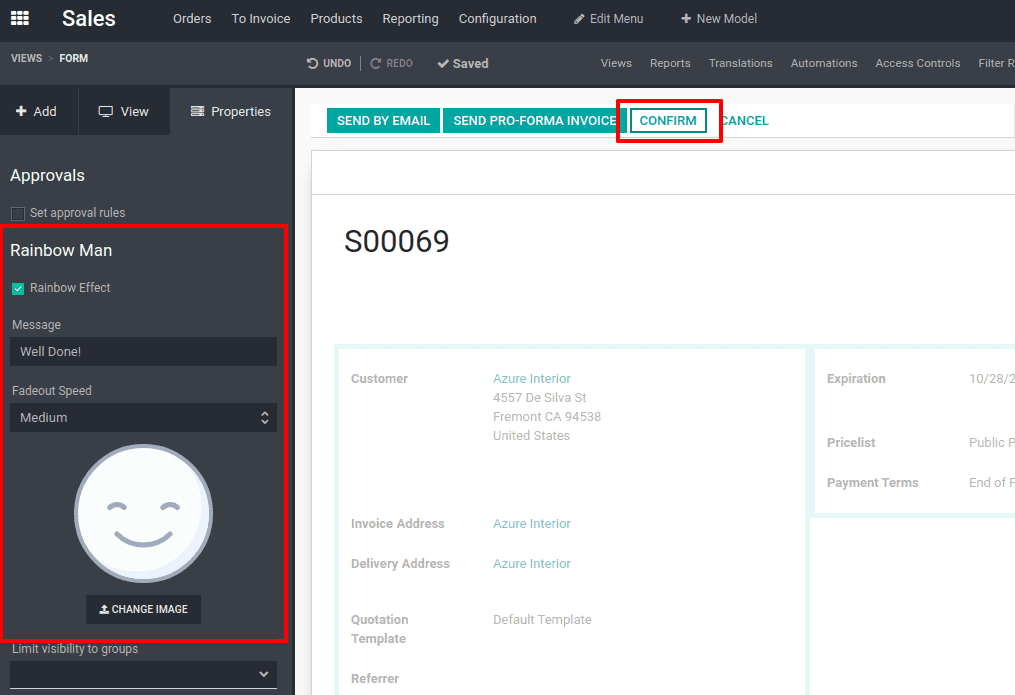
One can set the rainbow effect, the message to be displayed and fadeout speed (Slow, Medium ,Fast). The image also can be changed using the ‘change image’ option.
So when the sale order is confirmed, the rainbow man appears on the screen.

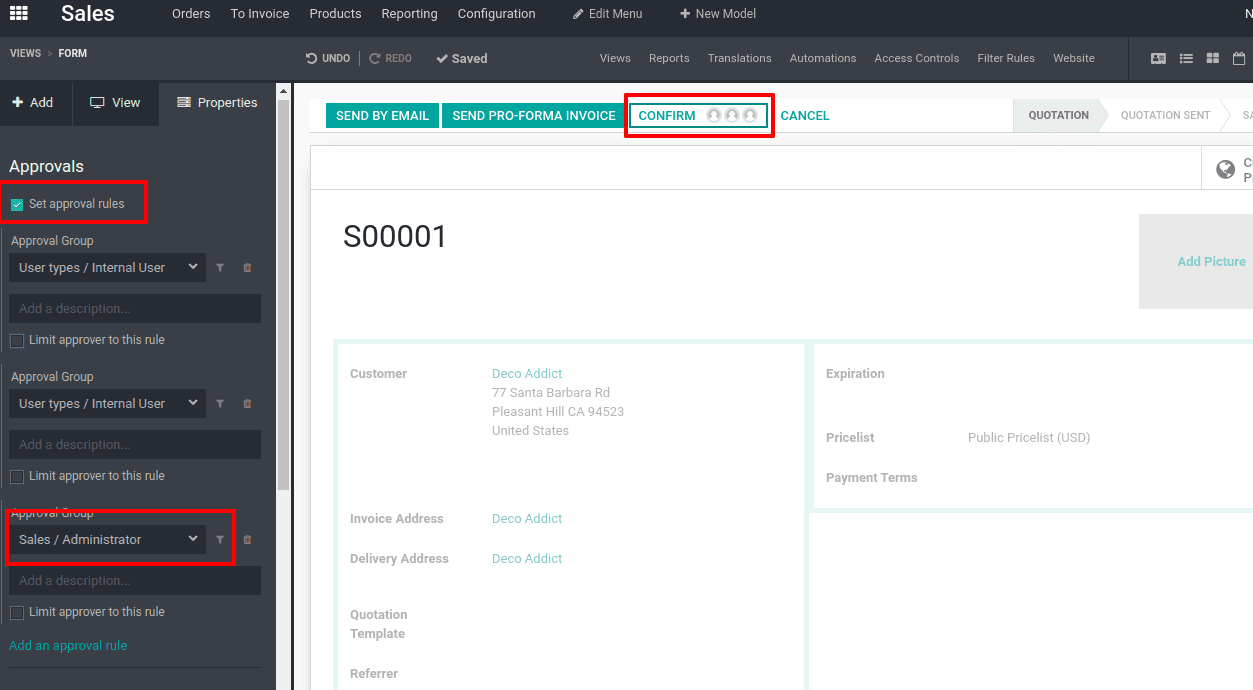
Now setting approvals can be set in such a way that the members of a certain group can approve on confirming the sale order.
Customizing Reports
To customize report, select the report tab in the studio tool. One can create new reports or modify existing reports. When creating a new report, it will ask the type of report: External, Internal, Blank.
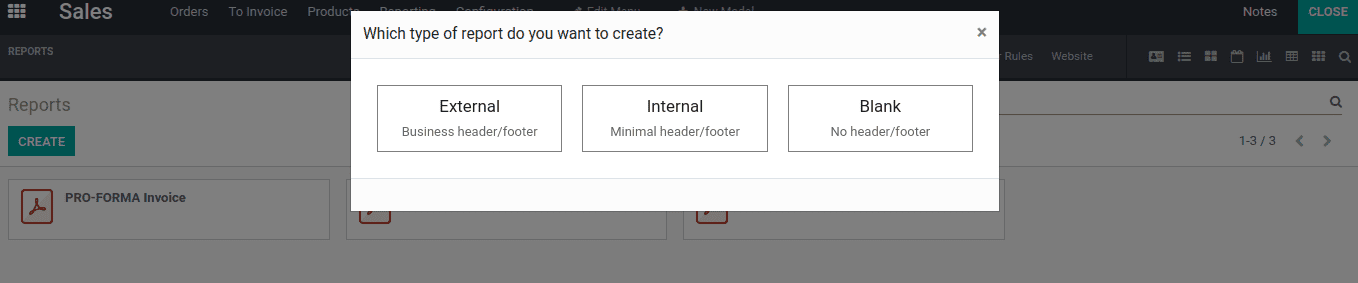
Choose the required one based on whether the report contains the header and footer. Thus the report template will appear.
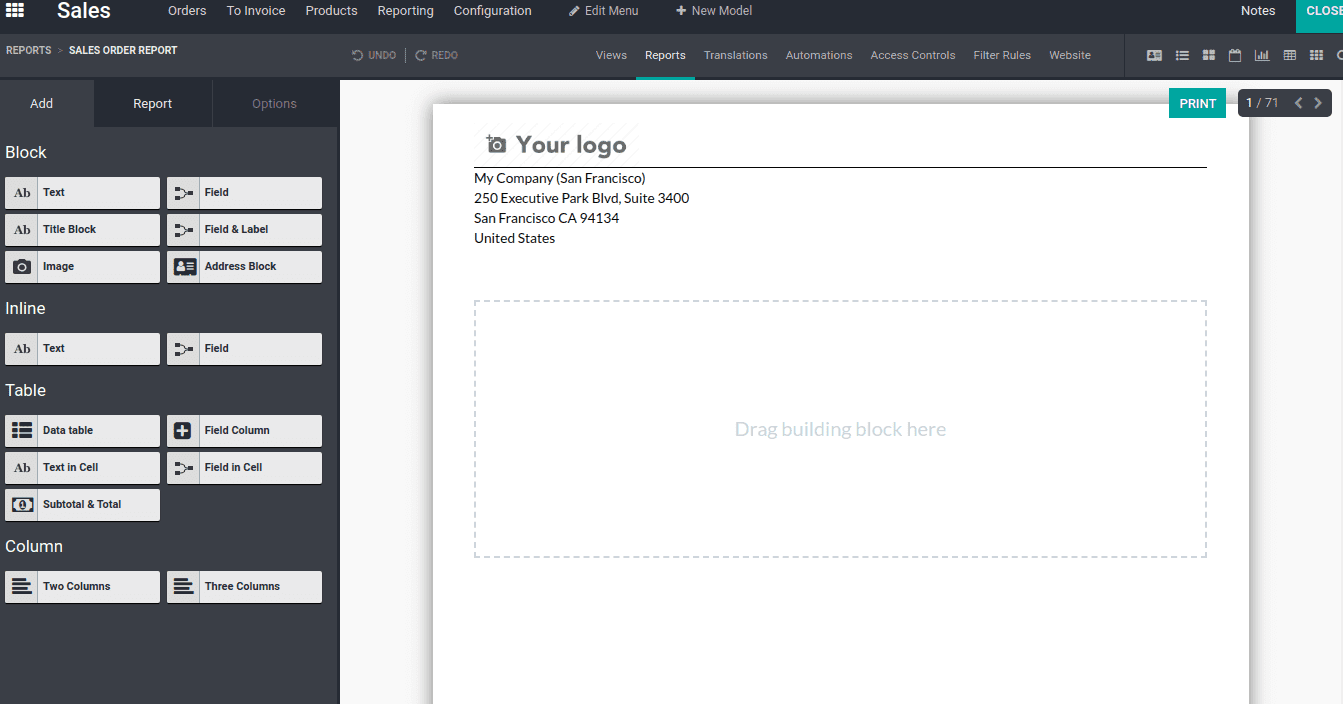
Now as earlier, one can design the report using the text fields, table can be added, subtotal & total can add etc.
Another new feature in Odoo 14 is the ways that address separator can be added. The separator on addresses can be obtained from the field address separator itself.

The drop down options for address separator like Line break, Space, Comma, Dash, Vertical bar, Slash can be used to separate the addresses. This is new in Odoo 14. Also font size, visibility can also be set
Also Read:
1. Odoo 14 Accounting
2. Sales and CRM in Odoo 14