Odoo sh is a cloud odoo hosting platform designed for odoo end customers. The introduction of odoo sh was really useful for developers, project managers, and end-users. While choosing a hosting type we should keep in mind some of the main features such as:
1. Maintenance
2. Backups
3. Email servers
4. Customization possibility i.e third-party apps
5. Server control
6. Built-in Developer and system administration tools etc
All these above-mentioned features are taken into consideration in odoo sh hosting platform. Thereby these were the things which actually odoo users were looking forward to. Now in this blog let us discuss some of the features available in odoo sh. First of all, let’s begin with new project creation. The odoo sh is linked to the GitHub repository, So it is important to have a GitHub account.
Now login to the odoo sh using your GitHub account.

After signing in you provide the following details:
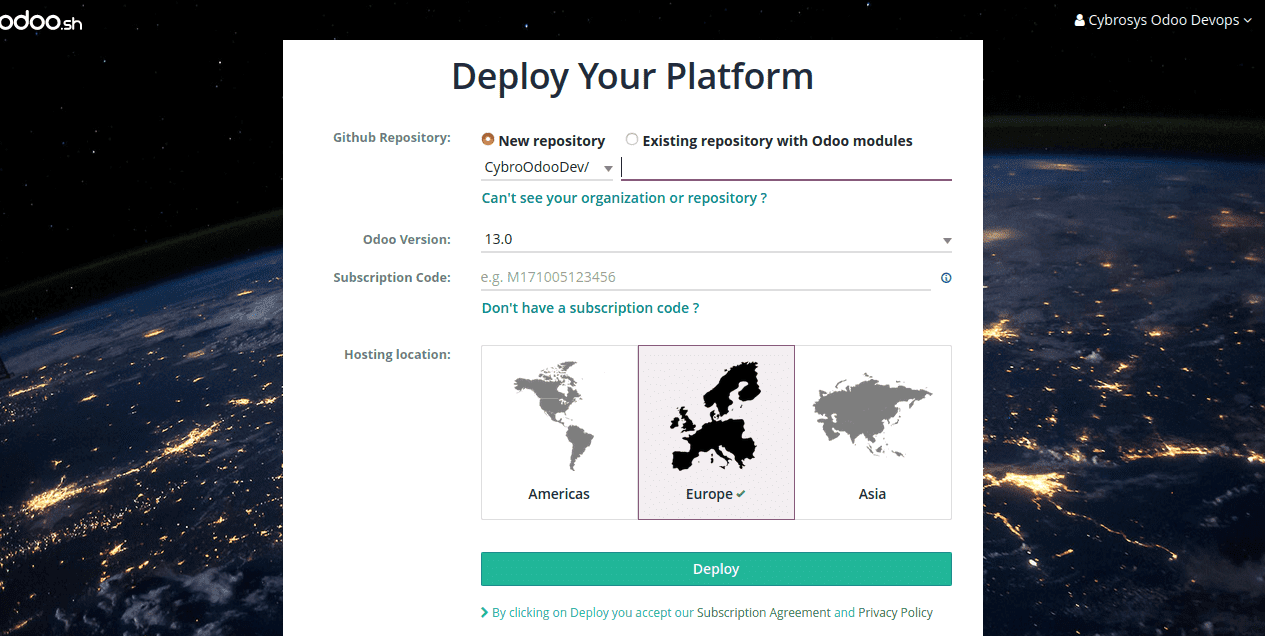
1. Github Repository - Add the git repository, you have two options available for this either you can create a new repository or you can add an existing repository.
2. Odoo Version-Choose the odoo version for your project
3. Subscription code - Enter the subscription code
4. Hosting Location - Provide the hosting location
Now choose to Deploy. When you deploy your project actually the GitHub repository which you have provided gets linked to your project.
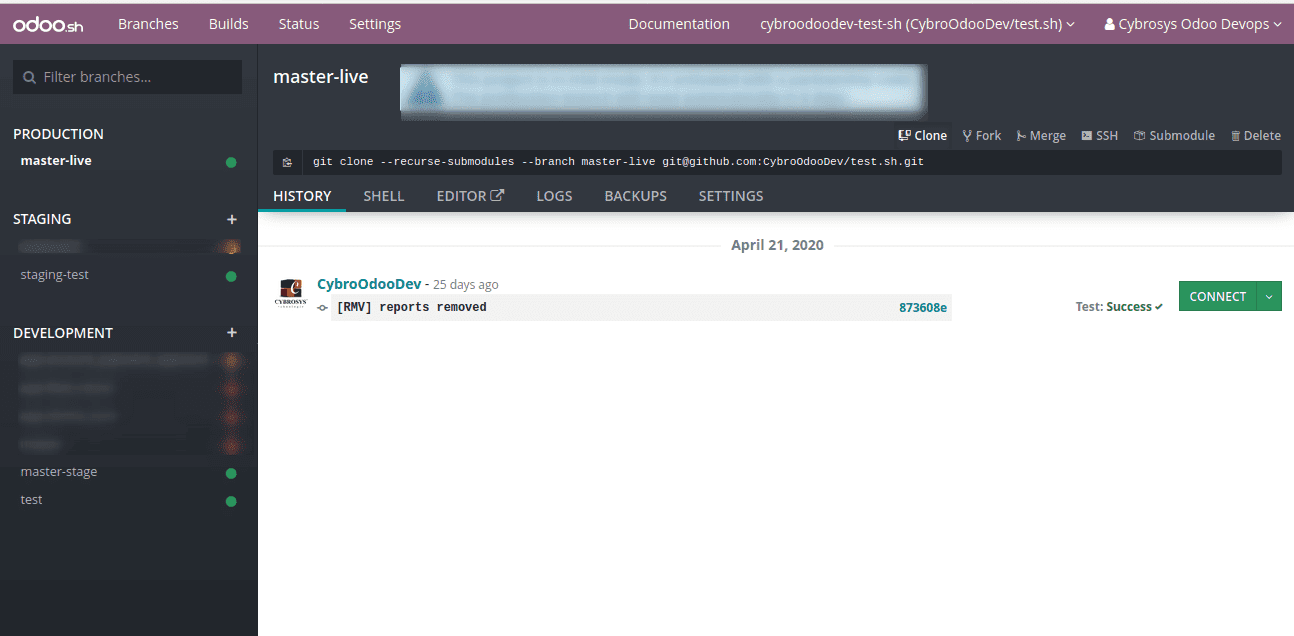
Now you can see three branches Production, Staging, and Development.
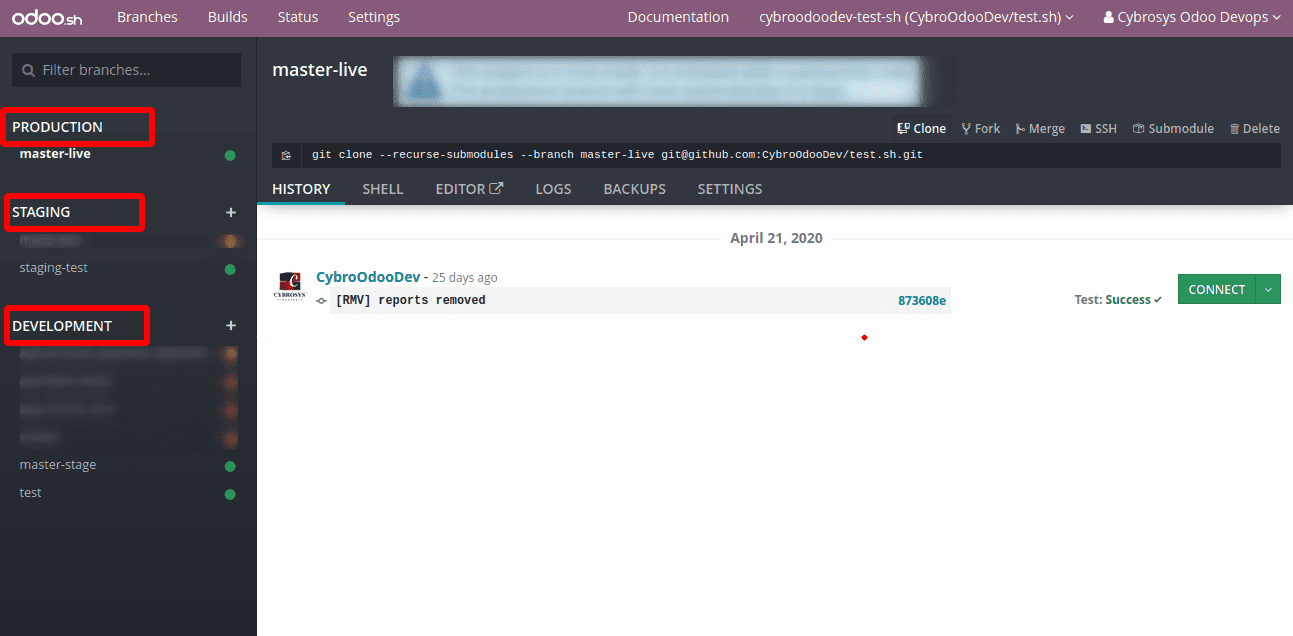
Stages:
Under these branches, you can see the GitHub branches which we have in our Github repository.
1.Production
The production branch is the branch where you have the production database. The changes you make here are final and are for real, which in short simply we can say here we have our live database. When we push a new commit to this branch the production server is updated with the new code and the service is restarted.
The advantage which you have in the production branch is that in case if the service fails to restart after your new code updation, the branch reverts back to the previous successful commit. This action actually acts as a safeguard to protect our production database. The demo data is not loaded on the production database and unit testing is also not performed because the server may be unavailable for preparing updates.
2.Staging
The staging branch is usually meant for testing purposes without putting your actual production data into risk. Here you can perform testing of new features that you have customized. The database here is a neutralized duplicate of production. The latest database is maintained in staging but the older instances are garbage collected in order to manage memory.
3.Development
The development stage creates a database with demo data so that it is easy for developers/end-users to test the developments quickly and efficiently. The unit tests are performed on these data. Whenever a new commit occurs in any of these branches(branches in the Development stage), a new database is created with the code updations committed on this branch. The databases used for development are valid for 3 days only. The scheduled actions and mail servers have restrictions in development and staging stages as they are used for development, the scheduled actions are not triggered often. Whereas in production all these happen often and for real according to the configuration.
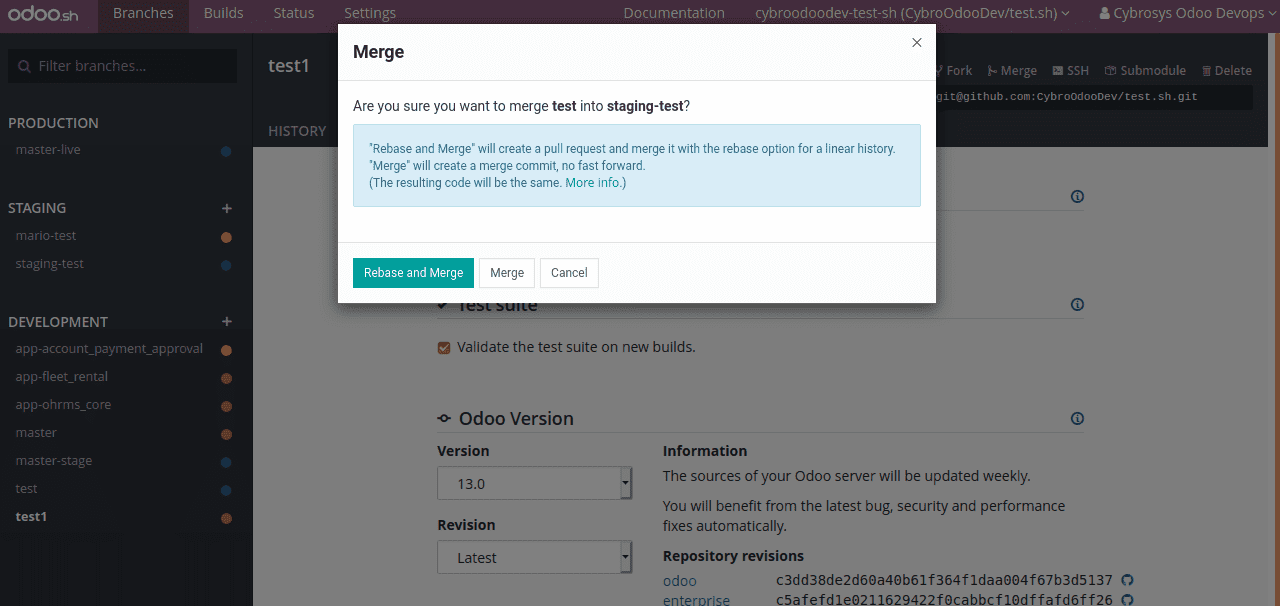
Merging
You can easily merge the branches by just drag and drop. You can merge the updations made in development to staging and then from staging to production. The merging can also be done directly from development to production but this requires courage and boldness when you do this you actually bypass the tests in the staging stage. Only perform this if you are confident about the updations.
BUILDS
The builds show the status of the updation, we have performed. The builds help us to test the behavior of the server. The build creation is considered as successful if there are no errors.
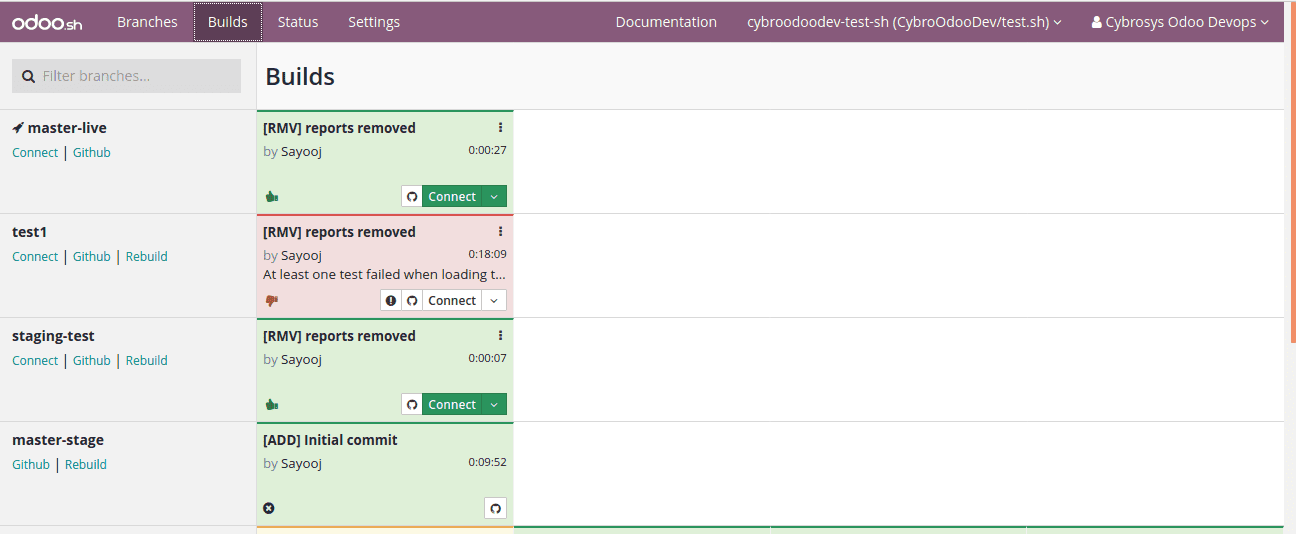
The build status can easily be identified using the following colors.
Red color indicates that our updates have some errors which in turn leads to an unsuccessful build.
Yellow color indicates a warning. So this shows that the build is almost successful. You can fix these warning messages to create a successful build.
Green color indicates the successful creation of build.
You can also rebuild a branch using the Rebuild icon.
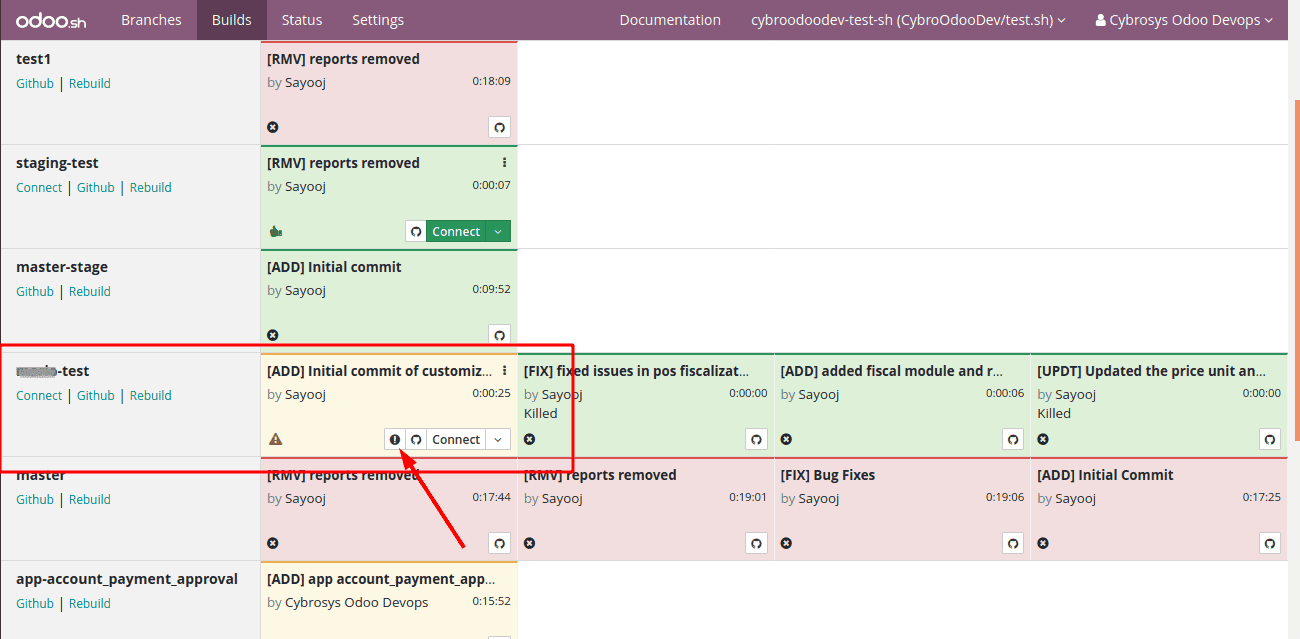
The rebuild occurs with the last commits made on this branch.
The warning/error messages can be viewed by clicking on the above-indicated button.
The changes made can be viewed at a glance using the Github icon. This leads you to the changes made on the specific branch.
The connect button helps you to connect to the particular build. In order to connect as a particular user, you can choose Connect As.
The behavior of the builds can be specified in each build’s settings. It is possible to update the previous build, create a new build for each commit.
Get access to some of the features easily from your builds with the three dots available:
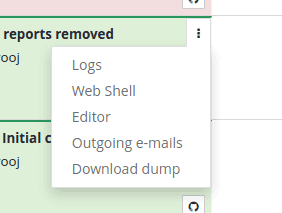
It gives easy access to logs, web shell, editor, outgoing mails and also helps to download database dump.
History - Provides the history of builds, commits, and test statuses with a date. The database can be accessed with the help of the Connect button if the build is successful
Mails -The mails consist of the sent emails. The development and staging branches help to send the emails for testing purposes which means they are intercepted whereas in production the mails are sent for real.
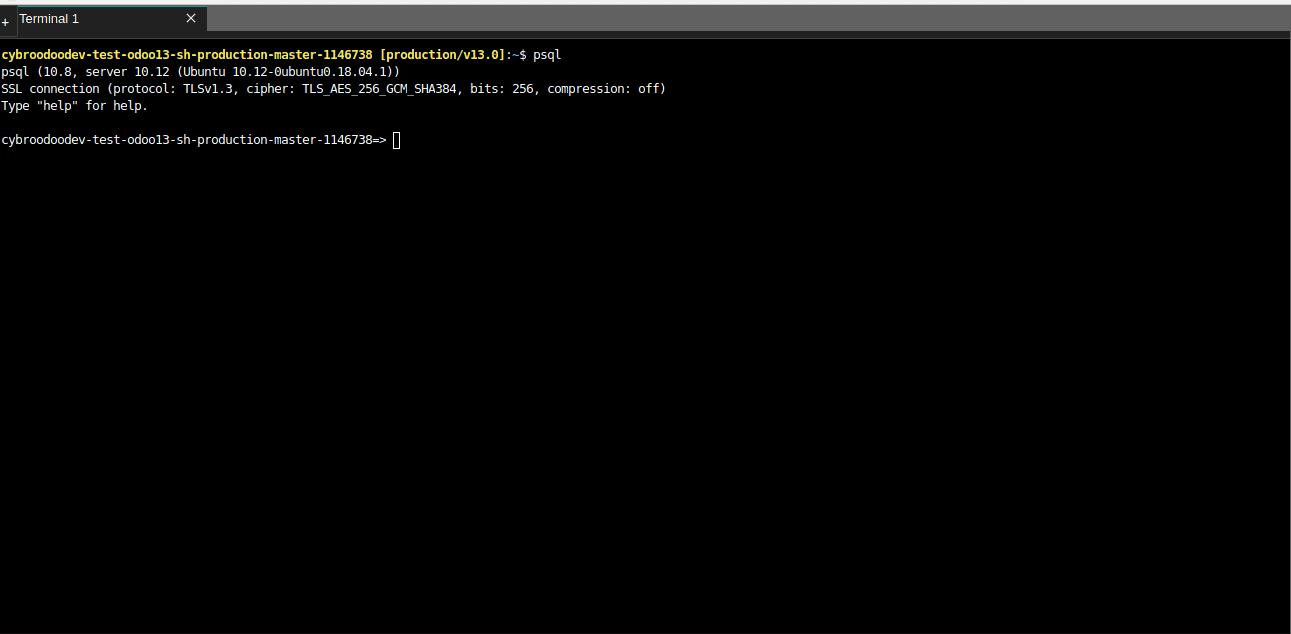
Shell - Provides the shell access, here the Linux commands come into action. It is possible to access the Postgres and run SQL commands using the terminal. Multiple terminals instances can be used using the + icon available at the sidebar.
Editor-The editor helps to edit the source code. The editor also helps you to create notebooks, access python2, python 3 consoles and shells, text files, etc from one click.

The odoo source code is available in /home/odoo/src. In order to edit the source code double click on the folder and navigate to the file which you want to edit. Save the file after making required changes using Ctrl + S shortcut or from the File ? Save python file. The edits made in odoo files are detected automatically so that the service need not be restarted manually. The changes made in view need an upgrade for the module. For this you can use the below command :
odoo-bin -u module_name --stop-after-init
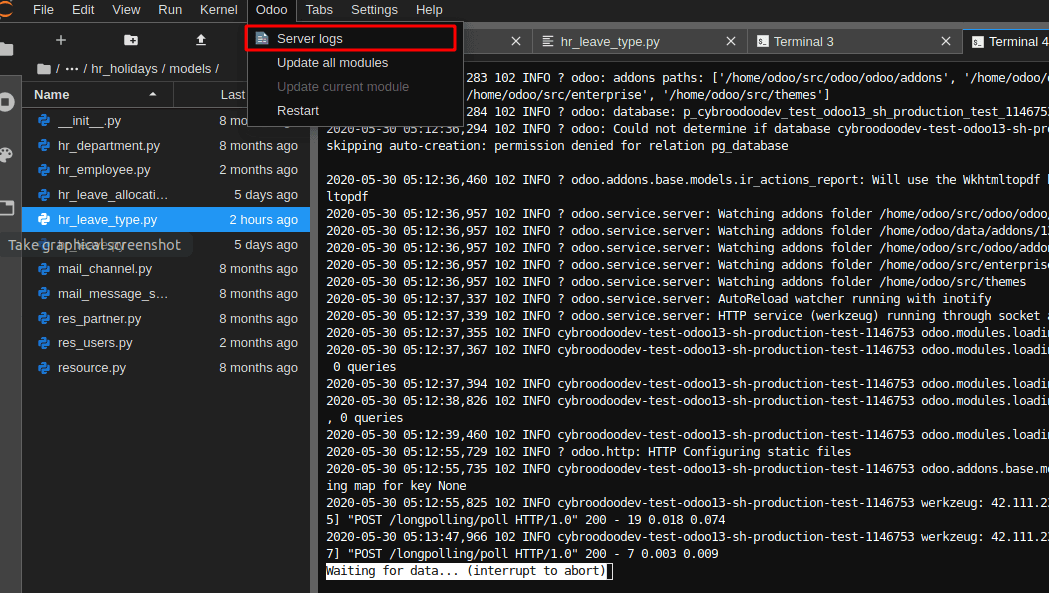
Or Just Go to Odoo-->Update current module
The server logs can be accessed from Odoo -->Server Logs
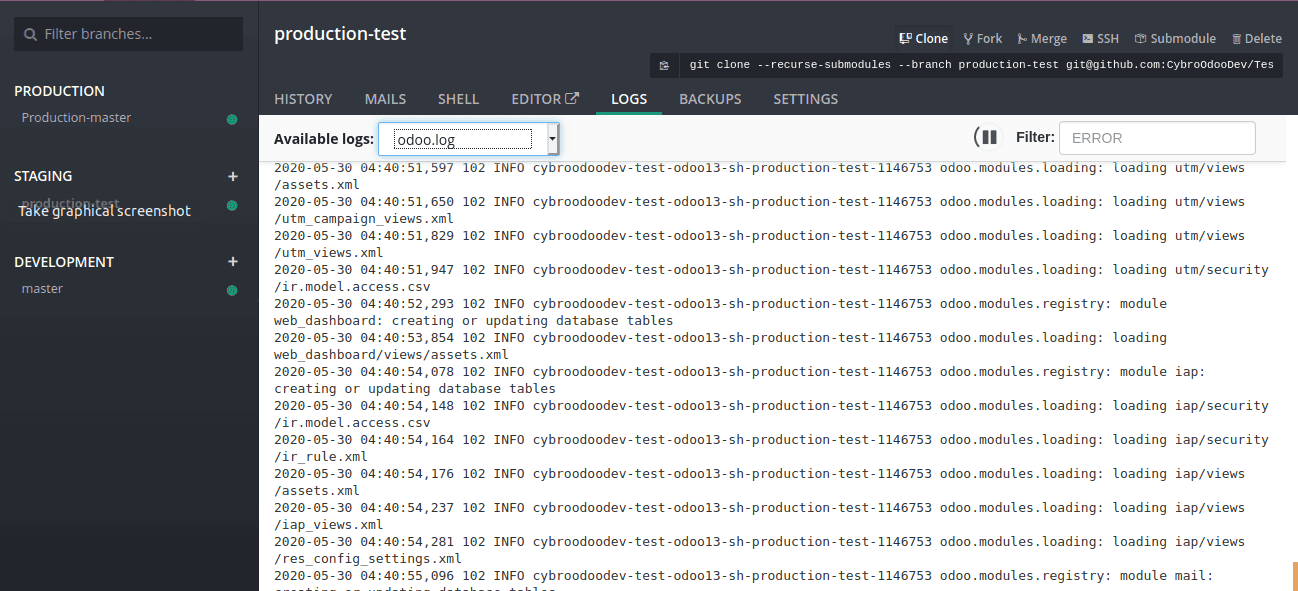
Logs- The logs provide the log view. There are various logs available:
Odoo.log - Provides the log of the server.
Pip-log - Provides the log of python dependency installation
Install-log - Provides the module installation log
Various other logs are also available like Jupiter-log, update logs, etc
The filter option is available for the log to filter content.
BACKUPS- The odoo sh maintains a backup of the production databases in the backup server.
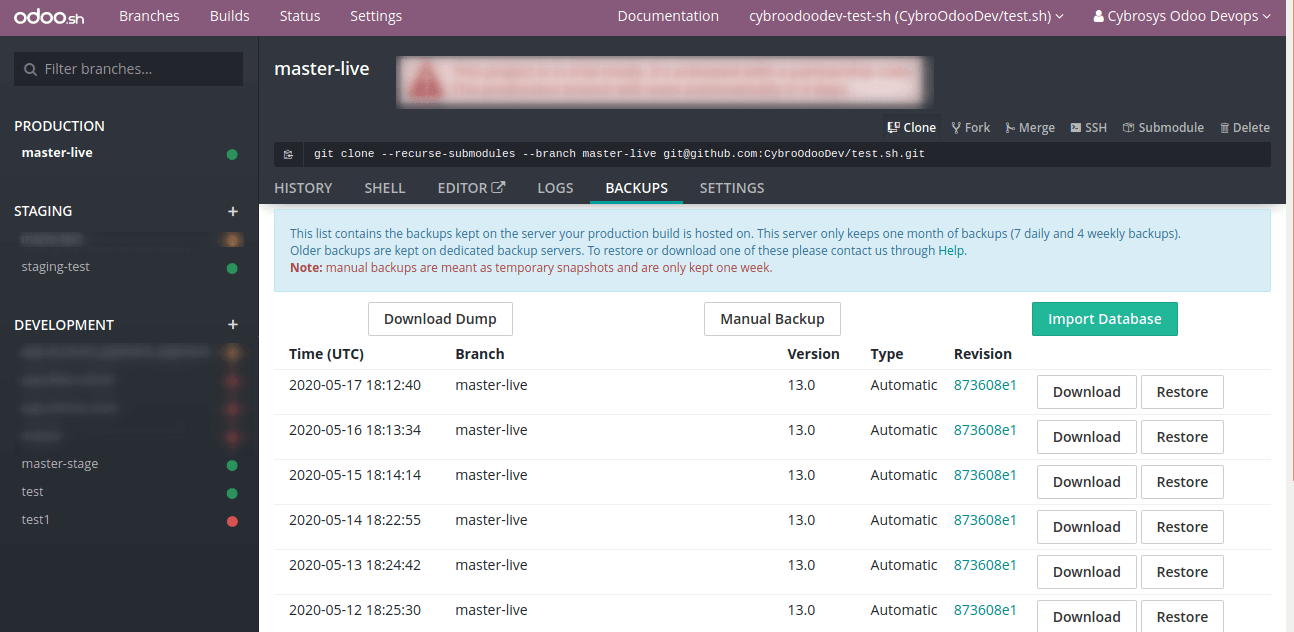
The dump can be downloaded using the Download Dump button. You can see the options to download dump as shown below:
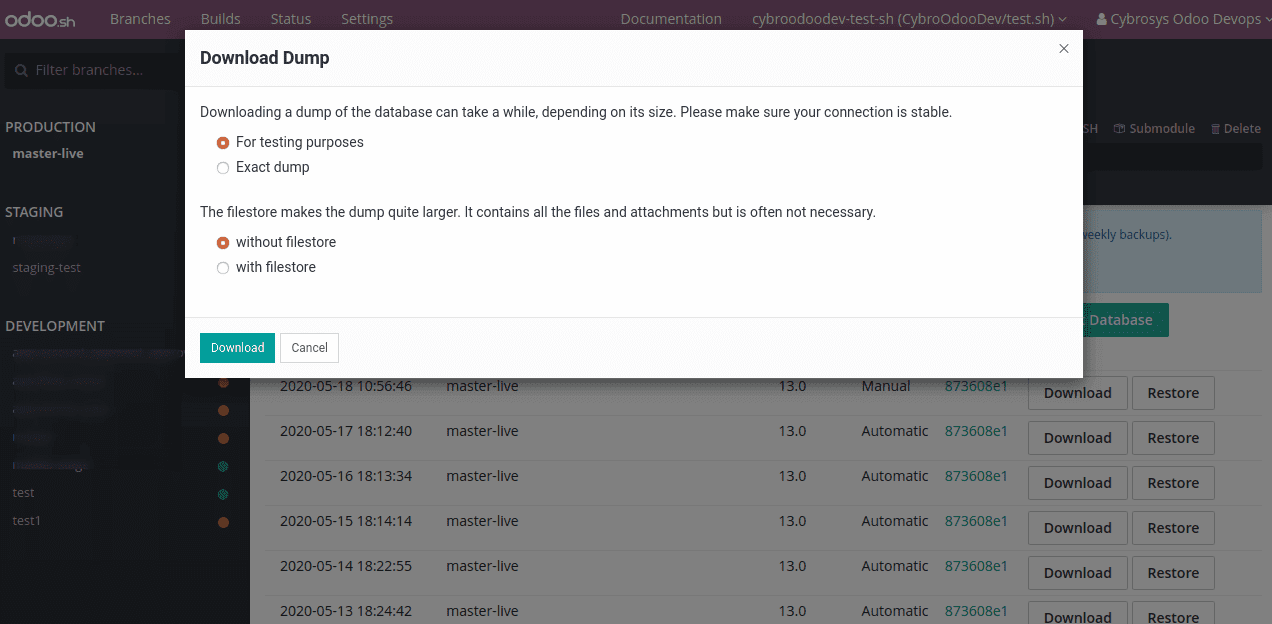
You can also upload databases to the production server using the import database option.
This list contains the backups kept on the server your production build is hosted on. This server only keeps one month of backups (7 daily and 4 weekly backups).
Older backups are kept on dedicated backup servers. In the case of on-premise odoo servers, backups can be obtained using /web/database/manager.
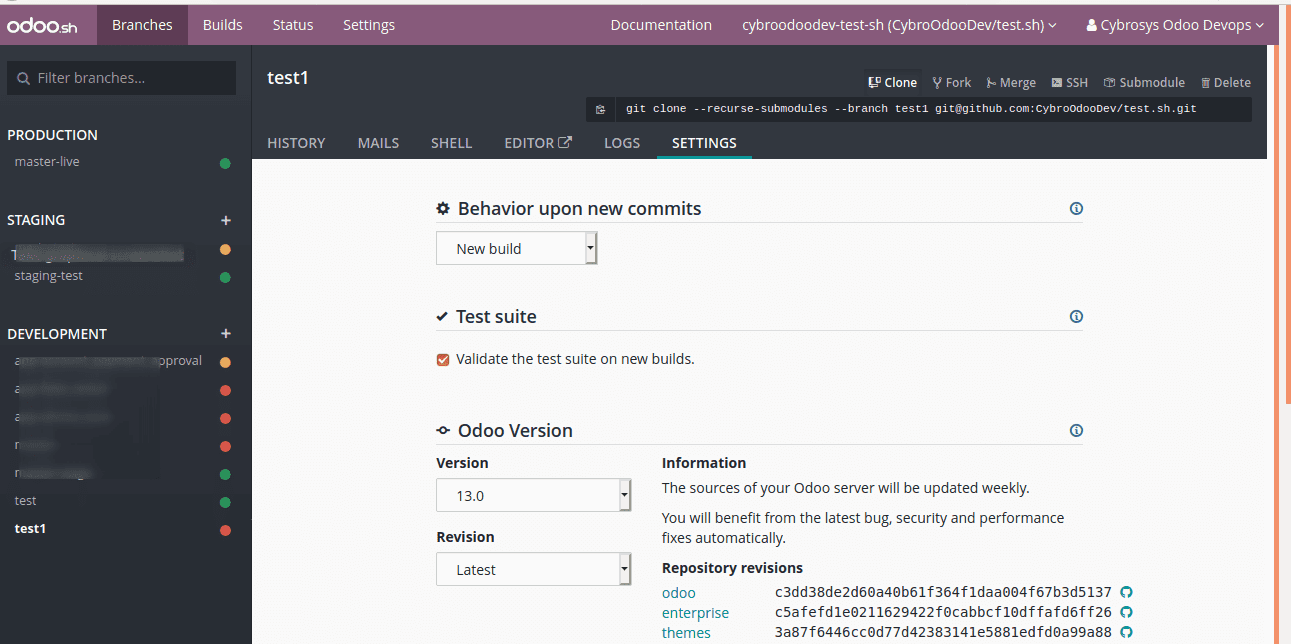
Settings
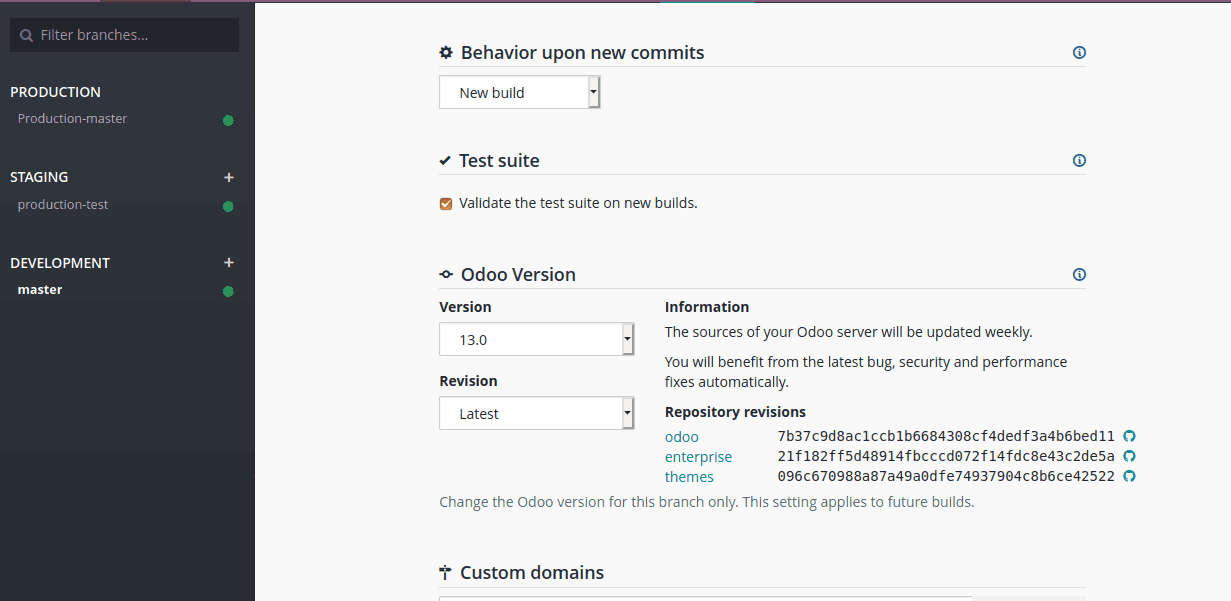
Behavior upon new Commits - The settings help you to set the behavior for each build. The build creation can be controlled using the Behaviour upon the new Commits option. By default, the staging branch builds updated the previous build, and the development branch creates a new one. The behavior changes to Do Nothing when you drag the staging instance to development.
Odoo Version - Specifies the odoo version. The odoo versions can be changed for each build but not for production. Any source code revisions are updated automatically.
Test Suits -They are enabled by default in development.
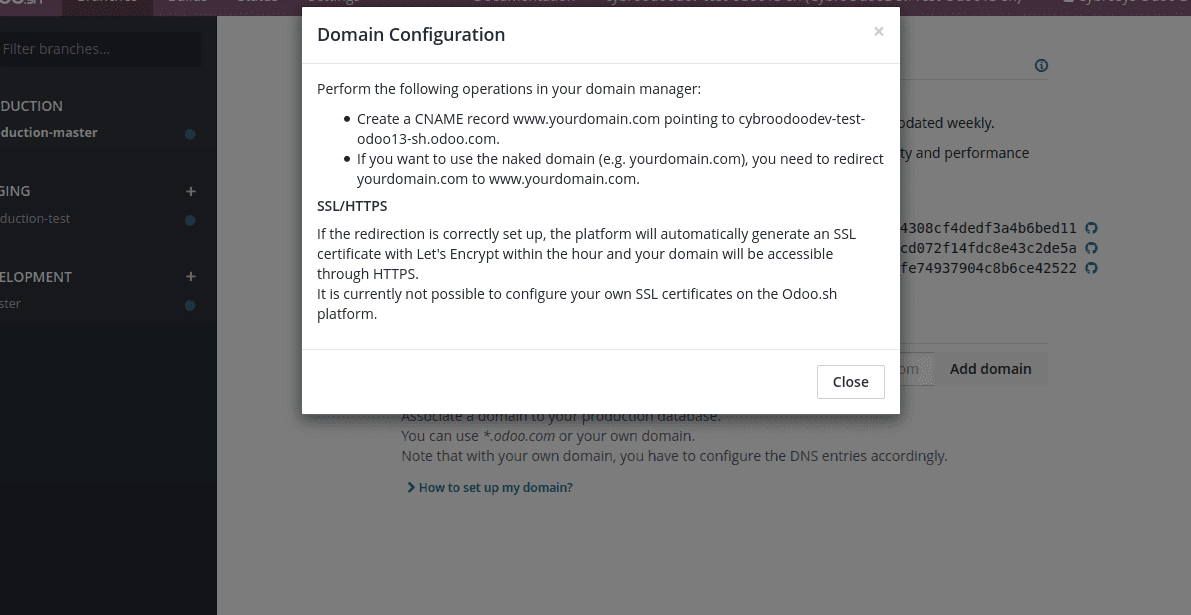
Custom Domains
Custom domains can be configured for your instances. The domain names can be configured using *.odoo.com.
In order to set up your custom domain like yourdomain.com follow the below steps:
Shell Commands
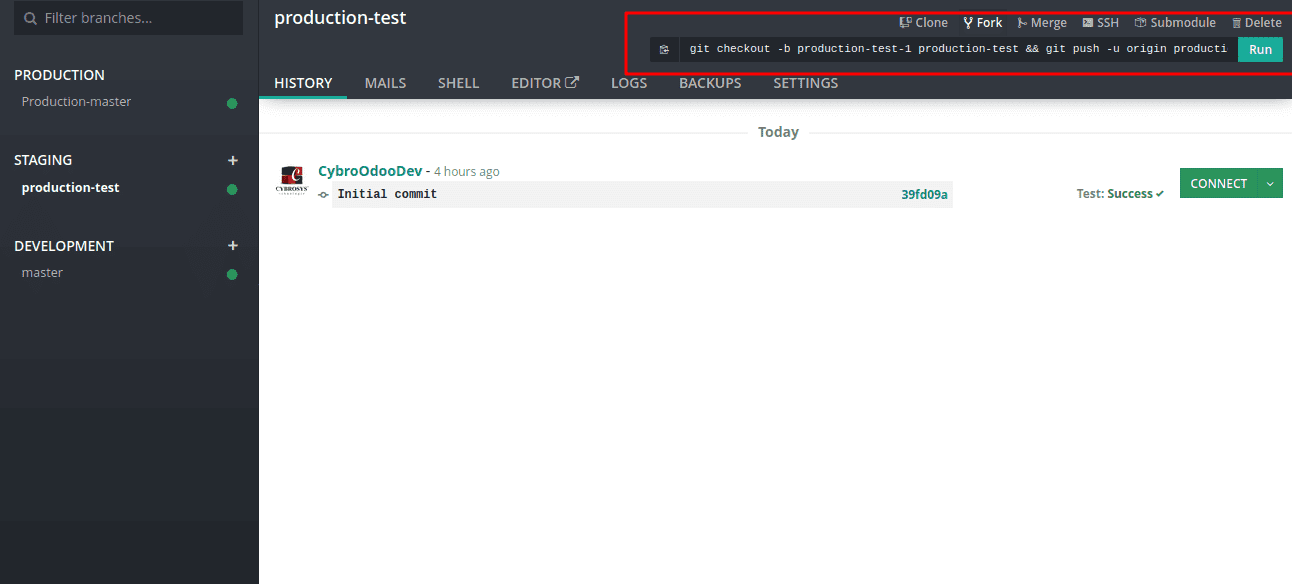
Git commands can be used to perform operations like merge, fork, clone, etc.
The commands that can be run automatically without any command modifications have the RUN button available on the right side. Just in one click, the operation can be performed.
But for operations like clone you need to specify certain parameters in git command.
The git commands can be copied using the copy icon available at the left-hand side of the git command and can be modified from a terminal.
The build can be accessed using ssh but in order to do that, you need to set up public key in your profile. Once configured you can access it using the below command
ssh <build_id>@<domain>
The executable command can be obtained easily from the right corner after entering the public key.
Submodules
It is possible to use other modules that rely on another repository to our repository. For this, we have the concept of submodules. The dependent modules can be added as a submodule to our repository branch.
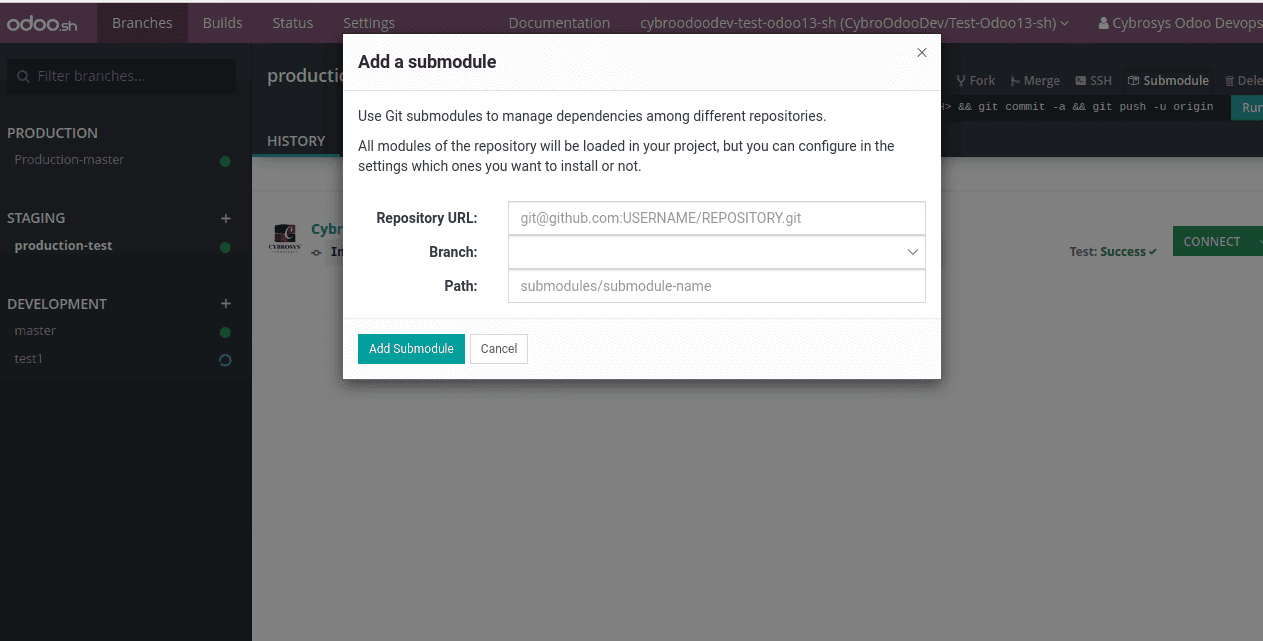
Git Commands can be used to perform the operation if the repository is private.
Settings
The Settings helps you to manage some of the important features related to your project.
Project Name: Name of your project.
Collaborators: Add the collaborators for your project. The access for the collaborators can be granted from here. Mainly we have two privileges Admin and User privileges.
Admin: Can access all features of odoo sh
User: Restricted Access. Users cannot access settings, production, and staging databases.
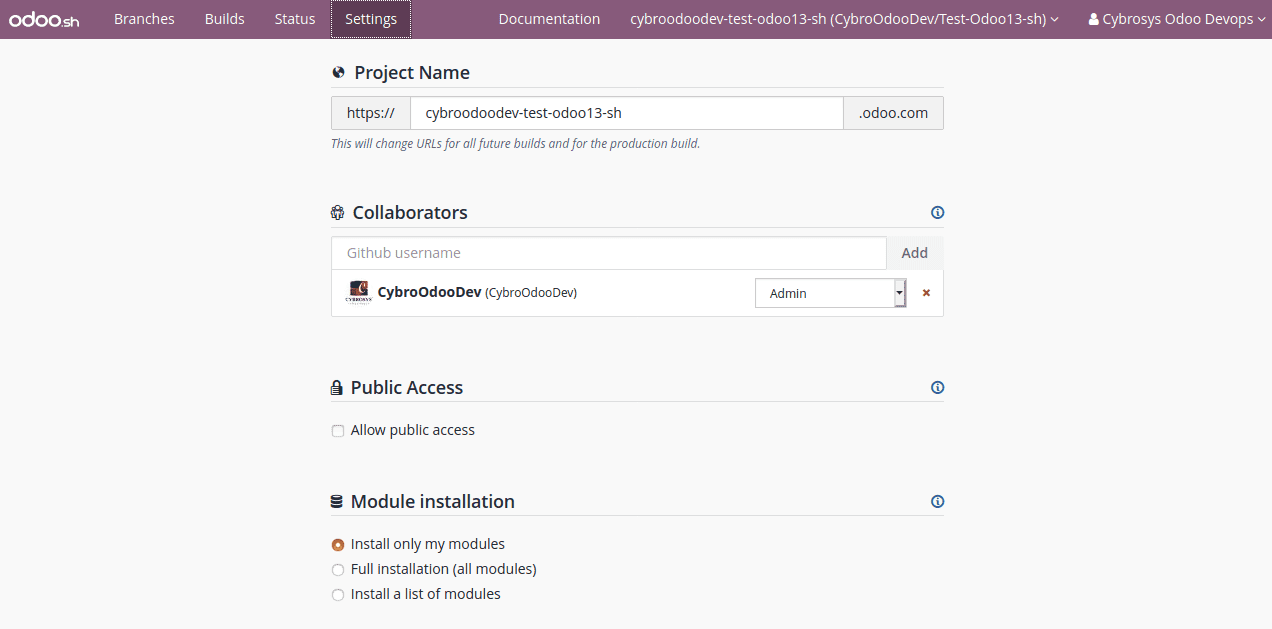
Allow Public access: Once access is granted the visitors can access development builds. They can connect to your builds.
Module Installation: The settings belong to the development build. The installed modules will be tested.
Full Installation(all modules): Here you have access to the submodules. All the modules are installed.
Install a list of modules: The modules to be installed can be specified separated by comma thereby only selected modules are installed.
Production Database Size: Provides a brief description of production database size and payment information. The increasing database size is synchronized along with your subscription. The storage capacity of the production database is indicated here.
Database Workers: Specifies the workers count. The worker's count should be taken into consideration depending upon the incoming requests and usage. There should be enough workers to serve your incoming requests.
Staging Branches: The number of branches allowed in staging can be set here. The staging branch number is also synchronized with your subscription.
Activation: Shows the subscription key. You can change the subscription code if needed.