The robust Attendance module of Odoo, a full suite of open-source business apps, simplifies the procedures for employees to check in and out. Among its many operating modes, KIOSK mode is particularly noteworthy for being an easy-to-use yet effective way to control on-site attendance in settings such as offices, factories, and retail stores. It turns any device, including tablets and desktop computers, into a centralized check-in point, reducing administrative work and guaranteeing precise timekeeping.
One feature that is frequently utilized in the manufacturing and HR attendance modules of Odoo 18 is the Kiosk Mode. It enables users or workers to communicate with Odoo through a streamlined interface, frequently for tasks like job distribution and time tracking. A kiosk is a specific device (such as a computer, tablet, or smartphone) that staff members use for check-in and check-out. For staff members without database access, kiosks are required. Employees who have database access are the only ones who can check in and out using the Attendance app; these employees are known as users.
By entering a personal PIN or scanning their badge, employees may record their attendance in Odoo Attendance's front-facing, user-friendly KIOSK mode. After being enabled, the device stays in a publicly available state that just permits check-in and check-out operations and does not provide access to the rest of the system. This makes it appropriate for settings where a single terminal is used by several personnel. It supports a number of authentication techniques, including barcodes, RFID, and manual PIN entry, and guarantees smooth interaction with little training.
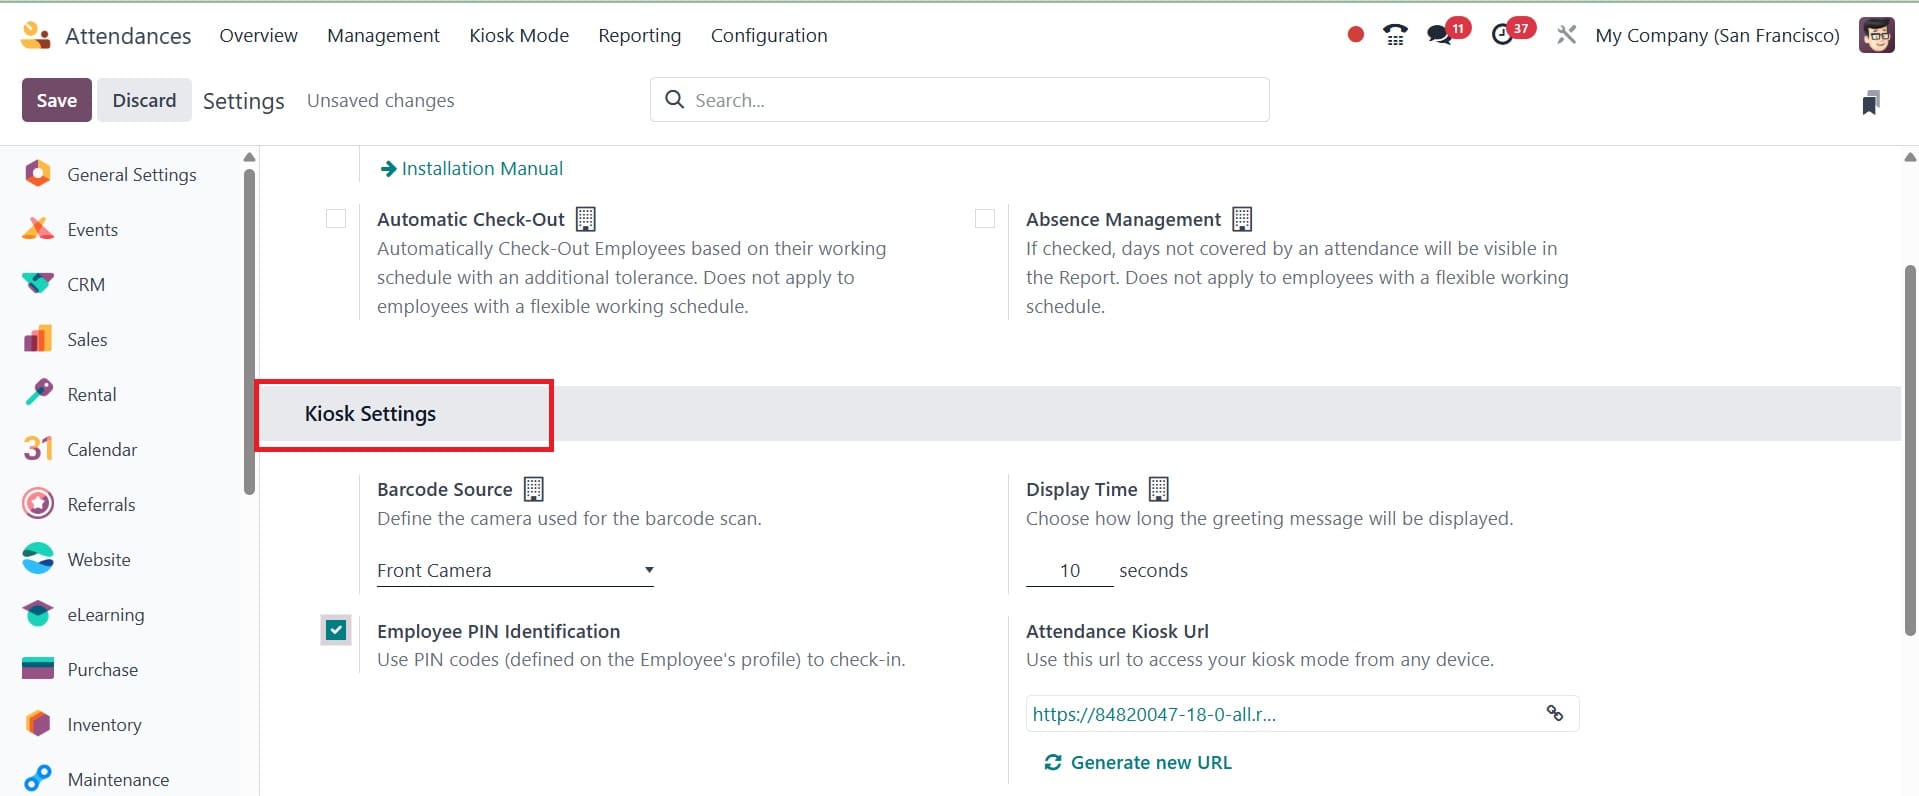
To use kiosks in the Attendance application, a few adjustments are required. Open the Attendances app > Setting up the Kiosk Mode and Kiosk Settings sections requires access to the Settings page.
Choose how an employee uses a kiosk to check in using the drop-down option. Barcode/RFID, Barcode/RFID with Manual Selection, or Manual Selection are the available options.

Kiosk Settings
How employees check in and out using kiosks is determined by the different options in the Kiosk options section:
- Barcode Source: Only when one of the two Barcode/RFID options is enabled for the Kiosk Mode setting does this setting become visible. Choose from the drop-down menu selections for the barcode scanning method at the kiosk, if it is available. A specialized scanner or the front or rear camera of a smartphone can be used to scan barcodes.
- Employee PIN Identification: If employees should check in with a unique PIN, check this box. PINs are set up on each employee's record separately. For additional details on configuring PINs, consult the new employee page.
- Display Time: Find out how long a check-in or check-out confirmation message stays on the kiosk screen before going back to the main check-in page by measuring the display time.
- Attendance Kiosk Url: To utilize a device as a kiosk, Odoo creates a special web address (URL) that eliminates the need to log into the Odoo database. To display the Attendances app kiosk when configuring a kiosk device, use a web browser and go to this special URL.
There are two ways to activate Kiosk Mode:
- Open the Attendances app, then select Kiosk Mode from the menu at the top. After that, the device switches to Kiosk Mode and logs out of Odoo.
- Go to the Configuration section of the Attendances app. To access Kiosk Mode on any device, click the link in the Attendance Kiosk URL box under the Kiosk Settings section.
Check In and Check Out
- Tap the Tap to Scan icon in the middle of the kiosk to use a badge to check in or out.

Next, use the method set up in the Kiosk Settings section of the setup menu to scan the badge's barcode. The employee is checked in or out after the barcode is scanned, and a confirmation message with all the details is displayed.
- To check in or check out using RFID, simply scan the RFID key fob with an RFID reader to check in or leave. The employee is either checked in or out after being scanned, and a confirmation message with all the details is displayed.
- Those without an RFID fob or scannable credential can check in and out manually at a kiosk. A screen listing every employee who can be checked in or out shows when you tap the Identify Manually button on the kiosk.
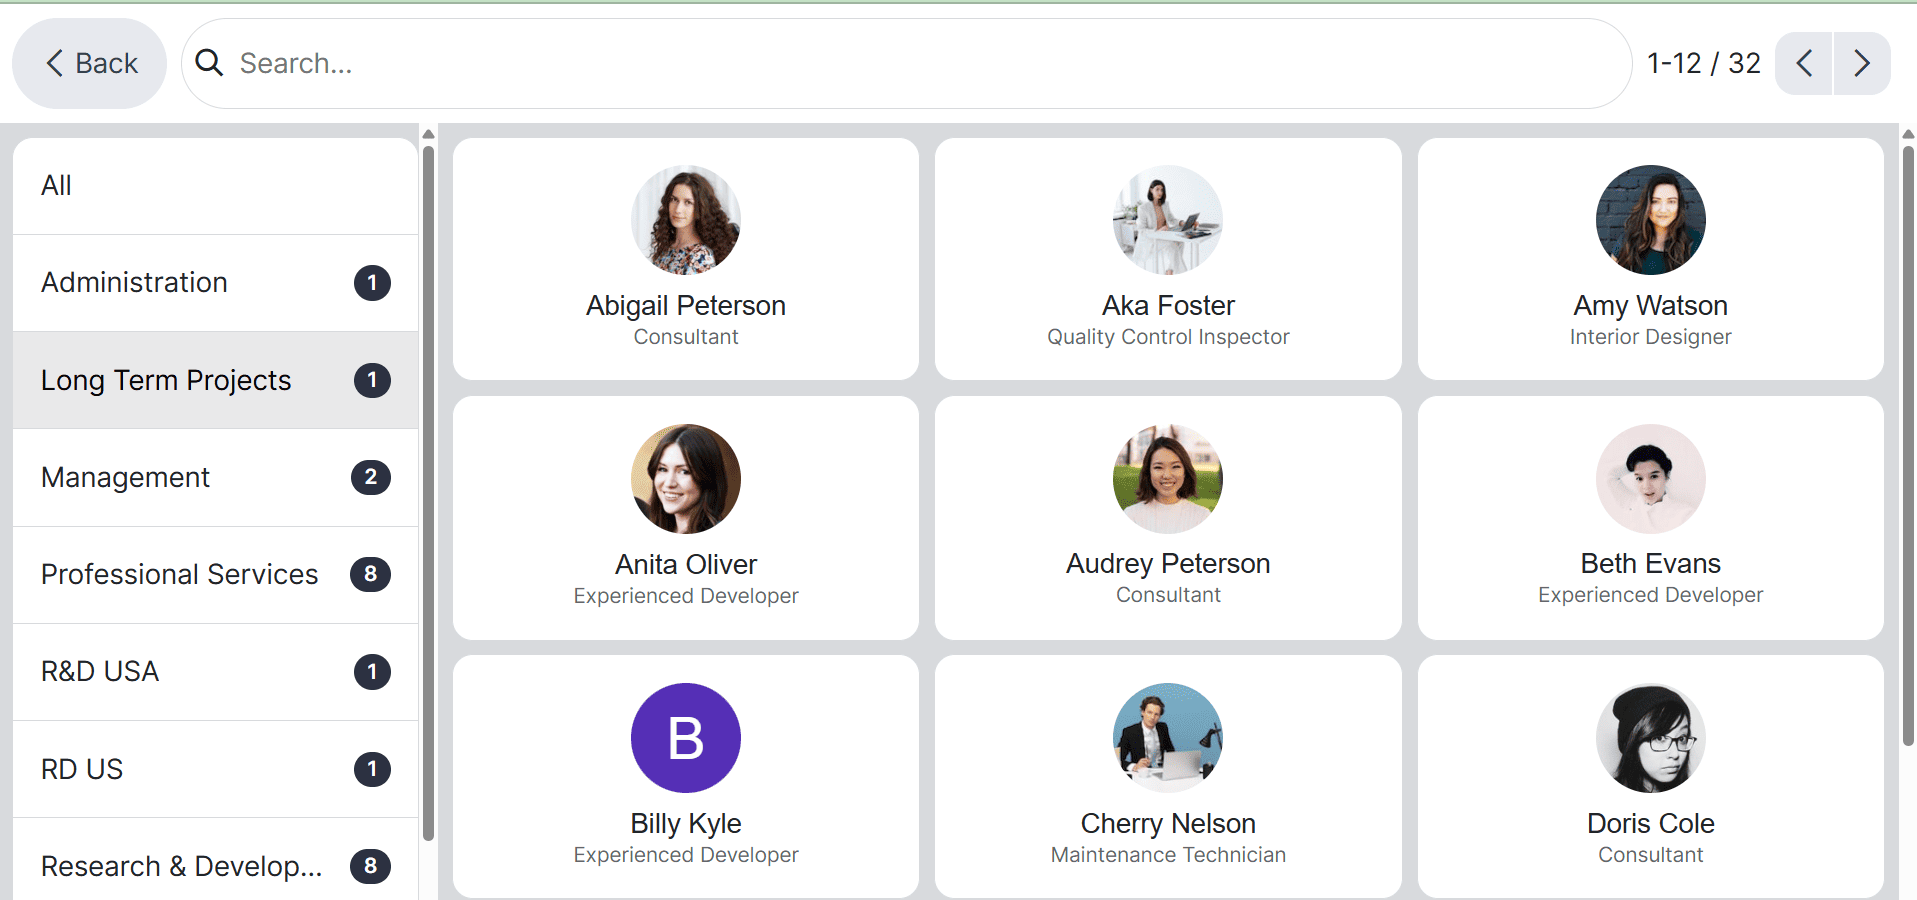
The appearance is the same on the Employees' application dashboard. To check someone in or out, tap on them; a confirmation message will show.
PIN
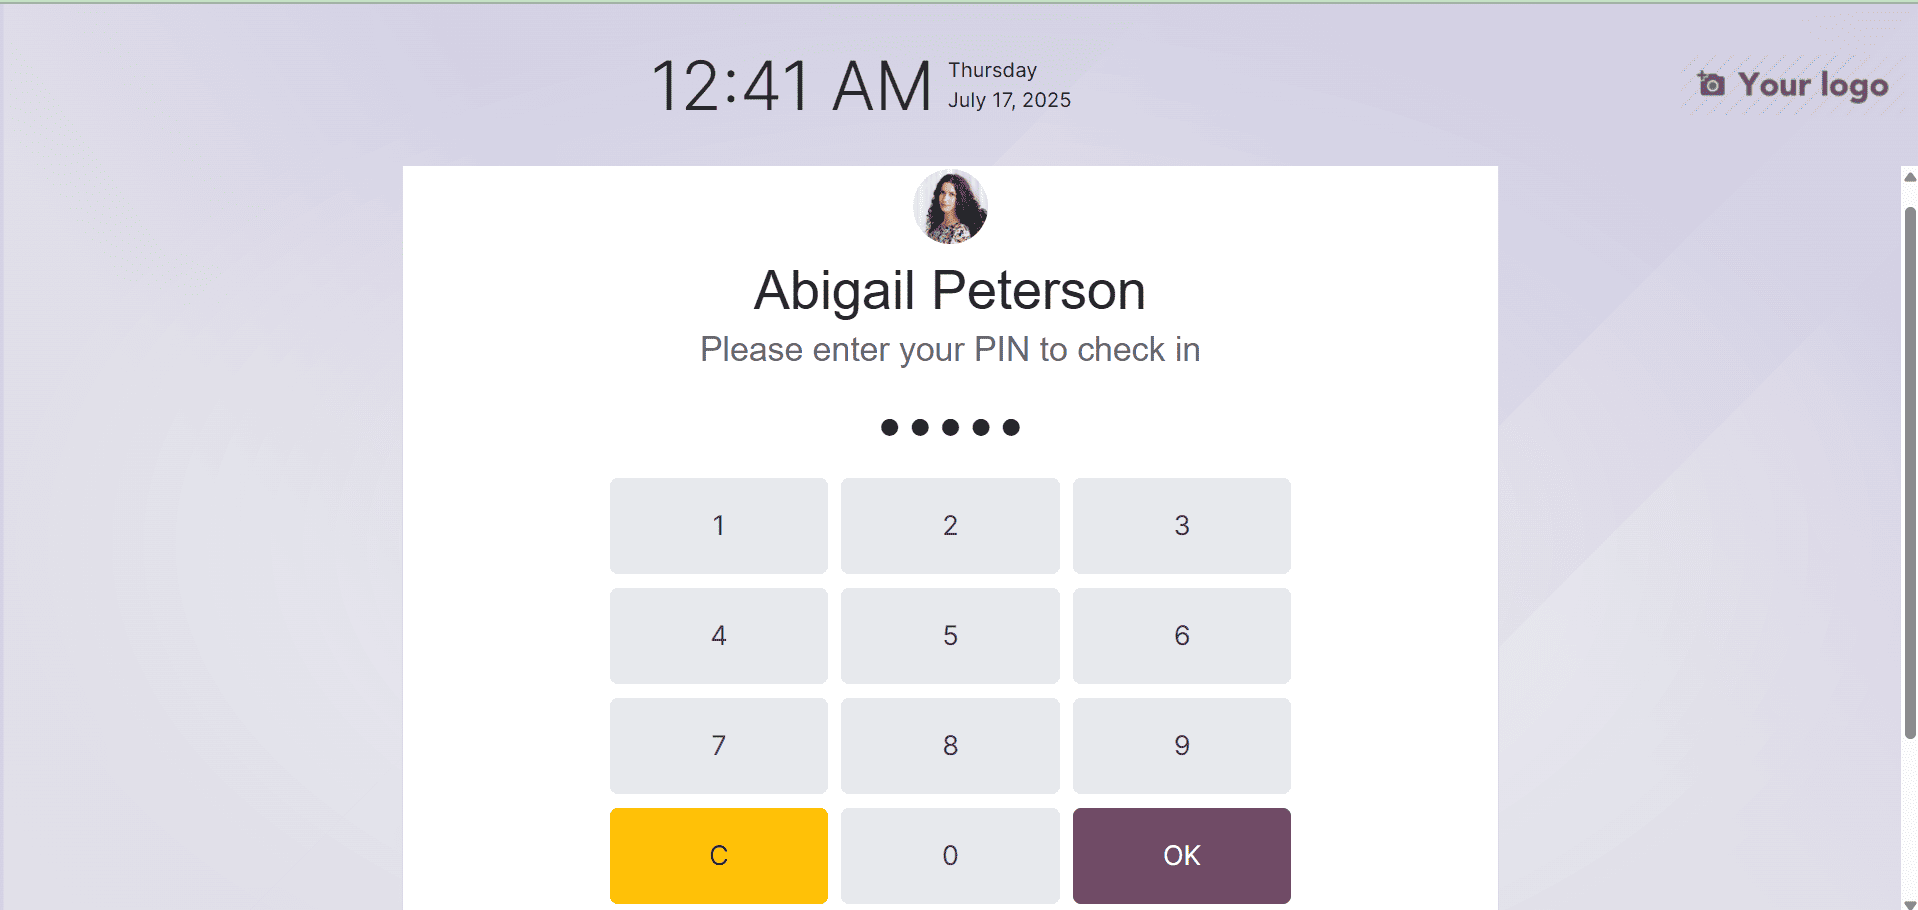
When manually checking in or out, the employee is asked to enter a PIN if the Employee PIN Identification checkbox was checked in the Kiosk Settings section of the setup menu.
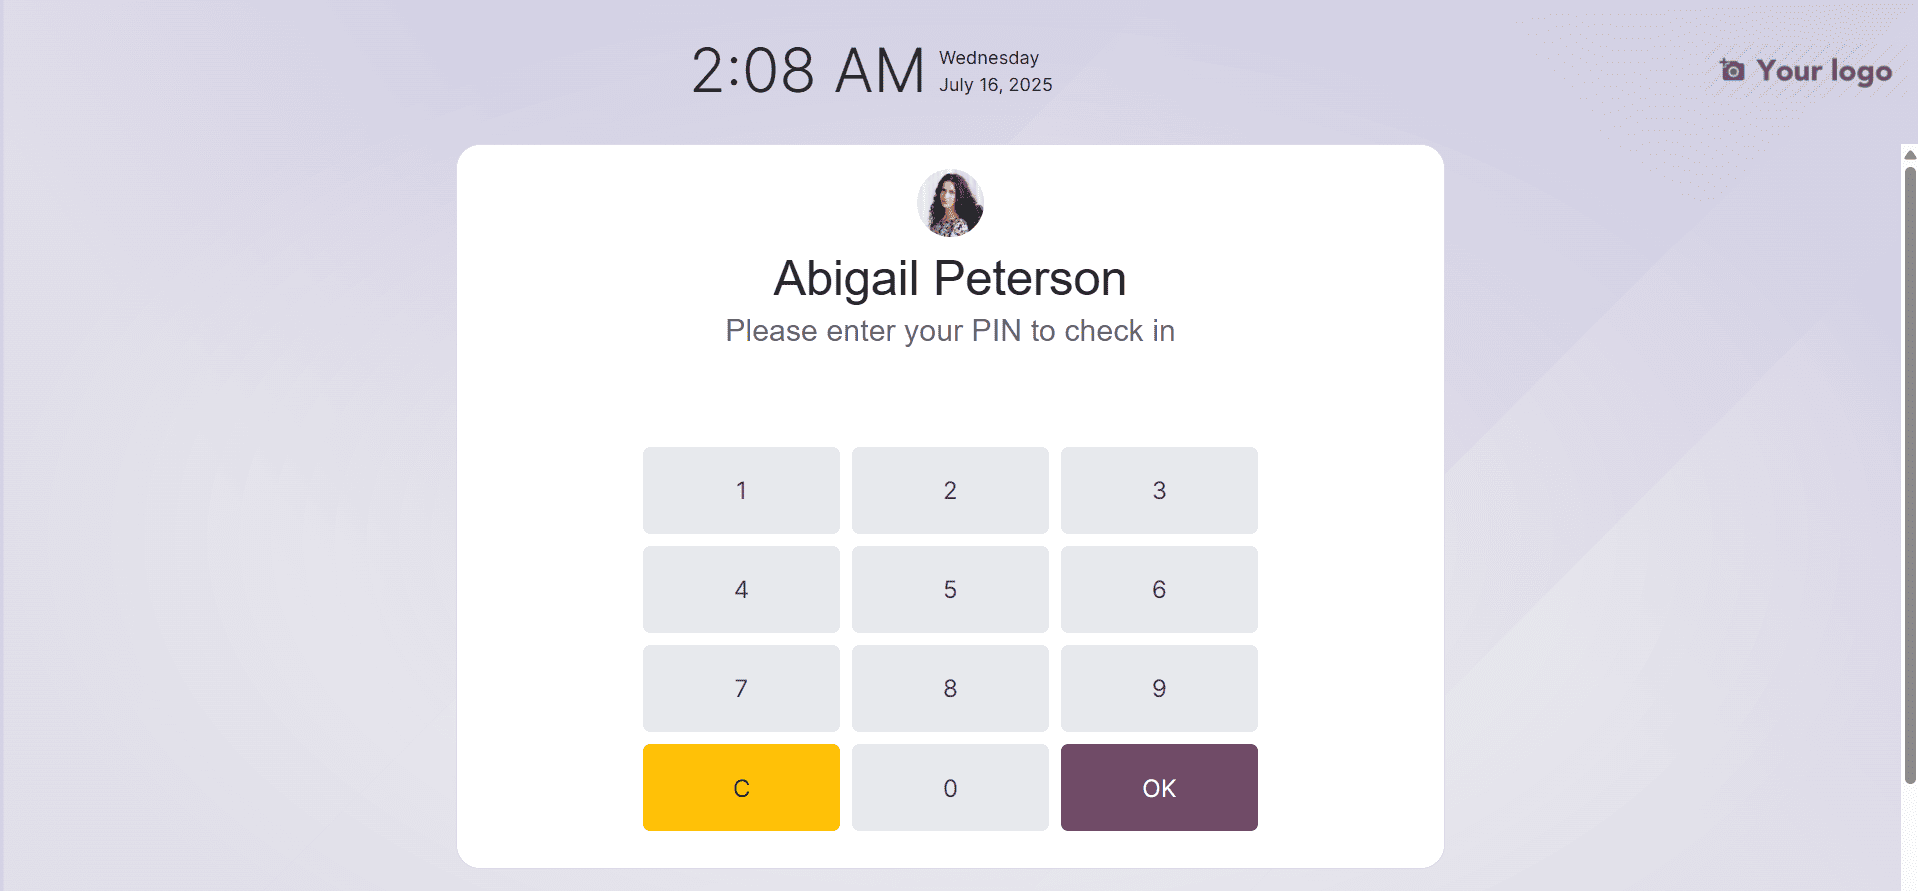
A message shows on the number pad once the employee has been chosen. Welcome, (Employee), when you log in! To check in, please enter your PIN, which is displayed above the digits. (Employee) Would you like to check out? To check out, please enter your PIN, which is displayed above the digits. Using the number pad, enter the PIN. When finished, touch OK.
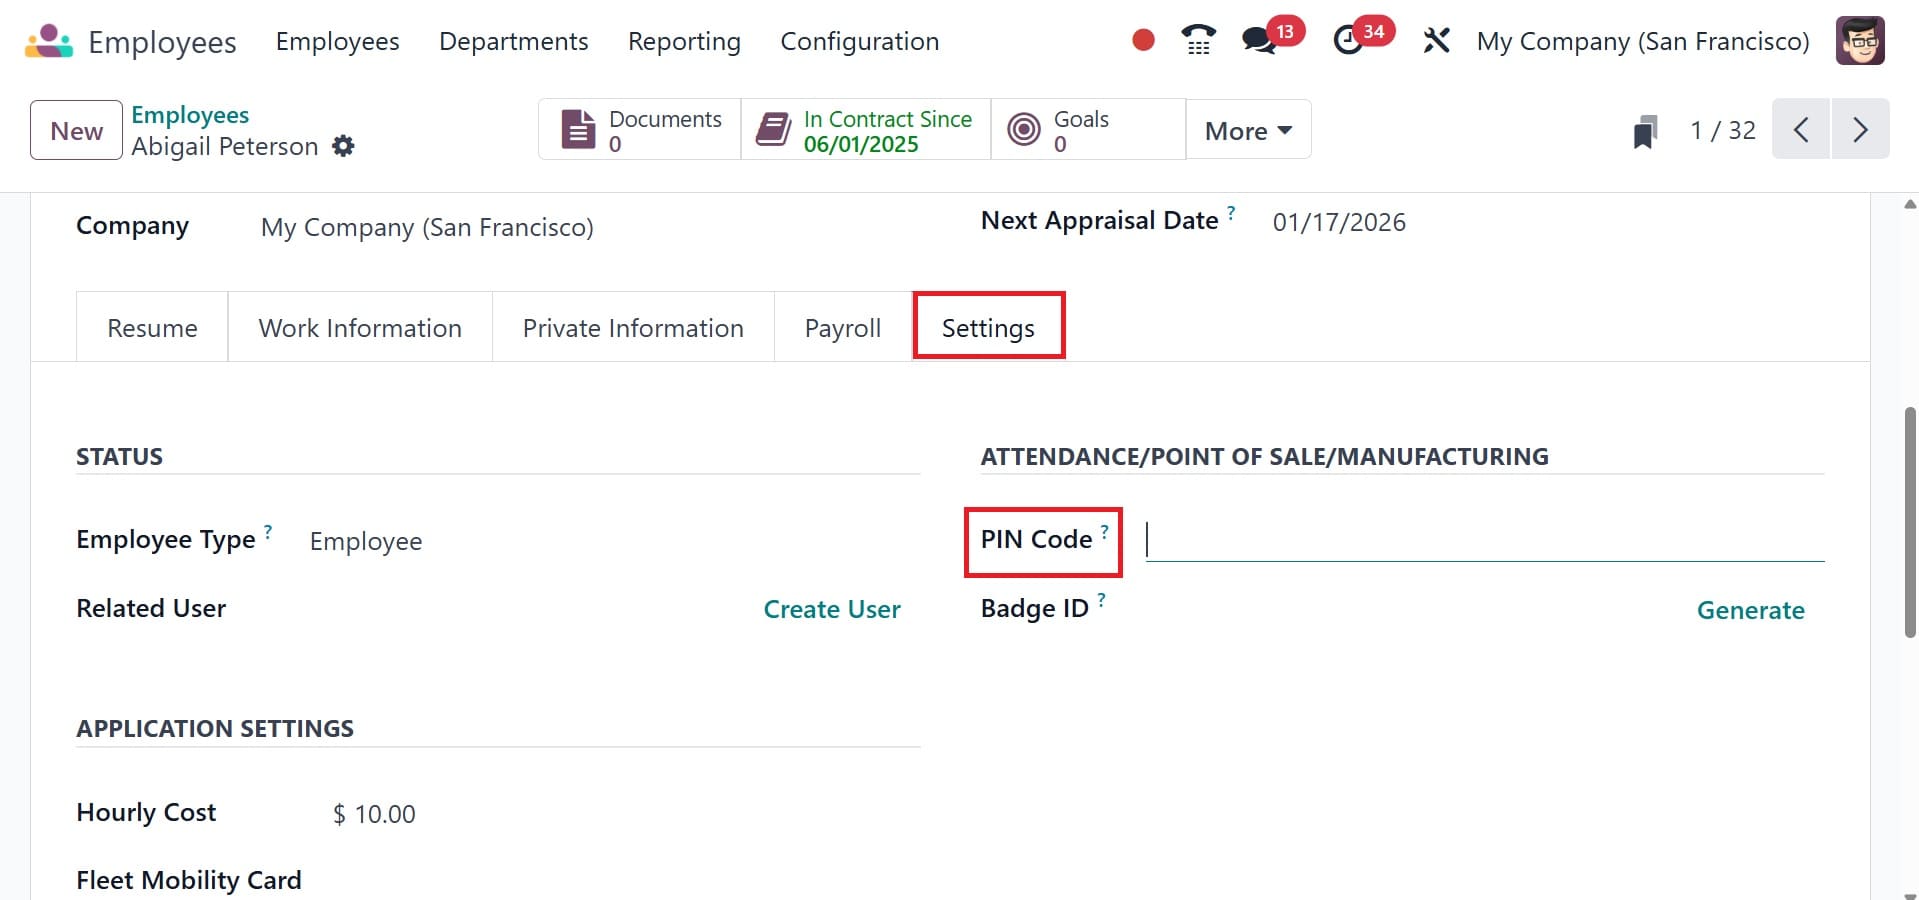
Now, let us look at how to set a PIN for each employee, so they can use the PIN to log in. For that, go to the PIN CODE option under the Settings tab in the Employee module.
There create a new PIN and then login with that PIN under the login screen.
So that you will get the welcome screen, as in the image below.
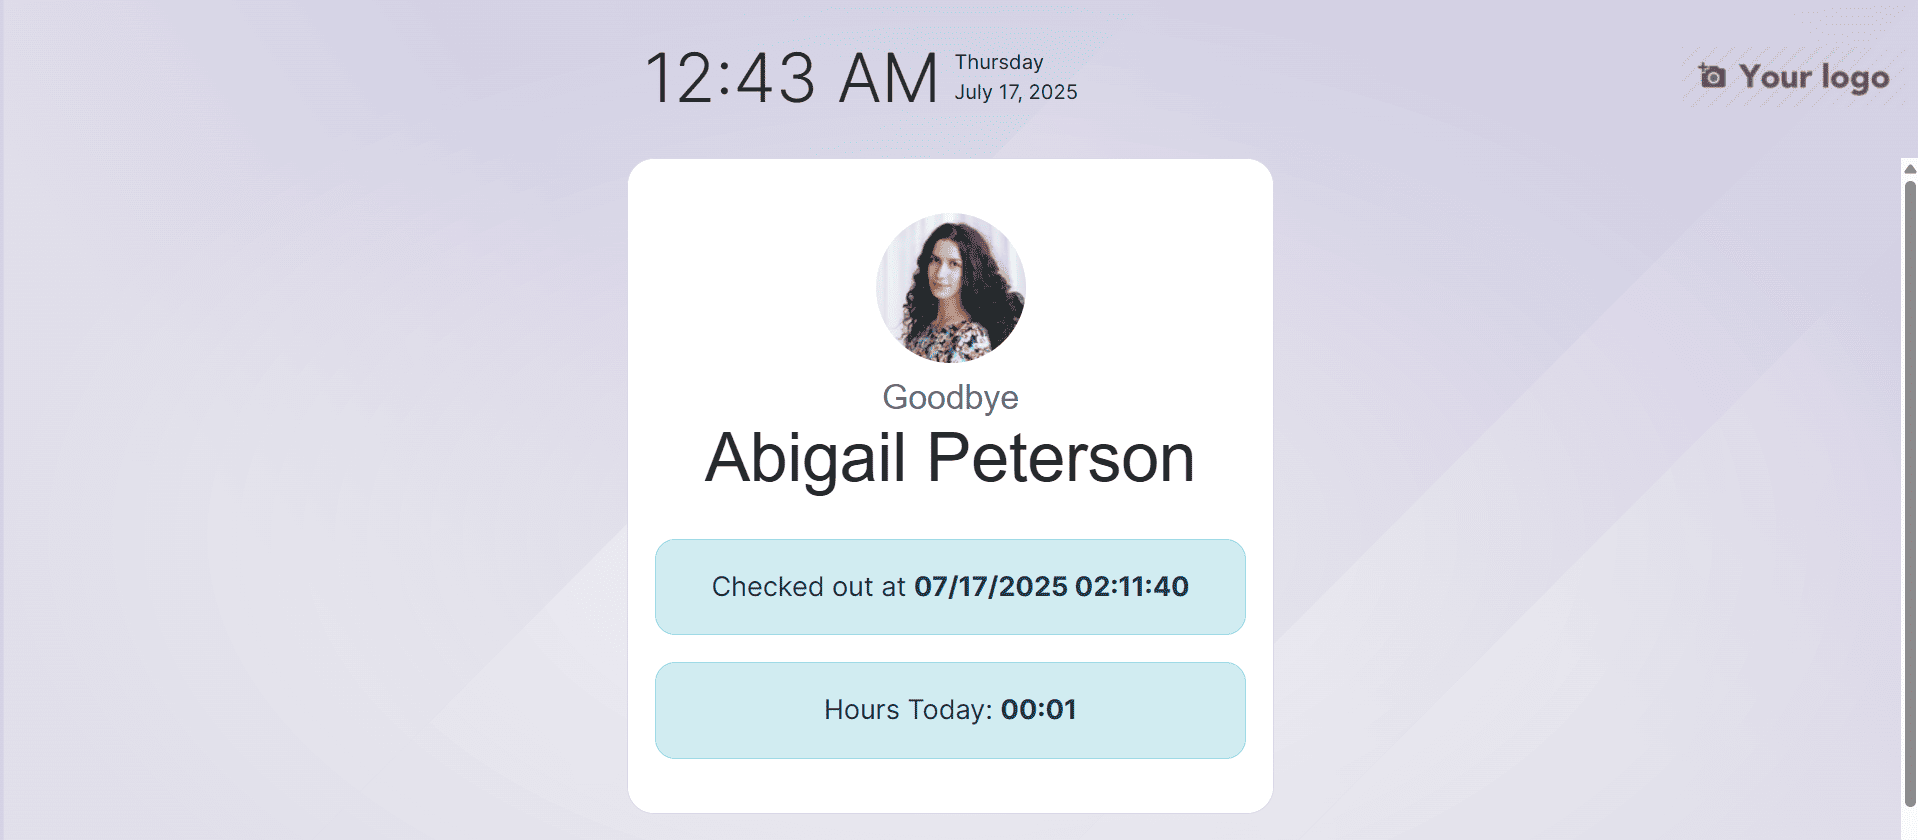
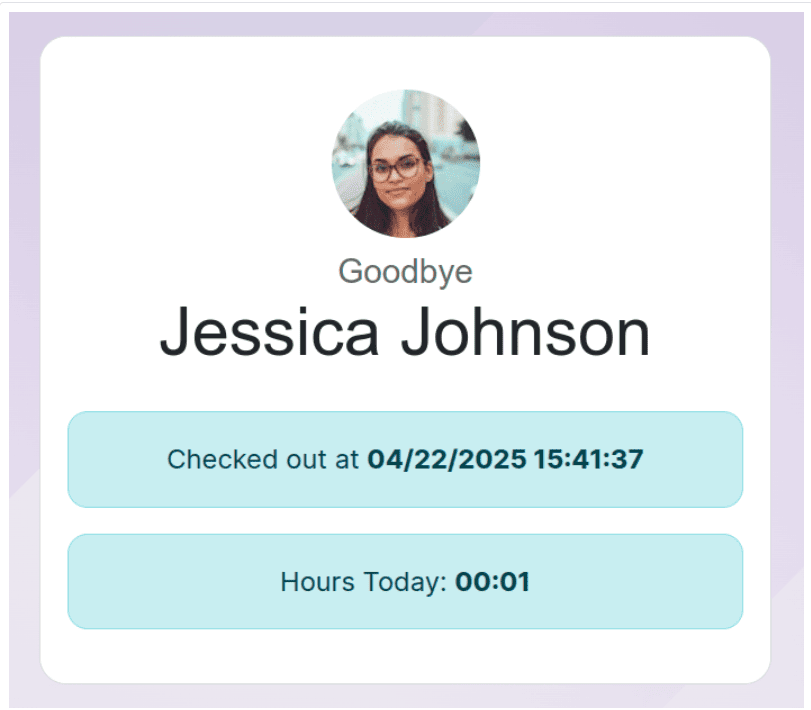
A confirmation message is then displayed when the employee has been checked in or out.
Confirmation Message
A confirmation message with all the check-in or check-out details is displayed when an employee checks in or out. The Welcome (Employee) message and the current time and date are displayed when you check in. An Hours Previously Today: HH:MM notice that displays the total number of hours logged previously also shows if the employee has already checked in and out for the day. Along with the date and time of check-out, Goodbye (Employee) displays during the checkout process. An Hours Today: HH:MM field with the total number of hours and minutes recorded for the day is located beneath the message. There is an OK button beneath the "welcome" and "goodbye" texts. Tap the OK button to close the screen before the kiosk's predetermined time.
The KIOSK mode in Odoo Attendance offers a sophisticated and useful way to manage staff attendance in a variety of settings. It is an invaluable tool for contemporary enterprises because to its user-centric design, seamless connection with other Odoo modules, and capacity to expedite time-tracking. Organizations may increase productivity, guarantee compliance, and promote a more accountable working culture by utilizing this tool. Within the Odoo ecosystem, KIOSK mode is a scalable and dependable attendance management solution that can be used in both small offices and large industrial settings.
To read more about How to Configure Attendance Kiosk in Odoo 18 ERP, refer to our blog How to Configure Attendance Kiosk in Odoo 18 ERP.