With new business and novel products coming to the market each day, the demand for production machinery and services are hiking like never before. The new business firms and established ones are venturing into new streams of products and services and considering economic and methodical reasons, buying and stocking every manufacturing equipment or services is not practical. ‘Renting’ is the ample solution for this. A new market has emerged for the rental of goods and services nowadays. For business firms planning to establish a subsidiary rental business and also the ones that have established it in the past, Odoo v13’s featured Rental module is a boon.
With its efficient rental management system, the tiring process of scheduling and implementing each task is made simple.
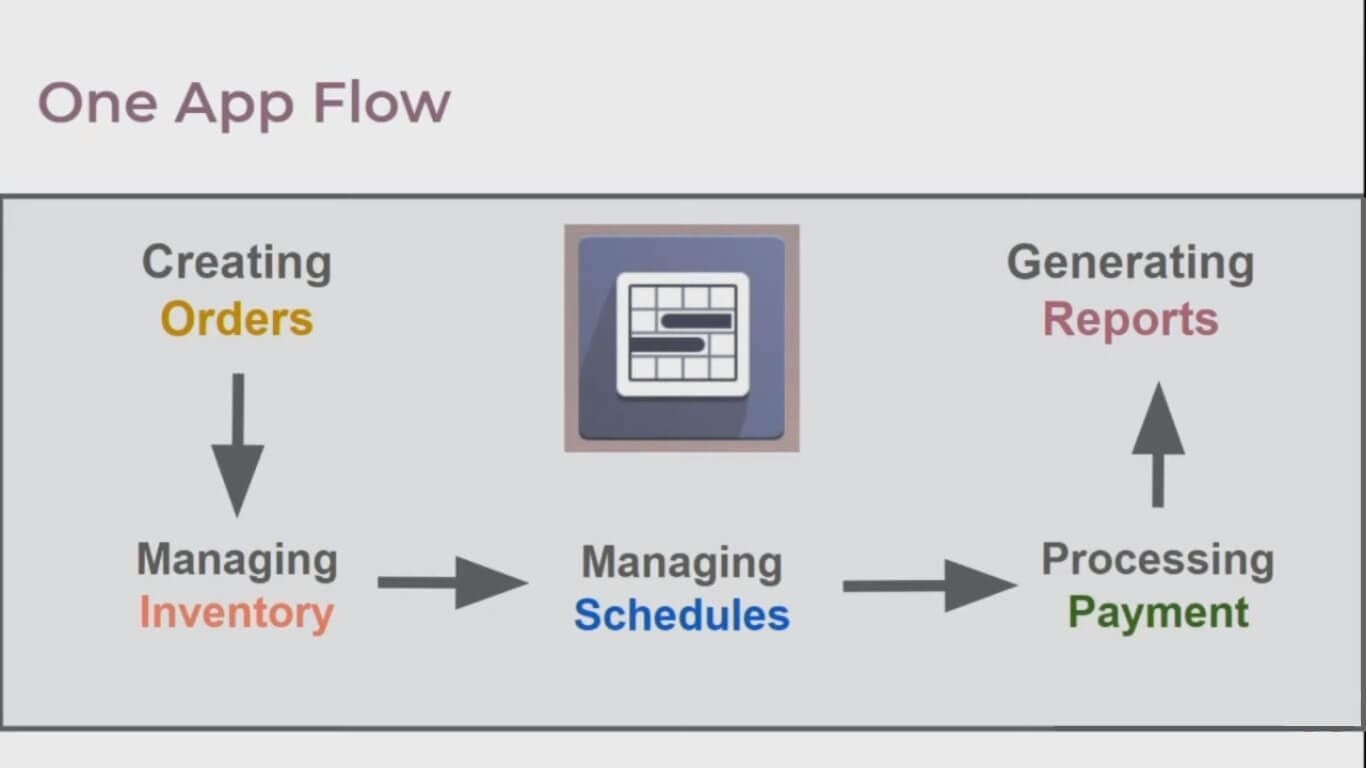
Now let’s take a look at the general workflow and the operational process of the Rental module.
Features:
* User-friendly Interphase experience; easy to configure and use.
* Minimal Data entry requirement; process your task with less data entry and a few selections
* Gantt chart provisioned schedule
Now before getting into the functionality of the Rental module, one must know how to assign different products to be rented. For that;
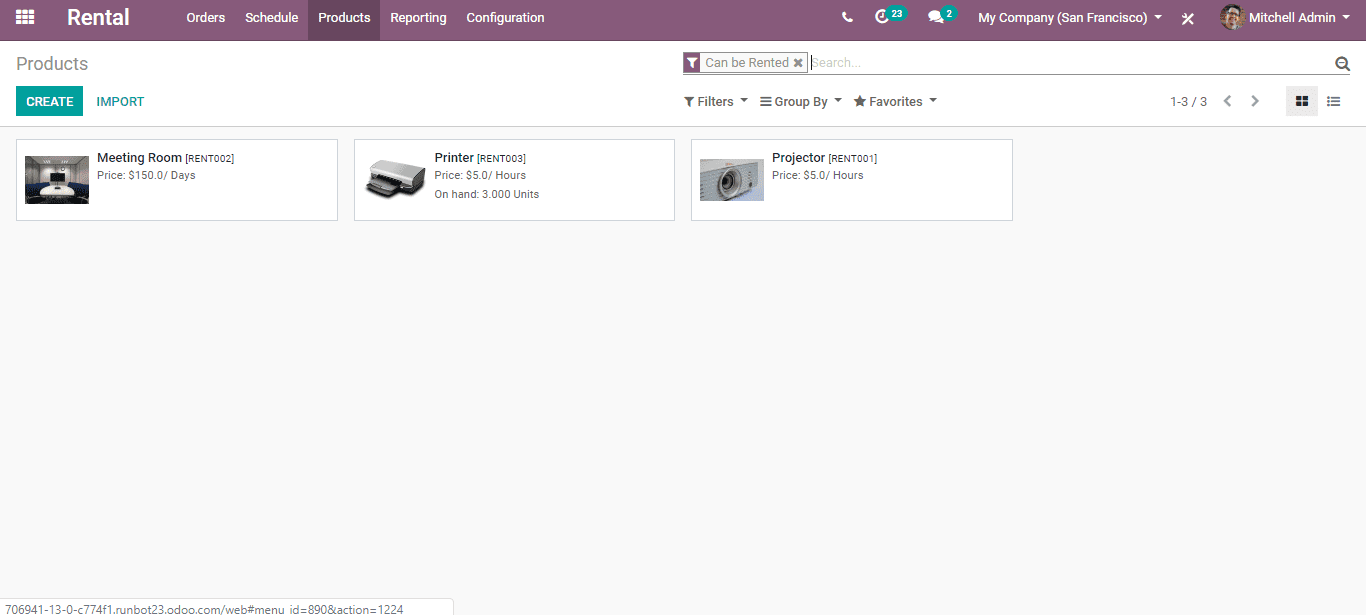
Go to Rental > Products
Here we can see the products ready to be rented. For enabling other products to rent click on the ‘Create’ button seen on the top left corner and well be guided to a window like the one given below.
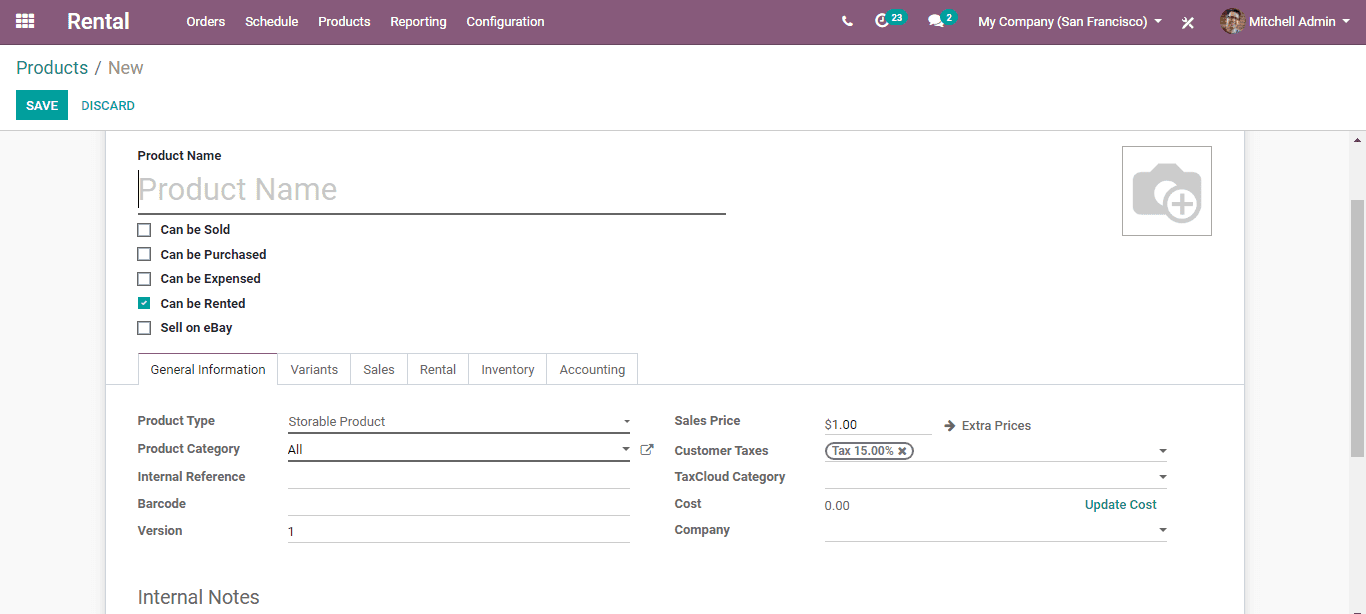
Here, fill up the product information under each tab. Remember to select the ‘Can be Rented’ to activate the rental option for the product.
Rental Orders
Like the sales order, while renting a product a Rental order should be created. This is the document that carries information regarding the Customer, product, rent rate, rental period, etc.
After the creation of the rental order, one has to save and confirm it to validate the rental process. Then, when the rented product is returned back by the customer after the expiry of the rental period, an invoice can be created from this Rental order.
To create a rental order, firstly;
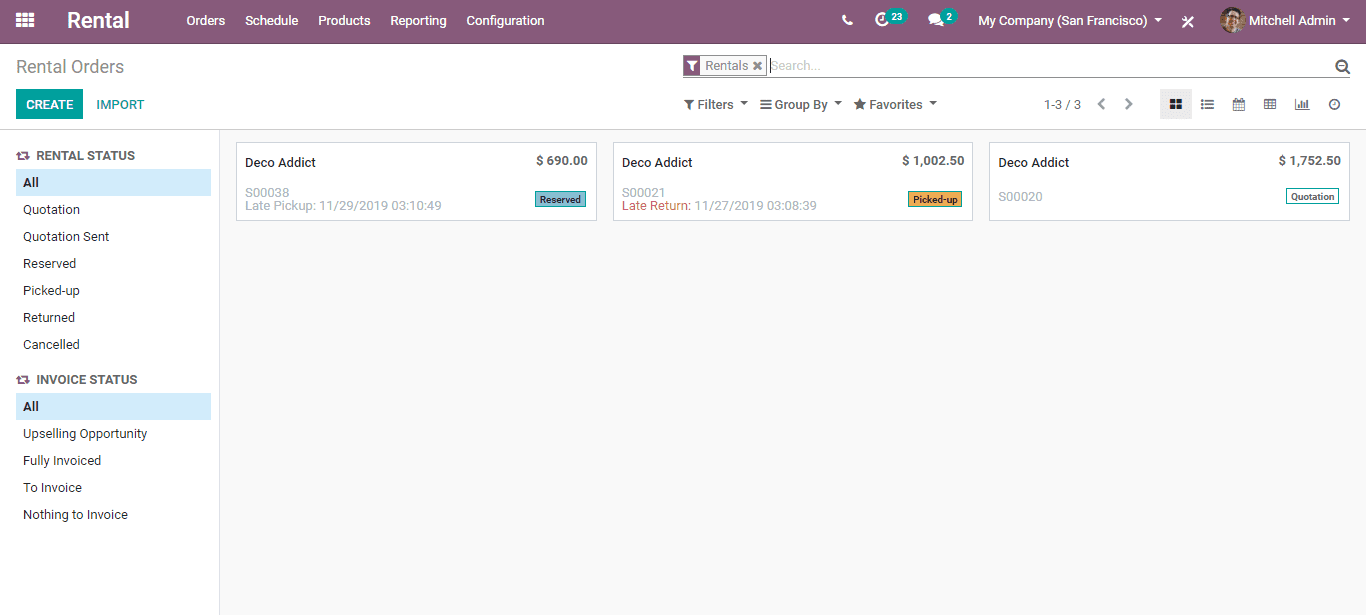
Go to Rental > Orders > Orders
Here, we can see the rental orders in various stages of the renting process. When a rental order is created prior to its delivery date/time, the status will be shown as ‘Reserved’ as certain units of the specific product are reserved to rent.
When the status is ‘Picked up’, the product is currently rented to a customer. When the status is ‘Returned’, the product has been returned back by the customer after the rental period.
In order, to create a new rental order, click on the ‘Create’ button present on the top left corner of the window. Now a window like the one given below will appear.
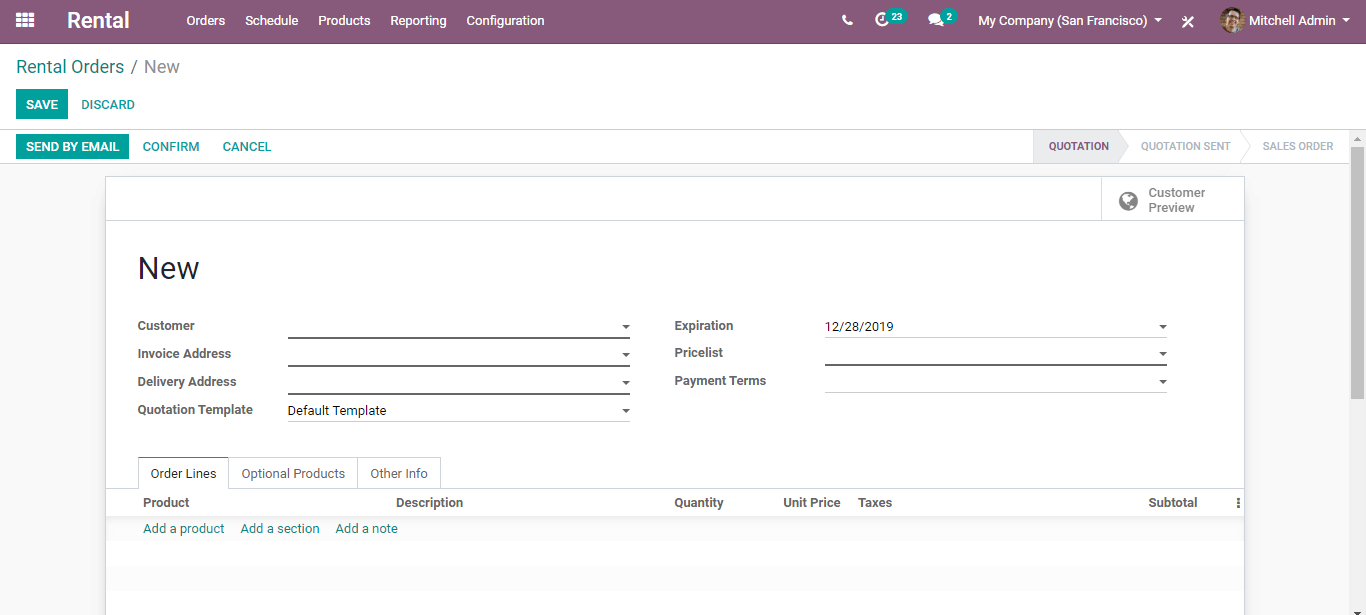
Fill up the required details in this form. Under the ‘Order Lines’ is where the products to be rented is selected. After the selection, a ‘Rent a Product’ window will pop up, there we can select the rental period in days.
After the days are set, click the ‘Add’ button and we’ll fall back to the rental order window. Now the total rent amount will be calculated automatically. Also, there is a tab to add ‘Optional Product’ which is an exclusive feature for Odoo v13 modules.
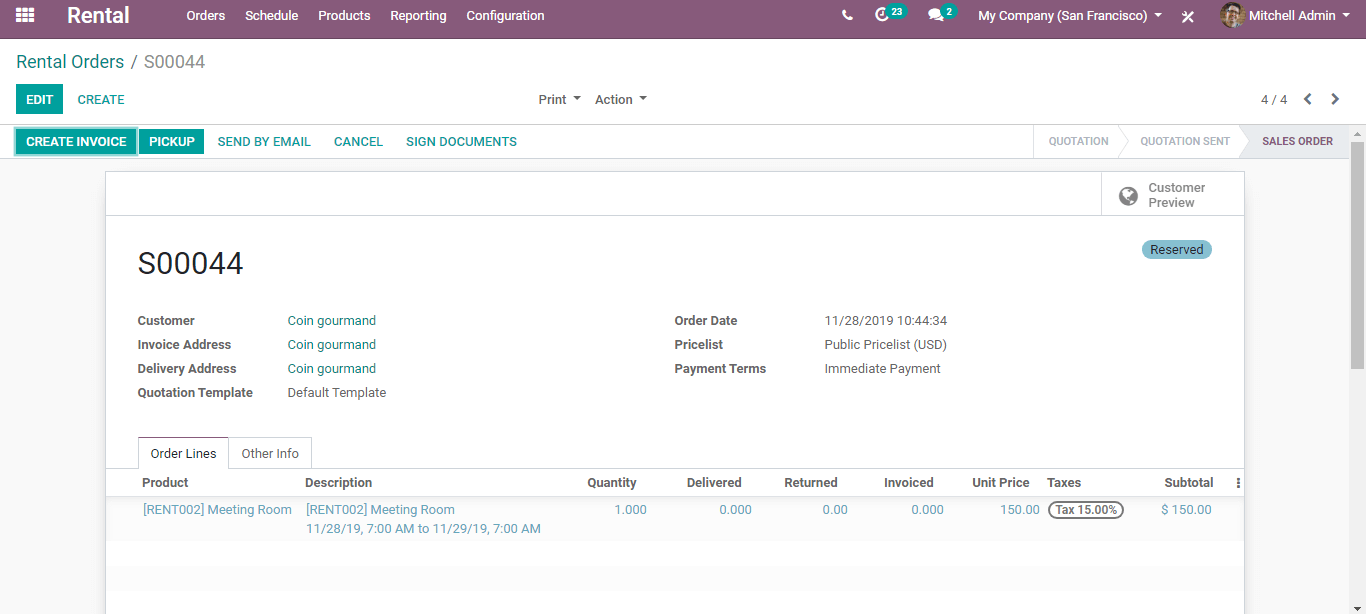
Once all the details are entered click the ‘Save’ button on the top left corner. Now a rental order is created with status as’ Reserved’ on the top right corner. Once the customer has picked up the product, click the ‘Confirm’ button and click ‘Validate’ now the status will be changed again as ‘Picked up’.
If products are returned on time, then click on the ‘Return’ button and validate it. In case of a late return, the status will appear with the corresponding status. Once the return is validated after accepting payment, an Invoice can be created and send to the customer.
For late returns, extra charges will automatically be calculated if values are entered during the creation of rental order.
Schedule
In order to see the schedules;
Go to Rental > Schedule
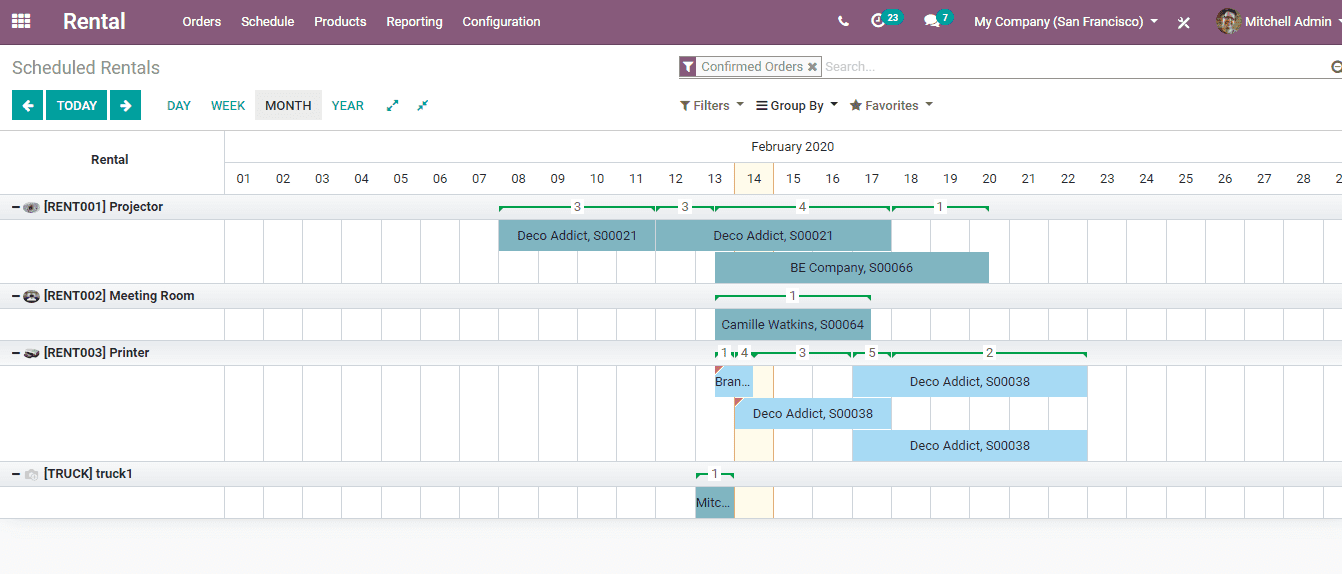
Elaborate Gantt chart view eliminates confusion in schedule and helps inefficient workflow of your business. Rows can be expanded and collapsed with the consecutively named buttons on the top right-hand side. In addition to filters like Quotations, Confirmed orders, To Do Today, Late one can add custom filters also.
Reports
In order to see the reports;
Go to Rental > Reporting
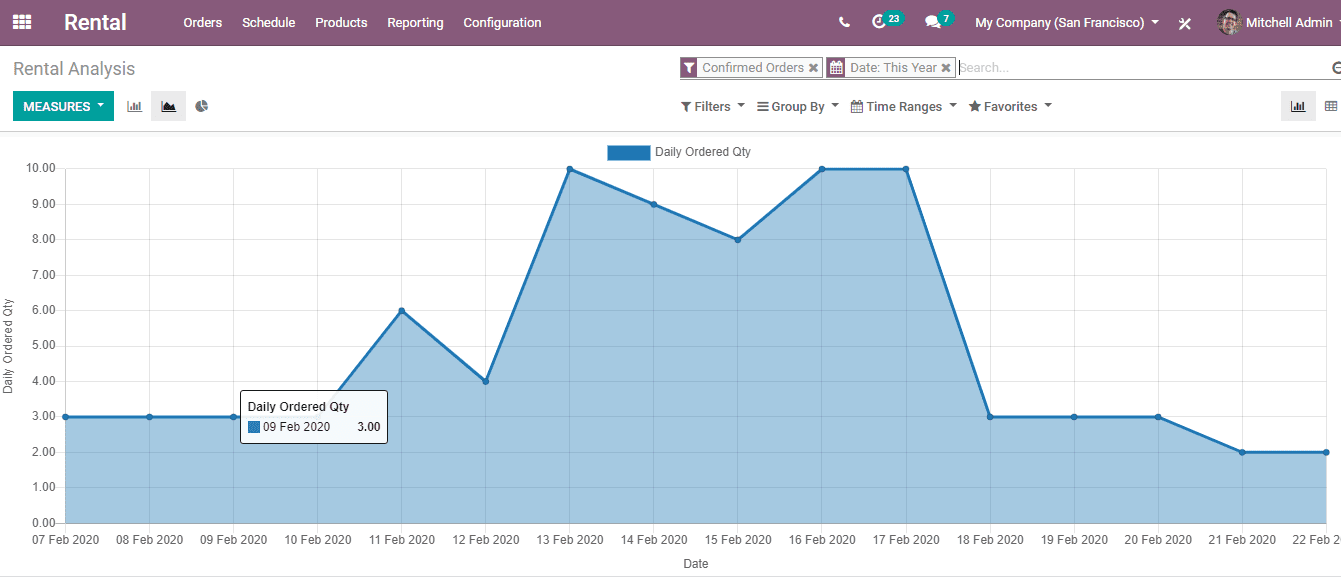
Systematic reporting always helps to understand the progress of a business. Examine and understand the graphs of your business by accessing the reports.
Now that is everything basic with Odoo v13’s new Rental module. For further reference, please refer our “Odoo v13 Online Book” a complete guide to Odoo 13.