In today's fast-moving business environment, automating data entry
can significantly improve productivity. One of Odoo’s lesser-known
but incredibly useful features is the Email Alias, which lets you
convert incoming emails into actionable records in your Odoo
database — automatically.
What Is an Email Alias?
In simple terms, an email alias is a connection between an email
address (like jobs@mycompany.com) and an Odoo model (such as
hr.applicant). When someone sends an email to that alias, Odoo
interprets the message and either:
- Appends it to an existing record (if it’s a reply), or
- Creates a new record (if it’s a new message).
This feature is especially handy in modules like CRM, Helpdesk,
Projects, Recruitment, and even Custom Modules that support threaded
communication.
How Does Email Alias Work?
At the core, Odoo uses a Mail Gateway system that processes emails
received through a configured incoming mail server. If an email’s To
address matches a defined alias, Odoo reads its content, identifies
the associated model, and processes it accordingly.
There are two main parts:
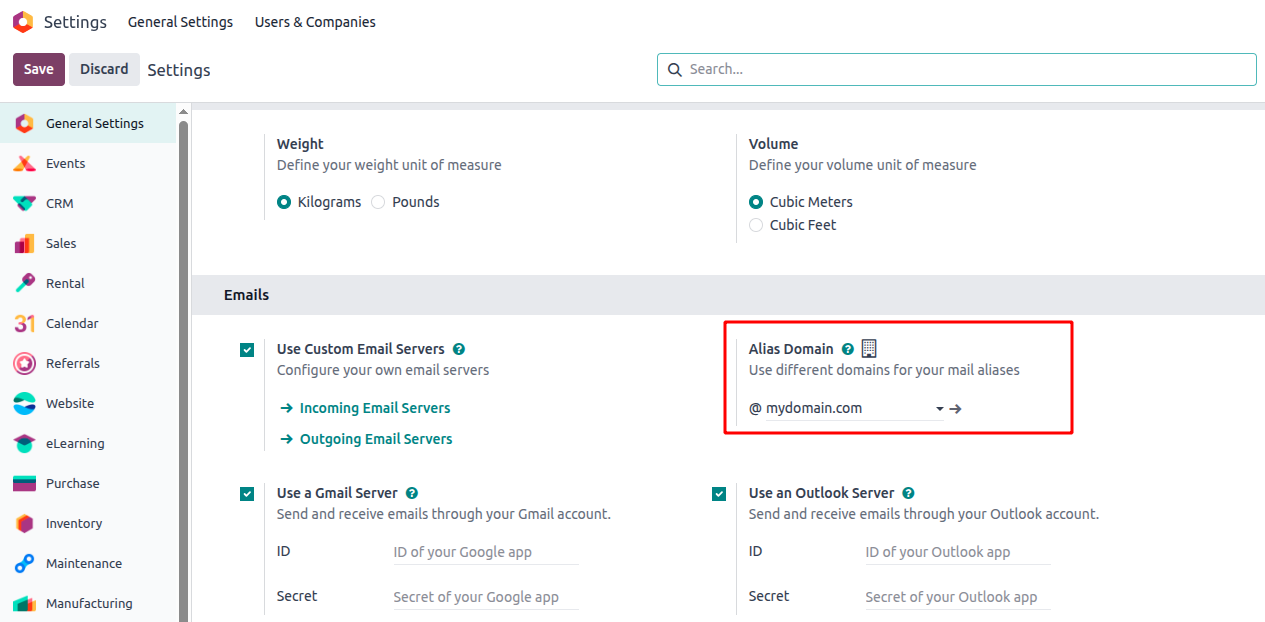
Alias Domain: The email domain used for routing (e.g., mycompany.com)
Mail Alias Record: A backend record (in model mail.alias) that
defines the alias name and target model
This system also works hand-in-hand with catch-all email rules on
your mail server. Any unmatched incoming email (like
support@mycompany.com, jobs@mycompany.com, etc.) gets routed
to a generic mailbox like catchall@mycompany.com, and from
there, Odoo takes over.
Setting Up Email Aliases in Odoo 18
Let’s walk through the steps to configure this in Odoo 18.
Step 1: Enable Alias Domain
Step 2: Create a Mail Alias
- You can create an alias via the UI or in XML (for modules).
- Using XML (common in custom development):
                    <record id="mail_alias_jobs" model="mail.alias">
    <field name="alias_name">jobs</field>
    <field name="alias_model_id" ref="model_hr_applicant"/>
    <field name="alias_user_id" ref="base.user_admin"/>
    <field name="alias_parent_model_id" ref="model_hr_job"/>
</record>
Explanation:
- alias_name: The alias used in the email address
(jobs@mycompany.com)
- alias_model_id: The model that should handle the message (e.g.,
hr.applicant)
- alias_user_id: The user under whom the message will be processed
- alias_parent_model_id: Optional parent model that holds context
(e.g., a job position)

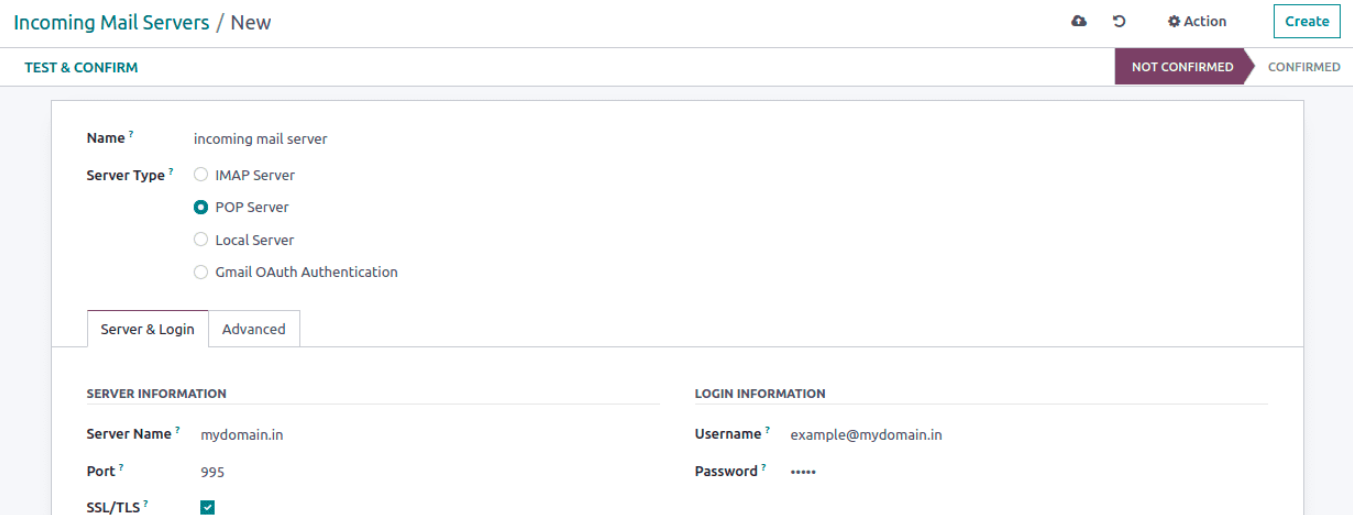
Step 3: Configure Incoming and Outgoing Mail Servers
- To make sure Odoo can fetch and send emails:
- Go to Settings > Technical > Email > Incoming Mail Servers
- Add or verify your IMAP/POP3 settings
- Test the connection
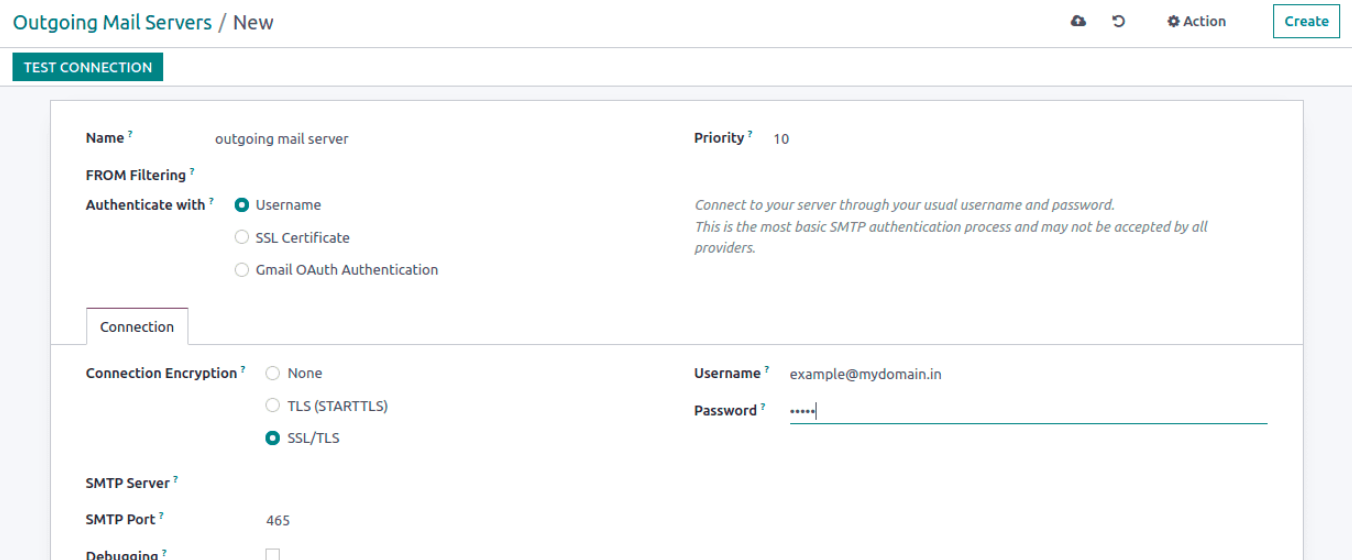
- Repeat the same for: Outgoing Mail Servers (SMTP)
Step 4: Define Catch-All Behavior
- Switch to Developer Mode
- Navigate to Settings > Technical > Parameters > System
Parameters
- Look for mail.catchall.alias
- Set its value to the default alias name (e.g., catchall)
This ensures that any email that doesn’t directly match an alias can
still be processed, if configured properly.
Email Alias Scheduling in Odoo
By default, Odoo runs a background job that checks for new emails
every 5 minutes. You can modify this in:
- Settings > Technical > Automation > Scheduled Actions
- Look for "Mail: Fetchmail Service"
This job is what fetches and processes incoming mail based on aliases
and catchall rules.