A wizard in Odoo is a temporary pop-up window (also called a
transient model) used to guide users through a specific operation or
workflow—like confirming an action, choosing options, or collecting
short-term data input.
Use cases:
- Generating reports with filter options
- Importing/exporting data
- Mass updates
- Approvals or confirmations
- Sending emails with template options
Consider a practical use case where the student.student
model is responsible for managing all student records within an
educational institution.
1. Main Student Model
from odoo import fields, models, api

class Student(models.Model):
   _name = "student.student"
   _description = "Student"

   name = fields.Char(string="Name", required=True)
   partner_id = fields.Many2one('res.partner', string="Partner")
   phone = fields.Char(string="Phone Number")
   email = fields.Char(string="Email", required=True)
   status = fields.Char(string="Status")
   leave_ids = fields.One2many('student.leave', 'student_id', string="Leaves")
2. Leave Record Model
class StudentLeave(models.Model):
   _name = "student.leave"
   _description = "Student Leave"

   student_id = fields.Many2one('student.student', string="Student")
   date = fields.Date(string="Date")
   reason = fields.Char(string="Reason")
3. Transient Wizard Model
class StudentLeaveWizard(models.TransientModel):
   _name = 'student.leave.wizard'
   _description = 'Student Leave'

   student_id = fields.Many2one('student.student', string="Student", readonly=True)
   date = fields.Date(string="Date")
   reason = fields.Char(string="Reason")
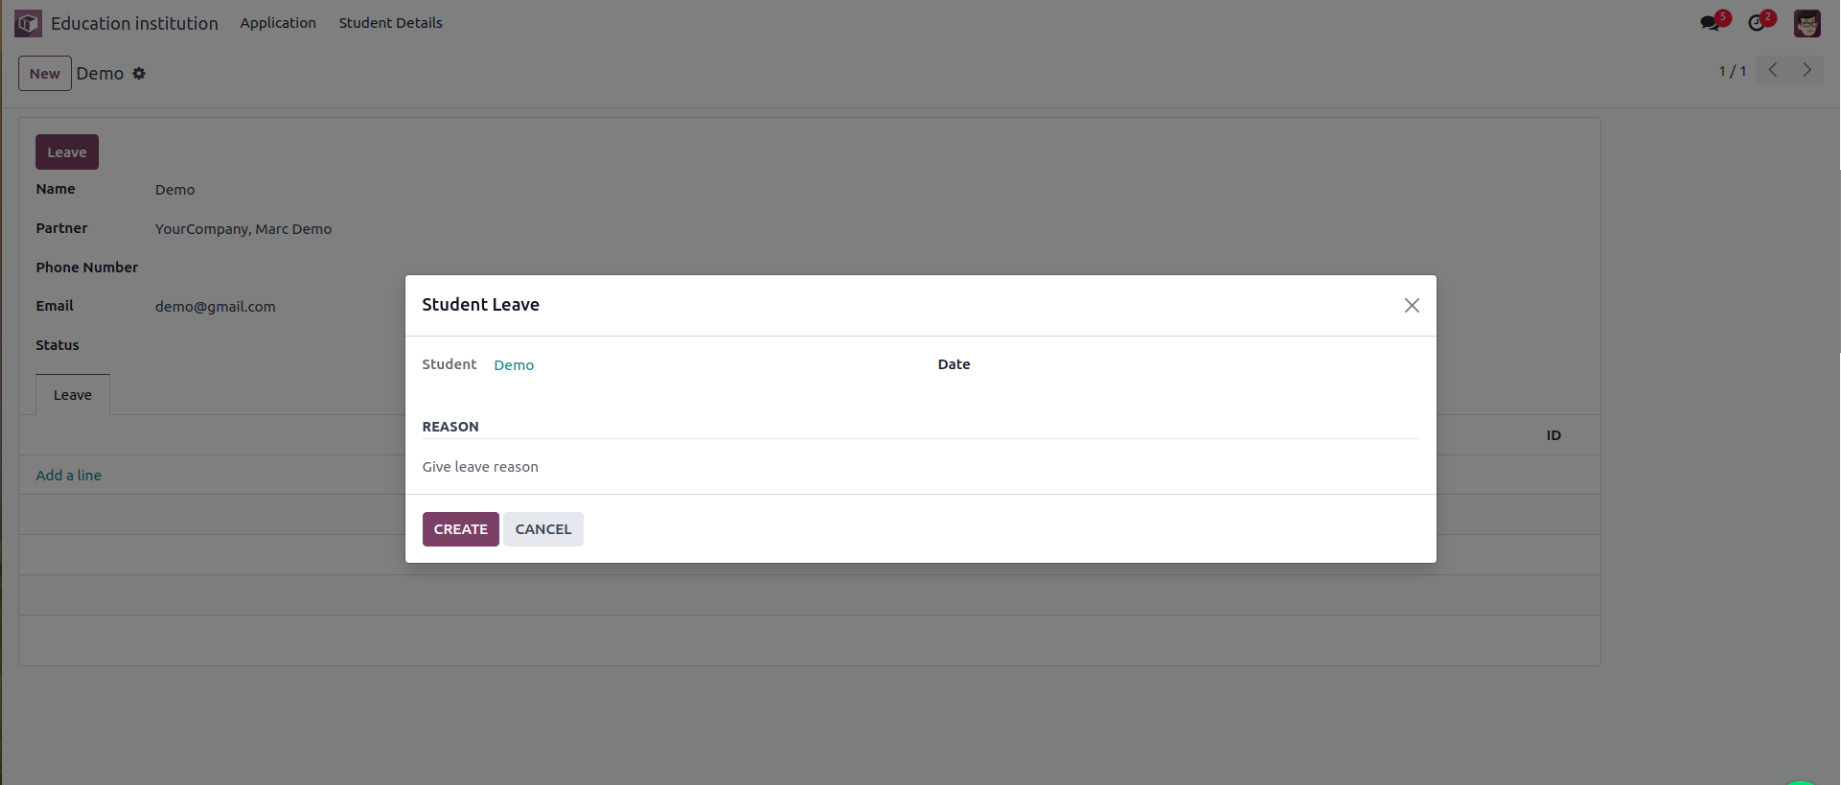
4. Button on Student Form View
Add this to the <header> of your student form:
<button name="create_leave" string="Leave" class="oe_highlight" type="object"/>
5. Method to Launch the Wizard
def create_leave(self):
   wizard = self.env['student.leave.wizard'].create({'student_id': self.id})
   return {
       'name': _('Student Leave'),
       'type': 'ir.actions.act_window',
       'res_model': 'student.leave.wizard',
       'view_mode': 'form',
       'res_id': wizard.id,
       'target': 'new'
   }
6. Wizard Form View
<record model="ir.ui.view" id="leave_wizard_form_view">
   <field name="name">Leave</field>
   <field name="model">student.leave.wizard</field>
   <field name="arch" type="xml">
       <form string="Leave">
           <sheet>
               <group>
                   <field name="student_id"/>
                   <field name="date" required="1"/>
               </group>
               <separator string="Reason"/>
               <field name="reason" required="1" nolabel="1" placeholder="Give leave reason"/>
           </sheet>
           <footer>
               <button type="object" name="create_leave_from_wizard" class="btn btn-primary" string="CREATE"/>
               <button string="CANCEL" special="cancel"/>
           </footer>
       </form>
   </field>
</record>
7. Wizard Submit Method
def create_leave_from_wizard(self):
   self.env['student.leave'].create({
       'student_id': self.student_id.id,
       'date': self.date,
       'reason': self.reason
   })
This will be output in UI.