In Odoo, views play a crucial role in improving data visualization
and enhancing user interaction. One of the core view types is the
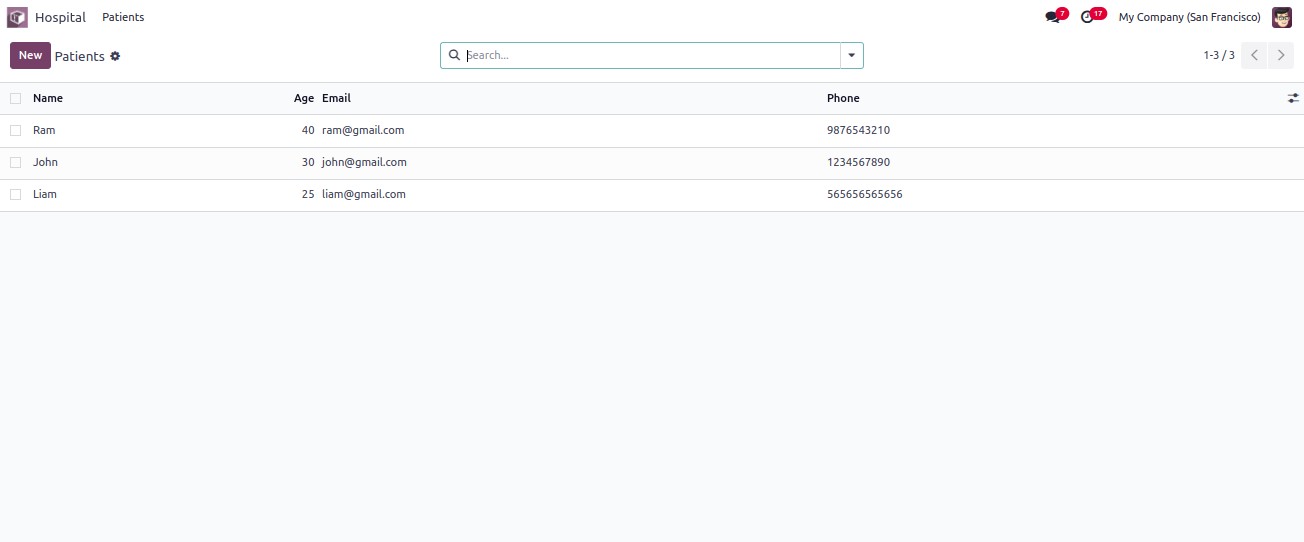
list view, which presents multiple records in a tabular format on a
single screen. This format is especially useful for summarizing and
managing data efficiently.
To create a list view, you first need to define a model with the
fields that should be displayed. Then, you define the view using XML
to control its layout.
Step 1: Define the Model
Below is an example of a simple model for managing hospital patient
records:
from odoo import models, fields

class HospitalPatient(models.Model):
    _name = "hospital.patient"
    _description = "Hospital Patient"

    name = fields.Char(string="Name", help="Name of Patient")
    age = fields.Integer(string="Age", help="Age of Patient")
    email = fields.Char(string="Email", help="Email of Patient")
    phone = fields.Char(string="Phone", help="Phone of Patient")
    state = fields.Selection([
        ('draft', 'Draft'),
        ('confirmed', 'Confirmed'),
        ('cancel', 'Canceled')
    ], string="State", readonly=True, help="Status of the patient record")
This model defines the structure for storing patient data such as
name, age, contact details, and current state.
Step 2: Define the List View in XML
Once the model is ready, the next step is to define how it appears in
the list view:
<record id="hospital_patient_view_list" model="ir.ui.view">
    <field name="name">hospital.patient.view.list</field>
    <field name="model">hospital.patient</field>
    <field name="arch" type="xml">
        <list>
            <field name="name"/>
            <field name="age"/>
            <field name="email"/>
            <field name="phone"/>
        </list>
    </field>
</record>
- <list>: This is the root tag for a list view.
- <field name="..."/>: These tags define which fields
are displayed in the list and in what order.
This view allows users to see a grid-style table of patients, making
it easier to scan through records quickly.