Building forms to gather input from website visitors is a frequent
requirement in website development. In this example, we use the
survey_form module to capture user responses. To store the submitted
data, a custom model must be created that will handle and retain the
records provided by website users.
Step 1
Begin by defining the model survey.form along with the necessary
fields to store the website user input.
                       class SurveyForm(models.Model):
   _name = 'survey.form'
   _description = 'Survey Form'

   name = fields.Char('Title', required=True)
   dob = fields.Date('Release Date')
   qualification = fields.Char('Qualification')
   phone = fields.Char('Phone', required=True)
   email = fields.Char('Email', required=True)
Step 2
Create and define the necessary views for the survey_form module to
handle form display and data input from users.
<!--    List View-->
   <record id="survey_form_view_list" model="ir.ui.view">
   <field name="name">survey.form.view.list</field>
   <field name="model">survey.form</field>
   <field name="arch" type="xml">
       <list create="false">
           <field name="name"/>
           <field name="dob"/>
           <field name="qualification"/>
           <field name="phone"/>
           <field name="email"/>
       </list>
   </field>
   </record>

   <record id="survey_form_action" model="ir.actions.act_window">
       <field name="name">Survey</field>
       <field name="res_model">survey.form</field>
       <field name="view_mode">list,form</field>
   </record>
Step 3
Configure access permissions for the survey.form model by adding the
appropriate entries in the ir.model.access.csv file, as shown below:
id,name,model_id:id,group_id:id,perm_read,perm_write,perm_create,perm_unlink
access_survey_form_user,survey.form.user,model_survey_form,base.group_user,1,1,1,1
Step 4
Create a menu item to display the Survey Form in the user interface,
making it accessible through the Odoo backend.
<?xml version="1.0" encoding="UTF-8" ?>
<odoo>
   <record id="website_survey_menu" model="website.menu">
       <field name="name">Survey</field>
       <field name="url">/survey</field>
       <field name="parent_id" ref="website.main_menu"/>
       <field name="sequence" type="int">90</field>
   </record>
</odoo>
The menu structure should be created as shown in the image below.

Step 5
Design a website template to render the survey form, allowing users
to submit their responses through the frontend.
<?xml version="1.0" encoding="UTF-8" ?>
<odoo>
   <template id="survey_form_template" name="Survey Form">
       <t t-call="website.layout">
           <div class="container s_website_form">
               <h3>Survey Form</h3>
               <t t-if="submitted">
                   <h3 class="alert alert-success mt16 mb16">
                       <i class="fa fa-thumbs-up"/>
                       Survey submitted successfully
                   </h3>
                   <a href="/survey_form">Submit another survey</a>
               </t>
               <t t-else="">
                   <div class="row">
                       <div class="col-6">
                           <form id="form_survey_form"
                                 action="/survey_form" method="POST">
                               <input type="hidden" name="csrf_token"
                                      t-att-value="request.csrf_token()"/>
                               <div class="s_website_form_rows row s_col_no_bgcolor">
                                   <div class="form-group col-12">
                                       <label for="name">Name</label>
                                       <input type="text" class="form-control"
                                              name="name"
                                              placeholder="Enter your name"
                                              required="required"/>
                                   </div>
                                   <div class="form-group col-12">
                                       <label for="email">Email</label>
                                       <input type="email" class="form-control"
                                              name="email"
                                              placeholder="Enter your mail-id"
                                              required="required"/>
                                   </div>
                                   <div class="form-group col-12">
                                       <label for="phone">Phone</label>
                                       <input type="number"
                                              class="form-control"
                                              name="phone"
                                              placeholder="Enter your name"
                                              required="required"/>
                                   </div>
                                   <div class="form-group col-12">
                                       <label for="dob">DOB</label>
                                       <input type="date" class="form-control"
                                              name="dob"
                                              placeholder="dd/mm/yyyy"/>
                                   </div>
                                   <div class="form-group col-12">
                                       <label for="qualification">
                                           Qualification
                                       </label>
                                       <select class="form-control"
                                               name="qualification">
                                           <option value="">Select</option>
                                           <option value="pg">Post Graduation
                                           </option>
                                           <option value="ug">Graduation
                                           </option>
                                           <option value="higher_secondary">
                                               Higher Secondary
                                           </option>
                                           <option value="secondary">
                                               Secondary
                                           </option>
                                       </select>
                                   </div>
                                      <div class="form-group col-12">
                                       <input type="submit"
                                              class="btn btn-primary"
                                              value="Submit"/>
                                   </div>
                               </div>
                           </form>
                       </div>
                   </div>
               </t>
           </div>
       </t>
   </template>
</odoo>
Step 6
Define a new route inside the main.py controller file to render the
survey form template when the corresponding menu item is selected
from the website.
class Survey(Controller):
   @route('/survey', auth='public', website=True)
   def survey(self):
      return request.render(module_name.survey_form_template')
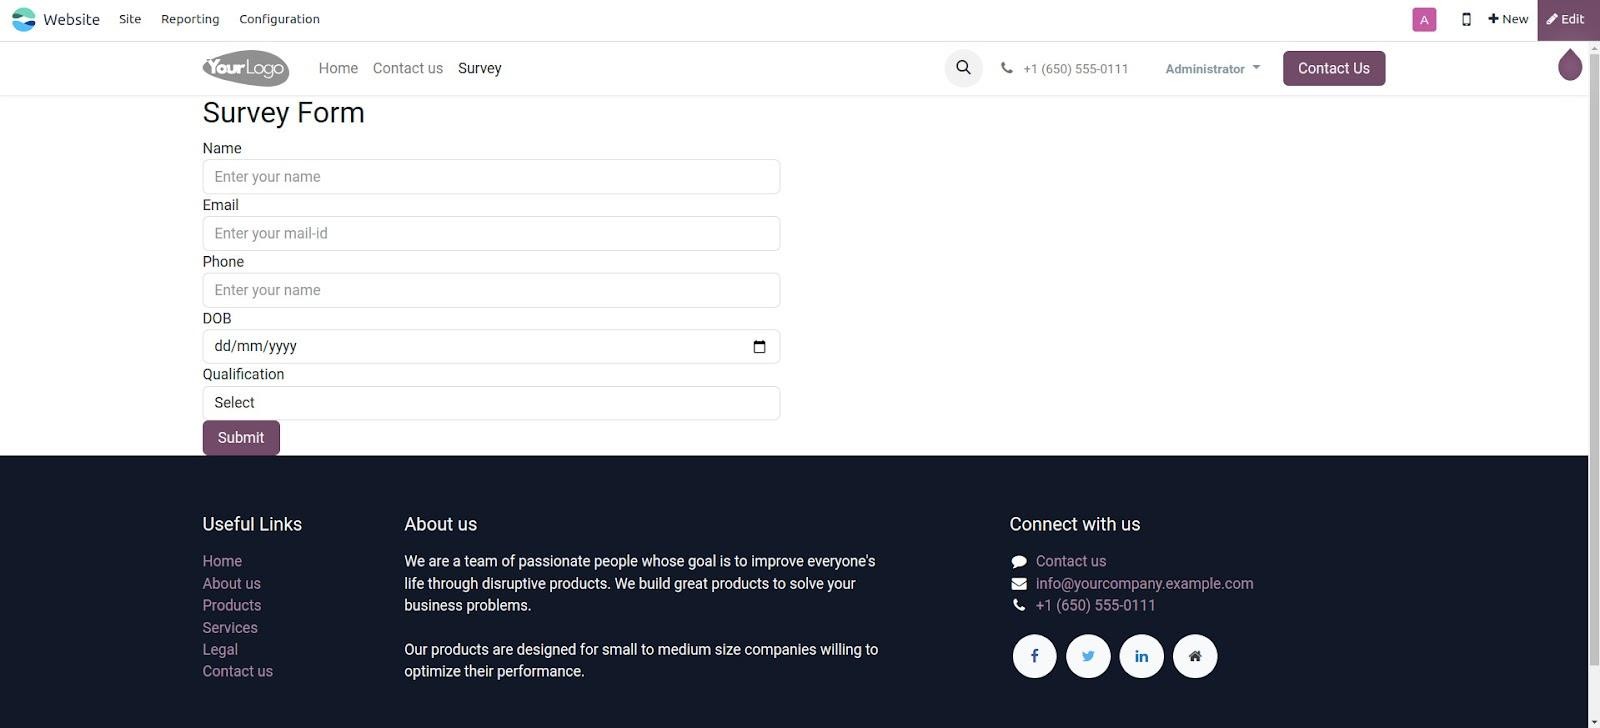
Clicking on the Survey menu will navigate the user to the survey form
page displayed below.
Step 7
Define a new route that handles the form submission. When the survey
form is submitted, this route will execute a function that saves the
input data as a new record in the survey.form model.
@route(['/survey_form'], type='http', auth="user", website=True)
def survey_form(self, **post):
   name = post.get('name')
   email = post.get('email')
   phone = post.get('phone')
   if name and email and phone:
      request.env['survey.form'].sudo().create({
         'name': name,
         'email': email,
         'phone': phone,
         'dob': post.get('dob'),
         'qualification': post.get('qualification')
      })
      return request.redirect('/survey_form?submitted=1')
   return request.render(module_name.survey_form_template',
                         {'submitted': post.get('submitted', False)})
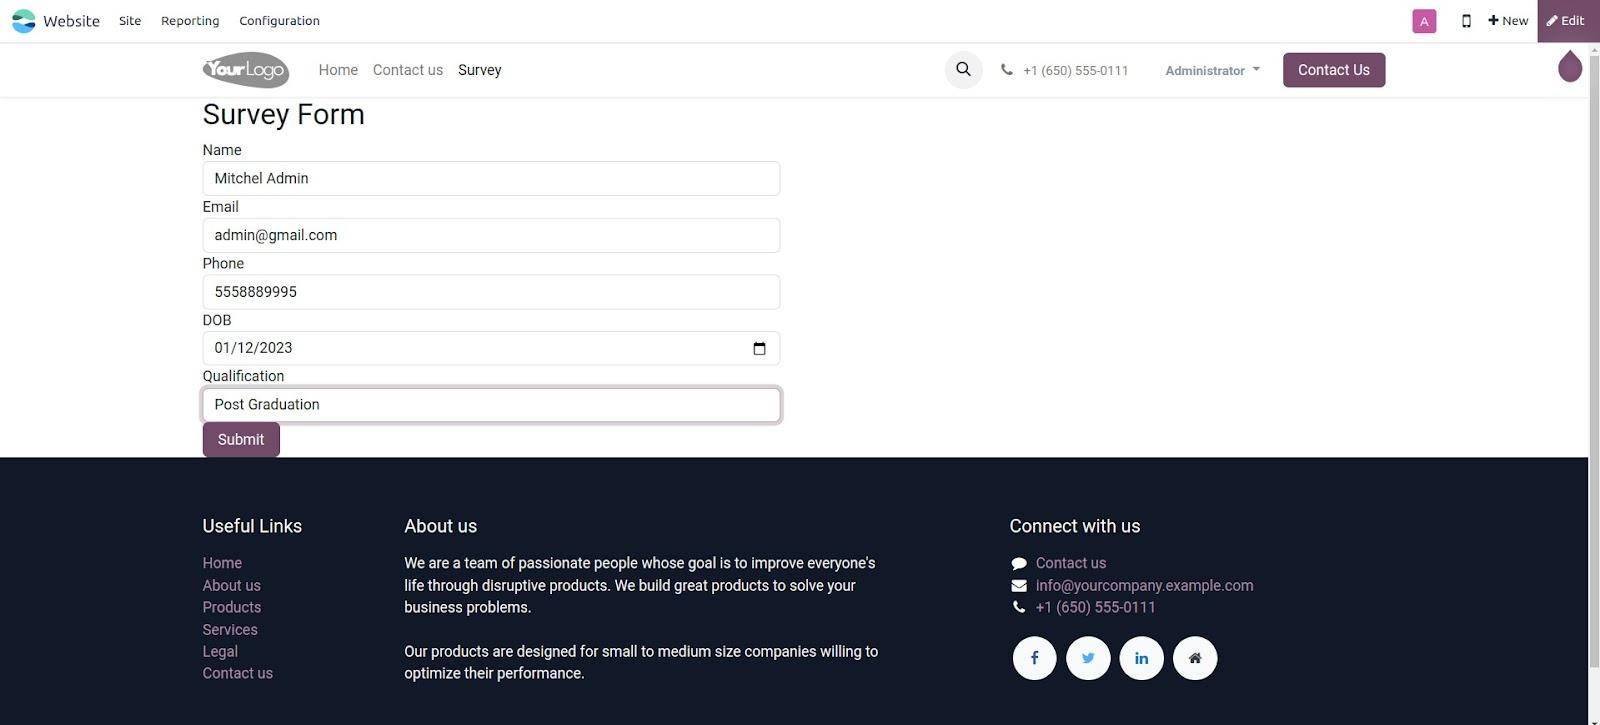
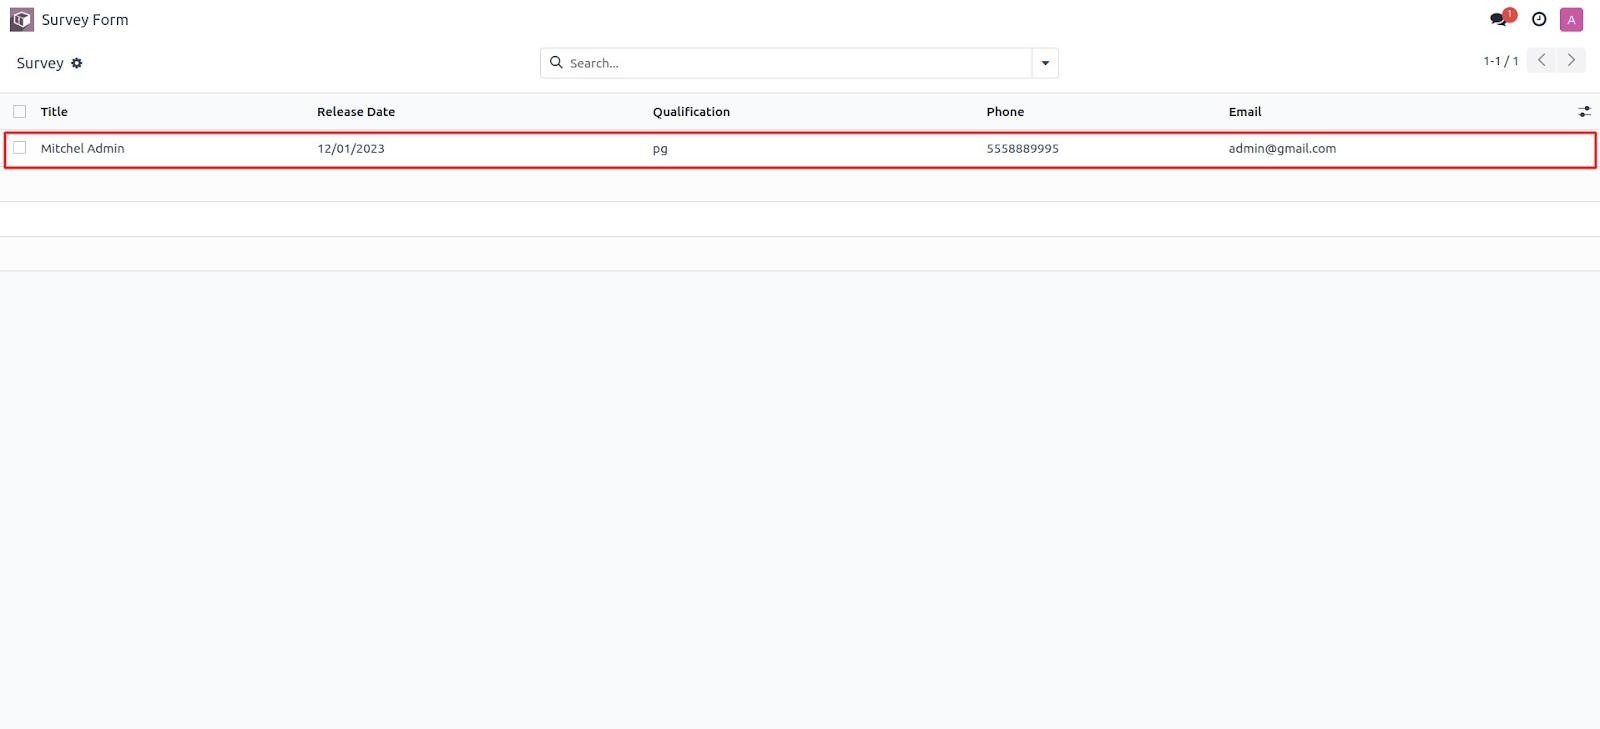
Fill in the survey form and submit it. After submission, navigate to
the Survey Form module in the backend — you’ll see that a new record
has been created based on the submitted data from the website.
This is the process of creating records in Odoo 18 using data
submitted by users through a website form.