A project is crucial to a company's success. Each company has its own set of projects. There are many different types of projects in a business, and there are many different ways to handle them. A project goes through various processes from beginning to completion. However, maintaining such a procedure continuously and manually is a challenging undertaking. However, the Odoo 15 Project module aids the firm in better project management.
Odoo adds new features to each module with each new release. Odoo includes some new features to Project Management in version 15. Let's look at those innovative features in the Odoo 15 Project module.
Let's begin by implementing a project. When you select the project module, a list of projects that have already been created in the company appears. While clicking the Create button, one can create a new Project. Before creating a project let us discuss the features of the project module. So let us go to Configuration and choose Settings.
Configuration > Settings
Enable Collaborative Pads, Sub-tasks, Recurring Tasks, Task Dependencies, Project Stages, Planning, Timesheets, Profitability, Customer Ratings.
Then: Save
Collaborative pad: This is a task pad that is used to collaborate with the task's assignee.
Assignees can use this pad to write work descriptions.
Sub-task: It is possible to add subtasks to a given task if it is too large. As a result, a subtask like this can be added to the parent task.
Recurring Tasks: Some tasks must be repeated several times over a period of time.
As a result, this option can be used to set the repetition in such cases.
Task Dependencies: We have a task that occurs due to another task.
In such circumstances, the task can only be completed after another task has been completed.
As a result, it is possible to pause the task in order to do another.
Project Stages: A project goes through several stages before it gets finished. When we glance at the dashboard, we can quickly understand the state of the project.
Planning: Using the planning module, we can estimate the number of hours required to accomplish the project
Timesheets: Some personnel was assigned to specific tasks. Those that completed the work must include a timesheet detailing how many hours they spent on it. This feature is used to add such timesheets.
Profitability: This is where you can figure out how much money the company made on this project.
Customer Rating: It is possible to send an email mentioning consumer satisfaction.

During the journey of a project's development, it may go through several stages. This makes it simple to understand the project's status from the dashboard. Project Stages can be found under the Configuration tab. There is a list of project stages, and you can also create a new stage by clicking the Create button.

Then for creating a new project, go to project overview.
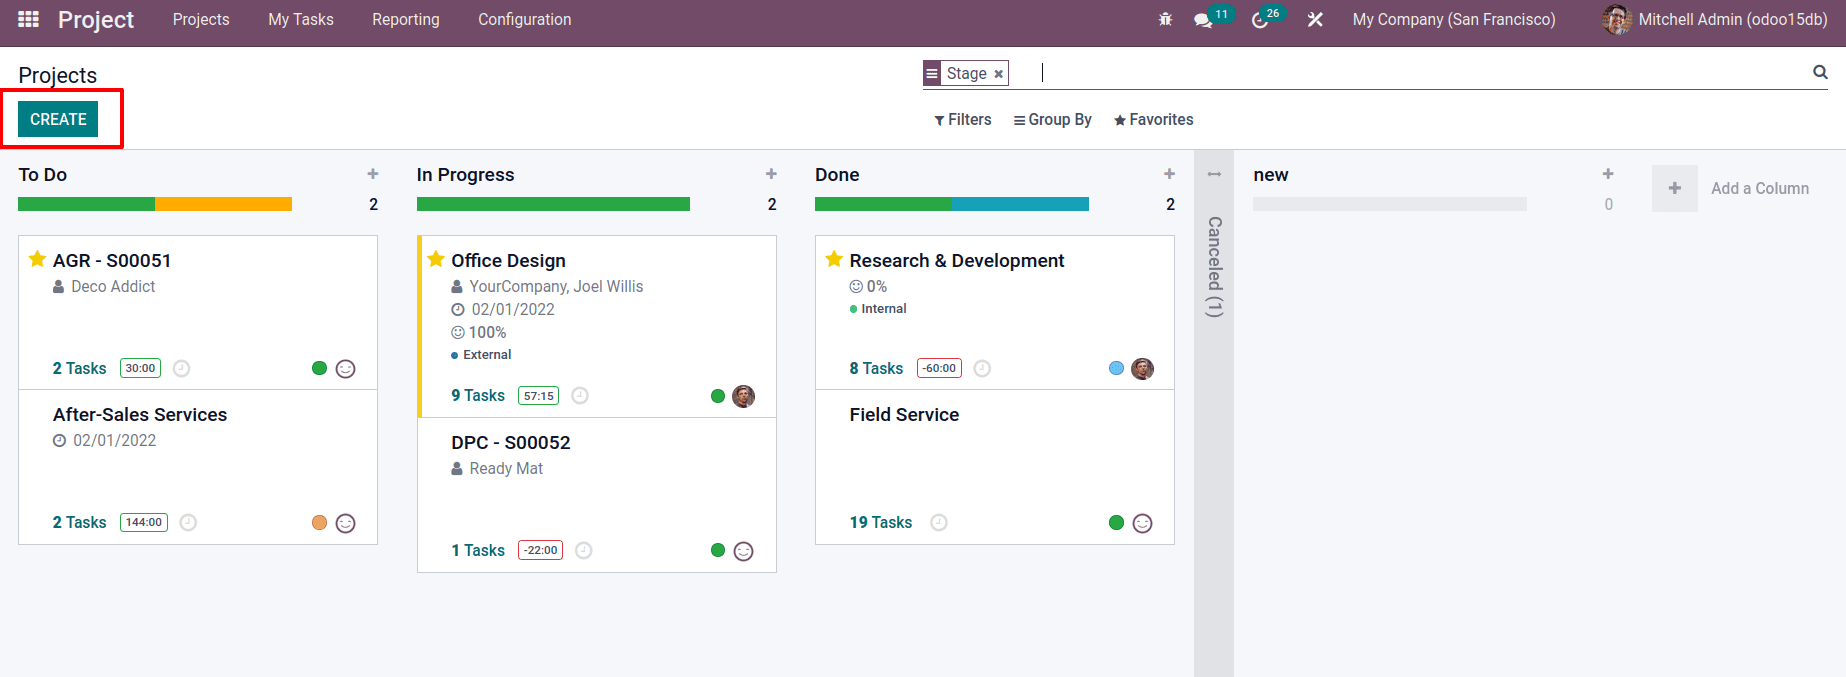
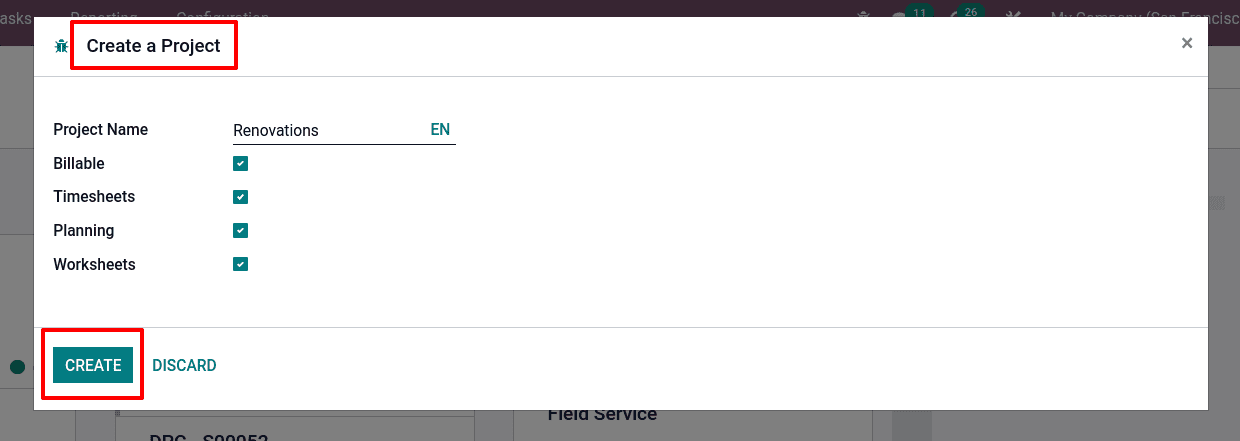
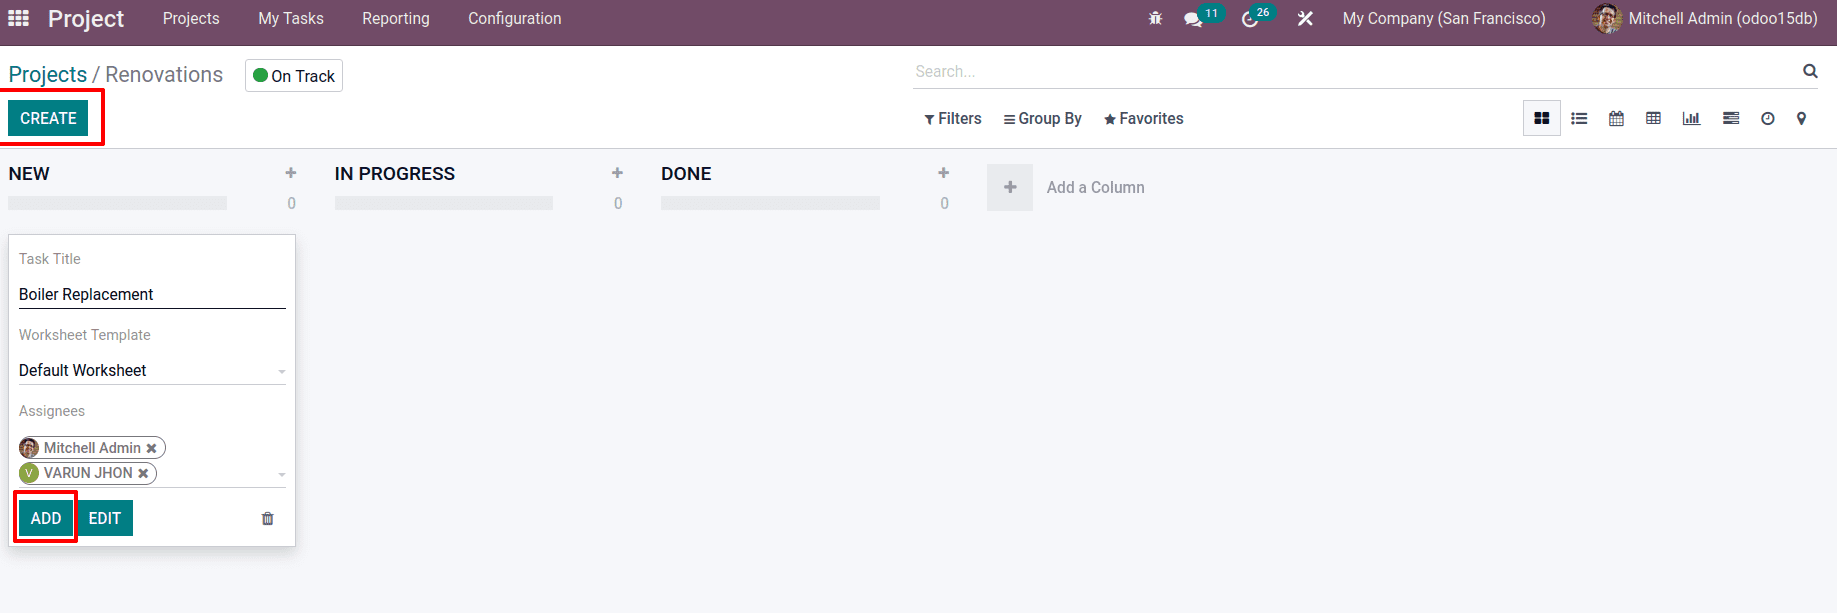
Click on Create to create a new project. A new wizard appears, prompting you to provide the project name. There are a few checkboxes displayed there. Check the Billable box if one needs to invoice the time and materials for the task. If you allow Timesheets, you'll be able to add an employee's timesheet to a project. Planning in a project is made possible by the use of resource planning. Activate Worksheets. If one wants a customizable worksheet for the task, then CREATE.
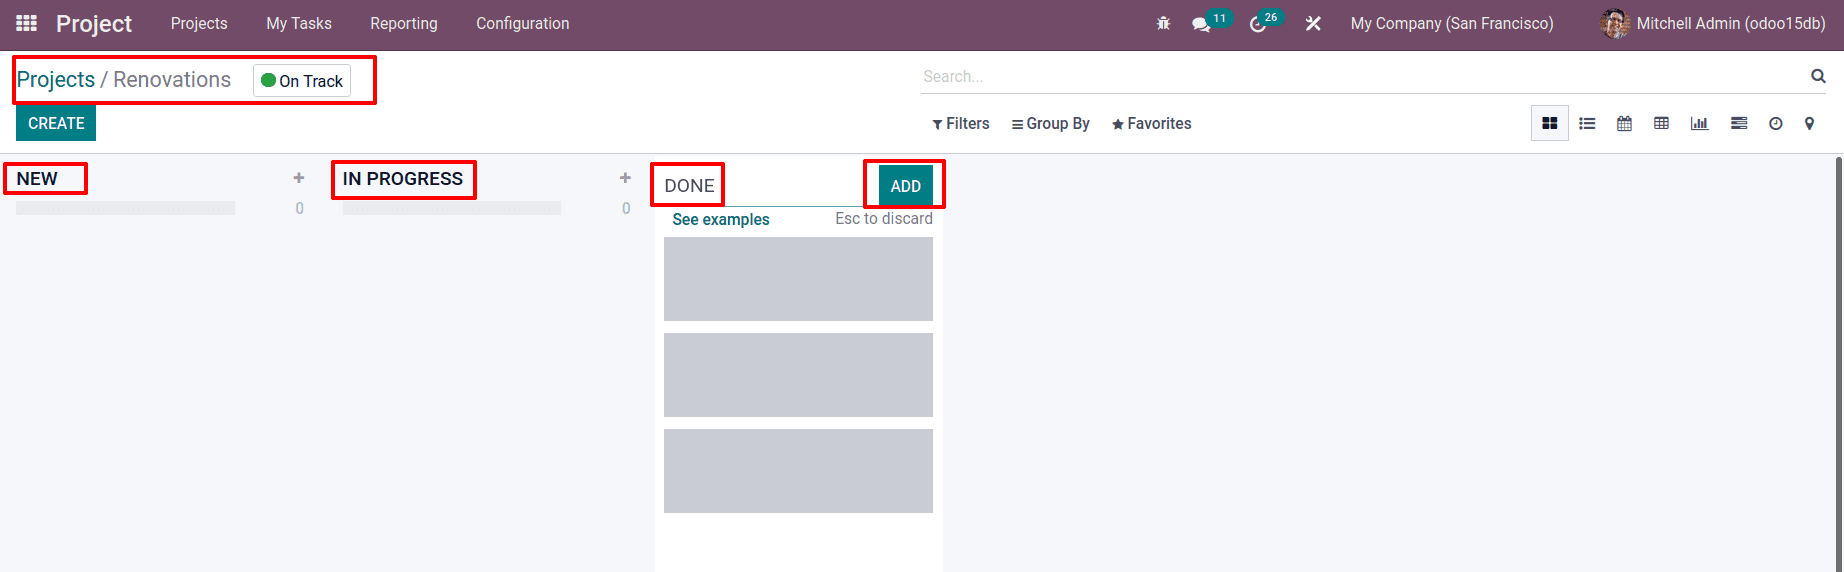
This leads to another page where the project’s task phases can be created. Different stage names should be mentioned. You can add new stages in the mentioned name by clicking the ADD button.
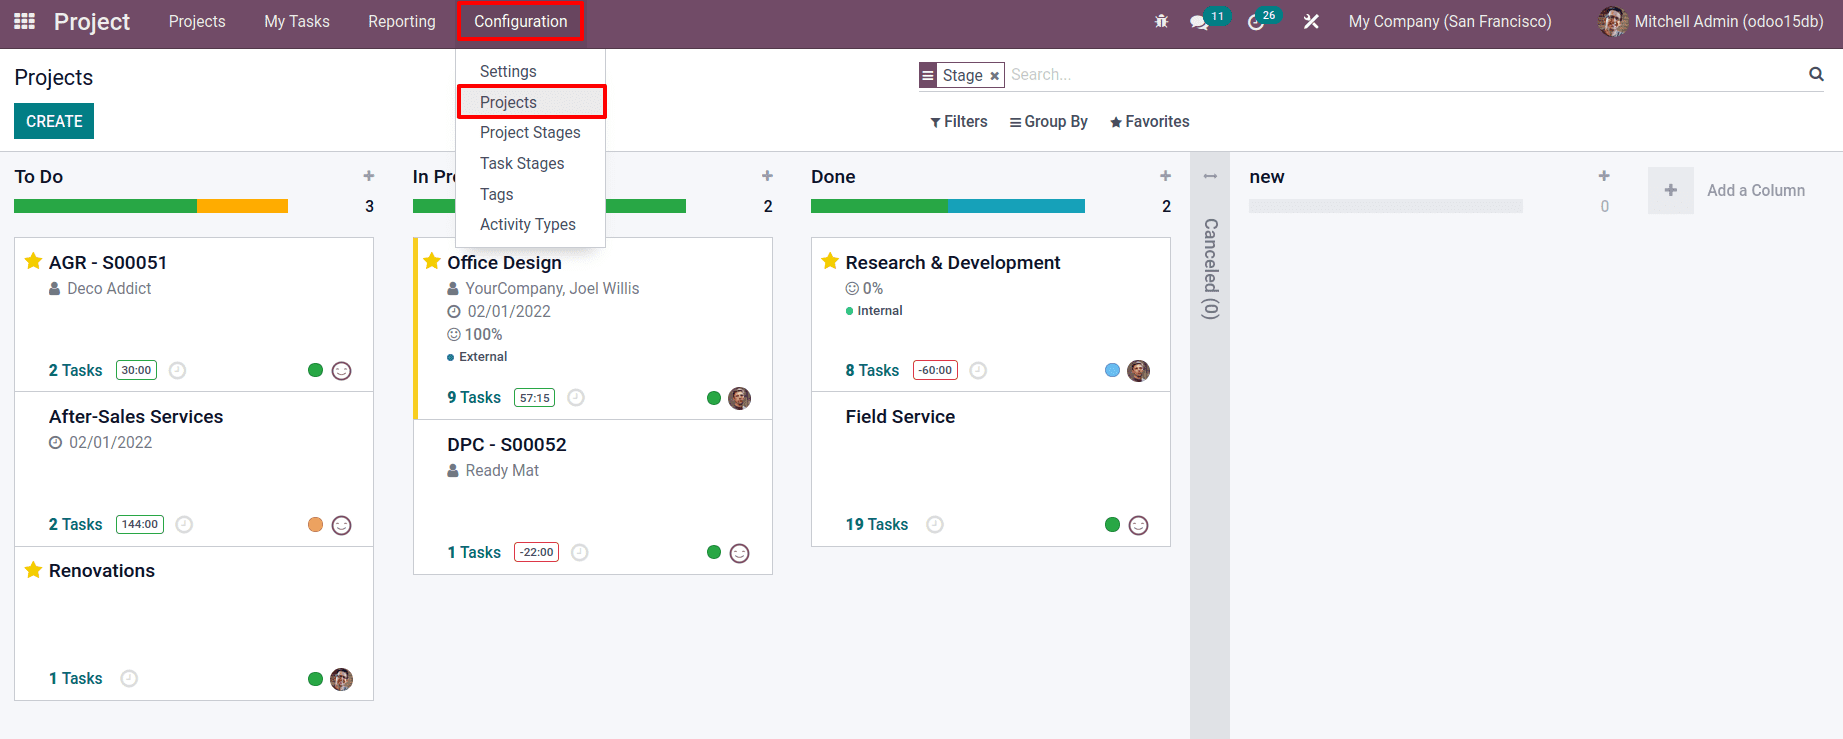
The Task phases have now been developed. Let's look at the phases on the Configuration tab and select Task stages from the drop-down menu.
Configuration < Task stages
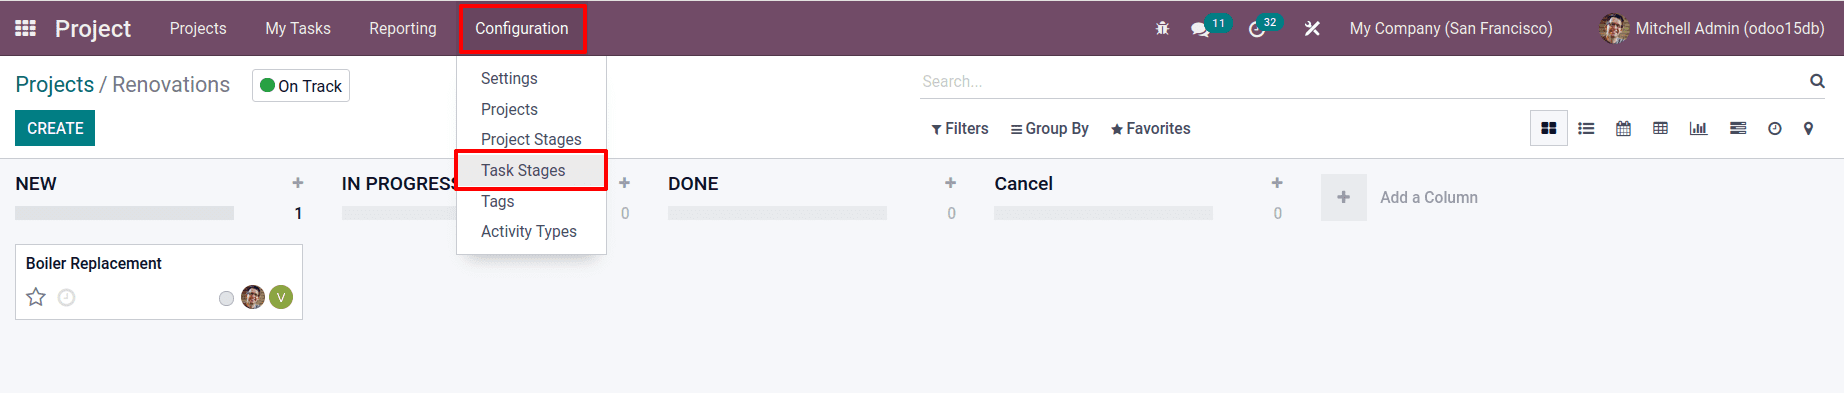
There's a list of stages, each of which was designed for a different project's task. While clicking on it will take you to a new page where you can edit the stage.
The project stage name and sequence number are displayed there. There are two email templates that can be inserted there. One is used to add client ratings, while the other is intended to notify the customer that the work or issue has progressed to this stage. When a customer responds to this stage's input, the kanban state is automatically changed by enabling Automatic kanban status. Changes to progress if the feedback is positive. When there is negative feedback, the stage becomes blocked.
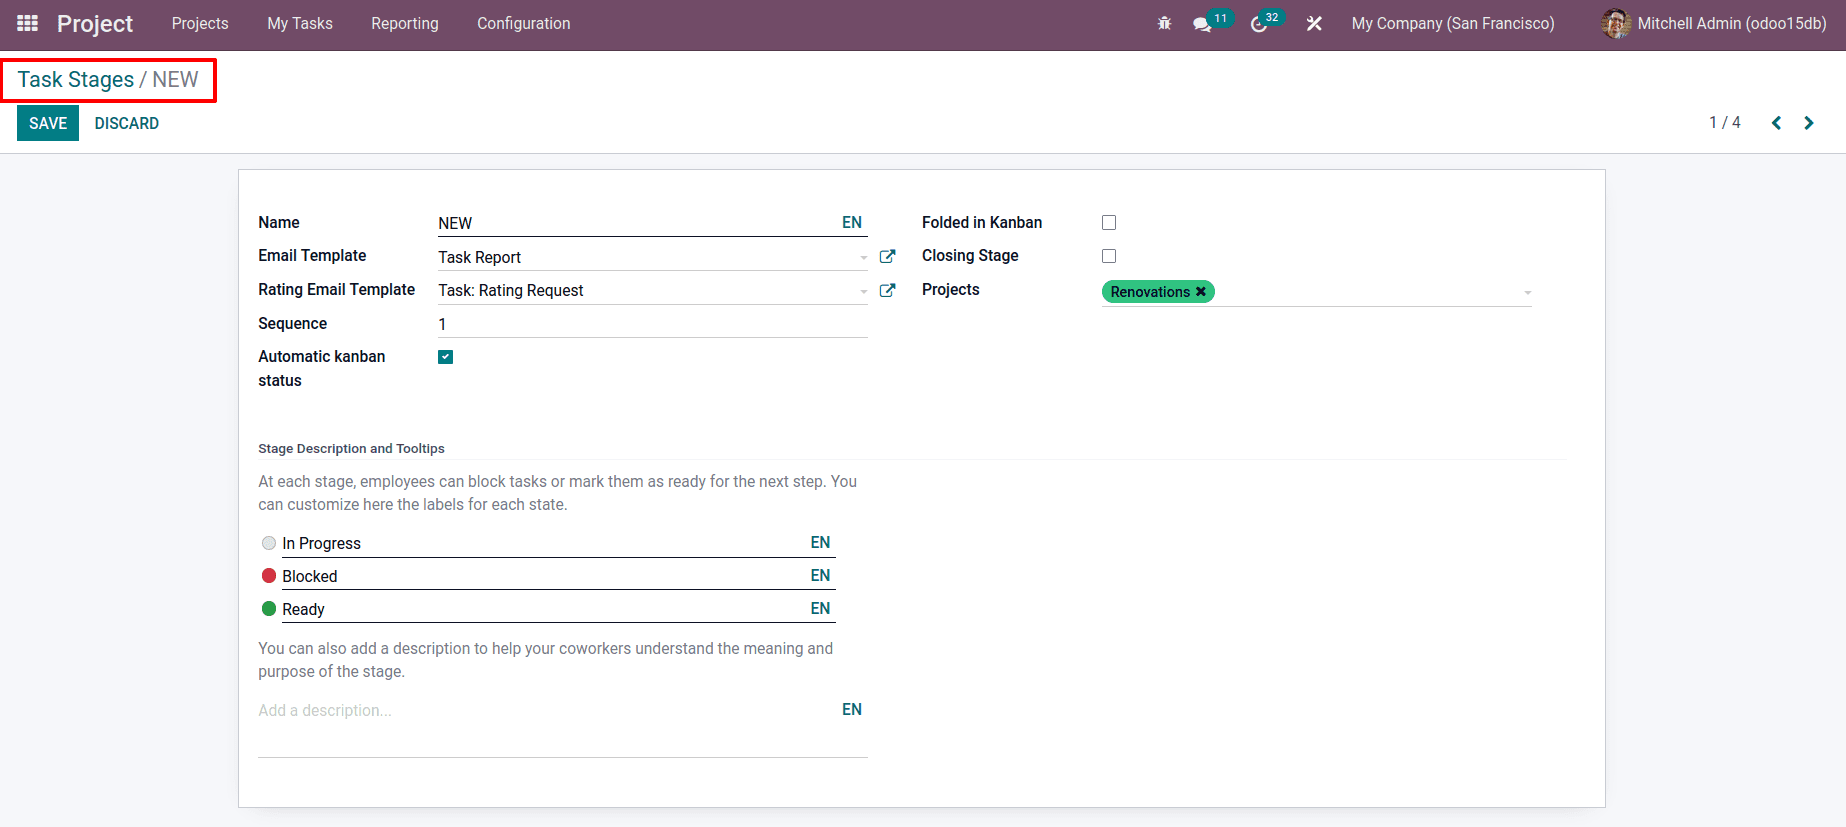
Mention the project names that this stage used in the project field. There are checkboxes to choose from. Enable the box Folded in Kanban if you want to fold this stage in Kanban view. Enable the checkbox Closing Stage to indicate that this is the task's final stage. Then save the stage. It's possible to add such changes in every stage.
Tasks can then be added to the stages. Mention the name of the task, the worksheet, and the Assignees. Then CREATE it. It's possible to do a variety of tasks here.
Go to the configuration tab and select the Project option. There is a list of all the projects, including the one that was just formed. Open the new project "Renovations".
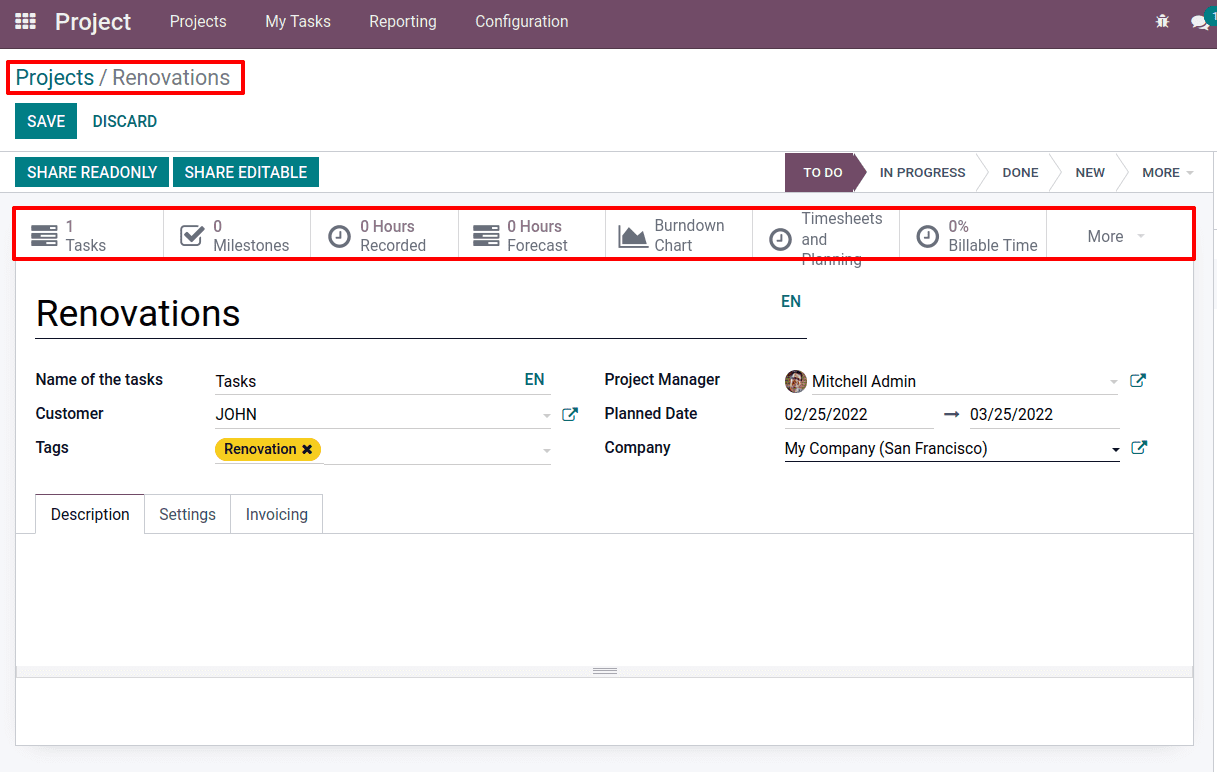
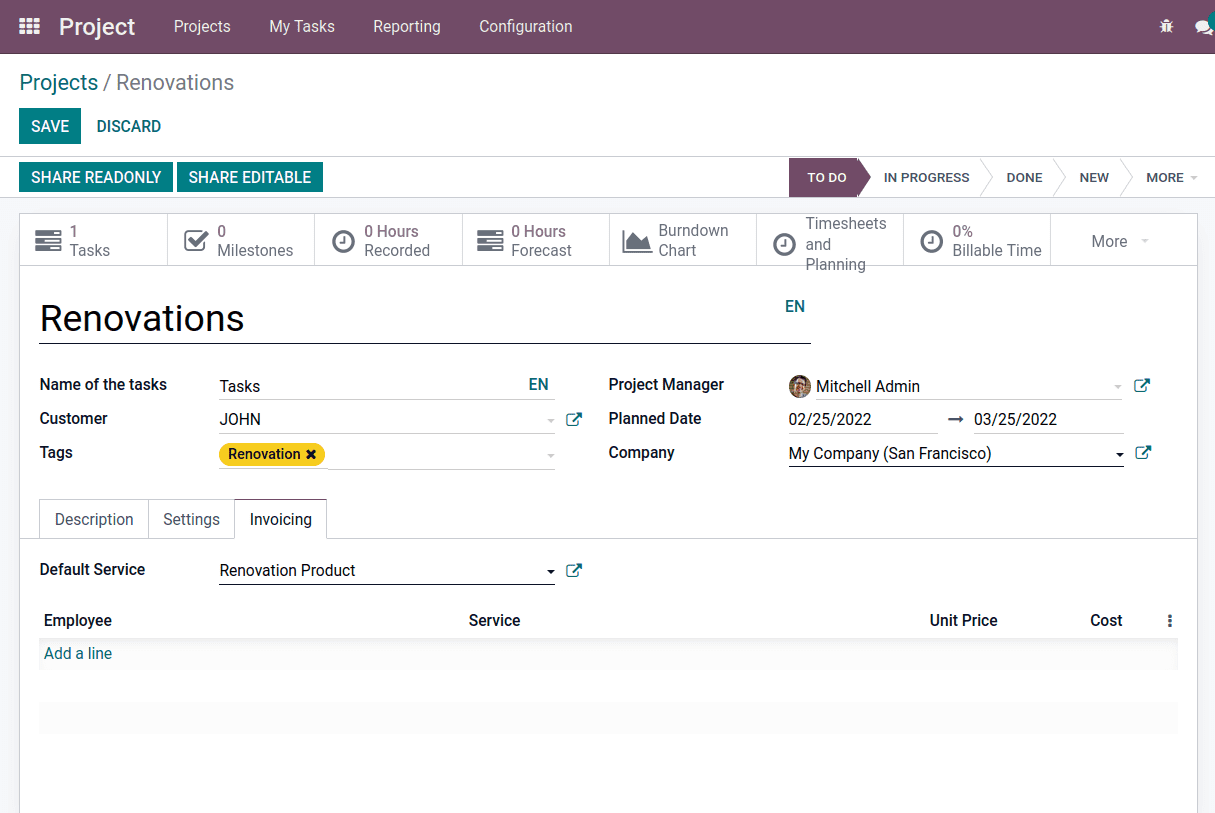
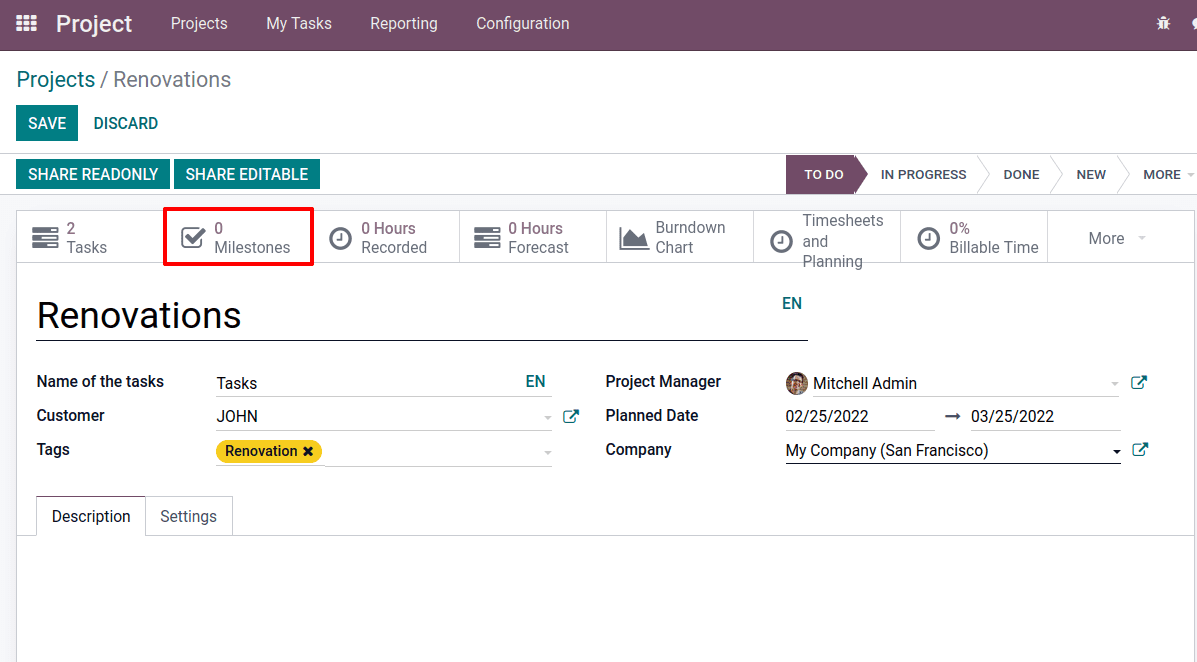
In a project, there are a lot of smart tabs. Task lists all of the tasks that have been generated for this project; one task was created here. Milestones, Recorded hours, Forecasted hours, Billable time, etc. Here one should put the Customer, Project Manager, and Tags. The intended date can be entered in the field Planned Date to indicate the time range for which this project is planned. There is a Description tab where you enter project descriptions.
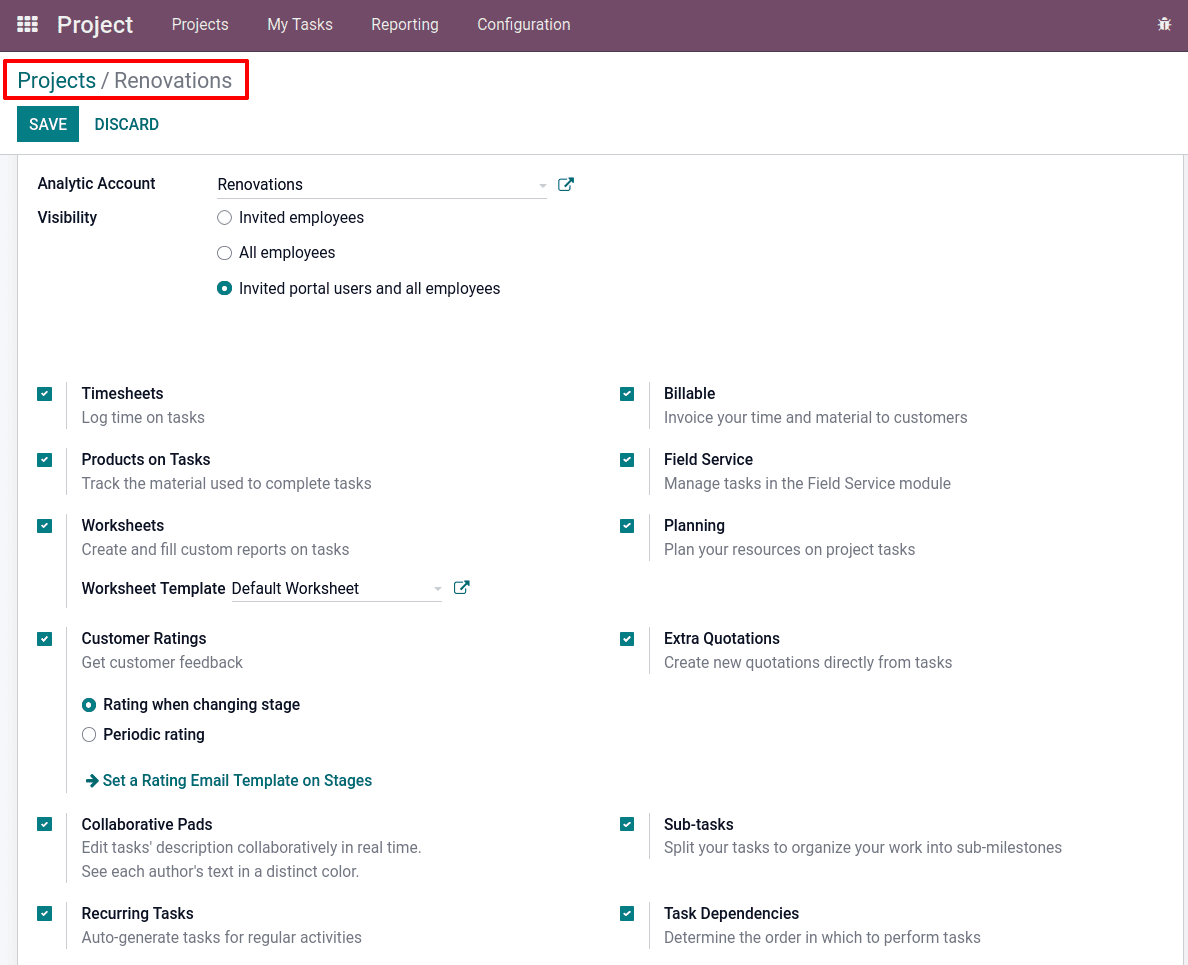
It is possible to update or add features to a project from the Settings tab. Invited employees, All employees, or both Invited portal users and all employees can have project visibility. Timesheets, Billable, Products on Tasks, Field Service, Worksheets, Planning, Customer Ratings, Extra Quotations, Collaborative Pads, Sub-tasks, Recurring Tasks, Task Dependencies, and so on can be added to our project by activating each one.
In the invoicing tab, a service product is added. With that service product, the time spent on the task can be billed. Then Save the project.
Tasks:
The number of tasks produced for this project can be discovered in the smart tab Tasks.
Open it as well as the task. The task's project name is updated there. It is possible to include information such as the Customer's name, Parent task, Tags, Sales order item, and Planned date. It is possible to assign the task to Assignees. It is also feasible to assign more than one person to execute a task here. If necessary, add a Worksheet Template to the task in the specified field. There is a Recurrent checkbox. When you enable this, a new smart tab called Recurrence appears.

Collaborative pad:
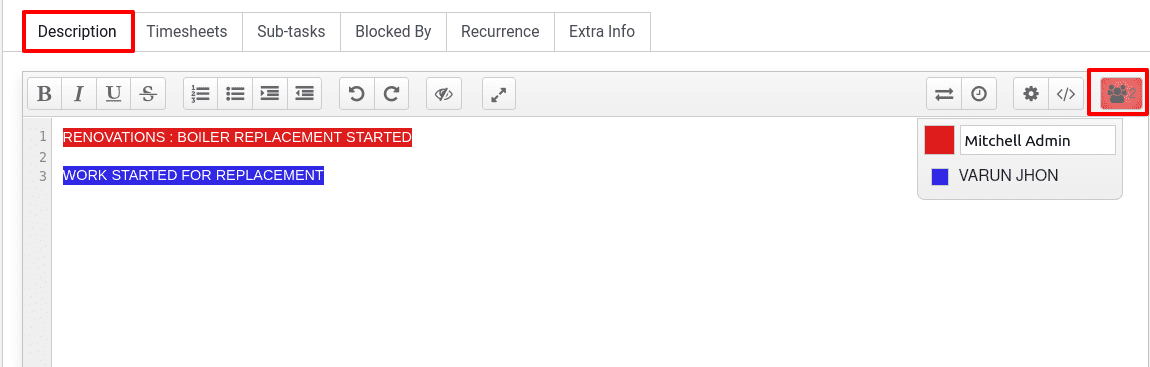
A Collaborative pad has been added to the Description tab. It is only available after enabling Collaborative Pads in Configuration's Settings. This field is used to provide task descriptions.
Everyone who has been assigned to this task has the ability to add descriptions here. Actually, the collaborative pad can be utilized as a chatbox, and each assignee can have a separate color code. If they add any descriptions here, the text will be displayed in that color. The user on the pad is displayed at the far right end, and it is possible to change the color of that one from there.
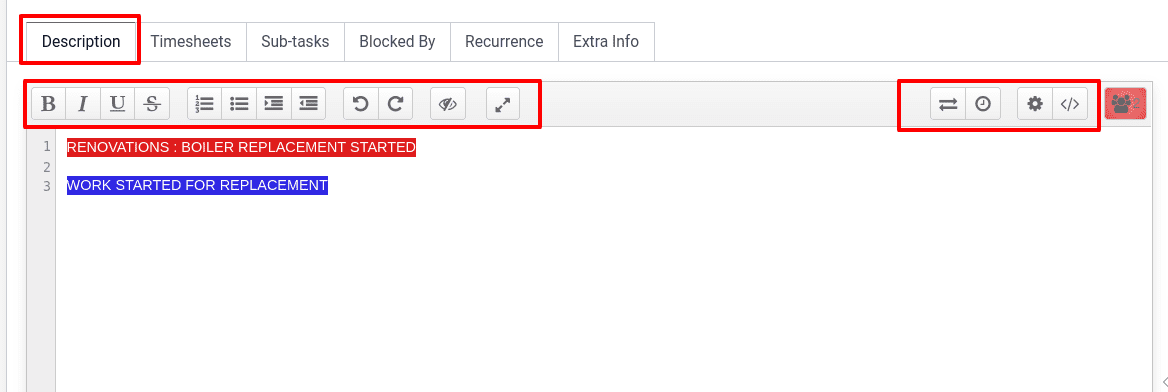
This pad allows you to import and export files. This tab can have a time slider added to it. There is a pad settings button there. If the Assignee desires to share this pad with another person, that option is also available. The options for Bold, Italic, Underline, and Strikeout are all familiar and present here. Ordered and unordered lists, as well as indent and outdent options, are all available.
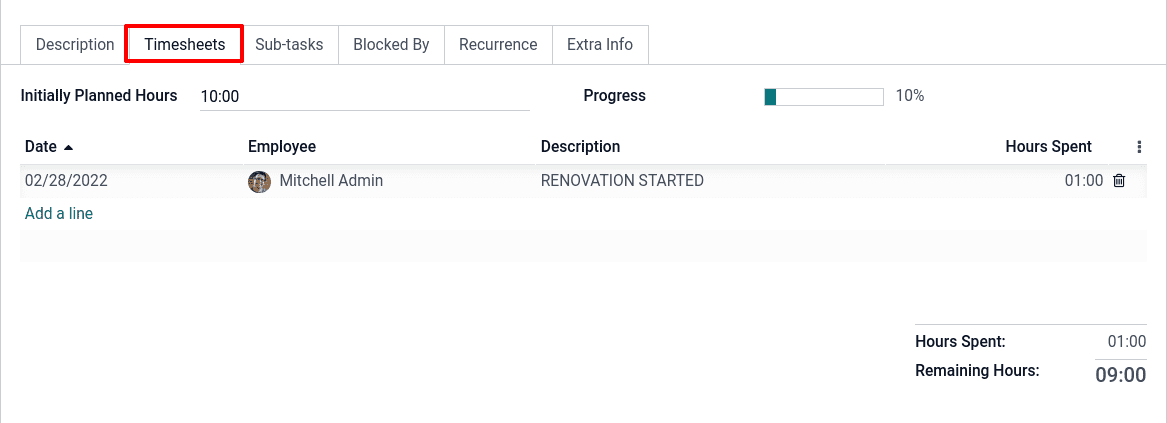
Timesheets:
Employees' time worked on this task can be recorded in the Timesheets tab. Add an Initially Planned Hours first. The initially planned hour is the total time needed to complete this task, including subtasks. Then add the employee's time worked. It is possible to include the date on which they worked on this task as well as a brief summary of his work. The work's progress is also shown from there.
Sub-tasks
Subtasks can be added to the existing task. It is possible to do so via the Sub-tasks tab. Add the name of the Sub-task, Assignees, Deadline, and Stage there. It is also possible to establish a deadline for the work. Actions like View Task or Delete can be done from here

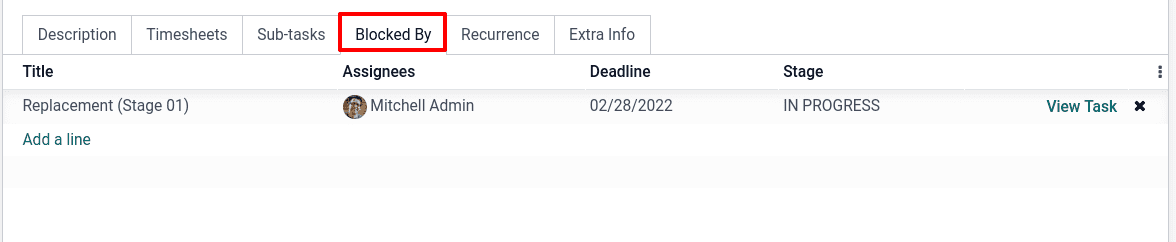
Blocked by
Perhaps this present task will only be completed when another has been completed. As a result, one task may be able to block the other. Odoo makes this very simple. The task can be mentioned in the Blocked by tab, and it will be performed first. The task Boiler Replacement begins only when the second task, Replacement (Stage 01), has been completed.
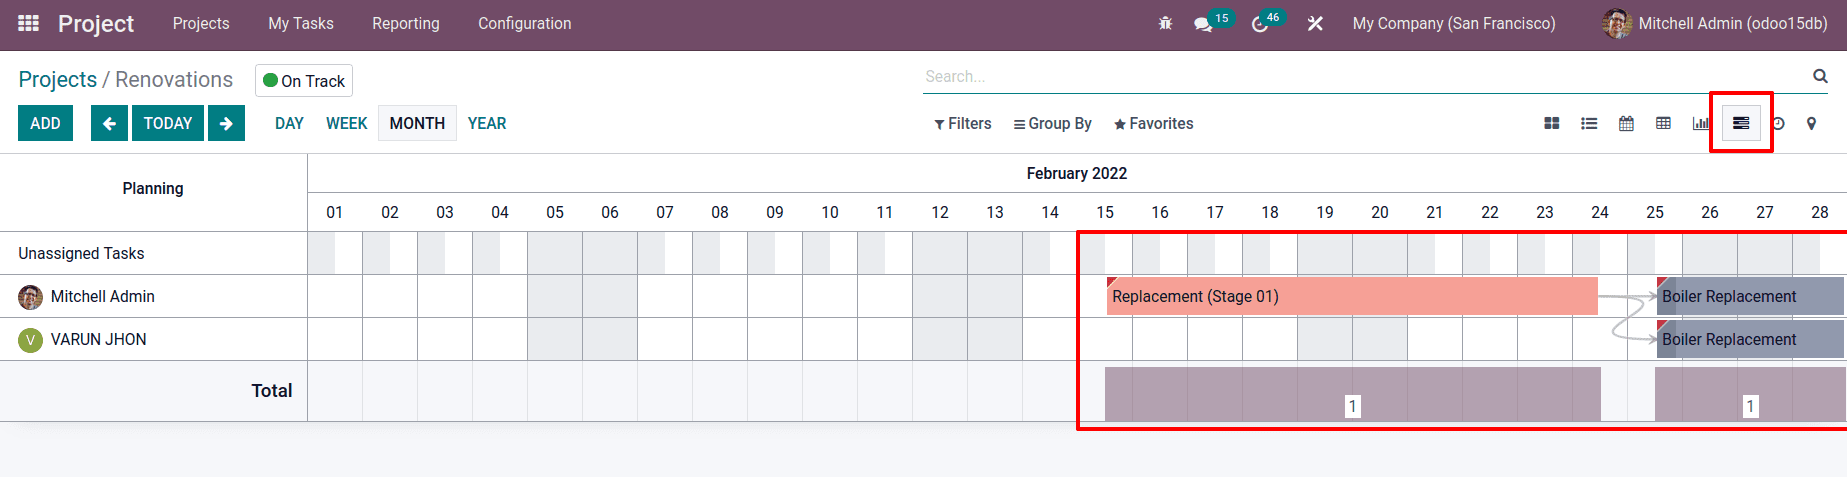
Let's move to the Gantt View of Task. Two tasks have been added to the Gantt chart. There's also an arrow to highlight the sequence in which these tasks are completed. After completing the task Replacement (Stage 01), undertake the task Boiler Replacement. So, an arrow mark begins at Replacement (Stage 01) and ends at Boiler Replacement to indicate the sequence of execution. A + button displays when the pointer is over the task. It is possible to create a new task using this method.
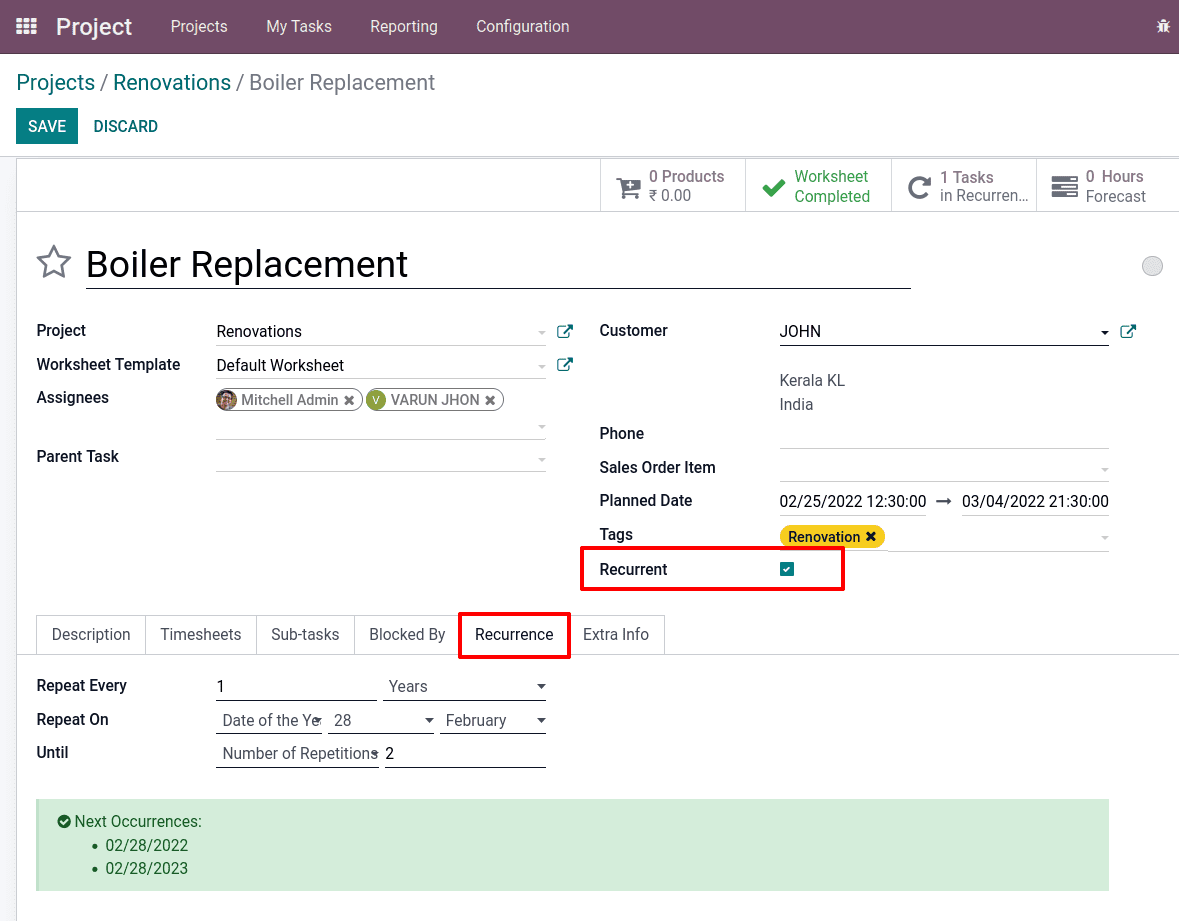
Recurrent:
If someone wants to repeat the task regularly, they must first enable Recurrent. Then a new tab called Recurrence appeared. This option allows the user to set the repetition frequency. Specify if the task will be repeated every day, week, month, or year. One can specify the month and day on which the task will be repeated. There is a limit to how many times the task can be repeated. The following occurrences will then be displayed there.
Analytic Account, Sequence, Email cc, Company, Cover image, Assigning Date, and Last Stage Update are all displayed on the Extra Info tab.
Let's make it possible to sell the project to a customer by creating a sales order for the service offering. There are three basic types of project invoicing policies.
a) Prepaid/Fixed Price
b) Based on Timesheet
c) Based on Milestones
We've already discussed the different types of project invoicing in another blog, so check it out if you want to learn more: How to Invoice a Project in Odoo 15
Milestones:
The project may go through several stages. There may be some critical components in a project that should be divided into phases. As a result, after completing project creation, it is easy to identify crucial project phases. In Odoo, these phases are referred to as Milestones.
Such phrases or Milestones can be created for a project. Return to the project, and a smart tab MILESTONE appears there. Please click on it.
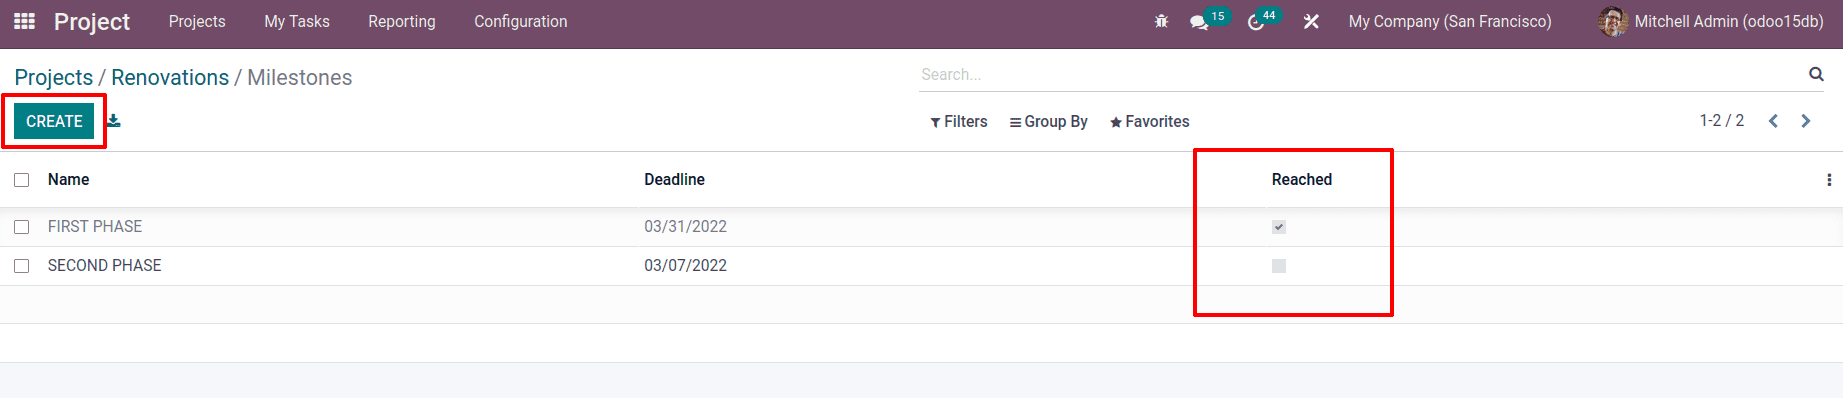
From here, create Milestones. Add the Milestone's Name and Deadline. Check the box when completed. Using the Create button, you may add more Milestones to the project.
Hours Recorded:
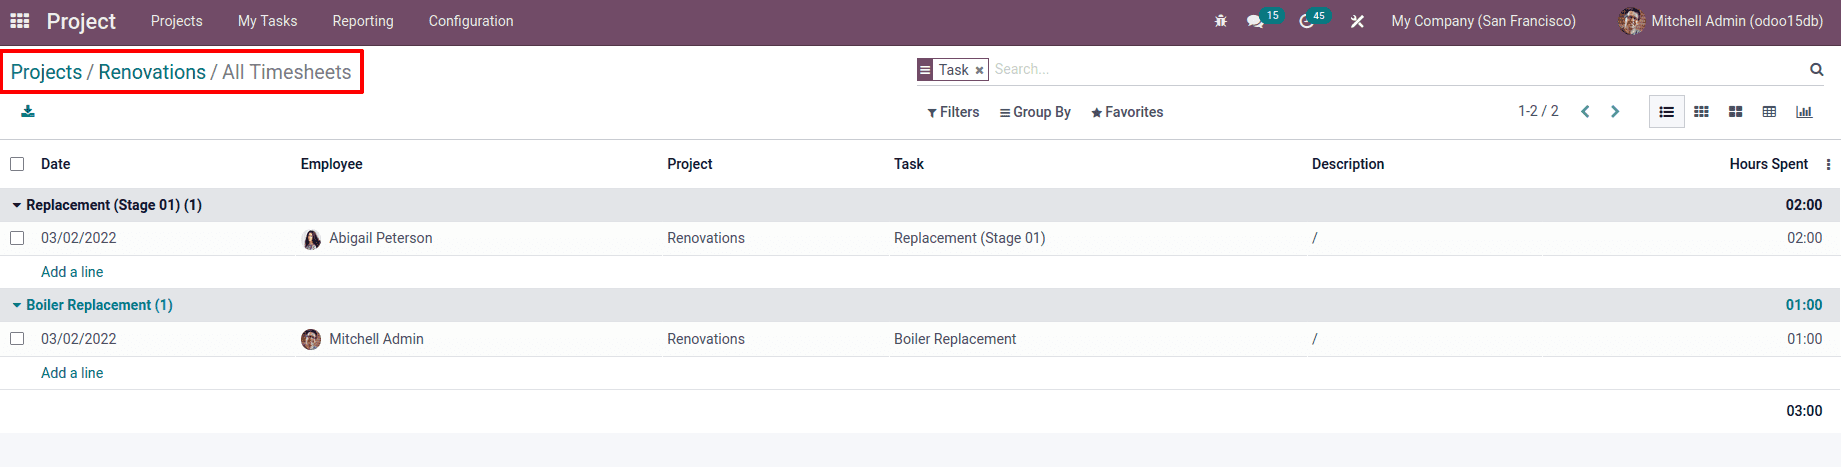
Hours recorded is another useful tab. This smart tab displays the total number of hours worked by all employees. A project is made up of numerous tasks. As a result, the real time spent on each task is reported as the project's total recorded hour. There are two tasks in this project. Employee Mitchell Admin added 4 hours to the first task, and Abigail Peterson added 2 hours to the sec
and task. As a result, the project's total recorded hour is 6 hours.

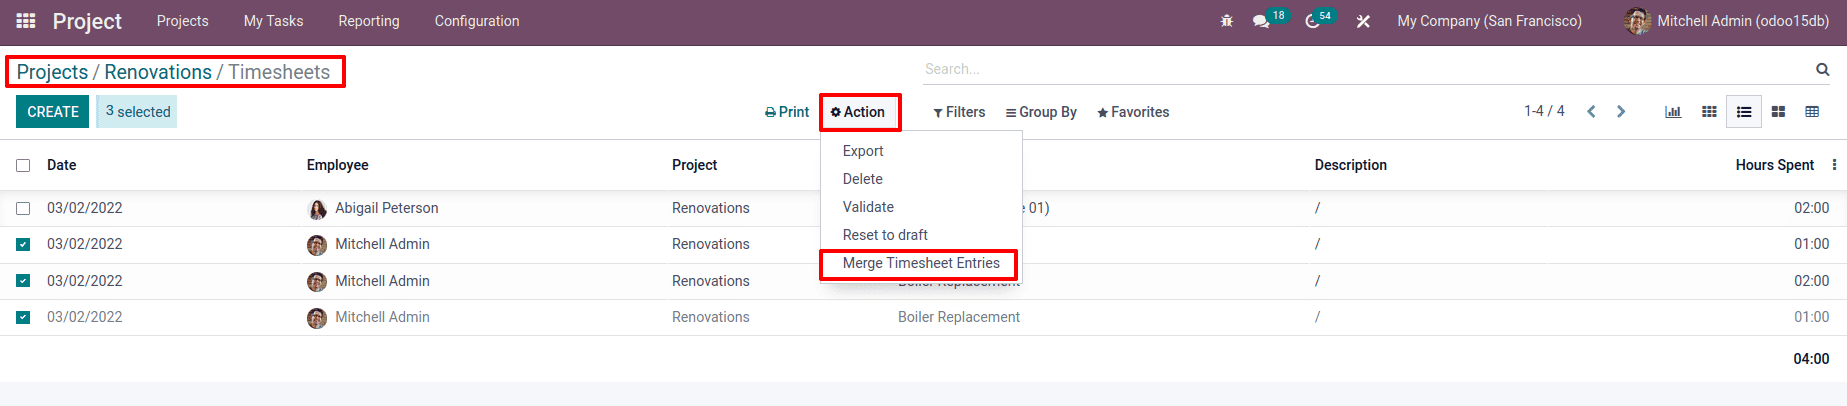
Because the same employee added three timesheets on the same day, such timesheets might be merged. Select a timesheet, and choose Merge Timesheet Entries from the Action button.
After assessing the details, a window with merging details appears, and we can merge the timesheets.
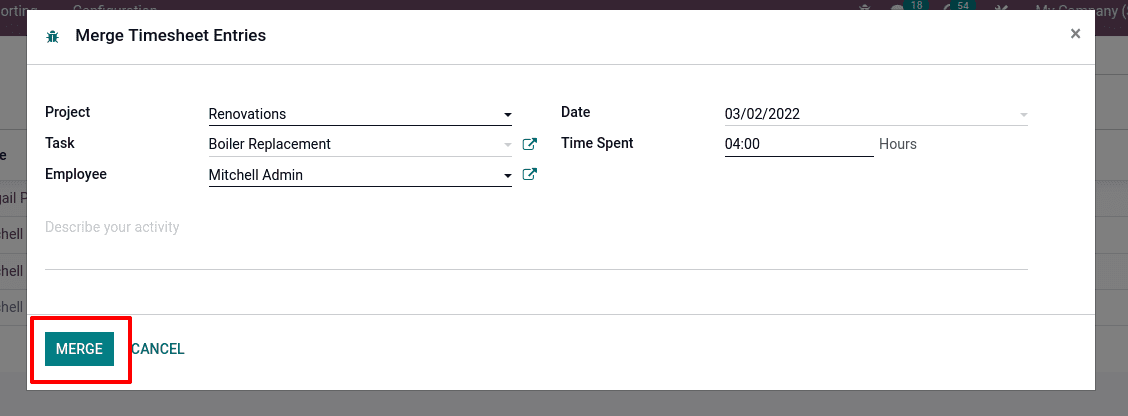
Then the selected timesheets merged and displayed as a single entry.
Forecasted Hours
We can see the overall time scheduled for this project in forecasted hours. The employee and his scheduled hours to work on this specific project are displayed, as they are in the planning module.

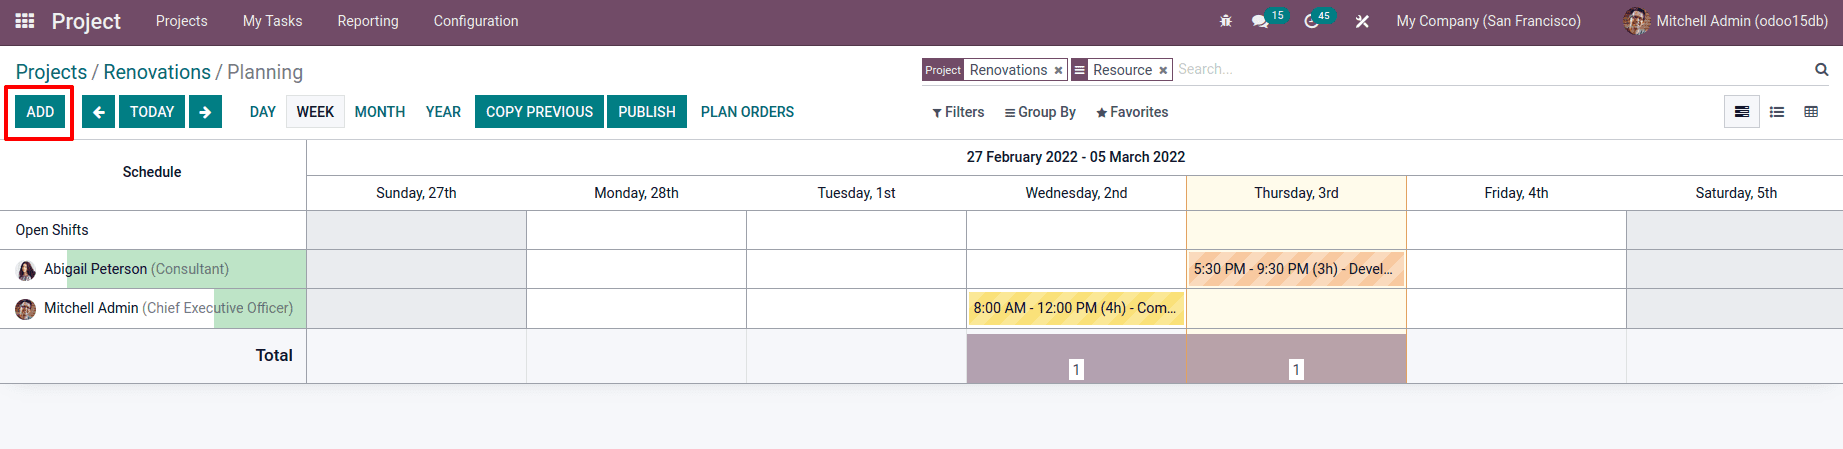
From here, we can establish a new plan for another employee. To do so, press the Add button. Here already planned 4 hours for Mitchell Admin. we can schedule 3 hours for another employee.
Then a new page appears, where you may select the Shift Template, which determines the employee's time shift. Then, in Resource, insert the employee's name and role. Then add the Project Name and Task Name. Allocated time is also included.
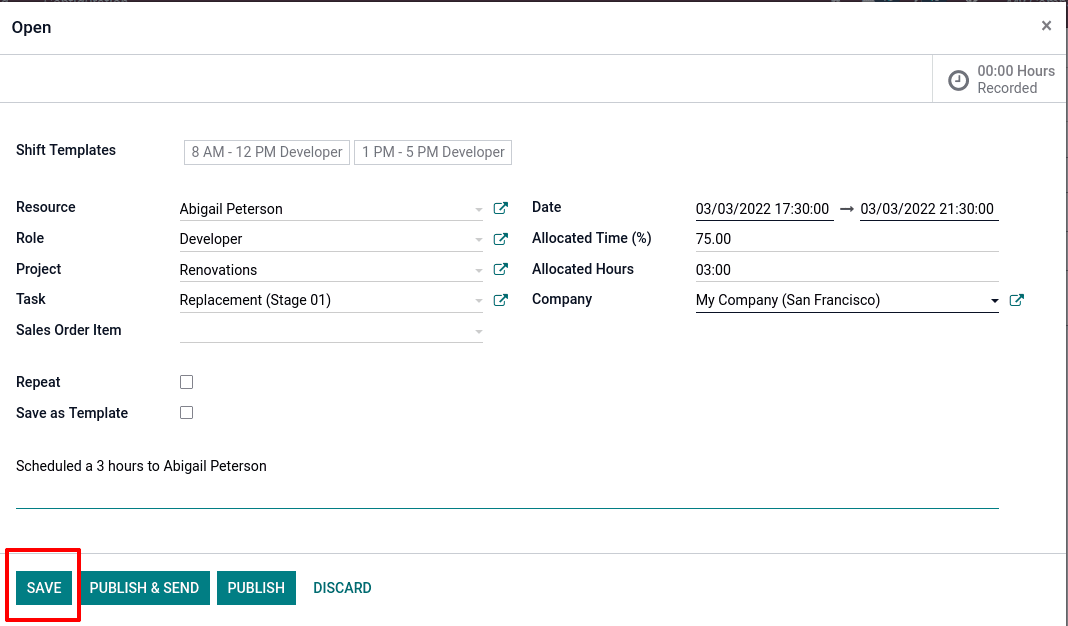
Then the total Forecasted Hours changed from 4 hours to 7 hours.
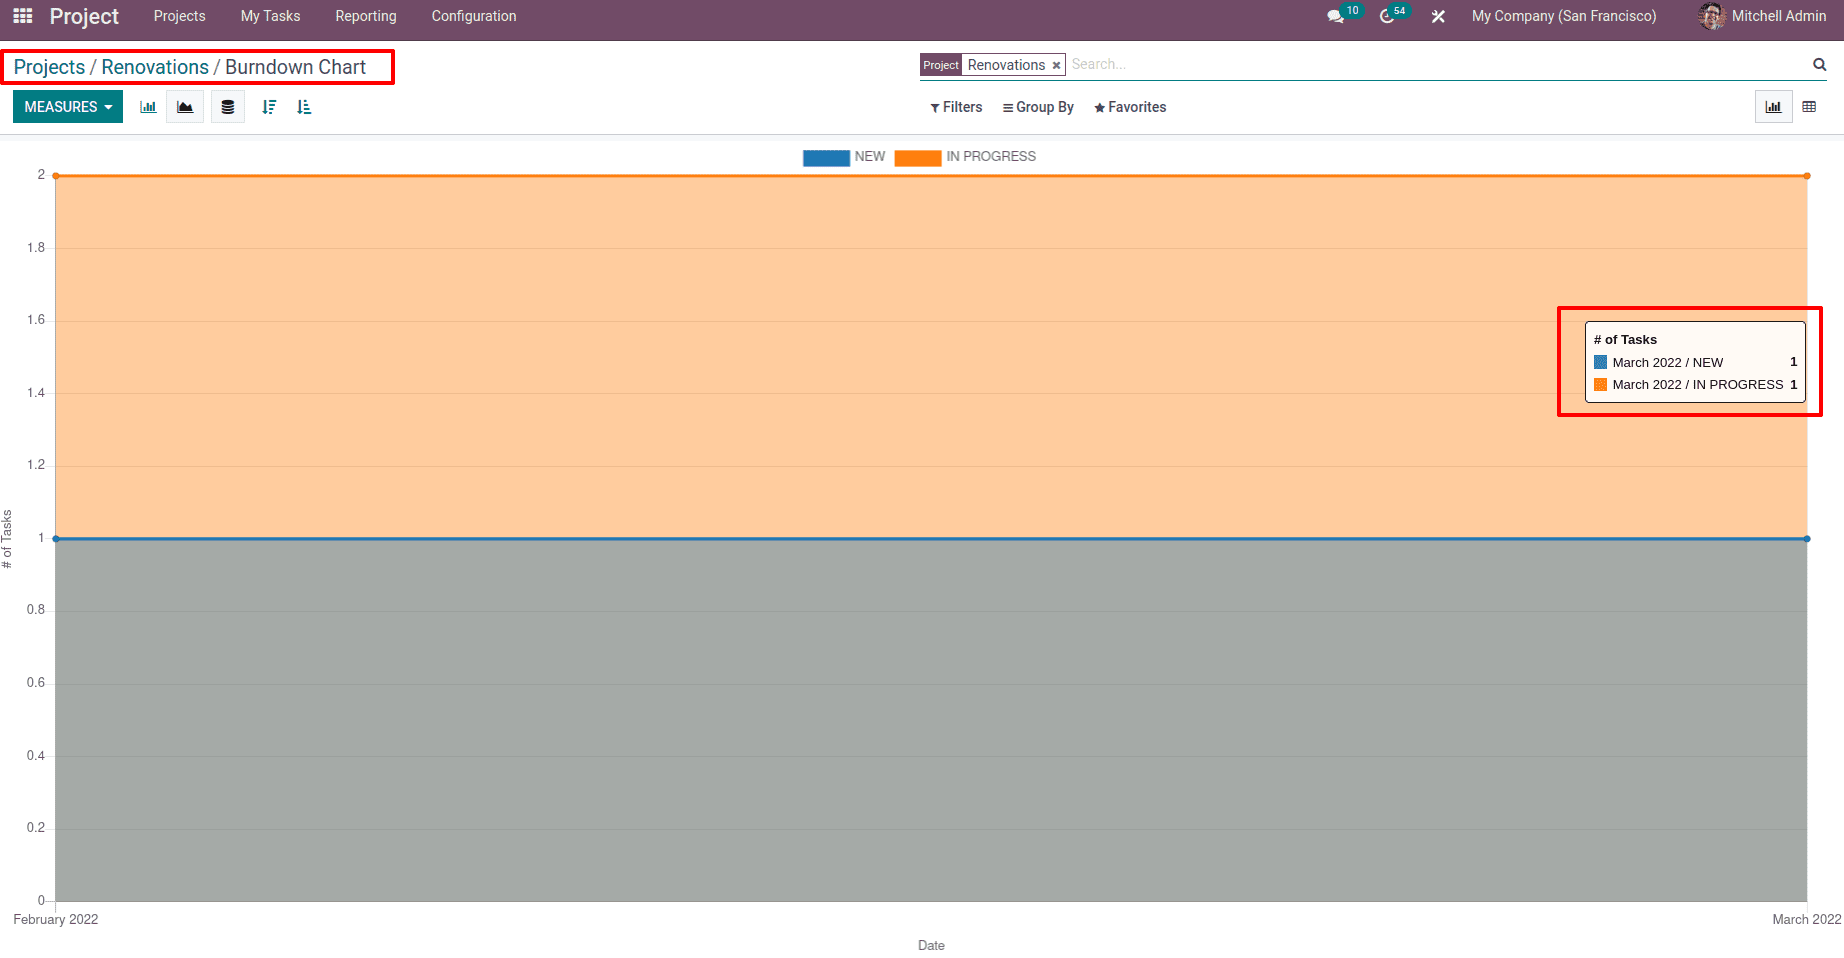
Burndown Chart:
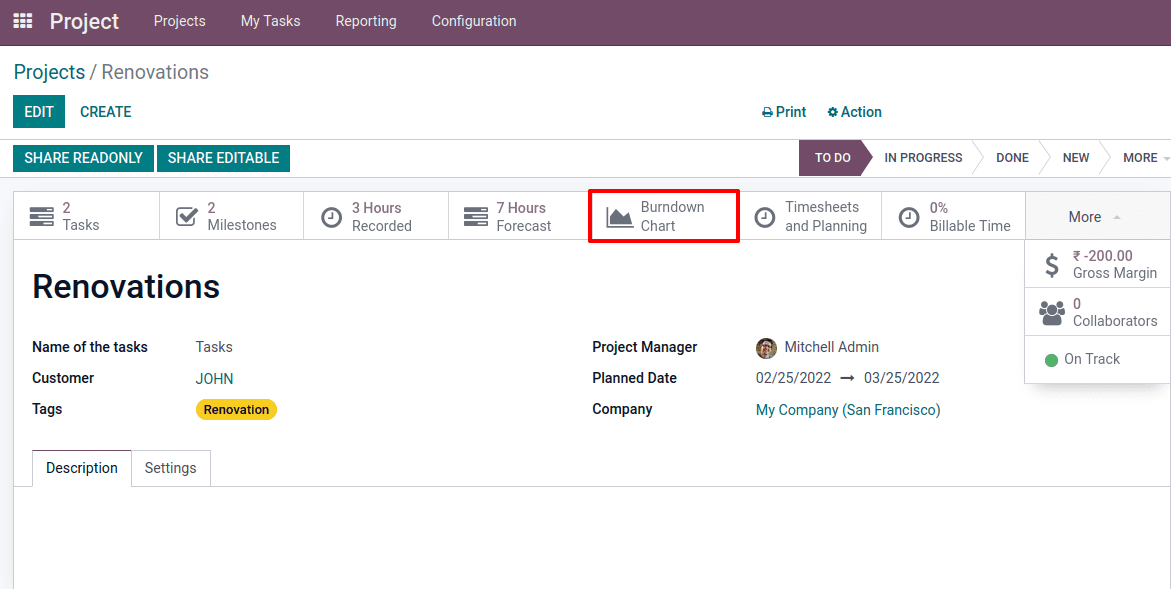
The reader can learn about the number of tasks created over a specific time period through a Burndown Chart, a graphical representation. The Burndown chart shows the number of tasks that have been completed at various stages over the course of a month. Different colors represent different stages. As a result, we can use the chart to analyze the number of tasks completed in each step during the month.
Billable
An employee reported his time spent on a task in the Timesheet tab. We can see the total time added in the Timesheet by each person in the project from the smart tab Billable. The entire billable time was also displayed.
Gross Margin:
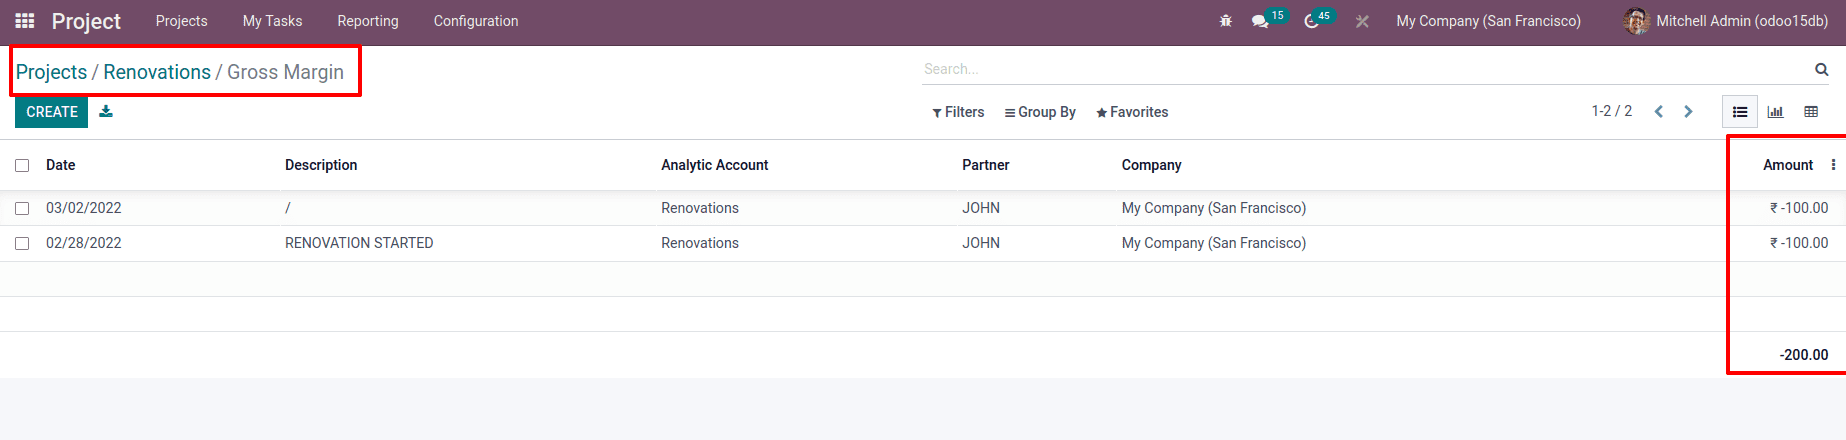
Gross margin is calculated using cost and revenue as inputs. Gross Margin is the difference between revenue and cost. Here, revenue refers to the company's earnings. Employees are paid a set amount for their labour, which is computed based on their cost per hour and total hours performed. For a business, the cost is an expense.

The gross margin is -200 in this case. In this project, nothing is billed. The first employee to add a timesheet is Mitchell Admin, who added 1 hour at the cost of $100 per hour. Abigail Peterson, the second employee, worked for a total of two hours at a rate of $50 per hour. Because these two costs are expenses, Odoo considers them to be negative. As a result, the total is -200.
Collaborators:
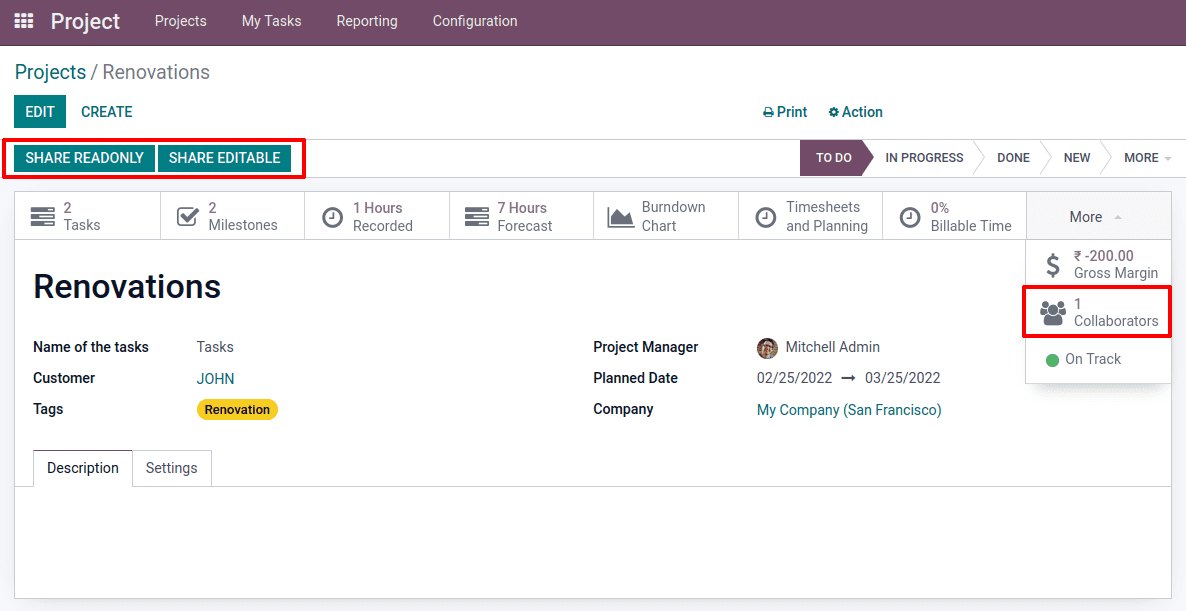
Sometimes we need to share a project with others. As a result, in the Odoo 15 Project, it is possible to share the project with others. It is possible to distribute the project in two different modes: Read Only and Editable. If we want to let the person with whom we're sharing the project make changes, we can use the SHARE EDITABLE button. Otherwise, select SHARE READ ONLY.
Then, we may add recipients to whom we want to send the project in a new window.
Then press the SEND button.
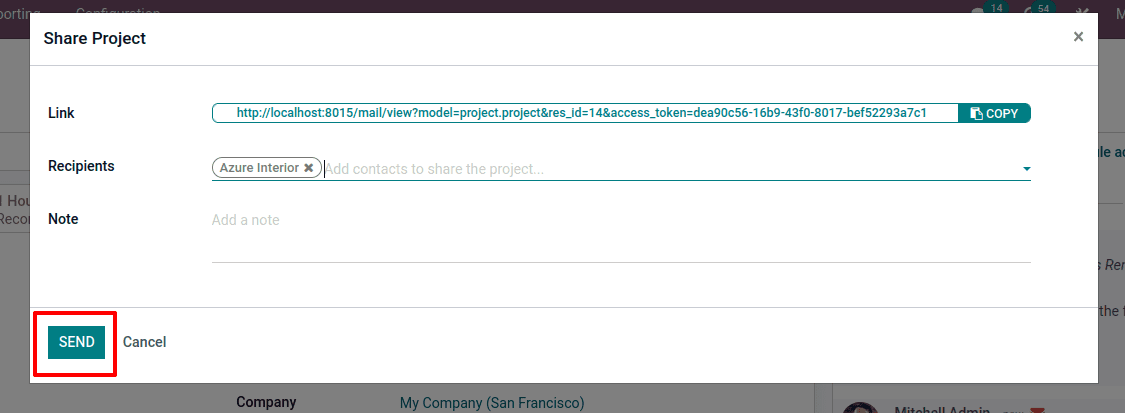
Then one collaborator is added to the collaborator tab. This only happens if the Recipient we added has portal access.

Project Updates:
After that, we'll move on to Project Updates. To do so, select Project Updates.
From there we can add our project's updates. Give it a name, then fill up the details like Status, Progress, Author, and Date. On Track, At Risk, Off Track, and On Hold are some of the Statuses. Also include the project's progress.
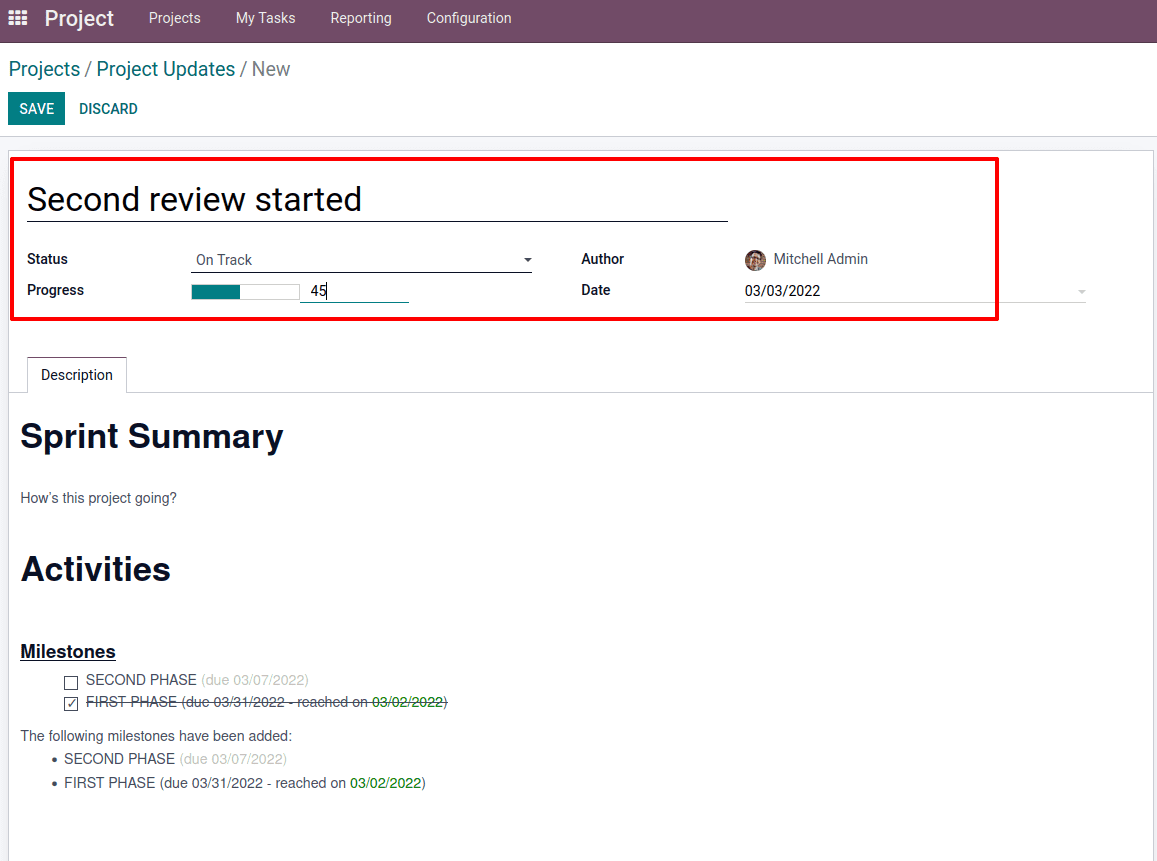
The project update is then added.
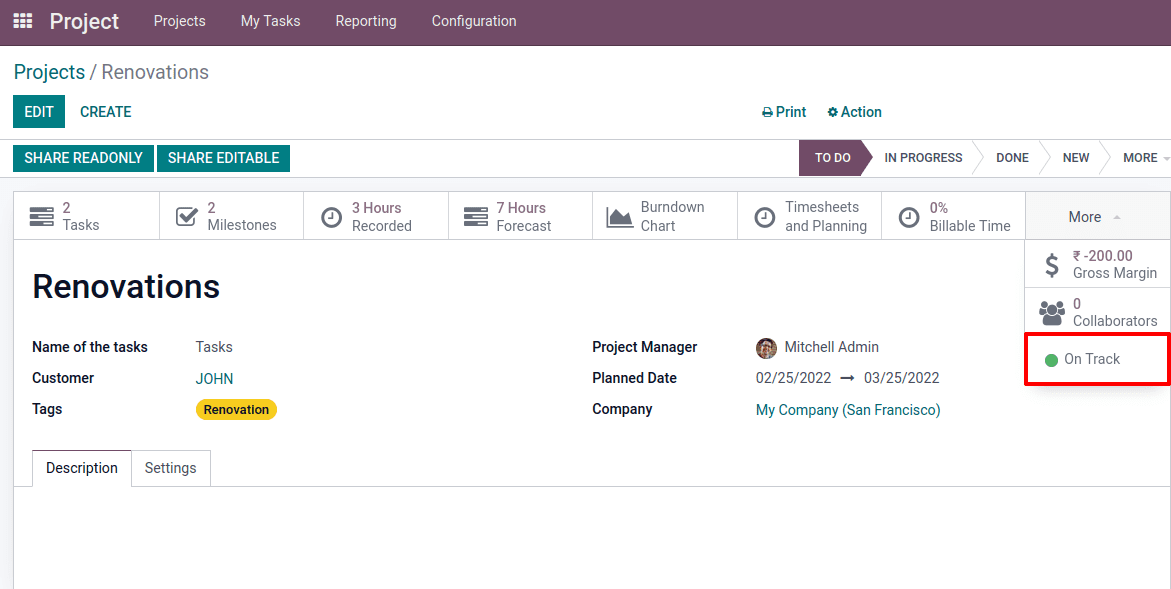
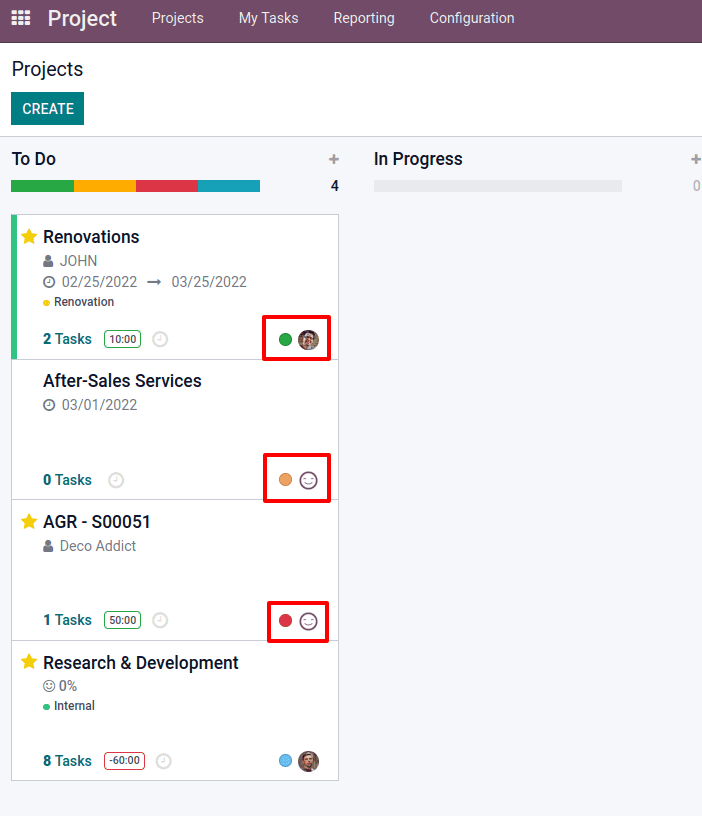
When you return to the overview and check the project, you'll notice a green mark indicating that the job is on track. As a result, by looking at this sign, one can quickly identify the project's current stage. At-Risk is represented by the color Orange, Off Track by the color Red, and On Hold by the color Blue.
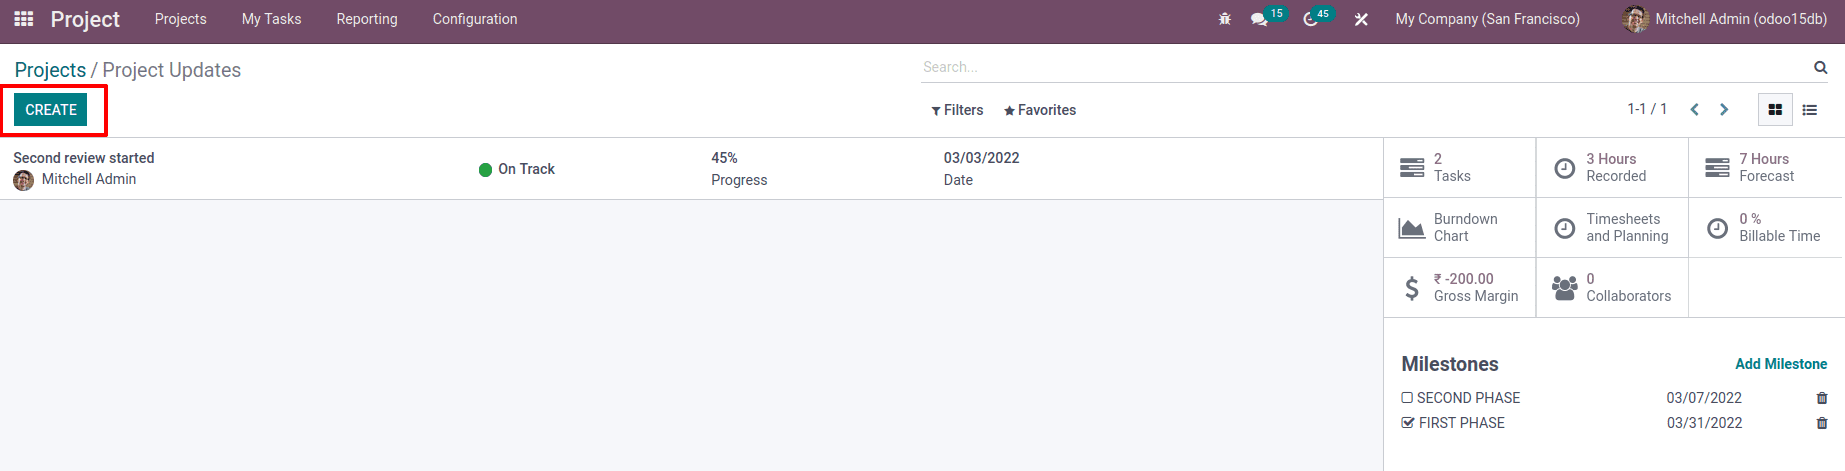
We may also see the smart tabs Task, Recorded Hour, Forecasted Hour, Burndown Chart, and others discussed in projects in project updates. It's also possible to add or delete Milestones from there also. The Odoo 15 Project module is the best platform for managing and organizing your project.