In small or large businesses the management of contacts is an integral part of the business. The number of contacts increases as your business grows, so it will be difficult to save all the contacts and their details in your smartphone or in your email. In order to solve this problem, many companies rely upon contact management systems which lets you organize the details of contacts. Juggling through spreadsheets and mobile contact lists will come to an end with a proper contact management system.
Odoo 14’s Contact module helps you to organize and manage the contacts of your company in an efficient manner. They help you to gather and store all the relevant information regarding the individual or the company. With the Contact module, you can gather contacts by applying Filters or by adding a custom filter, as per your requirement. You can view the details of the contact’s scheduled meetings with you, sales, subscription details, purchase details, vendor bills, and much more.
It is very easy to create a new entry in contacts, all you have to do is press the CREATE button and fill out the form with relevant information. To edit the existing contacts you can click on the EDIT button after selecting the desired contact. Apart from storing the details and organizing them in a convenient manner, the Odoo Contact module can also be configured as per your requirement.
Let us check the configuration tools that Odoo 14 Contact module has to offer.
You can have the Contact module by installing them from the Odoo Applications. By clicking on the module you will get a dashboard with a list of Contacts that your organization has. In order to get the details of the contact, you can select the contact by clicking on them. A page filled with details such as name, an organization under which he or she works, address, job position, email, phone number, titles, and tags. Other than from this basic information you can also view scheduled meetings, sales details, subscriptions, tasks, purchases, accounting, and membership details.
One of the greatest features of the Contact module is its configuration. By clicking on the Configuration tab you will get access to different settings. Let us look at them individually.
Contact tags
From the Configuration tab, you can select the Contact tags option. A list of already created tags can be seen on the screen. You can gather specific tags by applying Filters and can add custom filters too. You can view the details of the tag by clicking on them. Name of the tag, Parent Category, and if the tag is active or not. You can edit the tag by selecting the EDIT button. To create a new tag you can click on the CREATE button. A form will appear on your screen where Tag Name, Parent Category can be described and you can check whether the tag is active or not. After filling out the form you can click on the SAVE button. Created tag will be seen in the list of tags.

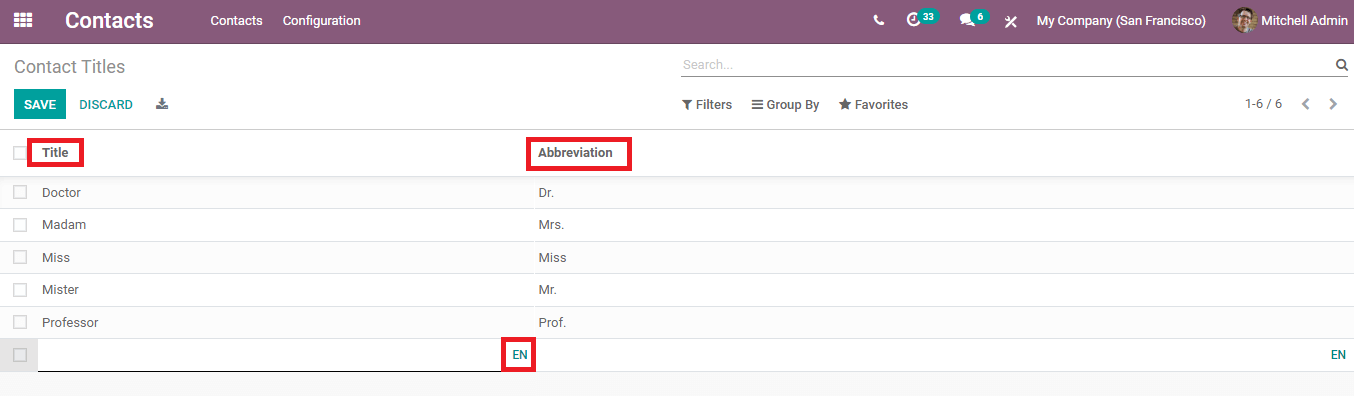
Contact Titles
While saving contacts you can give the person a contact title so that when you communicate with them it will be easier for you to call them as per their designation. You can configure the contact title by selecting the Contact Titles option from the Configuration tab. Titles and their abbreviation already created will be visible on your screen. You can edit existing ones simply by clicking on them. To create new contact titles in the database you can press the CREATE button. A new bar will appear below the titles. You can add a new title and its abbreviation next to it. If you want to see a translated version of the title, you can click on the EN option. After entering the title name and abbreviation you can click on the SAVE button to save the entry.
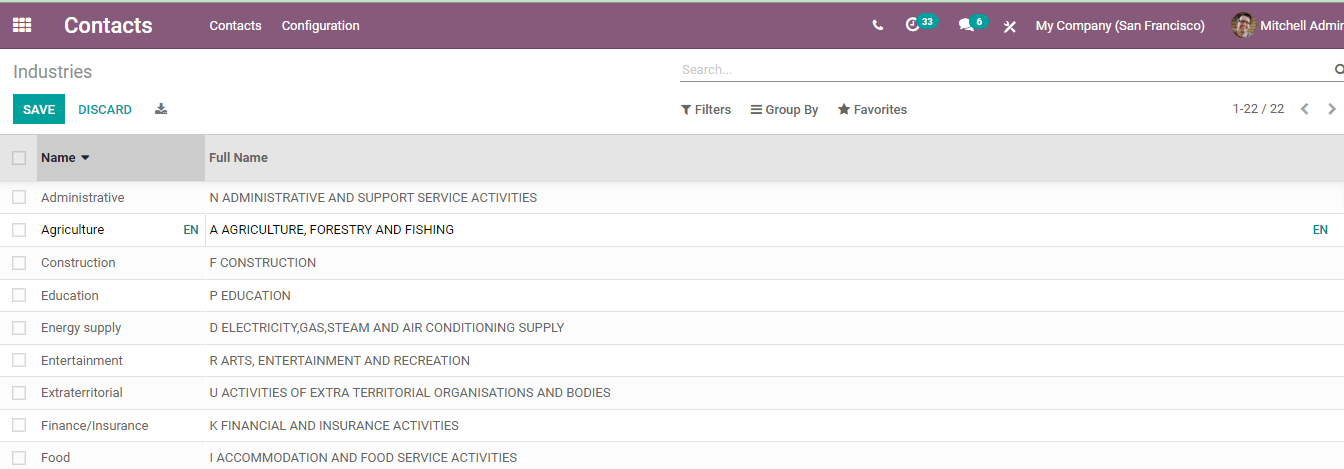
Industries
By clicking on the Industries option from the Configuration tab you can see a list of names of the industries and their full names. You can check the existing information of industries and their names, also can edit these by simply clicking on them. To create a new entry in industries you can click on the CREATE button. Upon which a new bar will appear, you will have to enter the name of the industry and then the full name. Entered name and full name will appear in the list after pressing the SAVE button.
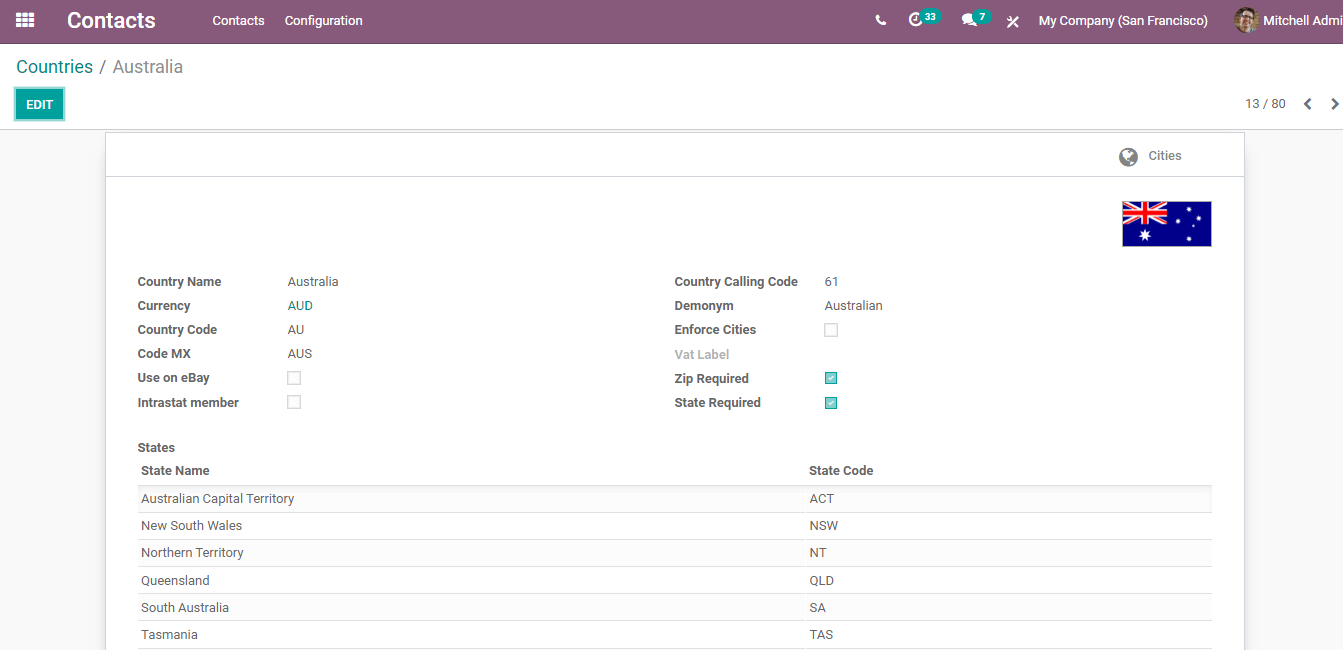
Countries
You can view the country name and their details by pressing the Countries option from the Configuration tab. List of the Names of the countries, Country codes, whether it can be used on eBay and Intrastat Member or not is displayed. By clicking on the country name details such as Name of the Country, Currency used, Country Code, Code MX, Use on eBay, Intrastat Number, Country calling Code, Demonym of the Country, Enforce Cities, Vat Label, whether Zip is required or not, State Required, Name of the State and State Code is displayed. You can edit and make changes in the details by clicking on them and then press the EDIT button. After making the change you can press SAVE to save your editing.
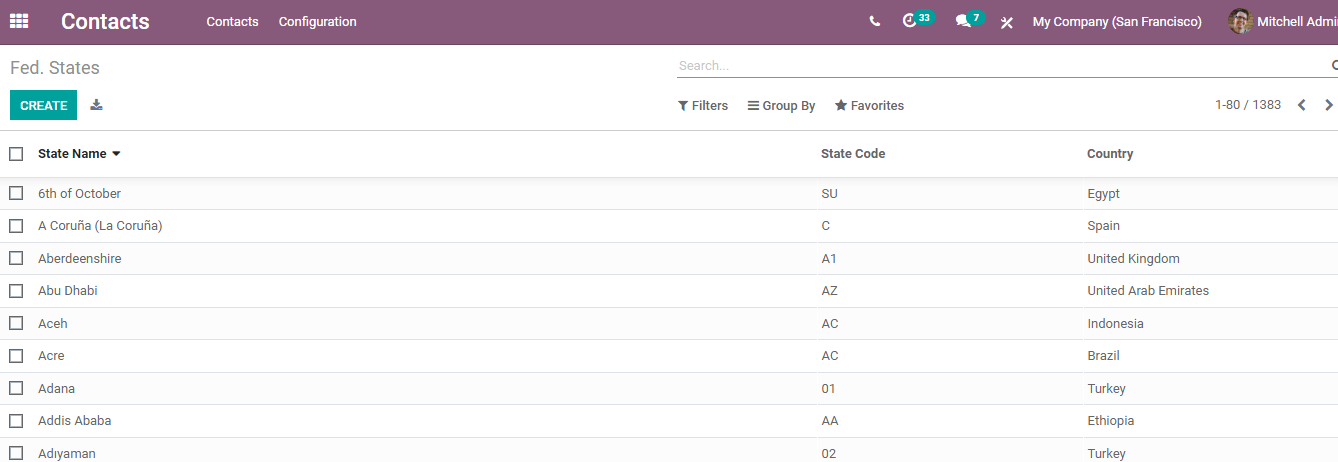
Fed.States
To view the state name and their details you can click the Fed. States option from the Configuration tab. A complete list of states will appear with details such as State name, State Code and Country. To edit them you can click on the state name and make relevant changes. To add new state information you can click on the CREATE button. A new bar will appear, you can add the State name, State Code, and Country name there. Then to save it you can press the SAVE button.
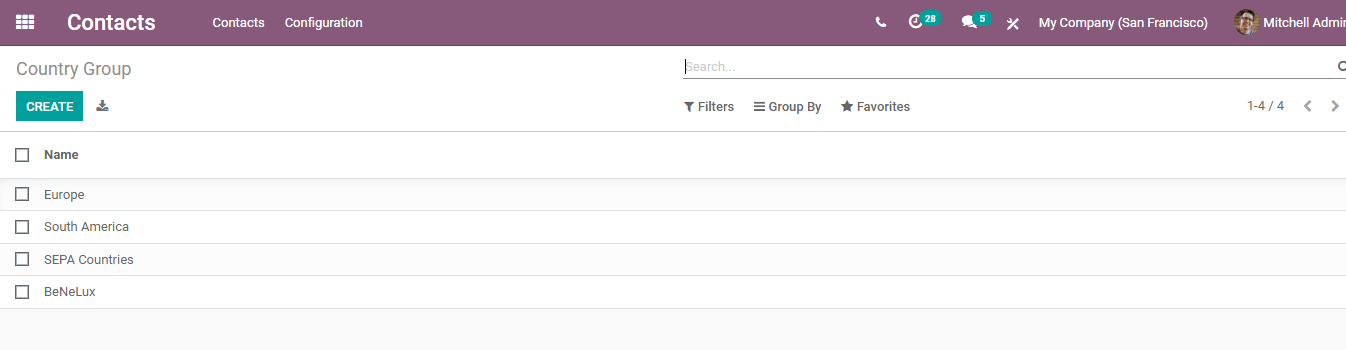
Country Groups
To view and edit the country groups in the database you can click on the Country Group option from the Configuration tab. The list with Country group names will be displayed. By clicking the country group name you can view the countries that fall under different groups, their Price List Name, Website, and Company. You can create a new Country Group by selecting the CREATE button. On the form page that appears you will have to enter the Name of the Group, Countries that fall under the group, Price List Name, Website, and name of the Company.
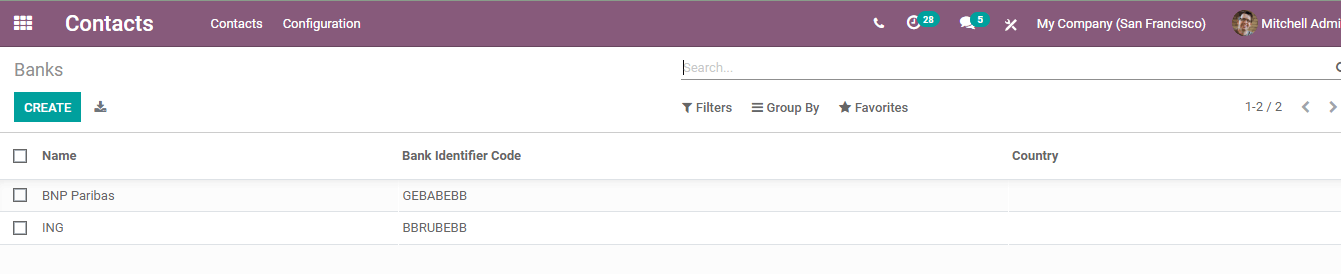
Banks
To configure the banks you can press the Banks option from the Configuration tab. The list of banks will appear on the screen with the name of the Bank, Bank Identifier Code, and name of the Country. By clicking on the bank name you can view the details of the bank including the Name, Bank Address, Bank Identifier Code, Email and Phone. You can edit and make changes to the information by clicking on the EDIT button.
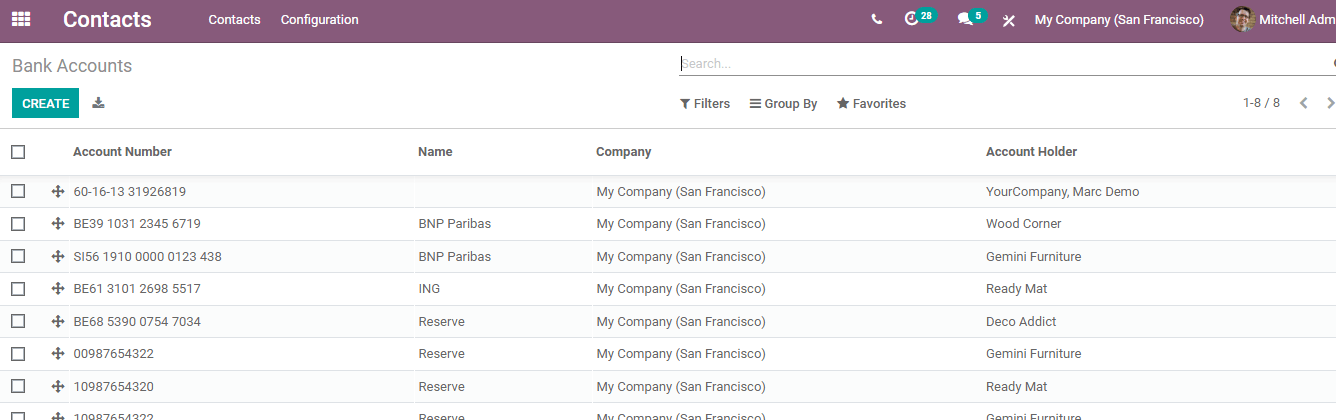
Bank Accounts
By clicking on the Bank Accounts option from the Configuration tab you can view a list of details regarding the bank accounts such as Account Number, Name of the bank, Company, and name of the Account Holder. By clicking on the Account number you can view details of the account. You can edit the details by clicking on the EDIT button. In order to add new account details, you can press the CREATE button. There you can add the details such as the Account Number, Swiss Postal Account, Type, Company, Account Holder, Bank, and ABA/ Routing.
Odoo 14 helps you to maintain your contacts with all these configurations. It helps you to keep the contact book organized and also helps to track the necessary details of the contact.