Odoo 18 brings a powerful and user-friendly manufacturing module that helps businesses manage every stage of their production process with ease. In this blog, we’ll take you through the full manufacturing lifecycle of a product in Odoo 18, step by step. You’ll learn how to create a product, set up a Bill of Materials (BOM) that defines the components required, and configure the operations and work centers involved in the production flow. Finally, we’ll show you how to execute a production order and monitor the progress from start to finish. This guide aims to make the entire process clear and straightforward, whether you’re new to Odoo or looking to refine your manufacturing setup.
Create a BOM for the product
To manufacture an item in Odoo, begin by creating a product record. Here, the product is a table. Check the stock count; here, the product is not available in the company's stock.

First, we have to go to the manufacturing module and select the product tab, followed by the BOM submenu.
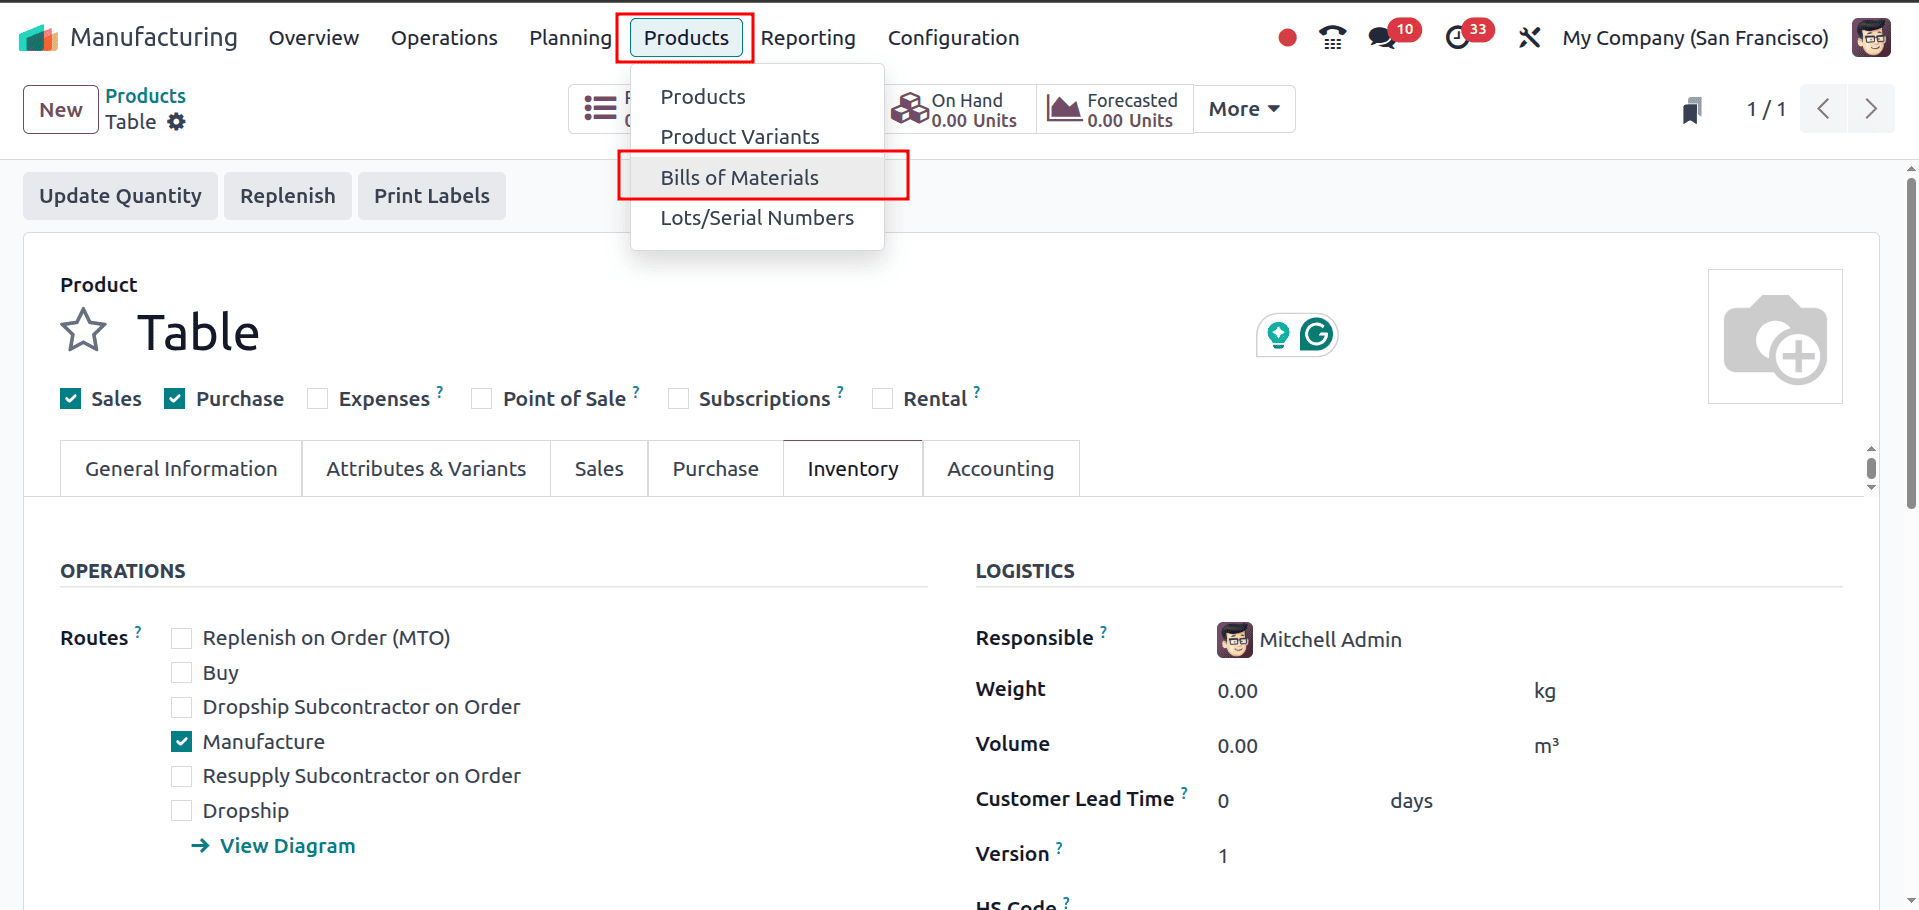
We can add the product name and BOM material list in this form page, which will be like the screenshot below.
Here, we create a record of the product Table with two BOM components as table leg, table top, screws, and bolts, which will be treated from the manufacturing module
The form also includes the BOM Type field, which determines how the Bill of Materials will be used. Odoo allows you to set the BOM type as Manufacture this Product, Kit, or Subcontracting, depending on your production process. In this step, we can specify how many units of the product we want to manufacture by entering the value in the Quantity field.
In the Components tab, we can see the list of all the materials required to produce the final product. Here, we can add or remove BOM components and choose the quantity needed for each item.

In our example, we selected one unit of each component to produce one unit of the final product (Table). This setup clearly defines what materials are required and in what quantities for a single production cycle.
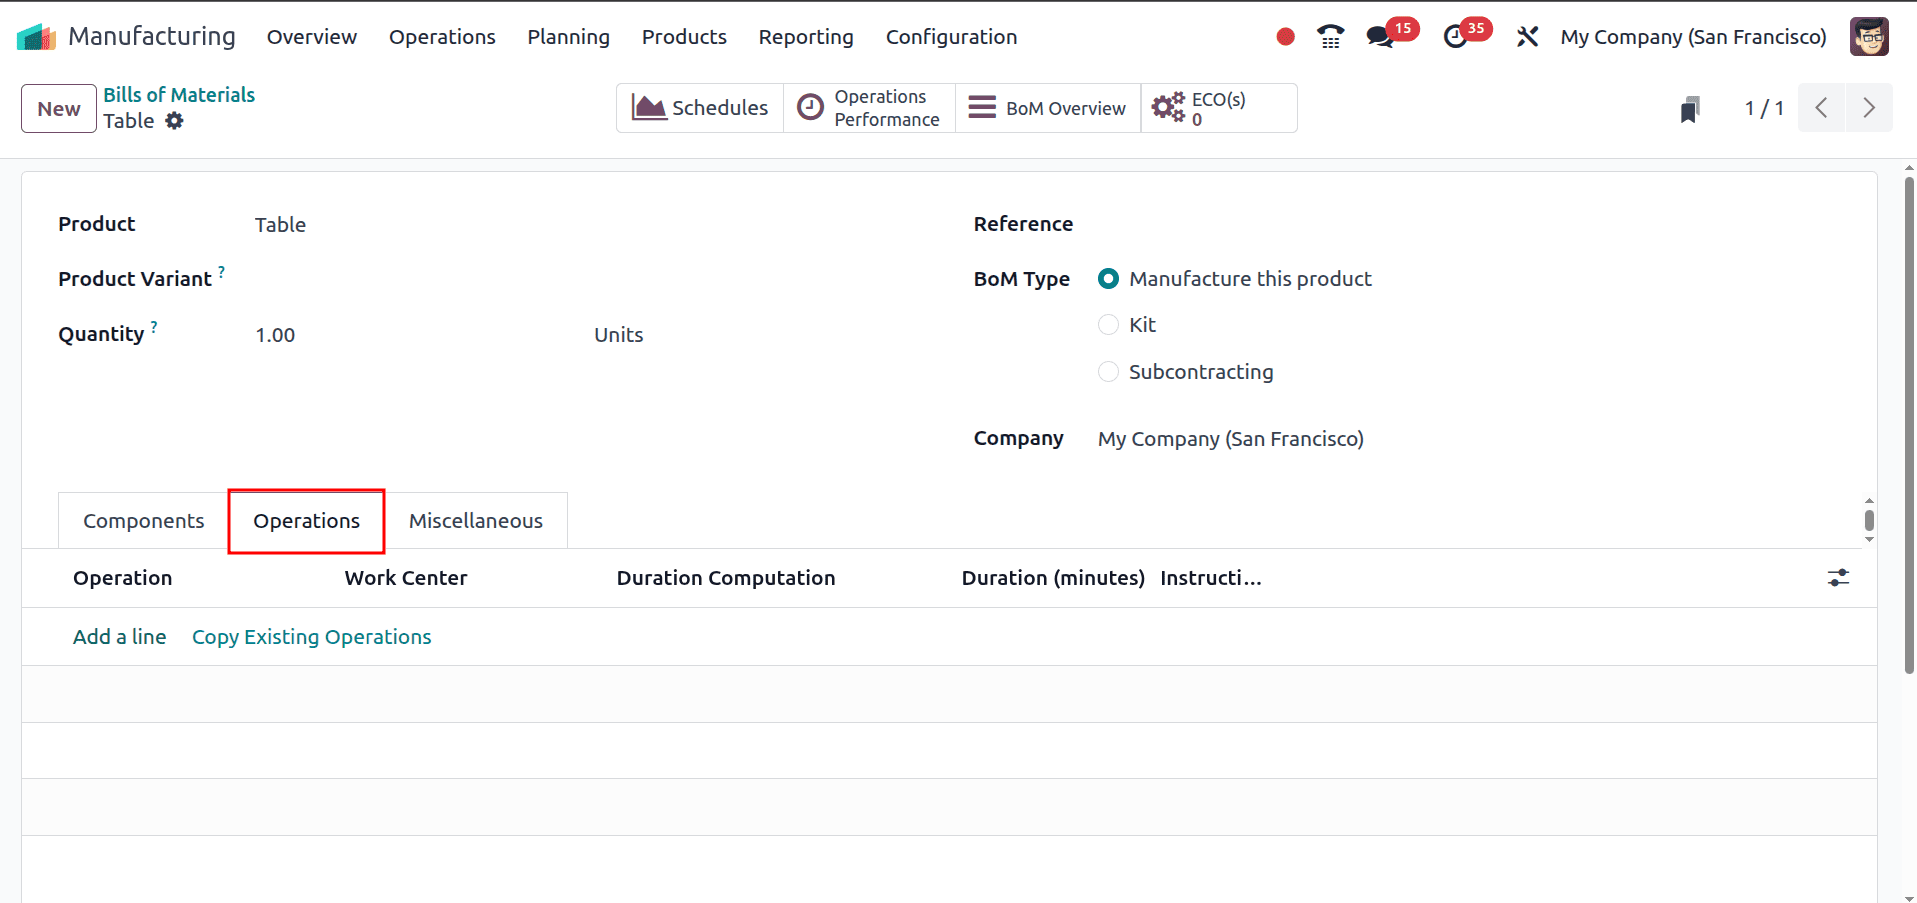
Here, the next tab is operation; selecting this tab will show us the operation line. If we add a line, it will show the pop up window to set up the operation method which is shown in the below picture. There we can see the operation name chosen, and then the work center should choose if we want to apply this to a variant; we can set that up by updating the ‘Apply on the variant’ field, then we have to select the duration computation.

In the Miscellaneous tab, you’ll find the Manufacturing Readiness option. This setting controls when the production operations are allowed to start, based on the availability of components.
You have two choices:
- When all components are available: If you select this option, Odoo will only allow the production to start after every required component is fully available. This ensures that the entire manufacturing process can run smoothly without interruptions.
- When components for the first operation are available: If you choose this option, Odoo will allow the production to start as soon as the materials needed for the first operation are available. Even if the remaining components are still not ready, the system lets you begin the first step of manufacturing.
This option is useful when you want to start work early and don’t want to wait for all materials to arrive.

The Flexible Consumption option lets you control whether workers can use more components than what is defined in the BOM during production. If you don’t want to allow any extra usage, you can restrict it completely. If you need flexibility, you can enable extra consumption so additional quantities can be added whenever required. There is also a middle option where extra consumption is allowed, but Odoo will display an alert before accepting the additional materials. This helps maintain control while still giving room for real-world adjustments during manufacturing.
The project and routing option will allow you to choose the related project and the operation type. There is another option, which is the manufacturing lead time
It is used to calculate the average lead time in days to manufacture this product.
We can set it to calculate the days to prepare manufacturing orders.
Once these operations are completed, we can go to the operation menu, then the manufacturing order submenu, and we can create the manufacturing order for this product
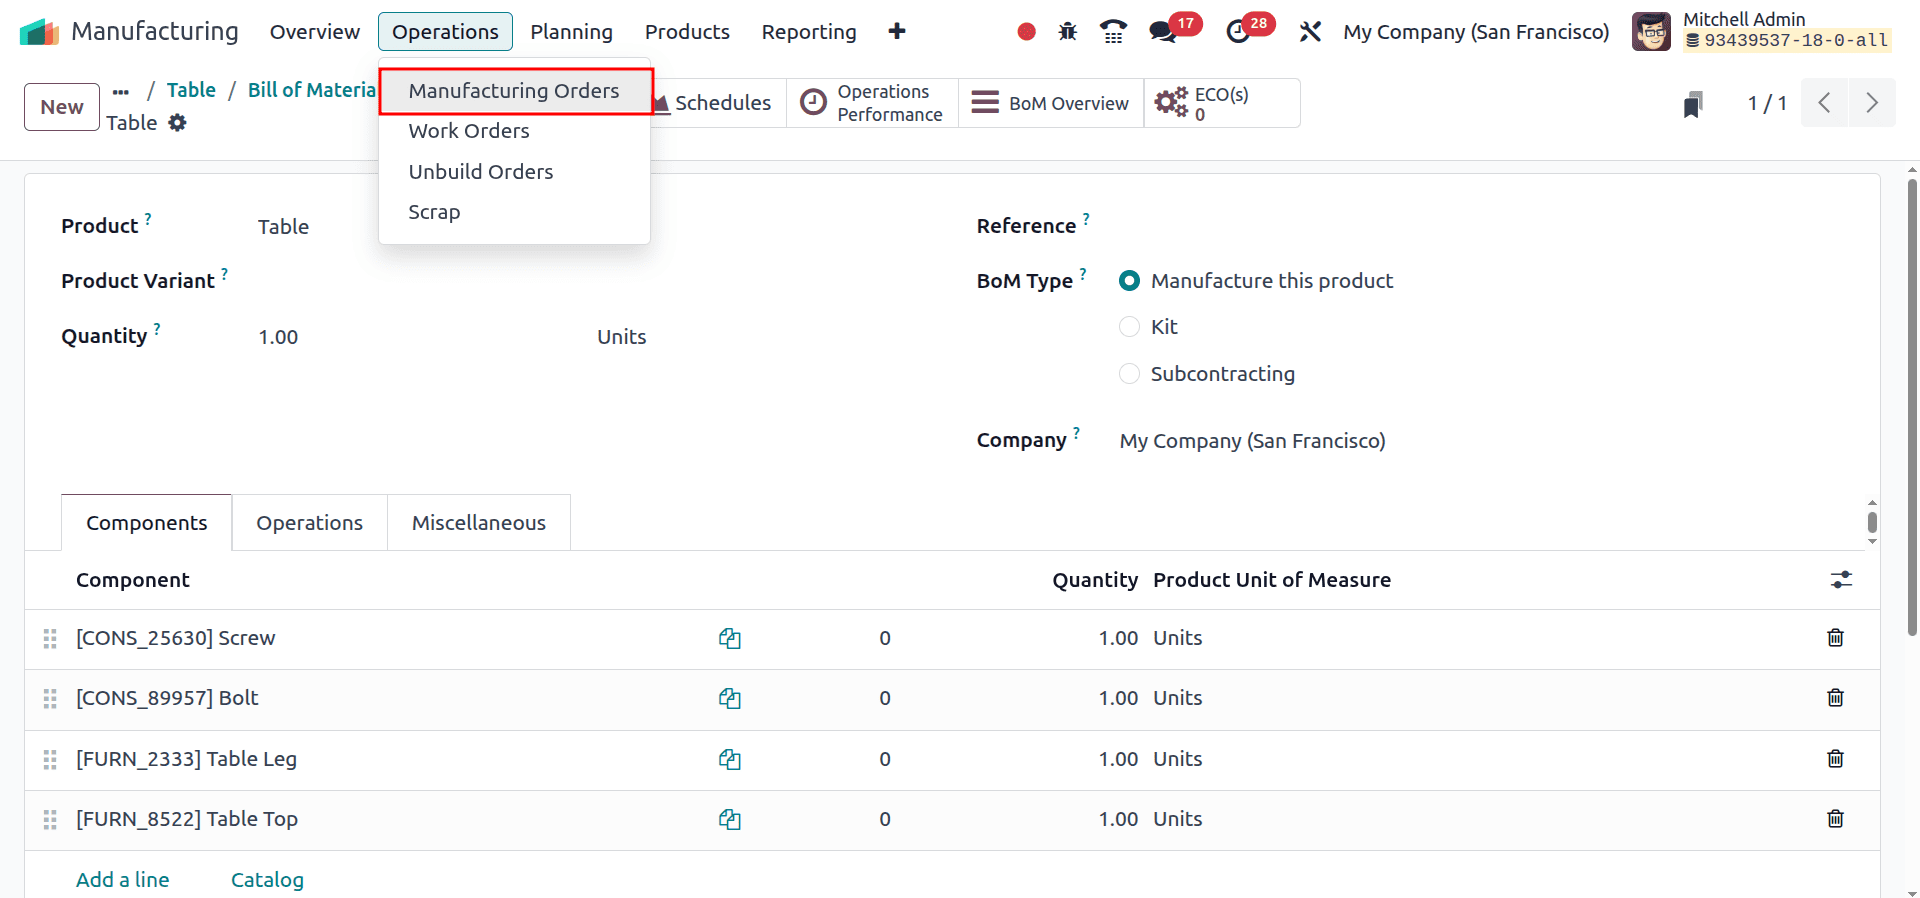
Here we can select the product and Bill of Materials. Then it will auto-fill the components and work orders.
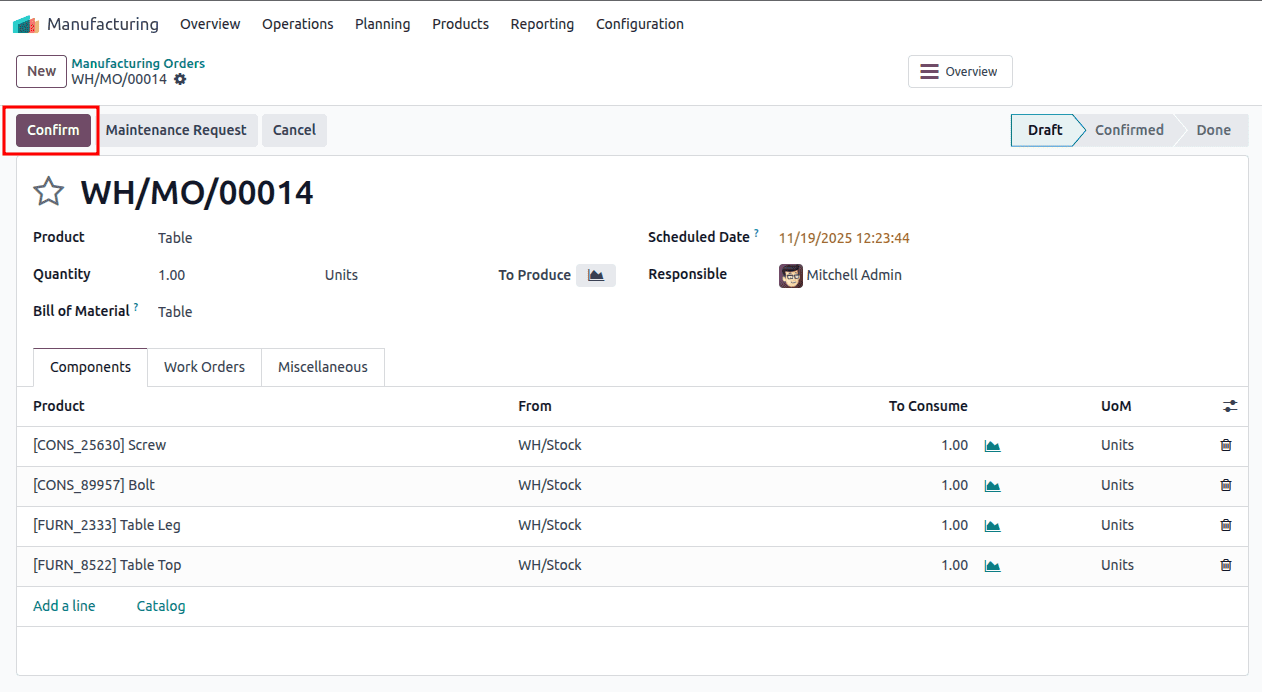
Once we confirm this manufacturing order, we can see the Plan button. This allows planning the operation at work centers.
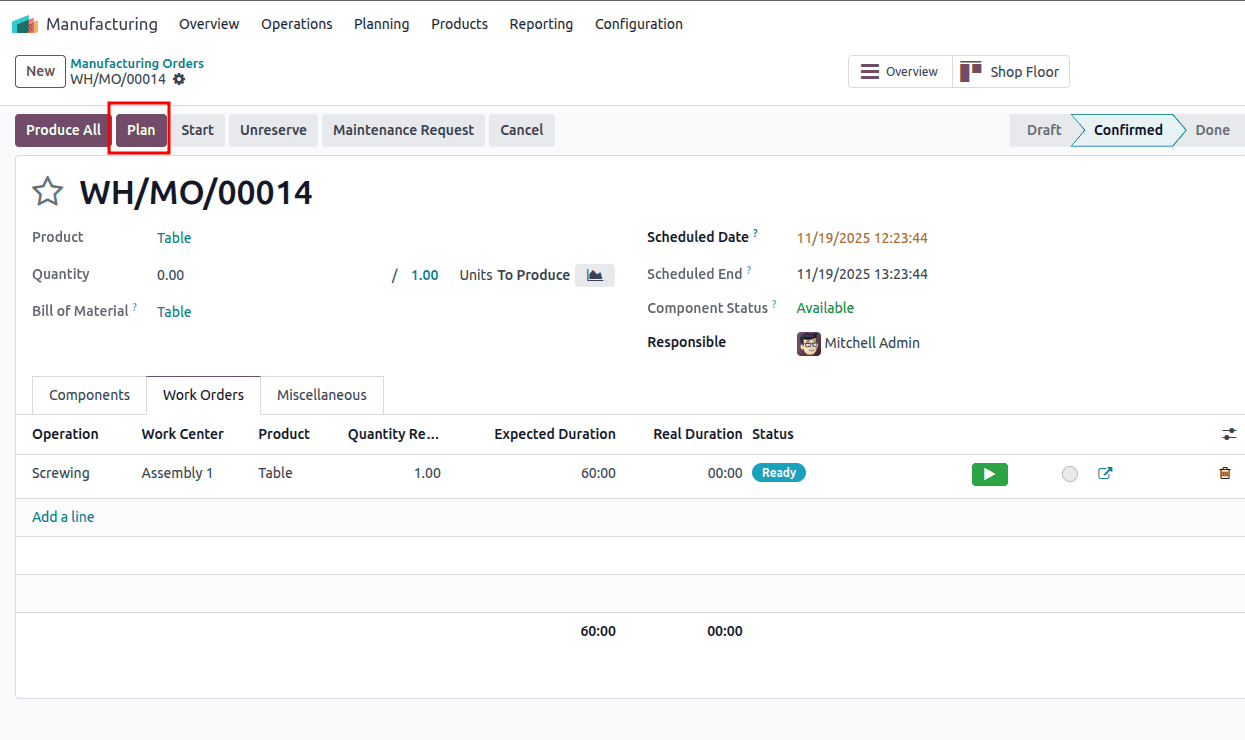
By activating the plan we can see the component status is available and the work orders are ready to start. The components are available there. And the Operations tab shows the operation is in the Ready stage. To start the operation, click on the Green button.
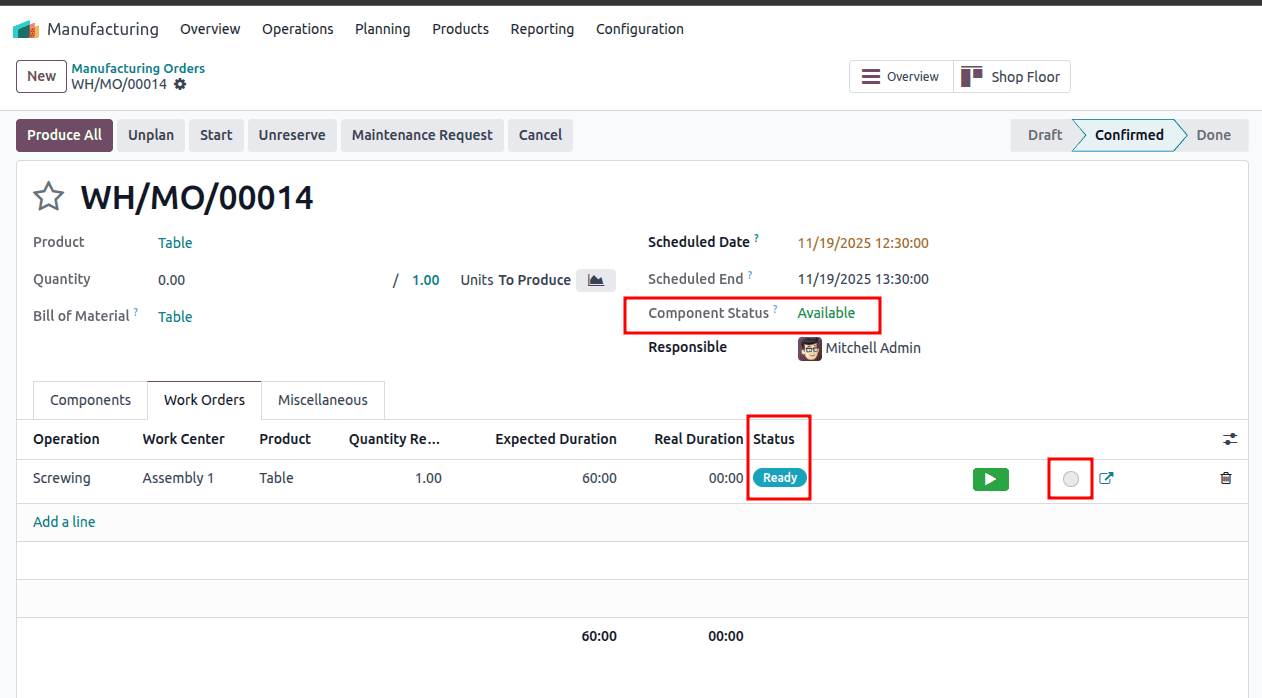
Once we click on the round section after placing the green button, it will pop up the shop floor option

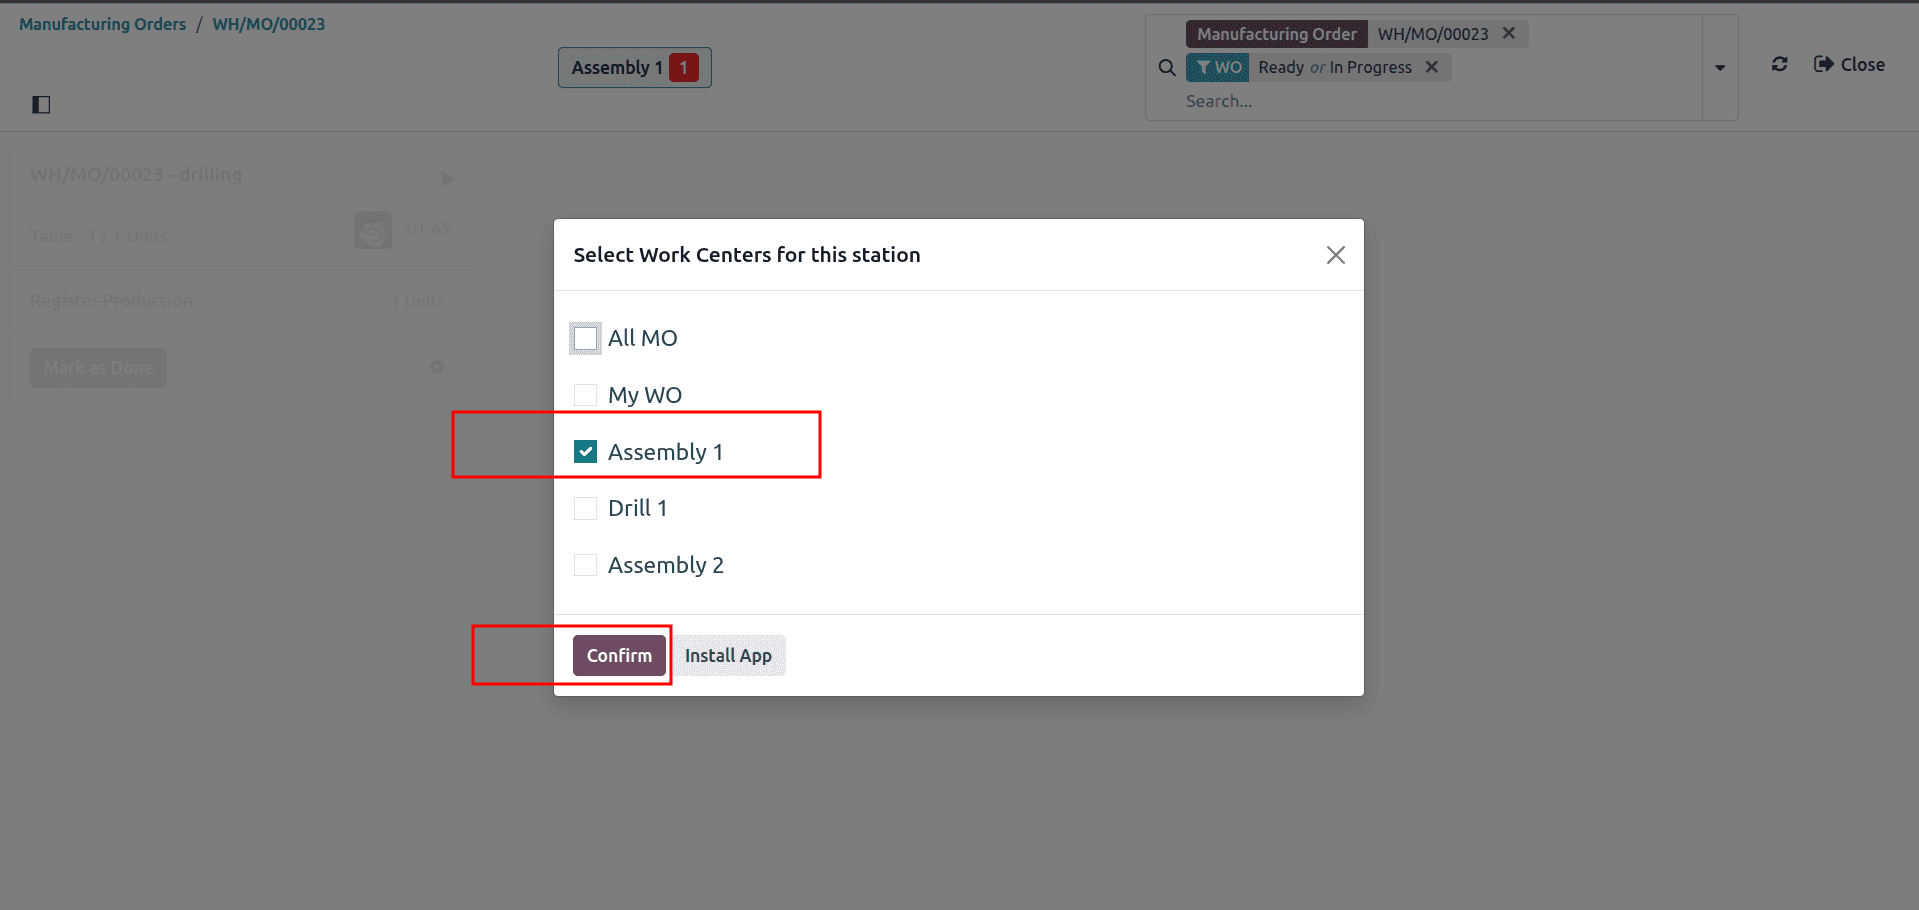
By clicking this option, the system will open the Shop Floor app. Here, you can view all available work centers. Simply select the correct work center for the station and then click Confirm to proceed.
It will show us the workstation. The login user's details and the work order are displayed as shown below.

We can see a settings icon here, so clicking on this will lead us to lots of other options like below.
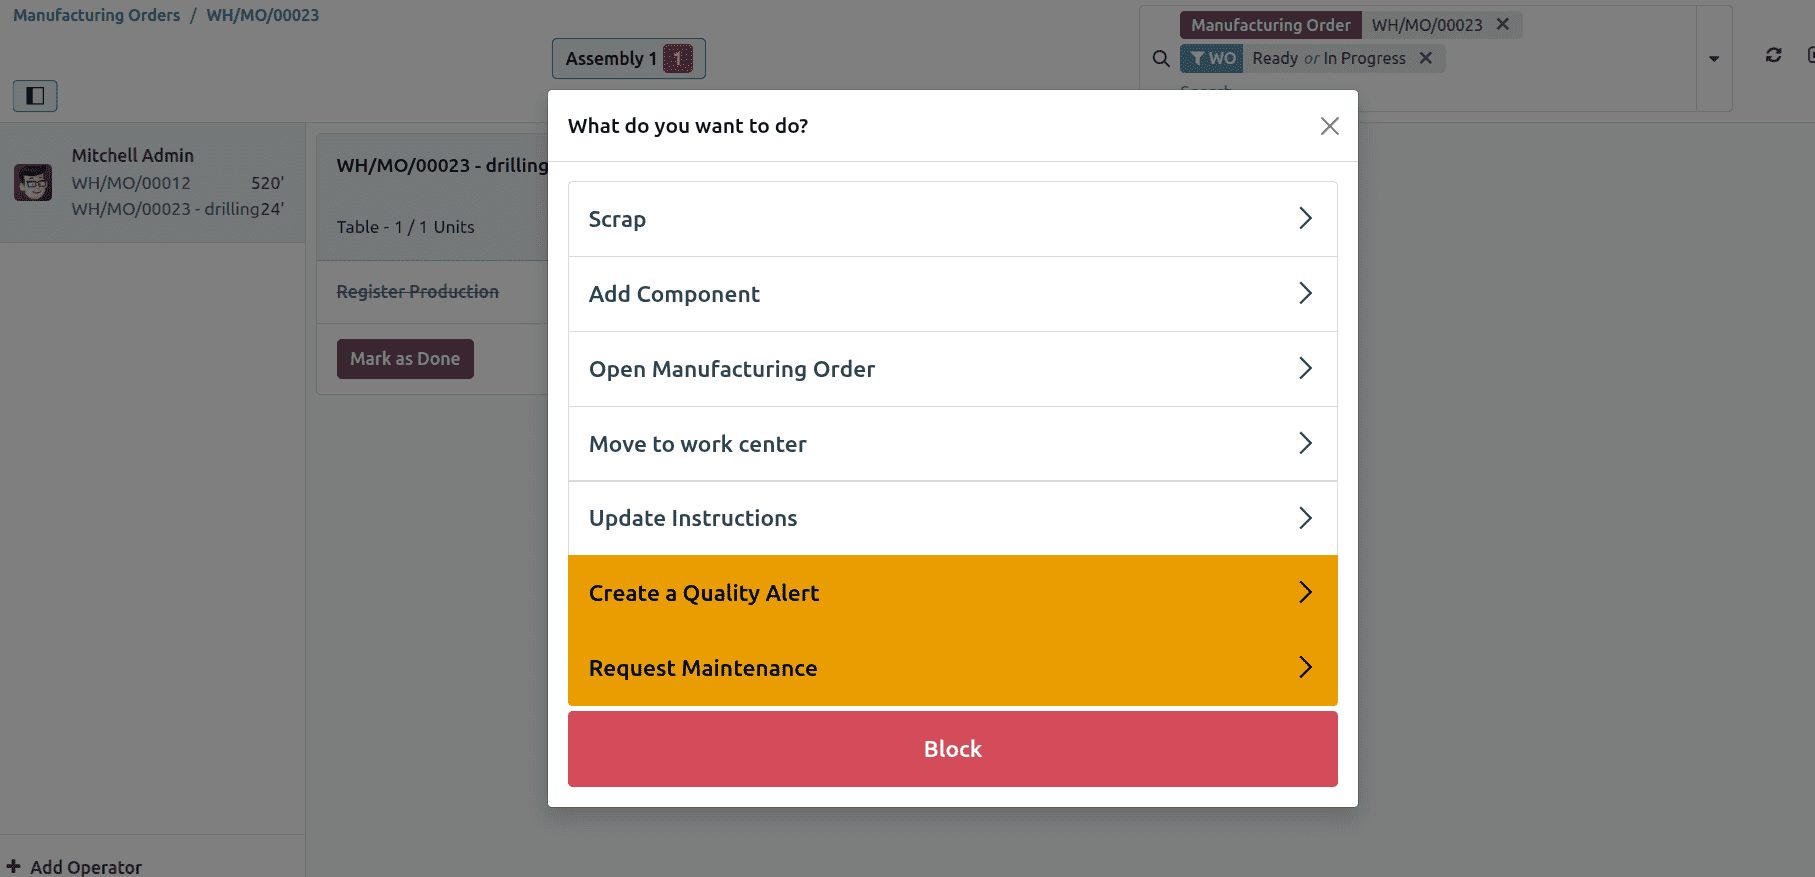
Here, the Scrap option allows you to mark the product or component as scrapped if it cannot be used. The Add Component option lets you include additional materials that were not originally defined in the BOM. You can also open the related manufacturing order from this screen to review or manage it. Additionally, you can update the work instructions for the operator, create a quality alert if an issue is found, and even create a maintenance request when a machine or tool needs attention. All these options help you manage the production process smoothly and handle any issues that come up during manufacturing.
Now we can move to the manufacturing order, where we can see the operation is in a finished state, and also we can see the quantity is updated to one.

Now we can produce the products. To complete the manufacturing order, click on the Produce All button.
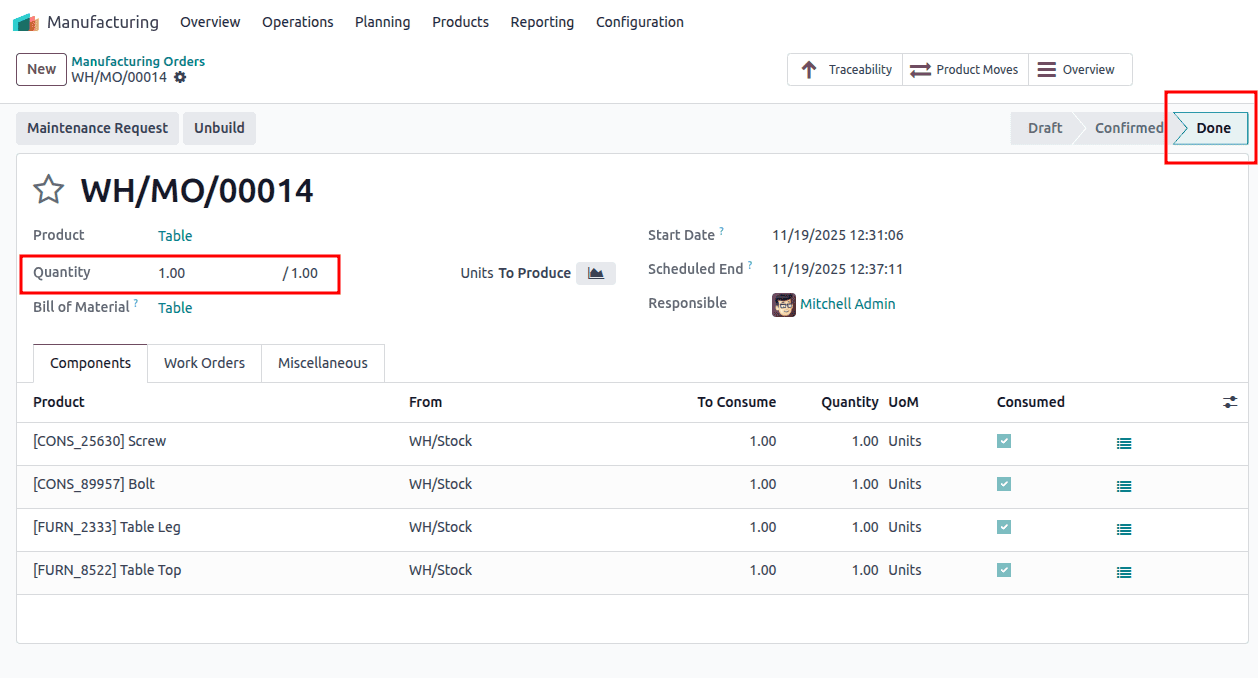
By clicking on the product, all buttons will update the state as to “Done” state.
If you want to check the product move you can click on the traceability button.
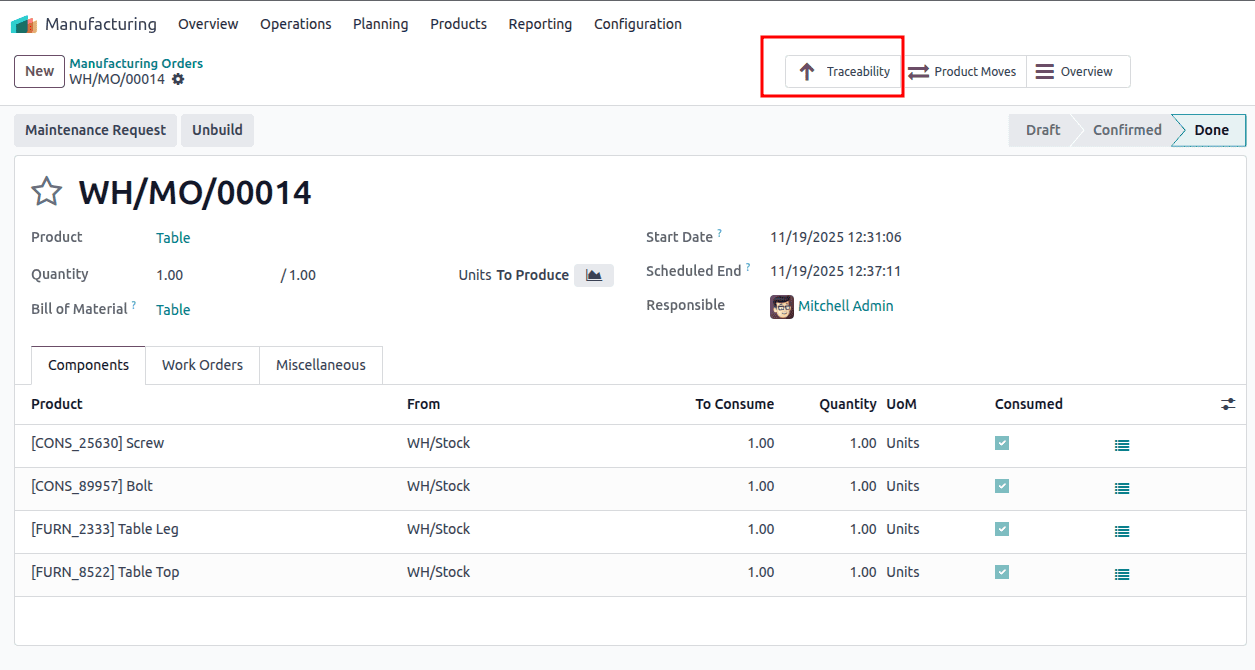
Clicking on the traceability button will lead to the traceability page. Here, the components are moved from the WH/Stock to the Production location. And the final product, the Table moves from the production location to the WH/Stock as shown below.

Then go to the product form page, where we can see the product quantity is updated to one.

And this is how we can create a product in Odoo 18 and manage its entire manufacturing process using the required components. Once the product is defined and its Bill of Materials (BoM) is set up, Odoo allows us to plan, track, and complete the manufacturing steps smoothly. From adding components and updating instructions to managing work centers and confirming production, Odoo provides a complete, user-friendly workflow for efficiently manufacturing the product.
To read more about How to Configure Products to Manufacture in Odoo 18, refer to our blog How to Configure Products to Manufacture in Odoo 18.