Efficient expense management is a cornerstone of healthy business operations. When employees incur costs on behalf of the company, such as travel expenses, accommodation, meals, or office supplies, it’s important to have a transparent and accountable reimbursement process in place. This is where Odoo 18 Expenses comes in as a powerful tool to simplify and automate employee expense reimbursements from submission to payment.
In this blog, we will walk through how to effectively manage and reimburse employee expenses in Odoo 18, highlighting its user-friendly interface, configurable workflows, and integration with accounting.
Imagine an employee has paid for his hotel stay and meals out of his own pocket. After returning, the expenses had to be recorded so that the company could review and reimburse him through the expenses. Also, the reported expense can be reimbursed to the employee either by paying the employee directly or by paying through the next payslip. So this can be done through the Expenses module in Odoo 18.
To record the expense, navigate to the Expenses module. From the dashboard, you can create a new expense report by clicking the New button, or upload an expense by clicking the Upload button.

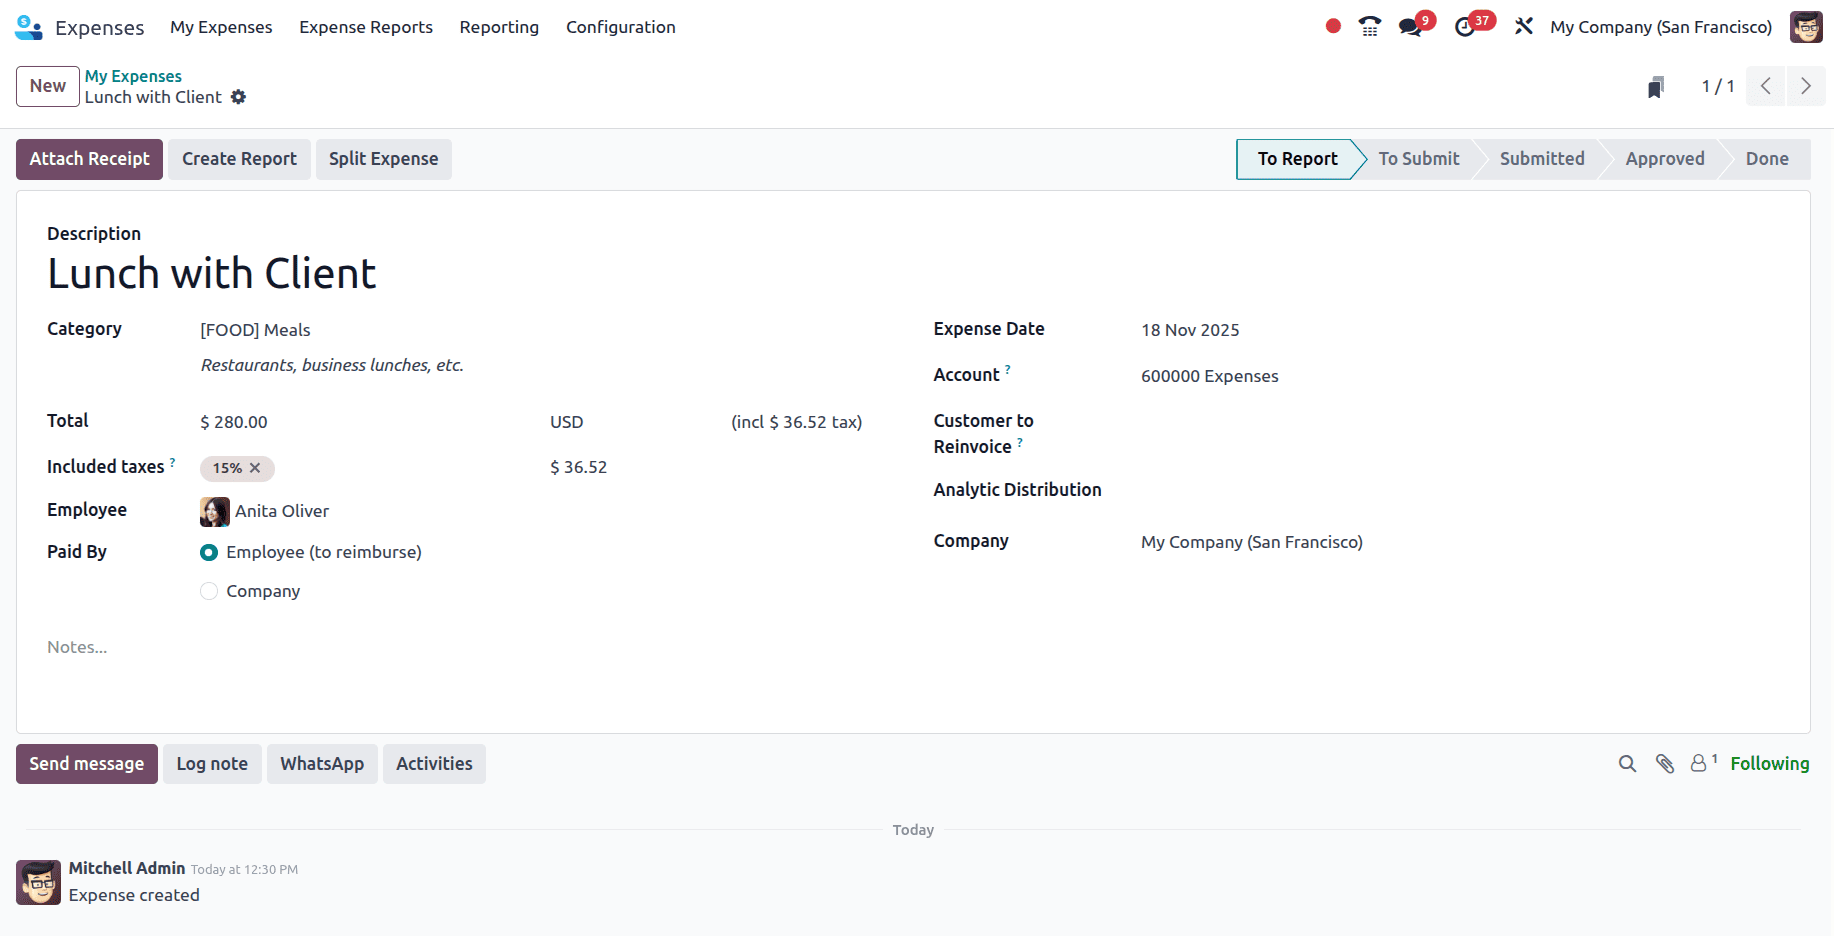
When the New button is clicked, a new form appears where you can fill in the details of the expense made.
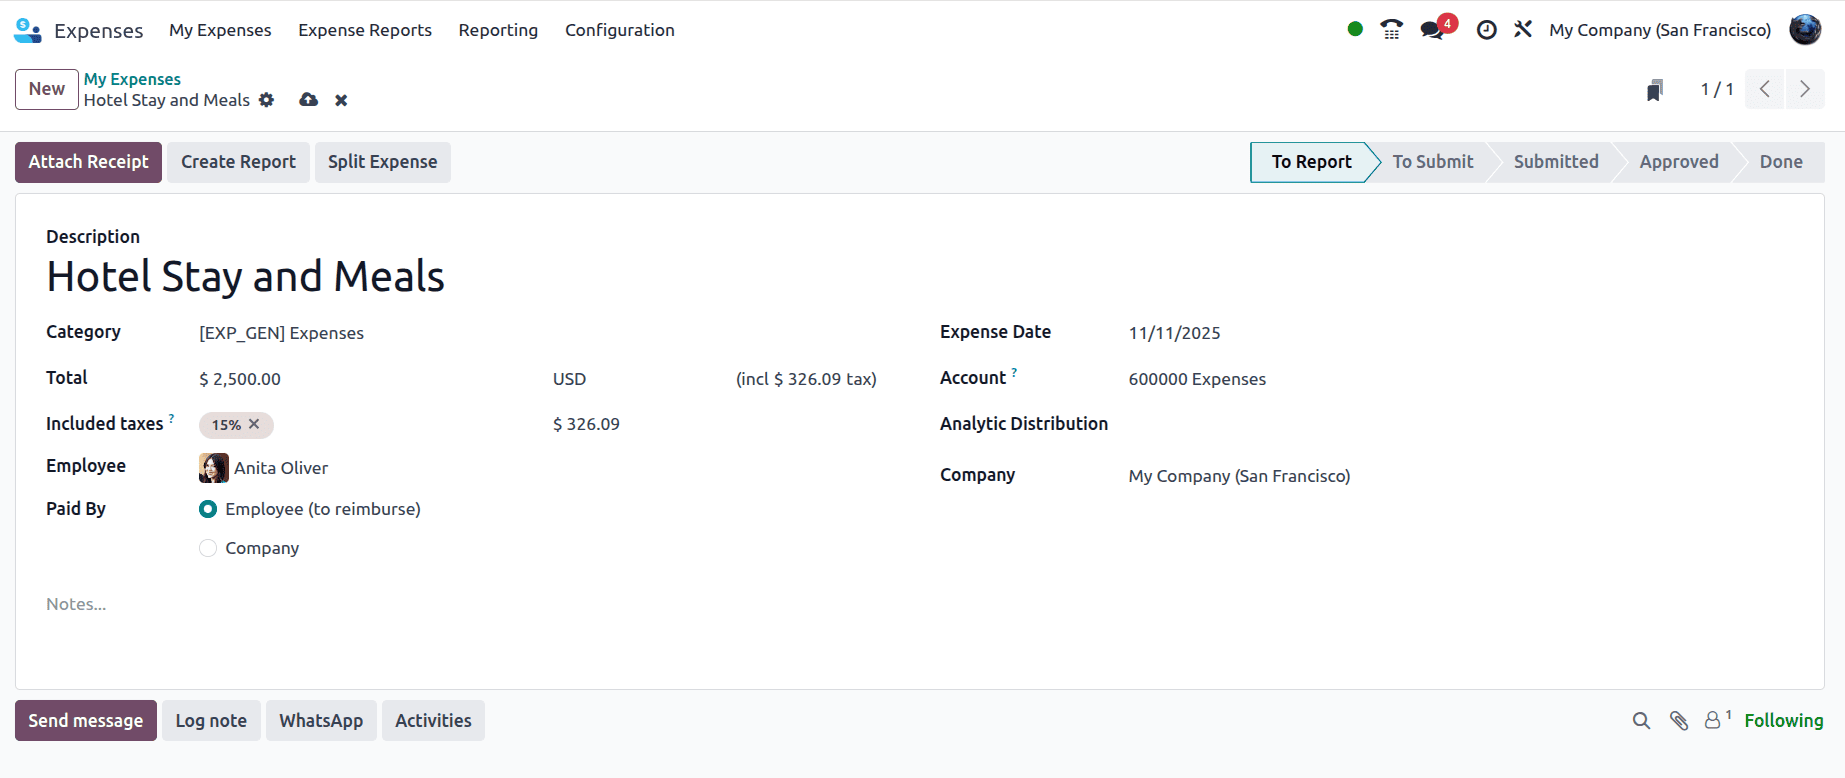
Fill in the following details in the expense created:
Description: A short title for the expense can be provided here.
Category: It represents a predefined type of expense that employees can select when recording their expenses.
Total: The total amount of the expense.
Included Taxes: Shows the tax percentage and the corresponding amount.
Employee: The person who incurred the expense.
Paid By
- Employee (to reimburse) – Indicates the employee paid for it and will be reimbursed by the company.
- Company – Indicates the company directly paid the expense.
Expense Date: The date when the expense was incurred.
Account: The accounting ledger account where this expense will be recorded.
Analytic Distribution: Used for cost analysis. You can assign the expense to a specific analytic account or department.
Company: The company under which the expense was recorded.
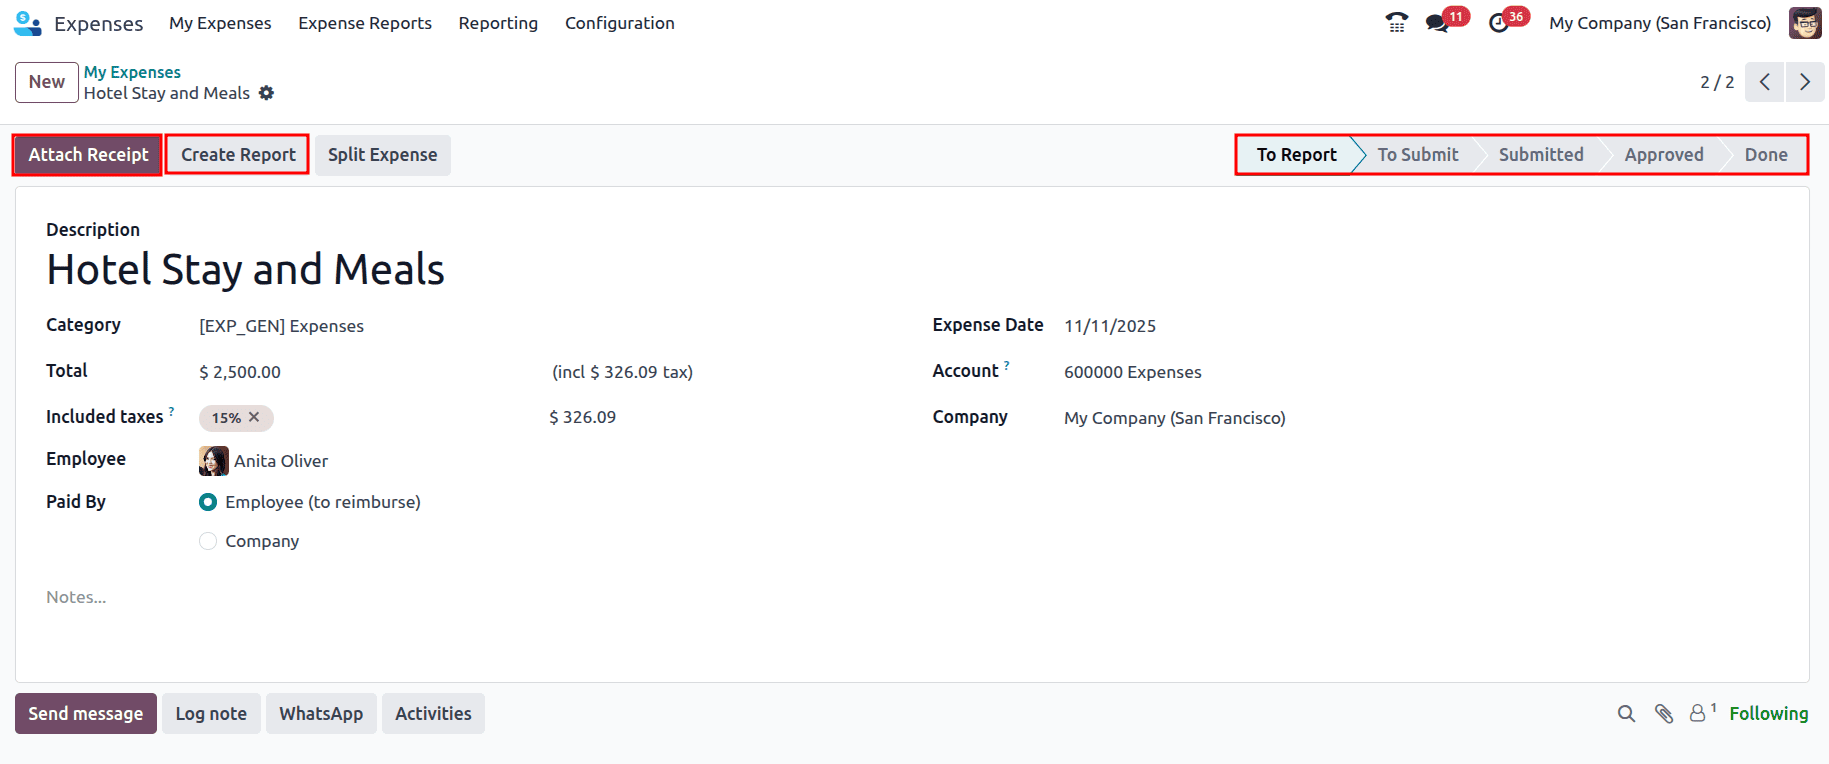
Once the report has been created, you can upload a receipt (like a bill or invoice) as proof of expense using the Attach Receipt button, or you can click on the Create Report button to create the report of the expense, and the state changes from To Report to To Submit.
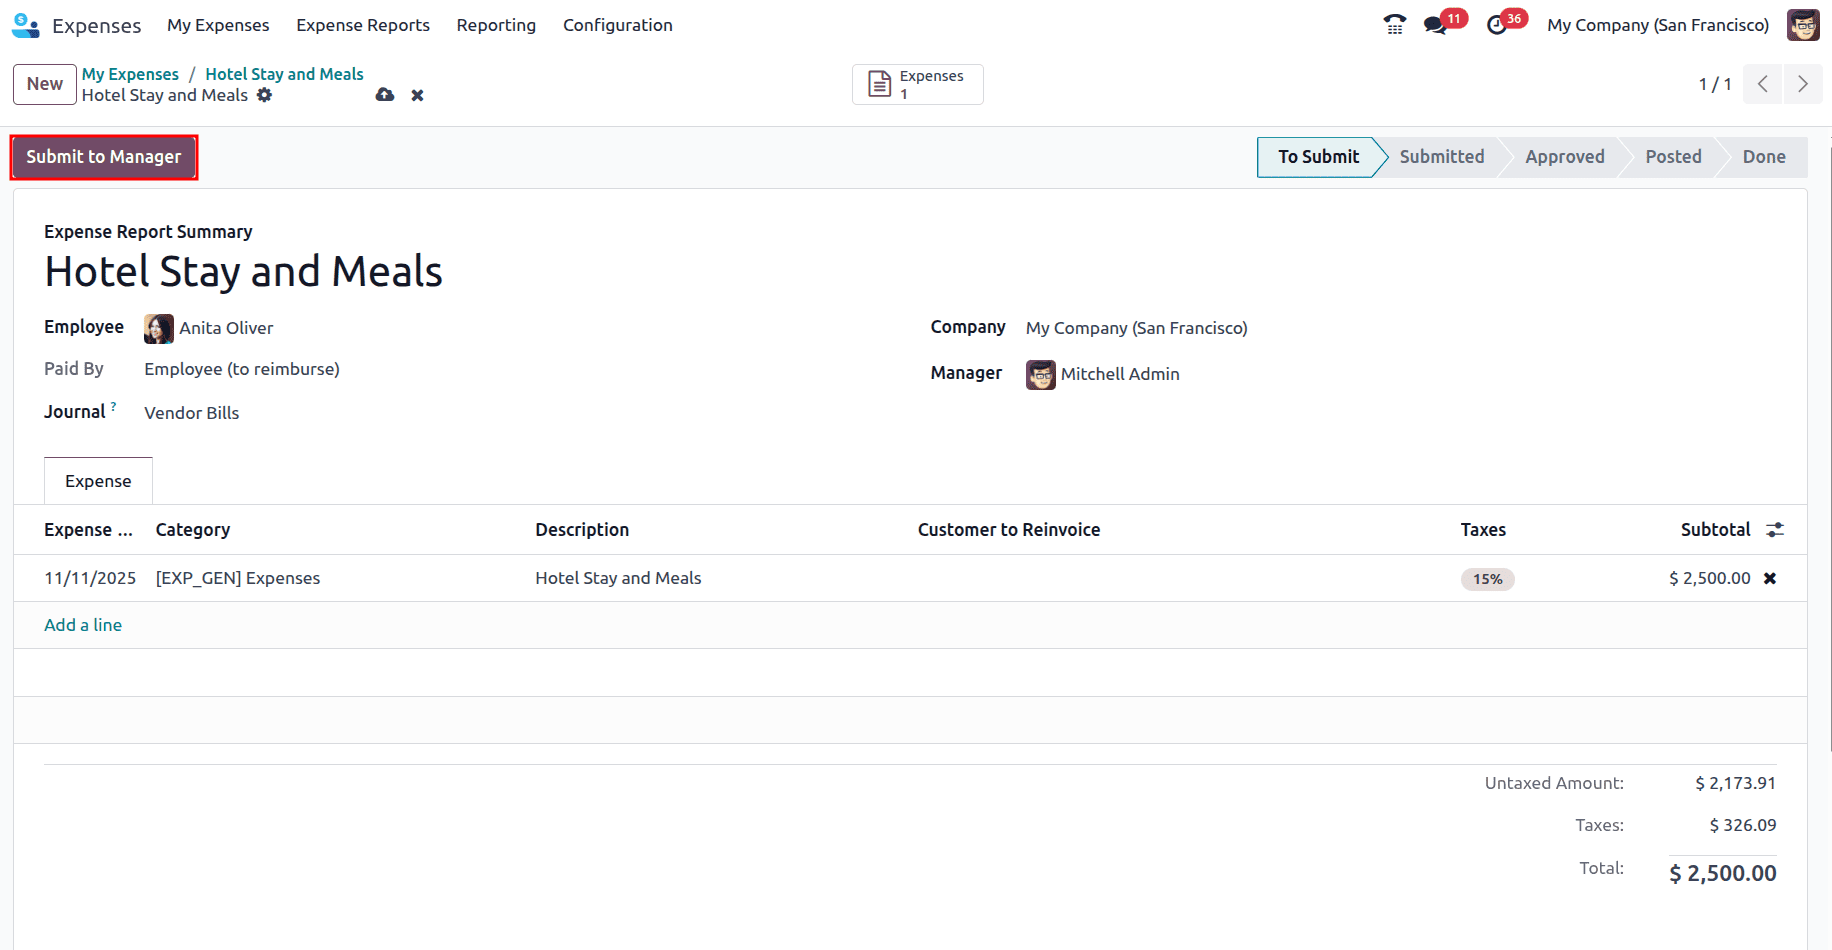
The report will be created, and if more expense records need to be added, they can be added. For that, click on the Add a line under the Expense tab, and an expense of the same employee that has not yet been reported appears, and you can add that under this report as well. For now, select the Journal that needs to be used when the expense has been paid by the employee, and also add the Manager who needs to review and approve the report, and then click on the Submit to Manager button to submit the report to the manager. Also, a smart tab can be seen, which shows the expense added to this expense report.
Once the report is submitted to the manager, the status is changed to Submitted, and the manager can now approve the expense report by clicking on the Approve button. And if the report has to be refused, there is a Refuse button right next to Approve; managers can click on that to refuse the expense report.

Once the Report has been approved, the journal entries can be posted by clicking on the Post Journal Entries.

Also, the Journal Entry smart tab has been generated. Once the journal entries have been posted, the state changes to Posted, and there is a Pay button with which you can pay the employee.

Click on the pay, and the payment pop-up appears, where the following fields will be auto-filled:
- Journal: The account (Bank/Cash) from which the payment will be made.
- Payment Method: The way the payment is recorded (e.g., Manual Payment).
- Recipient Bank Account: The vendor/employee’s bank account receiving the payment.
- Amount: The total amount you are paying for the expense.
- Payment Date: The date on which the payment is recorded.
- Memo: A short description that will appear on the payment entry.
Then click on the Create Payment button to register the payment.

And it can be seen that the payment will be in ‘In Payment’ state, and the state of the report will be changed to Done.
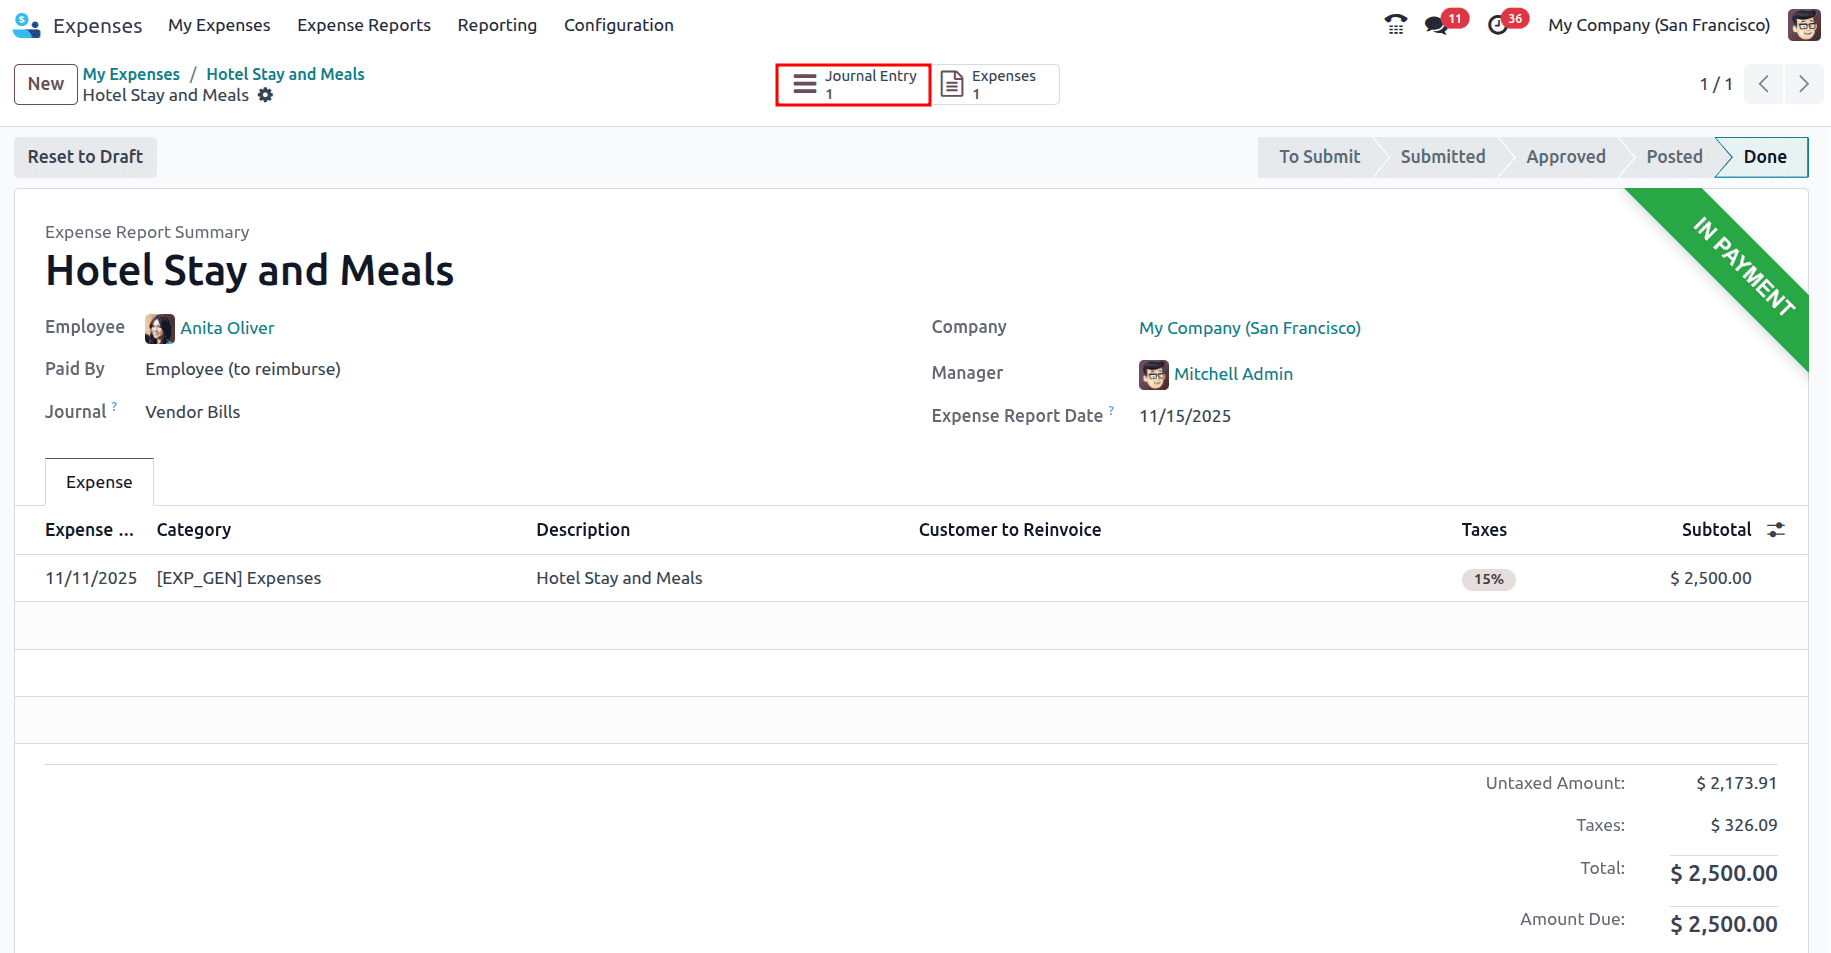
When the Journal Entry smart tab is clicked, the bill that has been generated can be viewed, which is in the ‘In Payment’ state.

Also, if the bill generated has to be linked to a purchase order, go to the Purchase Matching smart tab and select the journal, and you will be able to add it to the purchase order by clicking on the Add to PO button and selecting the purchase order, if any or if there is any matching purchase order line, you can match that with the bill.

Now this payment has to be reconciled; for that, navigate to the Accounting module, and from the dashboard, click on the Bank journal and then click on the Transactions button to create a bank statement.
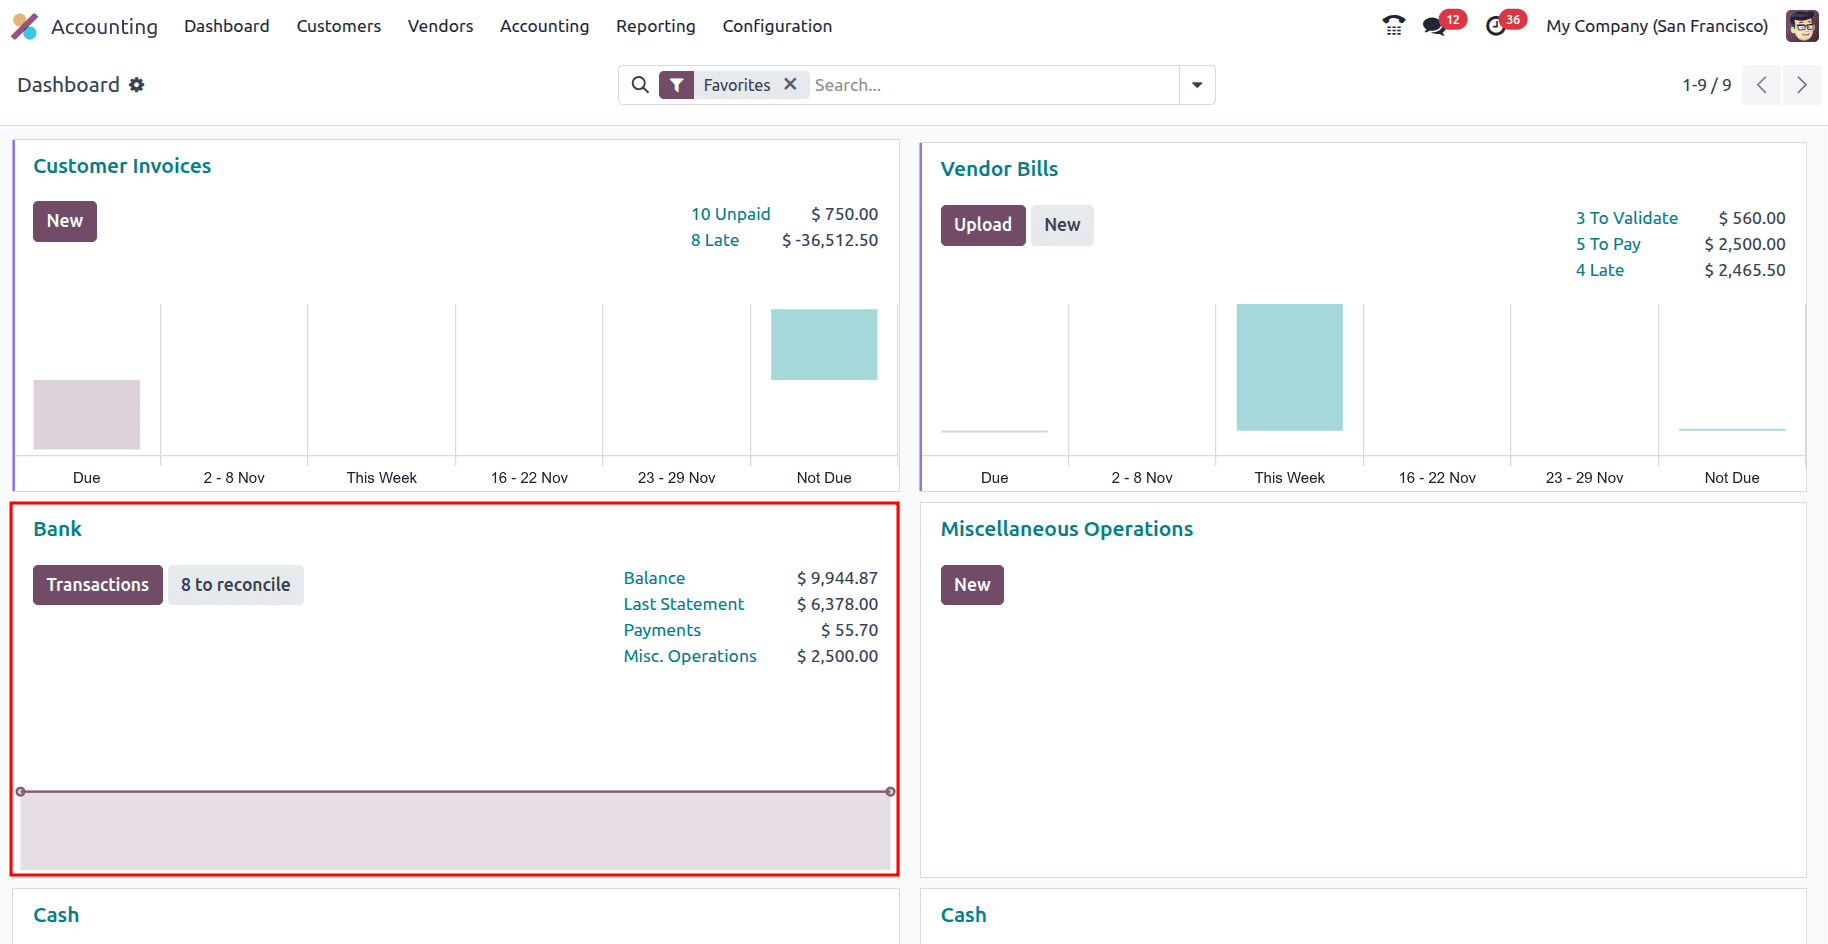
Click on the New button to create the new bank statement, add the employee in the Partner field, and add the amount as negative since the expense is paid to the employee.
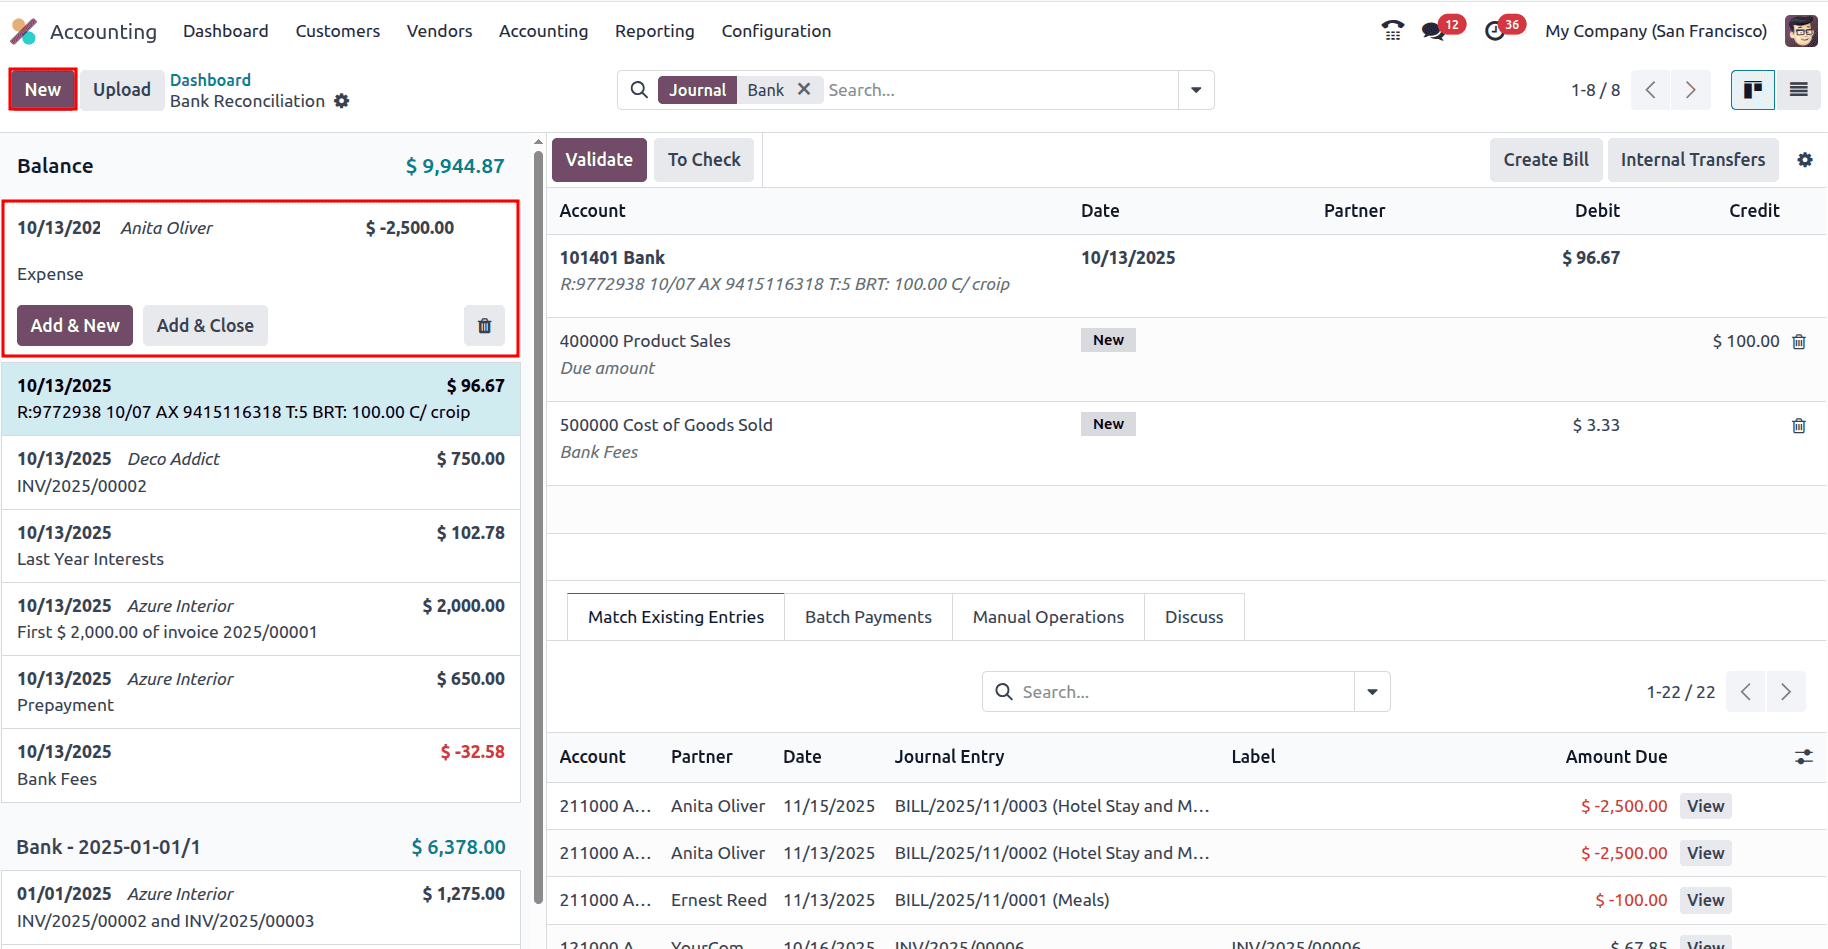
Then select the corresponding journal entry from the right window and click on Validate to reconcile the payment.
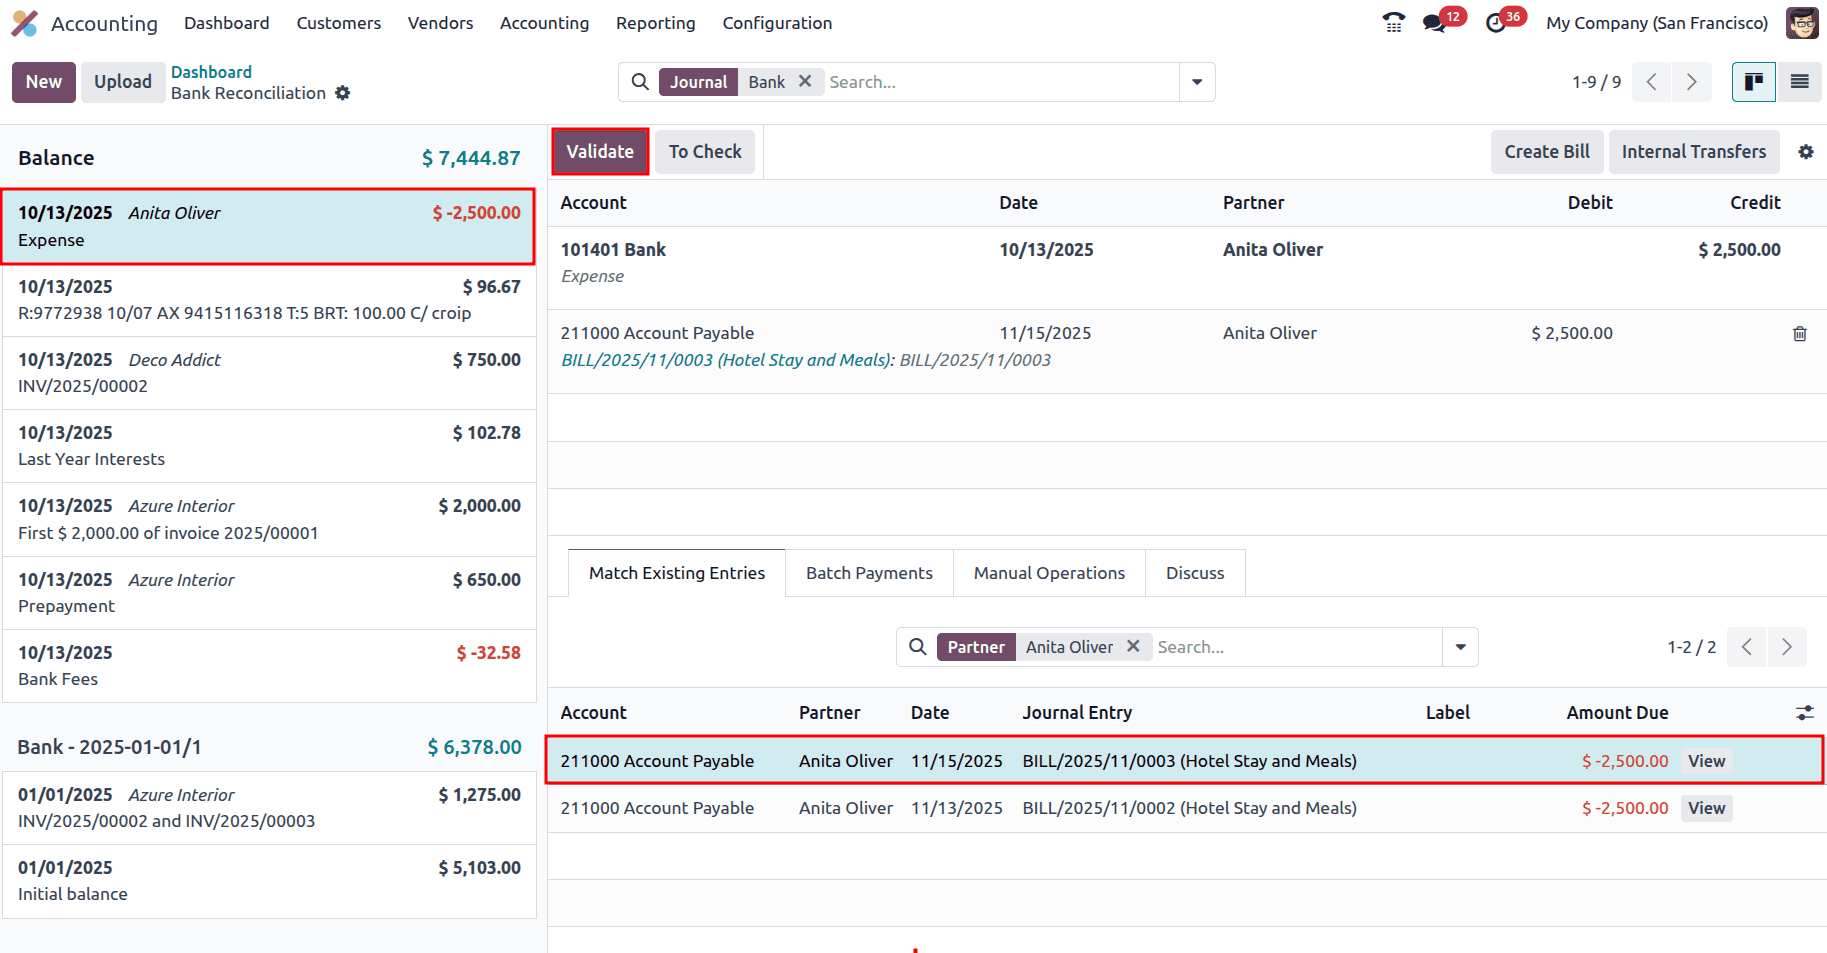
Once the payment is reconciled, it will be marked as Paid.

This is one way the payment can be reimbursed; the second method is to reimburse the amount to the employee on their next payslip.
Reimbursing the employee through the Payslip
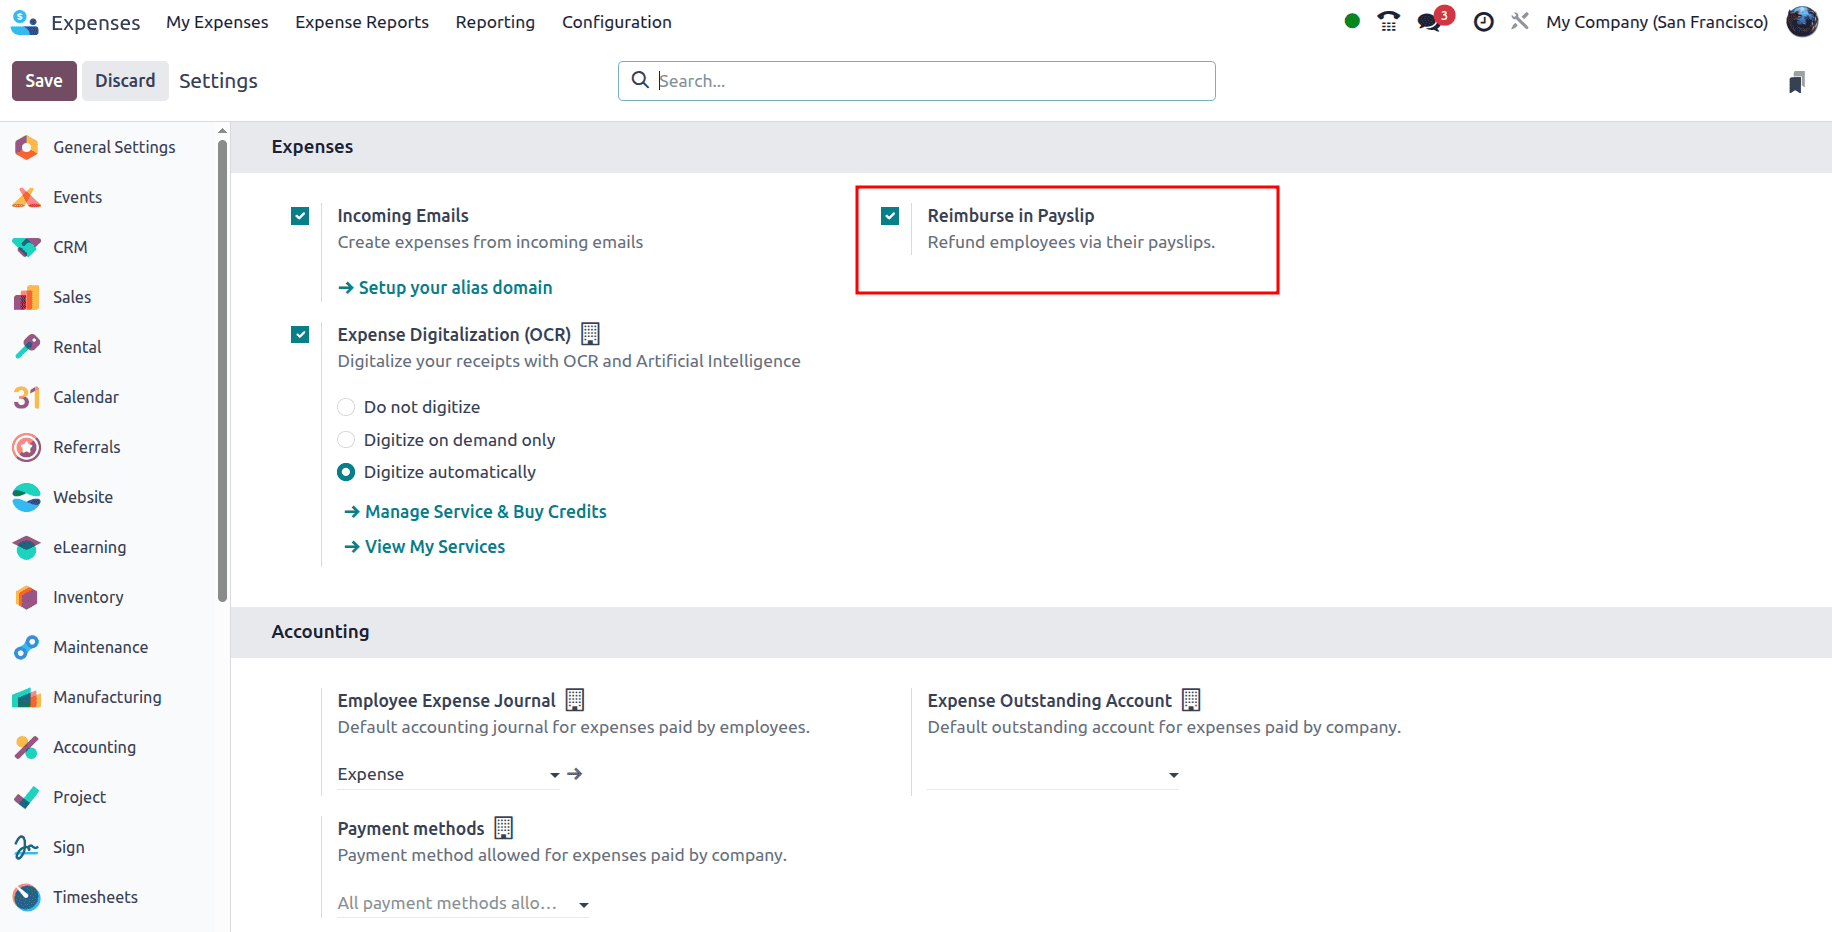
To reimburse the employee through the payslip, go to the configuration settings in the Expenses module.
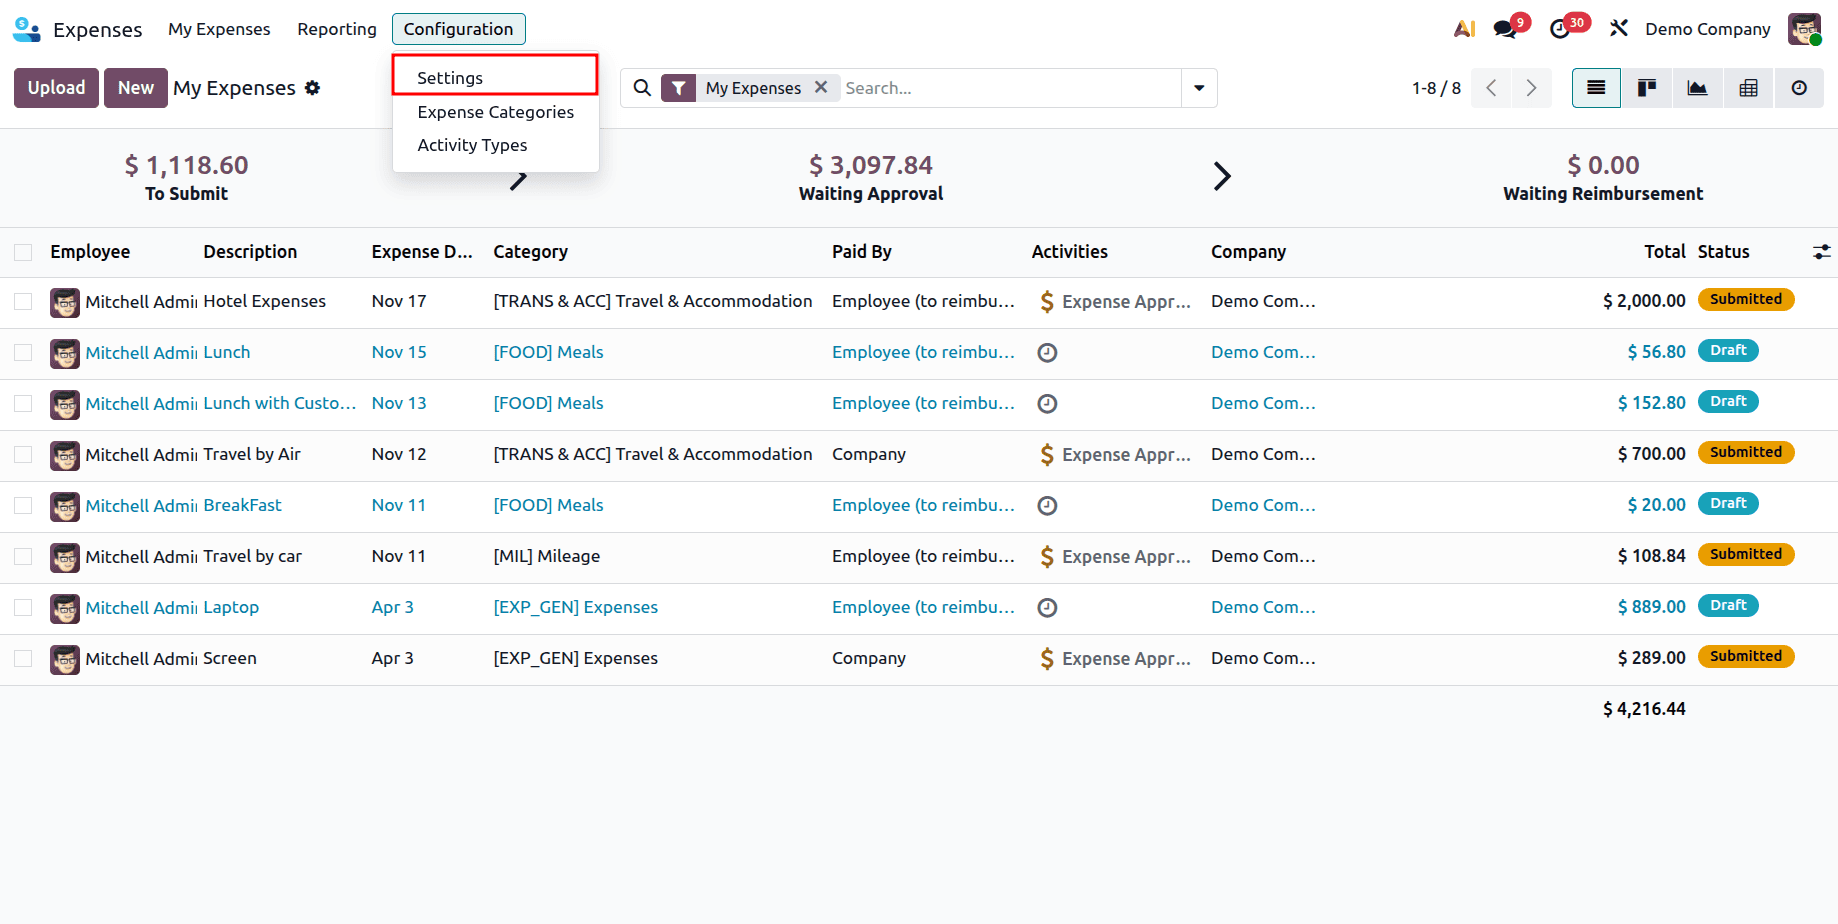
Enable the feature ‘Reimburse in Payslip’ and save the changes made.
Similarly, create one more expense.
Once the expense has been approved, click the Report in Next Payslip button so the employee is paid on their next payslip.
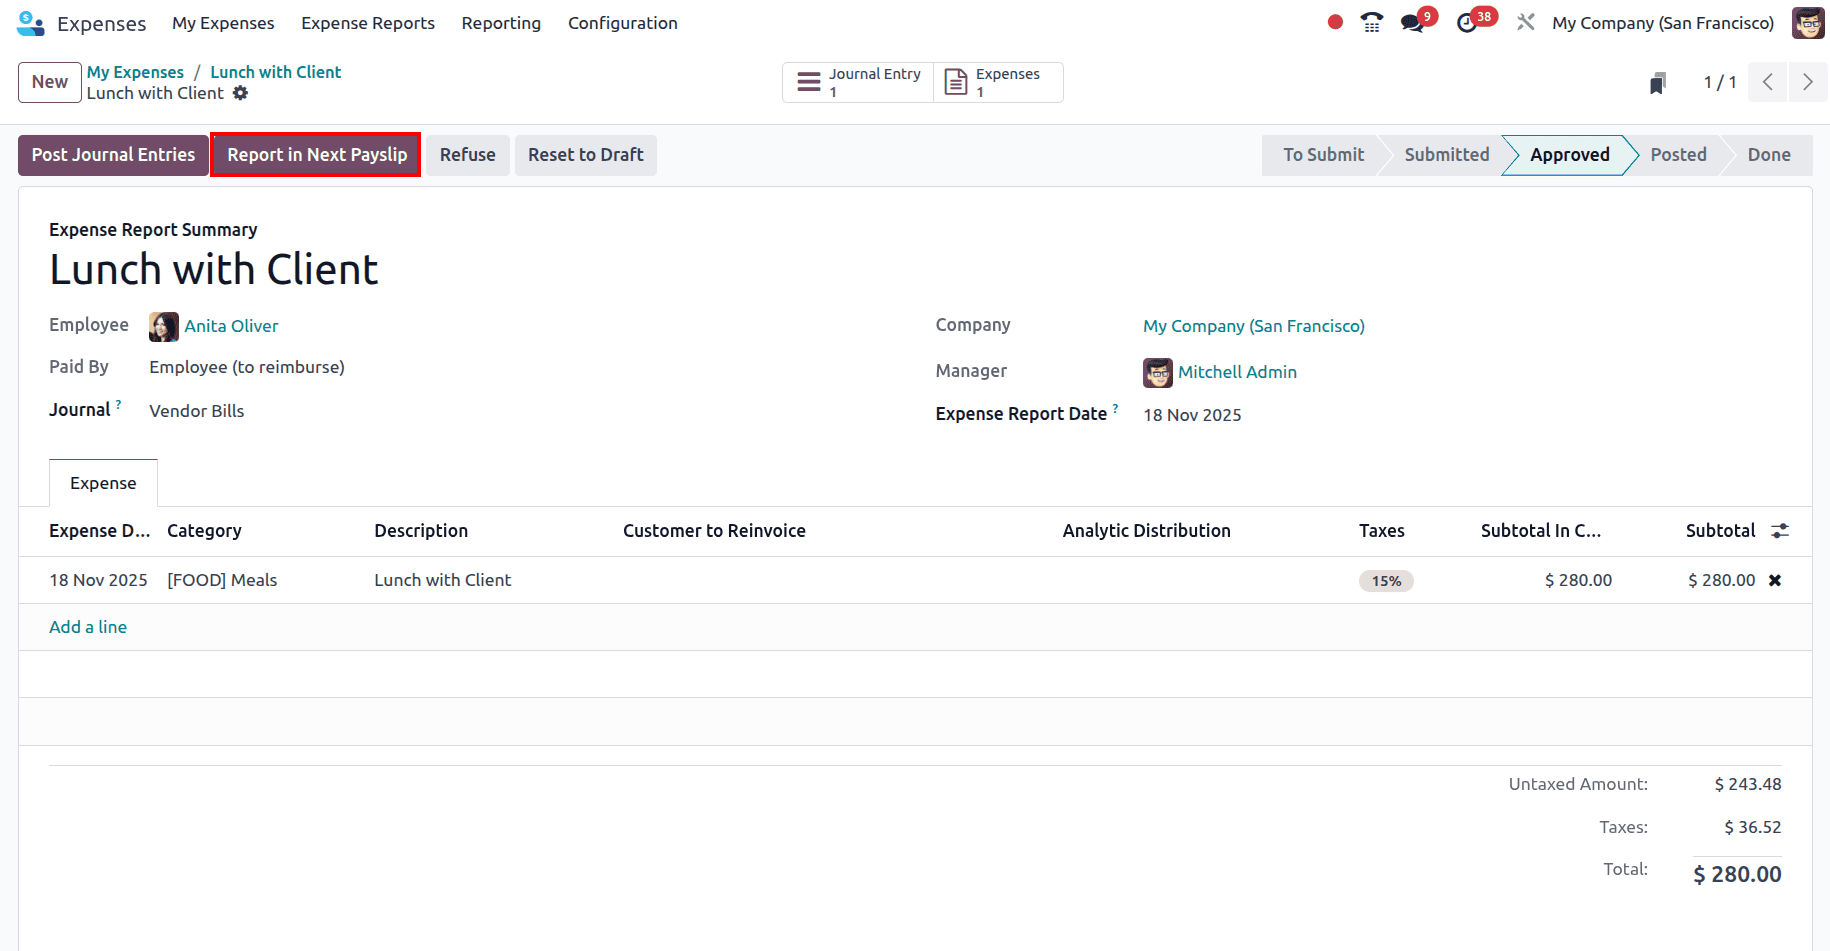
There is an option to remove the expense from the payslip; to do so, the Remove from Payslip button can be clicked.

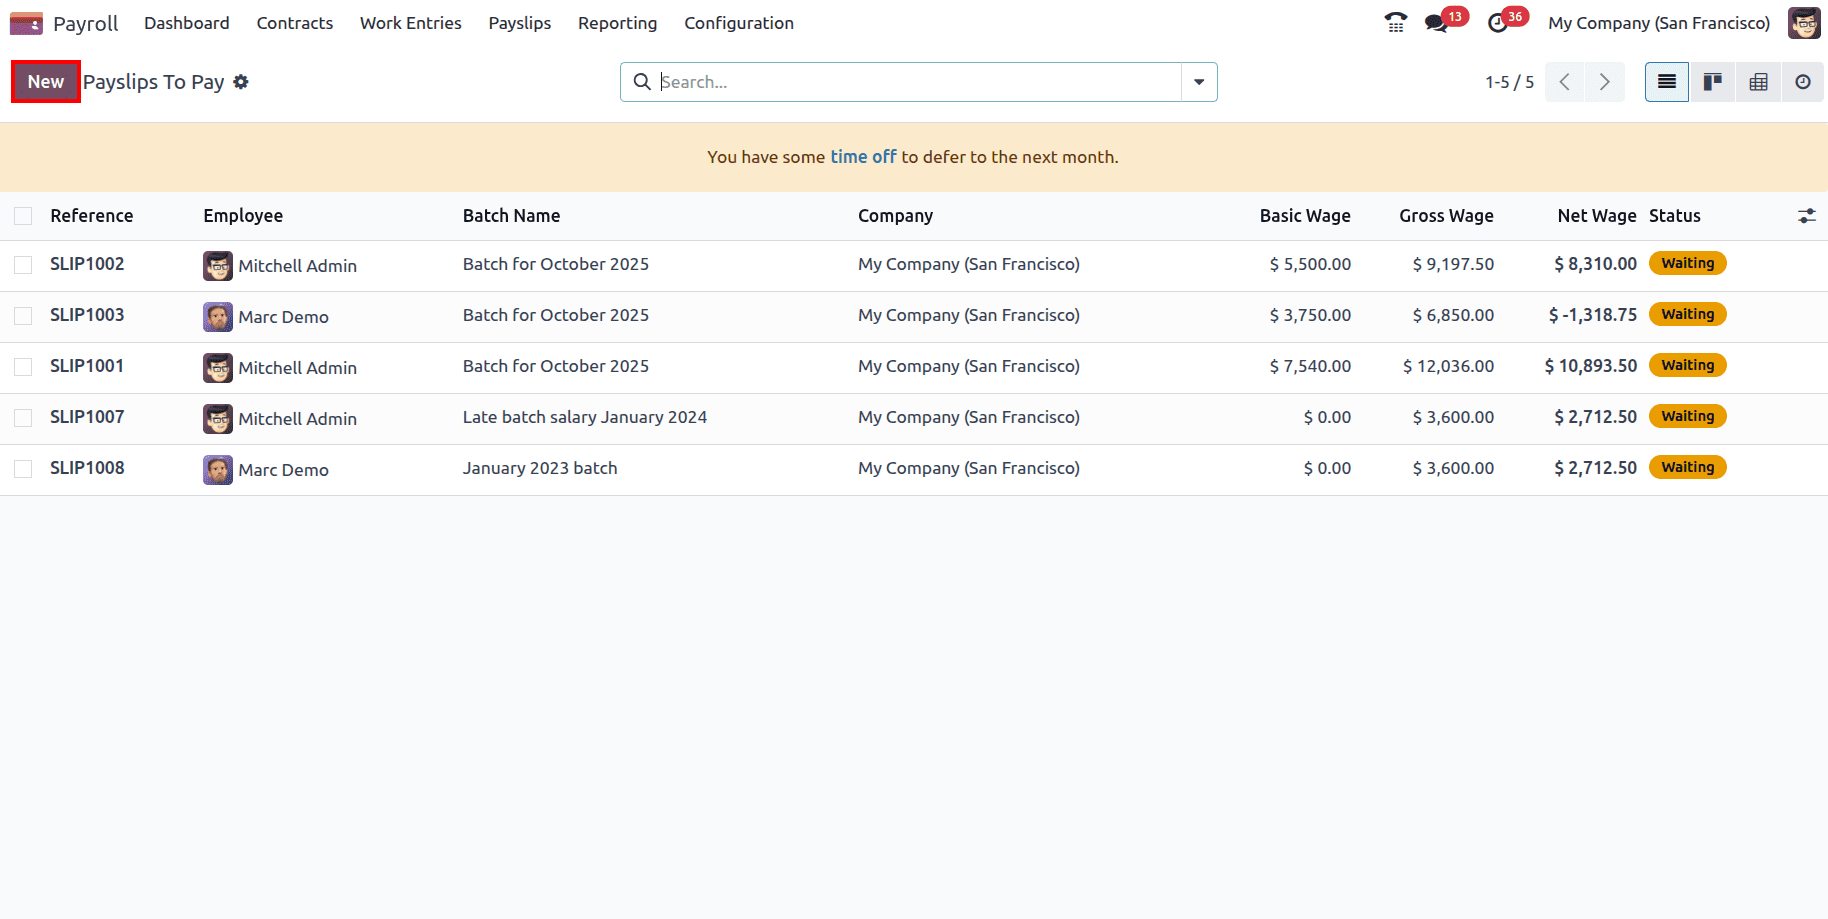
Once it is reported in the next payslip, go to the Payroll module and create the payslip for the employee. Also, make sure the Employee has an active contract. From the Payroll module, go to the Payslips > To Pay, and the created payslip that needs to be paid can be viewed.

Click on the New button to create a new payslip for the employee.
In the payslip form, add the Employee's name. The Contract will be auto-populated from the employee form, and the Structure and Period will be added based on the added contract.
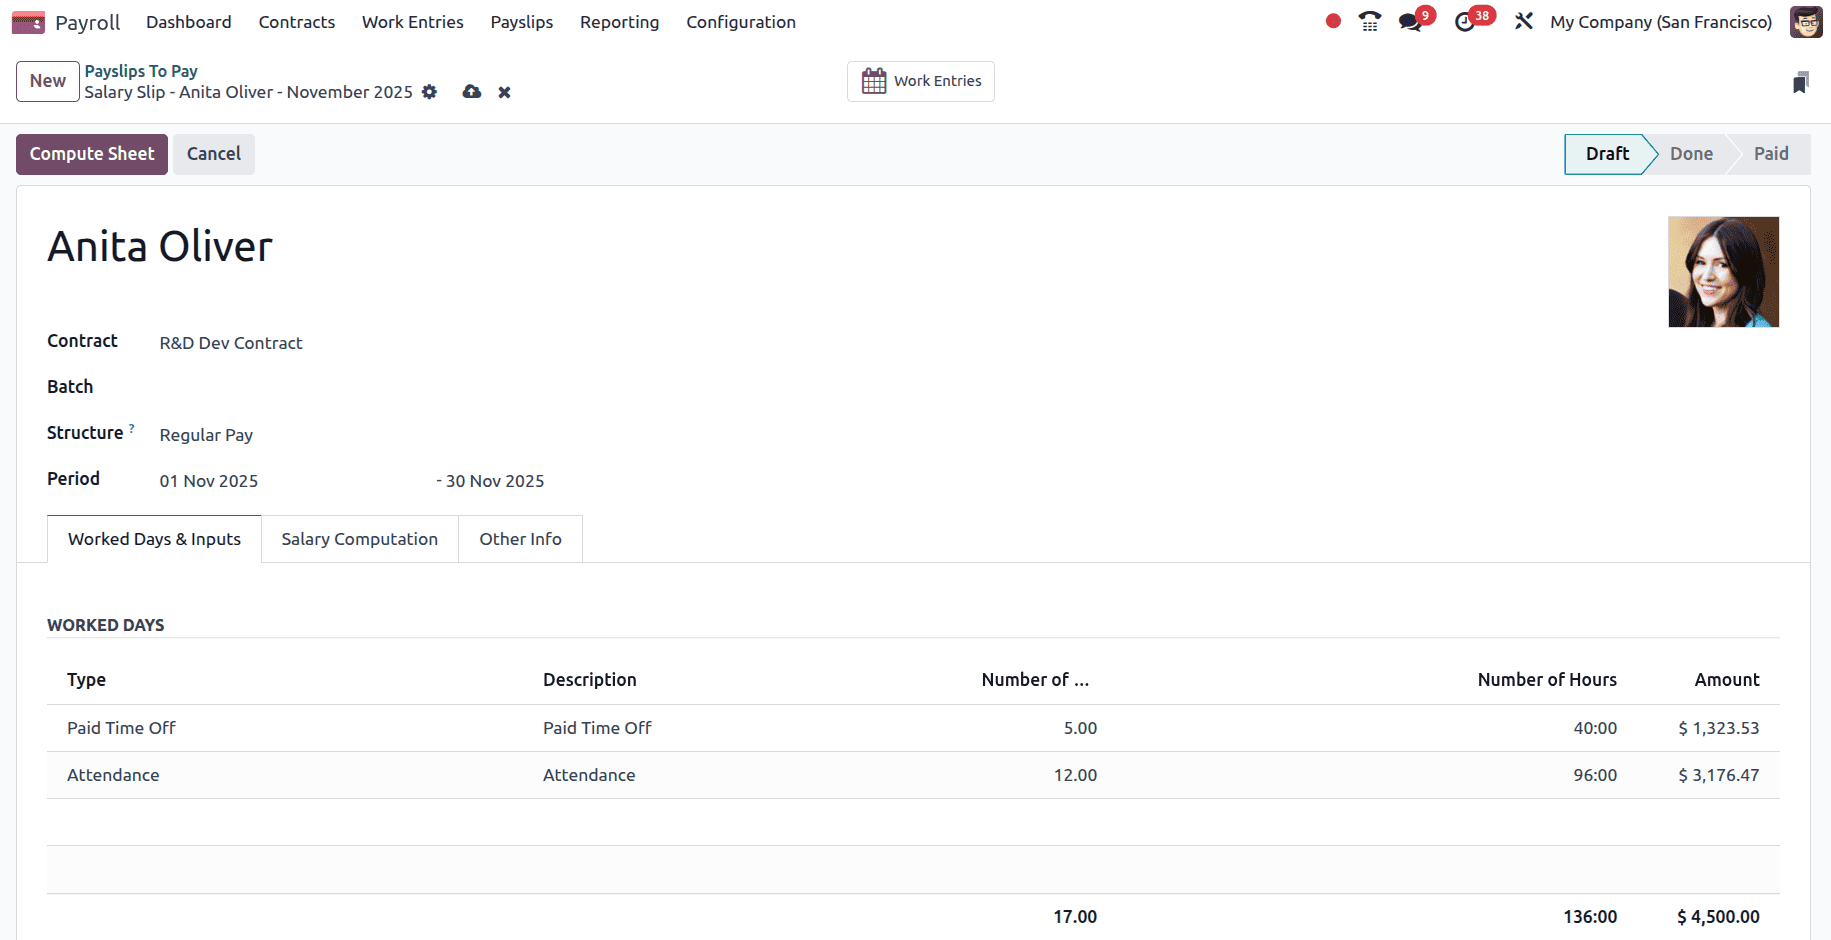
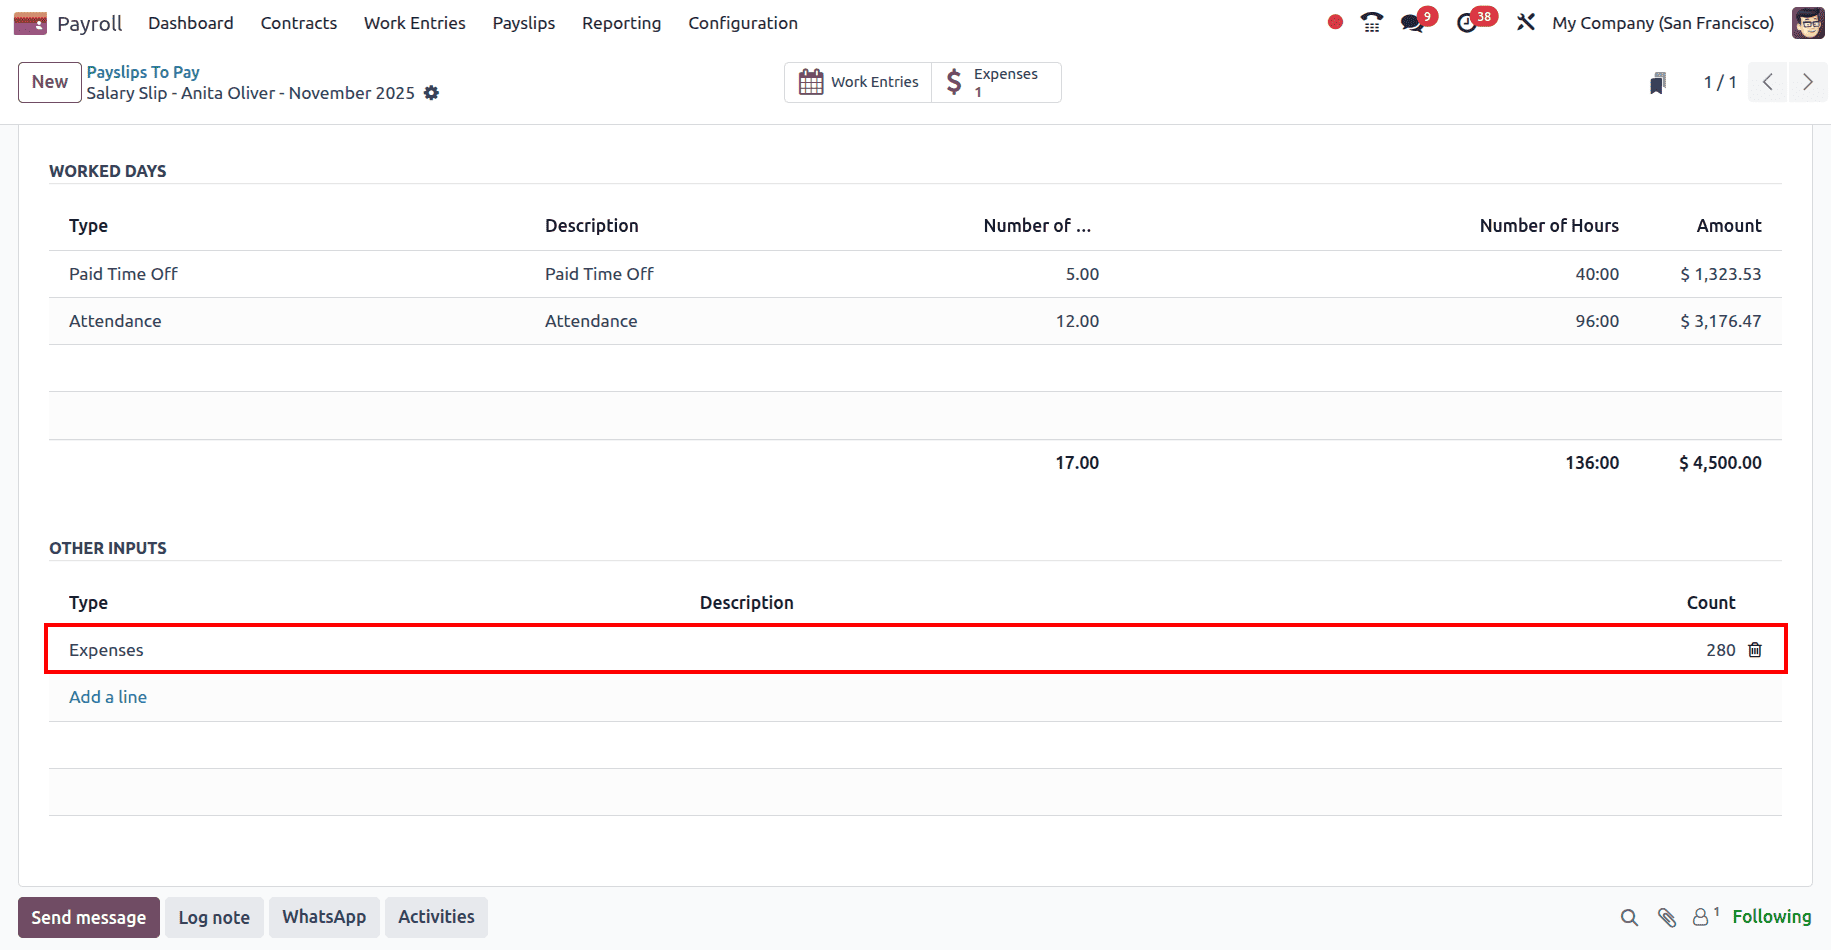
And in the Other Inputs section, the expense of the employee will be added.
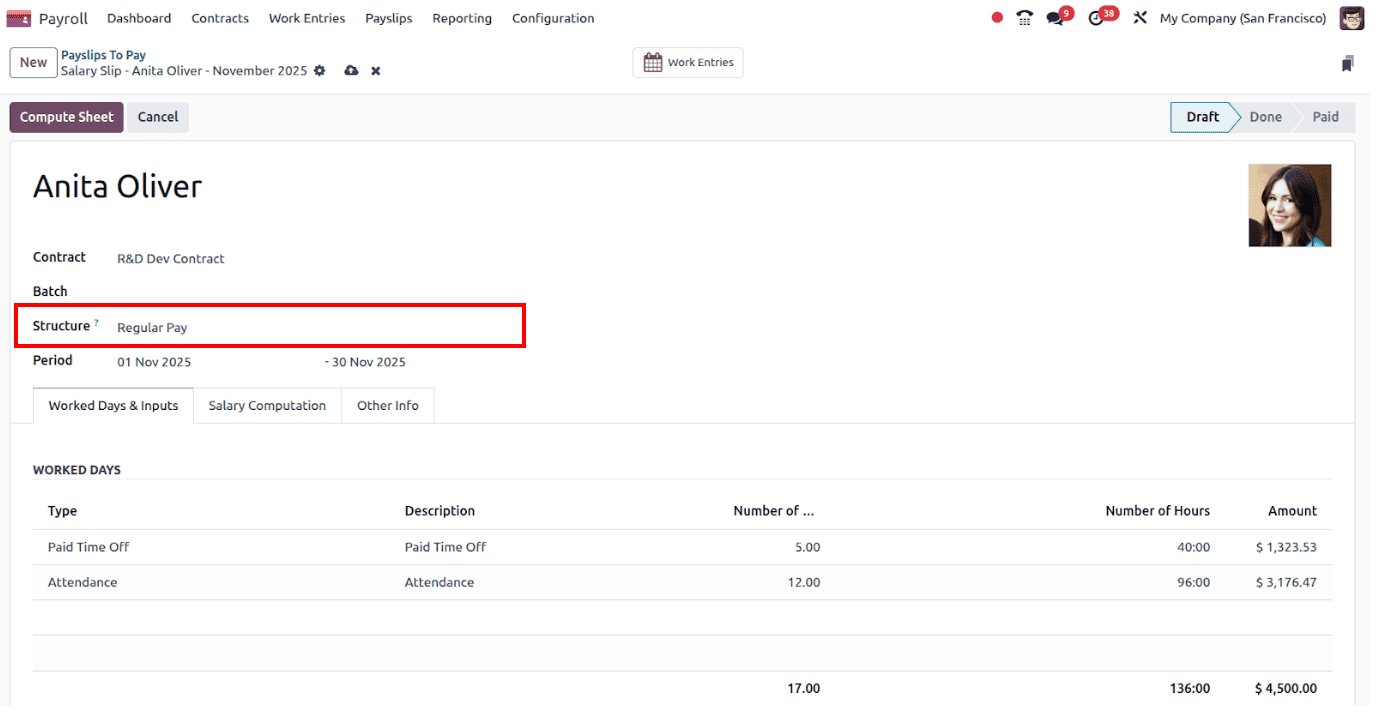
Click on the Compute Sheet to compute the payslip, and since the rule has been added in the salary structure, the expense reimbursement will be computed in the payslip. Go to the internal link of the added Salary Structure Regular Pay.
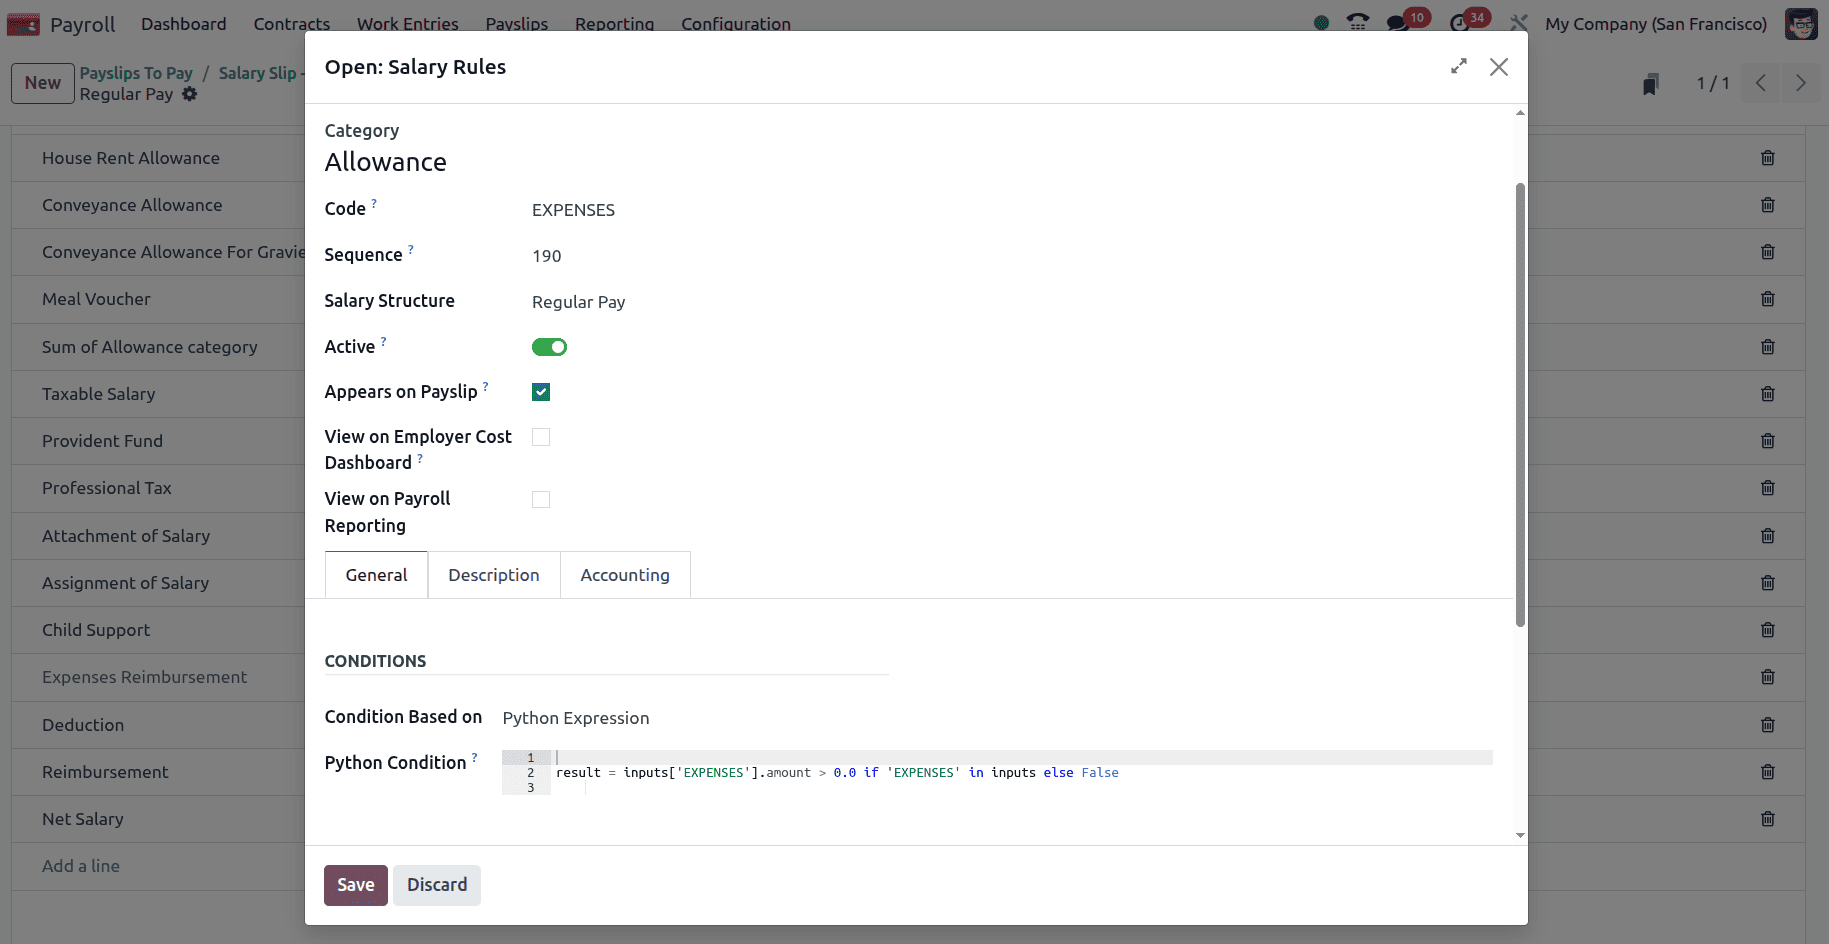
In the salary structure, all the rules that have been added can be viewed under the Salary Rules.

And when the expense reimbursement rule is clicked, the conditions and computations can be viewed.
Next, go back to the Payslip and click on the Compute Sheet button to compute the payslip.
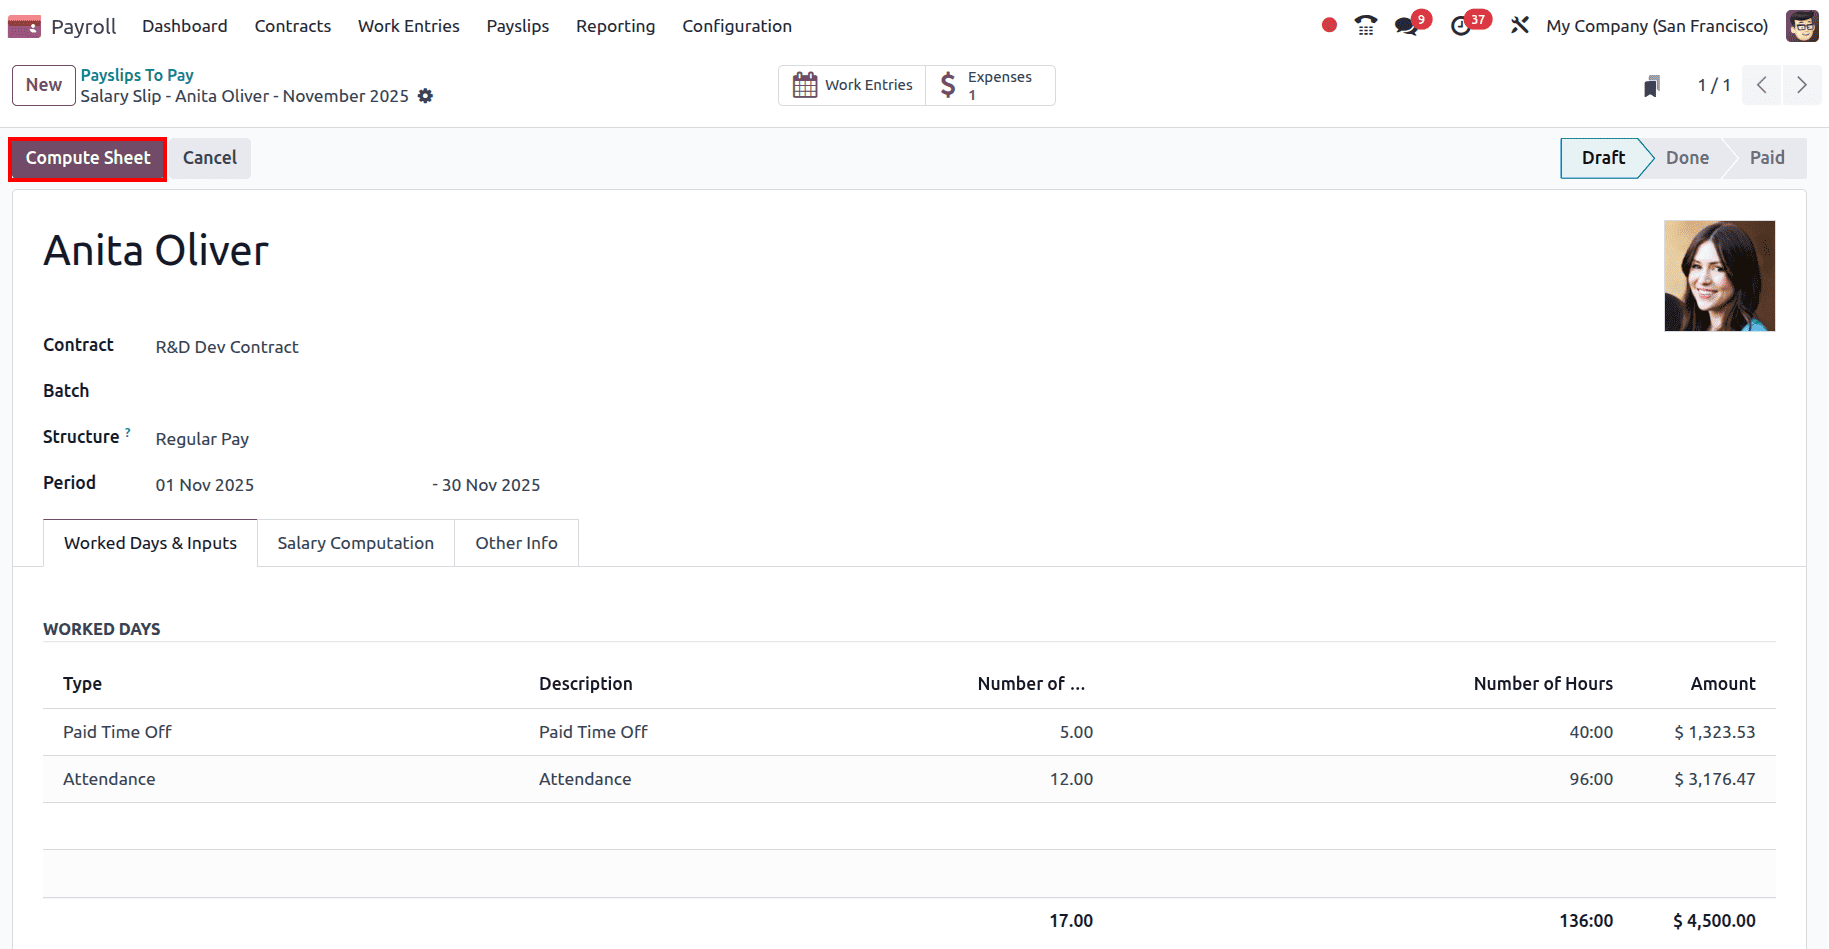
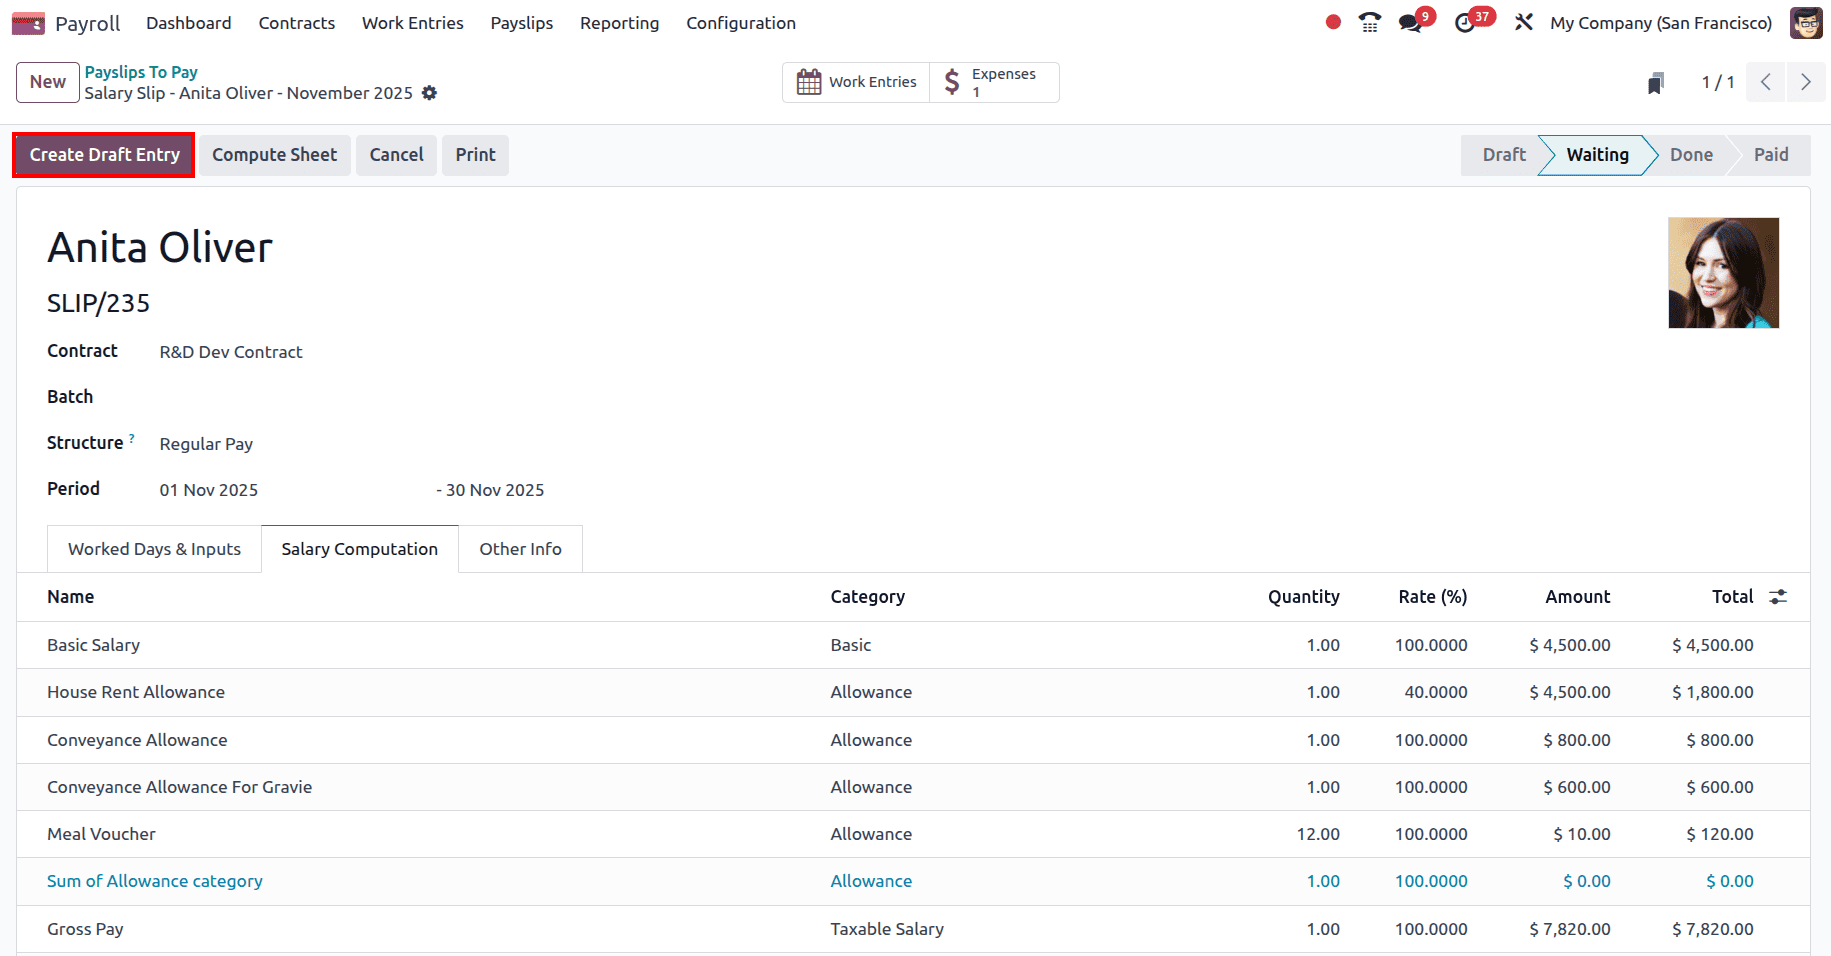
Go to the Salary Computation tab; the Expense Reimbursement rule and the Amount that has to be reimbursed can be viewed there.

Now, in the Payslip, click on the Create Draft Entry to create the draft entry of the Payslip.
Then go to the Journal Entry smart tab and Post the journal entry.
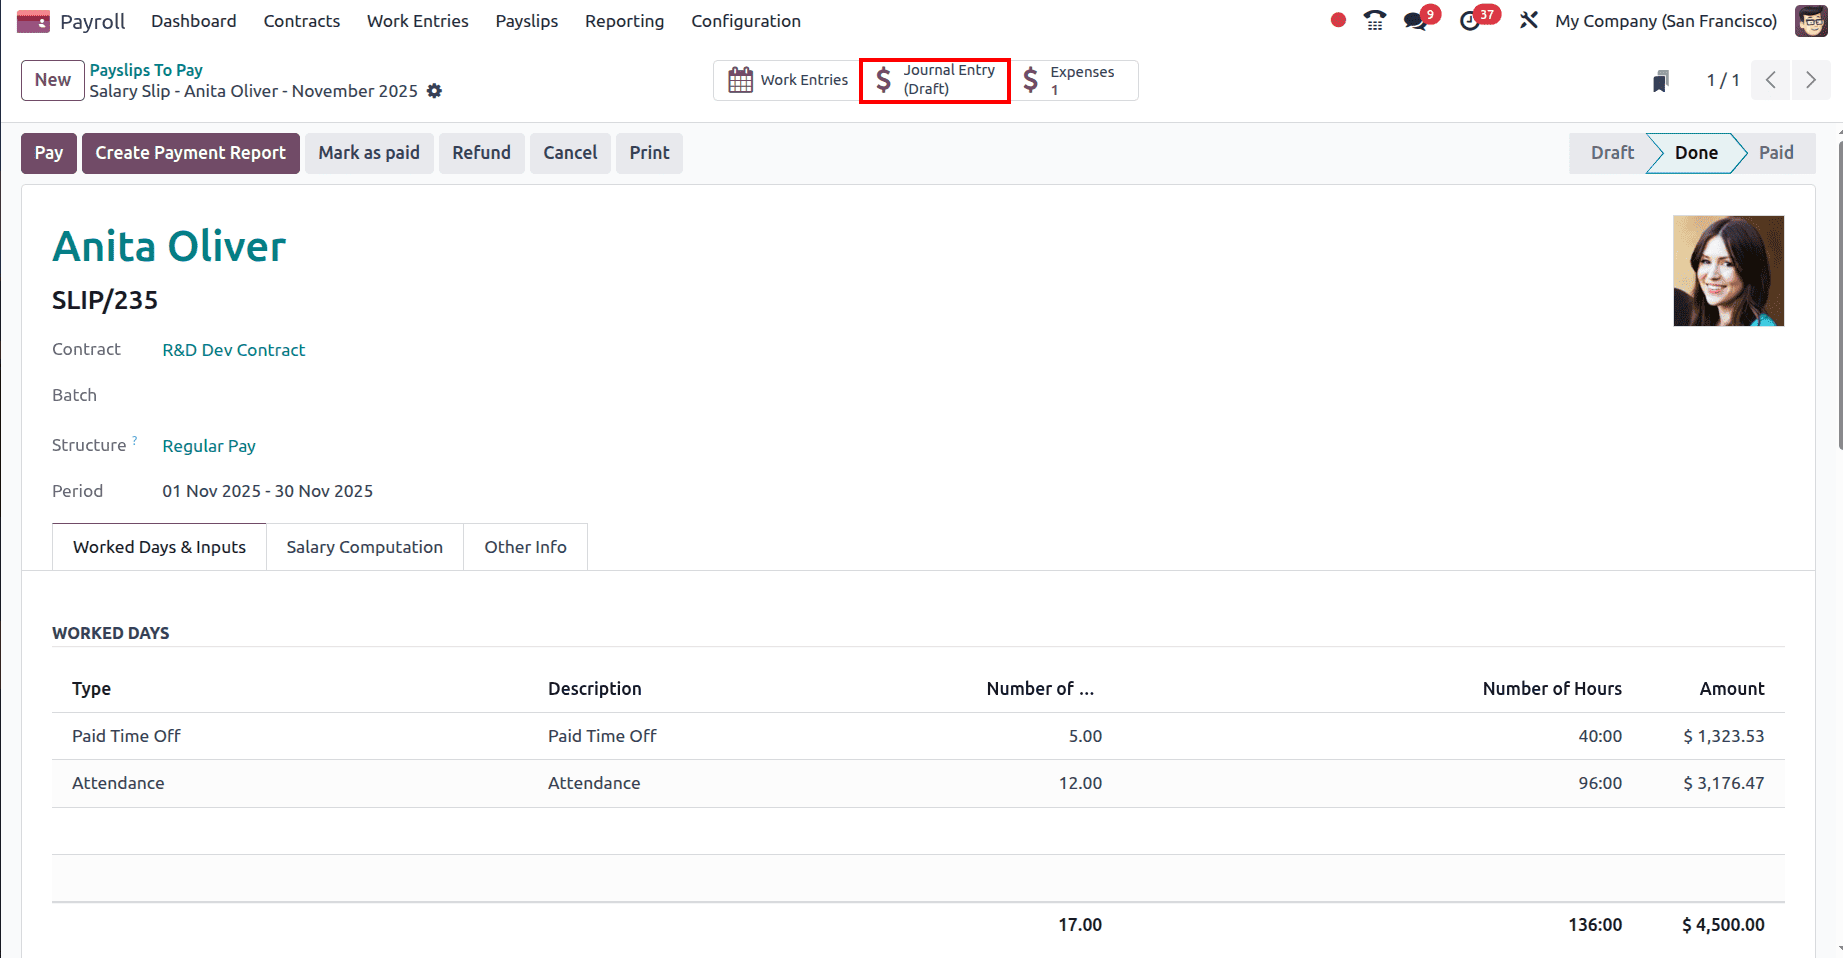
Click on the Post button to post the journal entry.
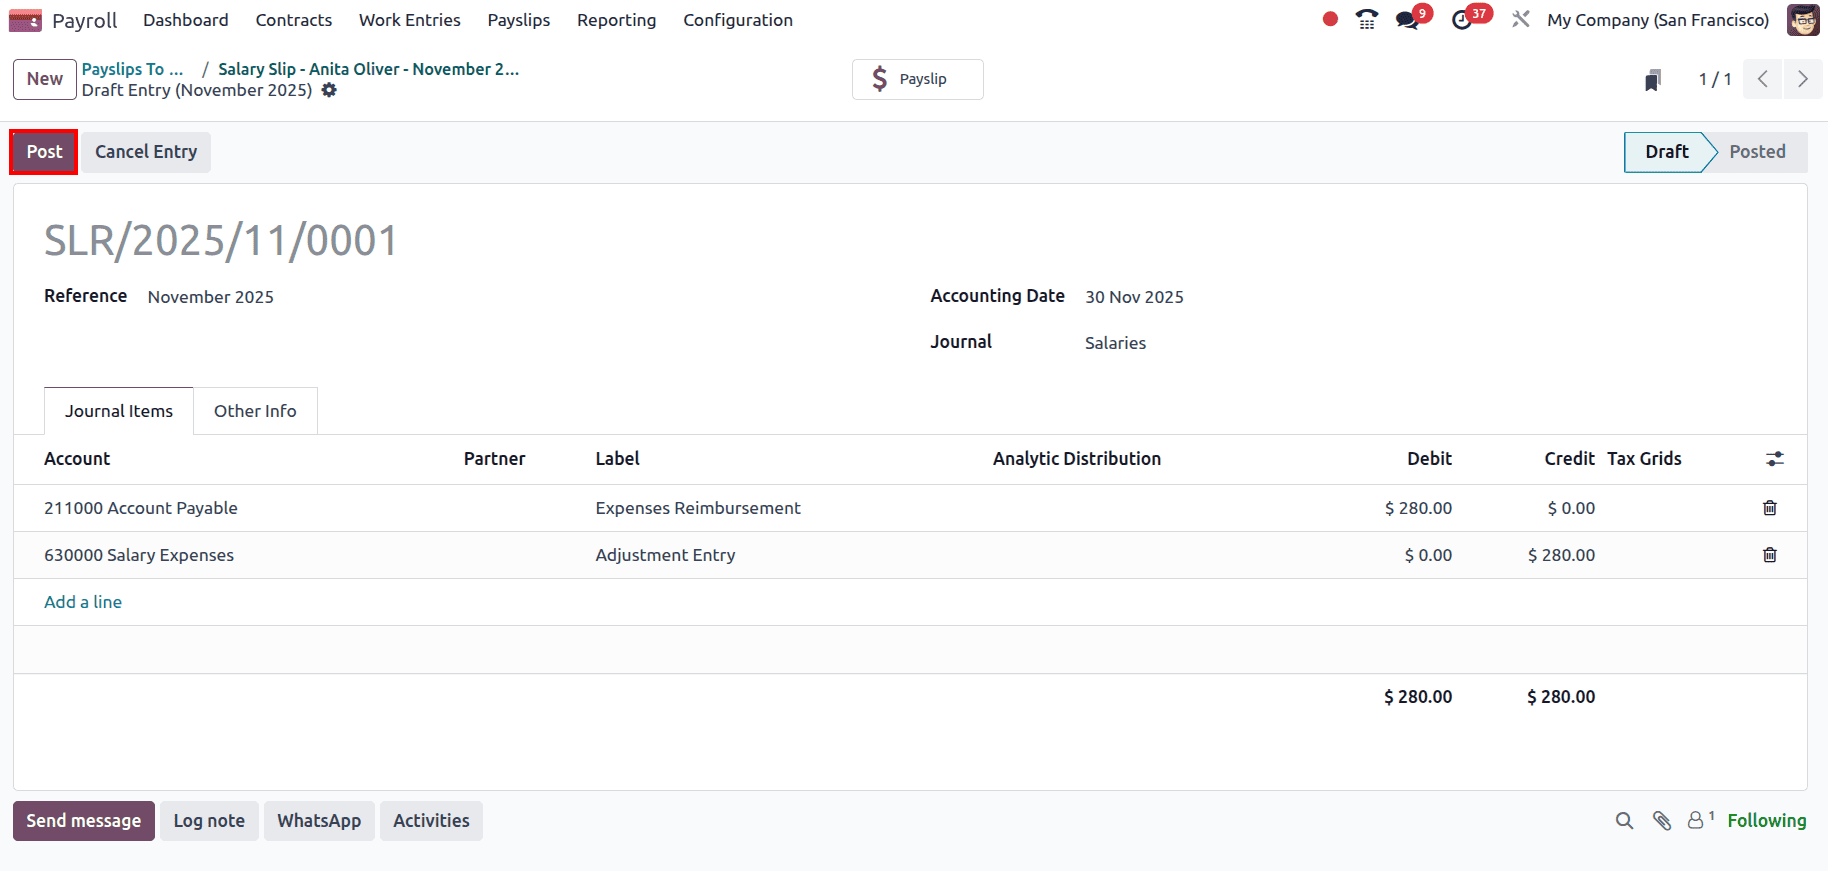
And the journal entry will be posted.
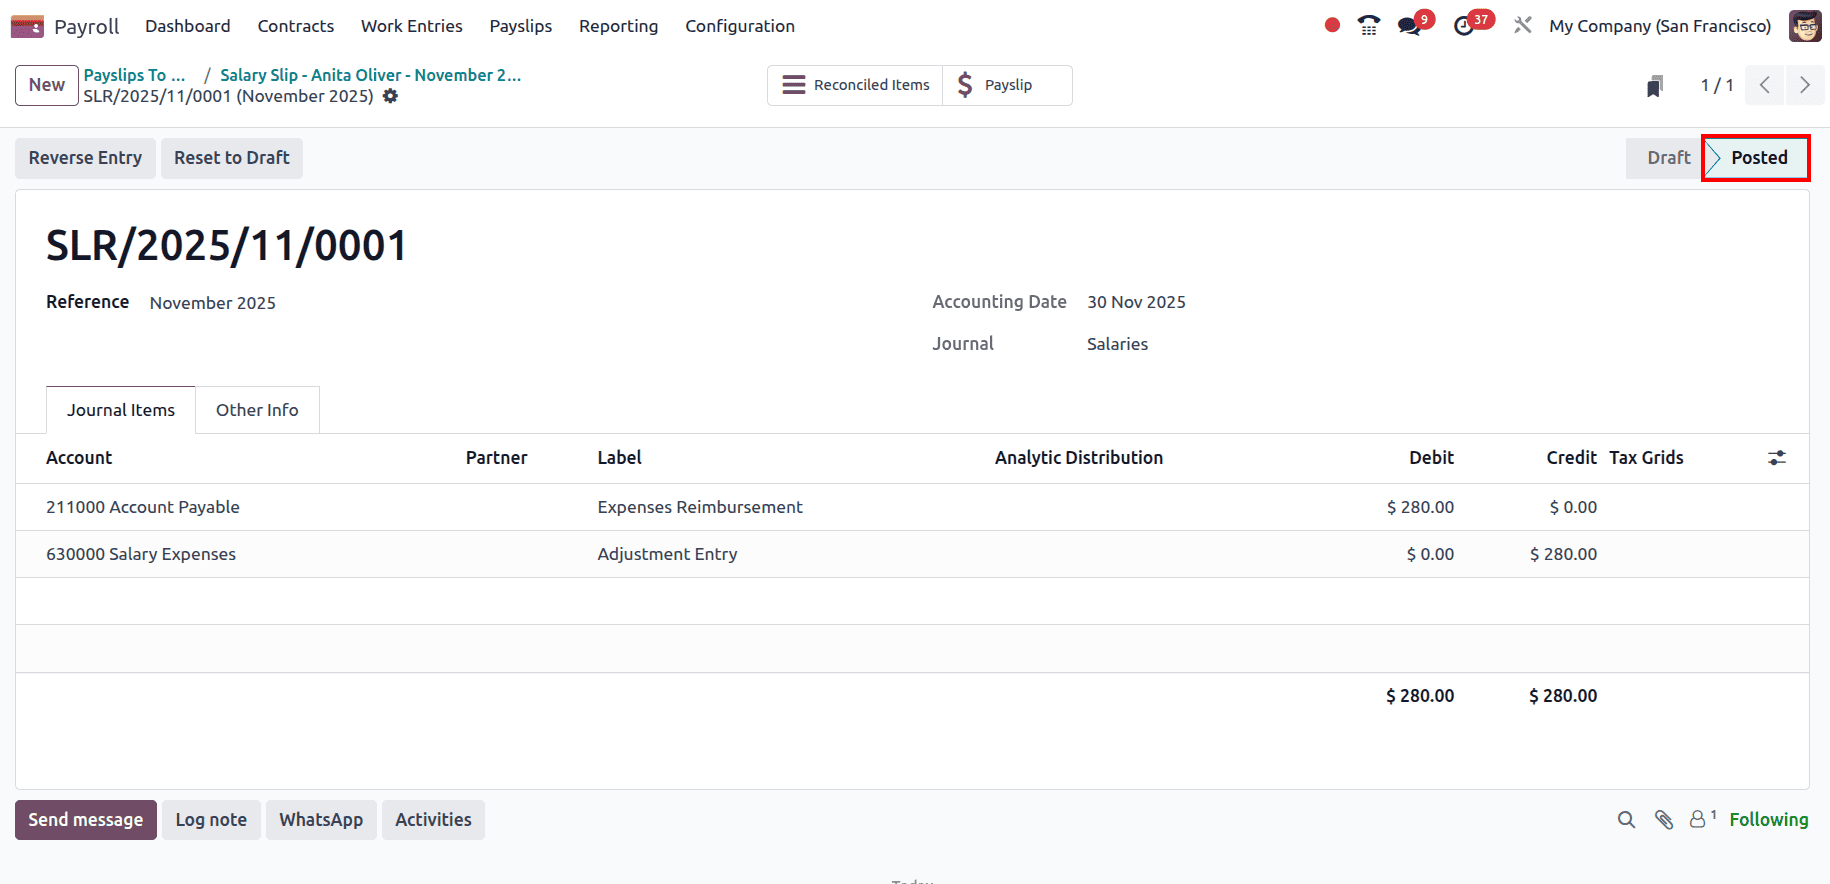
Now go back to Payslip and click on the Pay button to register the payment and pay the employee.
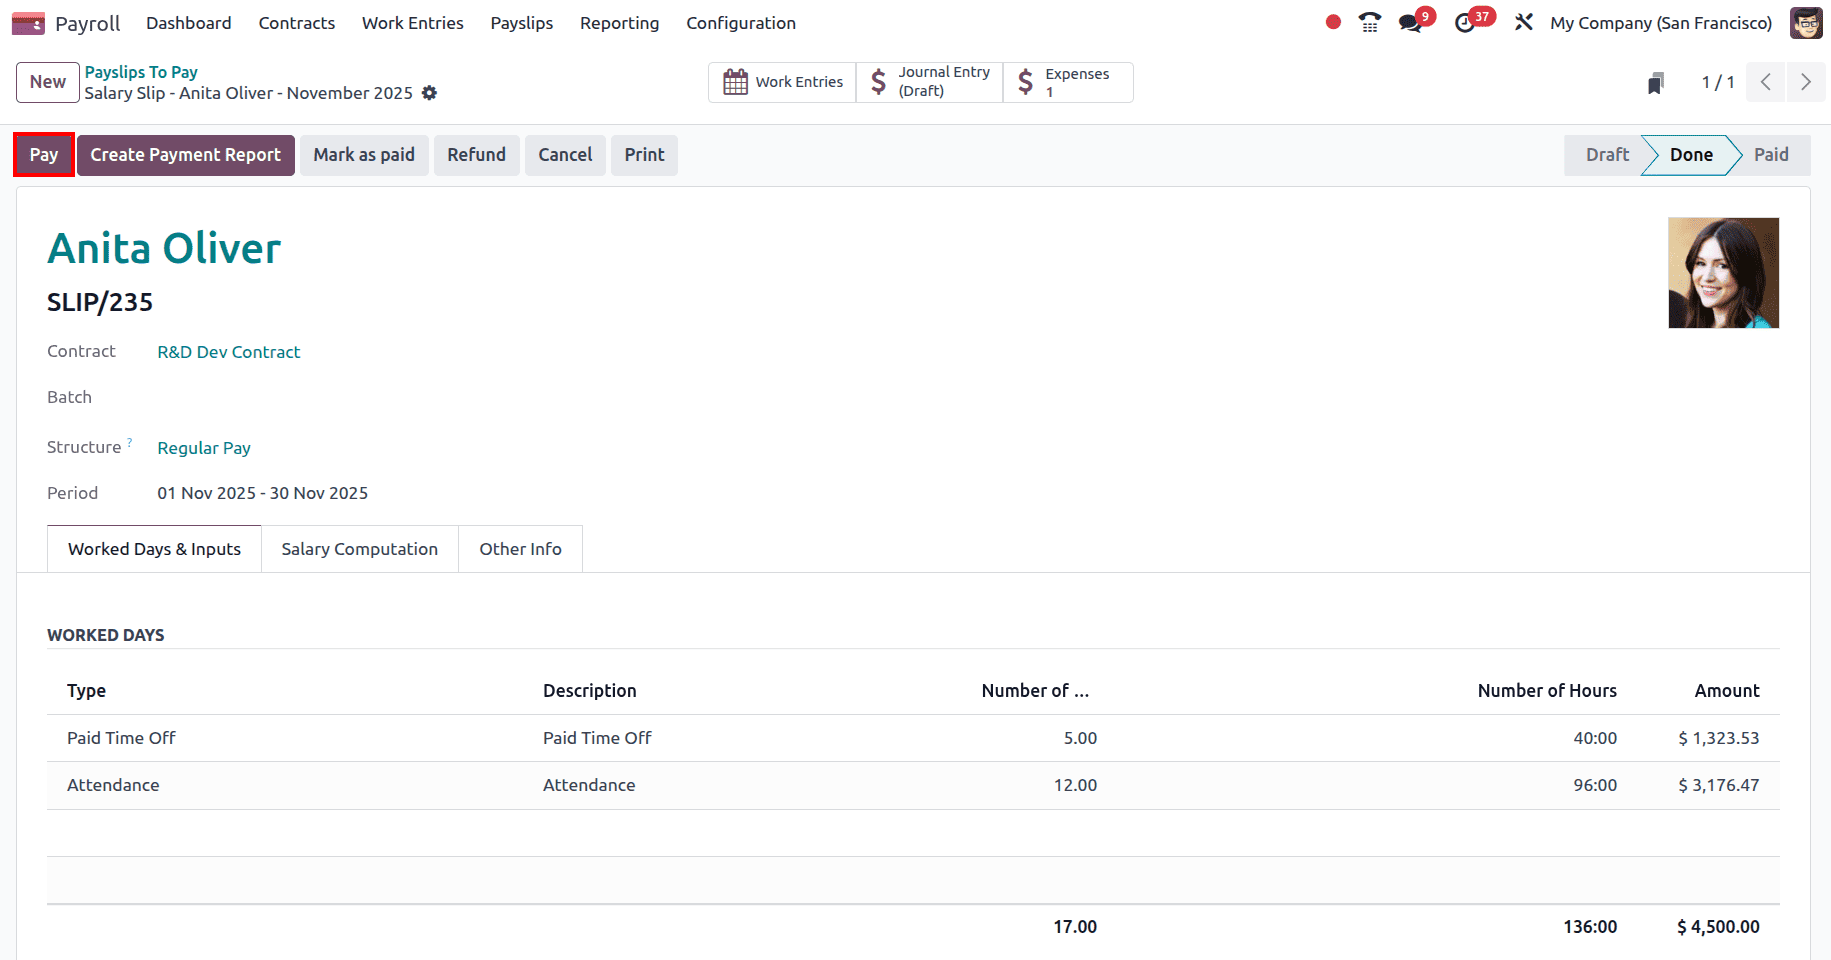
Or else, if the payslip has already been paid, click on the Marked as paid button to mark the payslip as paid.
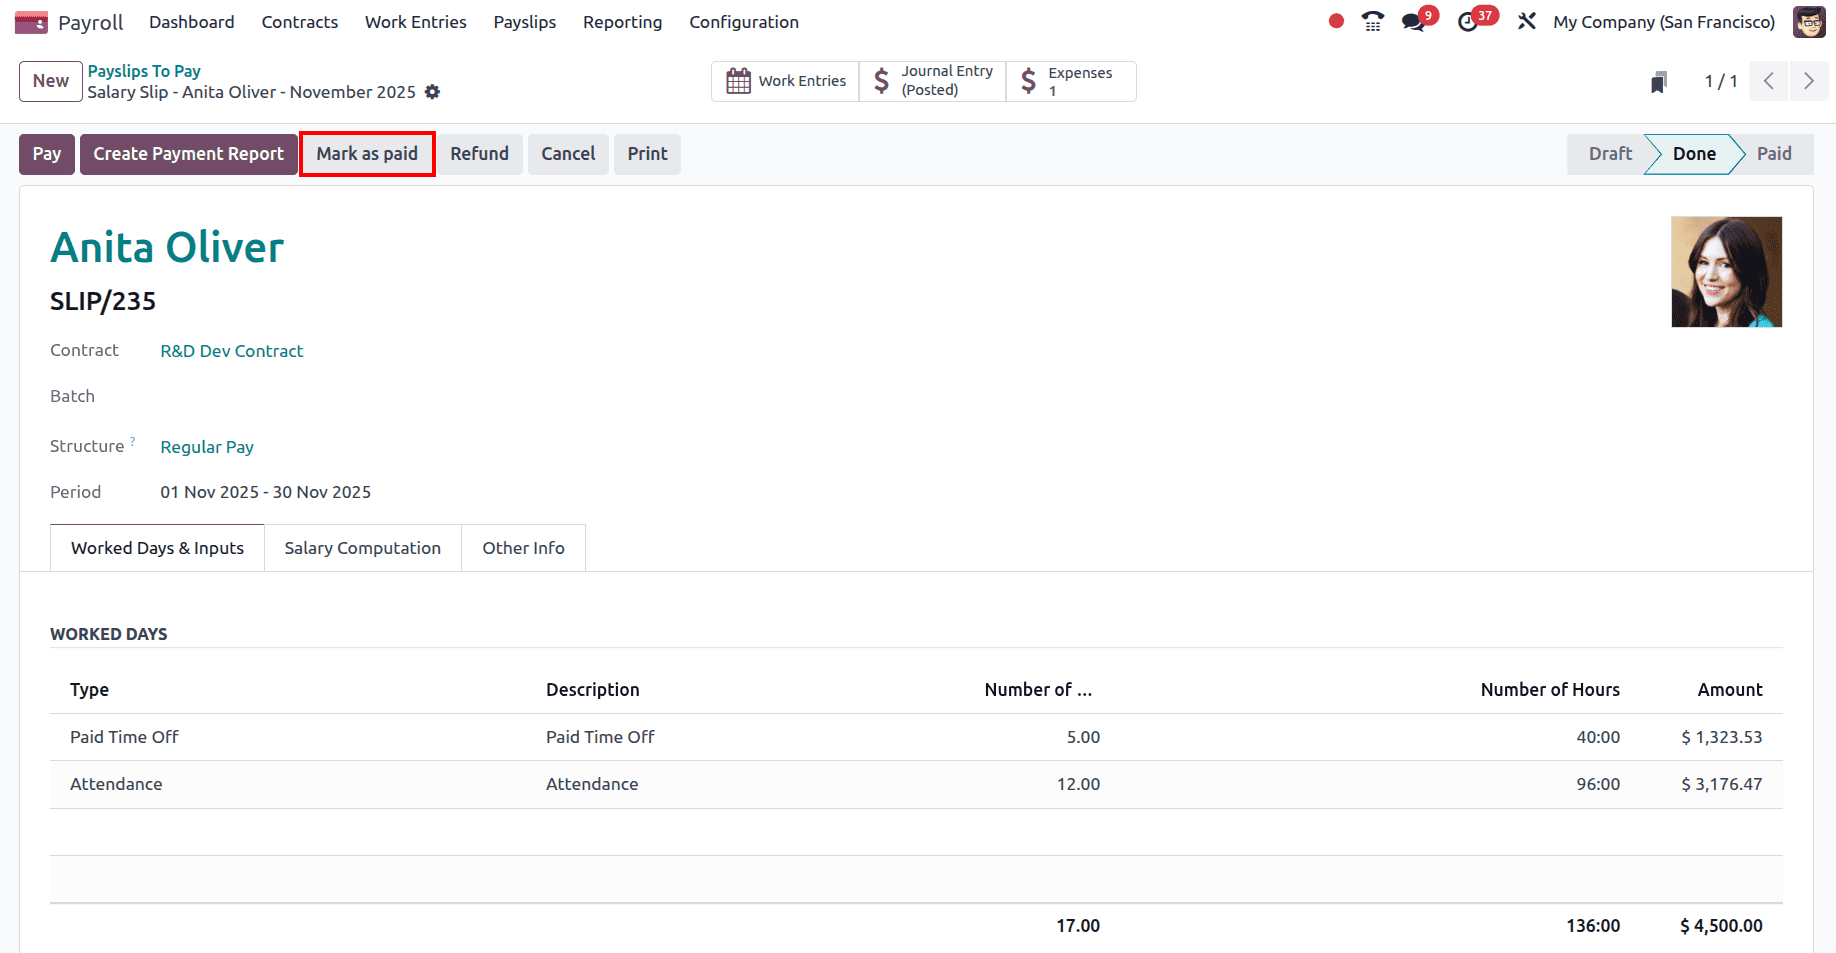
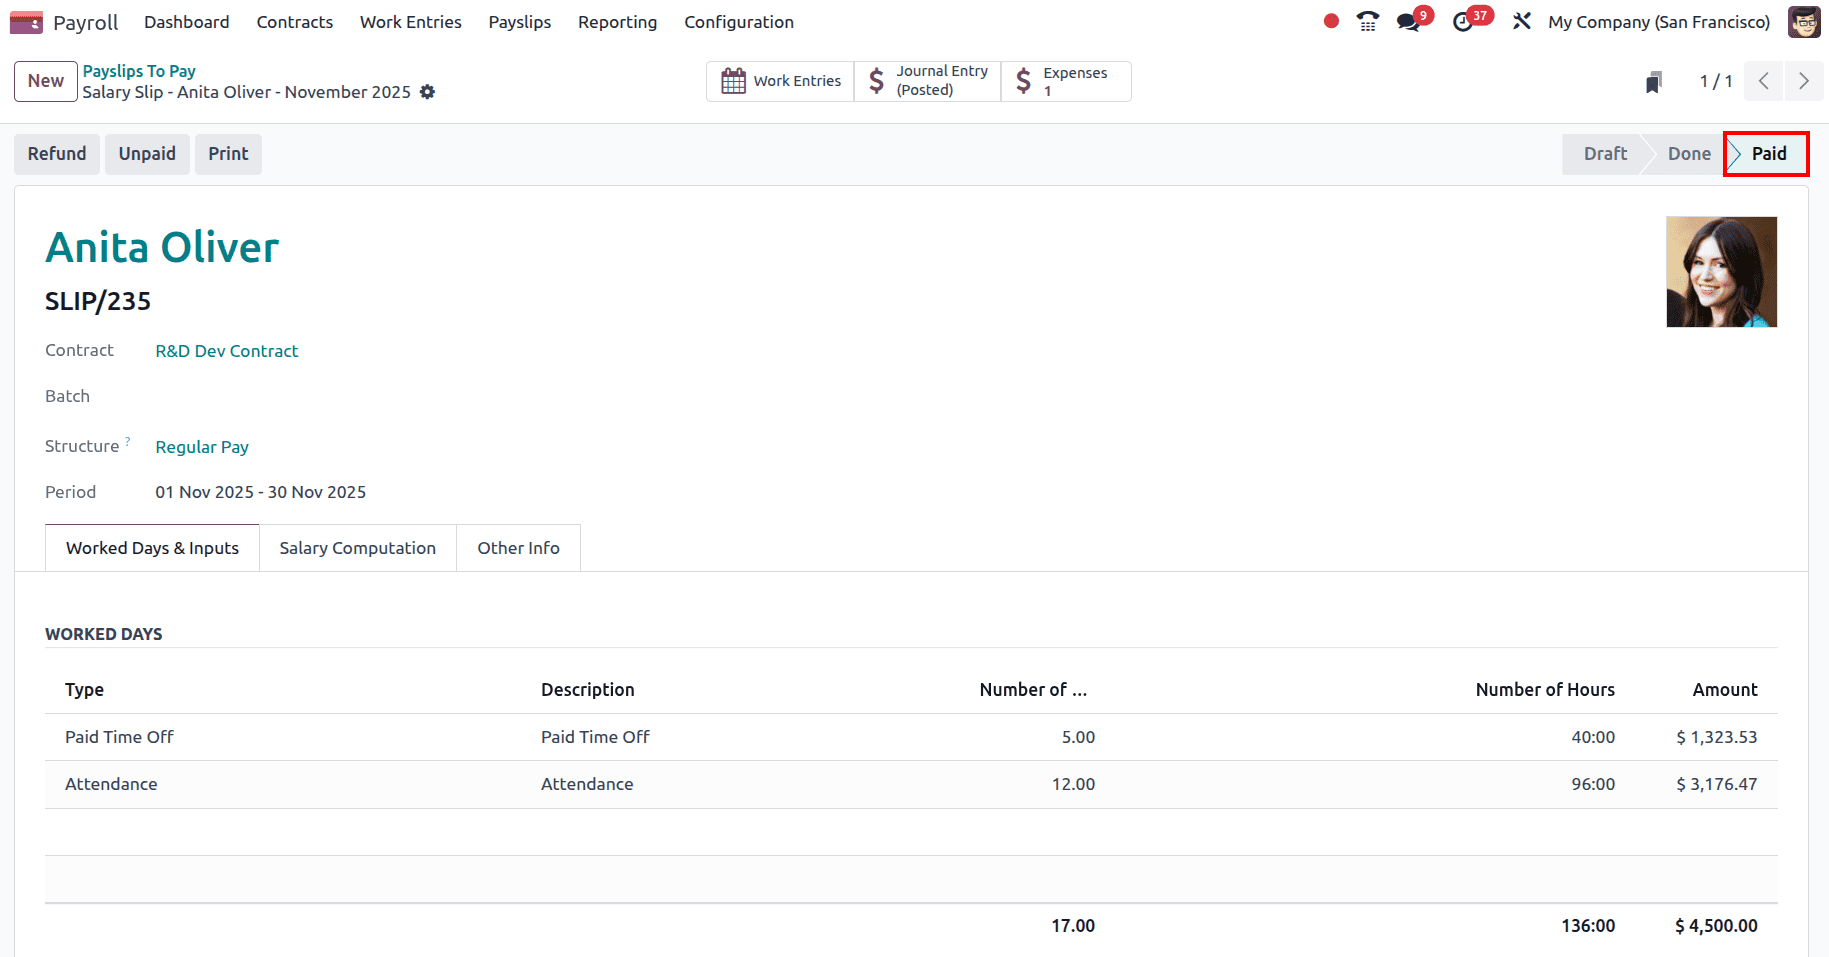
Here, in the payslip, it can be viewed that the payslip has been changed to the Paid state.
As seen, Reimbursing employee expenses in Odoo 18 is a smooth and organized process. Employees can submit their claims with receipts, managers can review and approve them, and finance teams can record and reimburse the amount with just a few clicks. By consolidating all steps into a single system, Odoo helps companies save time, reduce errors, and maintain clear financial records. It ensures that employees are reimbursed quickly and businesses stay in full control of their expense management workflow.
To read more about How to Manage Employee Expenses & Company Expenses in Odoo 17 Expense App, refer to our blog How to Manage Employee Expenses & Company Expenses in Odoo 17 Expense App.