In Odoo, we may want to perform some action to change the current record or group of records using the action menu button. This blog discusses adding a button inside the action menu and changing or updating the current record or group of records. With the help of the action menu button can perform the action to change for single records or multiple records. But the buttons inside the record will only affect the operations for the current records. In Odoo action, the button is shown in the form view and tree view. If we want to act for only one record, we can add a button inside the form view. Otherwise, we can add the button inside the tree view to act on multiple or selected records. For example, We can select multiple records in the tree view and see a delete button inside the action button, which can delete the selected various records. Another way is to open one record; we can see a delete button inside the action button, which can delete the current record.
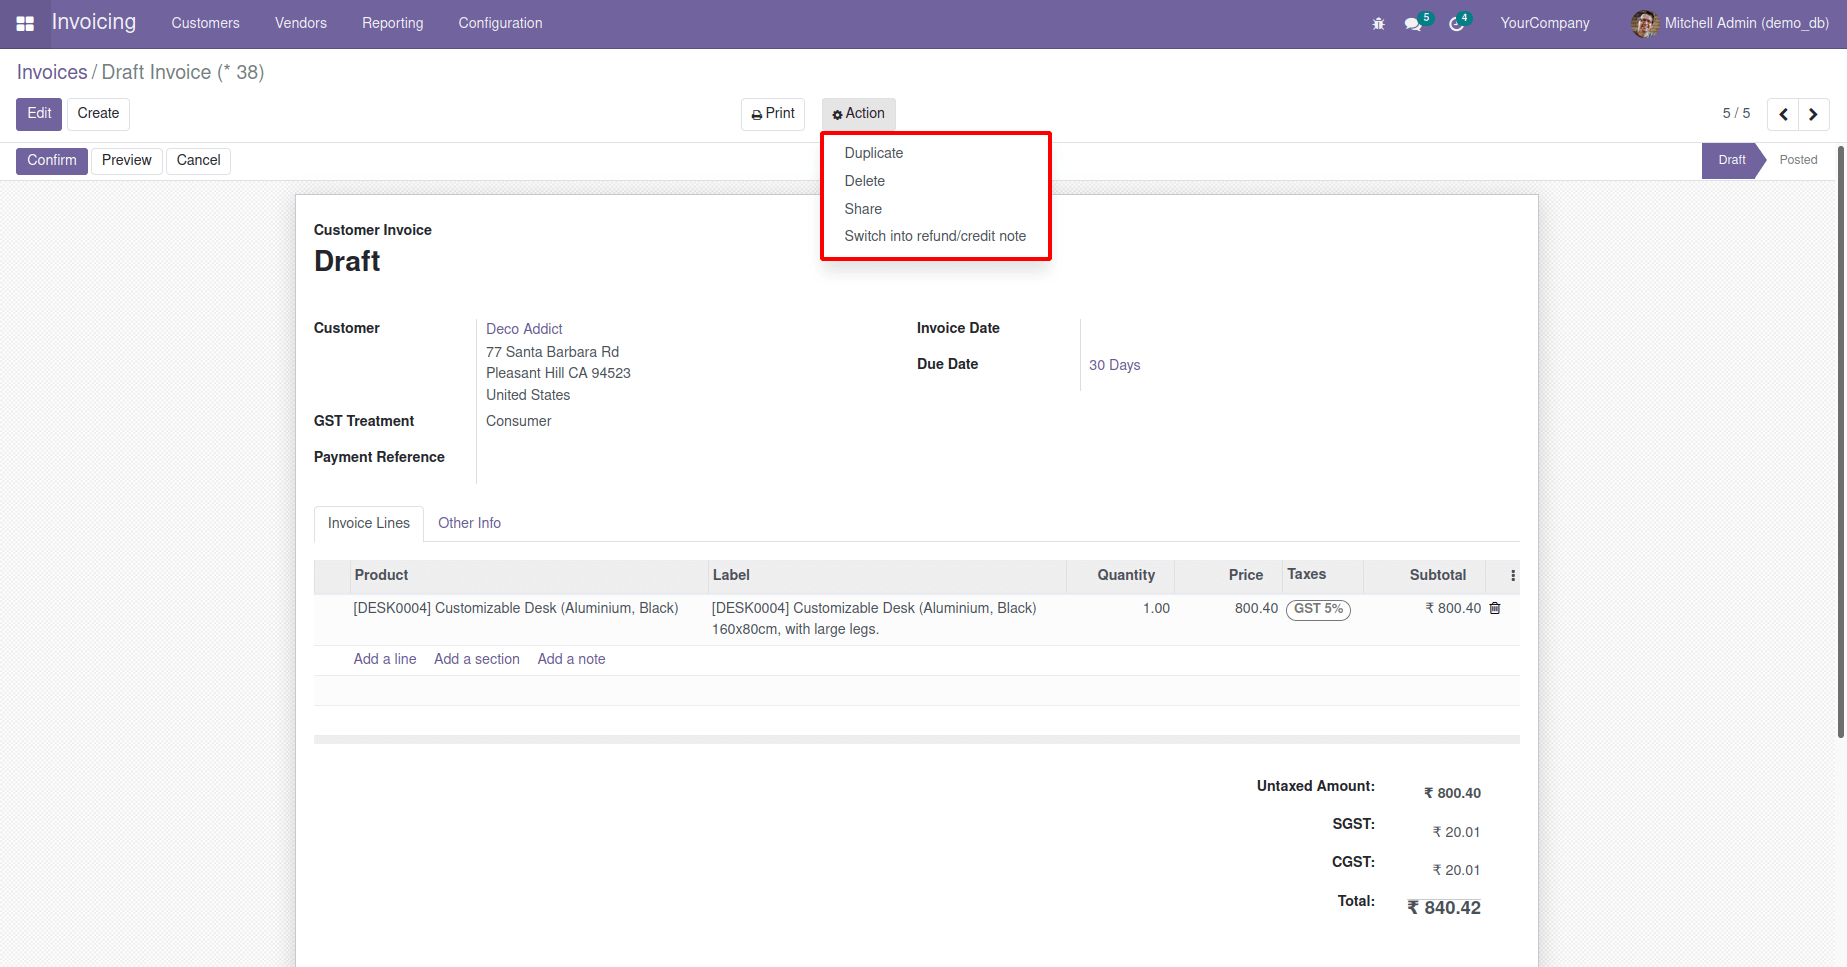
The below image contains the buttons inside the action button of Accounting > Customer Invoice form view.
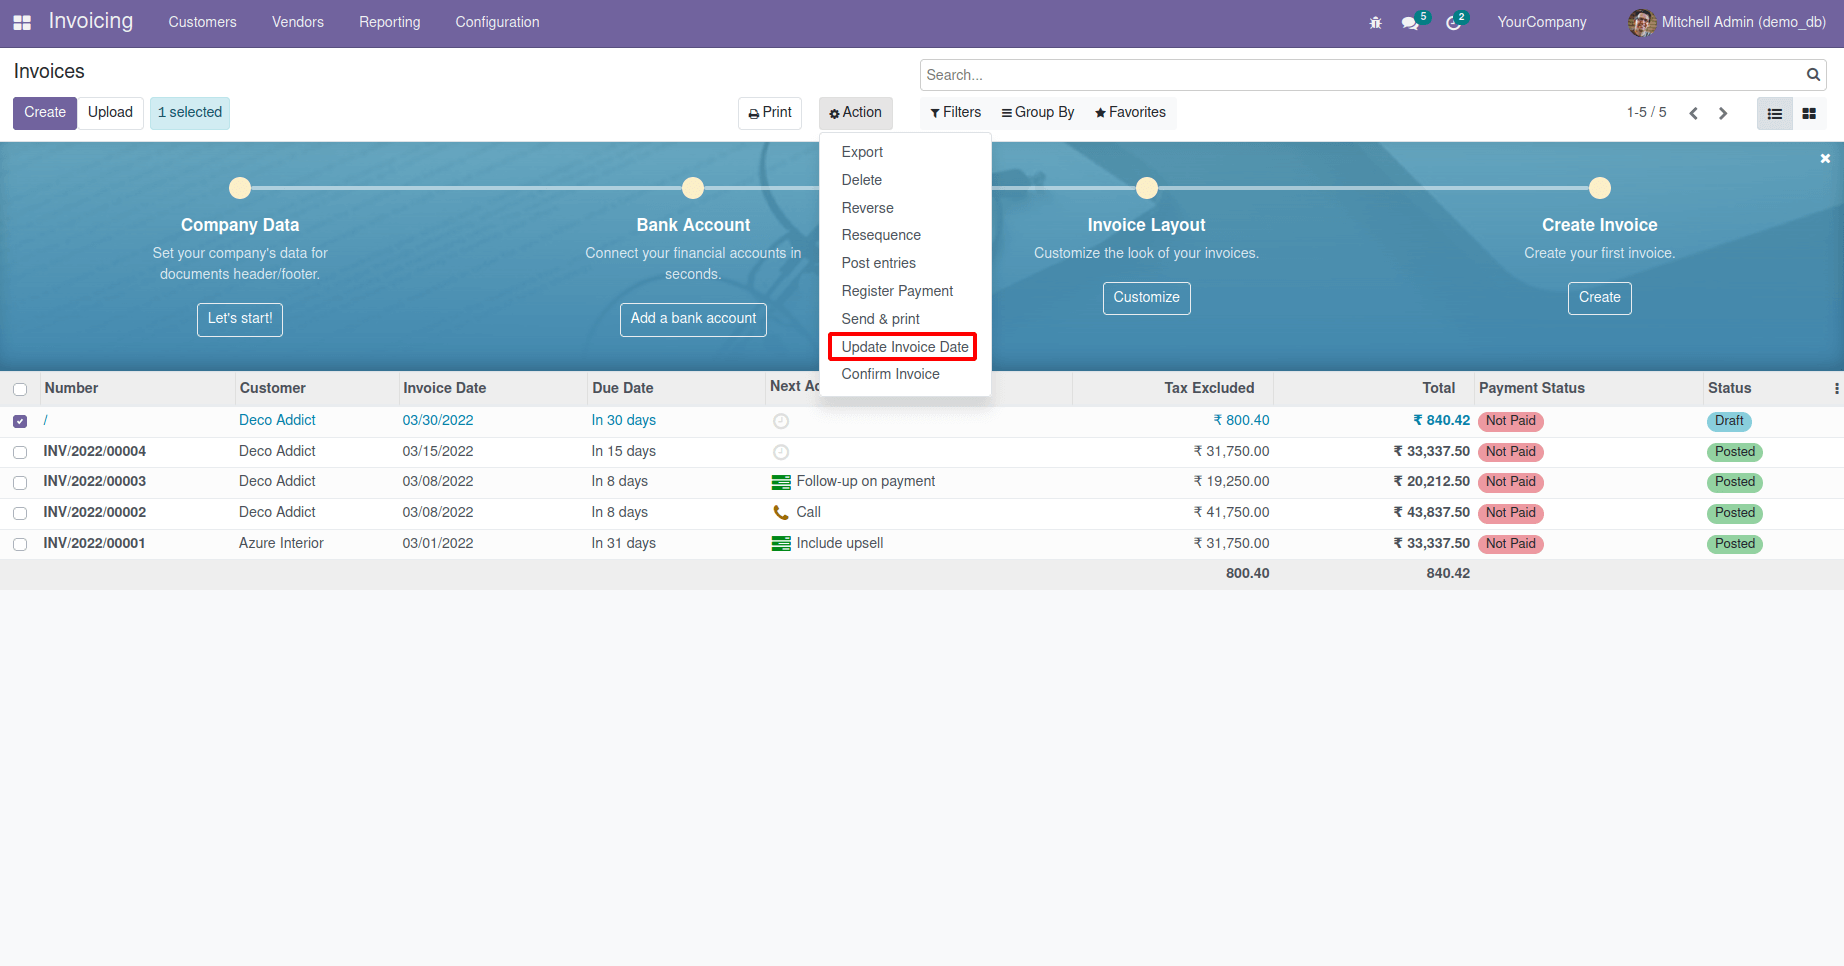
The below image contains the buttons inside the action button of Accounting > Invoice tree view.
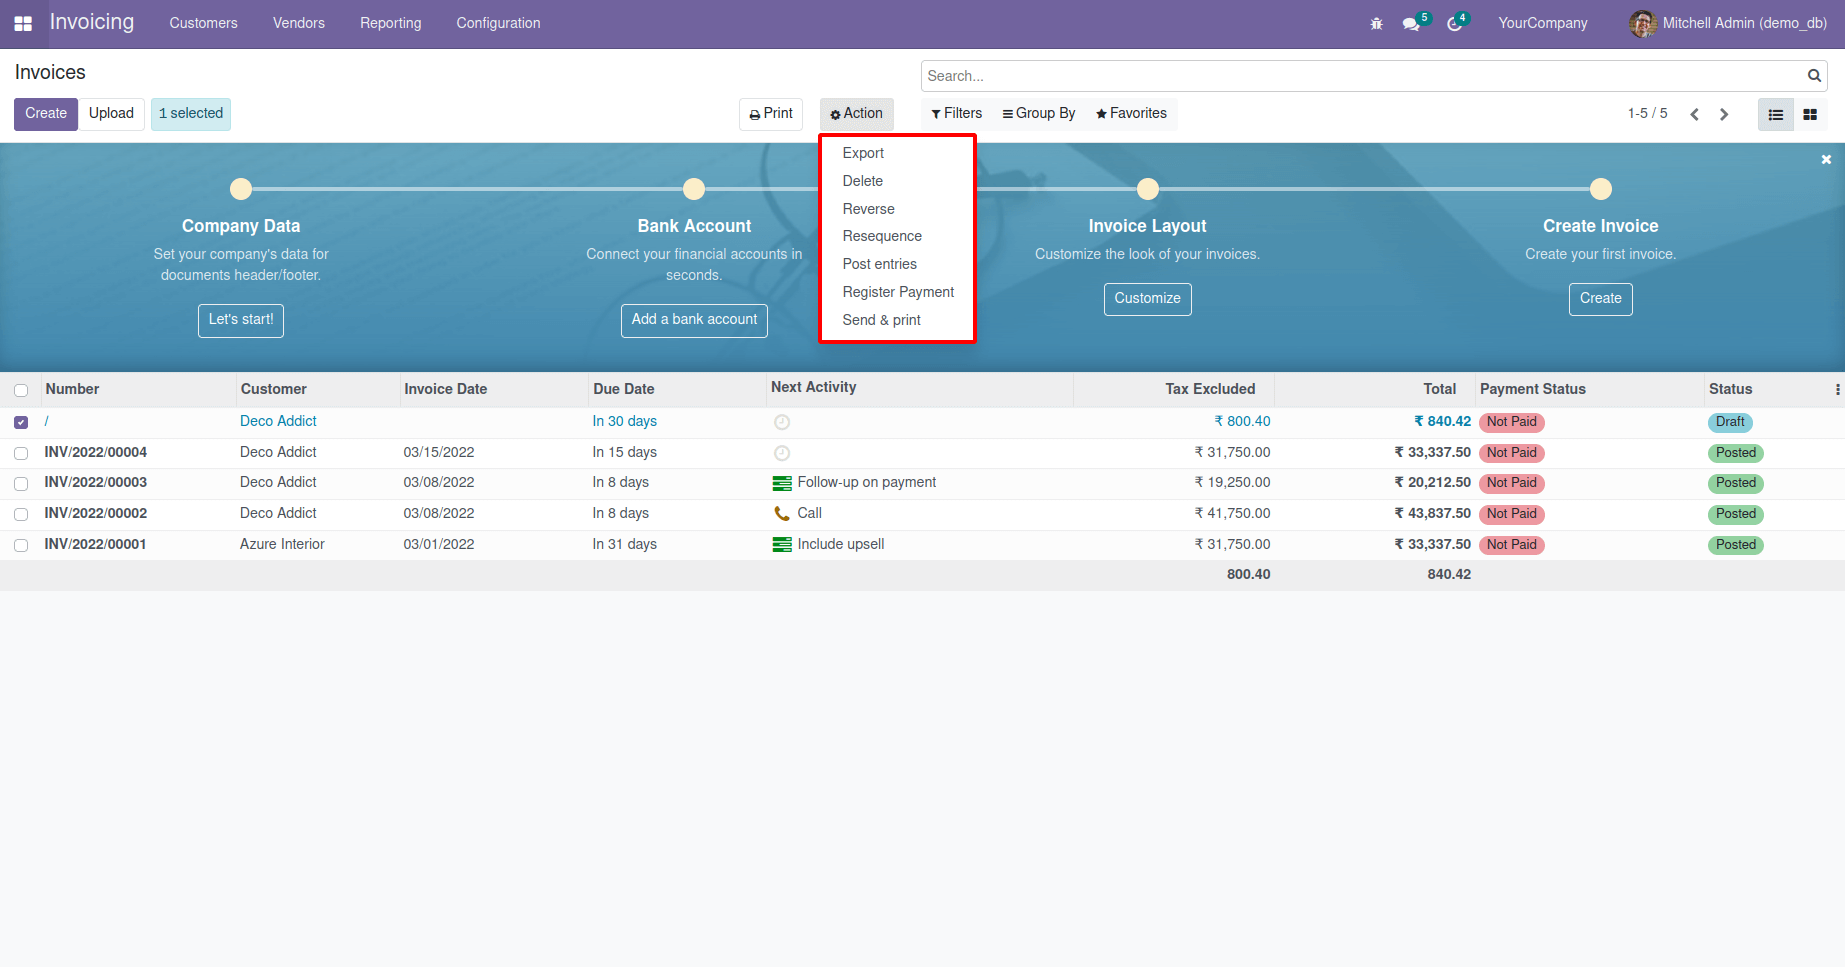
Here, we can see that some operations are only in the tree view and not in the form view. In this blog, I will be explaining how to add a new button inside the action menu button of the form view and tree view.
Here I am going to add a button inside the action button of the account.move form view, and while clicking that button, it will update the invoice date, and another one is 'Confirm Invoice' button. It will confirm the invoice and move it to 'Posted' state.
First, you need to add a function for when the invoice date is updated to today's date.
class AccountMoveInherit(models.Model):
   _inherit = 'account.move'
   def action_update_invoice_date(self):
       self.write({'invoice_date': fields.Date.today()})
Create a new XML record for server action,
1. Id
Record's in-database identifier
2. model (mandatory)
Odoo model gives which action to generate.
3. name (mandatory)
It is used to identify the server action description given. This is shown by,
Goto Settings > Technical > Actions > Server Actions.
4. model_id (mandatory)
It defines which is the linked action for the model.
5. ref (mandatory)
XML id or model to return corresponding records.
6. state (mandatory)
It defines the behavior of fields based on the state. It describes below,
- code: Using code argument to execute the python code.
- object_create: Using crud_model_id and fields_lines specification to create a new record.
- object_write: Using fields_lines specifications to update or change the current record
- multi: Using child_ids argument to execute several actions
7. binding_model_id (mandatory)
It defines which model is adding the action.
8. binding_model_id (mandatory)
It defines the view type for which action appears.
We need to add the code to add a button 'Update Invoice Date' inside the action menu of account.move form view or tree view.
   <record model="ir.actions.server" id="action_update_invoice_date">
       <field name="name">Update Invoice Date</field>
       <field name="model_id" ref="account.model_account_move"/>
       <field name="binding_model_id" ref="account.model_account_move"/>
       <field name="state">code</field>
       <field name="code">
           action = records.action_update_invoice_date()
       </field>
   </record>
We need to add the code to add a button 'Confirm Invoice' inside the action menu of account.move form view or tree view.
   <record model="ir.actions.server" id="action_confirm">
       <field name="name">Confirm Invoice</field>
       <field name="model_id" ref="account.model_account_move"/>
       <field name="binding_model_id" ref="account.model_account_move"/>
       <field name="state">code</field>
       <field name="code">
           action = records.action_post()
       </field>
   </record>
It is like a regular activity, but it has additional binding_model_id, binding_view_types fields. In this model, we are adding a button.
Here the binding_model is account.move. So this action will be bound to the account.move model, and it will show inside the form and tree view because we didn't add the binding_view_types.
You can change the binding_views to only form view to display the button in the account.move.
<field name="binding_view_types">form</field>
You can change the binding_views to only tree view to display the button in the account.move.
<field name="binding_view_types">list</field>
You can change the binding_views to tree view and form view to view the button in both form and tree view of account.move.
<field name="binding_view_types">list,form</field>
This button is used to Update Invoice Date inside the account.move form view.
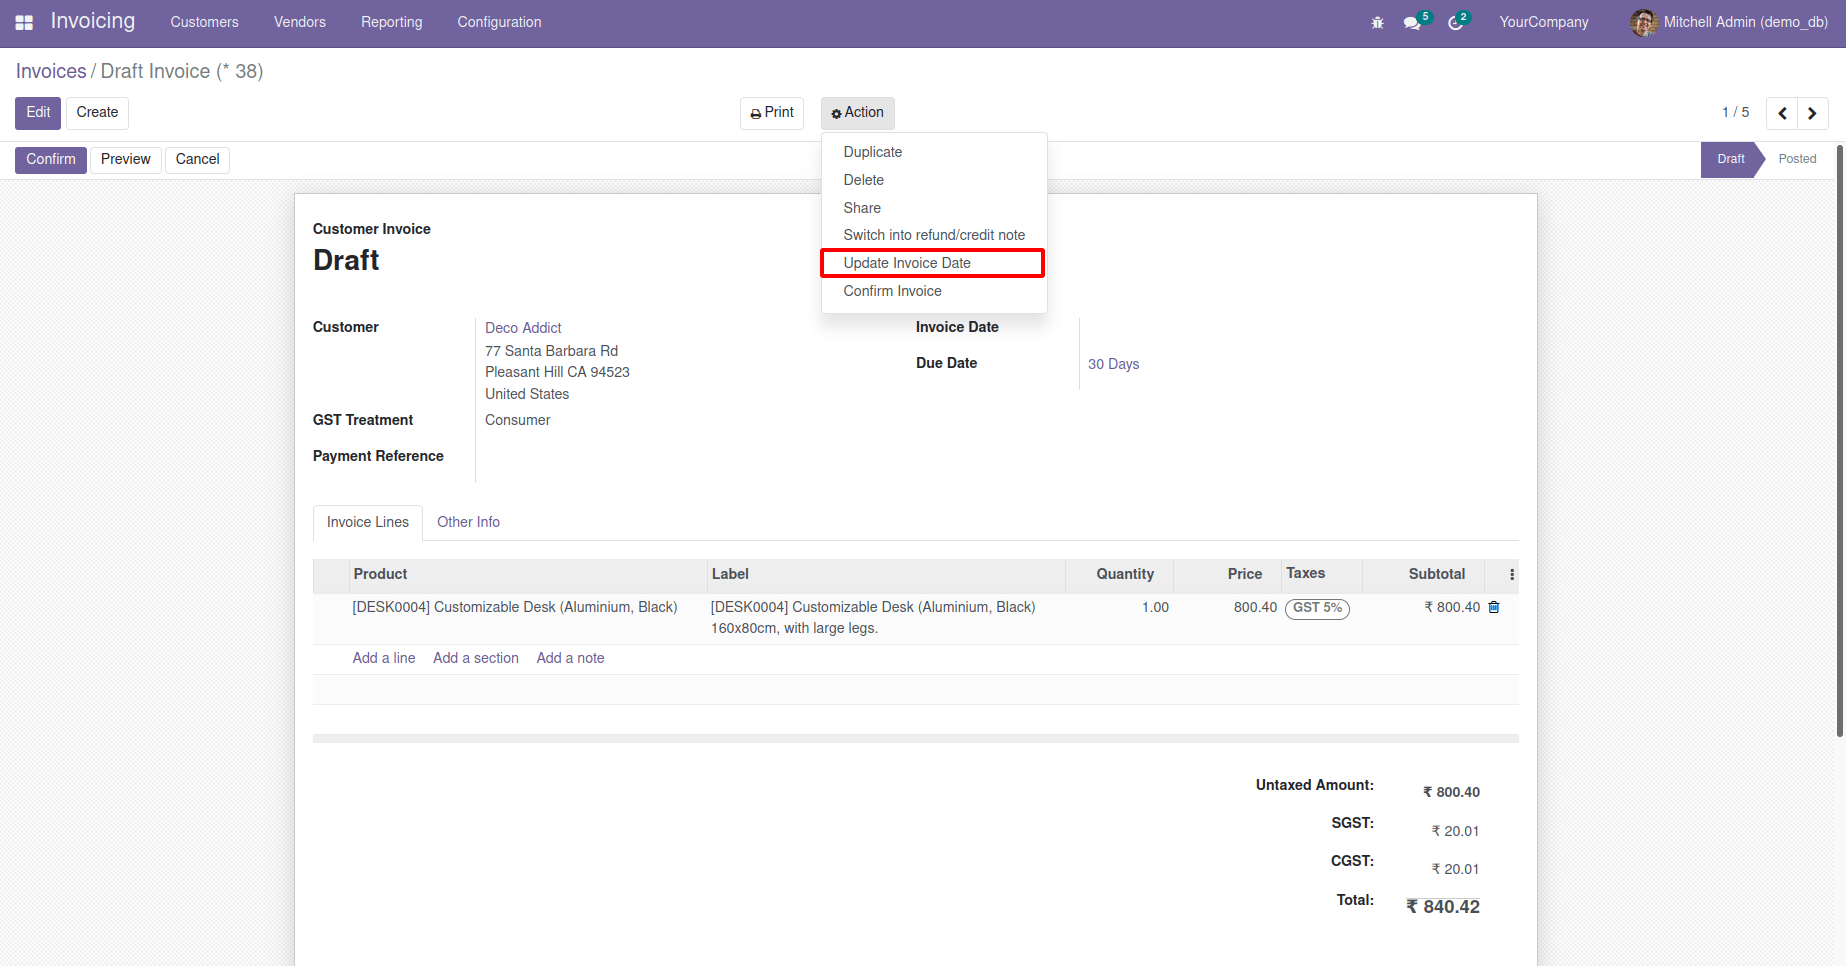
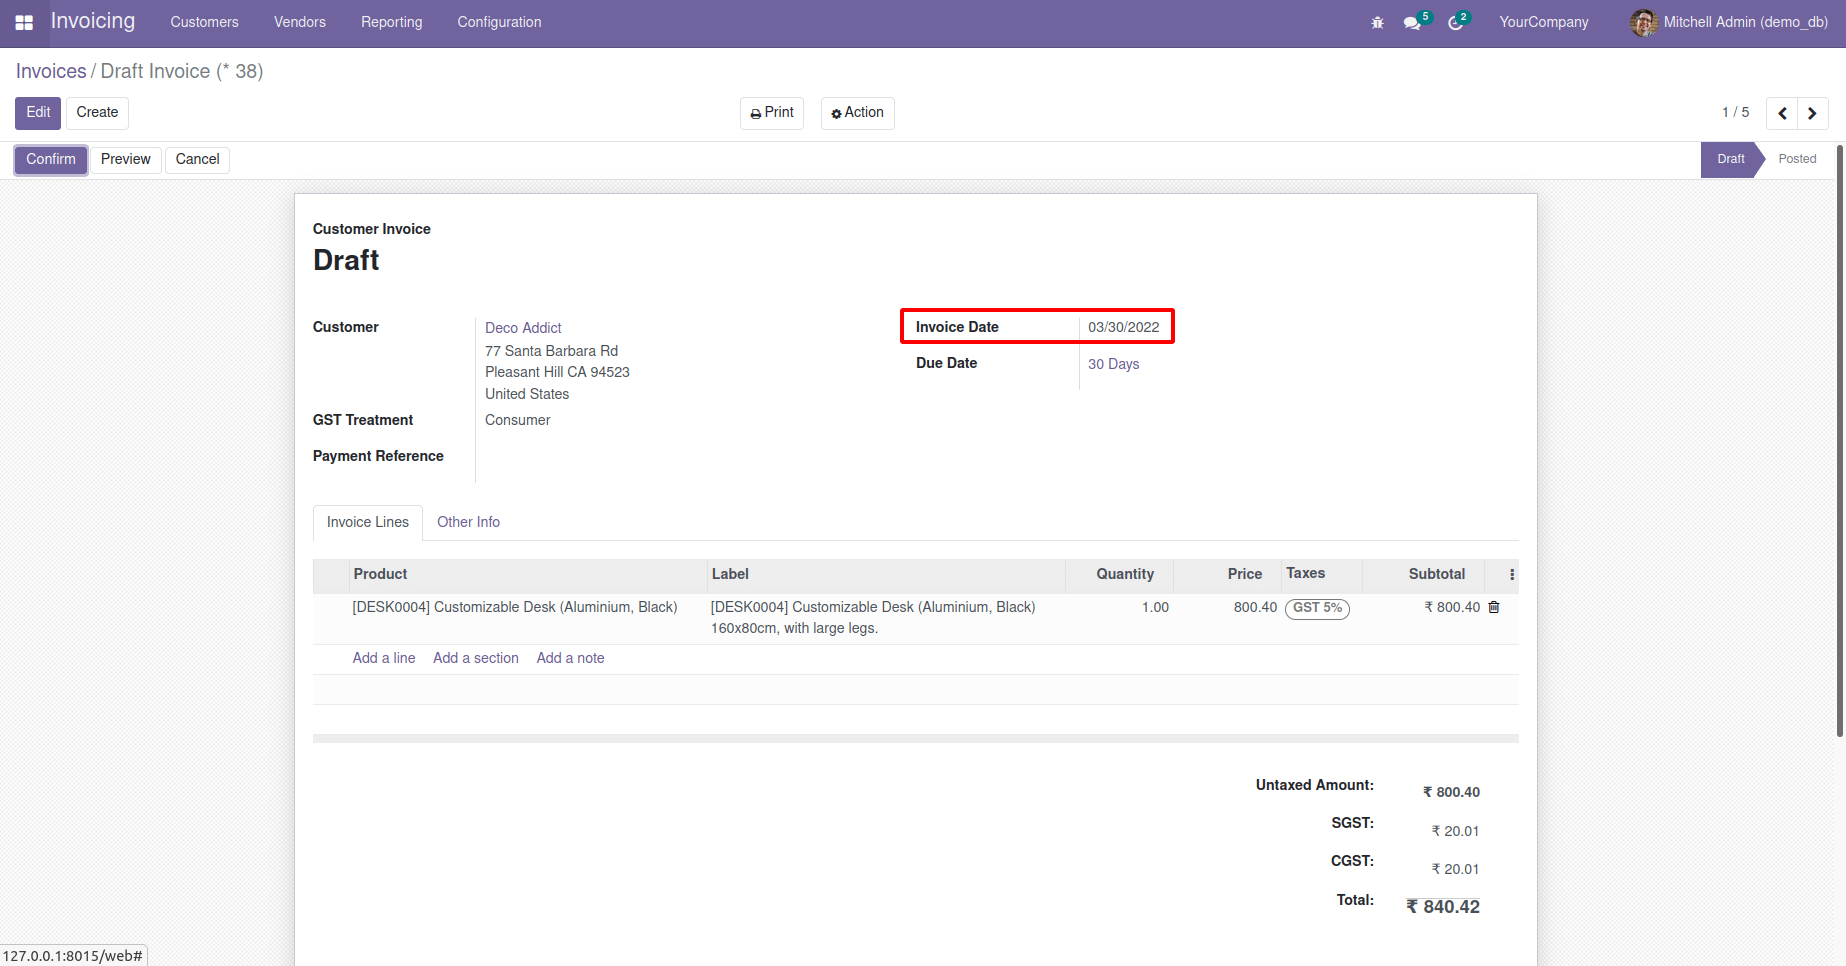
Click on the button 'Update Invoice Date'. Then we can see the ‘Invoice Date’ is updated.
It has been defined to add a button 'Update Invoice Date' inside the tree view.
<record model="ir.actions.server" id="action_update_invoice_date">
   <field name="name">Update Invoice Date</field>
   <field name="model_id" ref="account.model_account_move"/>
   <field name="binding_model_id" ref="account.model_account_move"/>
   <field name="state">code</field>
   <field name="code">
       action = records.action_update_invoice_date()
   </field>
</record>
This button is used to Update the Invoice Date inside the account.move tree view.
This button is used to Confirm the Invoice inside the account.move form view.
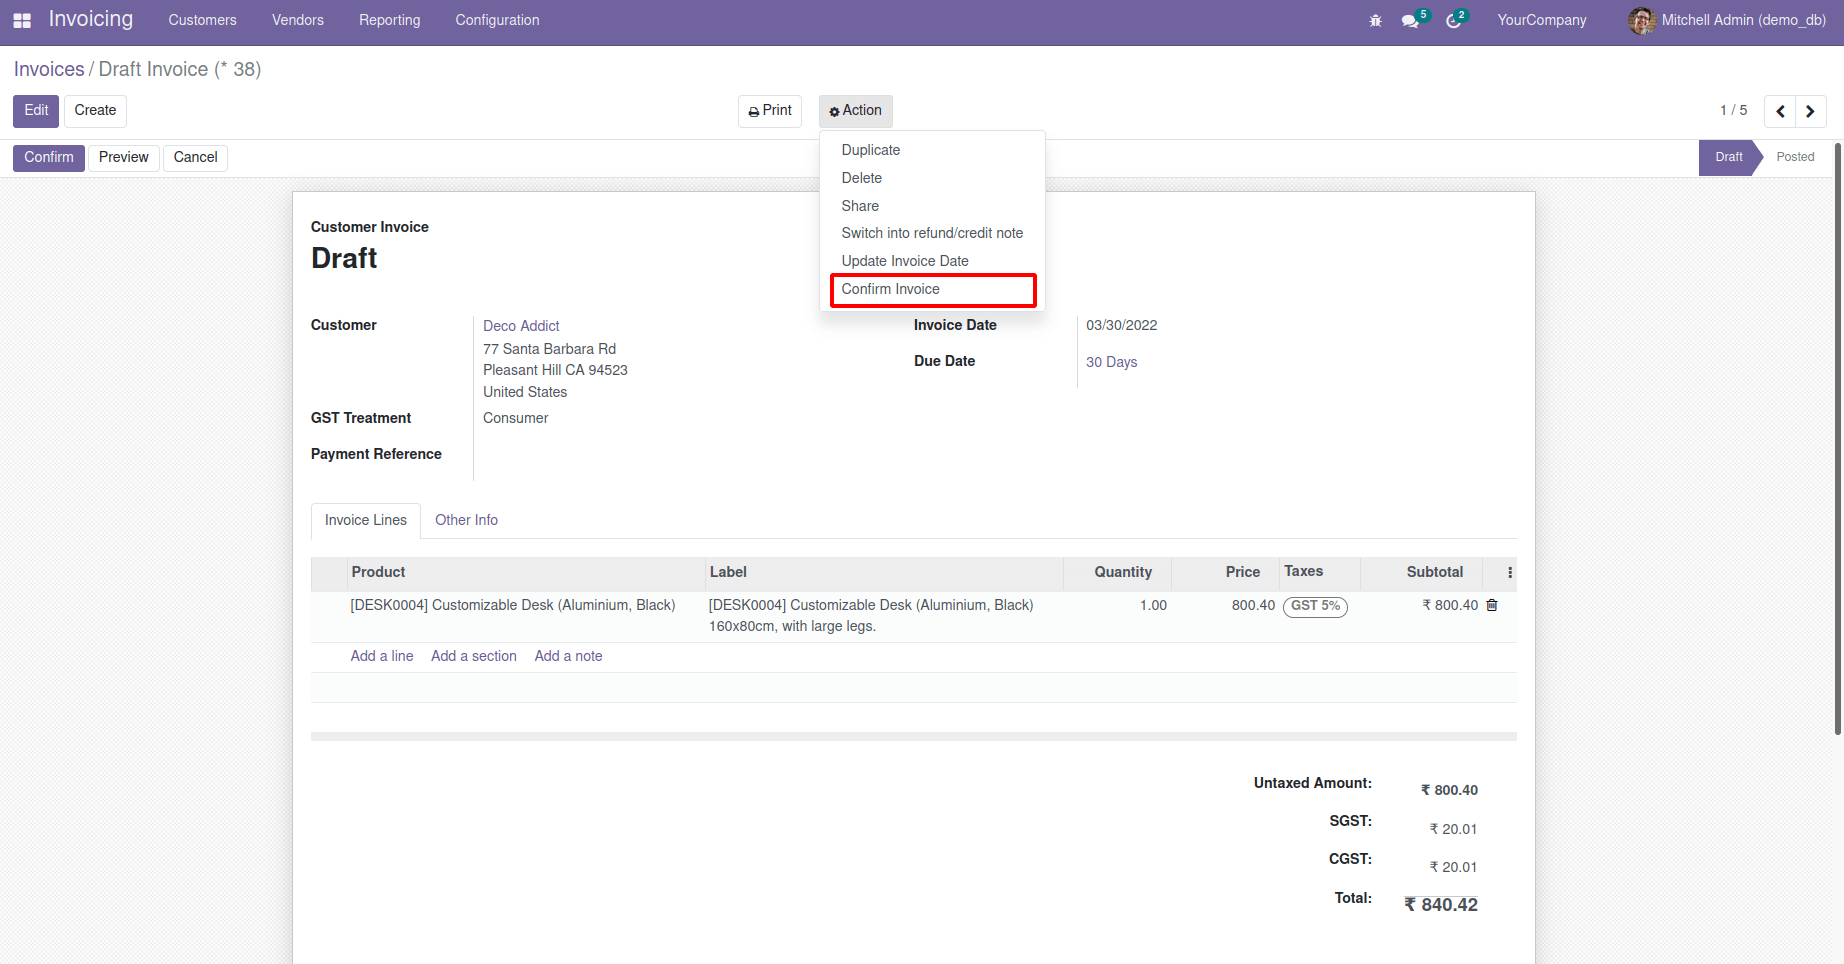
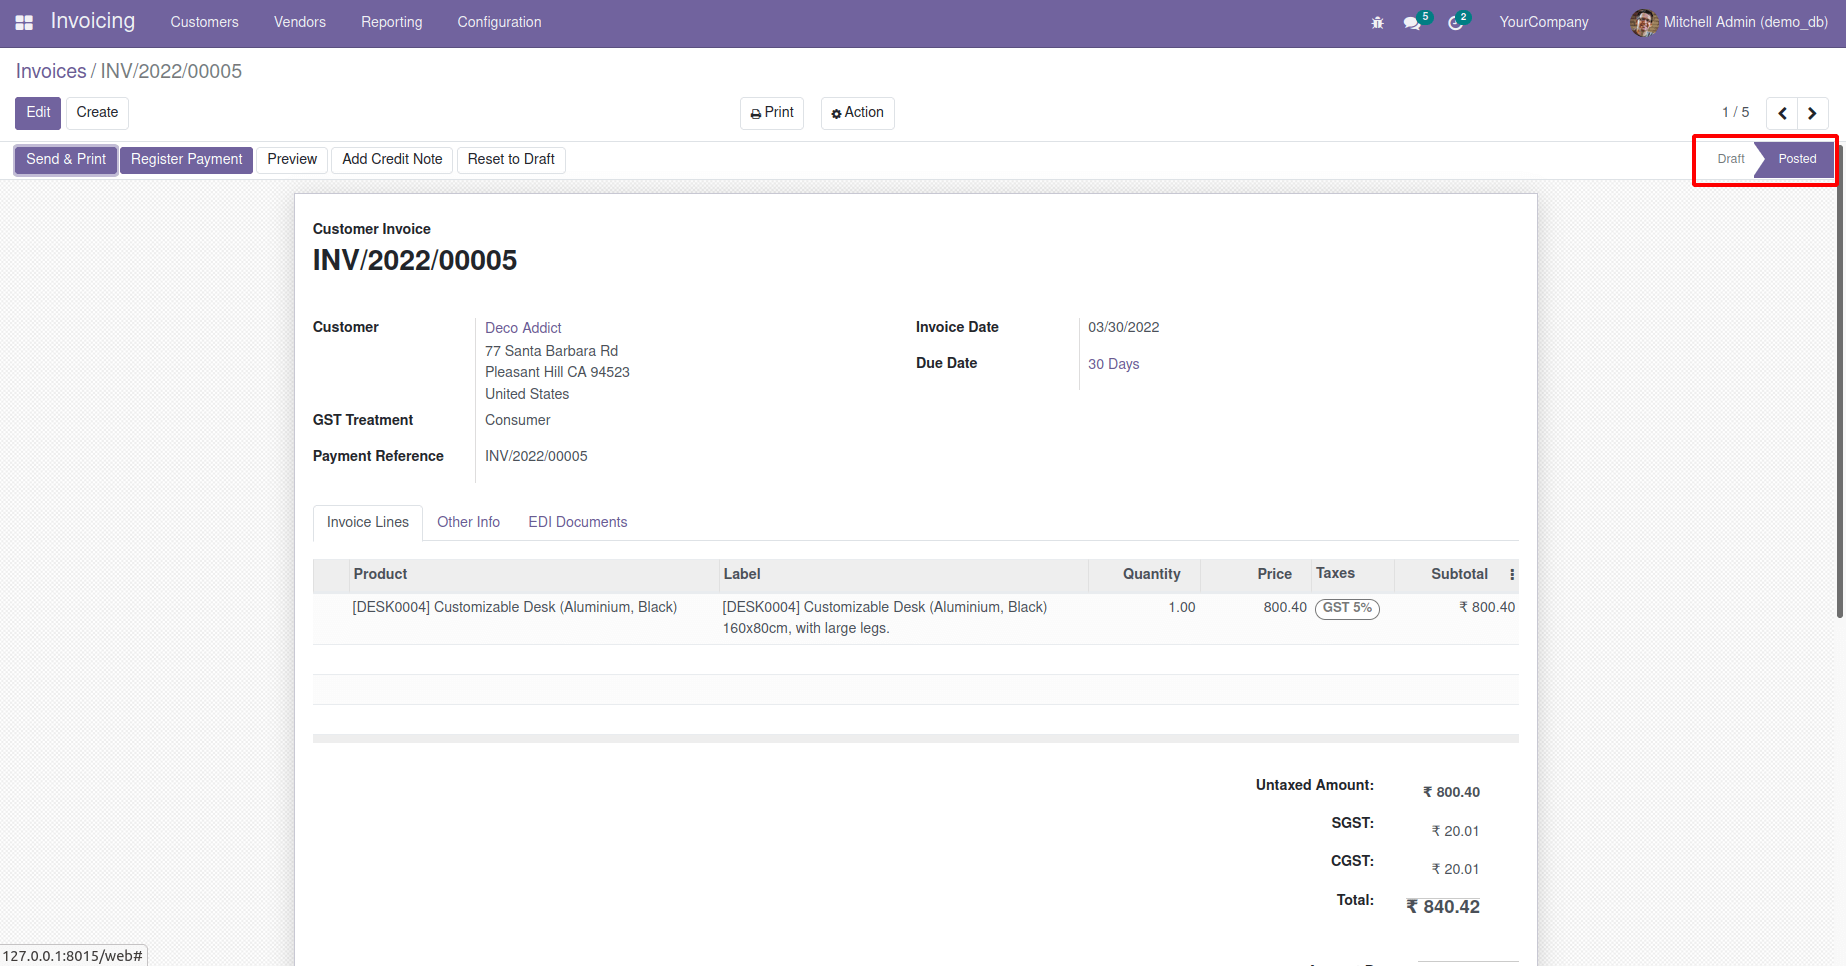
Click on the button 'Confirm Invoice'. Then we can see the invoice is confirmed and moved to 'Posted' state.
It has been defined to add a button 'Confirm Invoice' inside the tree view.
<record model="ir.actions.server" id="action_confirm">
   <field name="name">Confirm Invoice</field>
   <field name="model_id" ref="account.model_account_move"/>
   <field name="binding_model_id" ref="account.model_account_move"/>
   <field name="state">code</field>
   <field name="code">
       action = records.action_post()
   </field>
</record>
This button is used to Confirm the Invoice inside the account.move tree view.
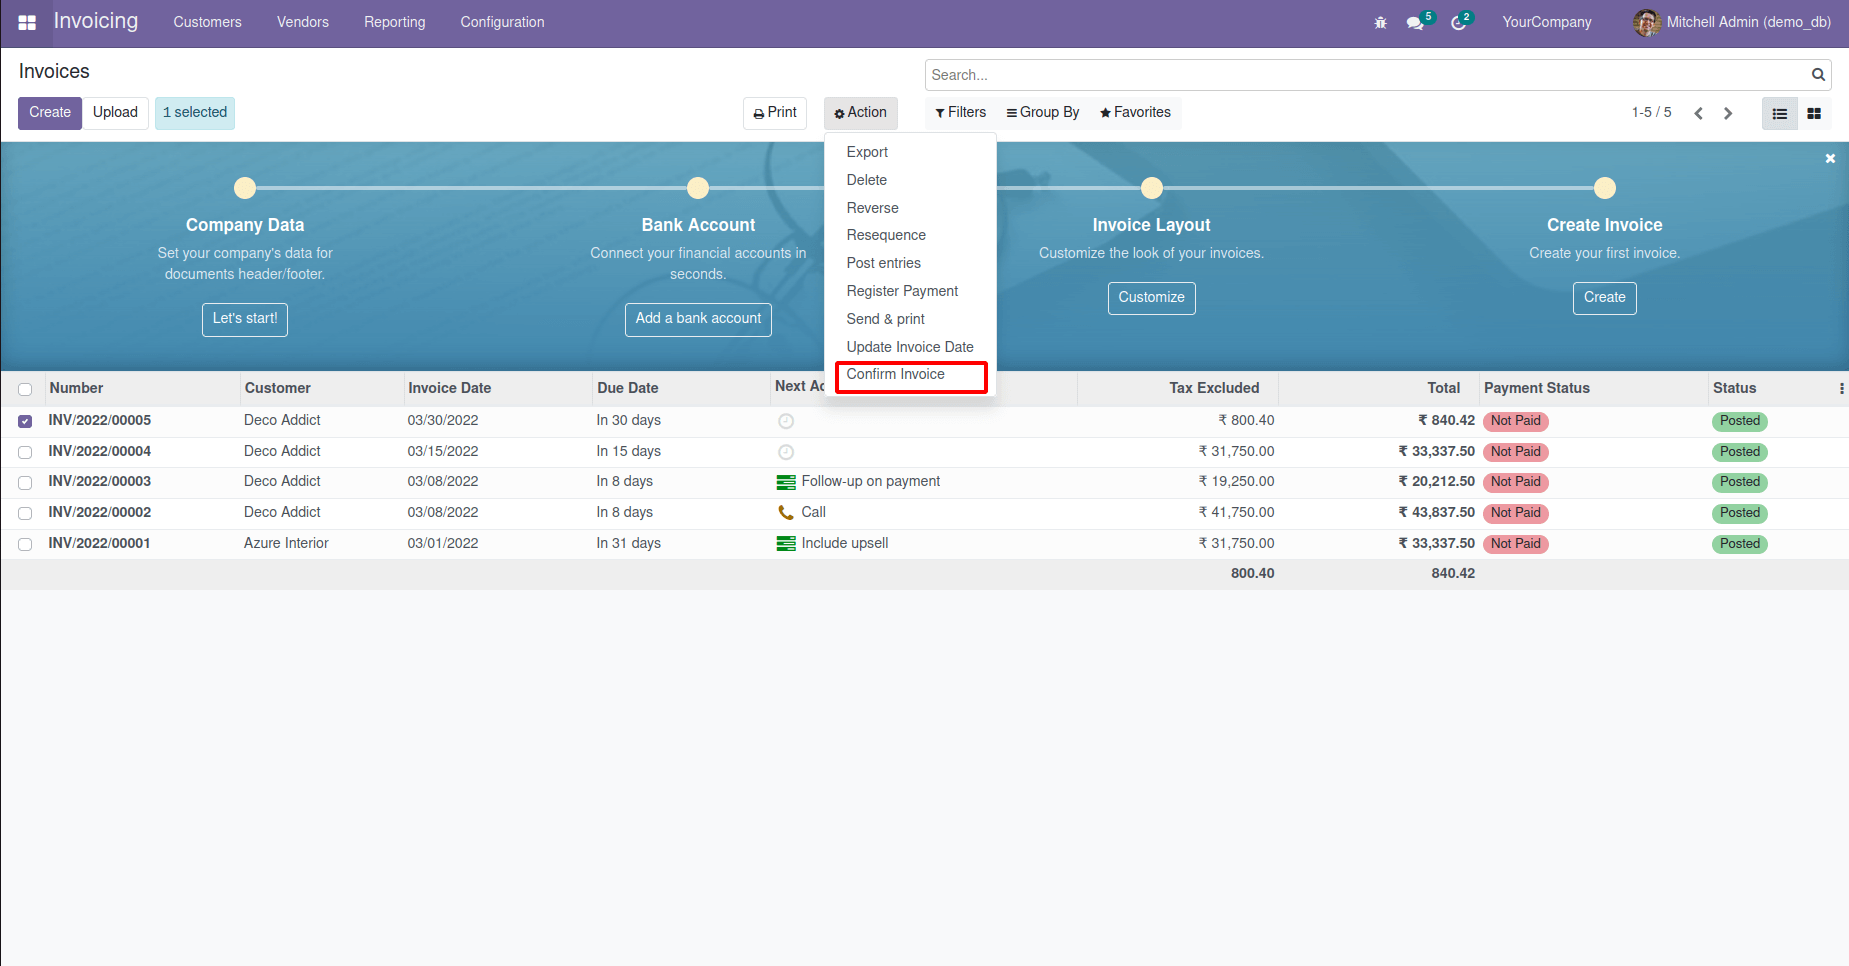
We can perform the same action for multiple records or current records in this manner.