In Odoo, sometimes you want to perform bulk actions on multiple records without adding extra buttons to the form or tree views. The Action Menu is the perfect place to put such operations. This feature uses Server Actions, which allow you to trigger Python code, open reports, send emails, or even create or update records — all directly from the Action dropdown.
Step-by-Step Implementation
We’ll create a new button in the Action Menu to confirm multiple sales orders at once.
XML: Create the Server Action
<!-- my_module/data/sale_order_actions.xml -->
<odoo>
    <record id="action_confirm_sale_orders" model="ir.actions.server">
        <field name="name">Confirm Orders</field>
        <field name="state">code</field>
        <field name="model_id" ref="sale.model_sale_order"/>
        <field name="group_ids" eval="[Command.link(ref('base.group_system'))]"/>
        <field name="binding_model_id" ref="sale.model_sale_order"/>
        <field name="binding_view_types">list,kanban</field>
        <field name="code">
            for record in records:
                if record.state == 'draft':
                    record.action_confirm()
        </field>
    </record>
</odoo>
Python (Optional): Add Custom Business Logic
# my_module/models/sale_order.py
# -*- coding: utf-8 -*-
from odoo import models
class SaleOrder(models.Model):
    _inherit = 'sale.order'
    def action_bulk_confirm(self):
        for order in self:
            if order.state == 'draft':
                order.action_confirm()
And then in the XML, instead of writing the loop, you can simply call:
<field name="code">
    records.action_bulk_confirm()
</field>
Manifest: Include the XML in Your Module
# my_module/__manifest__.py
{
    'name': 'Custom Sale Order Actions',
    'version': '19.0.1.0.0',
    'depends': ['sale'],
    'data': [
        'data/sale_order_actions.xml',
    ],
    'installable': True,
    'application': False,
}
How It Works
- The binding_model_id links the server action to the sale.order model.
- The binding_view_types defines where the action appears (list, kanban, etc.).
- The code field contains the Python logic executed when the action is triggered.
Once installed, if you go to settings > Technical > Actions > Server Actions you can see the created record like below,

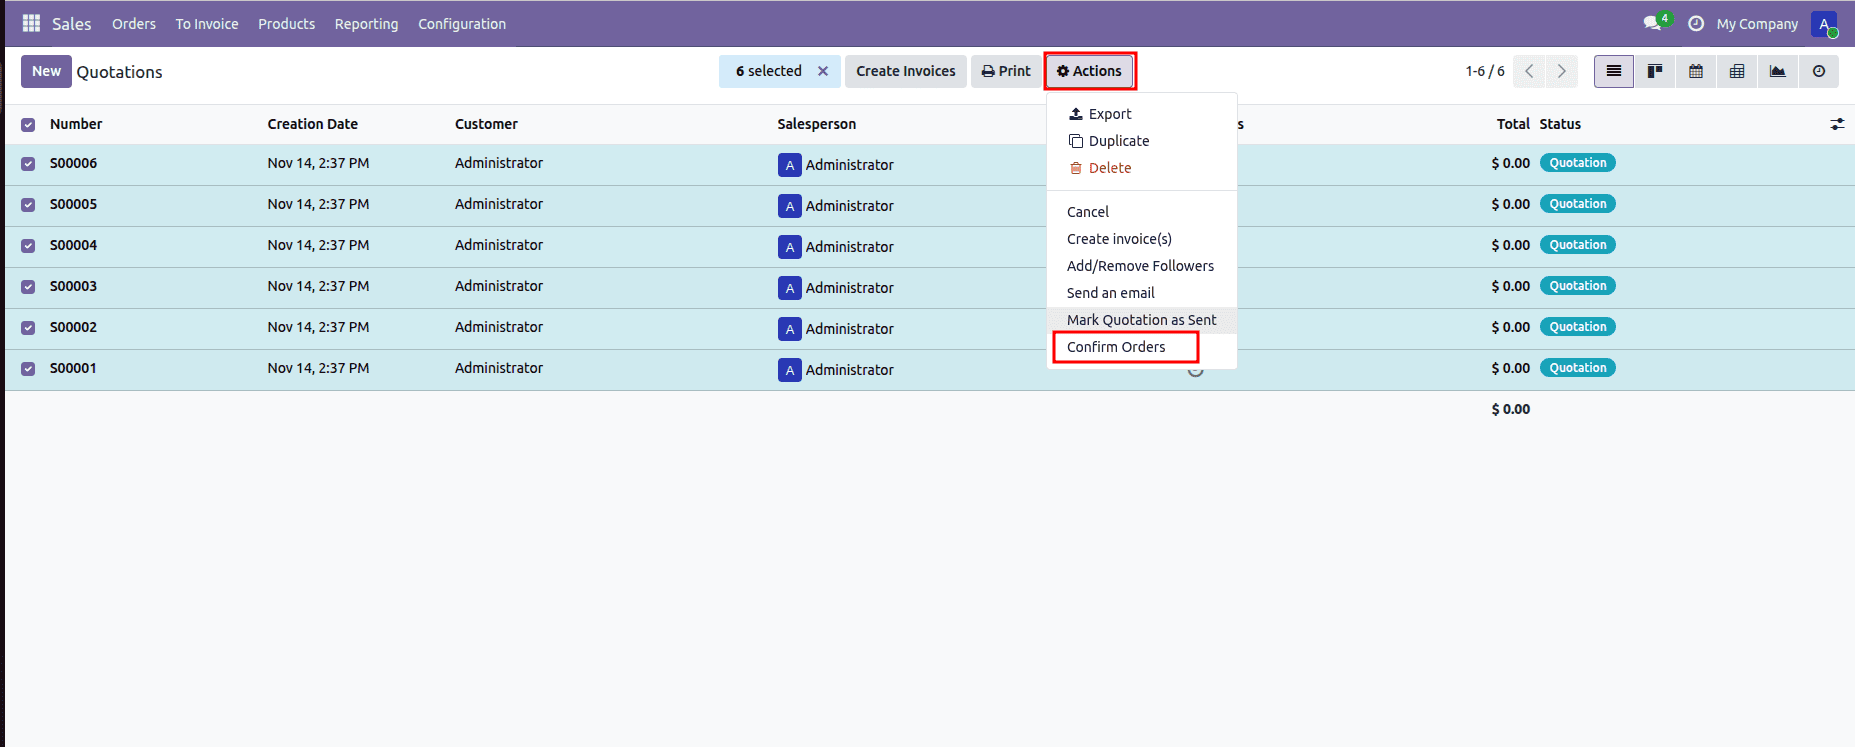
Go to the Sales Orders list view, select multiple records, open the Action dropdown, and you’ll see the new Confirm Orders action. Clicking it will confirm all selected draft sales orders.
In this blog, you’ll learn how to create a button inside the Action Menu in Odoo 19, understand how the <field name="state"> works, and implement it with real examples.
Understanding <field name="state"> in Server Actions
The <field name="state"> field defines what type of action will be performed when the server action is executed. Here are the commonly used values:
| State | Description |
| code | Executes custom Python code on the selected records. |
| object_create | Creates new records in the specified model. |
| object_write | Updates specific fields on the selected records. |
| object_copy | Duplicates (copies) the selected records. |
| mail_post | Posts a message in the chatter of the selected records. |
| followers | Adds followers on the selected records. |
| remove_followers | Removes followers from the selected records. |
| next_activity | Creates a scheduled activity (to-do) on the selected records. |
| sms | Send an SMS message to the selected records. |
| multi | Executes multiple actions defined in sequence. |
| webhook | Sends data to an external URL (webhook) for integration with external systems. |
Most of the time, for custom development, the code state is used because it allows you to write Python logic directly in the server action.
Conclusion
Adding a button to the Action Menu in Odoo 19 is a clean and user-friendly way to perform bulk operations or trigger custom logic. By understanding how the <field name="state"> works, you can create powerful server actions — from executing Python code to printing reports, sending emails, or even opening different views. This approach keeps your interface uncluttered while giving users quick access to important actions.
To read more about How to Add a Button Inside the Action Menu in Odoo 18, refer to our blog How to Add a Button Inside the Action Menu in Odoo 18.