In this blog, we'll explore how to enhance the functionality of your Odoo instance by adding buttons to perform specific actions using the Studio module. Unlike other features in Studio, creating a new button involves some XML coding, making it a unique process.
To begin, you'll need to enable debug mode. You can do this either from the general settings menu or by using a simple command.
?debug=1
In the URL after the web, as shown below:

Now that debug mode is enabled, let's proceed to create a server action for executing specific actions when the new button is clicked:
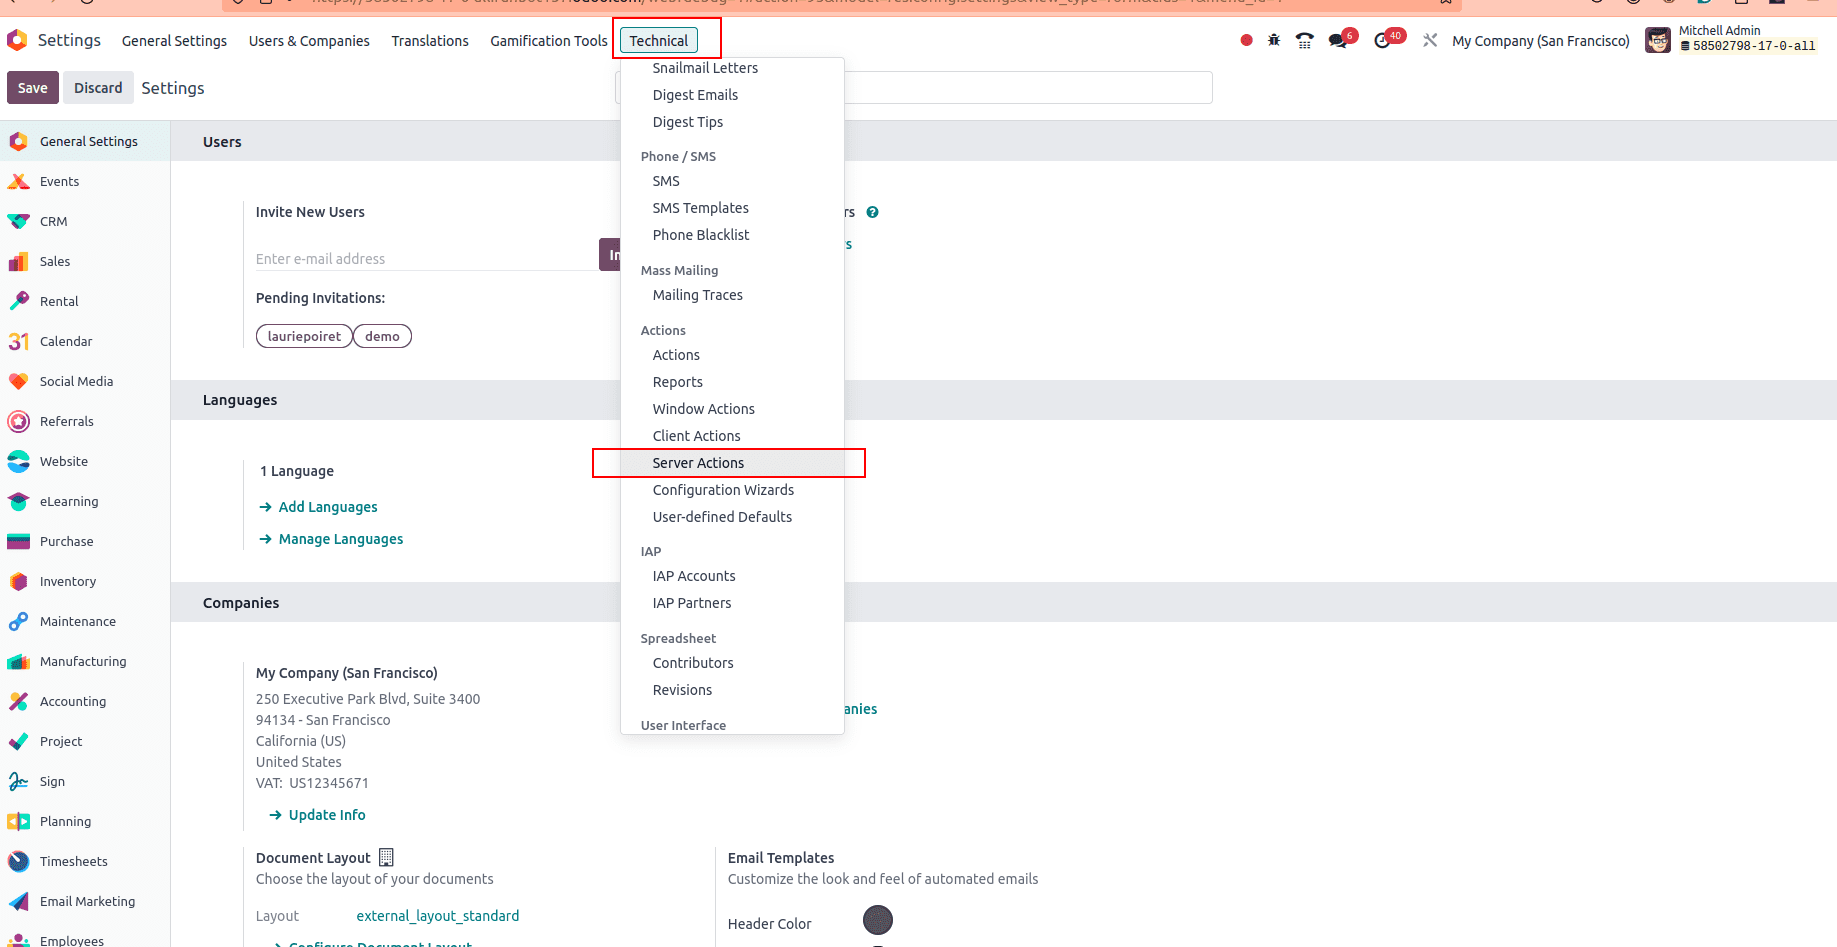
1. Navigate to Settings and select the Technical menu from the top. Please note that this menu is visible only in developer mode.
2. Click on the Server Actions option from the list that appears under the Technical menu.
Click on the 'New' button to initiate the creation of a new Server Action, and proceed to fill in all the necessary fields.
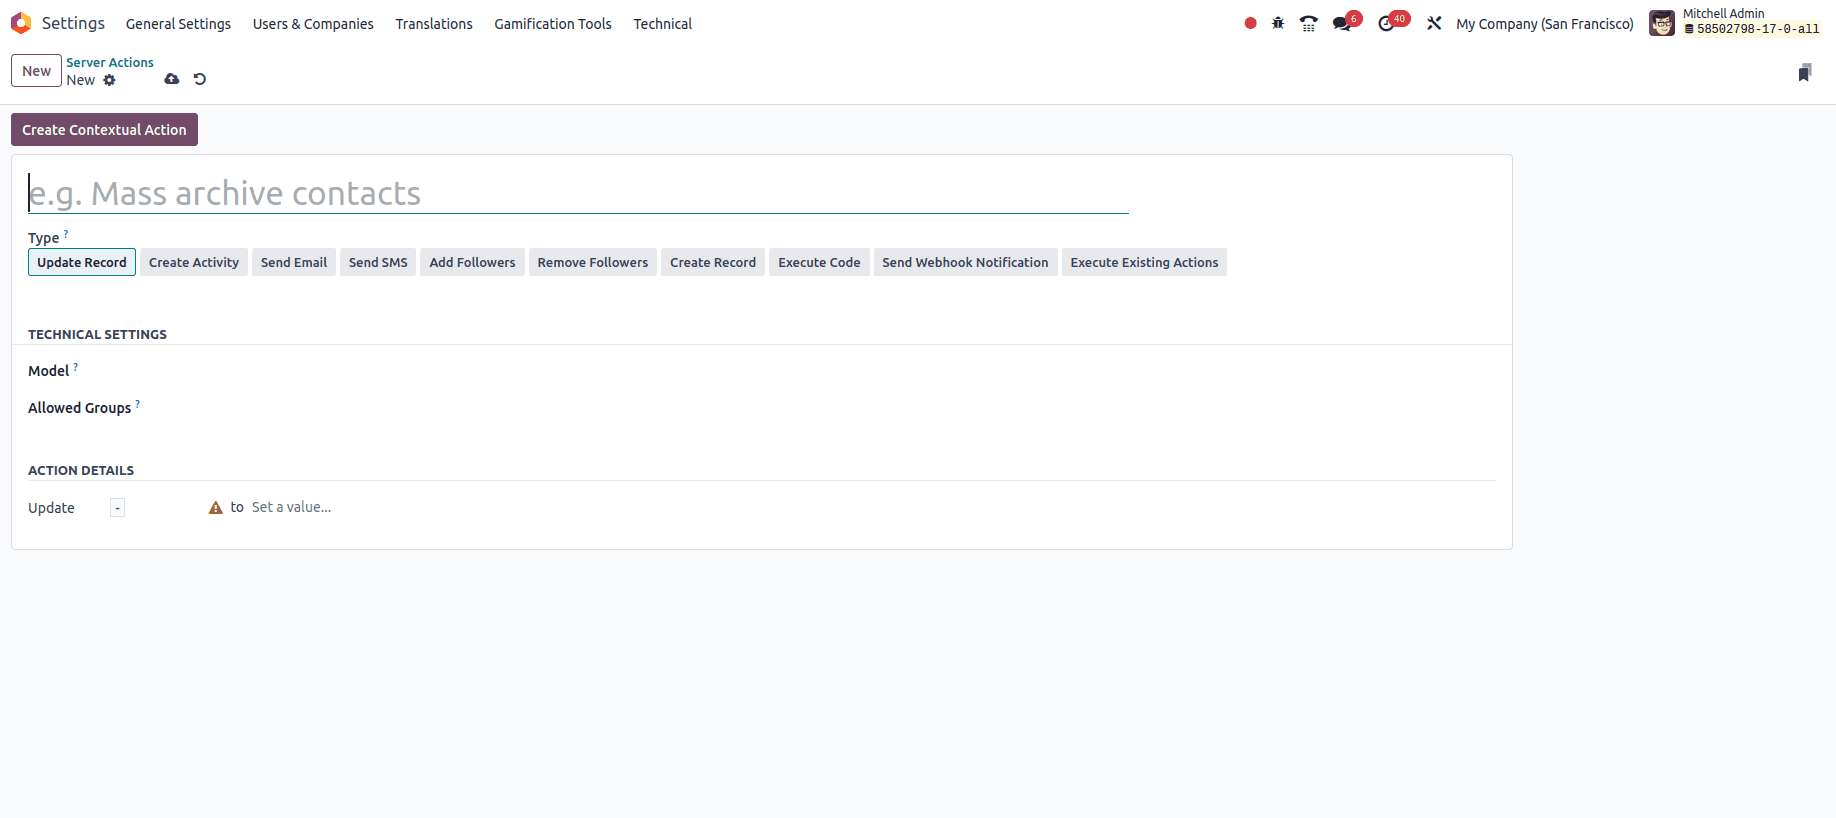
Here's an explanation of the fields on the form:
1. Name: Provide a descriptive name for your action to easily identify its purpose.
2. Type: This field determines the type of server action you want to create. Here are the available options:
* 'Update a Record': Modify the values of an existing record.
* 'Create Activity': Generate a new activity, such as a discussion.
* 'Send Email': Post a message, note, or send an email.
* 'Send SMS': Transmit SMS messages and log them on documents.
* 'Add/Remove Followers': Add or remove followers from a record.
* 'Create Record': Establish a new record with specified values.
* 'Execute Code': Execute a block of Python code.
* 'Send Webhook Notification': Send a POST request to an external system, also known as a Webhook.
* 'Execute Existing Actions': Define an action that triggers several other server actions.
3. Model: Specify the model on which the server action will operate.
4. Allowed Groups: Assign specific groups that are authorized to execute the server action. Leave this field empty to allow access to all users.
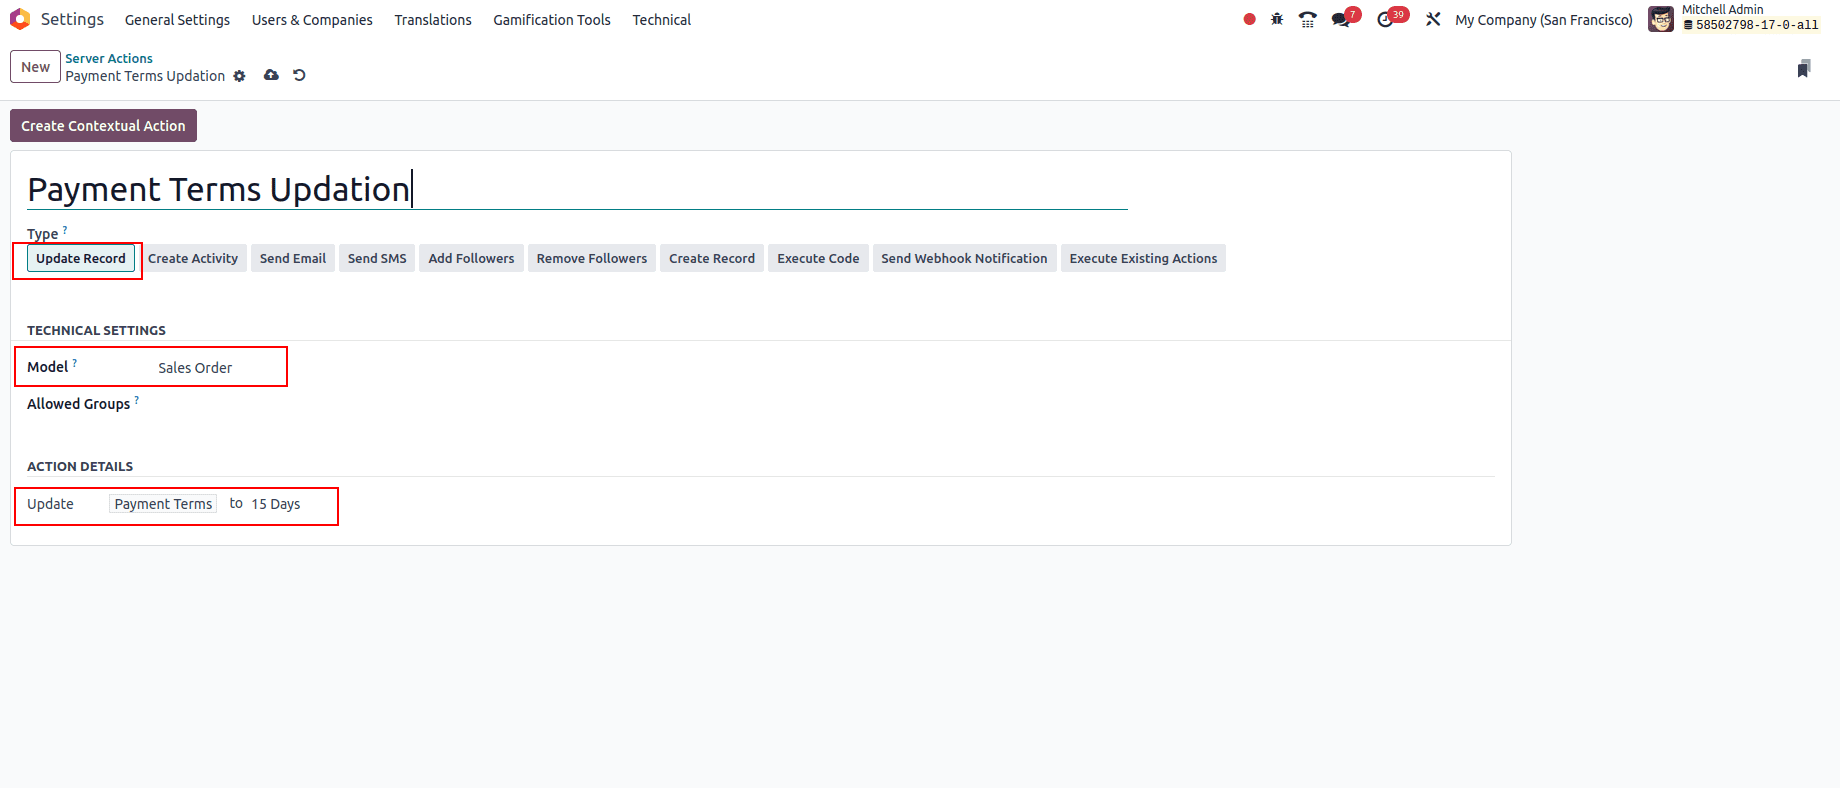
* Ensure all essential fields are filled out before saving the server action.
* To locate the ID of the server action, refer to the URL structure demonstrated below:
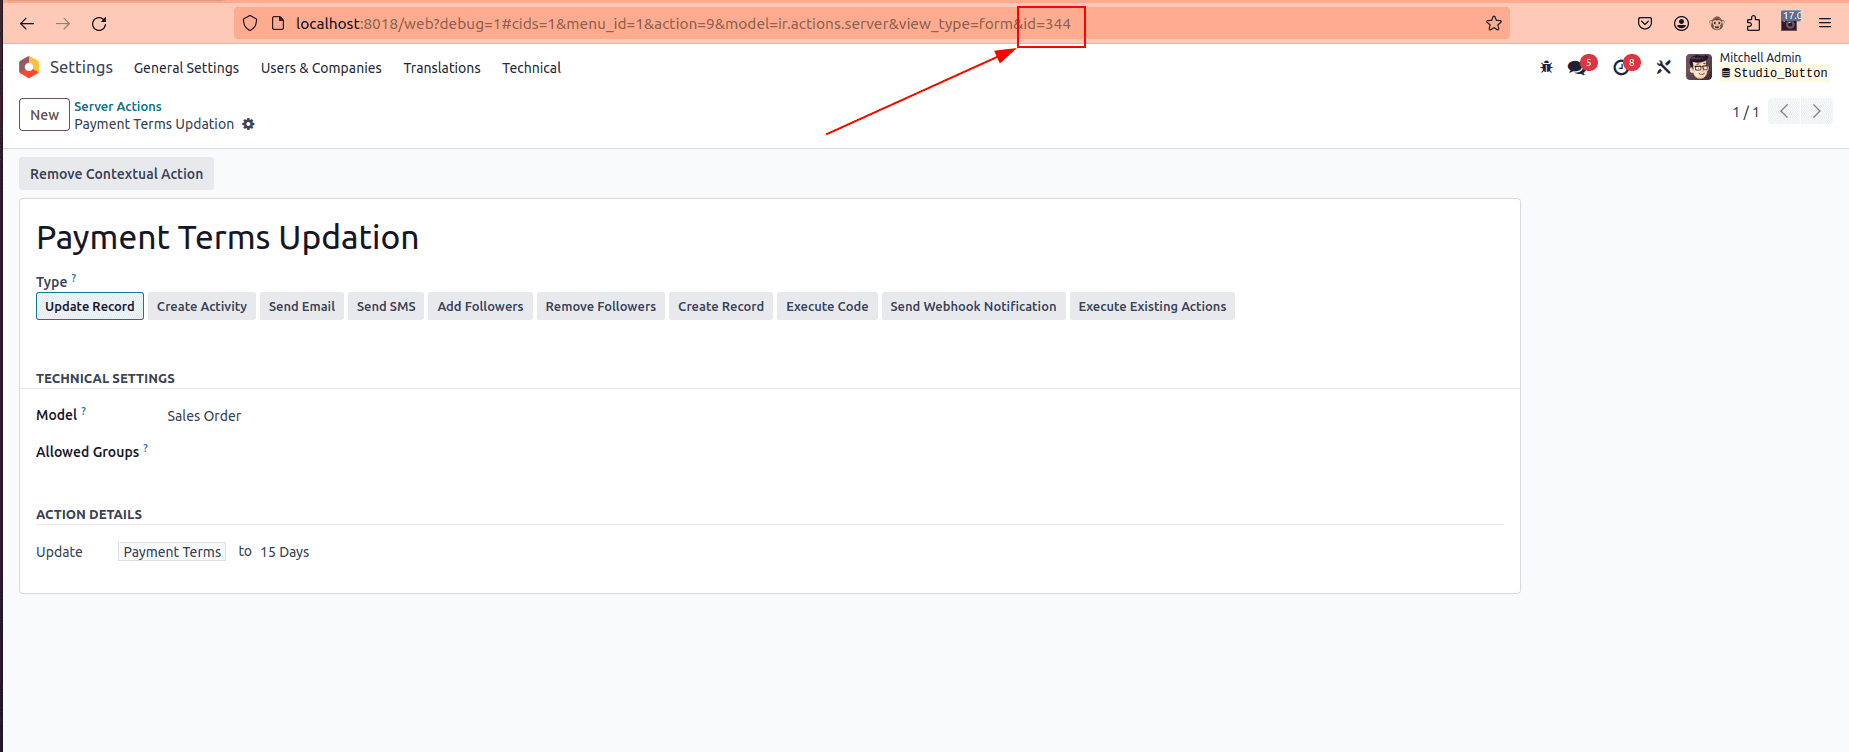
* Copy the ID of the server action you just created.
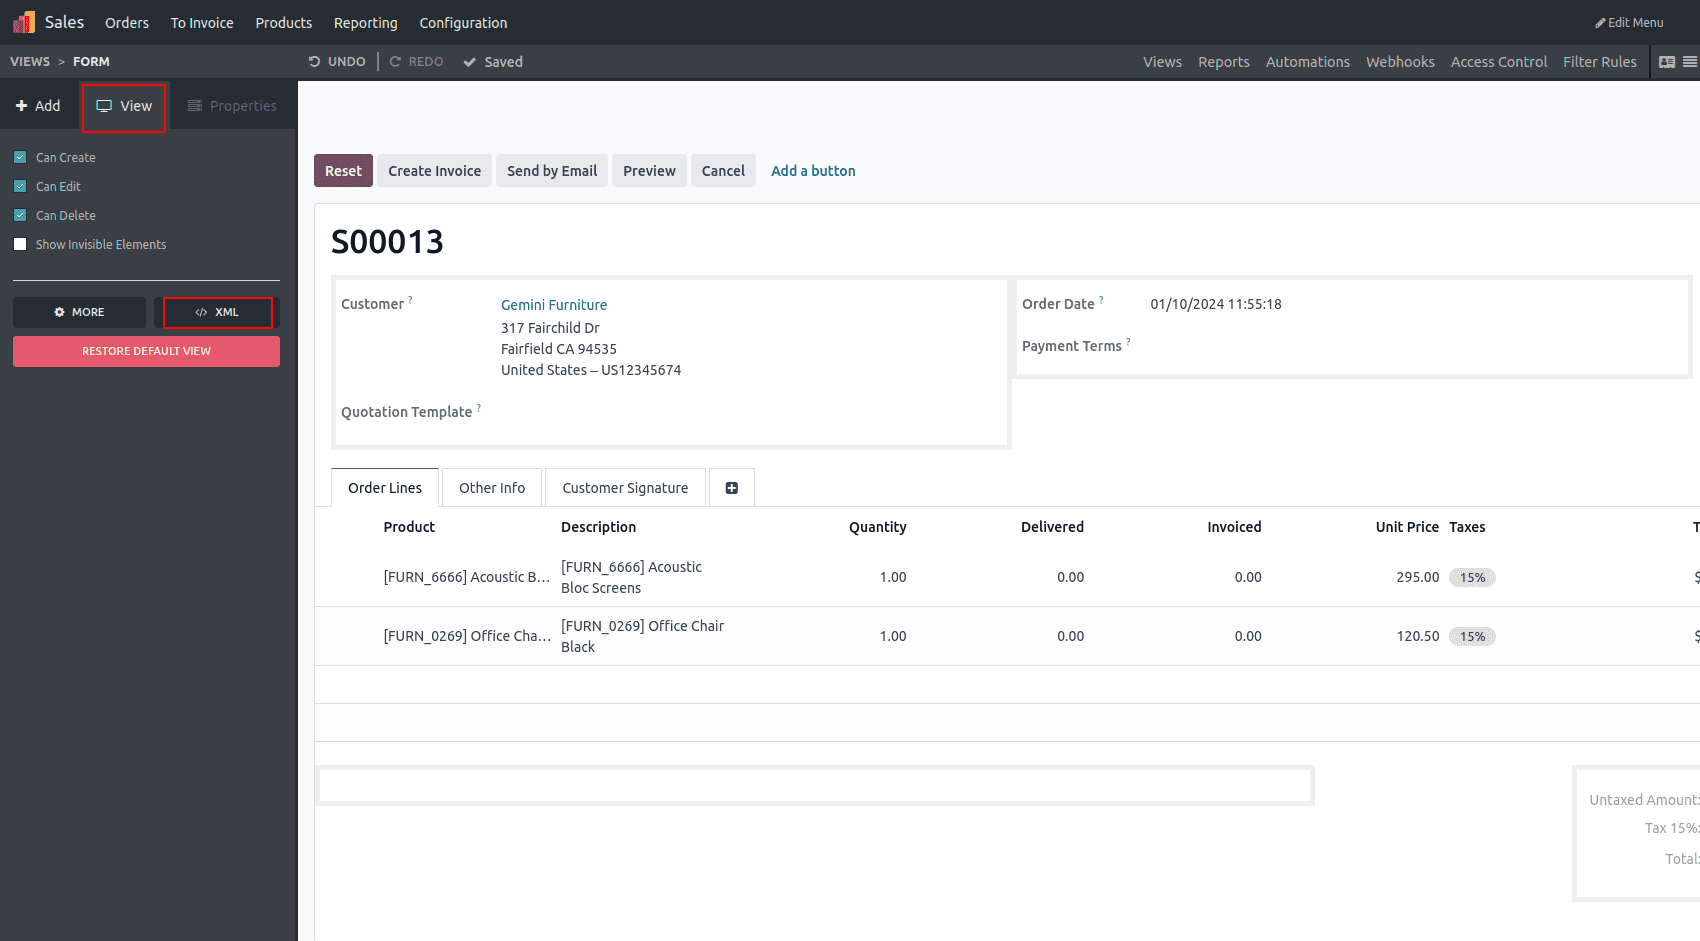
* Next, navigate to the view where you wish to add the button. For instance, I've chosen the sale order form view and accessed it via Studio.
* Click on the "View" menu within the Studio interface, then select the "XML" tab, as illustrated below.
Within the Studio interface, the XML code for the selected view is displayed on the left side. Inside the <header> tag, you can find the code corresponding to the buttons already present in that view.
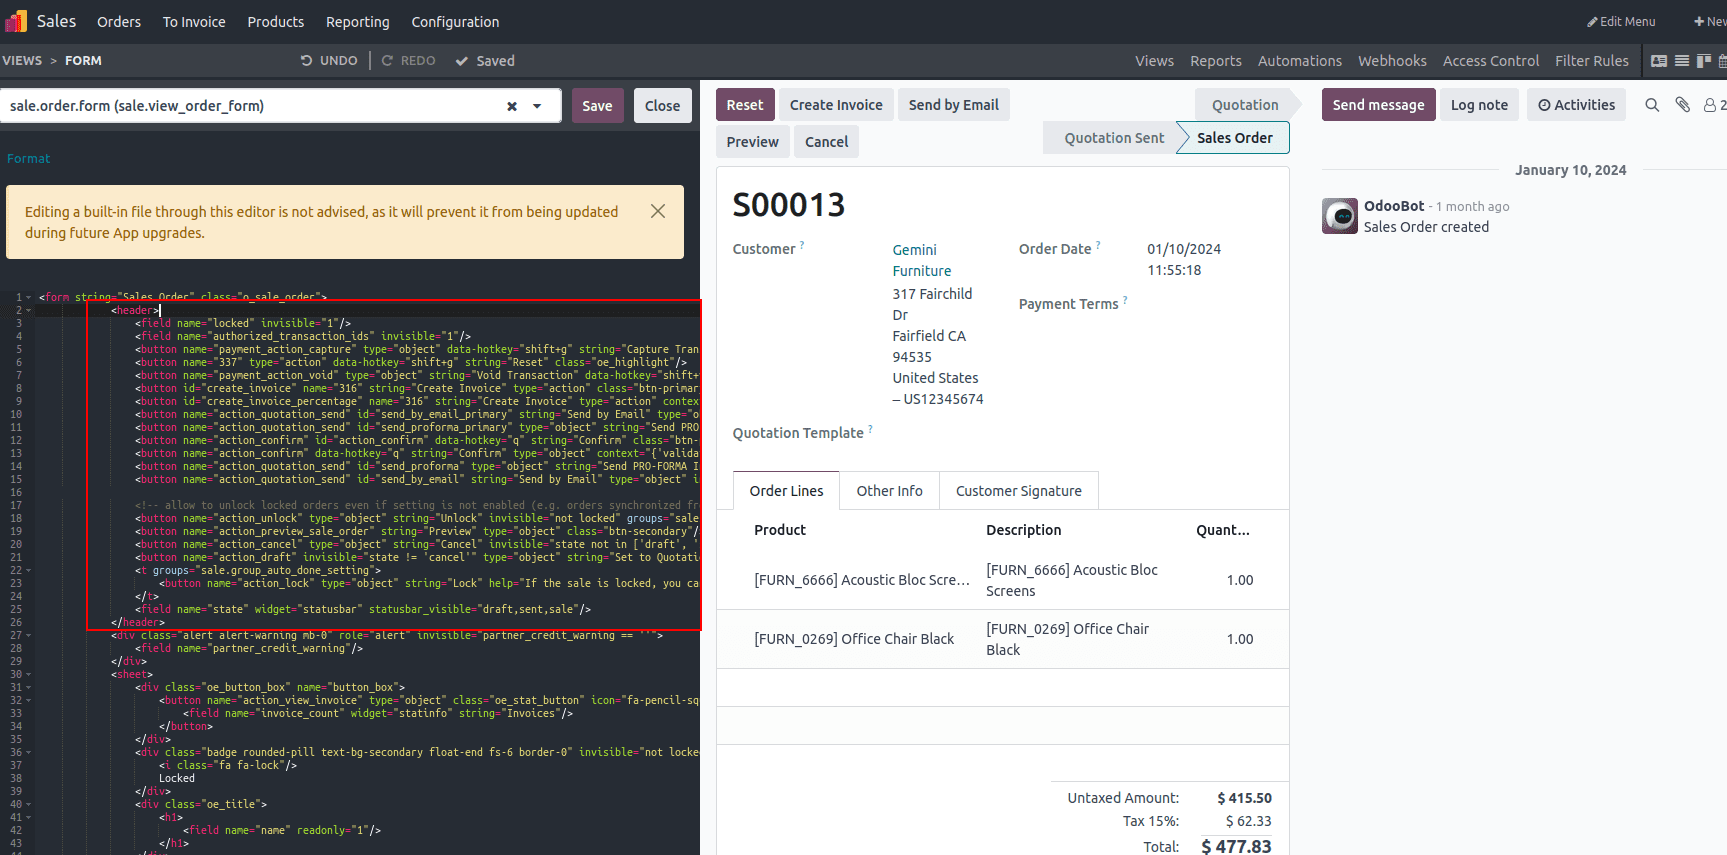
You can create a new button within the <header> section, similar to the example below, and include the ID of the created server action as its name:

Then, you will find your button on the view, and upon clicking it, the defined server action will be executed.

In summary, using Odoo Studio Version 17 to add a button is simple and boosts your Odoo applications' functionality and ease of use. Its user-friendly interface and robust features enable easy customization, even for non-technical users. By following the steps in this blog, you can quickly add buttons to tailor your Odoo applications, streamline processes, and maximize efficiency.