Collecting information through website forms is one of the most common requirements in any business application. From job applications and support requests to customer inquiries, forms make it easy to capture structured data. But in many cases, just text input isn’t enough—users also need the ability to attach documents, images, or files along with their submission.
With Odoo 19, you can extend the default website form functionality to include file attachments, ensuring a smoother and more efficient data collection process. This makes it possible to accept resumes, proof documents, screenshots, or any other type of file directly from your website users.
In this blog, we’ll walk through how to implement file upload functionality using JavaScript in Odoo 19. You’ll learn how to enhance your website forms with attachment support, handle uploads on the frontend, and save them properly in the backend. By the end, you’ll have a working form that combines both data fields and file inputs—making your Odoo website far more versatile
In Odoo, you can create custom menus using XML to define their structure and placement. To include these menus in your module, you need to define the XML file in the __manifest__.py file.
<record id="menu_attachment_form" model="website.menu">
<field name="name">File Submission</field>
<field name="url">/submit/attachments</field>
<field name="parent_id" ref="website.main_menu"/>
<field name="sequence" type="int">40</field> </record>
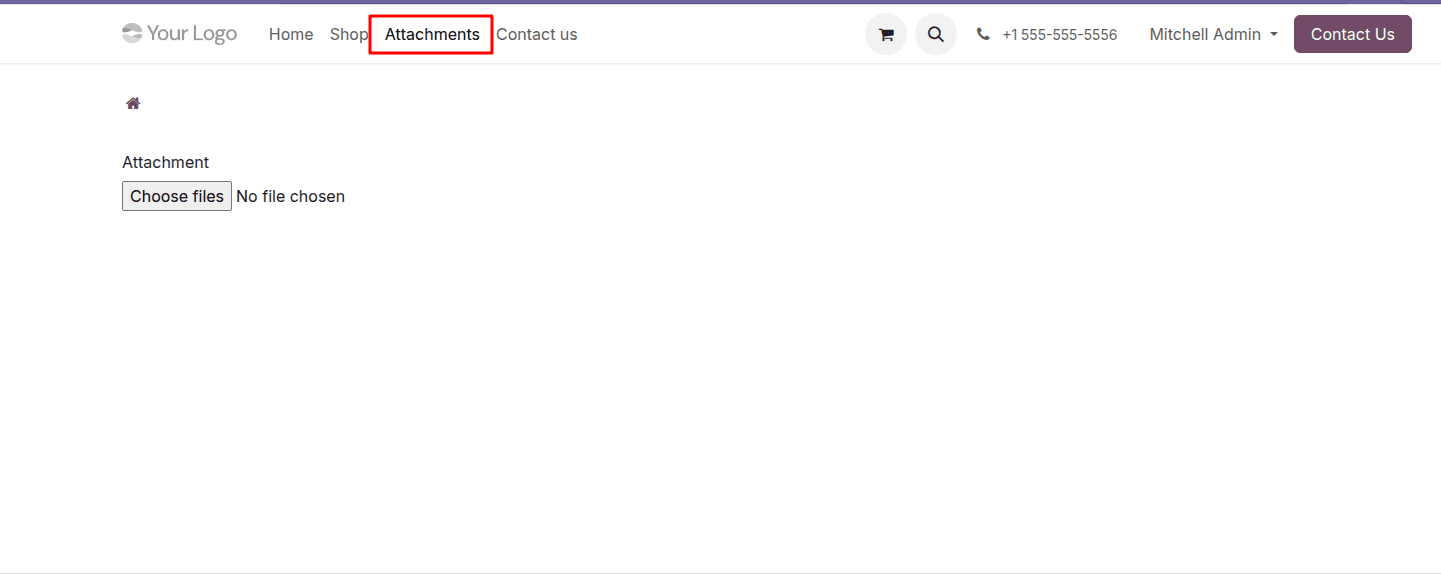
This menu directs users to the /my/attachments URL, which will be handled by the corresponding controller in Odoo. To manage this functionality, we’ll create a controller to handle the redirection to the attachment form template.
First, we need to create a controller file (e.g., website_attachment.py or main.py) inside the controllers directory. Then, we must define this Python file inside the __init__.py file to ensure it is properly recognized by Odoo.
from odoo import http
from odoo.http import request
class WebsiteAttachment(http.Controller):
    @http.route(['/submit/attachments'], type='http', auth="public", website=True)
    def attachment_form_page(self, **kwargs):
        """
        Renders the website form template where users can submit data with file attachments.
        """
        return request.render("website_attachment.my_attachment_template", create{})https://docs.google.com/document/d/1V7abvJ85LnIwxM_65CTqSkgGCByXTGI-2f_jZjWNW-M/edit?usp=sharing
Once the website menu and controller are in place, the next step is to design the form template. This template specifies how the form will be displayed on the website, including the file upload field for selecting and uploading files. Below is the XML code to create the form template with an attachment option. After creating the template, remember to include the XML file reference in the __manifest__.py file.
<template id="my_attachment_template">
   <t t-call="portal.portal_layout">
       <form action="/track/upload_attachment" enctype="multipart/form-data" method="post">
           <div class="upload_form form-group">
               <div class="col-lg-3 col-md-4 text-right">
                   <label class="col-form-label"
                          for="attachment">Attachment
                   </label>
               </div>
               <div class="col-lg-7 col-md-8">
                   <input class="file" id="attachments" type="file"
                          name="attachments" multiple="true"
                          accept="image/*,application/pdf,video/*"
                          required="True"/>
               </div>
           </div>
       </form>
   </t>
</template>
After setting up the website form with a file upload option, the next step is to activate the actual attachment functionality using JavaScript. The JavaScript file is responsible for managing file uploads dynamically, handling user interactions, and communicating with the server in real time. Unlike the form structure, which only defines the layout, JavaScript brings interactivity—detecting when a file is selected, converting it into a suitable format (such as base64), and sending it to the server asynchronously. This ensures that uploads happen smoothly without page reloads while also providing instant feedback, such as success or error messages. To achieve this, create a JavaScript file (e.g., website_attachment.js) inside your module’s static/src/js folder. Then, include it in the web.assets_frontend section of the __manifest__.py file so it loads properly on the frontend of your Odoo website
/** @odoo-module */
import publicWidget from '@web/legacy/js/public/public_widget';
import { rpc } from "@web/core/network/rpc";
publicWidget.registry.form = publicWidget.Widget.extend({
   selector: '.upload_form',
   events: {
       'change #attachments': 'attachment_upload',
   },
   attachment_upload: function(e) {
       var attachments = e.target.files;
       for (let i = 0; i < attachments.length; i++) {
           var reader = new FileReader();
           reader.readAsDataURL(attachments[i]);
           reader.onload = function(e) {
               rpc('/upload_attachment', {
                   'attachments': e.target.result,
                   'attachment_name': attachments[i].name
               });
           }
       }
   },
});
When a user uploads a file through the website form, the JavaScript code comes into action. An event listener monitors the file input element (#attachments) for any changes. Once a file is selected, the attachment_upload function is triggered. This function processes multiple files by reading each one as a Data URL (base64-encoded string), which makes it suitable for transmission over HTTP. After encoding, the file data along with its name (attachment_name) is sent to the server via an RPC request to the /upload_attachment route. This ensures that uploads happen asynchronously without reloading the page, delivering a seamless user experience.
On the server side, we need to define a controller to handle the received files and create them as attachments in Odoo. Below is the controller code that processes the uploaded file and stores it in the system as an attachment.
@route('/upload_attachment', type='jsonrpc', auth="public", methods=['POST'],
      website=True)
def upload_attachment(self, **kw):
   base64_data = kw['attachments'].split(",")[1]
   Attachments = request.env['ir.attachment']
   Attachments.sudo().create({
       'name': kw['attachment_name'],
       'type': 'binary',
       'datas': base64.b64decode(base64_data),
   })
   return {'status': 'success'}
The following code illustrates the complete code of the module, providing a detailed view of the implementation.
Manifest file:
{
   'name': 'Website Attachment Odoo',
   'version': '19.0.1.0.0',
   'category': 'Website',
   'summary': 'Allows upload attachment from website',
   'description': """This module will help you to upload attachment from website""",
   'author': 'Cybrosys Techno Solutions',
   'company': 'Cybrosys Techno Solutions',
   'maintainer': 'Cybrosys Techno Solutions',
   'website': "https://www.cybrosys.com",
   'depends': ['portal', 'website_sale'],
   'data': [
       'views/website_form_views.xml'
   ],
   'assets': {
       'web.assets_frontend': [
           '/website_attachment/static/src/js/website_attachment.js',
       ],
   },
   'license': 'AGPL-3',
   'installable': True,
   'auto_install': False,
   'application': False,
}
Xml file:
<?xml version="1.0" encoding="utf-8" ?>
<odoo>
<!--    Wb menu for the pre-booking-->
   <record id="menu_service" model="website.menu">
       <field name="name">Attachments</field>
       <field name="url">/my/attachments</field>
       <field name="parent_id" ref="website.main_menu"/>
       <field name="sequence" type="int">31</field>
   </record>
<!--    Template for the pre-booking order Track-->
   <template id="my_attachment_template">
       <t t-call="portal.portal_layout">
           <form action="/track/upload_attachment" enctype="multipart/form-data" method="post">
               <div class="upload_form form-group">
                   <div class="col-lg-3 col-md-4 text-right">
                       <label class="col-form-label"
                              for="attachment">Attachment
                       </label>
                   </div>
                   <div class="col-lg-7 col-md-8">
                       <input class="file" id="attachments" type="file"
                              name="attachments" multiple="true"
                              accept="image/*,application/pdf,video/*"
                              required="True"/>
                   </div>
               </div>
           </form>
       </t>
   </template>
</odoo>
Controllers:
from odoo import http
from odoo.http import route, request
import base64
class WebsiteAttachmentController(http.Controller):
   @http.route(['/my/attachments', '/my/attachments/page/<int:page>'],
               type='http', auth="user", website=True)
   def my_attachments(self):
       """Can track the pre bookings from the website"""
       value = []
       values = {'value': value}
       return request.render("website_attachment.my_attachment_template", values)
   @route('/upload_attachment', type='jsonrpc', auth="public", methods=['POST'],
          website=True)
   def upload_attachment(self, **kw):
       base64_data = kw['attachments'].split(",")[1]
       Attachments = request.env['ir.attachment']
       Attachments.sudo().create({
           'name': kw['attachment_name'],
           'type': 'binary',
           'datas': base64.b64decode(base64_data),
       })
       return {'status': 'success'}
Js file:
/** @odoo-module */
import publicWidget from '@web/legacy/js/public/public_widget';
import { rpc } from "@web/core/network/rpc";
publicWidget.registry.form = publicWidget.Widget.extend({
   selector: '.upload_form',
   events: {
       'change #attachments': 'attachment_upload',
   },
   attachment_upload: function(e) {
       var attachments = e.target.files;
       for (let i = 0; i < attachments.length; i++) {
           var reader = new FileReader();
           reader.readAsDataURL(attachments[i]);
           reader.onload = function(e) {
               rpc('/upload_attachment', {
                   'attachments': e.target.result,
                   'attachment_name': attachments[i].name
               });
           }
       }
   },
});
By implementing file attachments in website forms, you significantly enhance the usability and flexibility of your Odoo website. By combining XML form templates, JavaScript interactivity, and backend controllers, you can seamlessly process and store user-uploaded files as Odoo attachments. With Odoo 19’s modular architecture, this approach remains clean, maintainable, and easily adaptable for various use cases from recruitment applications to support ticket forms.
To read more about How to Add Attachments in Website Forms Using JavaScript in Odoo 18, refer to our blog How to Add Attachments in Website Forms Using JavaScript in Odoo 18.