It is really helpful to differentiate records using some methods in a tree view. In Odoo 15, we can use different methods, like changing the text's colors and making the text bold or italic. So, in this blog, we are discussing changing the colors of the text in the tree view. In addition, we can change the colors of the text according to the conditions that we need.
Here is an example of the list view of an operation in the Invoicing module.
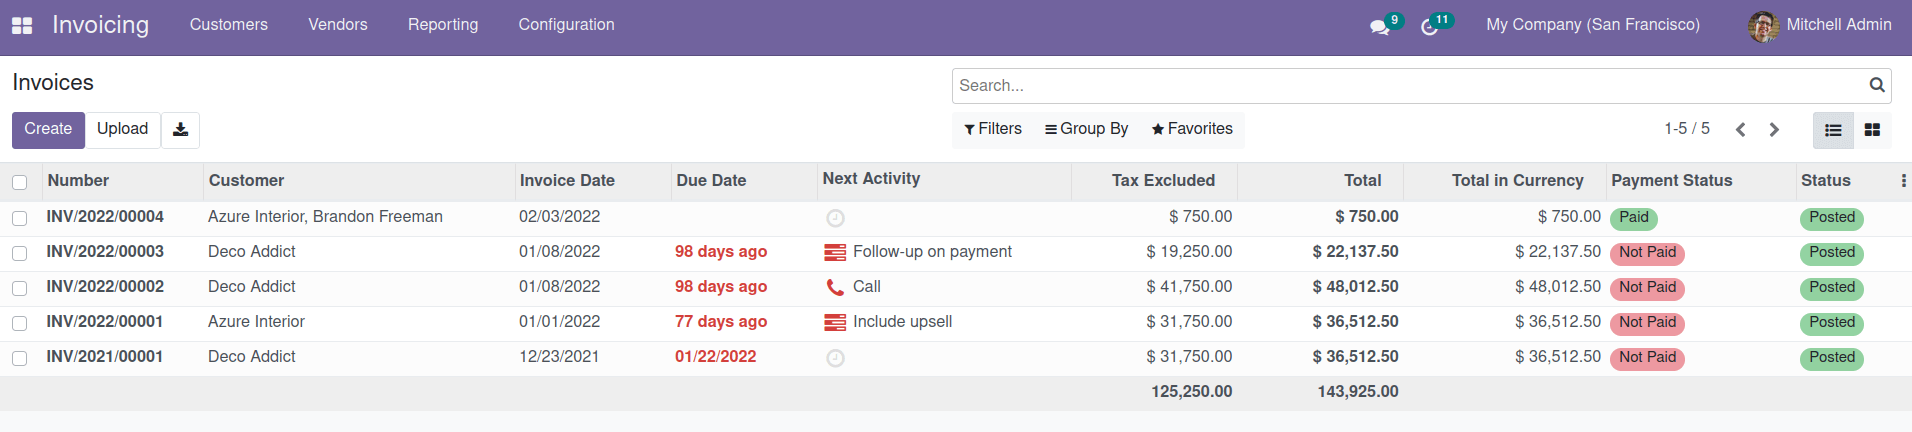
In this example, we can see that some fields are indicated in red color, and some are bold based on their status. Like that, we can differentiate the records.
This blog will describe how to add different colors to the tree view using a custom module.
Based on the conditions for the records, we can provide different colors in the tree view. So, we can easily identify the records based on the colors in the tree view. Now Let's check how we can configure this.
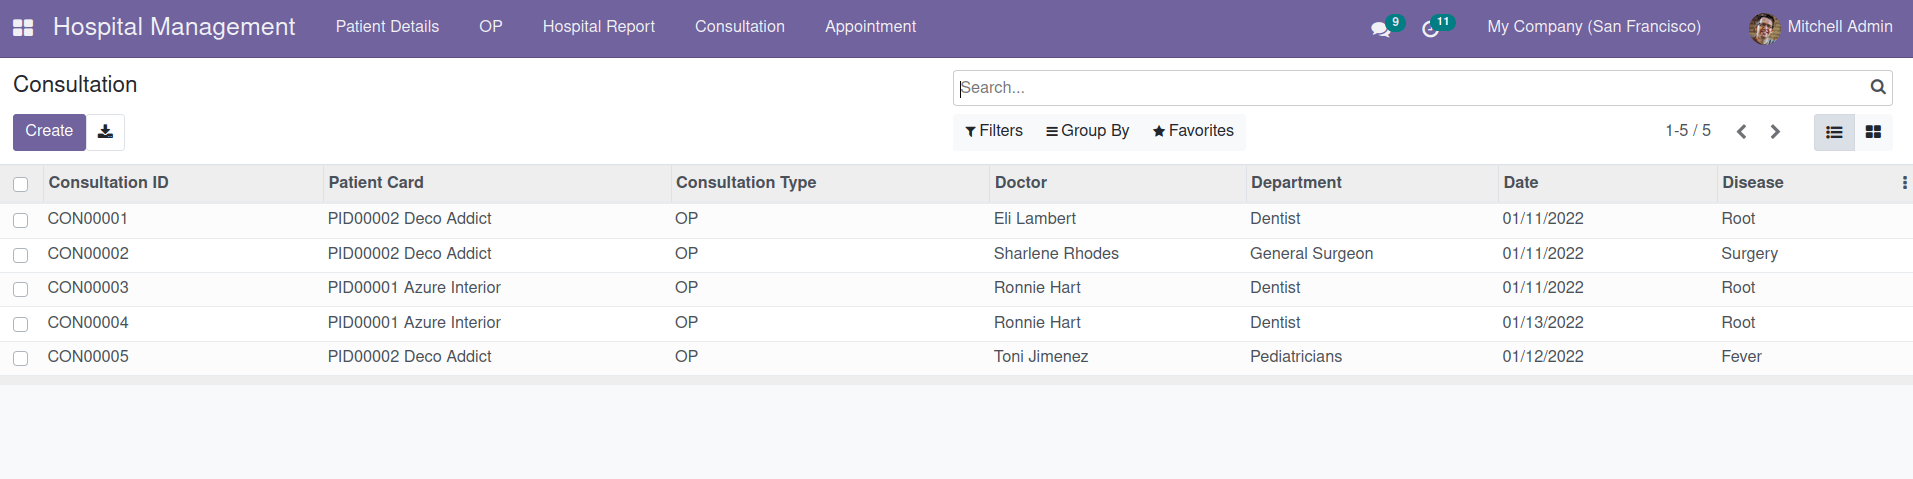
Here we can see a simple tree view of a custom module.
And the code for this will be,
<tree sample="1">
<field name="sequence_no"/>
<field name="patient_card_id"/>
<field name="consultation_type"/>
<field name="doctor_id"/>
<field name="department"/>
<field name="date"/>
<field name="disease_id"/>
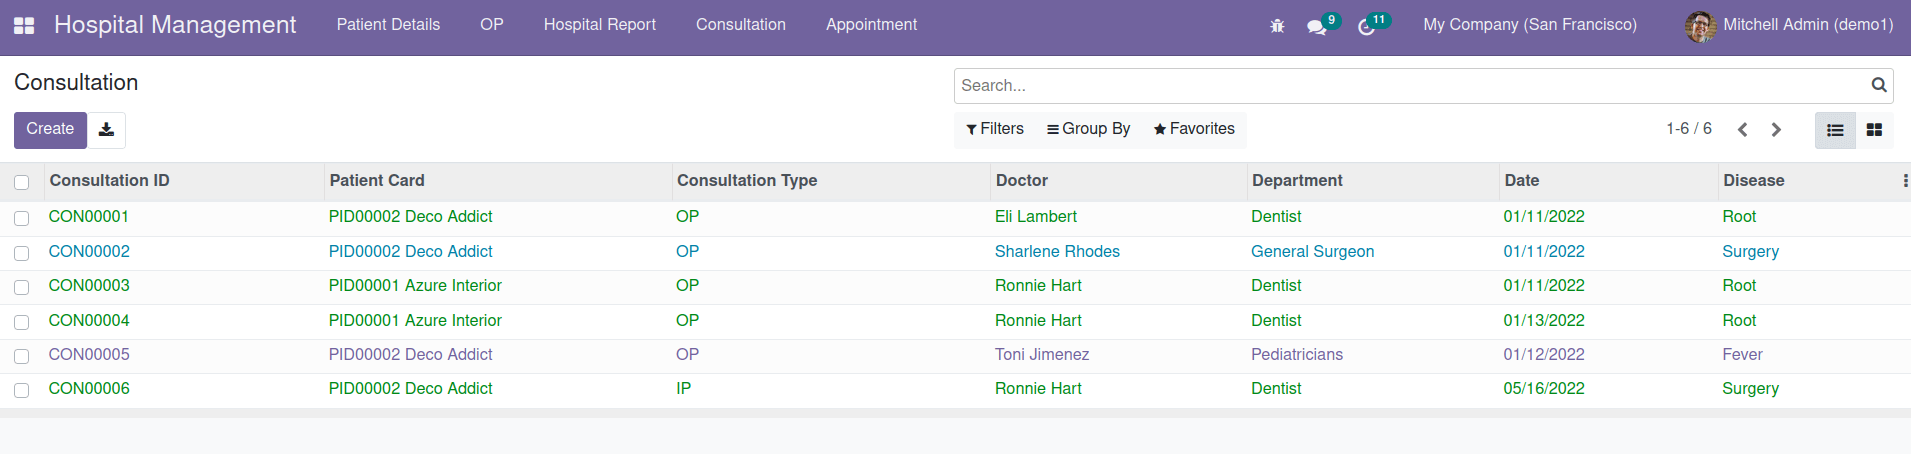
</tree>So, in order to color the records in Odoo, we have to use the decorator in the tree view. Here, we can use the decorator to color the records in different ways. We can make a whole column a different color according to certain conditions. For example, we can separate the record of the above tree view according to the departments.
<record id="view_consultation_tree" model="ir.ui.view">
    	<field name="name">consultation.tree</field>
    	<field name="model">consultation.details</field>
    	<field name="arch" type="xml">
        	<tree decoration-success="department == 'Dentist'"
              	decoration-info="department == 'General Surgeon'"
              	decoration-primary="department == 'Pediatricians'">
            	<field name="sequence_no"/>
            	<field name="patient_card_id"/>
            	<field name="consultation_type"/>
            	<field name="doctor_id"/>
            	<field name="department" optional="show"/>
            	<field name="date" optional="show"/>
            	<field name="disease_id" optional="show"/>
            	<field name="diagnose" optional="hide"/>
        	</tree>
    	</field>
</record>
The tree view after giving the color is given below. Here we can see that the columns are displayed in different colors according to the conditions. So the record with the department ‘Dentist’ is shown in green color, ‘General Surgeon’ in light blue, and ‘Pediatricians’ in light purple.
And we can also change the colors of data in each row. For example, we can make each row into a different color in the tree view.
<record id="view_consultation_tree" model="ir.ui.view">
<field name="name">consultation.tree</field>
<field name="model">consultation.detail</field>
<field name="arch" type="xml">
<tree>
<field name="sequence_no" decoration-success = "1"/>
<field name="patient_card_id" decoration-info = "1"/>
<field name="consultation_type" decoration-muted = "1"/>
<field name="doctor_id" decoration-primary = "1"/>
<field name="department" decoration-danger = "1"/>
<field name="date" decoration-warning = "1"/>
<field name="disease_id" decoration-bf = "1"/>
</tree>
</field>
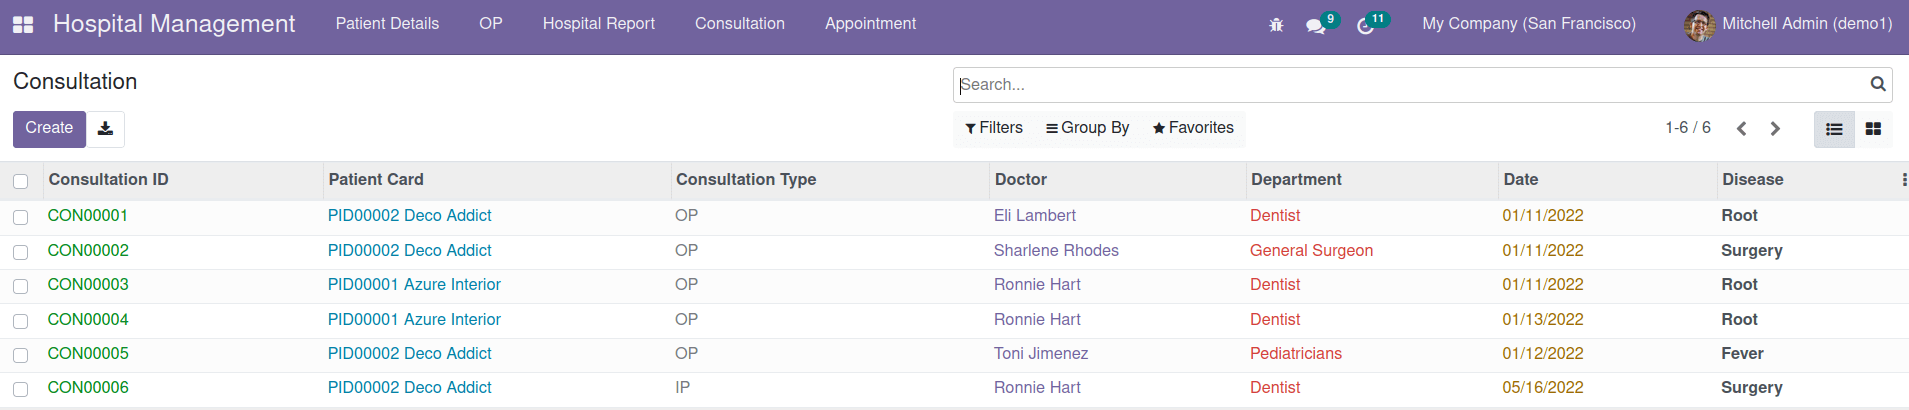
</record>Here we can see the rows in different colors. We can also make it according to some conditions as well. In this case we make the Consultation ID in green using decoration-success = "1", Patient Card in light blue using decoration-info = "1", Consultation Type in light gray using decoration-muted = "1", Doctor in light purple using decoration-primary = "1", Department in red using decoration-danger = "1", Date in light brown using decoration-warning = "1".
Therefore you can use these methods in your tree view for better readability and can analyze the records quickly. For more understanding, you can try the below-listed decorators.
decoration-success: light green
decoration-primary: light purple
decoration-info: light blue
decoration-muted: light gray
decoration-warning: light brown
decoration-danger: light red
And we can also use some other decorators like bold and italic to enhance the view.
decoration-bf: Bold text
decoration-it: Italic text
So in this way, we can easily add colors to the Odoo tree view and make it more attractive.