One of the unavoidable factors of company operations is product expirations in a consumable way or not. It is easy to reduce product loss due to expiration through inventory operations, purchases and sales. Product expiration relies on various factors such as environmental, the difference in product components, and aging. A company gets a loss by sending expired products to customers, and it decreases the firm's reputation. Odoo ERP offers a centralized inventory suitable for eCommerce and retails for business management structure. Users can easily manage the cost of products with the assistance of the Odoo 15 Inventory module.
This blog assists in setting up product expiry dates in the Odoo 15 Inventory module.
Most products manufactured in a company contain expiration and manufacturing dates. We can quickly track and manage the commodity using serial numbers based on the expiration date. Let's view how to generate expiration dates for a product using the Odoo 15 Inventory module.
To Activate Lots/Serial Numbers to Product for Tracking
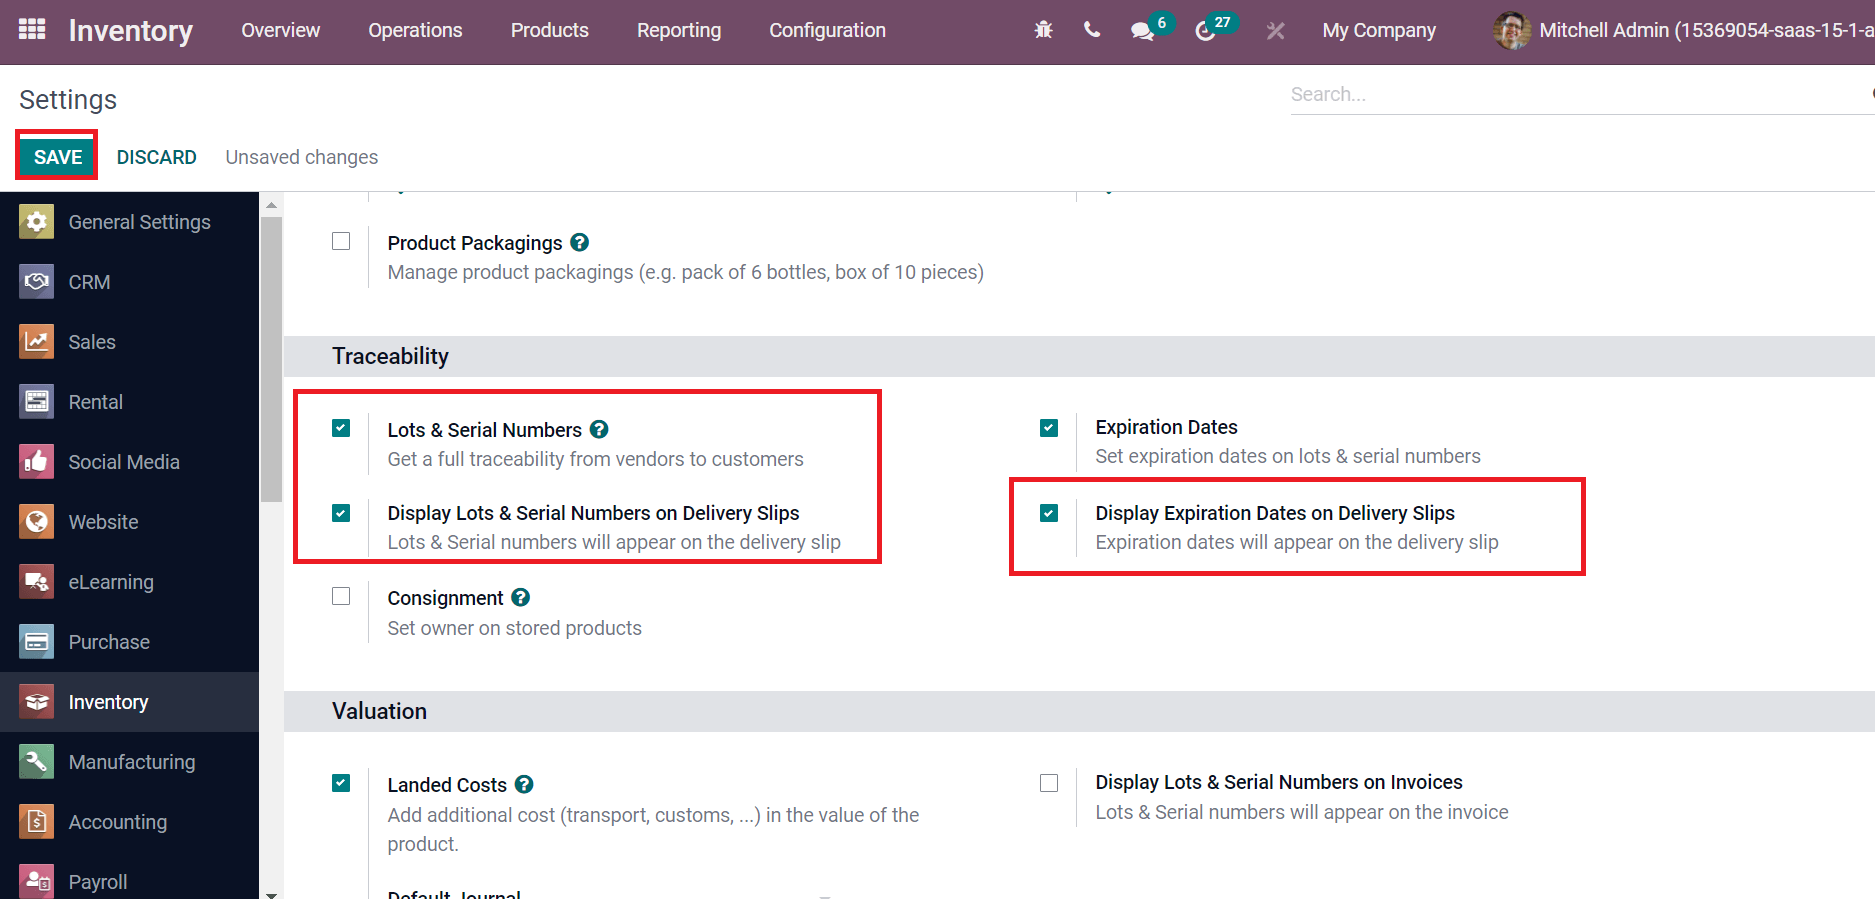
Select the Settings menu in the Configuration tab of the Odoo 15 Inventory module. Activate the Lots & Serial Numbers inside the Traceability section to access tracking from vendors to customers. By enabling the Display Lots & Serial Numbers on Delivery Slips, serial numbers are visible in delivery slips. We can see the expiration dates on delivery slips by enabling Display Expiration Dates on Delivery Slips, as depicted in the screenshot below.
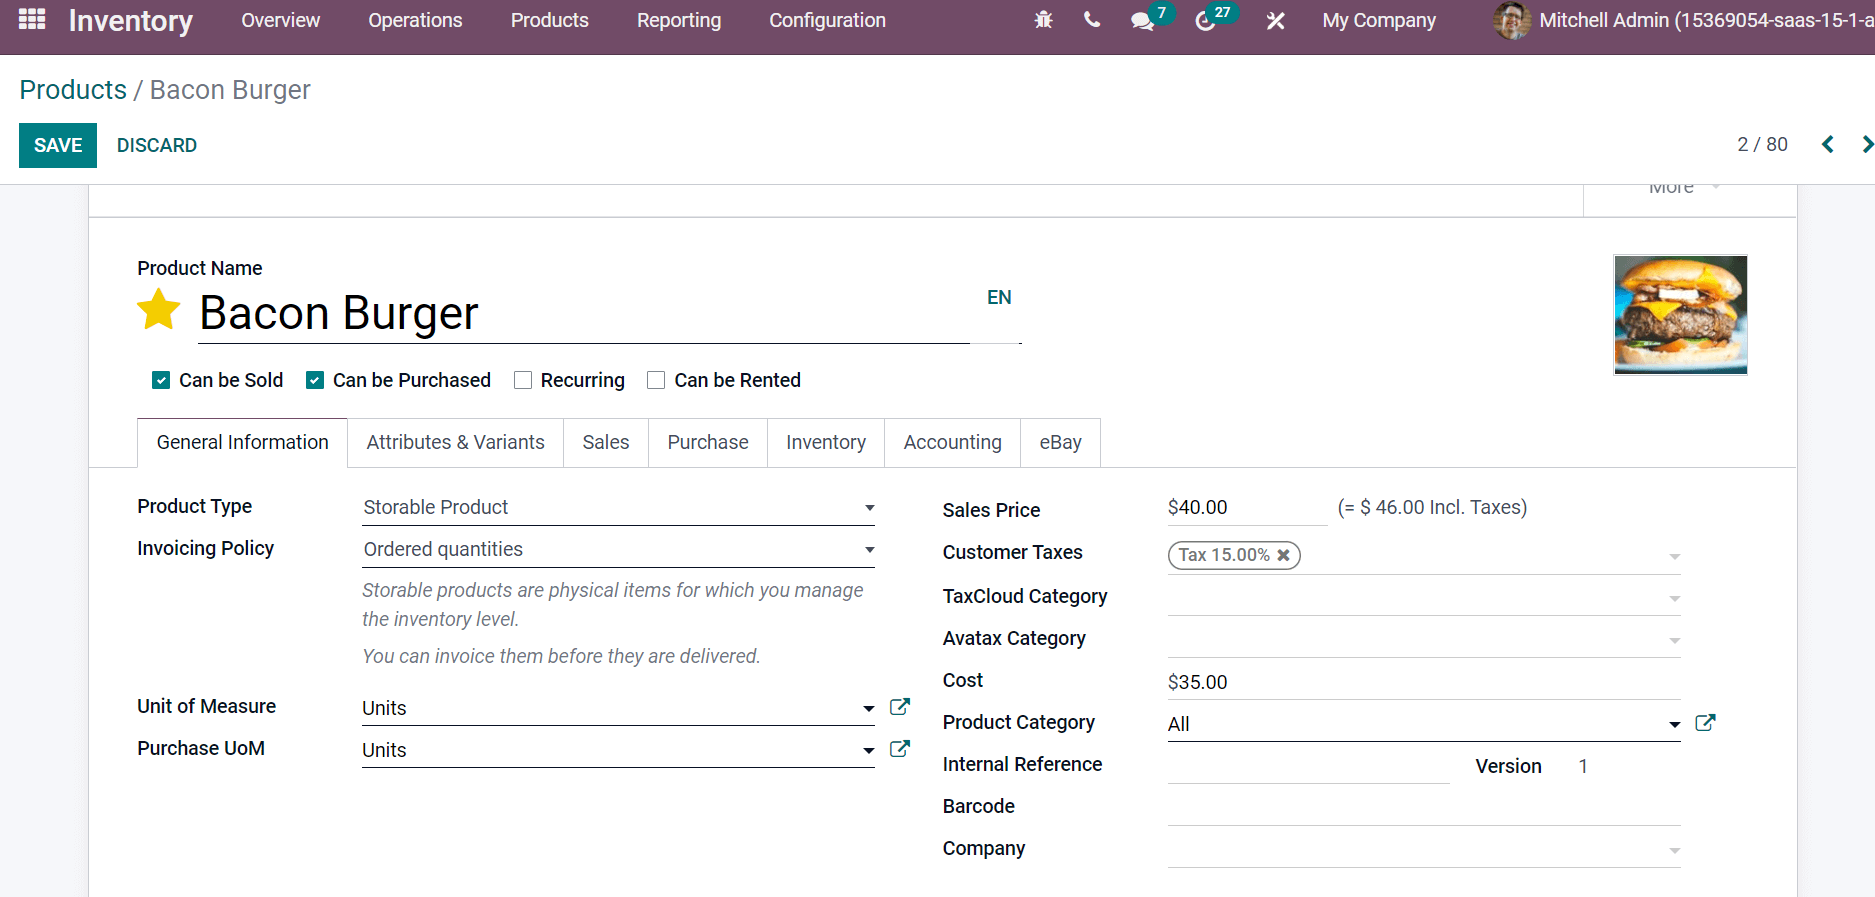
Choose the SAVE icon after enabling the options inside the Traceability section. Now, choose a product, 'Bacon Burger', from the Products tab and set the expiration date. In the Products window, you can add Product Type, Sales Price, Cost, Invoicing Policy, Product Category, and other measures inside the General Information tab, as displayed in the screenshot below.
Inside the Inventory tab, you can see the option to track products from the Traceability section. The Tracking is based on By Lots and By Unique Serial Number, as in the screenshot below.

By choosing By Lots as Tracking, a new Expiration Date field appears before you. After enabling the Expiration Dates field, the Dates section opens before you. The Expiration Date is only visible after selecting By Lots or By Unique Serial Number options inside the Tracking field.
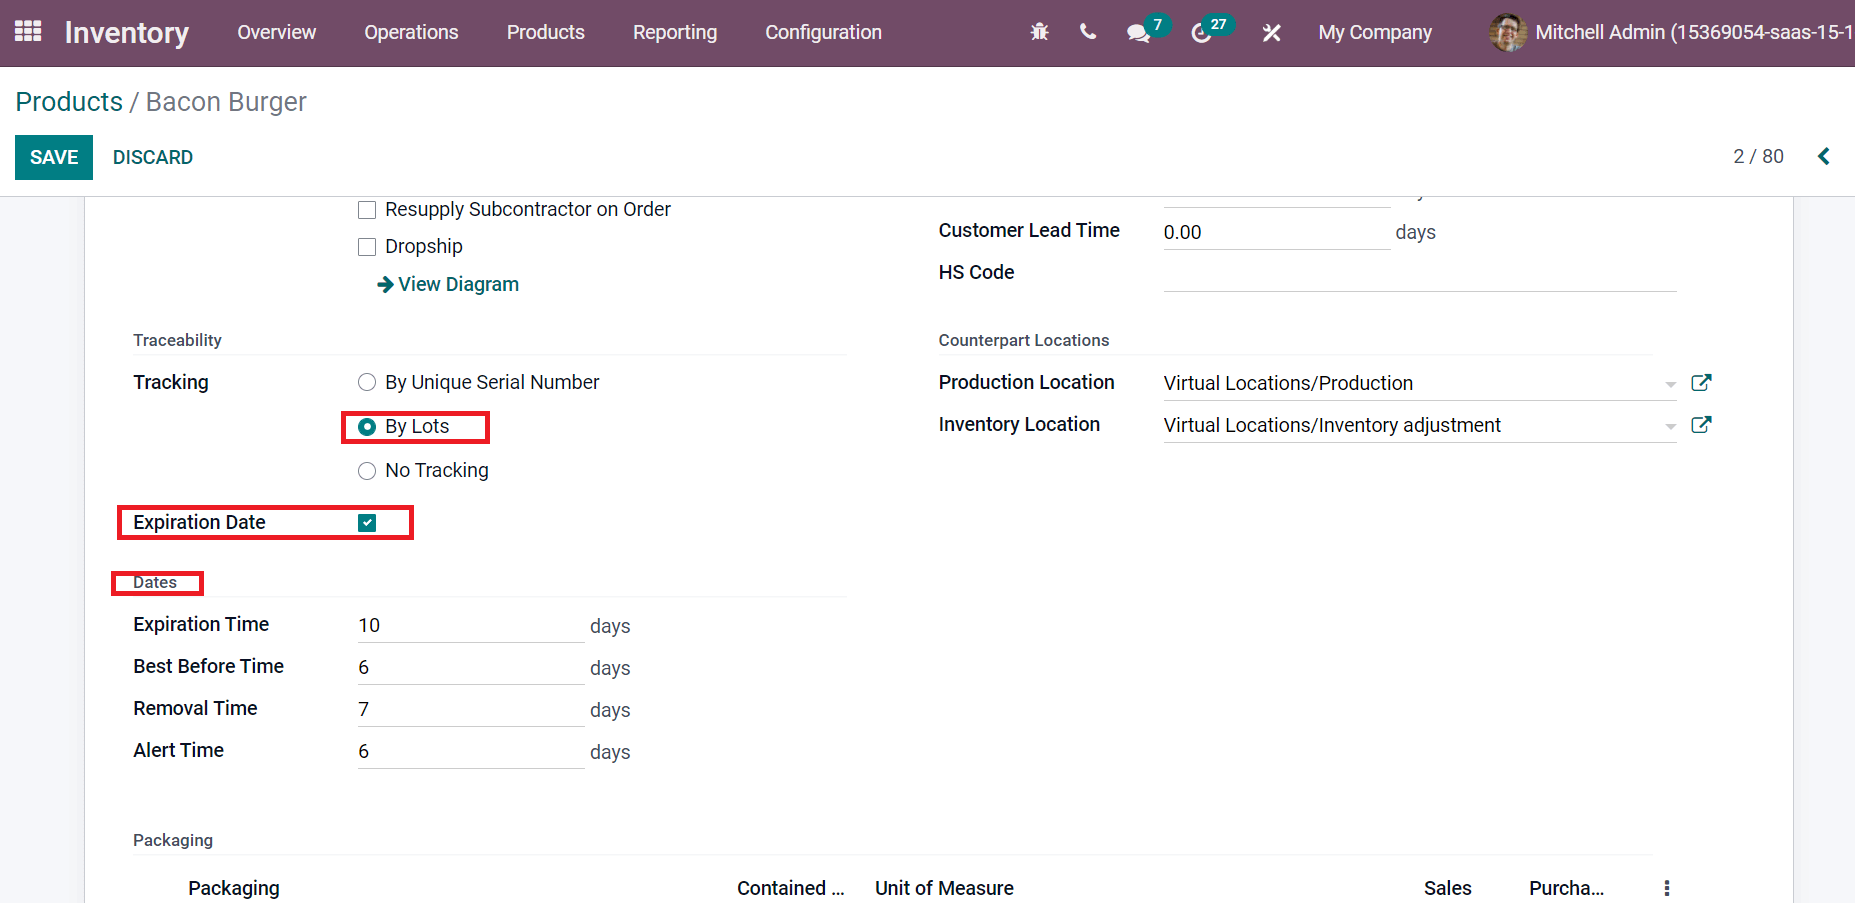
Several days after a product's receipt from the vendor is an Expiration Time, and the goods are dangerous or not to be consumed. Here, we set an Expiration Time of 10 days for the product 'Bacon Burger'. The count of days before the expiration date later in which goods start being destroyed is a Best Before Time, and we add six days here. Moreover, the number of days before expiration day after which products are removed from stock is Removal Time, and we added seven days for Bacon Burger. Alert Time is the date on which an alert should be activated for a product serial number, and it is set as six days. After adding this information, select the SAVE icon in the Products window.
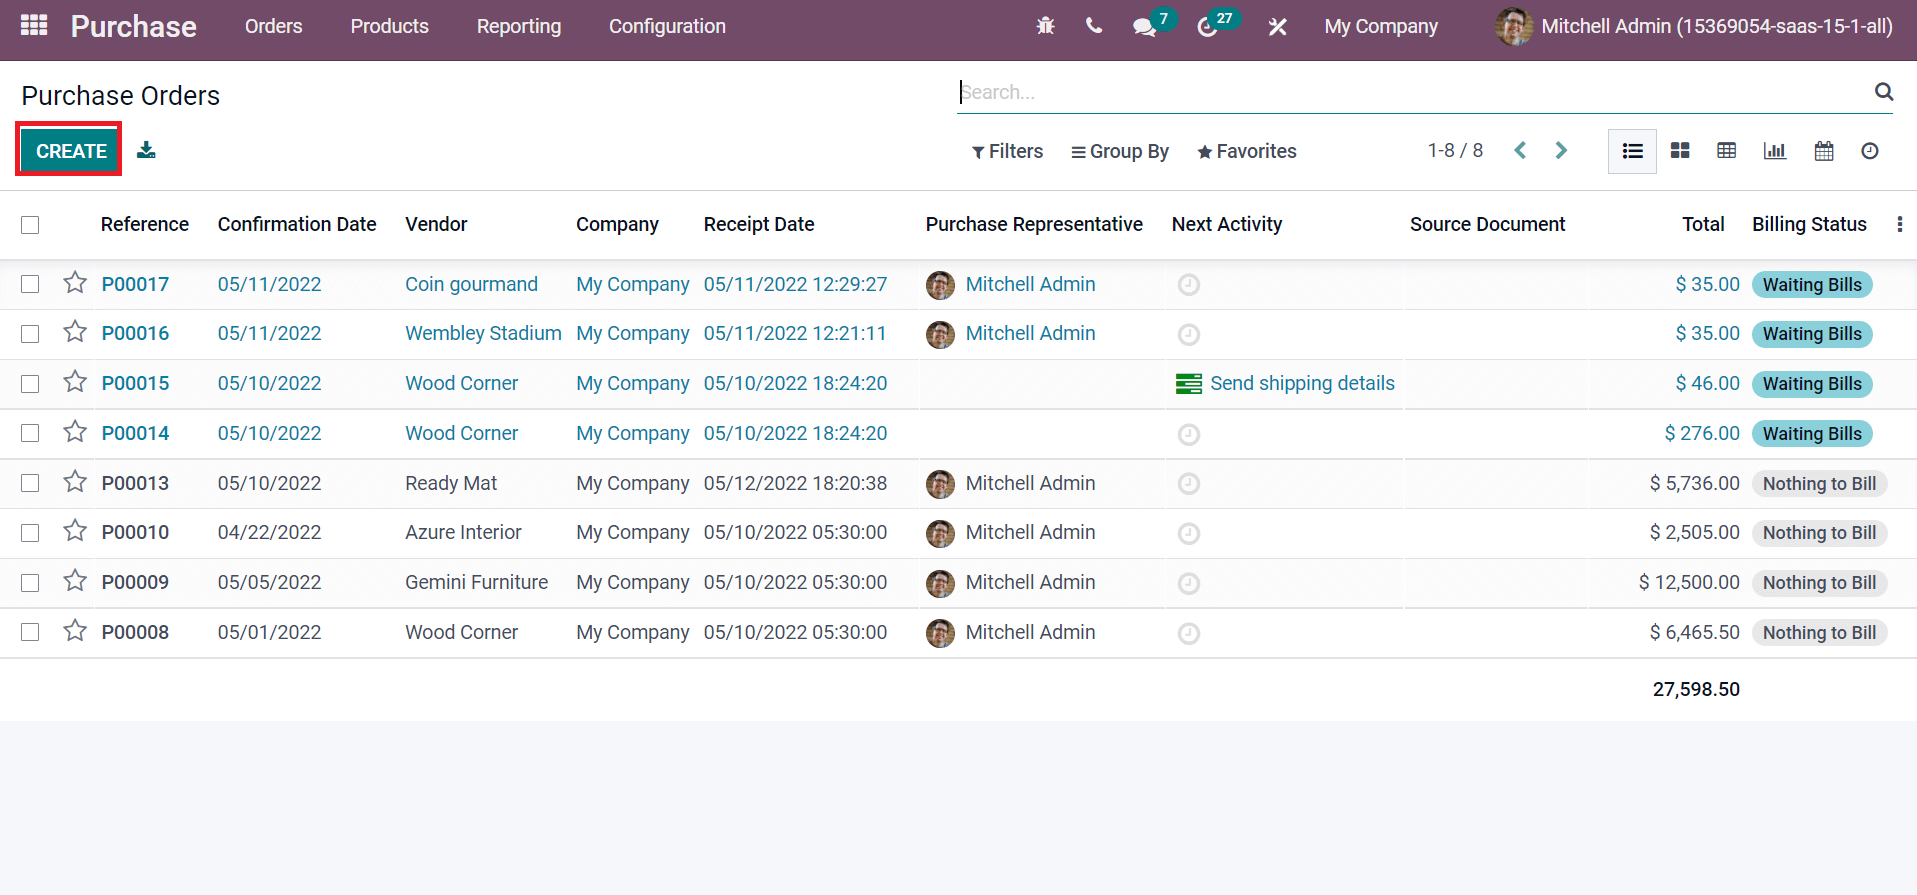
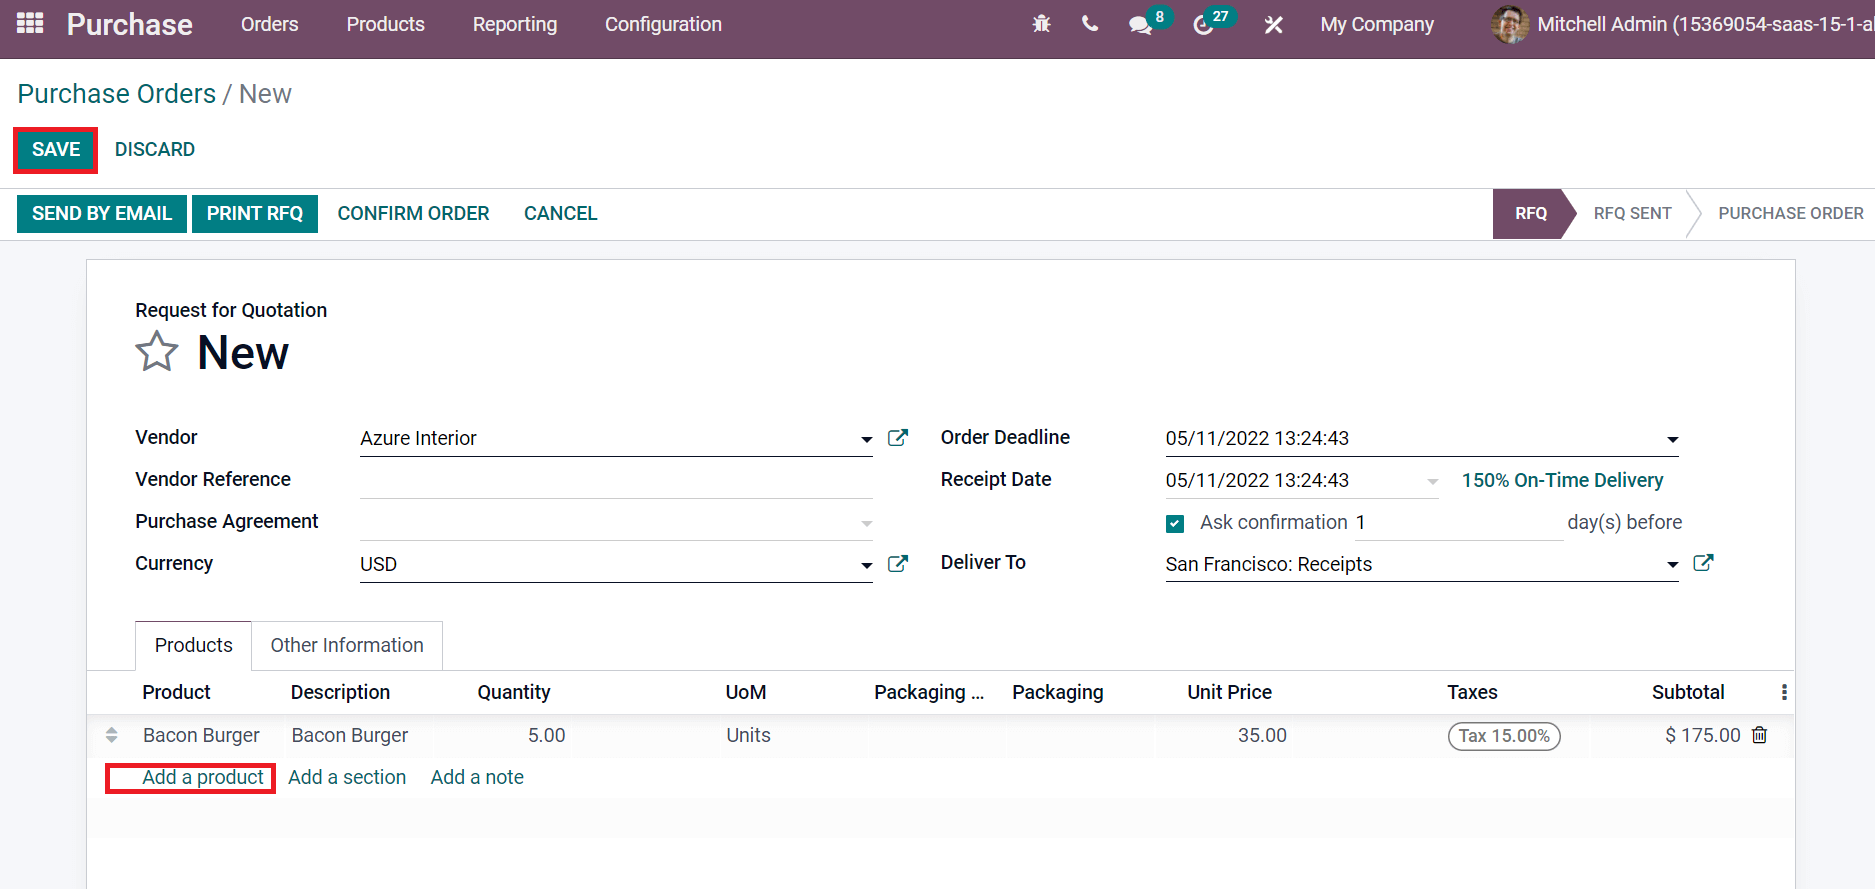
Now, let's develop a purchase order for the Bacon Burger. Go back to the Odoo 15 Purchase module and select the Purchase Orders menu in the Orders tab. The Purchase Orders window shows the details such as Reference, Vendor, Receipt Date, Total and more data. Click on the CREATE icon in the Purchase Orders window, as mentioned in the screenshot below.
In the new window, select your vendor and add the Product 'Bacon Burger' by clicking on Add a product option. Here, we choose five quantities of Bacon Burger and click on the SAVE icon, as portrayed in the screenshot below.
After that, confirm your order and receive products from the vendor. We can view the purchase order's Receive From and Destination Location in the new window, as depicted in the screenshot below.
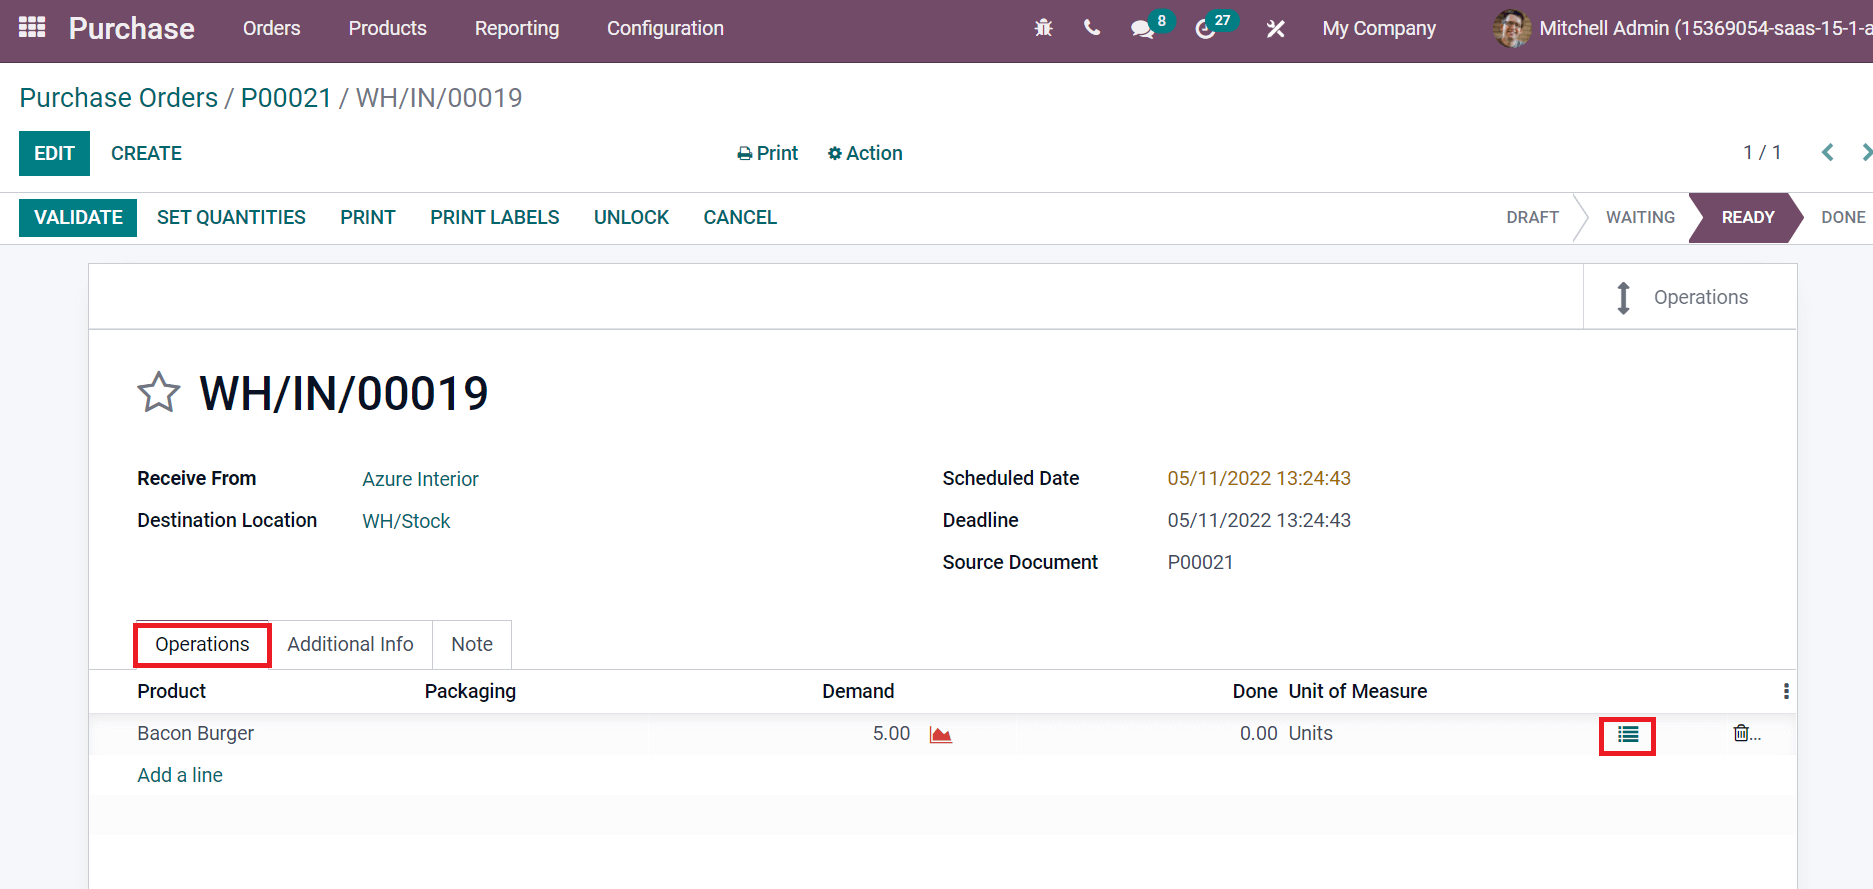
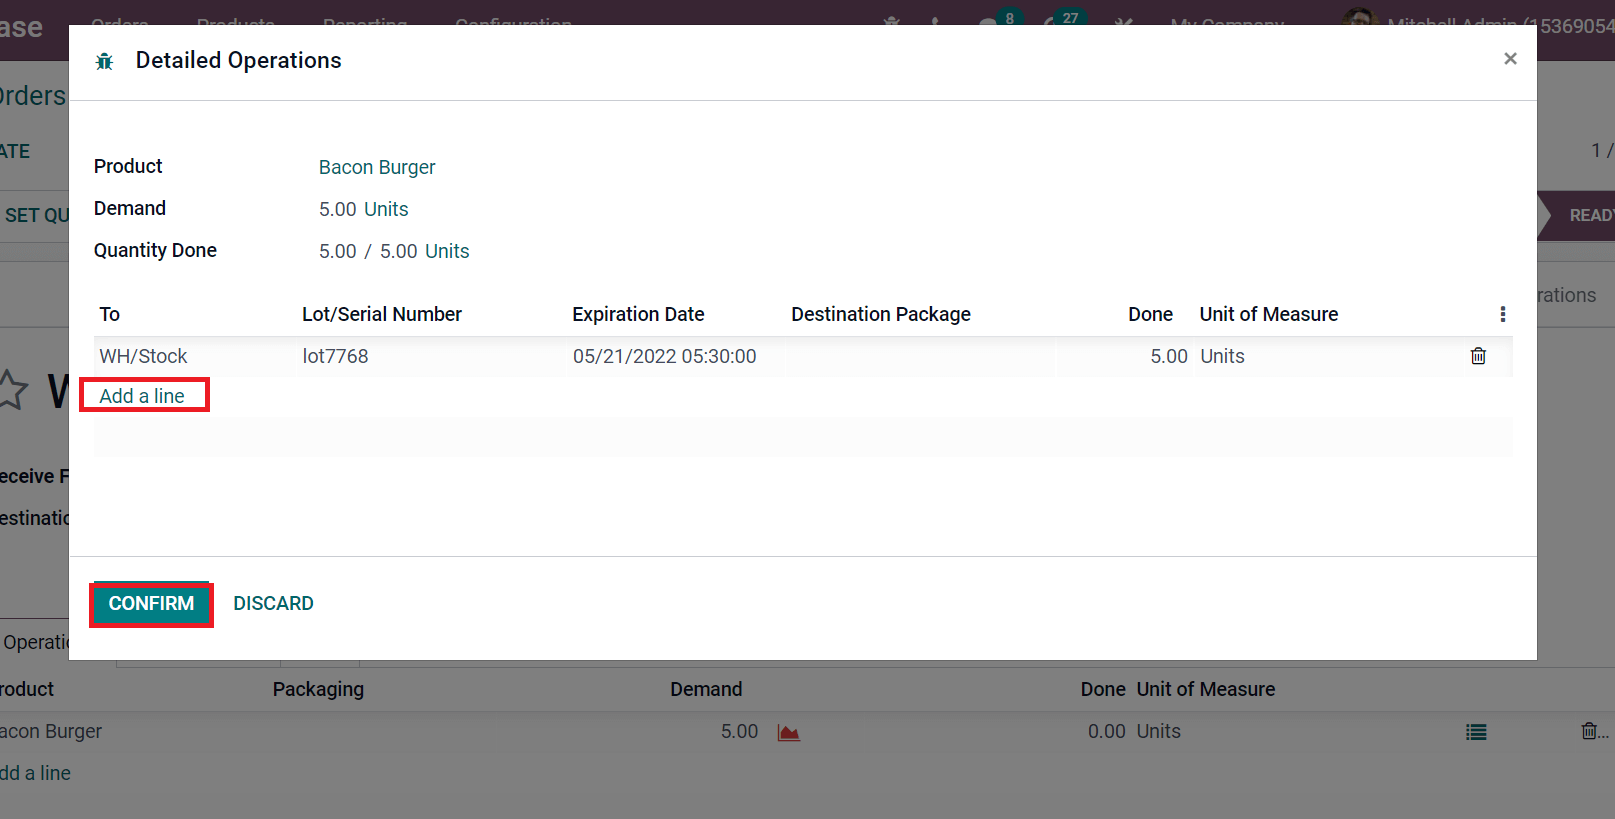
Before validating, you need to supply a Lot/Serial number for 'Bacon Burger'. So, click on the Details icon at the end of the product information. A new screen opens before you that shows the Product Name, and Demand is the product's quantity from an inventory point of view. You can apply for a serial number by clicking the Add a line option. Here, the user can add Lot/Serial Number and Units as 5. Later, click on the CONFIRM icon in the Detailed Operations window, as illustrated below.
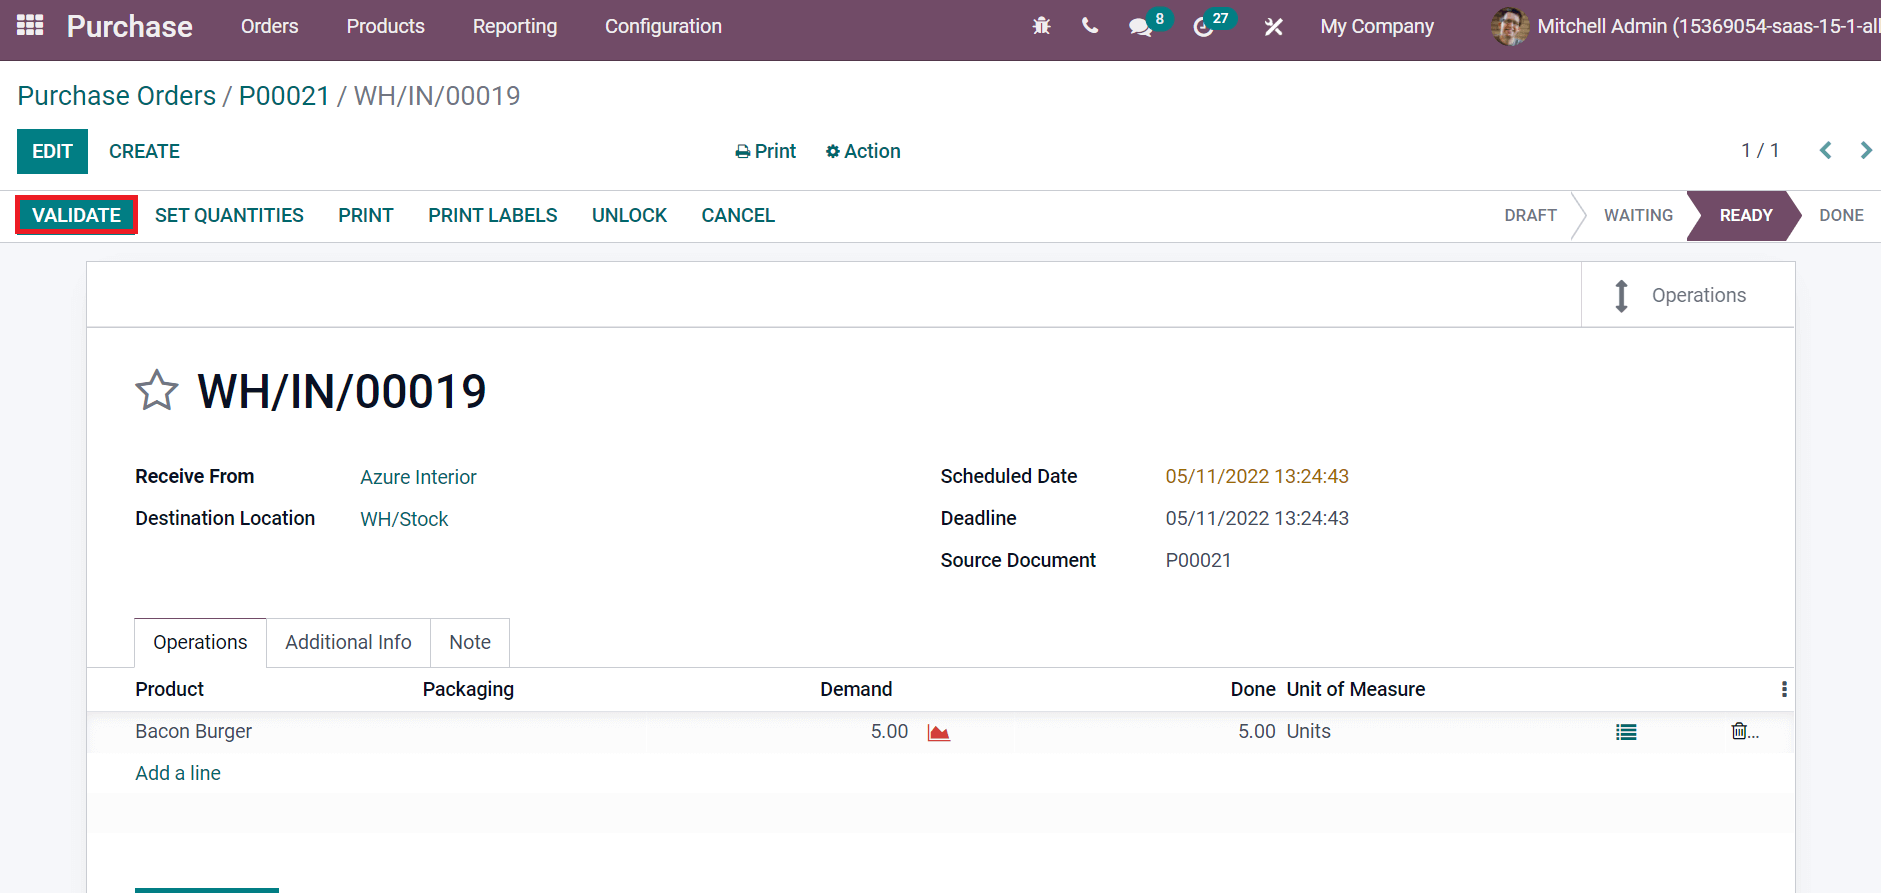
You need to select the VALIDATE button inside the Purchase order window.
After validation, the user can see a Traceability smart button and click on it.
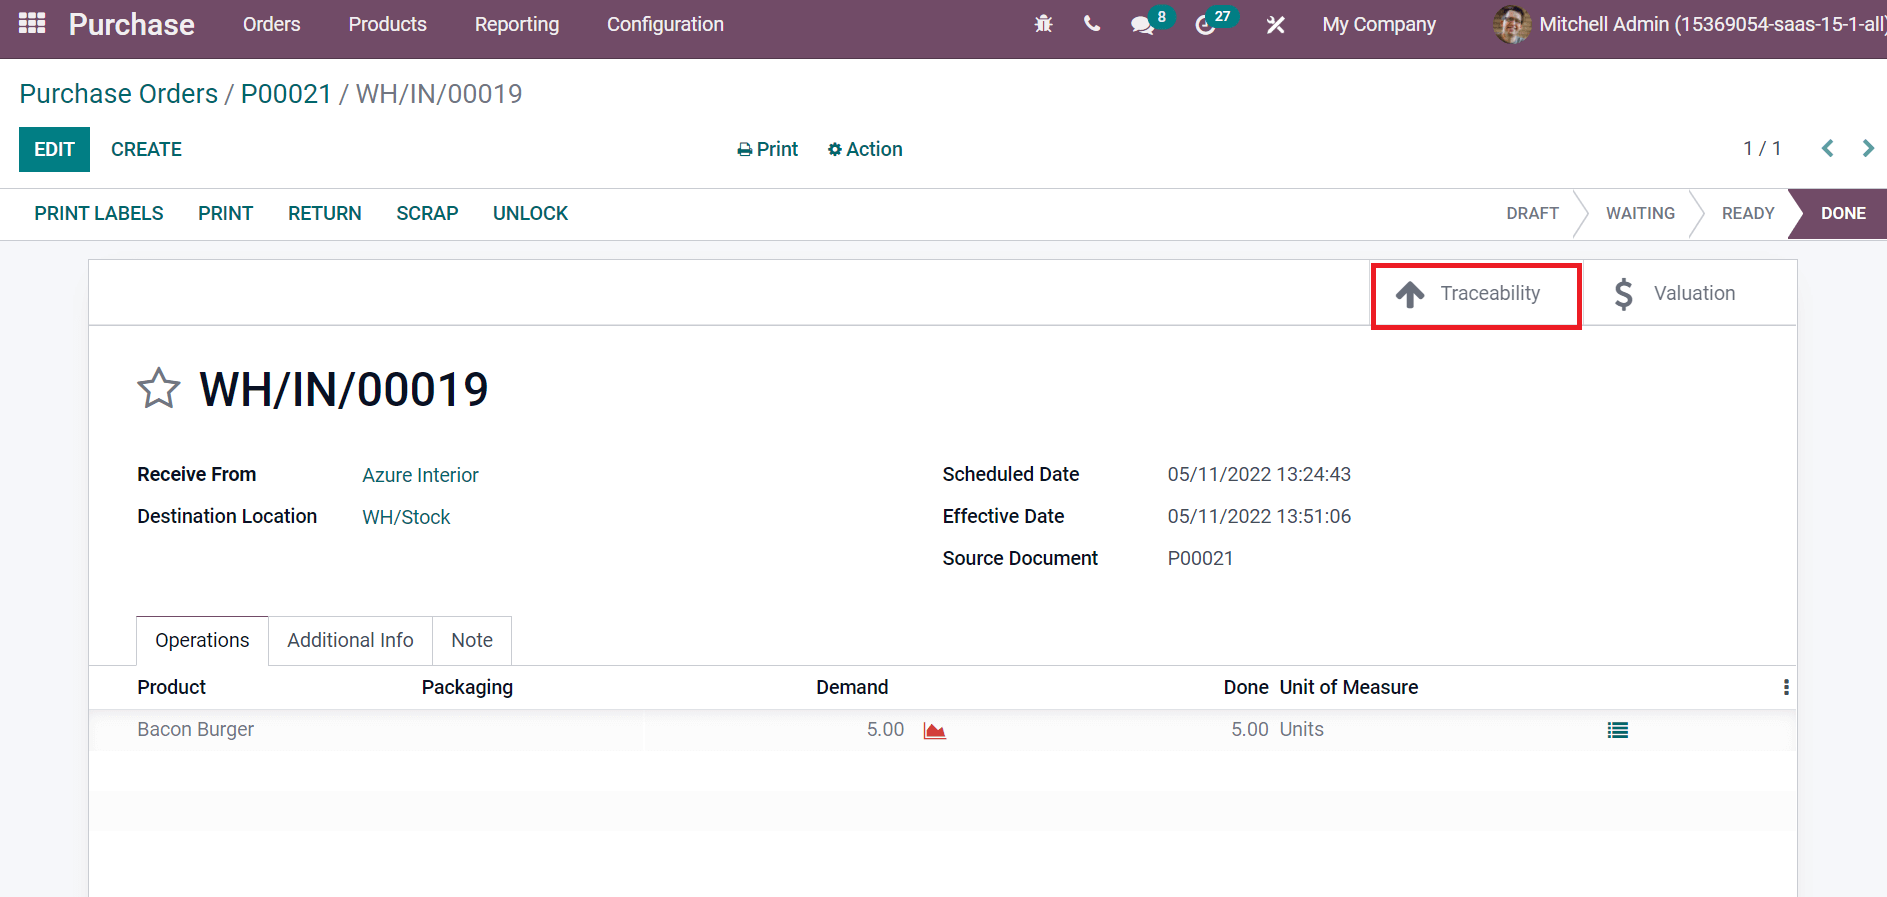
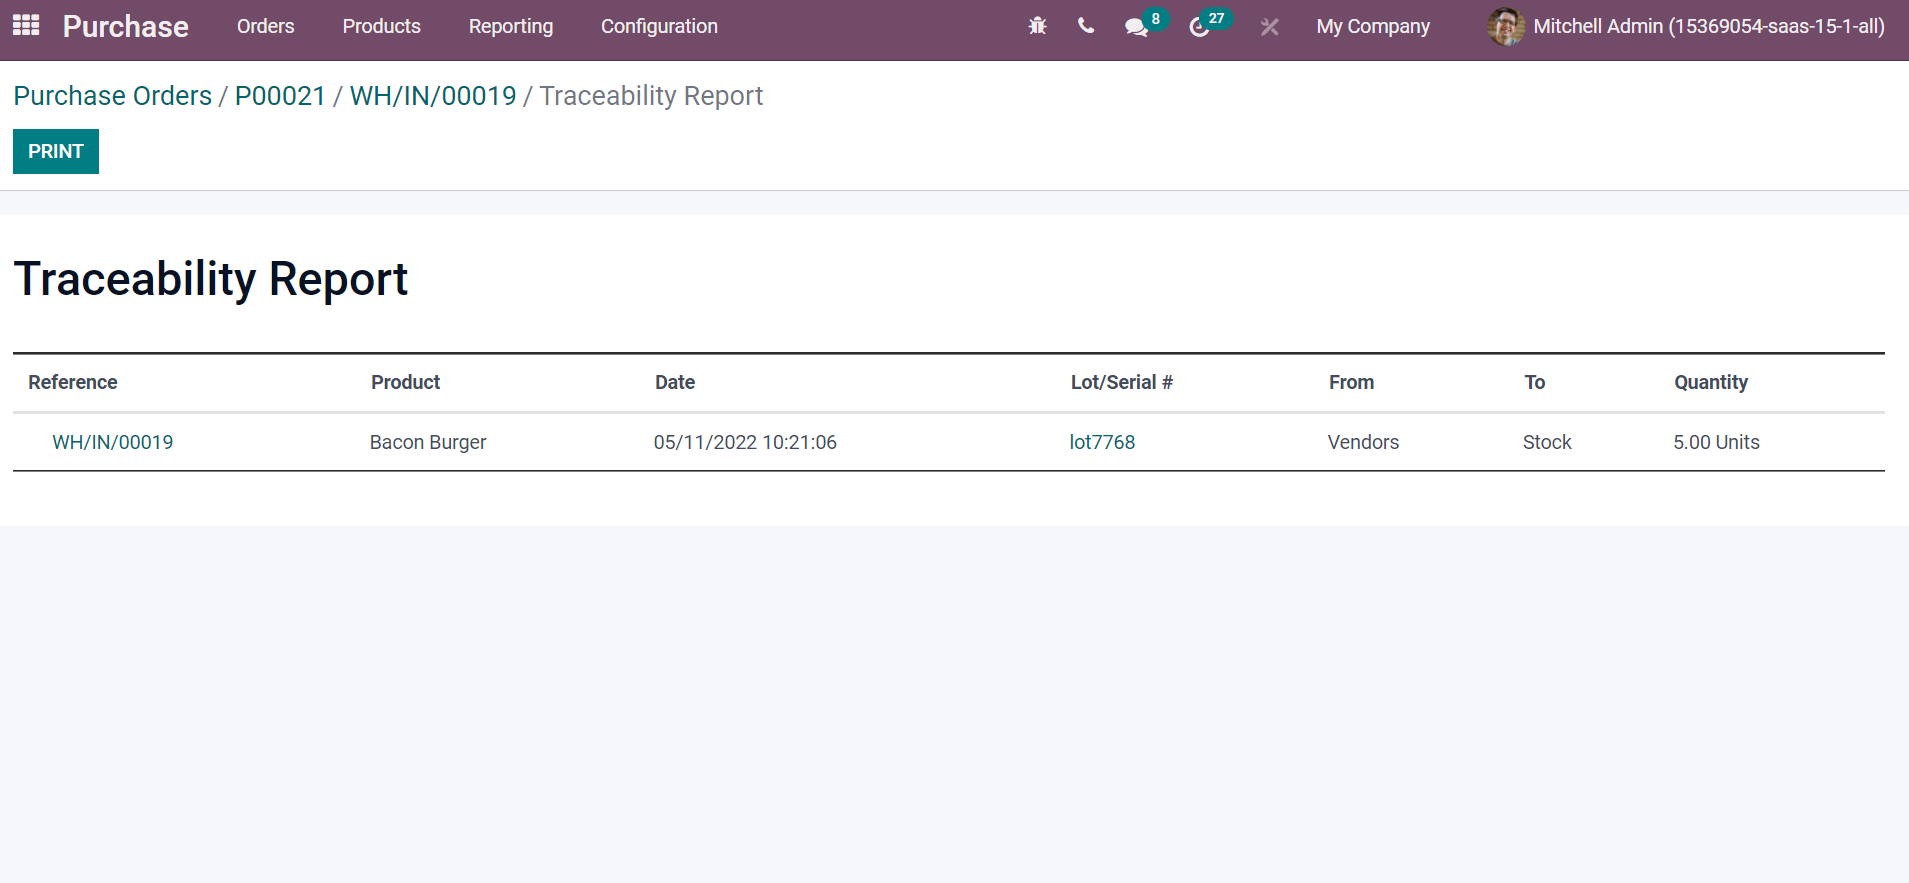
In the Traceability Report, we can view that five quantities of Bacon Burger are moved from vendor location to stock. The Lot/Serial number, Date, and Reference are viewable here as displayed in the screenshot below.
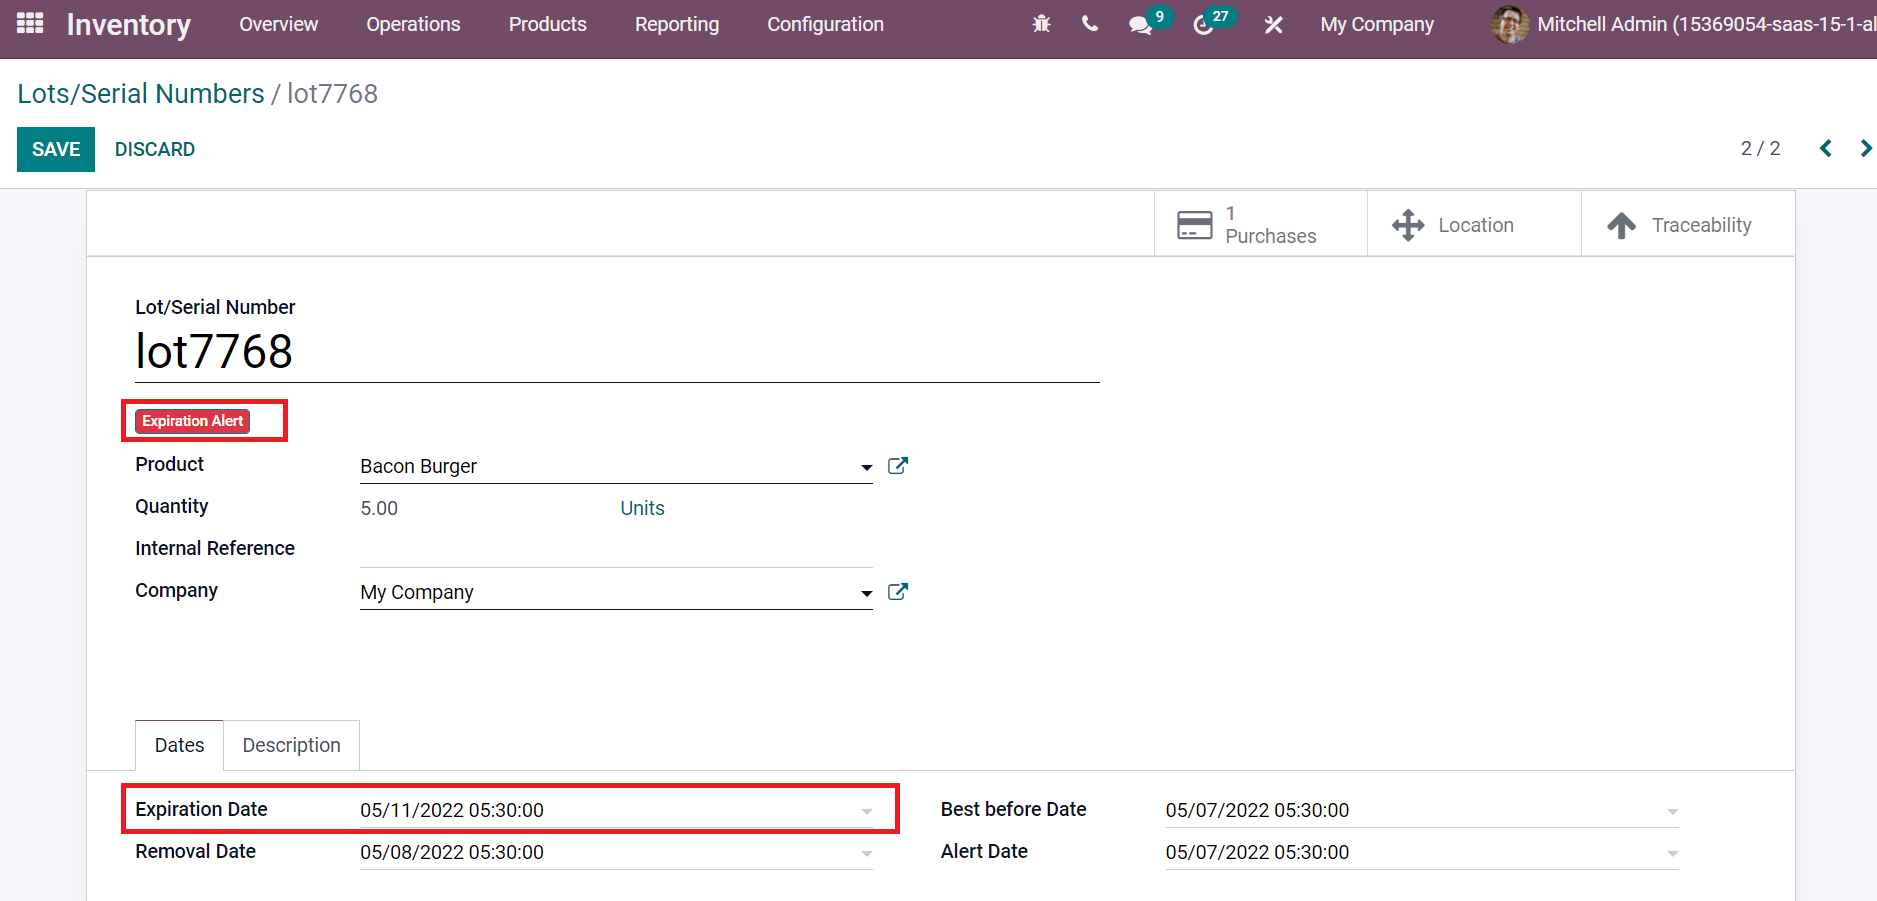
Next, we can move to the Odoo 15 Inventory module and choose the Lot/Serial numbers menu. Here, select your Lot/Serial number of Bacon Burger. In the Lot/Serial number of Bacon Burger window, the user can view the Product name, Company, and created Quantities as mentioned in the screenshot below.

Inside the Date section, you can view the Best Before Date, Expiration Date, Removal Date, and Alert Date. We can also edit it and make changes to the product date. By choosing the current date in Expiration Date, you can see an Expiration Alert below the Lot/Serial Number, as displayed in the screenshot below.
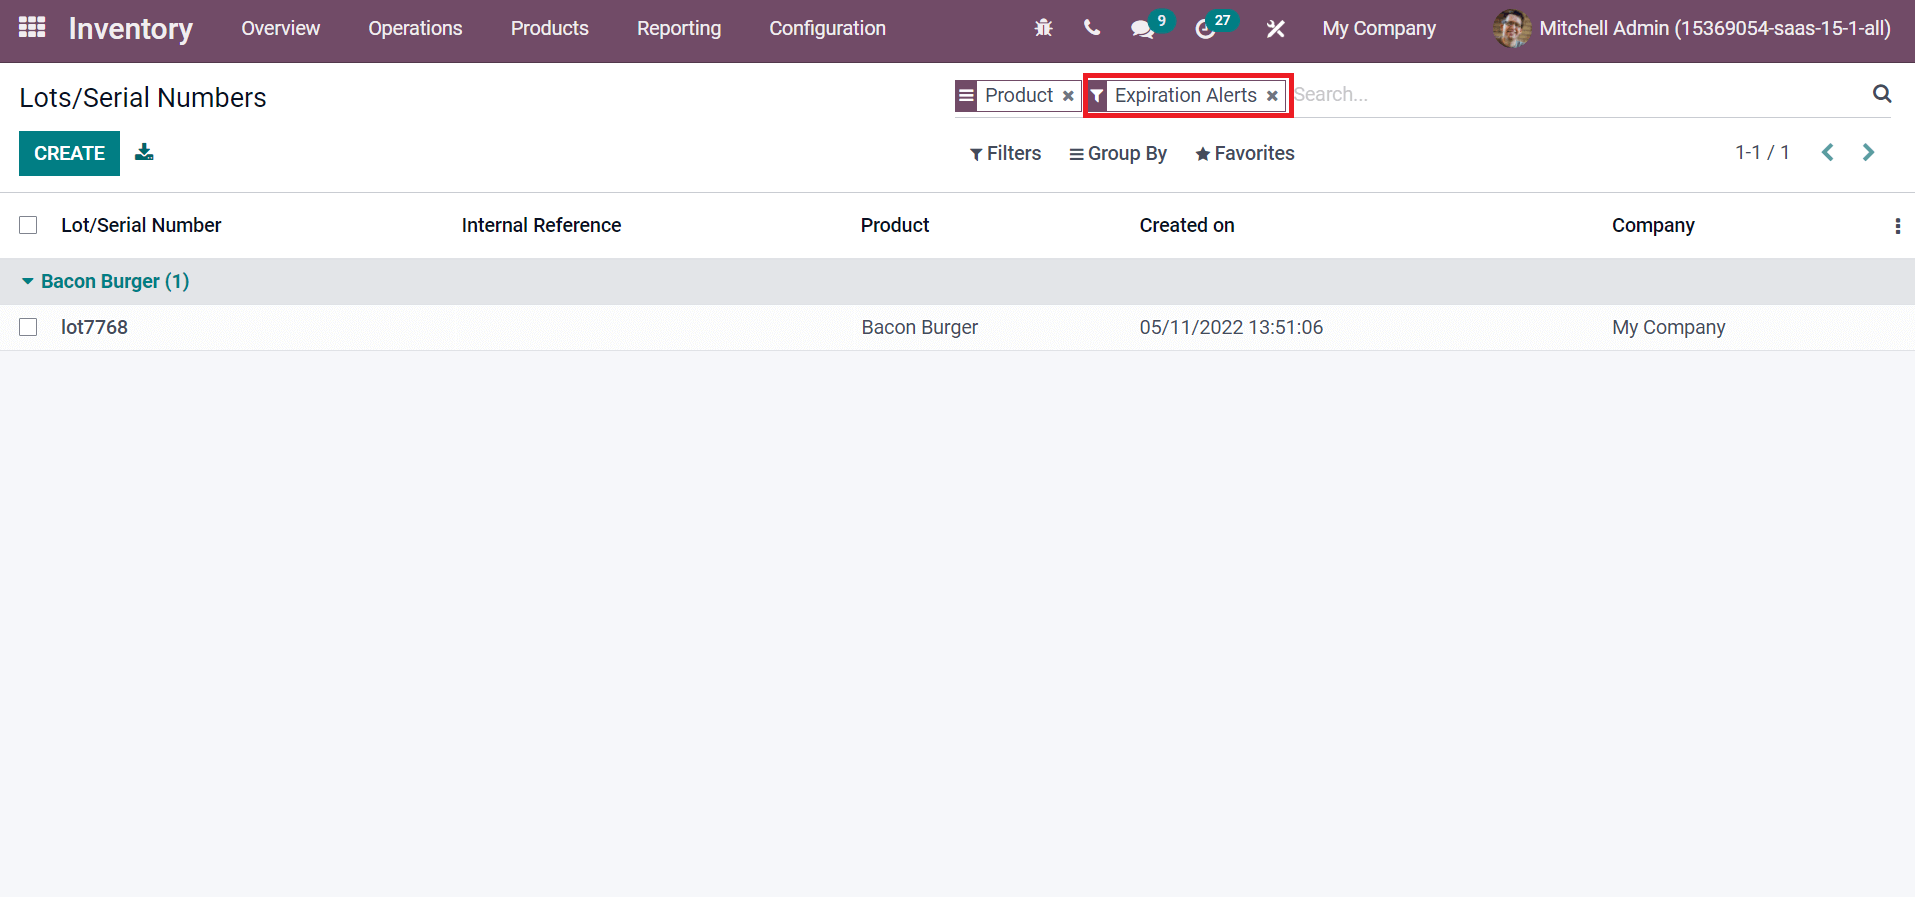
Lot/Serial Numbers window displays Internal Reference, Created on, Product, and Company details. Later, you can filter the Lot/Serial numbers using the Filter option. Select the Expiration Alerts inside the Filter option as denoted in the screenshot below.
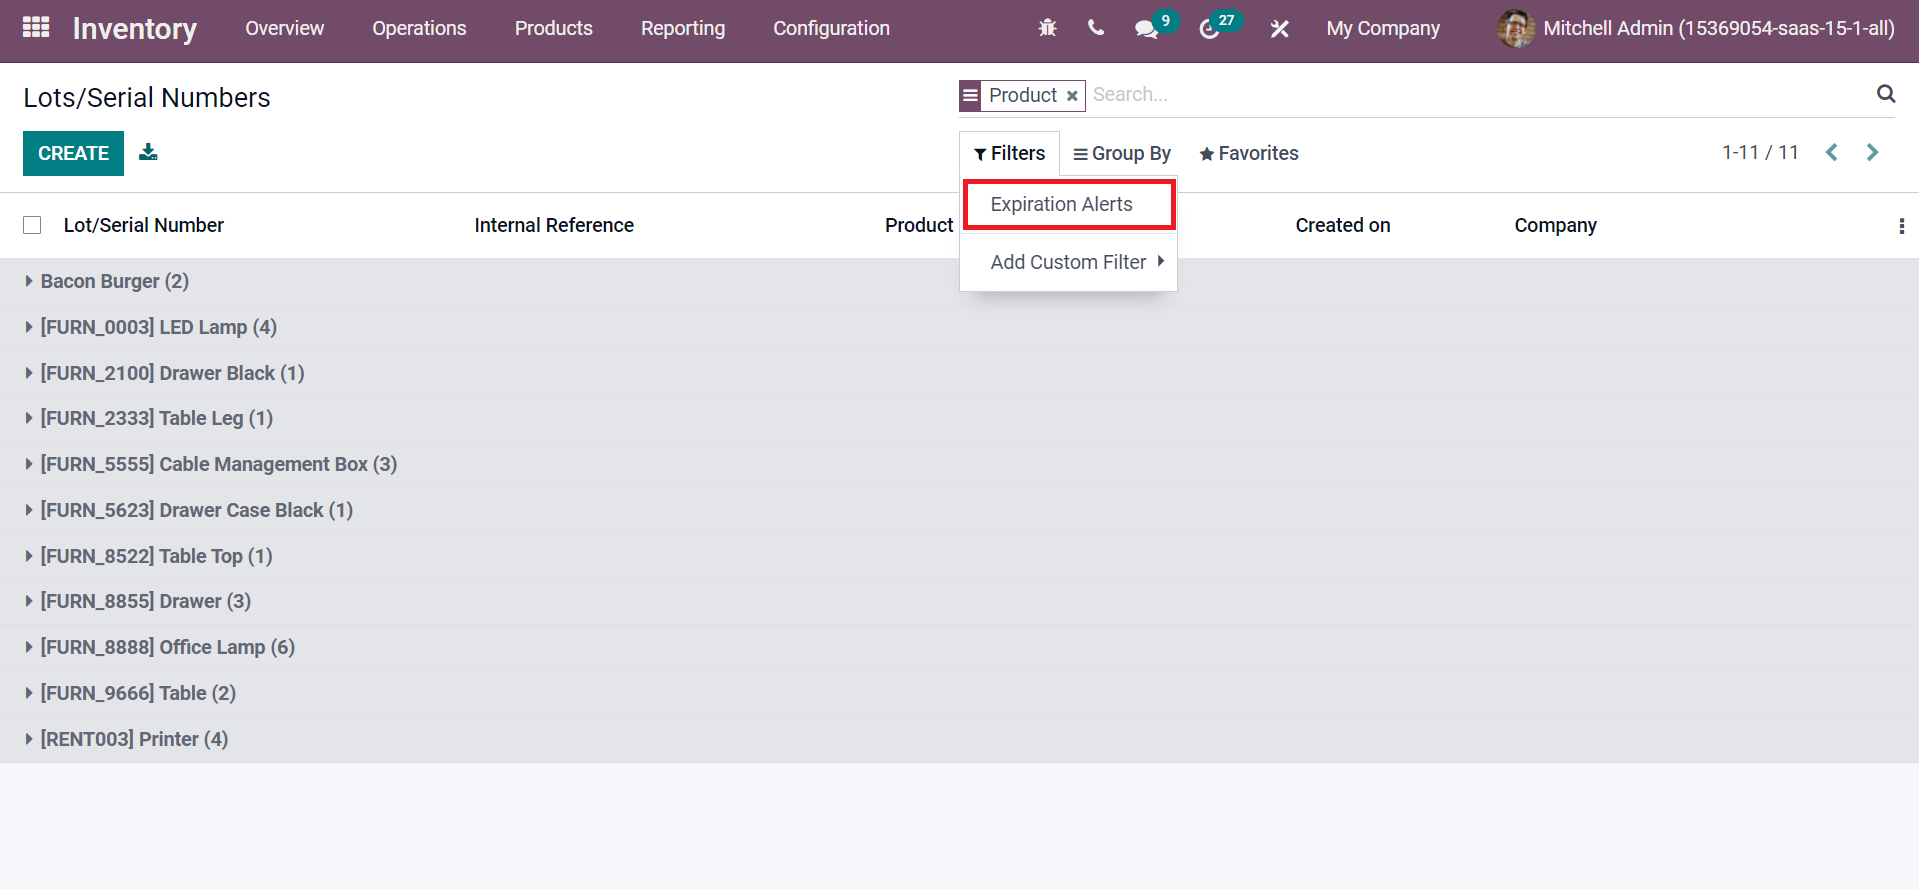
Hence, you can view the Lot/Serial Numbers of products that will be expired.
Users can quickly formulate expiration dates for products in a company with the help of the Odoo 15 Inventory module. Customers will be satisfied with the materials that consist of expiration dates and buy more to lead to business profit. Hence, Odoo ERP plays a significant role in efficiently boosting your business and planning new ideas.