The Odoo ERP system is a complete business resource management software program. This platform is widely used throughout the organization to manage business processes. Odoo offers functional business apps that are seamlessly integrated and can be combined to create an ERP solution. The Enterprise edition is offered with SaaS subscription pricing, and the Community edition is free.
Users can easily create and manage webpage layouts, edit content, add videos and media, change website banners, and manage website pages. The use of application-specific modules by developers will be made simpler by the use of ready-to-use themes. You can build a website with Odoo without knowing any code. The website builder application on the Odoo platform is so unique that it will take care of the practical aspects of building a website, which can be done quickly.
Some features of the Odoo16 website
* The website platform for Odoo offers a large selection of common themes.
* It consists of enticing building blocks that are simple to access using the drag-and-drop functions that can be customized.
* Websites can be improved by users by including stunning visual effects.
* It can be used for mobile applications.
* From the application platform, users can access millions of copyright-free images.
* Translations are made simple with inline translation and GeoIP visitor language detection.
* Utilize the same database to power multiple websites at once and share products between them.
* By posting blog entries, you can quickly update the content of your website.
* The website builder has fully integrated with the email, push, and social media marketing features of Odoo.
What are Odoo Payment Acquirers?
Your customers can make payments on their customer portals or your eCommerce website, thanks to the numerous payment acquirers that Odoo embeds. They can set up recurring payments for sales orders, invoices, or subscriptions using their preferred payment options, like credit cards.
By making it easier for your customers to pay using the payment method they prefer and are familiar with, having a variety of payment options increases your chance of receiving payment on time or even immediately.
How to Set Up Payment Acquirers?
Payment Acquirers, Aka. Payment Providers are an inevitable part of every business sector because it provides hassle-free payment processing, and also customers can choose from a wide range of payment provider services.
Customers may need multiple Payment options like Payment Provider Services, Card Payments, and Bank services while making payments for sales and purchases.
Establishing payment acquirers is an effortless and straightforward task that can be accomplished with ease. Let me lead you through the process.
We can go inside the website module platform to demonstrate the described scenario,
You can see the website module homepage view from the screenshot below.
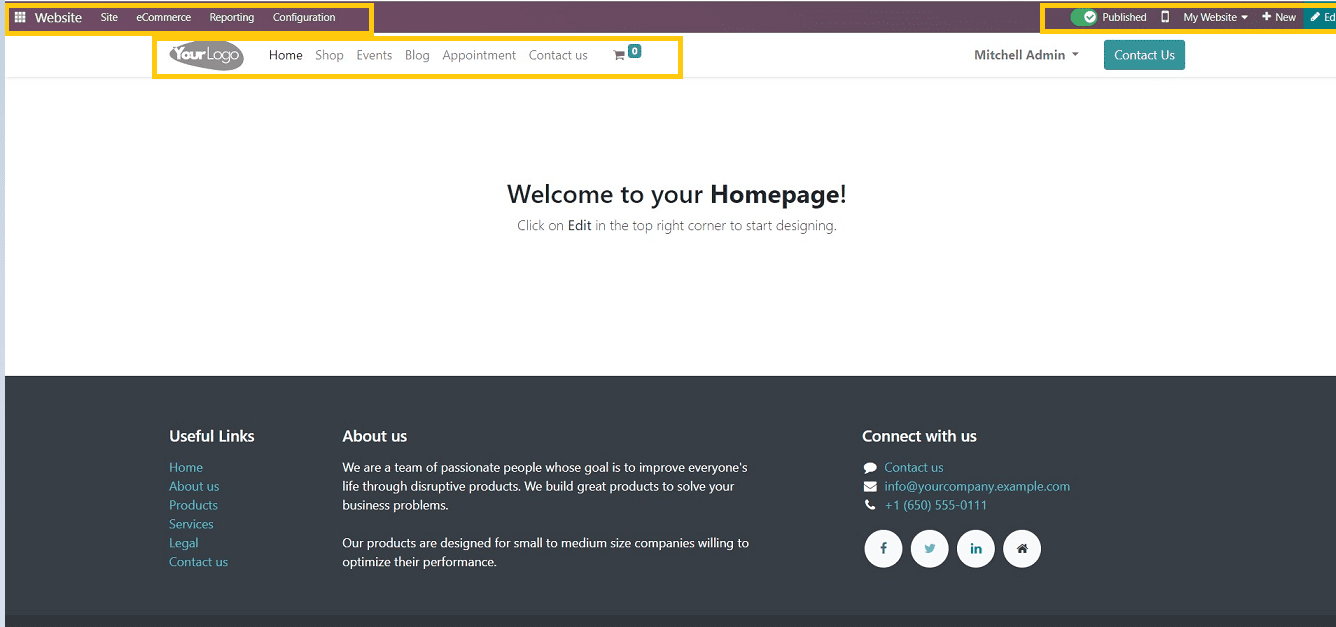
The website homepage will be opened. We can see the various Odoo website menu bar such as Site, E-Commerce, Reporting, Configuration, Publish & Unpublish, Mobile Preview, Website, Create New and Edit.
We can see the website template menu also.
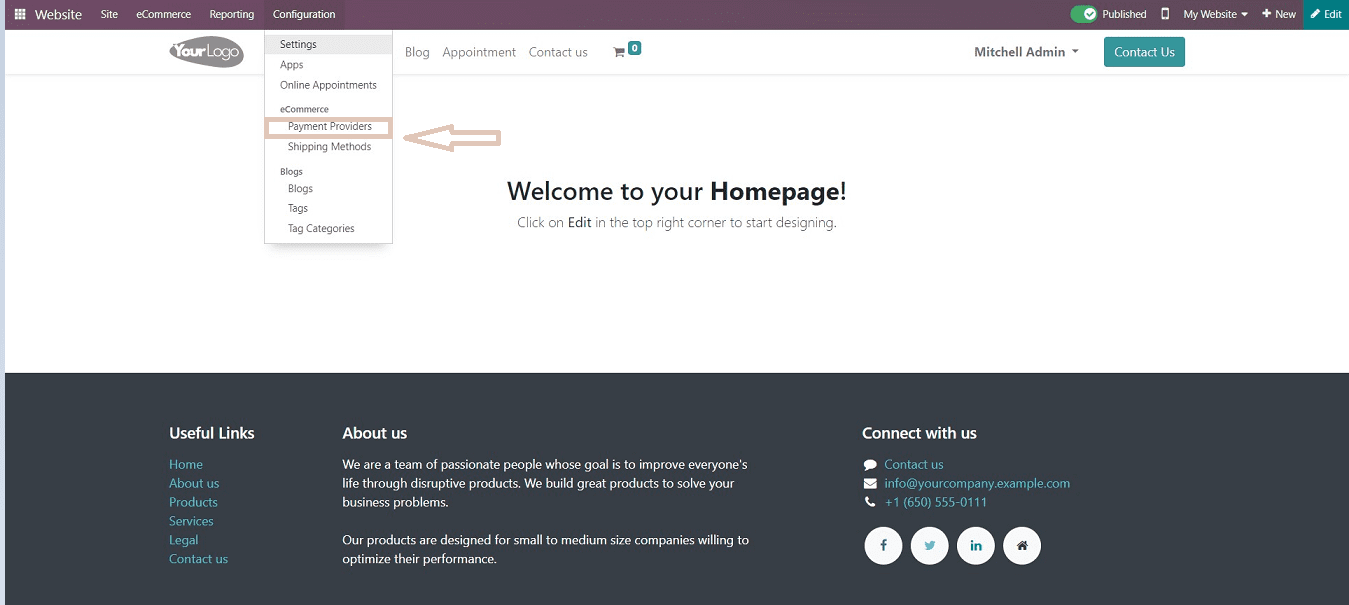
Select the Payment Provider Option from the “Configuration” menu, as shown in the above screenshot. We can see the payment provider list on the upcoming page.
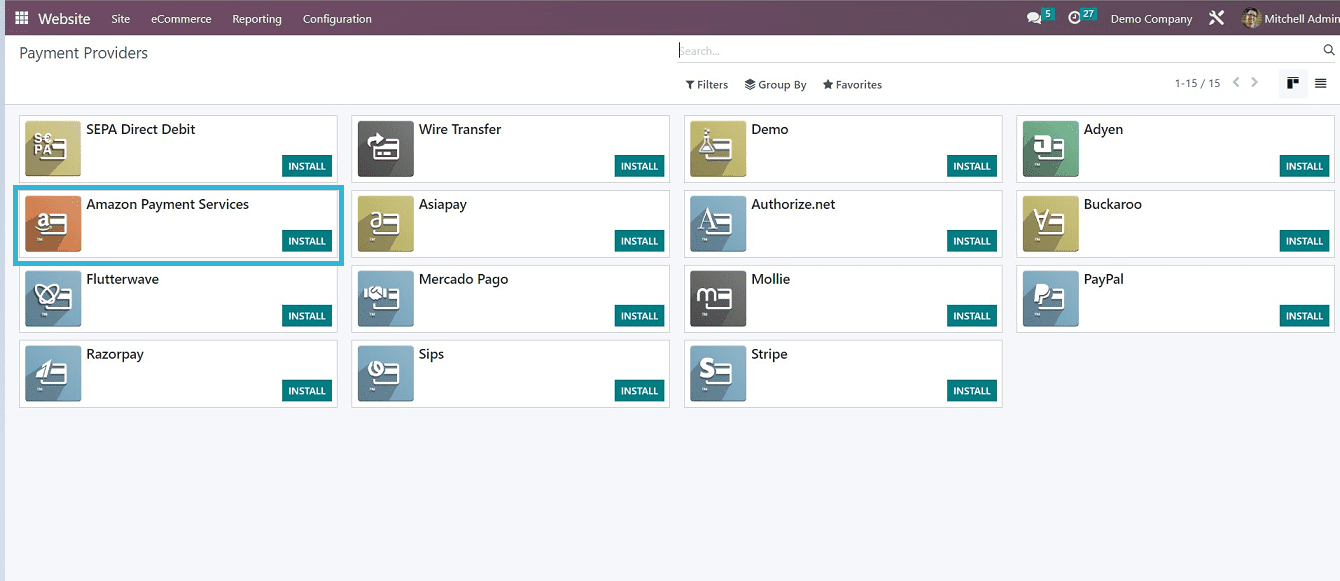
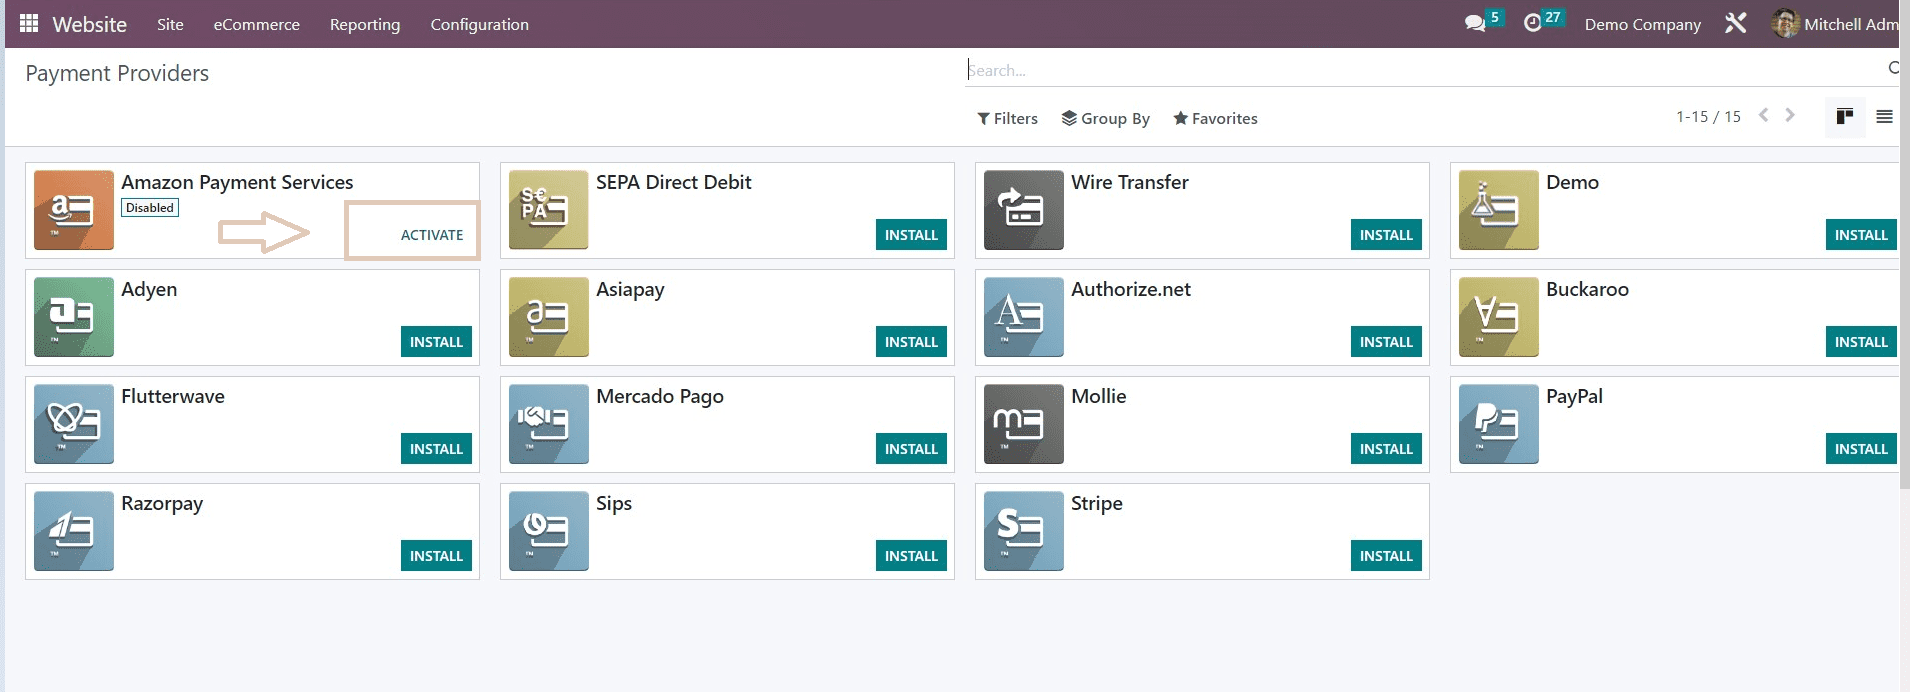
We can see the list of various payment options as SEPA Direct Debit, Amazon Payment Services, Wire Transfer, Asiapay, Adyen, Flutterwave, Razorpay, Mollie, Stripe, Paypal, etc.
To activate the payment provider on our website, Just click on the “Install” button provided near the respective payment option. Immediately it will be activated, and the “ Activate” button will appear on the respective Kanban view, as illustrated in the screenshot below.
Here we are going to activate the “Amazon Payment Services” for demonstration.
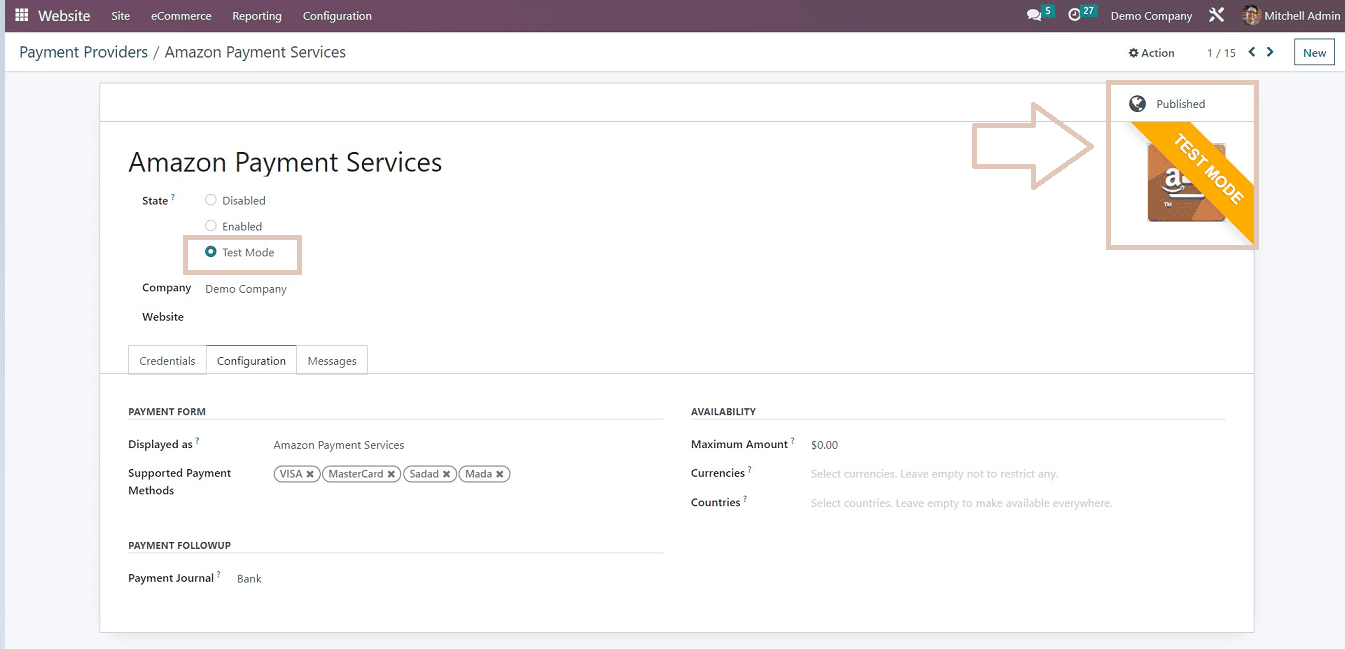
After clicking on the “Activate” button, it will open a form view in which we can provide the payment details, bank details, etc.

We can see the Three sections in the payment provider configuration form, and also, we can see the status of our service as “Unpublished” and “Disabled” from the upper right corner of the form view, as illustrated in the above screenshot.
Users can select the state of the particular payment provider by clicking on the options such as Disabled, Enabled, and Test Mode.
Mention your company details and website link in the text fields and fill in the required data in each section as described below.
Credentials
* Merchant Identifier - Users can mention the merchant account code used with this payment provider.
* Access Code - Access code or password used for this payment provider.
* SHA Request Phase - An key or password is required for using the embedded payment fields.
* SHA Response Phase - If you use the embedded payment fields, such as the Card data entry mode, This key must be entered.
Configuration
Fill up this section with the payment details such as Payment Form, Payment Followup, and Availability, Such as
* Displayed As - Description of the Payment Provider
* Supported Payment Methods - Uses can select the supported payment methods, cards, wallets, etc., in this field.
* Payment Journal - Provide the payment journal as the bank.
* Maximum Amount - User admins can set the maximum limit of payment amount in this data field.
* Currencies - Provide the list of currencies available with this payment provider.
* Countries - Provide the list of countries in which the payment is available.
The fields for currencies and countries are completely optional. Leaving the fields empty will prevent any restrictions. Users can do this as per their business requirements.
Messages
* Help Message - Set the message to help and explain the payment process. Users can add widgets, navigation links, etc.
* Pending Message - Create a message to let users know when a payment is still being processed.
* Done Message - Message to inform successful payments.
* Canceled Message - This message will let the customer know that their payment process has been canceled.
After filling in the required data fields, save the changes and publish the payment provider by simply clicking on the “Unpublished” button on the form.
Here I am selecting the “Test Mode” to illustrate the process. Users can give their genuine bank details and access keys to set up the payment provider.
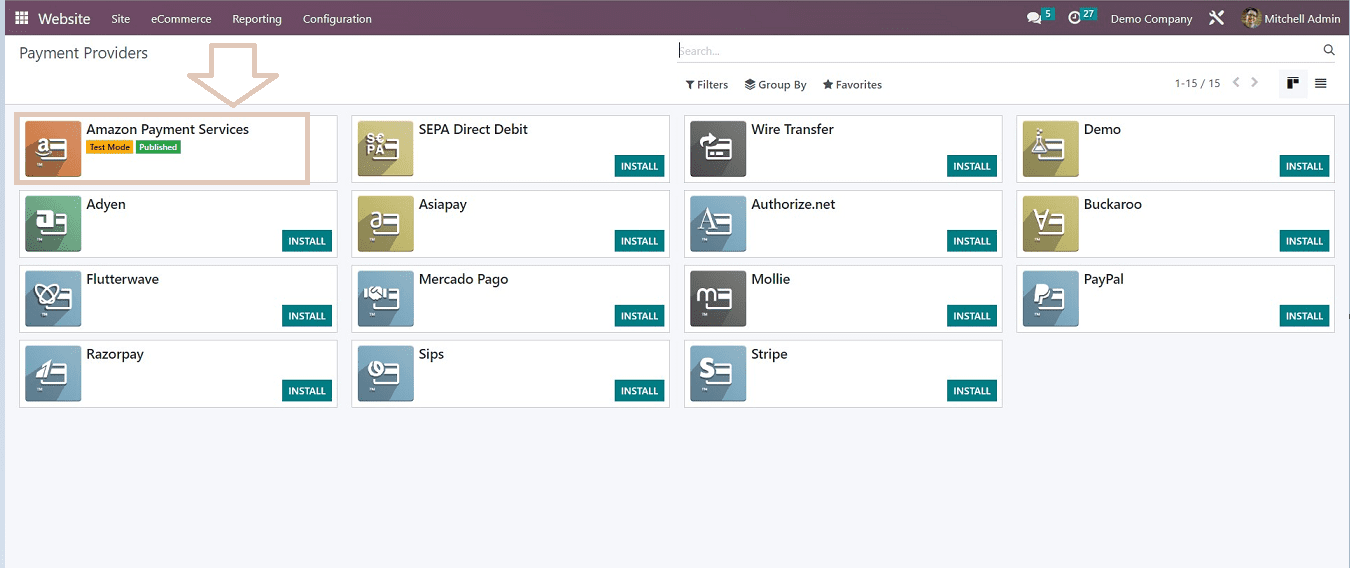
Then we can see the “Amazon Payment Service” has been activated from the payment provider home page, as shown in the below screenshot.
Just as previously mentioned, we can activate and deactivate the payment providers. For each of the service providers listed in the Odoo Platform, the procedures are the same.
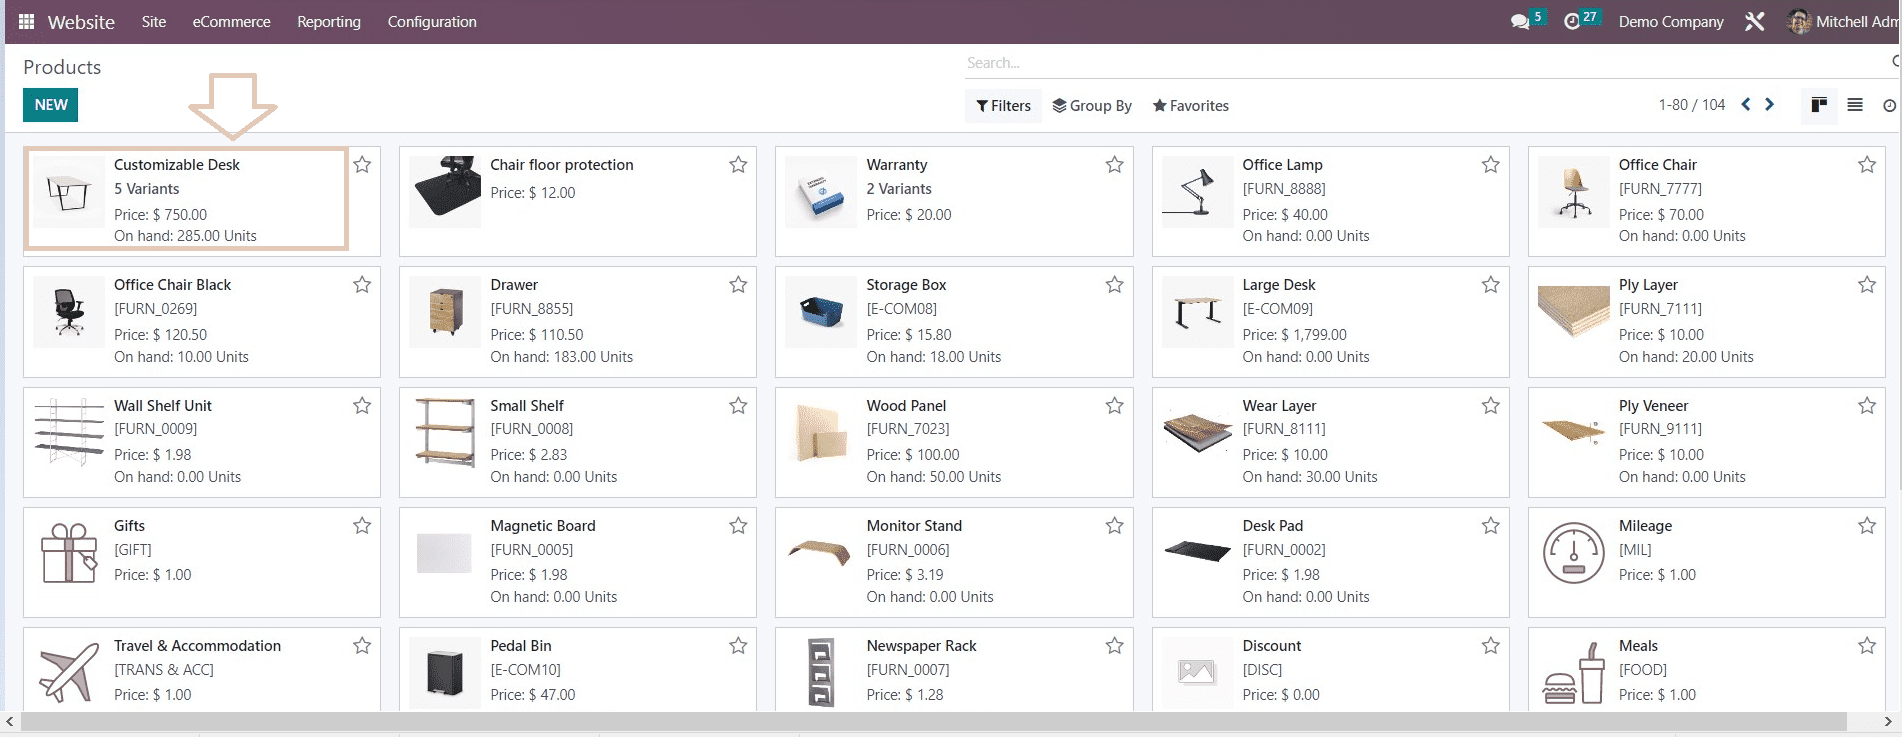
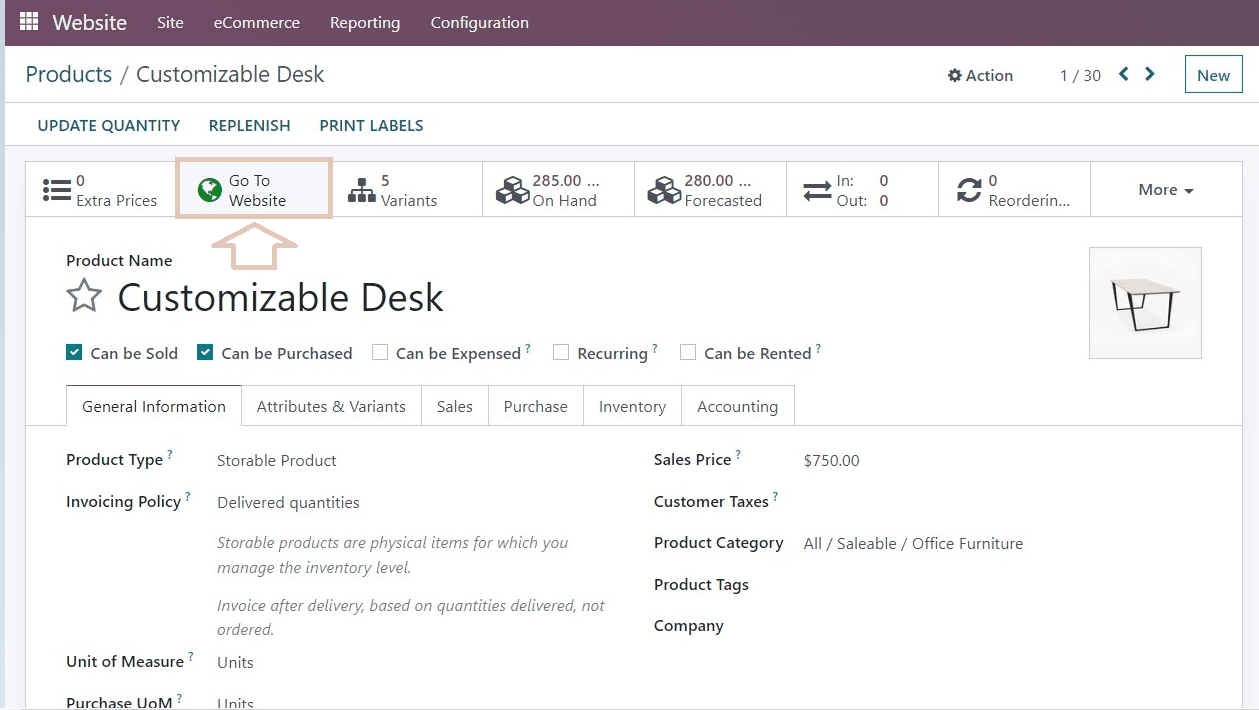
By selecting an existing product from the "Products" menu under the "E-commerce" menu, we can easily check the application of this active payment provider.
Once we click on the product, the product configuration form will open, and we can select the “Go To Website” option to manage the webpage and product.
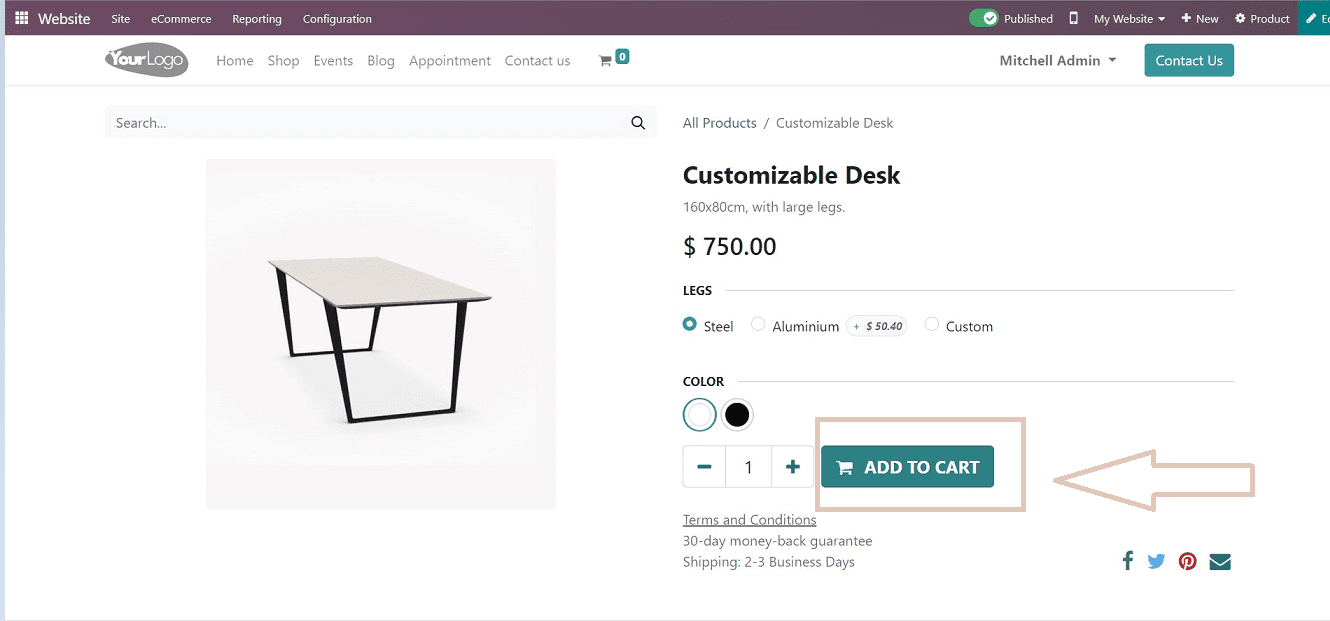
After reaching the website, we can continue the shopping process by clicking the “Add To Cart” option and then proceeding with the payment.
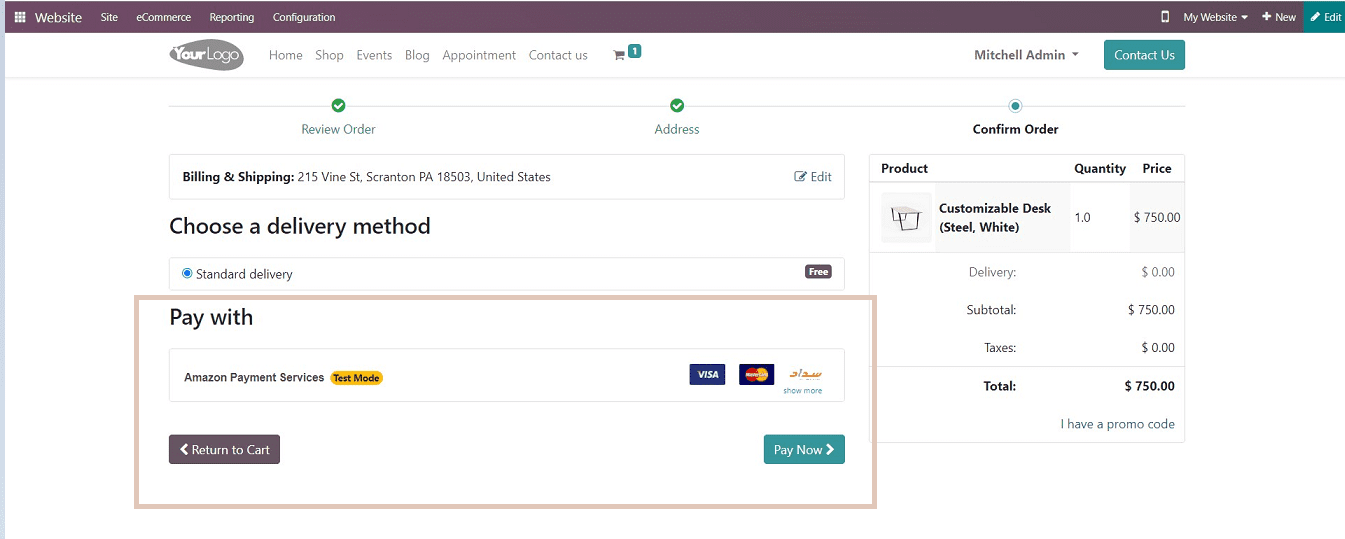
In the “Billing &Shipping” section, We can see our new payment provider has been activated and is ready to process payments, as demonstrated in the below screenshot.
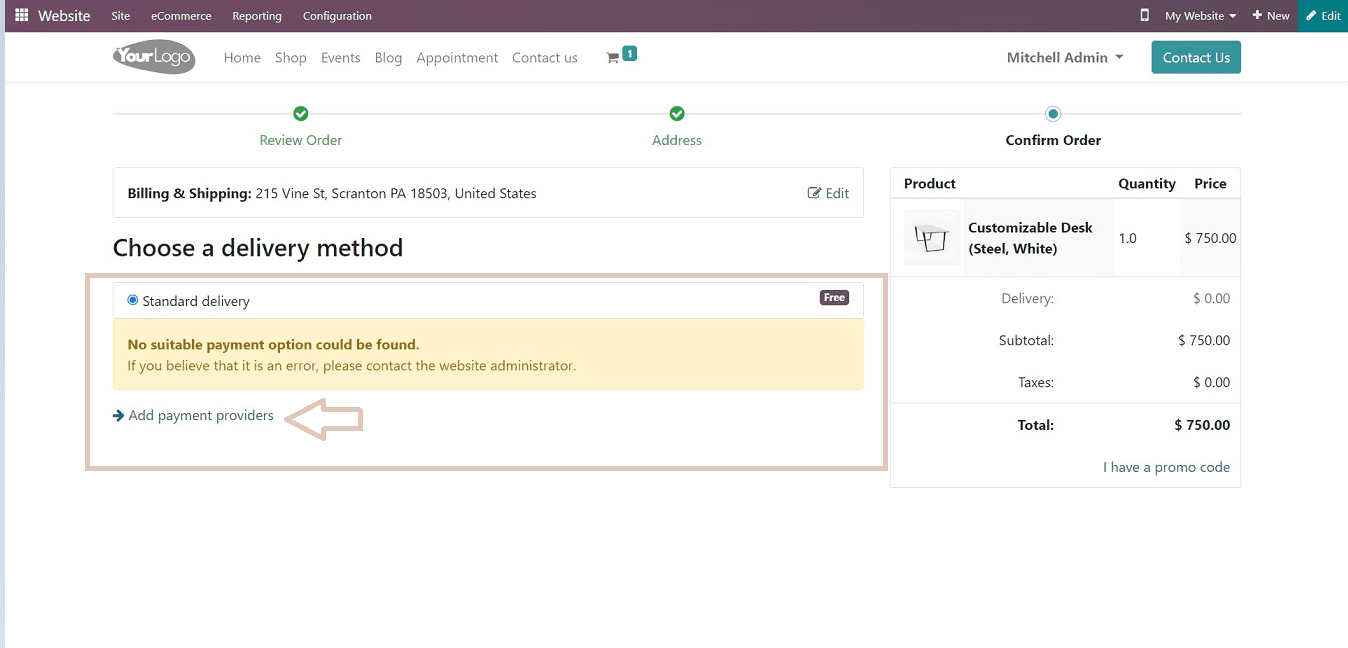
If the user did not add any payment providers when creating their website and e-commerce section, the shopping page would appear without any payment provider services in the billing section. So they can directly add a payment method by clicking on the “Add payment Providers” link and doing the same procedures as we discussed above.
The screenshot below shows that users can add their payment processors directly from the billing section.
Users can add multiple payment providers depending on business requirements or convenience, and adding each payment provider follows the same process.
In this blog, we have provided comprehensive guidance on how to add a payment provider to the Odoo 16 Website module platform. The blog demonstrates how simple this task is. Businesses can easily and securely set up payment acquirers on their websites by utilizing the access key feature of the Odoo platform.