Odoo provides a versatile solution for optimizing user experience on your website portal, enabling you to incorporate searching options for specific products, articles, or support documentation. Without a search feature, they might need to manually navigate through categories or scroll through numerous pages, leading to frustration and potentially lost business. Integrating a search menu empowers users to quickly find what they're looking for, enhancing their overall experience and increasing engagement with your portal.
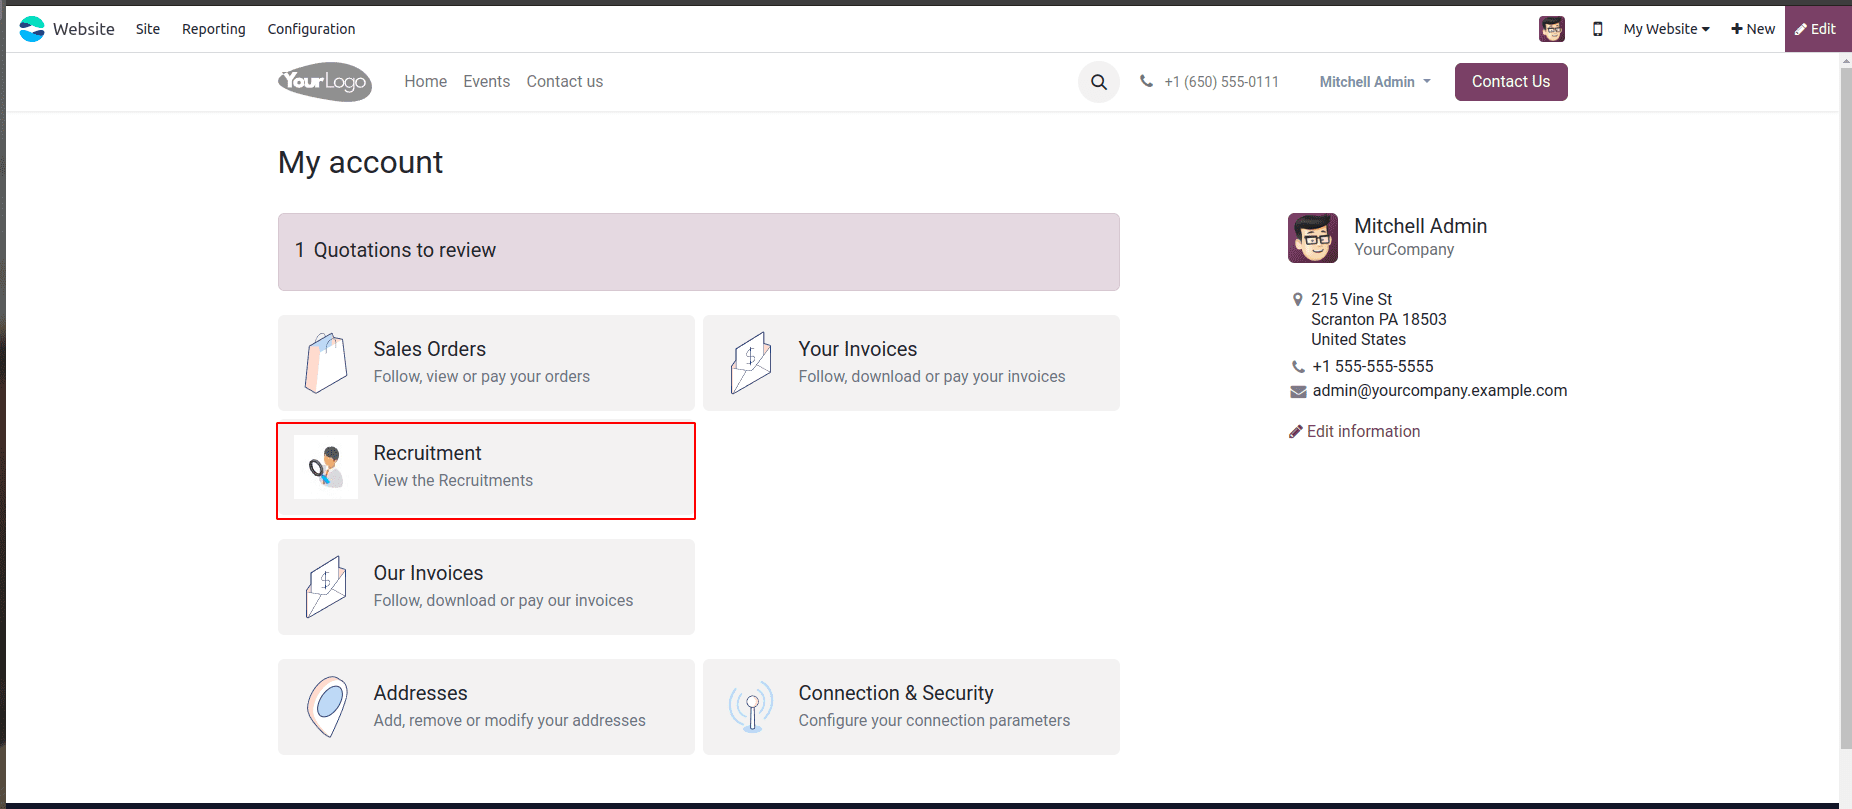
In Odoo, clicking "My Account" shows the customer portal, where features are available, including purchase orders, sale orders, quotations, and more. By choosing each menu, you may access more details.
Our custom menu has now been included in the "Recruitment" customer portal.
To add a custom menu to the website customer portal, use the following XML template:
from odoo import http
from odoo.http import request
from odoo.addons.portal.controllers import portal
 <?xml version="1.0" encoding="UTF-8"?>
<template id="portal_recruitment" name="Recruitment" inherit_id="portal.portal_breadcrumbs" priority="30">
       <xpath expr="//ol[hasclass('o_portal_submenu')]" position="inside">
           <li t-if="page_name == 'recruitment'" t-attf-class="breadcrumb-item #{'active ' if recruitment else ''}">
               <a t-if="recruitment" t-attf-href="/recruitment?{{ keep_query() }}">Recruitment</a>
               <t t-else="">Recruitment</t>
           </li>
       </xpath>
   </template>

   <template id="portal_my_home_menu_recruitment" name="Recruitment" inherit_id="portal.portal_my_home"
             customize_show="True" priority="30">
       <xpath expr="//div[hasclass('o_portal_docs')]" position="before">
           <t t-set="portal_client_category_enable" t-value="True"/>
       </xpath>
       <div id="portal_client_category" position="inside">
           <t t-call="portal.portal_docs_entry">
               <t t-set="icon" t-value="'/portal_recruitment/static/src/img/recruitment.svg'"/>
               <t t-set="title">Recruitment</t>
               <t t-set="url" t-value="'/Recruitment'"/>
               <t t-set="text">View the Recruitments</t>
               <t t-set="placeholder_count" t-value="'portal_recruitment'"/>
           </t>
       </div>
   </template>

<template id="portal_my_home_recruitment_views" name="My Time Off">
   <t t-call="portal.portal_layout">
       <t t-set="breadcrumbs_searchbar" t-value="True"/>
       <t t-call="portal.portal_searchbar">
           <t t-set="title">Recruitment</t>
       </t>
       <t t-call="portal.portal_table">
           <thead>
               <tr class="active">
                   <th class="text-left">Applicant</th>
                   <th class="text-center">Create Date</th>
                   <th class="text-center">Job Position</th>
                   <th class="text-end">Status</th>
               </tr>
           </thead>
           <t t-foreach="recruitment" t-as="record">
               <tr>
                   <td class='text-left'>
                       <span t-field="record.partner_name"/>
                   </td>
                   <td class='text-center'>
                       <span t-field="record.create_date"/>
                   </td>
                   <td class='text-center'>
                       <span t-field="record.job_id.name"/>
                   </td>
                   <td class='text-end'>
                       <span t-field="record.stage_id.name"/>
                   </td>
               </tr>
           </t>
       </t>
   </t>
</template>
To create the custom menu and display it, we must define a function in the Python controller. This can be implemented with the following code.
from odoo import http
from odoo.http import request
from odoo.addons.portal.controllers import portal

class WebsiteEvents(portal.CustomerPortal):
   """To get the recruitments in the website portal"""
from odoo import http

from odoo.http import request

from odoo.addons.portal.controllers import portal
   def _prepare_home_portal_values(self, counters):
       """To get the count of my time off in portal"""
       values = super()._prepare_home_portal_values(counters)
       if 'portal_recruitment' in counters:
           values['portal_recruitment'] = request.env[
               'hr.applicant'].sudo().search_count([('user_id', '=', request.env.uid)])
       return values
For the particular URL that we specified in the template, we have to create a controller function.
@http.route(['/Recruitment', '/Recruitment/page/<int:page>'], type='http', auth="user", website=True)
def portal_recruitment(self, search=None, search_in='All'):
   """To search the recruitments data in the portal"""
   searchbar_inputs = {
       'All': {'label': 'All', 'input': 'All', 'domain': []},
       'Job Position': {'label': 'Job Position', 'input': 'Job Position', 'domain': [('job_id', 'like', search)]},
       'Status': {'label': 'Status', 'input': 'Status', 'domain': [('stage_id', 'like', search)]},
   }
   search_domain = searchbar_inputs[search_in]['domain']
   recruitment = request.env['hr.applicant'].sudo().search([
       ('user_id', '=', request.env.uid)])
   search_recruitments = recruitment.search(search_domain)
   return request.render('portal_recruitment.portal_my_home_recruitment_views',
                         {
                             'recruitment': search_recruitments,
                             'page_name': 'recruitment',
                             'search': search,
                             'search_in': search_in,
                             'searchbar_inputs': searchbar_inputs
                         })
Label: Defines the display label for the search option.
Input: Defines the value entered in relation to this search option.
Domain: Defines the domain filter that should be used while searching.
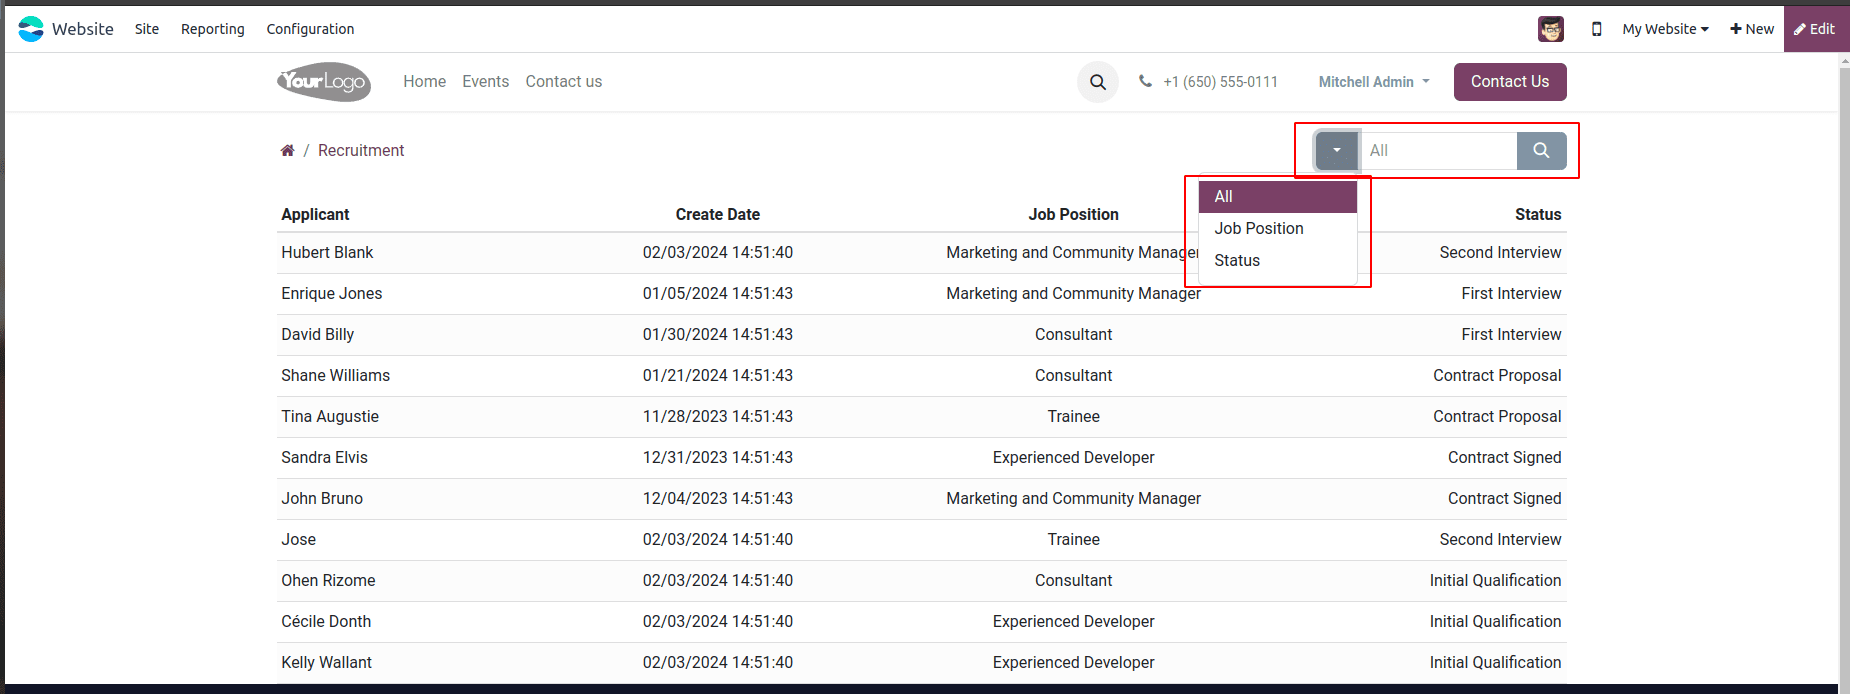
The following view with the records will be displayed when we click on the menu, and the Search option with searching values is viewed on the right side.
Next, we extract the records which is based on the
search value that we would like to apply.
search_domain = searchbar_inputs[search_in]['domain']
recruitment = request.env['hr.applicant'].sudo().search([
   ('user_id', '=', request.env.uid)])
search_recruitments = recruitment.search(search_domain)
return request.render('portal_recruitment.portal_my_home_recruitment_views',
                     {
                         'recruitment': search_recruitments,
                         'search': search,
                         'page_name': 'recruitment',
                         'searchbar_inputs': searchbar_inputs
                     })
In order to execute the method of searching properly, we have to provide this order value within the search() method. We include the search, search_in, and searchbar_inputs when we return the values to the XML.
We can now search the records according to the specified need by choosing the "Search" option.
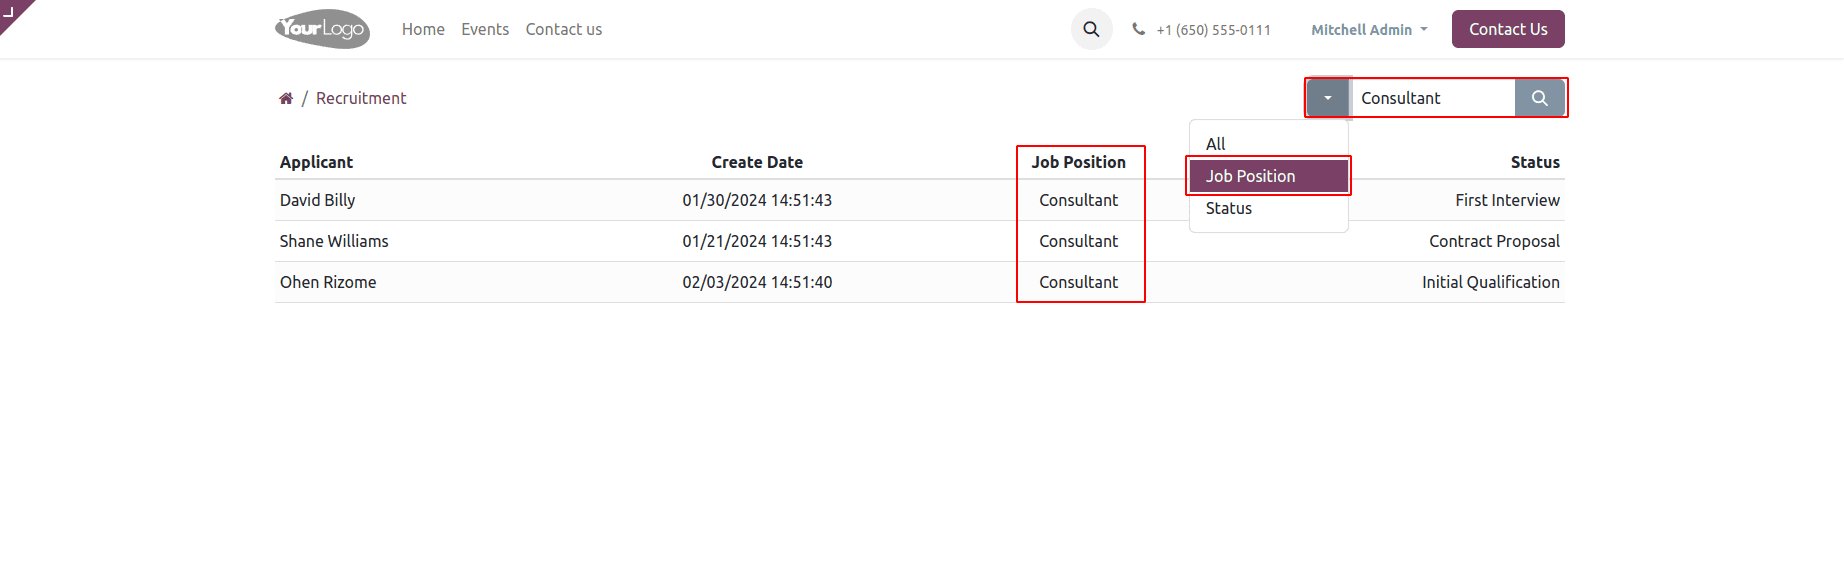
Here, the records are fetched according to the job position of the recruitment process. By following the steps, you can add the search option to your Odoo website portal and customize the search functionality to meet your specific needs.