Software systems with elegant customization features, like Odoo ERP, let customers tweak and personalize their company applications. Customization wasn't prevalent in the past, but it is now crucial for organizations to match client demands and surges in demand. Even if there is little rivalry in many industries, the current competitive market is unstable. Odoo ERP continues to be the sole user-friendly tool for managing business operations with acceptable alternatives despite the introduction of software with bespoke solutions. It is a useful tool for organizations of all sizes since it enables users to easily manage their business and utilize their apps in a customized way.
This blog session is going to discuss adding the Smart tabs and pipelines and setting Approvals on the Button in the Odoo 16 Studio Module. In business applications, smart tabs are utilized for instantaneous, one-click tasks. The sales pipeline is a visual depiction of your sales process, from the initial contact through the successful close. The method through which you develop, qualify, and close leads throughout your sales cycle is referred to as this. The Odoo 16 platform allows you to construct numerous stages as pipelines. You must enable it at the initial step and customize the model with your desired parameters in order to set it up.
Businesses need to have suitable permission and approval processes in place to monitor how they are operating. The Odoo platform has a specific permission Module where employees may ask upper management or business management for permission. Employees may use a separate request window to access this module, see approval requests, check their progress, give permission, or reject them, ensuring efficient oversight and support of the approval process.
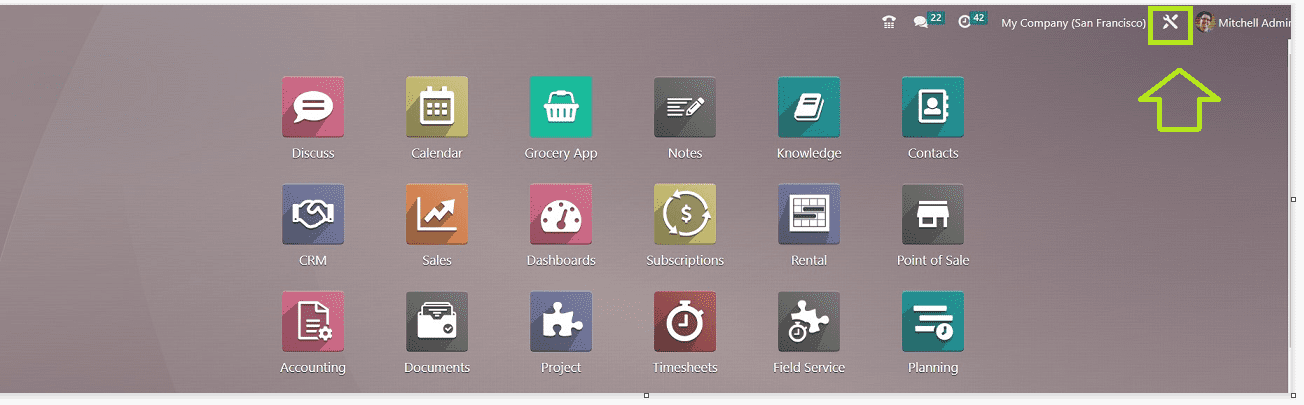
To start with the process, we can activate the Studio Module inside the Odoo 16 Platform’s Apps section. Then go to the “Toggle Studio” icon found in the menu of the Odoo homepage.
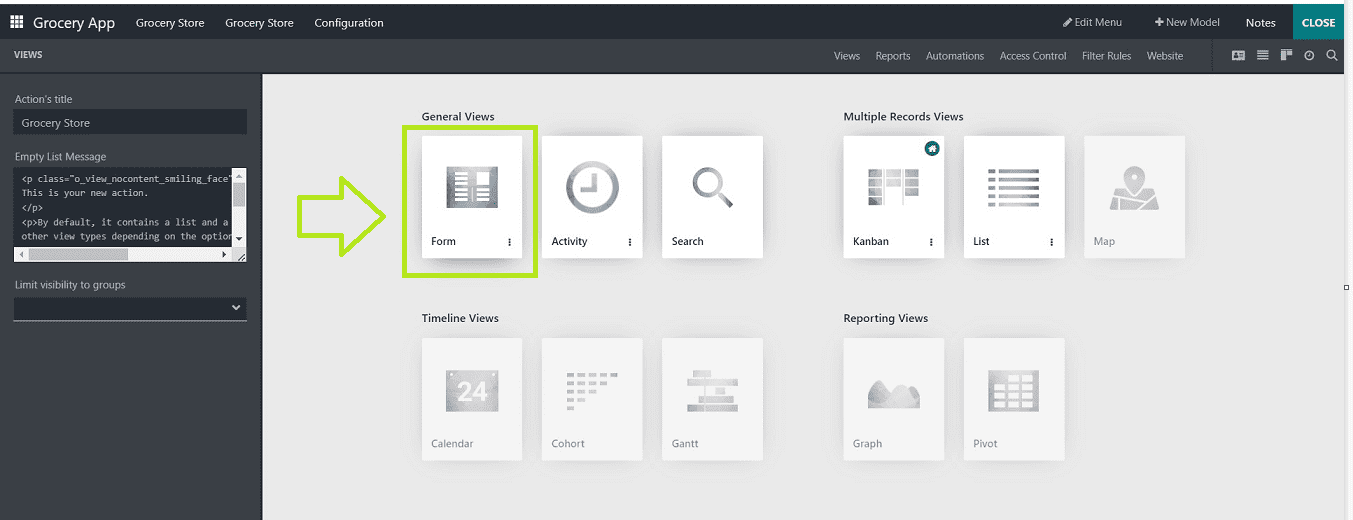
I am just opening a sample application named “Grocery App,” created for demonstration purposes. After opening the application inside the Studio Module, you can take the “Form” view to check the configuration procedures of a new Smart button.
How to add Smart Tabs
After opening the Form view of a newly created or existing application, you can see the Smart button section in the upper right corner of the form view, as shown below.

You can press the “+” icon provided on the upper right side of the form under the stages menu.
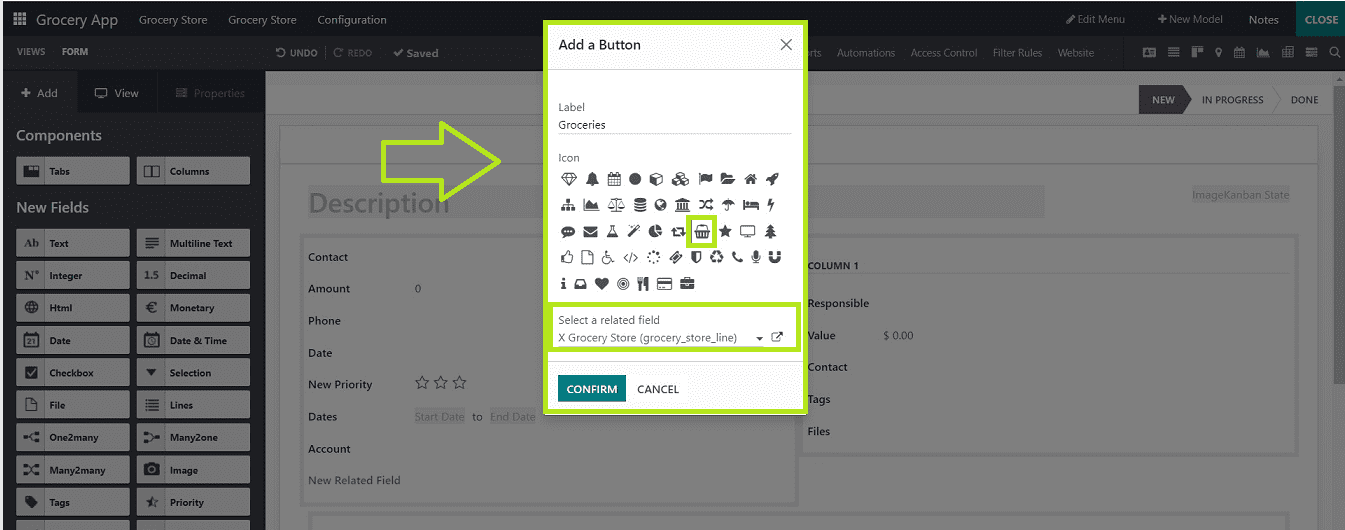
You will be given a pop-up window allowing you to edit the button specifics. Select a Smart button icon, Label, and also a related field in the designated areas and save the details by pressing the “CONFIRM” button. You can see the smart button has been placed on your form view, as shown below.
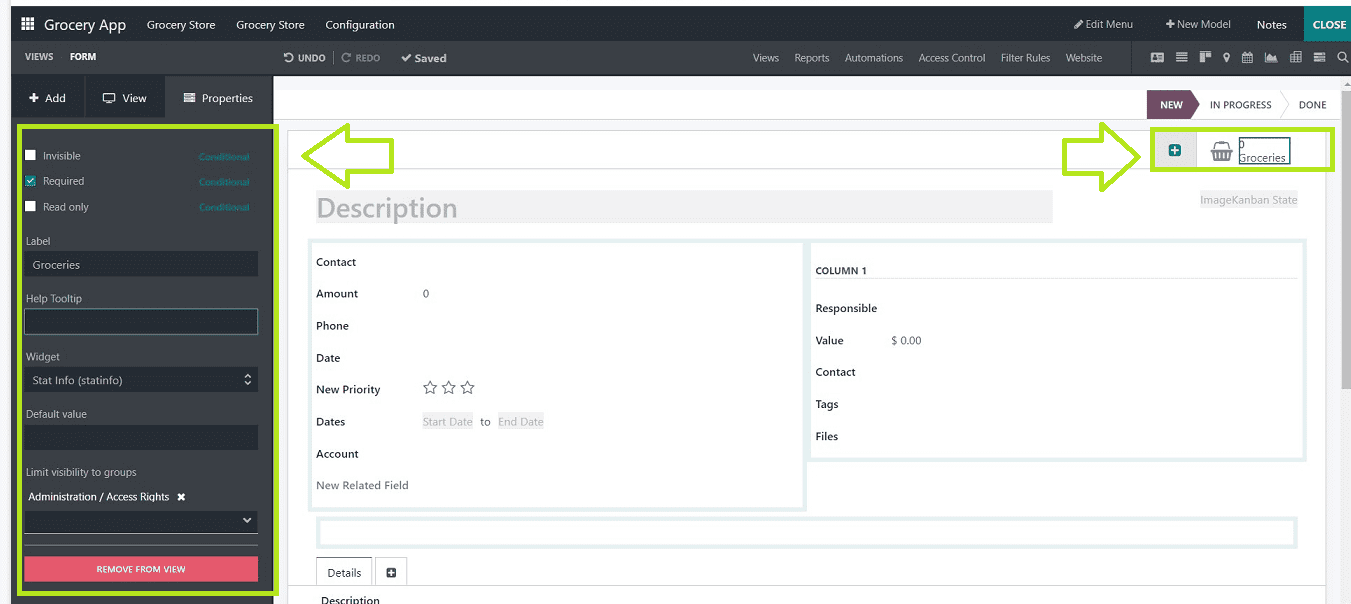
You can edit the smart button’s specifics using the editing options available on the left side of the page. Also, it is possible to add multiple Smart Buttons as per your application’s requirements using the same procedure.
Adding Pipelines
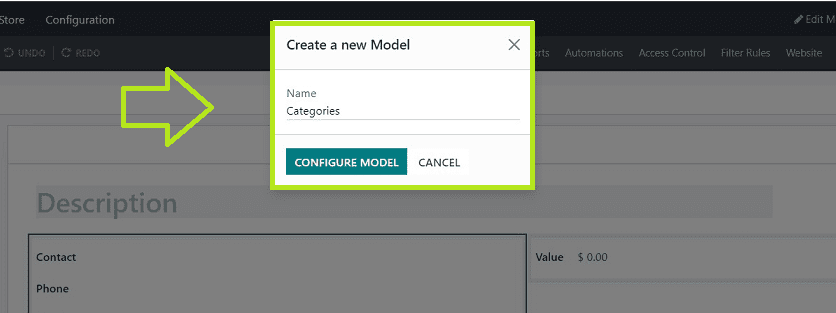
The Pipelines are used to identify various stages. It is very useful in sales-related applications. The Odoo 16 Studio platform also allows you to construct numerous stages as pipelines within an application’s form view. To create Pipelines, we have to enable the “Pipeline Stages” option when initiating the Application Model features. Here, you can check the procedure of creating a new Model and setting its Pipeline settings by clicking on the “+New Model” option found at the top of the form. Enter the Model name and click on the “CONFIGURE MODEL” button.
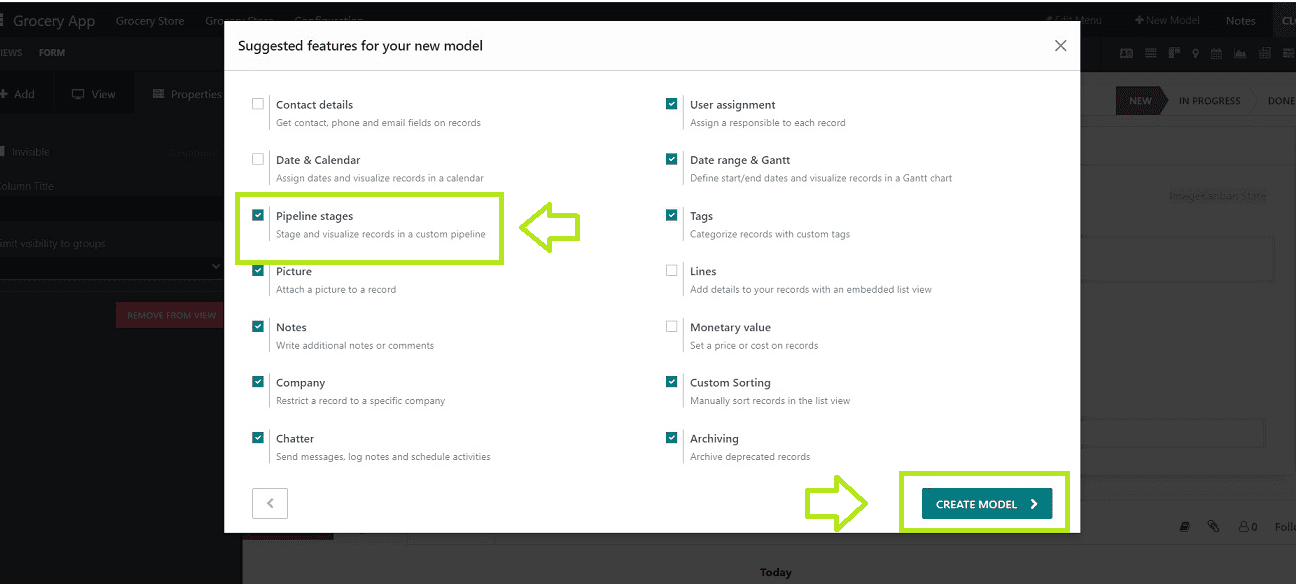
You can activate the “Pipeline Stages” option from the Model’s available feature set and press the “CREATE MODEL” button.
If you haven't added the Pipeline settings, you can see it inside the form view, as shown below.
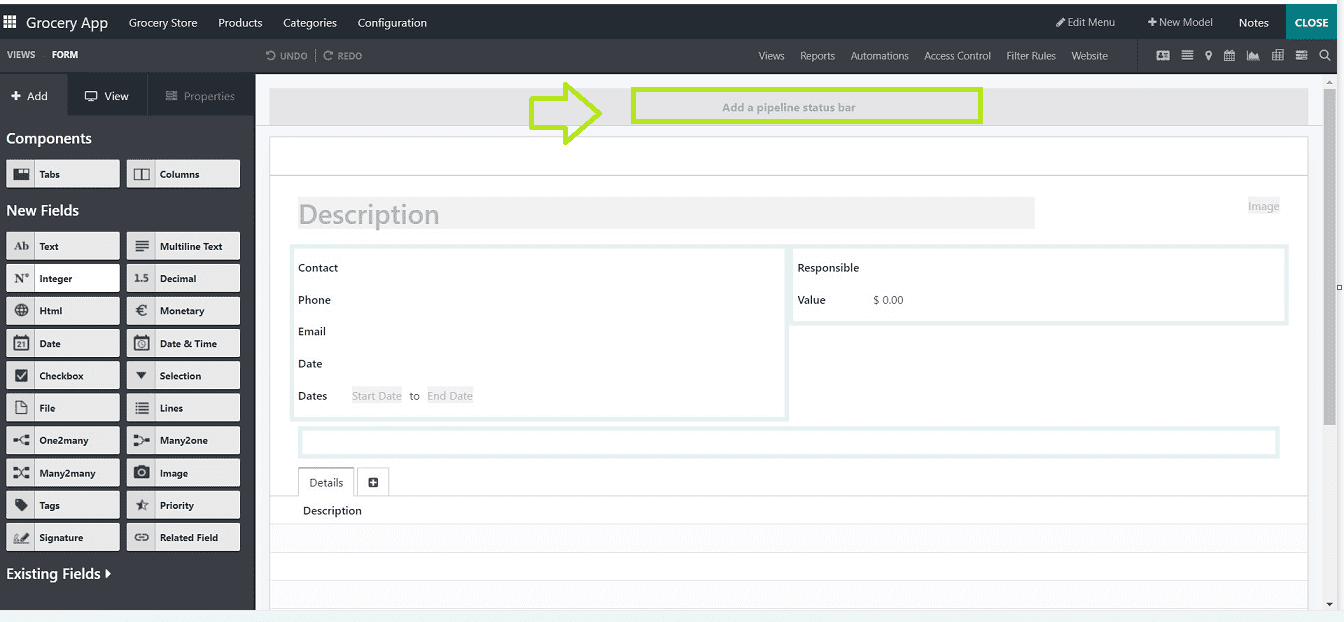
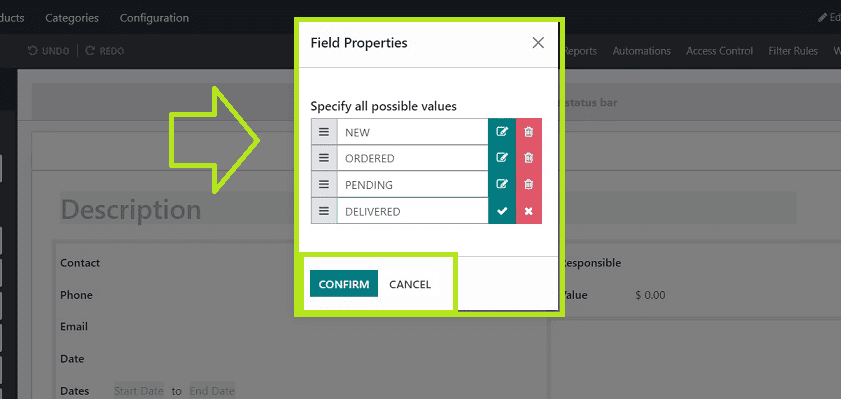
You can click on the “Add a pipe status bar” button to add new Pipeline Stages. Clicking on the button will open a small pop-up window where you can edit the Pipeline Stages in the displayed “Field Properties” window.
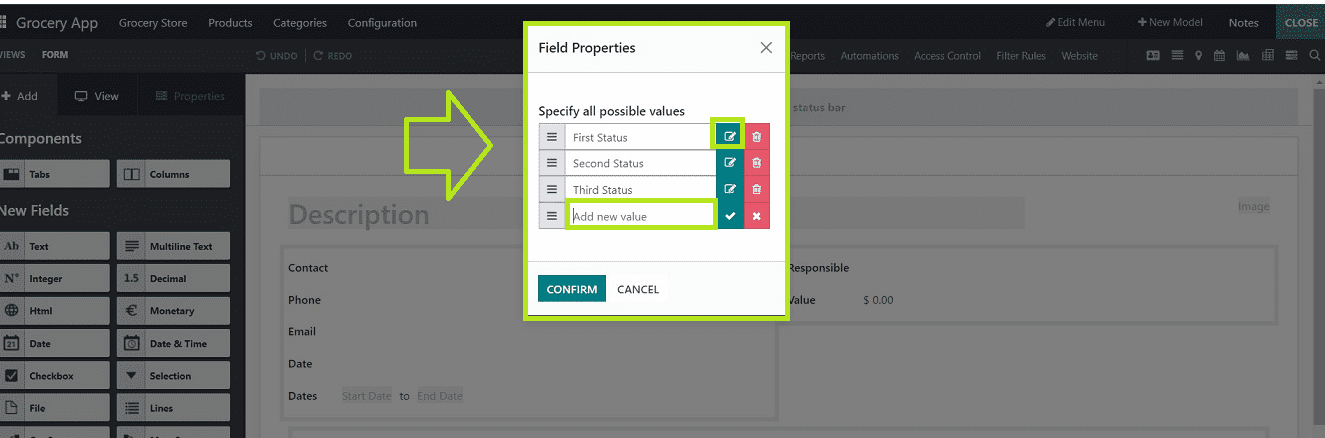
After editing the Pipeline stages, click the “CONFIRM” button to add them to your form view.
You can see and manage various Pipeline stages from the upper right corner of the form view, as shown below.
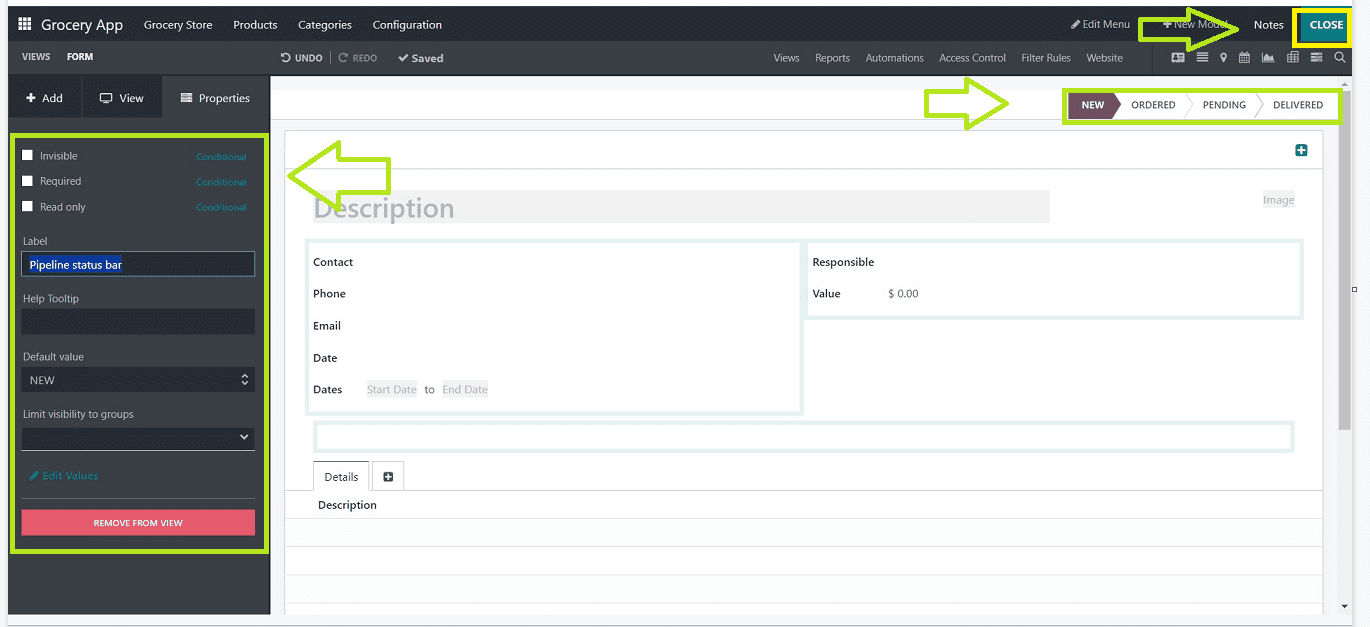
Now, Click on any Stages option and go to the left side of the screen to activate studio edit mode. When you choose the properties tab, the Pipeline Stage’s technical Label name is displayed. You can then choose a default value limit where user groups can see the status bar on the “Limit visibility to groups” field and edit values using this editing section per your Application requirements.
Switching Pipeline Stages
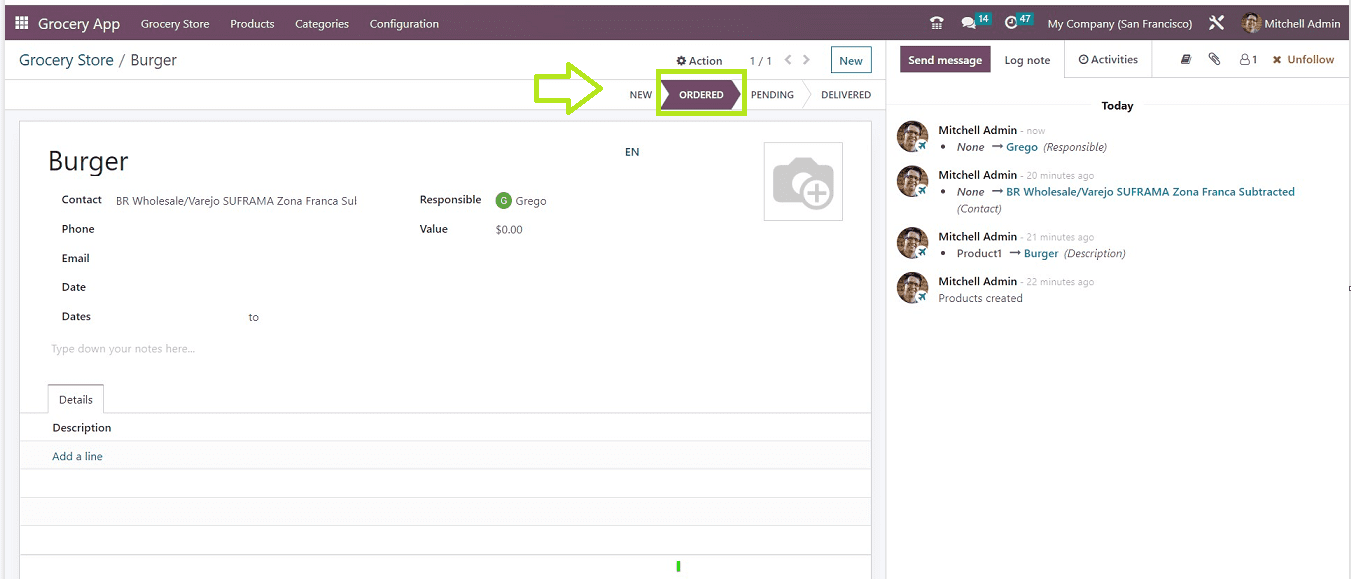
From your form view, you can simply change between the various Pipeline stages. Close the studio editing mode and click on any stage in order to confirm this. Using the form, I've just created a product and moved its stage to the "ORDERED" stage, as seen below.
Setting Automated Pipeline Stages:
You can also automatically change the Pipeline Stages as per the progression of the activity or the updation of each stage using the “Automation” functionality available in the Odoo 16 Studio Module. Automated processes can automatically make changes in response to user input or time constraints. To activate the automation of the stages, go to the “Automation” menu available in the Odoo Studio.
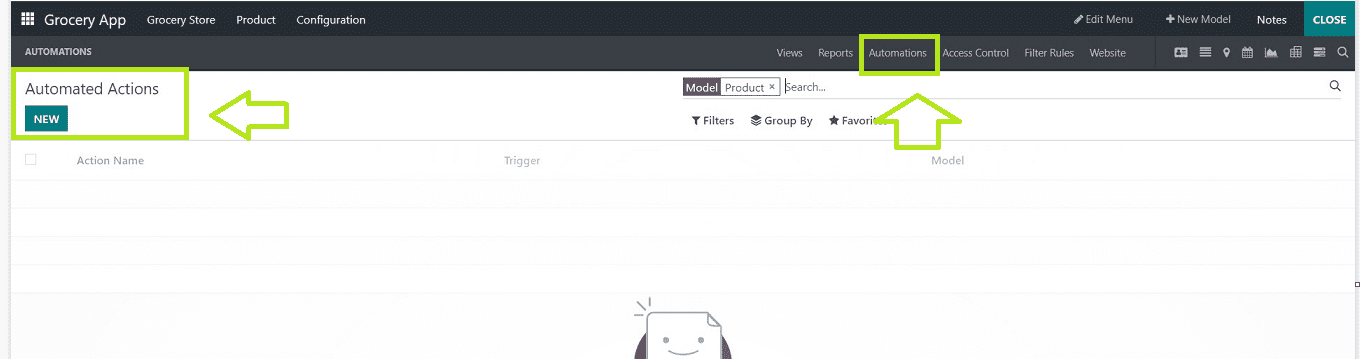
You will be reached in an “Automated Actions” dashboard, as shown below. Just press the “NEW” button to create a new automated activity; this will open a configuration form, as shown below.
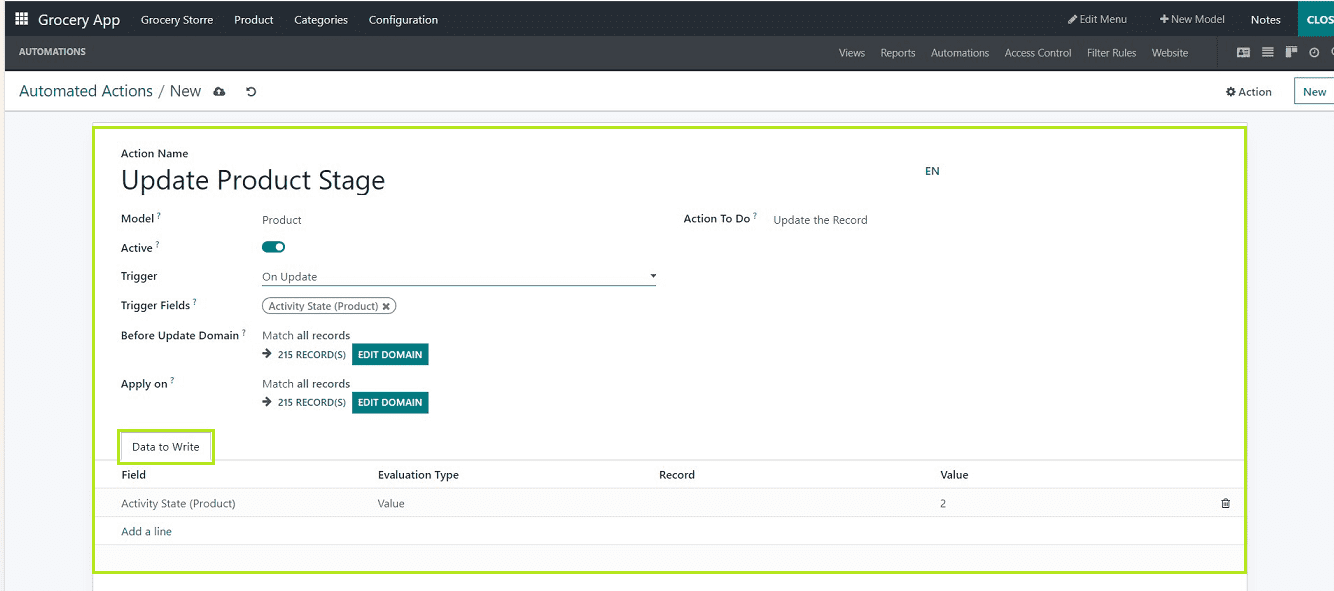
You can edit the “Action Name,” choose the “Model,” and enable the “Active” button to activate the automation process at all times. In this instance, we're going to set an automated activity for altering the product pipeline stages based on updates. So, you can set the “Trigger” as “On Update.” The “Before Update Domain” and “Apply On” fields can be used to set certain conditions before updating a record and before updating the action rule, respectively.
The “Trigger Fields” can be chosen to select the trigger fields; whenever a user makes an updation on these fields, it will trigger the automation activity. In the “Action To Do” field, you can mention what type of server action has to be done in the Pipeline Stages tab.
The “Data to Write” tab can be used to edit data to required fields after updating the activity. Save your automated action details. Your Pipeline Stages will be automatically changed every time a user makes any updates on the above-mentioned fields. For example, whenever any record is updated, its pipeline status will be updated to value ‘2’, which means the state changes to the second stage, whichever is configured.
Categorizing Products Based on Their Pipeline Stages
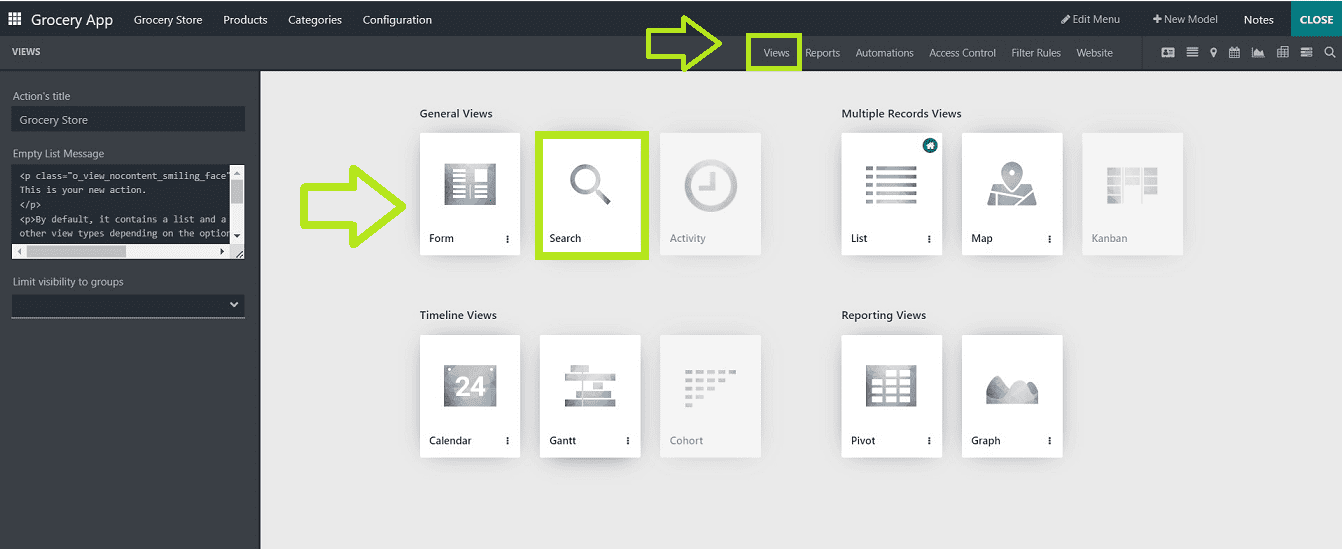
In Odoo 16 Studio, users can set the property of categorizing products based on their various pipeline Stages. To check this functionality, go to the “Search” view of your application from the “Views” menu.
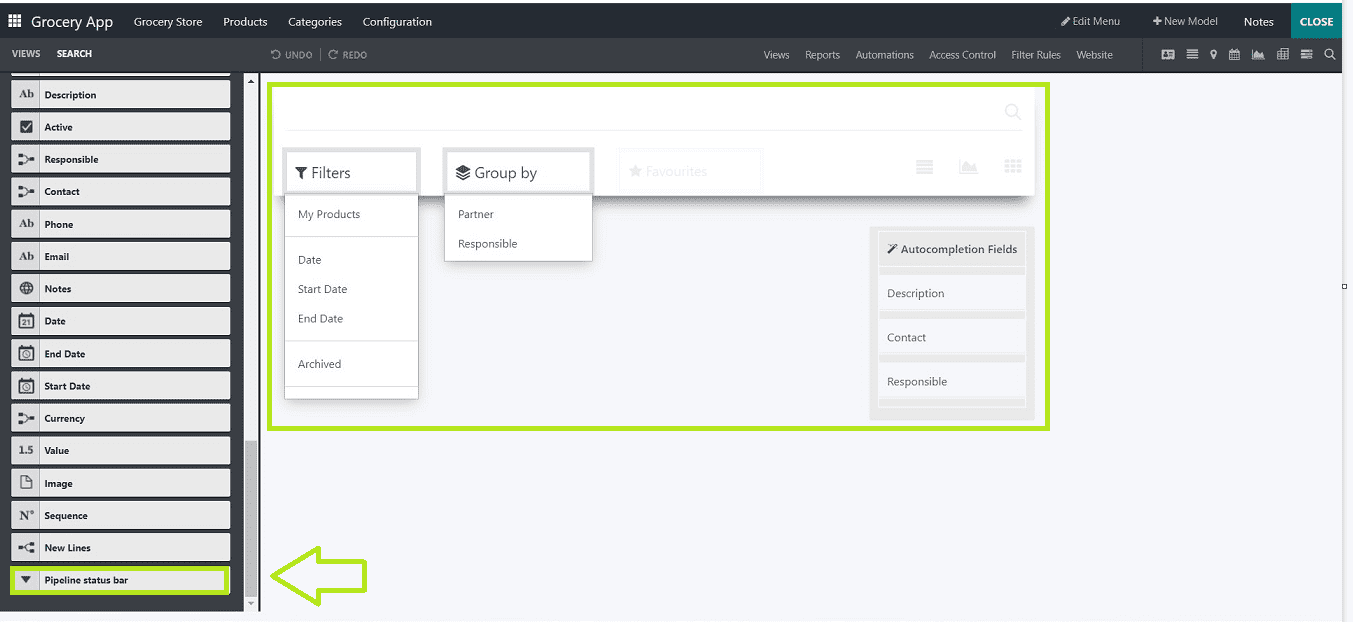
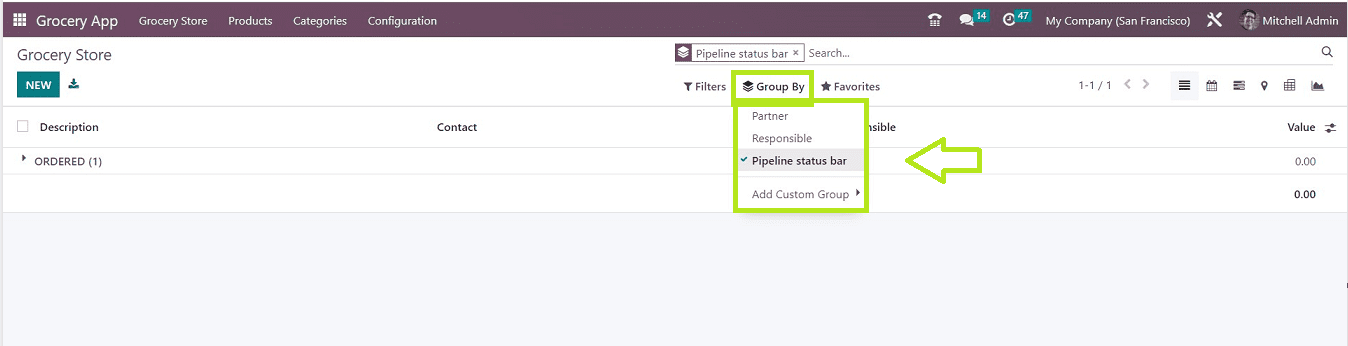
Next, we will explore the "Filters" and "Group by" choices based on several Stages, as shown in the image below. By locating the "Pipeline status bar" field under "Existing Fields" and dragging and dropping it under the Group by menu, you are able to access filters and “Group by” choices in your application platform.
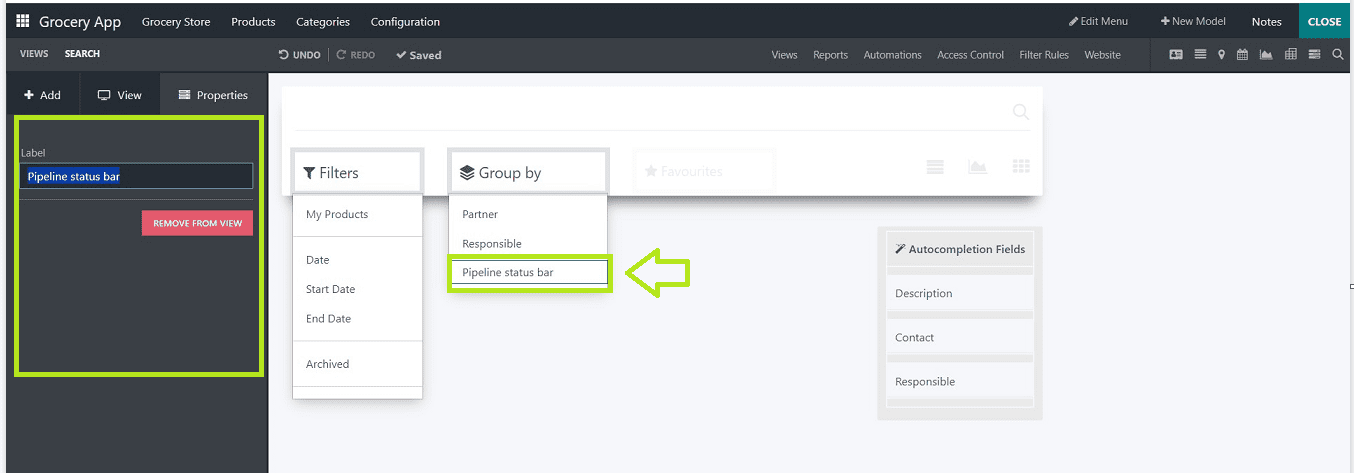
You can add the “Group by” option based on various Pipeline Stages like this.
Now, close the Studio editing area, then return to your application platform to examine the "Group by" option that has just been created. Now that you can group your items according to their "Pipeline Stages," The only product included in this "Grocery Store" dashboard is the one that is currently in stock. In the "Group by" part of your application, as shown below, you can view your available items if you have a list.
Adding Approvals On Button
Applications like Sales, Approvals Modules, and other applications that feature a range of approval-based tasks and activities can all benefit from using the "Approvals On" button. With the help of this field, users can handle various Approval activities. You can set approval conditions or filters to approve any specific quotations. We can go to the Odoo 16 Approvals Module to check this functionality.
Inside the Approvals Module, you can check the available approvals that are waiting to be approved from the “All Approvals” section of the “Manager” menu, as shown below.
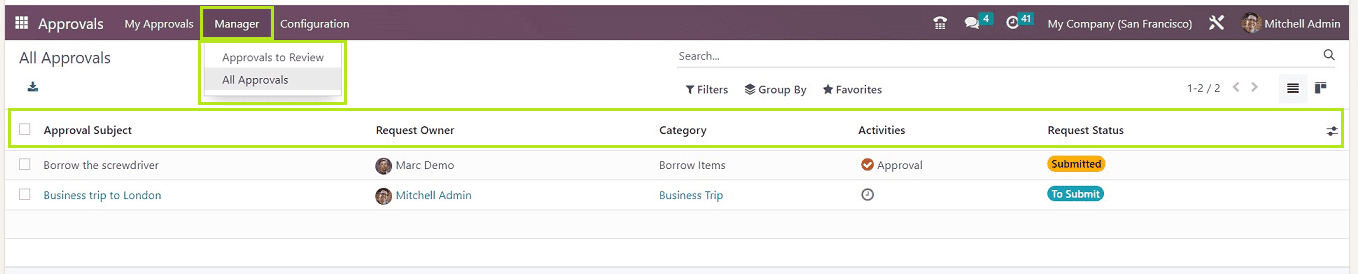
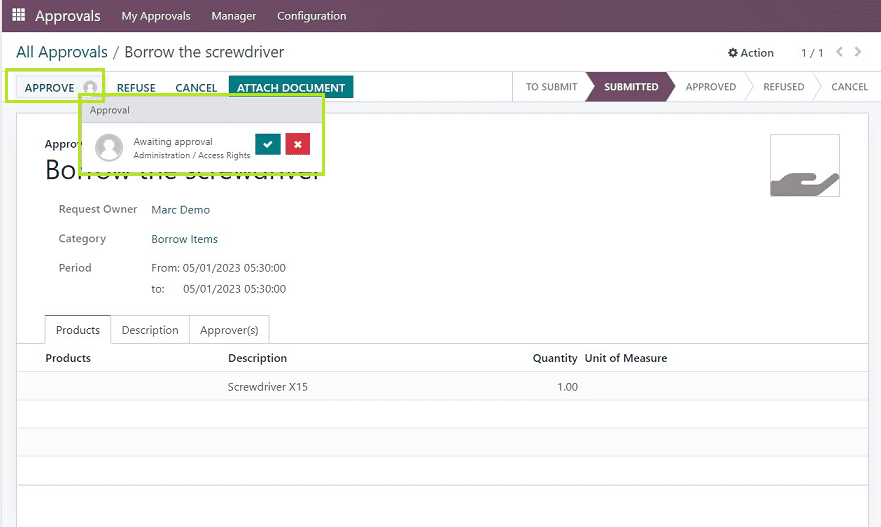
You can open any of the approval form that has been requested by an employee. Here, I am selecting the first approval request.
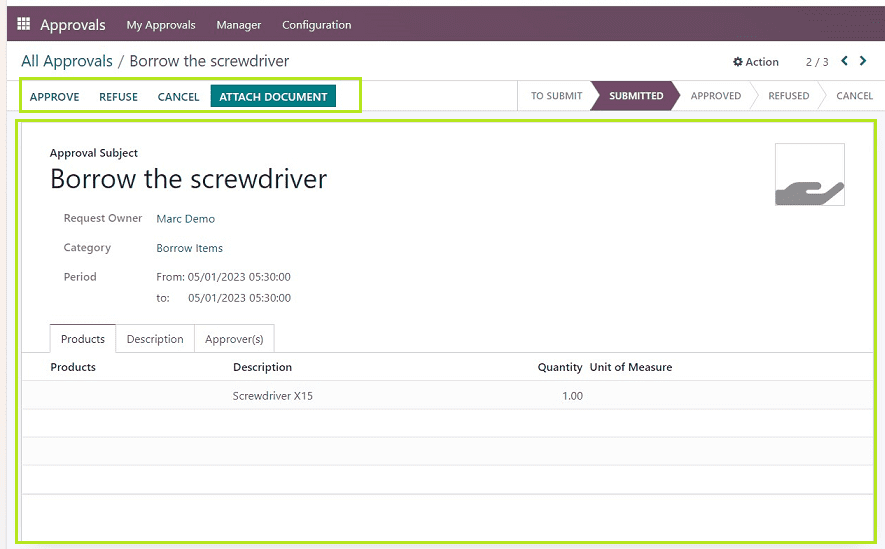
The form will include information like the Approval Subject, Requested Person, and Category. The admin or manager can authorize the request by verifying the information or by any specific restrictions. For instance, the management can decide that a minimum expenditure amount of "X" must be incurred before approving an expense reimbursement request. The request wasn't approved in this case since it did not adhere to the rules. We can access the editing studio section by clicking the "Toggle Studio" icon, where we may change the approval settings.
Pressing the “Approval” button will open its specifics inside the editing section. You can set approval rules by choosing the “Set approval rules” option.
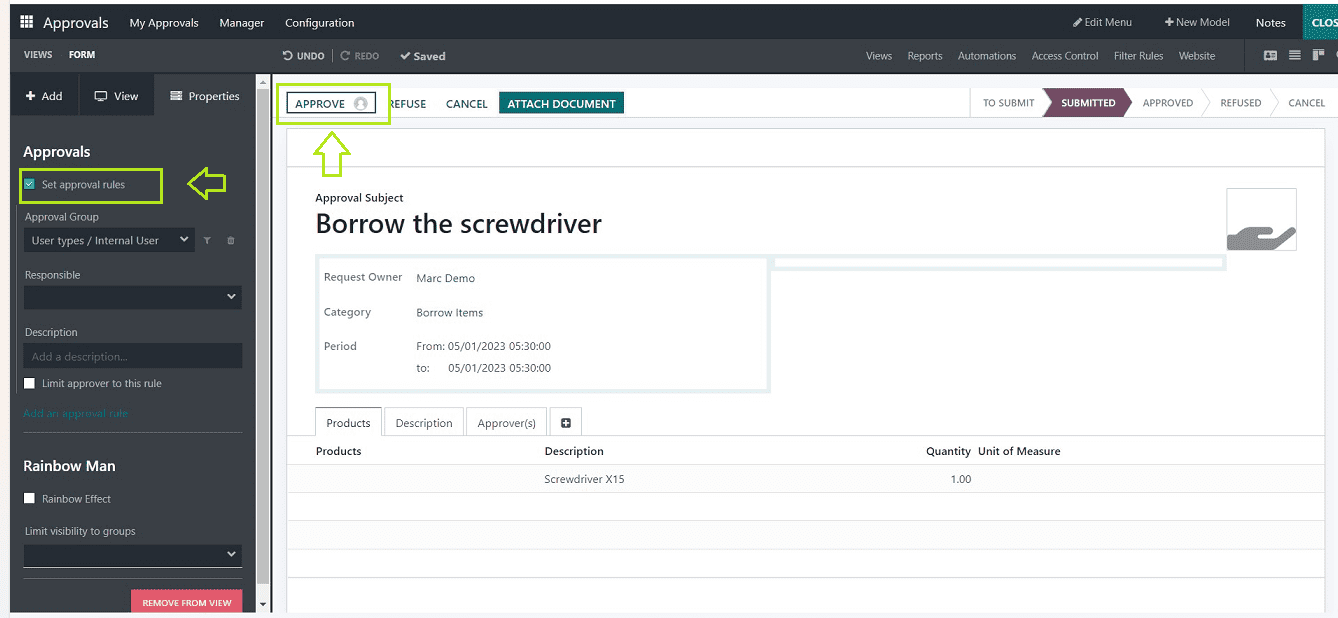
When a request has been verified, you can press the “Approve” button to activate the button that allows us to define the approval rules. From here, we can also add an approval rule to the “Approve” button from the editing section available on the left side of the window. You can activate the Approval Rule for the “Approve” button by enabling the “Set Approval Rules” button under the “Approvals” editing area illustrated below.
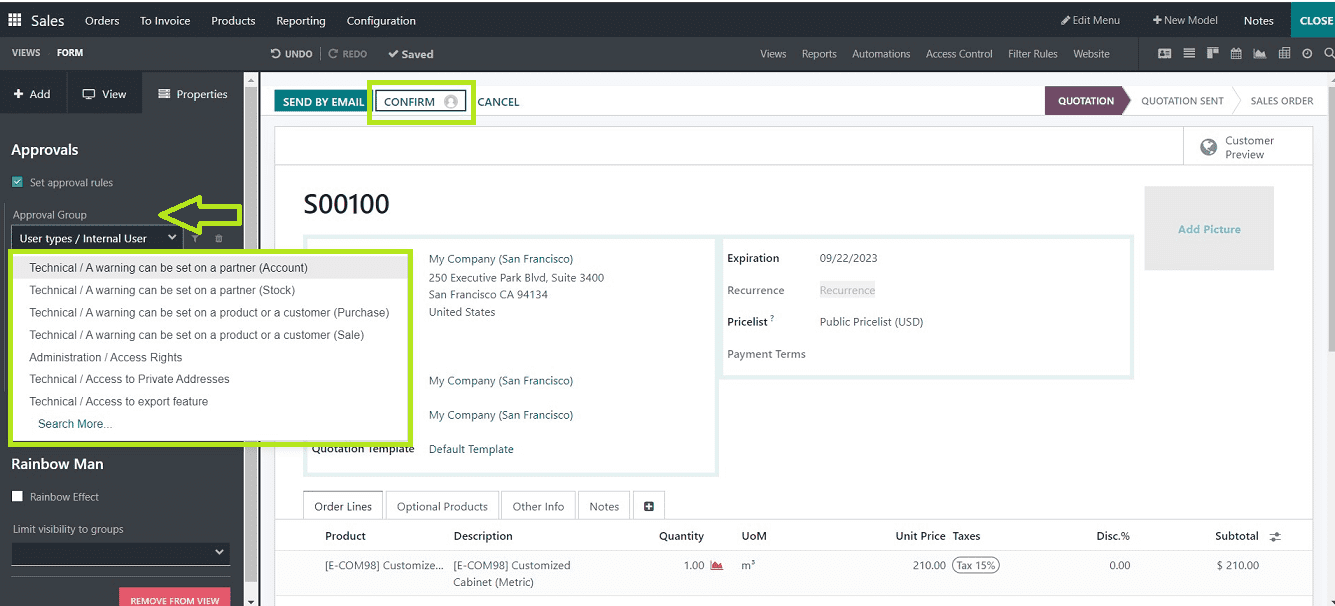
You can choose an "Approval Group" and add a number of approval rules to it. We're going to describe the approval rule here and choose an "Approval Group" as the "Administrator/Access Rights" so that those who are a part of it can abide by the approvals.
It is also possible to set certain filters to the Approval Rules by clicking on the “Filter” icon provided near the “Approval rules” field. A little popup window that appears when you click the Filter icon will guide you into the filter configuration area. You can execute this feature by selecting the "+ ADD FILTER" option.
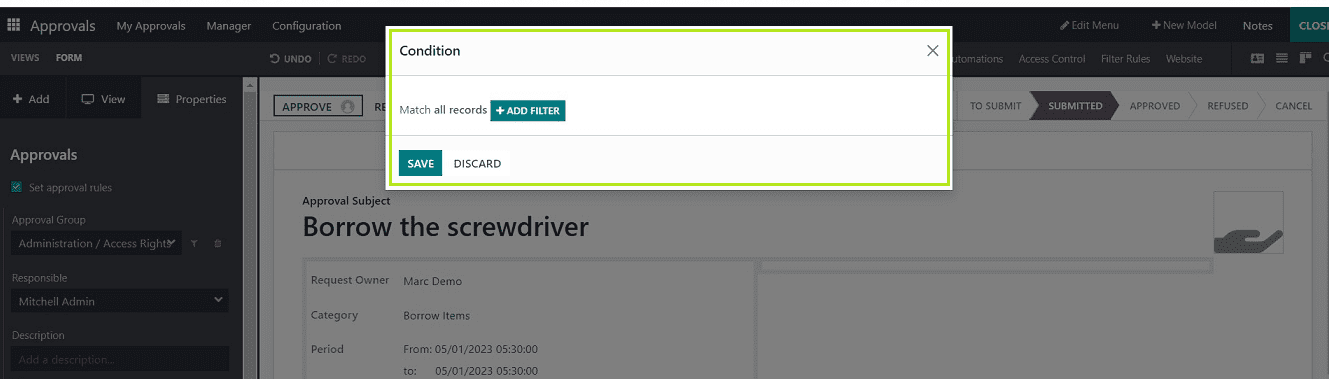
After opening the “ADD FILTER” button, you will reach another window where you can set your filter rules and conditions, as illustrated in the screenshot below.
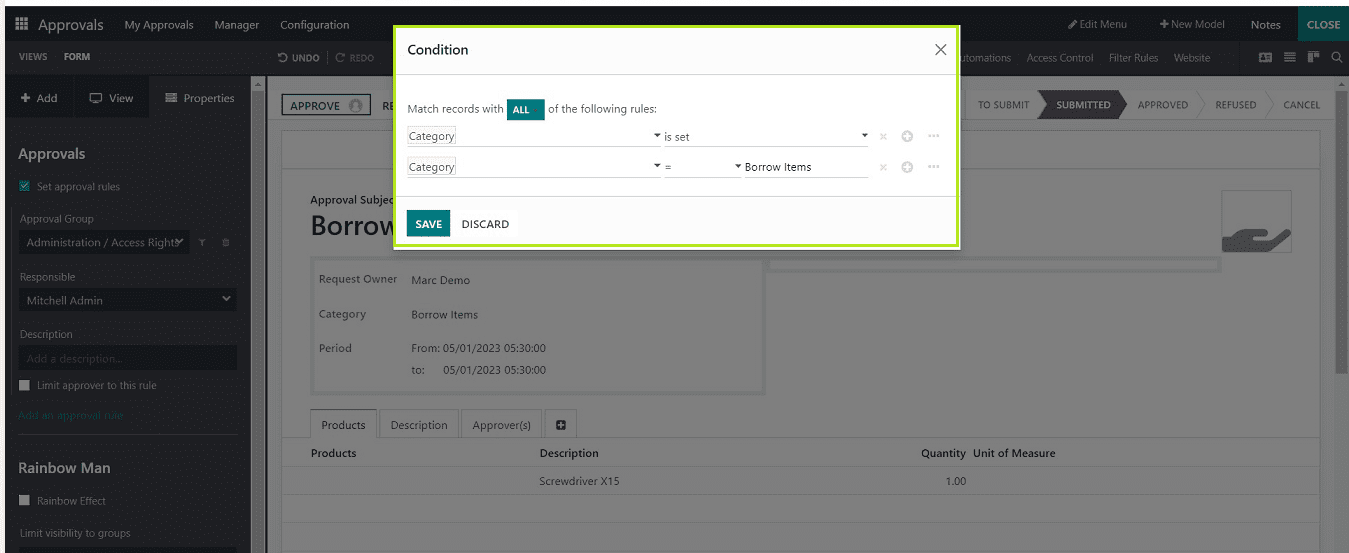
You can pick a rule based on any record in the "Condition" window and choose the value corresponding to that specific data. You can see that I selected the record based on the "Category" and that I set the rules "is set" and "is equal to Borrow Items." Only the approvers can execute this, as it must be a request for borrowing something.
After setting the conditions, save the details using the “SAVE” button and come back to the studio session.
Then, by selecting the approval groups and writing the description for the approval rule, you can add multiple approval rules by clicking the “Add an approval rule” link provided and repeat the same process by entering another approver's name. Use the "Limit approver to this rule" option to restrict a certain approver to only approving requests that adhere to a specific rule.

Here, I haven’t added multiple approval rules because it is a simple approval request. You can add multiple Approval Rules and Groups as per your requirement in the same way. Then close the editing section and go to the Form view inside the Sales Module.
Inside the quotation form of this particular order, you can see there is the Approvals function has been activated inside the “Approve” button. The authorized person can accept or reject this quotation by selecting the green checkmark next to each of the username columns. To reject it, simply select the reject option.
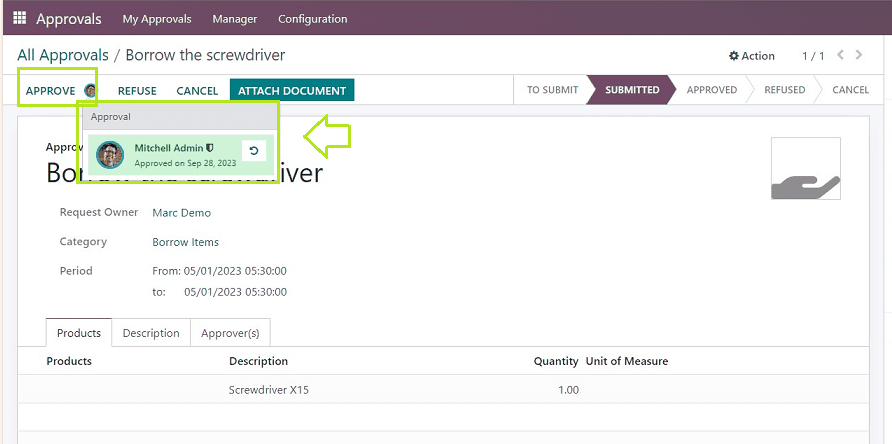
The Approver cannot approve this quotation if they do not have any administrative access. As a result, only the person with access permissions is allowed to approve this quotation. In this case, the user “Mitchell Admin” has access rights, so he only can approve the quotation. After approval, you can see the status as depicted in the screenshot below.
Additionally., it is very easy to revoke the approval using the refresh icon, and pressing the reject button will allow you to refuse the approval.
These features can easily enabled using the Approvals On Button in the Odoo 16 Studio Module. Users can use this Approvals On functionality in various modules, such as Sales, Approvals, Expenses, Time Off etc. to approve various requests based on certain rules and conditions. Users are able to control their own approval procedures, and the features are highly customizable.