In order to operate a company effectively, customized software systems are required. The Odoo platform provides administration solutions tailored to individual applications and a user-friendly interface to develop applications without any hassles of more intricate backend functions. The platform supports the creation and modification of more customized Odoo applications with simple drag-and-drop functions and inbuilt tools. The Odoo Studio module in the Enterprise edition enables the creation and development of distinctive applications based on functional specifications on a low-code platform.
We are going to discuss the “Views” and “Reports” menu options available in the Odoo 16 Studio module. We can Customize the Form views, Reporting Views, Timeline Views, and other records view inside the Odoo studio Module. Also, we can customize the reports in the Odoo studio module, which also includes tools and features for setting different business procedures. Through the creation of personalized reports and data, this function improves company operations management. The Enterprize edition enables a low-code development of complex operational functions, improving company operations management.
Views and Customizing Views in Studio Module
The Odoo Studio Module Views menu makes it possible to create a variety of Views for applications, boosting their usability and aesthetic appeal. Views from the General Views, Multiple Record Views, Timeline Views, and Reporting View categories are included in this menu.
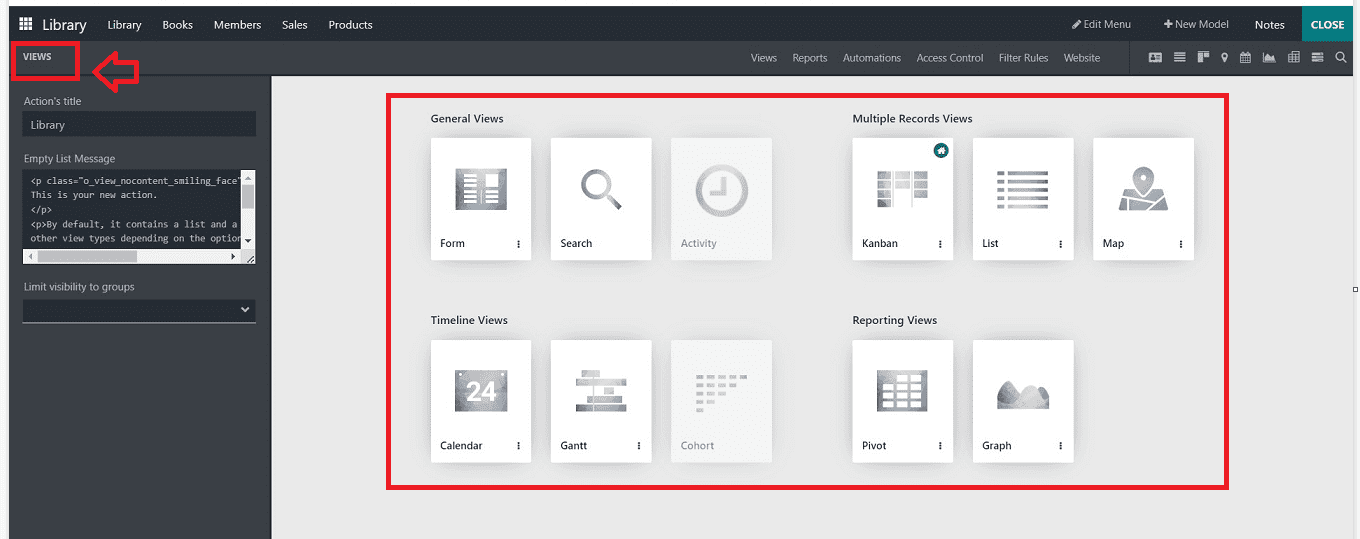
Odoo also helps you to set or change a view as the default view for a specific application. To change the default view of a model, you can go to the “Views” menu and select the “Set as Default” option from the three dots available on each view.
General Views and Form View
Form, Search, and Activity Views serve as the menus' General views. The “Form” View is the main part of an application platform that helps to configure various functions.
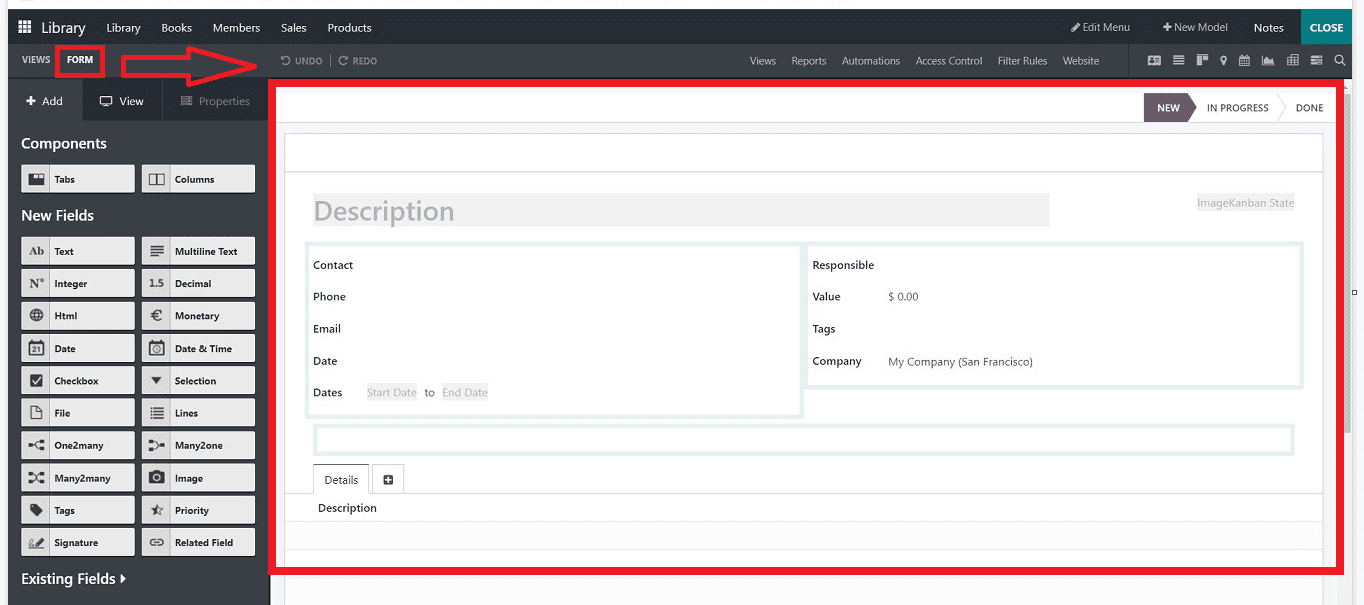
You can see the elements like the Form's title and button settings based on your operational requirements under the Form. You can find the various form editing tools and components on the left side of the page. On the right side, you can see the status buttons as NEW, IN PROGRESS, and DONE. These buttons are fully customizable. According to operational requirements, action items like Delete, Archive, Unarchive, and Mark can be included using the “+” button, which is only visible when we move the cursor onto the upper right corner. You can add an image and Kanban view using the “Image” and “Kanban State” buttons available in the upper right corner of the form near the “Description” area. Form tab sections can be added using the “+” icon available near the “Details” tab.
Search View
In the Odoo Studio, the different Filtering components can be displayed and placed under the “Search” view, where these tools can be used to organize the essential elements. The user has total control over how to utilize the Filter tool thanks to the customization capabilities that allow for the usage of the Filter options to be specified.
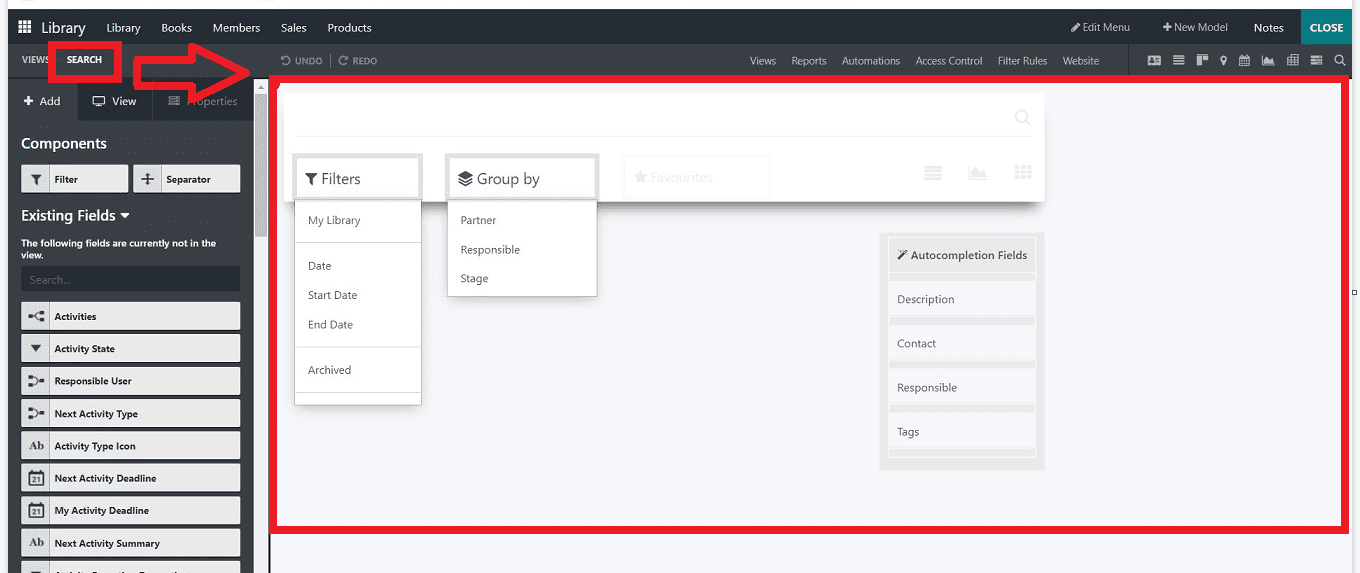
Each "Filter" and "Group by" option box has a clickable link that allows you to customize it to suit your specifications. You can edit or remove the options in the editing column that is available on the left side. The fields that are automatically filled up when users enter particular data on the form can be specified in the "Auto Completion Fields" section, and also you can add or remove more fields to it.
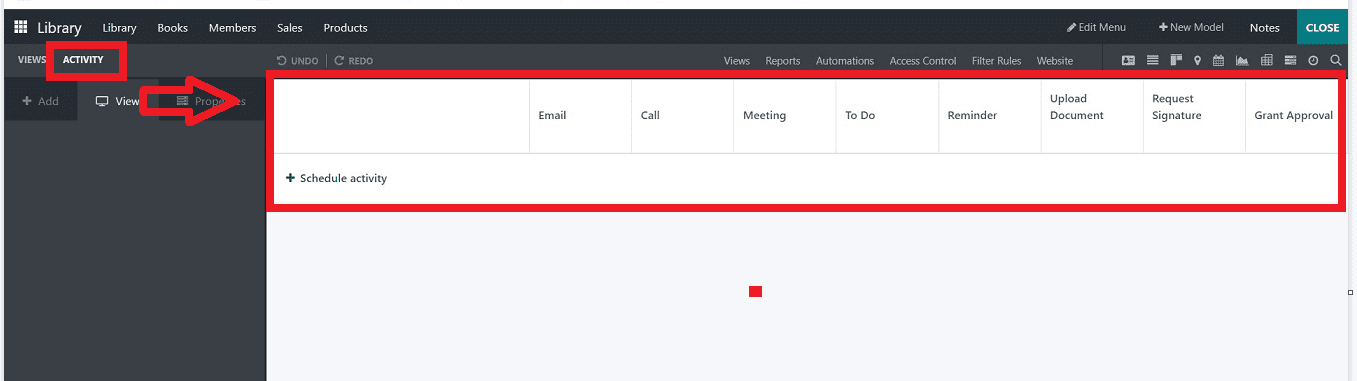
Activity View
The “Activity” View enables users to organize activities using the Chatter element, allowing participants to converse before the specified time. This guarantees a forum for everyone to participate in fruitful debates. You can schedule Emails, Calls, Meetings, To-Do lists, etc, using the “+Schedule Activity” button.
Multiple Records Views and Kanban View:
You can establish multiple Kanban views from the “Multiple Record Views” section, as shown below.
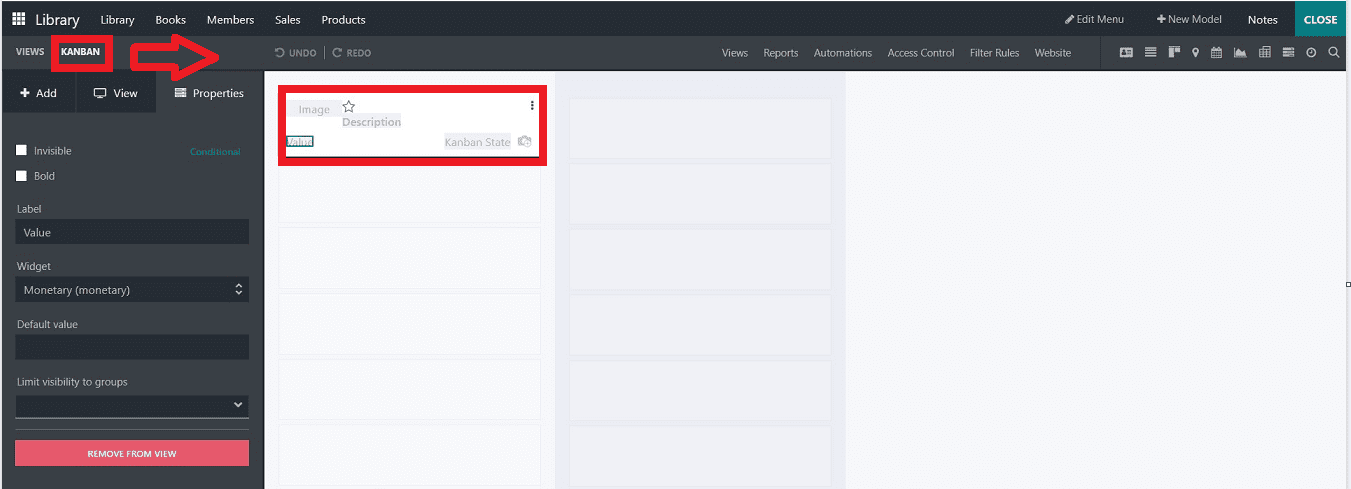
We can edit the options required for the Kanban display by clicking on the sample template and adding the required fields and components as per the specification. Here, some of the kanban details are given; you can Edit, Delete, Replace, or Customize them using the editing section provided on the left side.
List View:
You can edit the “List” View for your Application. Operational fields like Priority Filed and Contact Field can be adjusted in the List View to provide the necessary instructions. These fields can be hidden, modified, or removed depending on the requirements of the user.
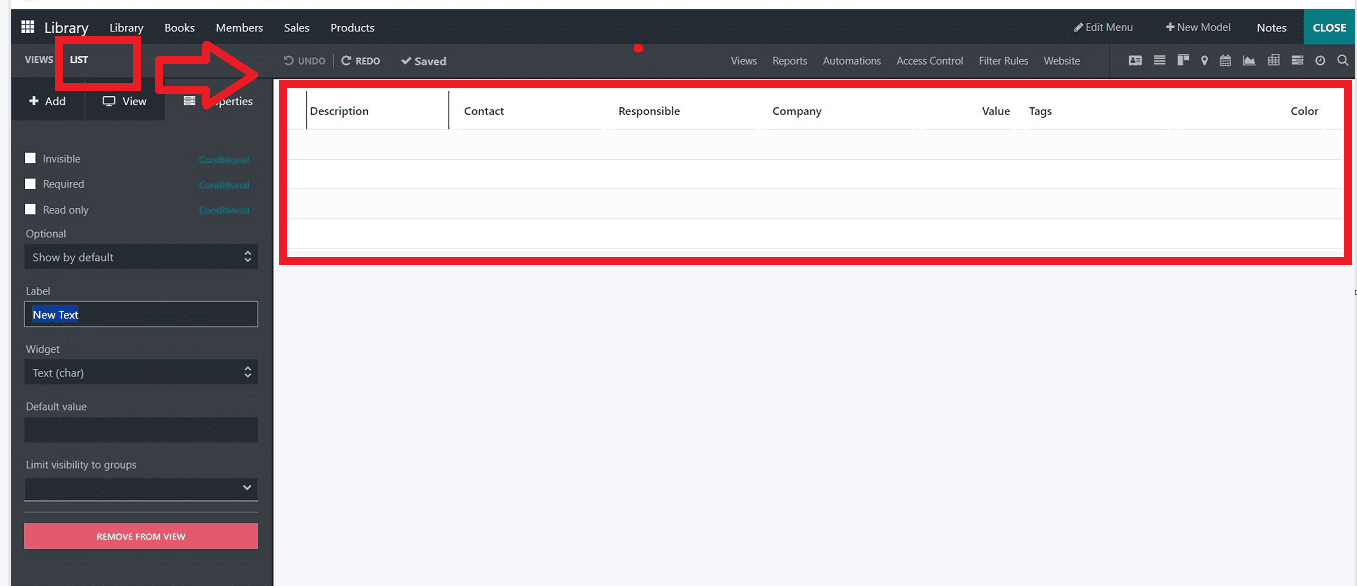
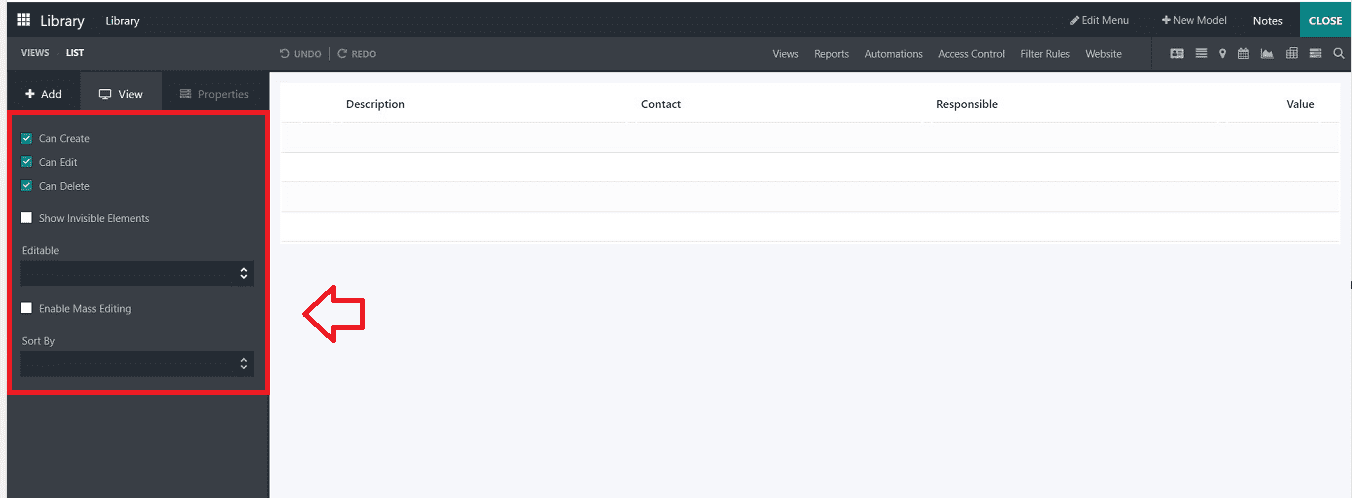
The List view is a helpful tool for concurrently viewing and modifying huge records. Disable the boxes next to "Can Create," "Can Edit," and "Can Delete" to stop users from adding data. Choose New Record at the top or New Record at the bottom under Editable to create and modify records immediately. By choosing a field under “Sort By,” you may enable mass editing for numerous records at once and alter the default sorting as illustrated below.
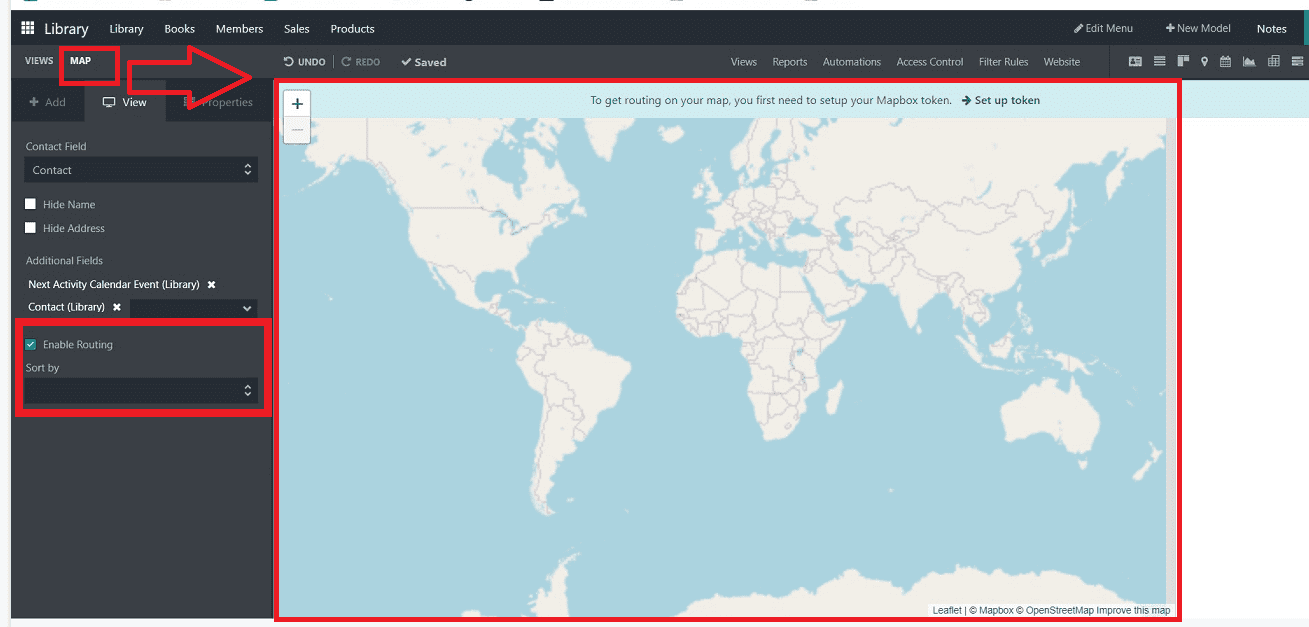
Map View
The Name and Address components can be adjusted and hidden inside a “Map” View using the “Hide Name” and “Hide Address” options available in the editing section. You may also select the “Enable Routing” option, which will make it easier to grasp the address and plan your travel to the appropriate locations, as well as Additional Fields that will assist with the view.
Timeline Views and Calendar:
You can configure Calendar, Cohort, and Gantt views using the “Timeline views” category.
The Start Date Field and Stop Date Field, among other configuration options, may be set under the “Calendar View.” The administration features of the Delay Field, Colour, All Day setup, and Default Display mode may all be customized from the editing section, as illustrated in the screenshot below.
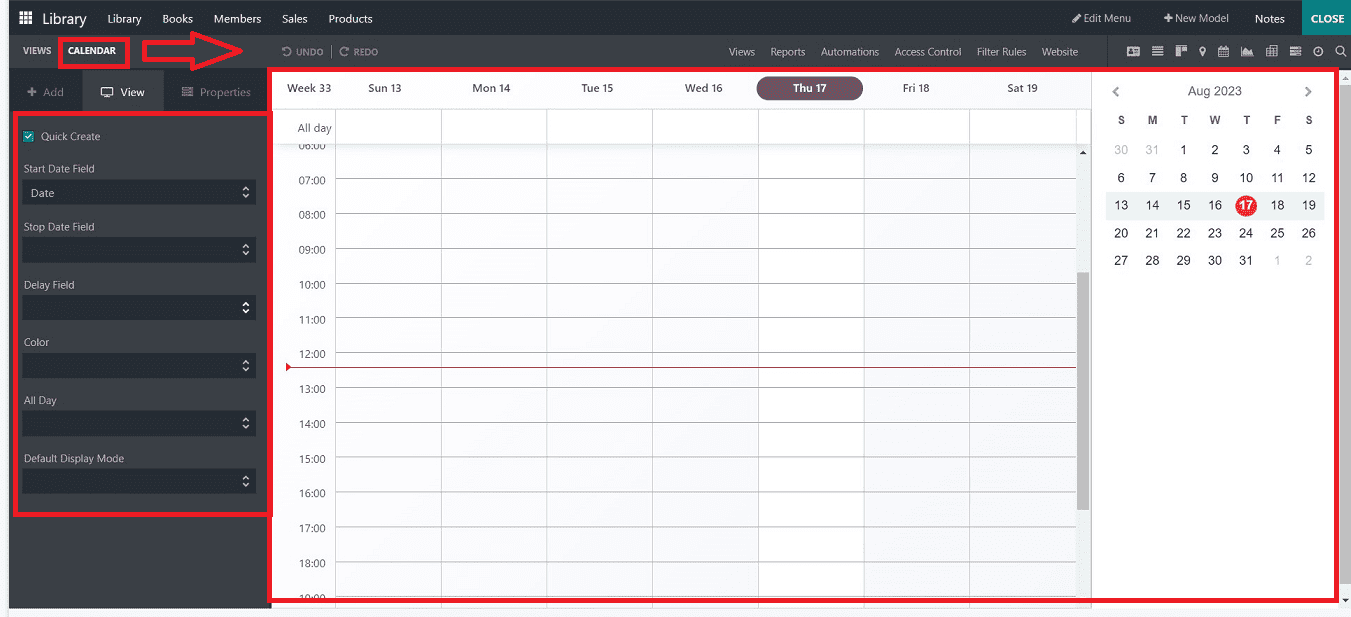
Enable Quick Create so that records may be created without opening the Form view. Only models that can be swiftly made with a name are eligible for the function; however, as most models cannot be created quickly and must be filled out. You can choose a field under the “Color” field to add color to the calendar entries, so this will help to organize and display the same type of events on the calendar. Select Day, Week, Month, or Year under Default Display Mode to set the events' default time scale.
Gantt View
The Gantt view is a tool for analyzing and forecasting record progress. Records are shown as bars under a time scale. You can enable or disable the “Display Unavailability,” “Display Total Row,” and “Collapse First level of the Gantt view. You can also edit the Start Date Field, End Date Field, Label, Day Precision, Week Precision, etc.
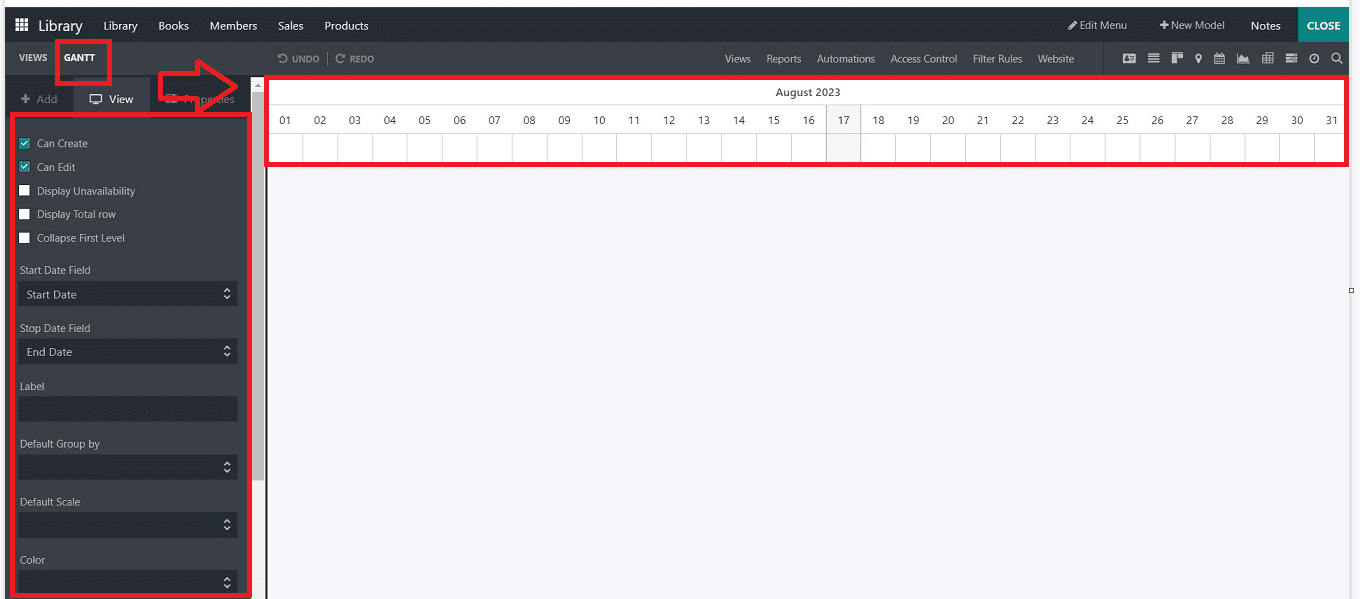
By deactivating Can Create or Can Edit, users can stop records from being created or edited. You can select the “Display Unavailability” option to show records in grey and select the “Display Complete” row field to see the complete row. Choosing the “Collapse First Level” button will collapse several records at once. A default time scale may be configured under the “Default Scale,” and records can be grouped by default. Additionally, the field under the “Color” field can be used to add color to records.
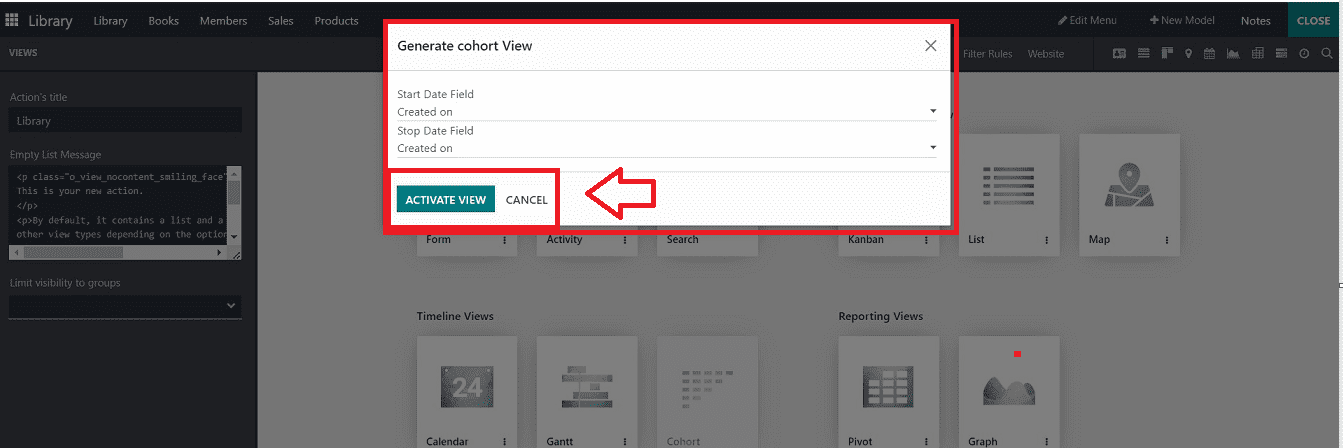
Cohort View
Both the Start Date Field and the Stop Date Field can be customized under the “Cohort” View. The Timeline, Interval, Mode, and Measure Field may also be configured.
Pivot View
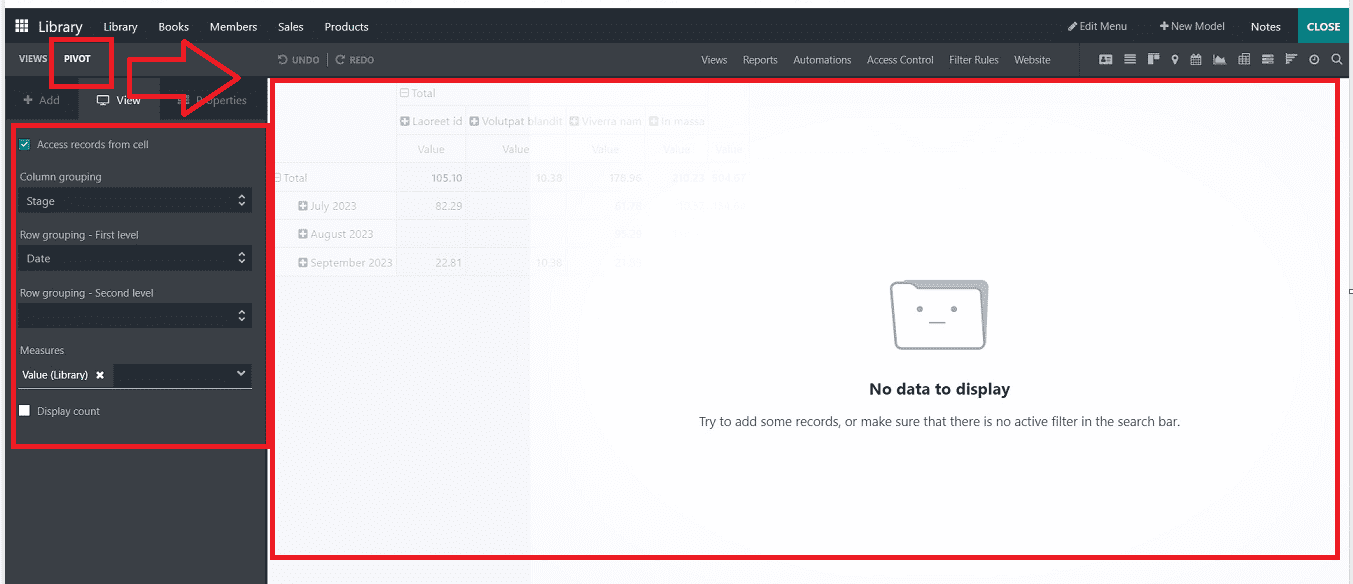
Users can get the data records from a pivot table by enabling the “Access records from cell” option. Aspects like Column grouping, Row grouping - First level, Row grouping - Second level, Measures, and the Display count can be activated under the Pivot View depending on the situation.
Graph View
Bar, line, or pie charts are used to present data in the Graph view. Graph types, Sorting options, First and Second Dimensions, and Measures are all included in the “Graph” view. At the time of the creation process, users can add new dimensions.
You can select options such as Bar, Line, or Pie under the “Type” field to modify the format of the chart. Select a default data category for the “First dimension” and “Second dimensions,” and you can also choose a default data type for the Measure in the “Measure” field.

The "Access Records from Cell" and "Stacked Graph" options can also be enabled to download data records from the graphical report view and show a stacked graphical representation of the data, respectively.
These are the options available in the “View” menu of the Odoo 16 Studio Module. Now, we can discuss the “Reporting” section of the platform.
Reporting Menu
The Odoo platform can be developed with features for filtration and grouping under the ”Reports” menu. Odoo provides some inbuilt tools and functions for creating and processing customized features that are accessible and will aid in configuring the different reporting windows for creating new apps. This page will define every report created using the Odoo platform. The Search, Filtering, and Group by options can also be customized.
To check the functionalities available in the reports section, go to the “Reports” menu of the Studio Module.
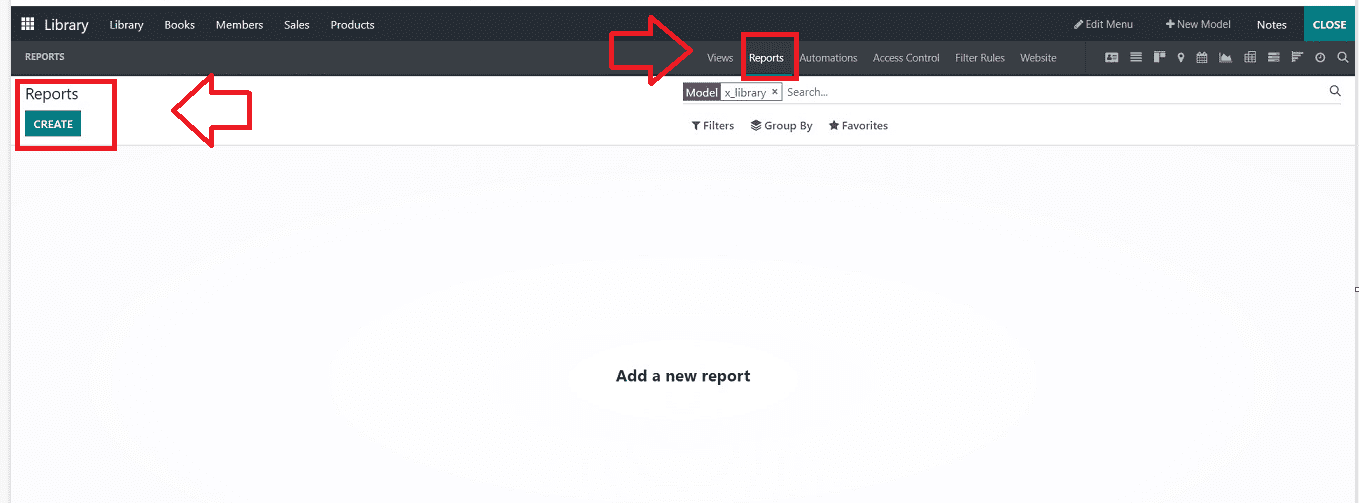
The application model for which we will generate the report will be visible to you in the filter search area. Then click on the “CREATE” button to create a new Reporting section.
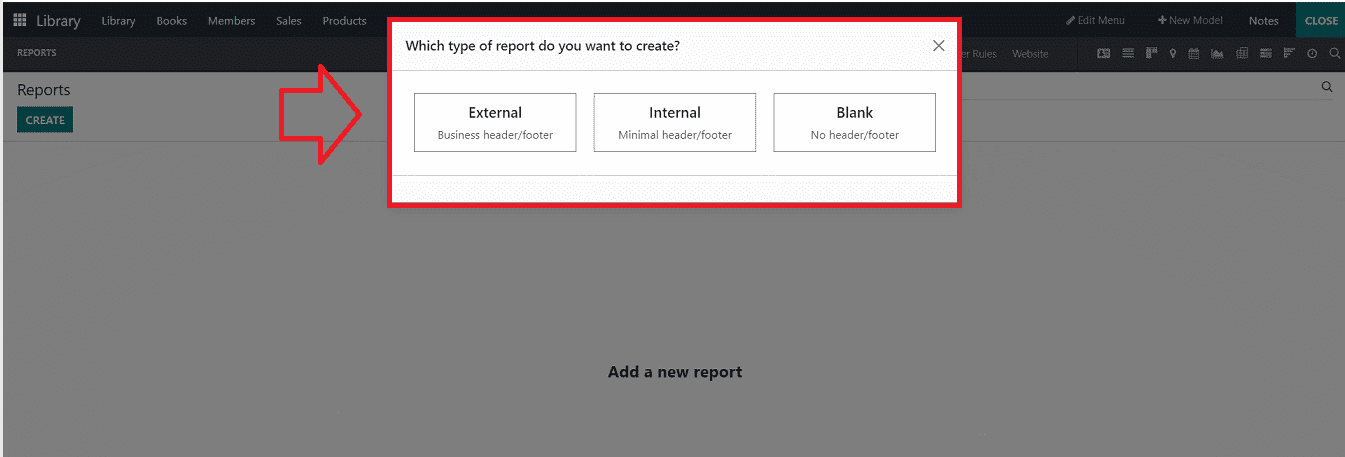
You will receive a dialogue box containing some relevant report types where you must decide whether to produce External, Internal, or Blank Reports. You will see the settings menu based on the Report Type you select, where you can configure all the essential information for the Translate View menu. Clicking on any of these options will open its corresponding report configuration form.
Creating a New Report
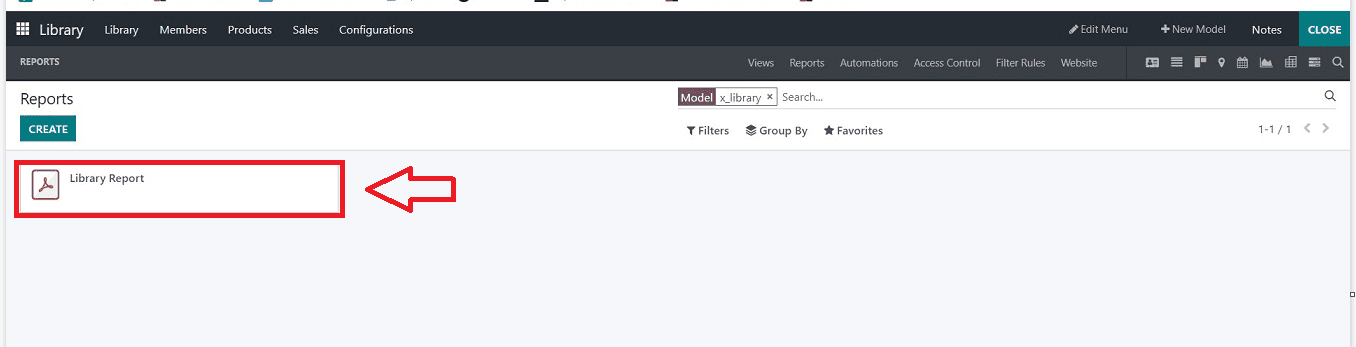
Opening the External Reporting option will add a report section to your “Reports” dashboard, as shown below.
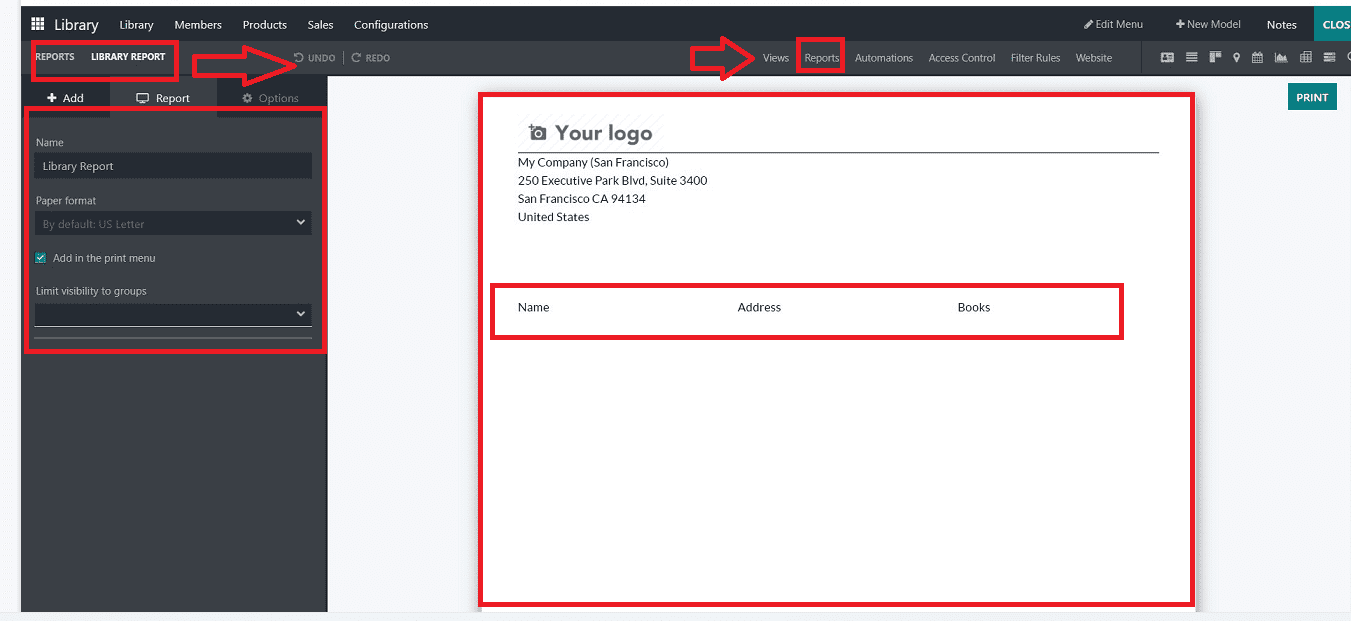
To edit a report specifics, any records should be available in your application database; after that, you can edit the report specifics by clicking on the displayed card. this will open the report configuration section, as shown below.
Users can choose the report title, enable the printing option, and have visibility restrictions in the Report menu. Users can print generated reports straight from the same window by turning on the “PRINT” button. Allowing for separate user groups Limit Visibility to Groups.
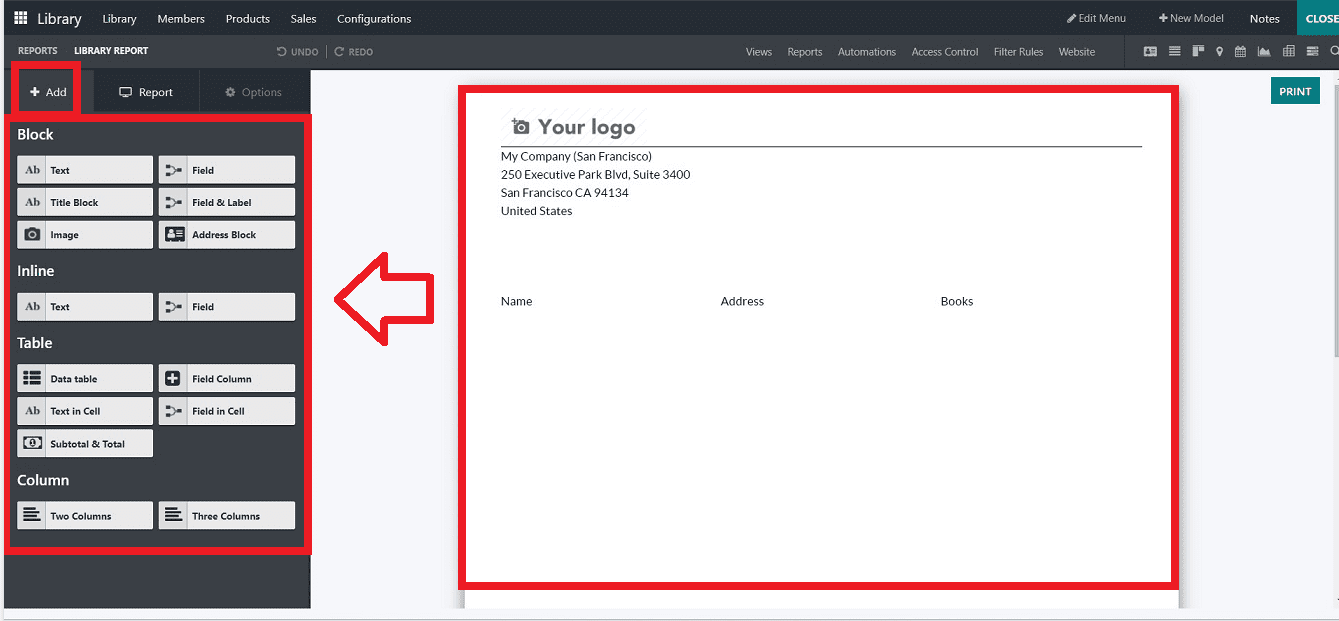
By choosing the appropriate report type and going to the Report arrangement window, you can create a customized report design using the various tools and components available in the “Block” section by clicking on the “+Add” option on the window's left side.
Blocks like Text, Field, Title Block, Field and label, Image, and Address Block may expand the desired area. The many characteristics of the blocks and fields may be configured using “Inline” aspects like Text and Field components. “Tables” such as Data Table, Field Column, Text in Cell, Field in Cell, and Subtotal and Total can be defined via the Reporting menu. "Column" types can be used to establish two or three columns.
Here, I've made a simple Report page for demonstration purposes, which is seen below. You can add more columns and data to the page as per your application type and requirements.
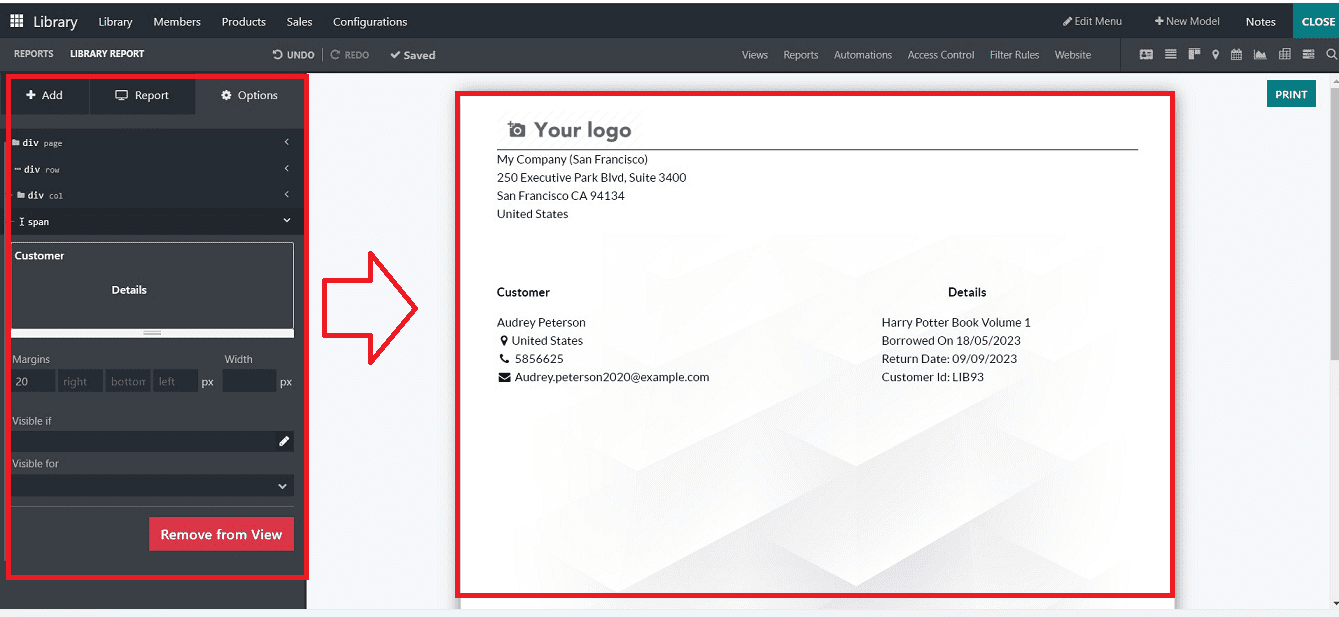
Users of the Odoo Studio module can configure report menus with a variety of operational tools for business operations. You can preview and double-check the activities by choosing the “PRINT” button, Edit the Print Preview, etc. Also, it is possible to download the report data in PDF Format.
These are the functionalities available in the “Views” and “Reports” sections of the Odoo 16 Studio Module.
To read more about configuring reports & translators in Odoo 15 Studio, refer to our blog How to Configure Reports & Translators in Odoo 15 Studio