The checkout process is capable of defining whether the sale is completed successfully or fails. In Odoo 19's Website module, the merchants are able to define how customers will authenticate themselves during the purchase via "Sign in/up at checkout" configuration. The feature includes three configurable options: Optional, Disabled, and Mandatory, which allow merchants to specify if customers should sign in, have permission to purchase without logging in, or register on their own.
Enabling Guest Checkout with Optional Sign In/Up in Odoo 19
A seamless checkout process is important for any e-commerce site. One of the elements that contributes to providing an outstanding checkout experience to the users is providing the option of purchasing something without creating a user account. The possibility of doing so in Odoo 19 can be obtained thanks to the “Sign in/up at checkout” option. Let us examine the options of the “Optional” mode and understand how it works in detail.
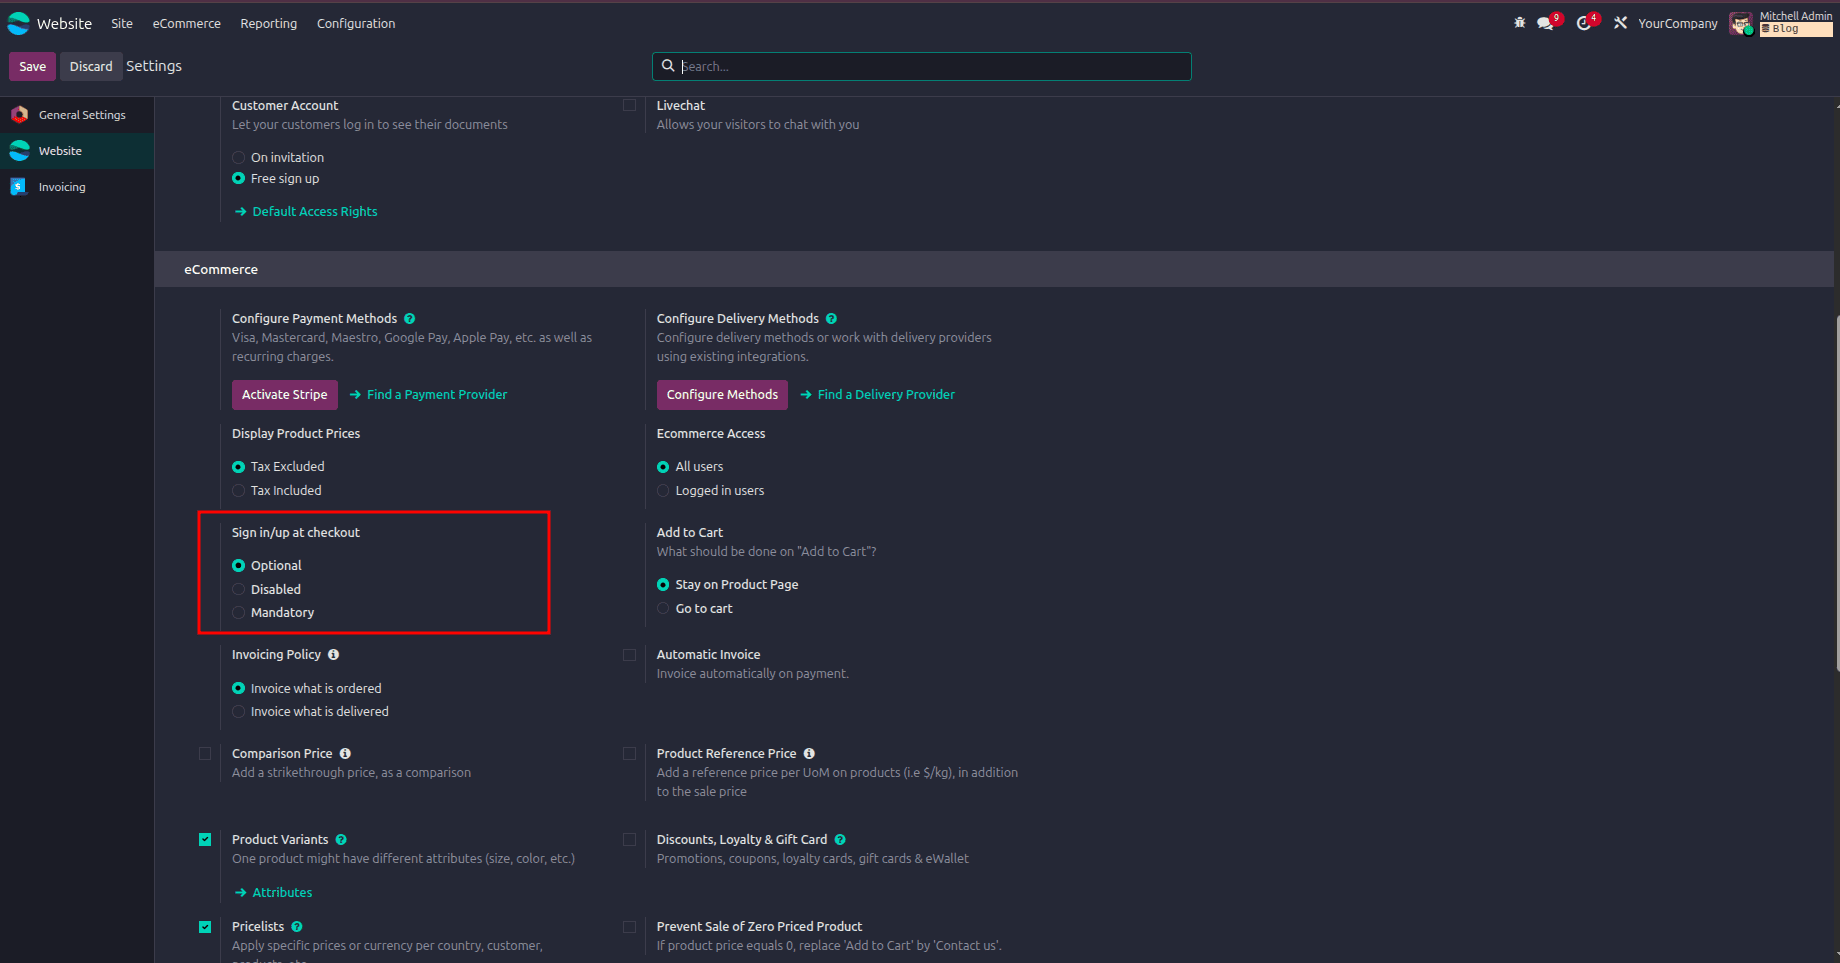
In this case, you want to enable the optional sign-in/sign-up process for your shoppers at checkout, then go to the Configuration page in the Website module. In the Shop - Checkout tab, you should see the Sign in/Sign up at Checkout field. Select the "Optional" radio button from there and save the changes. Once done, Odoo 19 will give shoppers an option to sign in and sign up during the order confirmation step if they need to.
From there, we can browse the Odoo 19 website without needing to sign in, enjoying full access to the site simply as a guest.
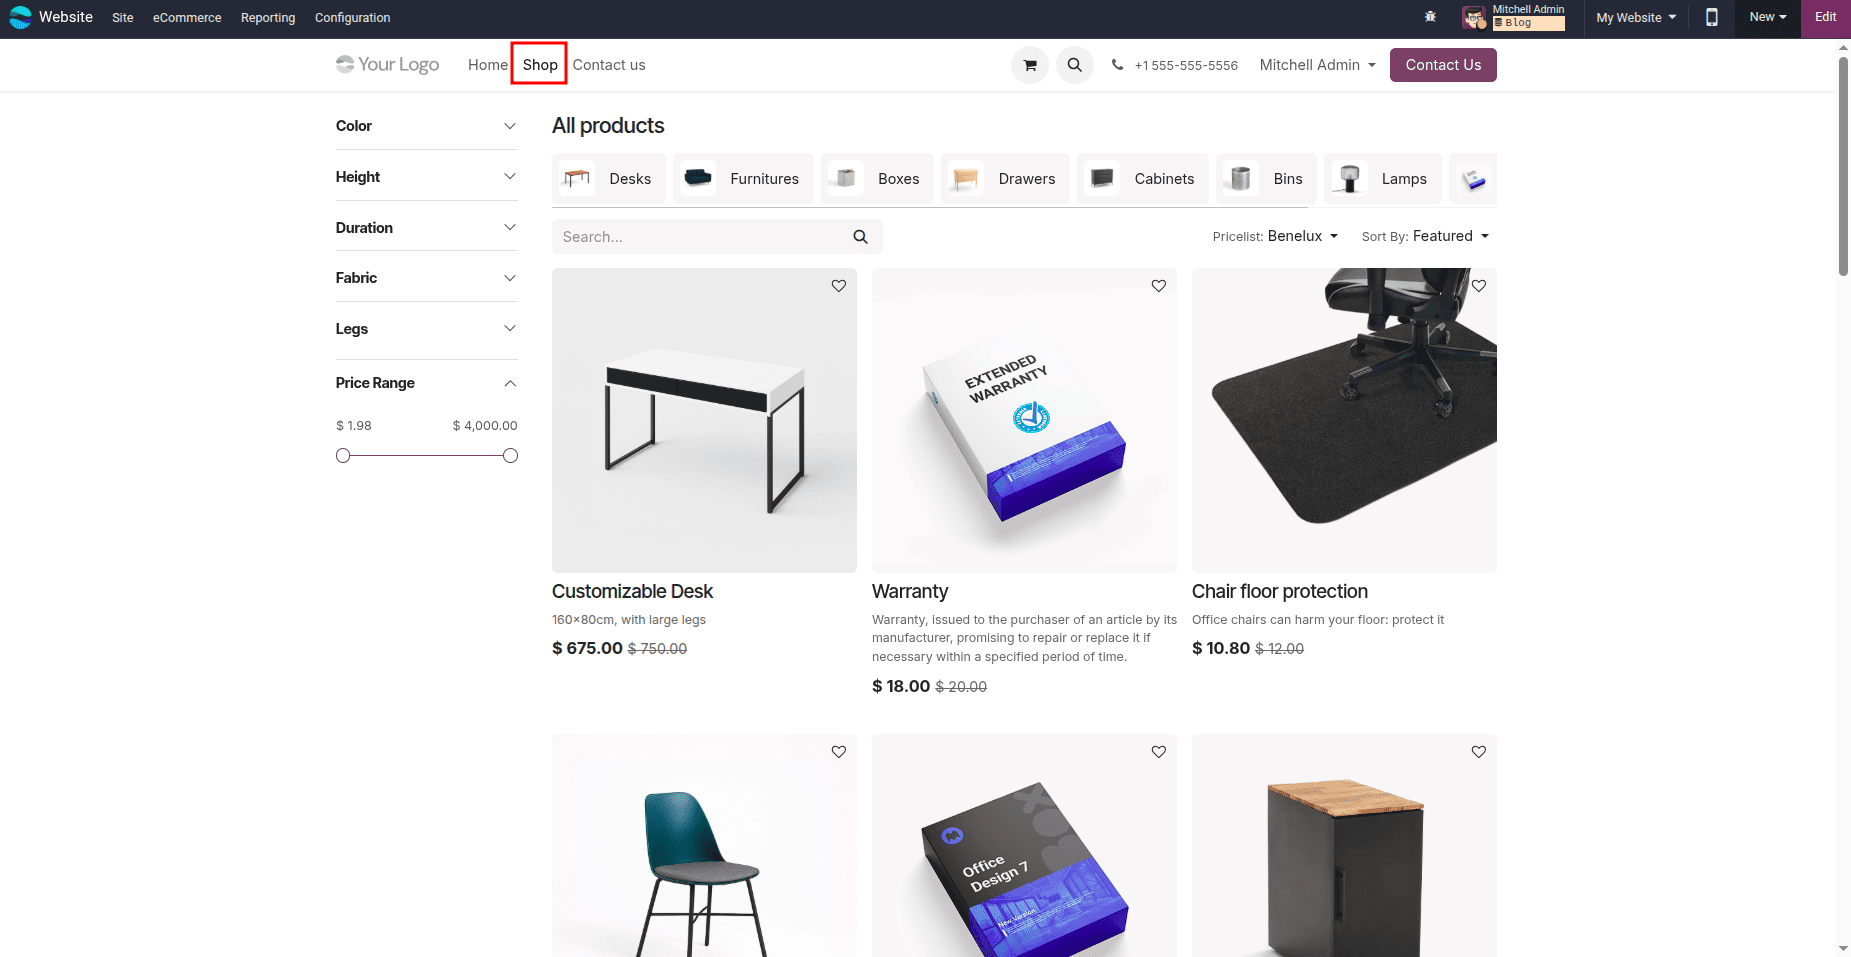
After visiting the shop as a guest, customers can browse the available products and select the item they want to purchase. Once the product is added, click the “Proceed to Checkout” button to continue with the order process.
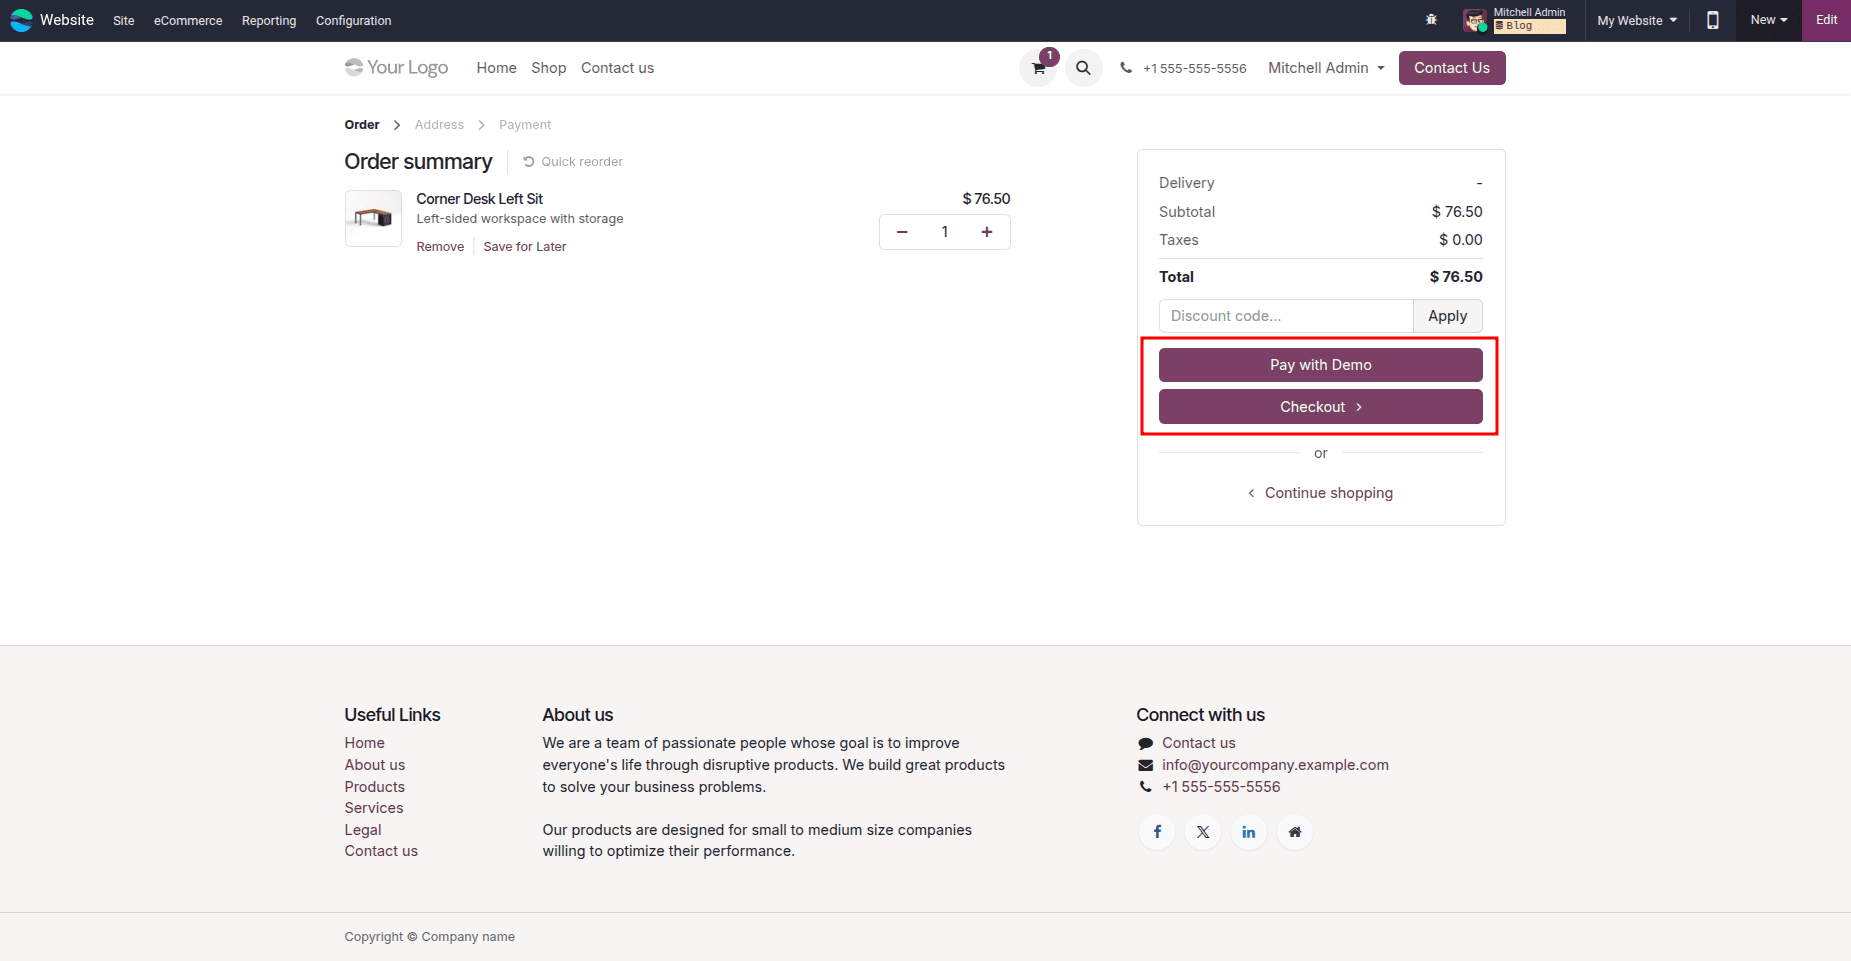
There are two choices on this page: Pay with Demo and Checkout, and Demo is one of the choices for paying in this case. By pressing the Checkout button, another page opens, and it gives an opportunity to log in. Nevertheless, if the customer does not want to log in, he or she can just provide the information required, such as e-mail, name, and delivery address, and go ahead without being logged in. The customer may also press the Sign In button and log in to his or her customer portal.
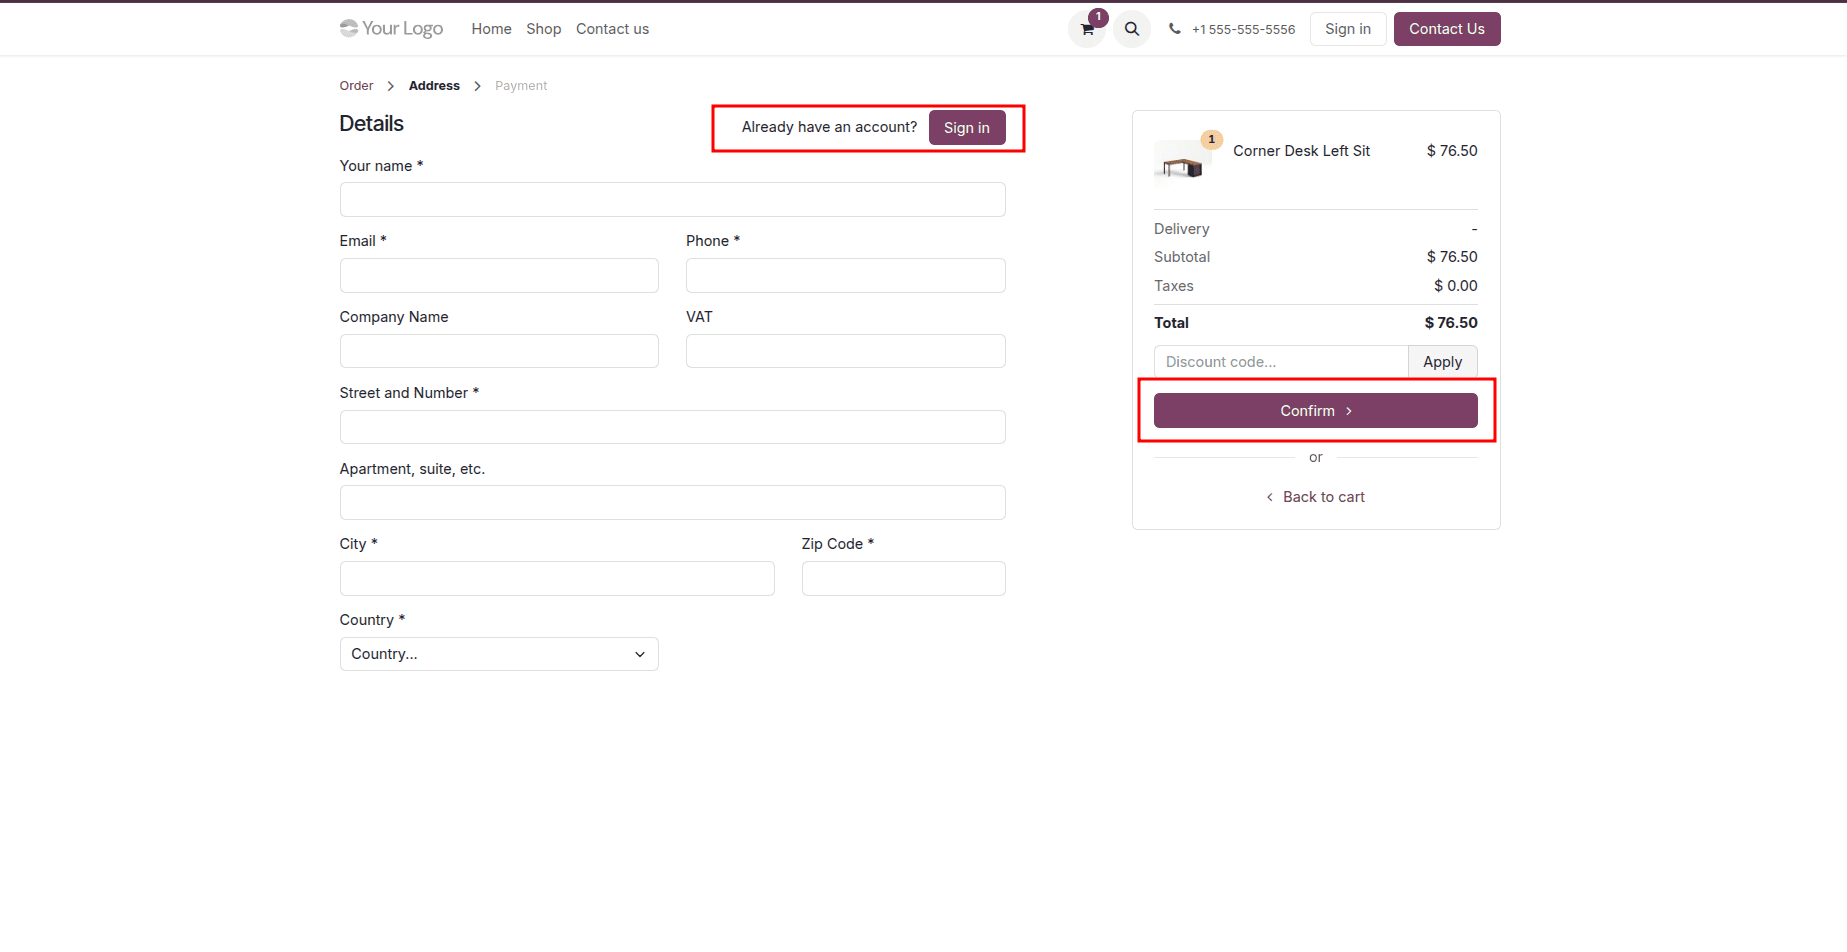
After entering the required details, the customer can click the “Confirm” button to move to the next step of the checkout process. The following page will then display the delivery address along with a full summary of the order.
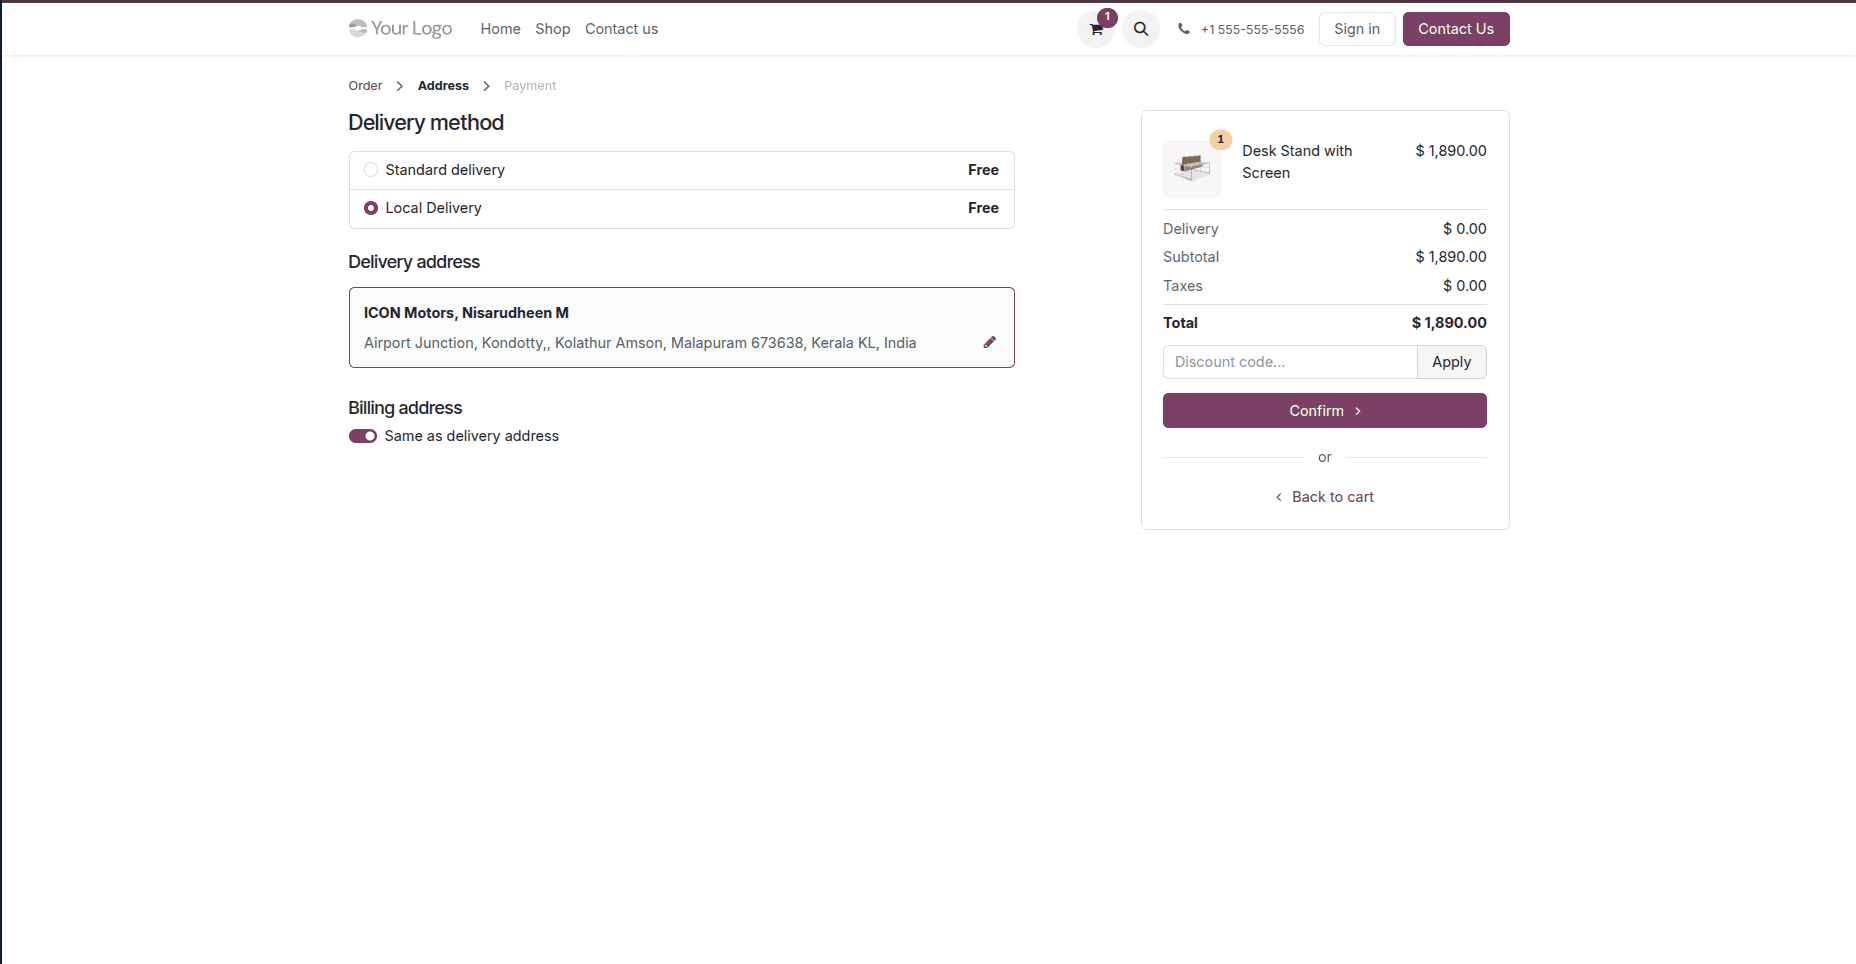
The next page will present the delivery address alongside a complete order summary. Once all the order details have been reviewed and confirmed, the customer can click the “Confirm” button to continue.
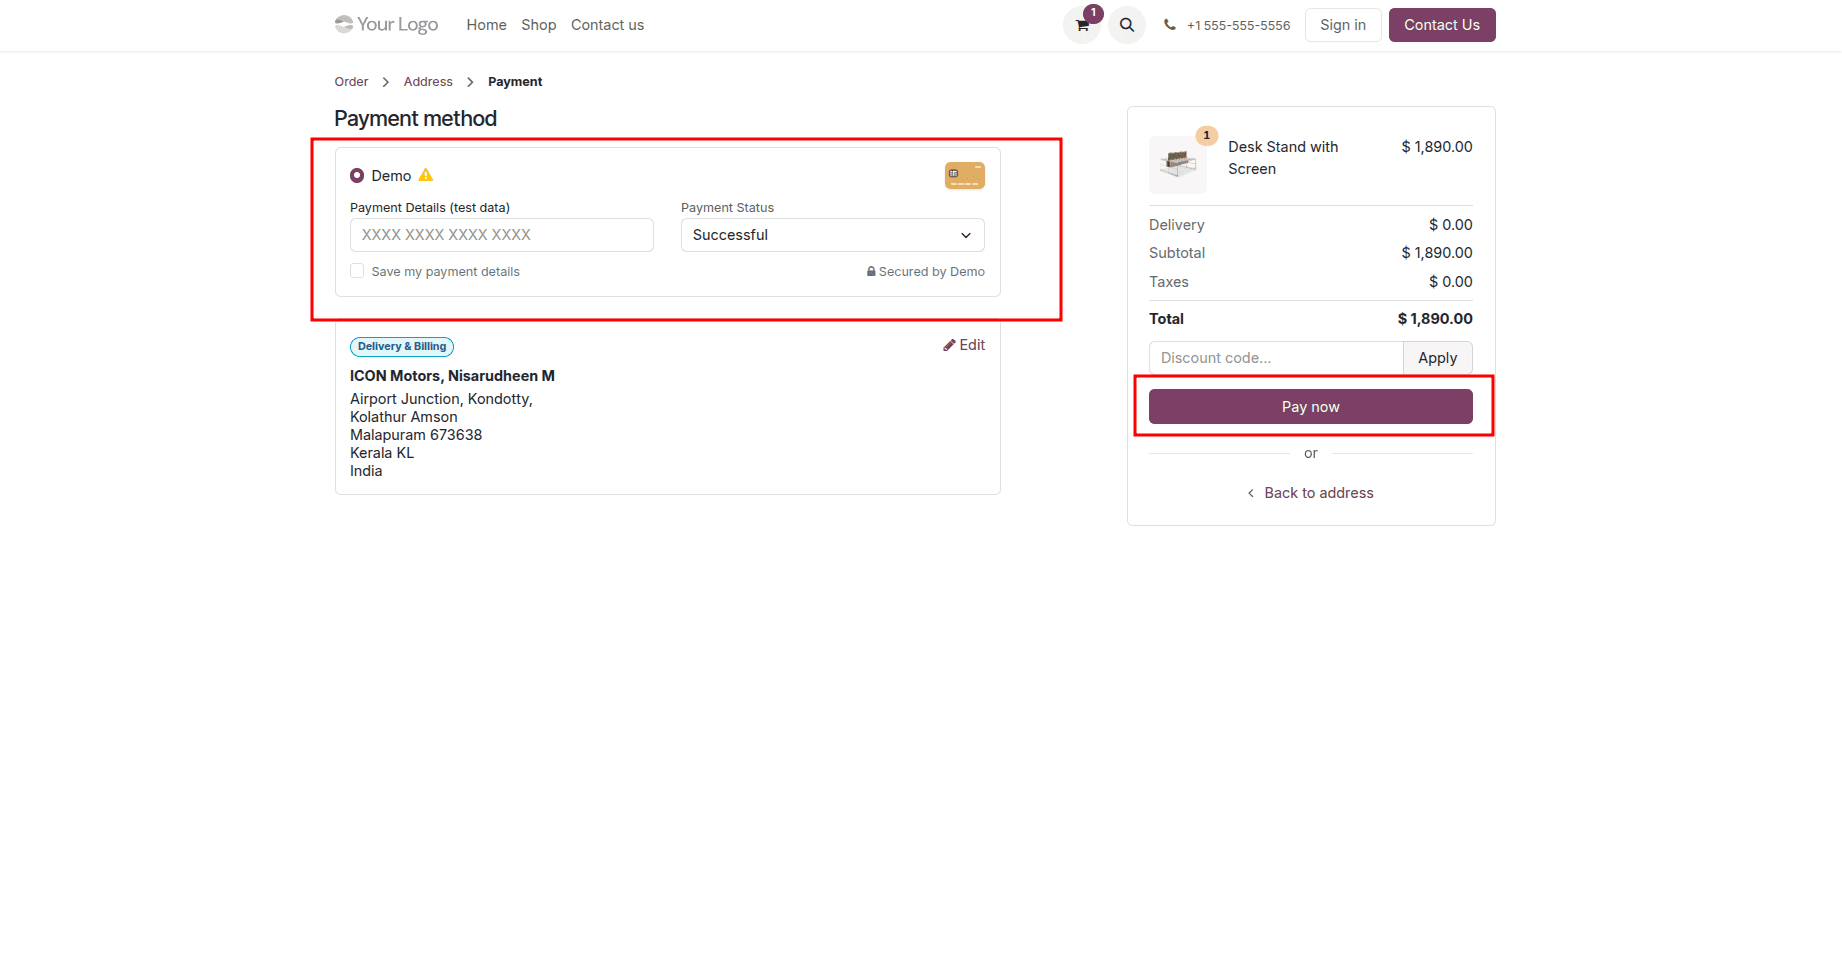
The next page will display all available payment methods, allowing the customer to choose their preferred payment option. After choosing the desired payment method, click the "Pay Now" button to finalise and complete the product purchase.
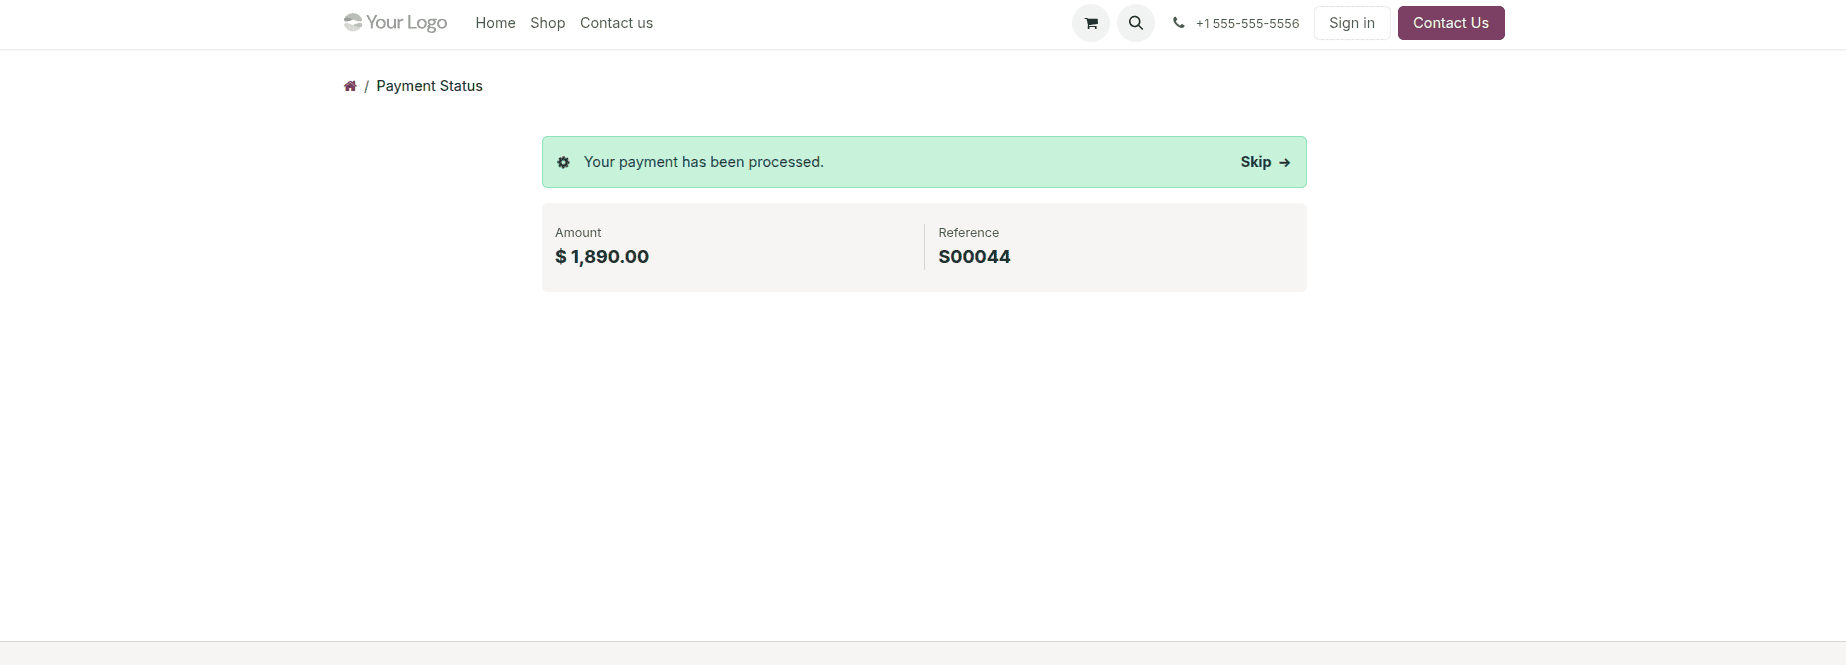
By using this option, customers can avoid any login-related delays, which helps reduce cart abandonment and makes the experience particularly beneficial for first-time or one-time shoppers. For stores that rely on repeat purchases or require order tracking capabilities, sign-ups can still be encouraged by sending a follow-up email once the order has been placed.
Enabling Guest Checkout with Disabled (Buy as Guest) Sign In/Up in Odoo 19
By choosing to use the “Disabled (Buy as Guest)” feature in Odoo 19, the customer will have the ability to make the purchase without the requirement to log in or register. At no time during the checkout process will there be a prompt that requires logging in or signing up, thus ensuring the entire process remains anonymous and easy. This method would be ideal for people making one-off purchases.
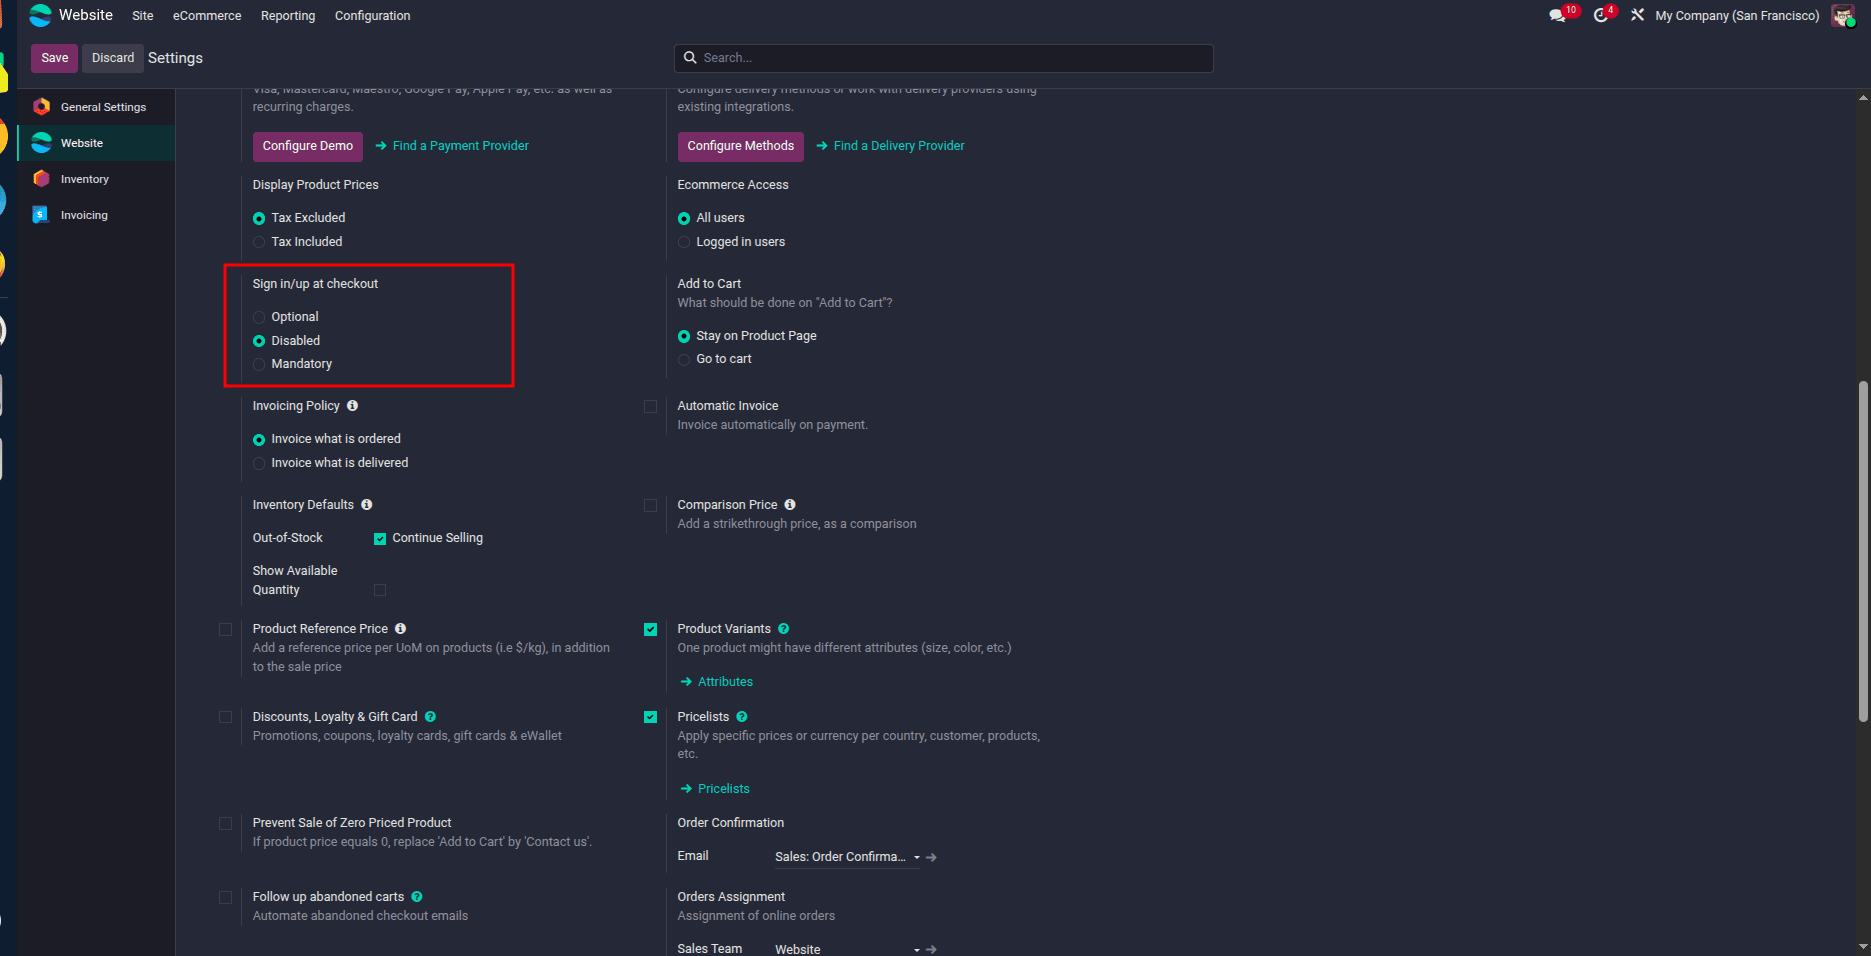
To enable this option, go to the Website module’s Configuration settings and set the “Sign in/up at Checkout” option to “Disabled (Buy as Guest)”. Then, click the “Save” button to apply the changes.
When a visitor accesses the website without logging in and navigates to the shop, they can simply browse and select the product they wish to purchase.
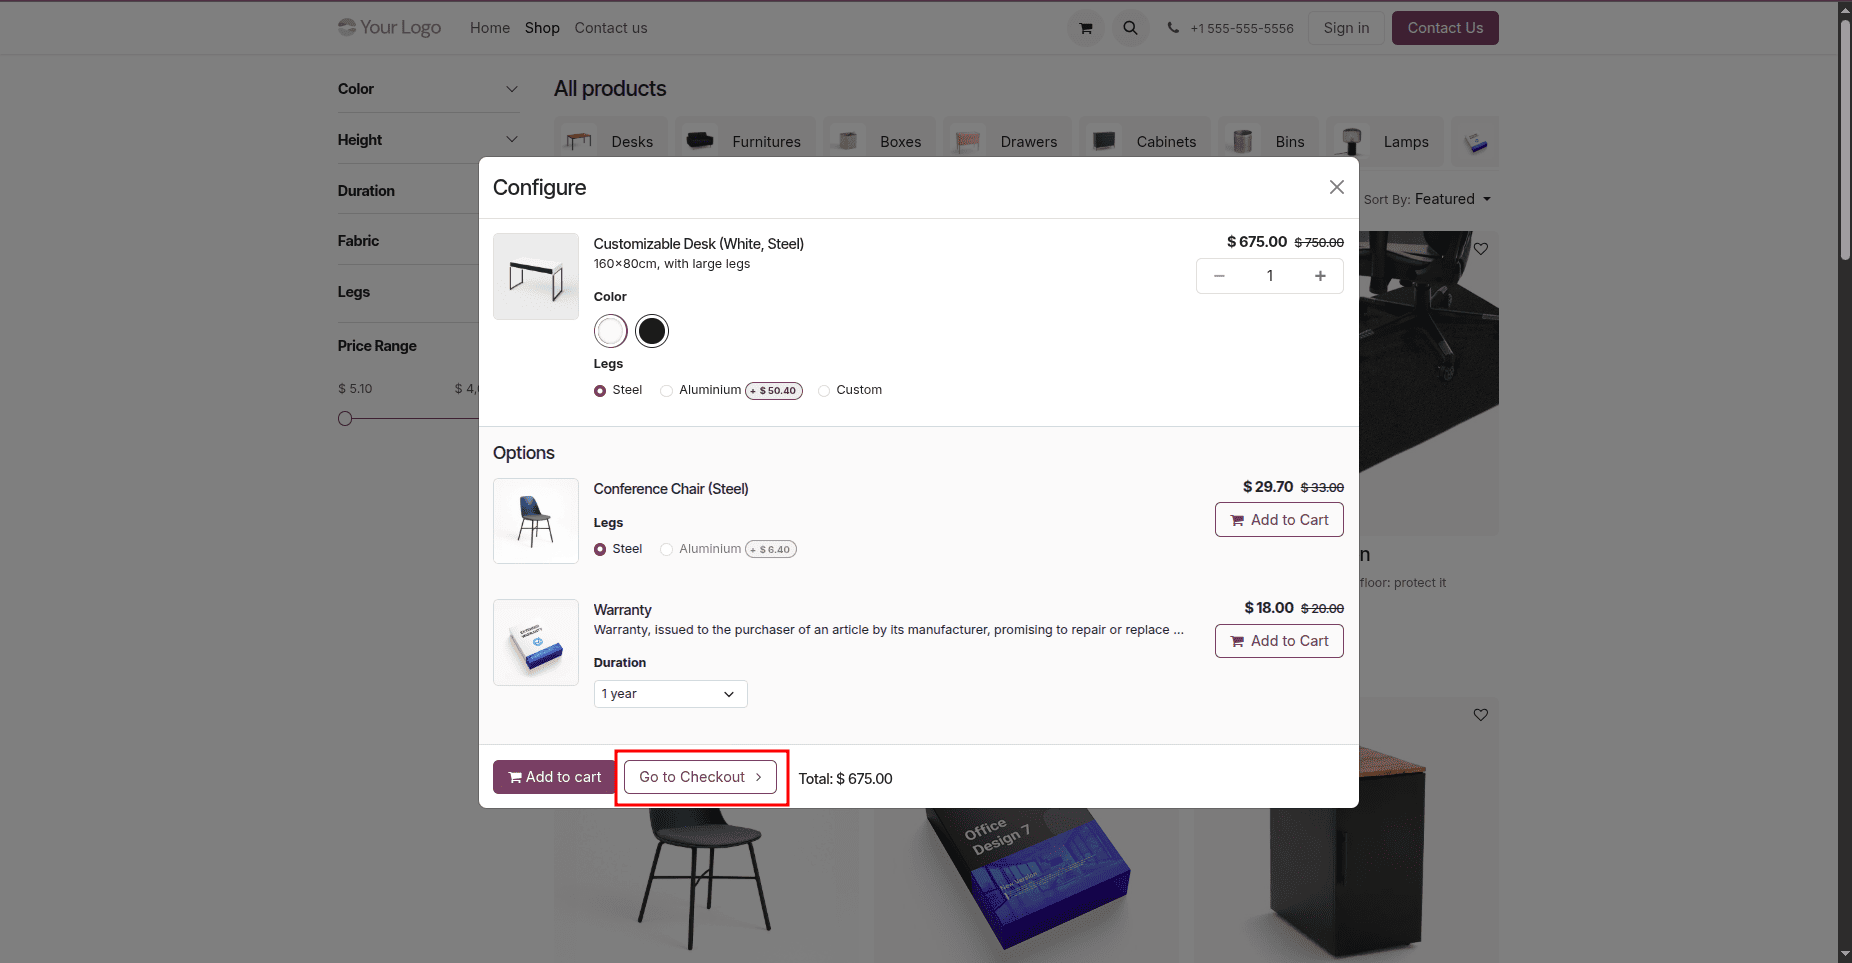
After selecting the product that you want to buy, place it in the cart in order to make the purchase. At this point, there will be two choices available, which are Continue Shopping and Proceed to Checkout. The customer who wants to select other products has two choices: click Continue Shopping for further shopping in the store or Proceed to Checkout in order to confirm their choice. After clicking on Proceed to Checkout, a page with an order overview appears, where the customer has two choices: Pay with Demo, which is a payment provider, or proceed to Checkout.
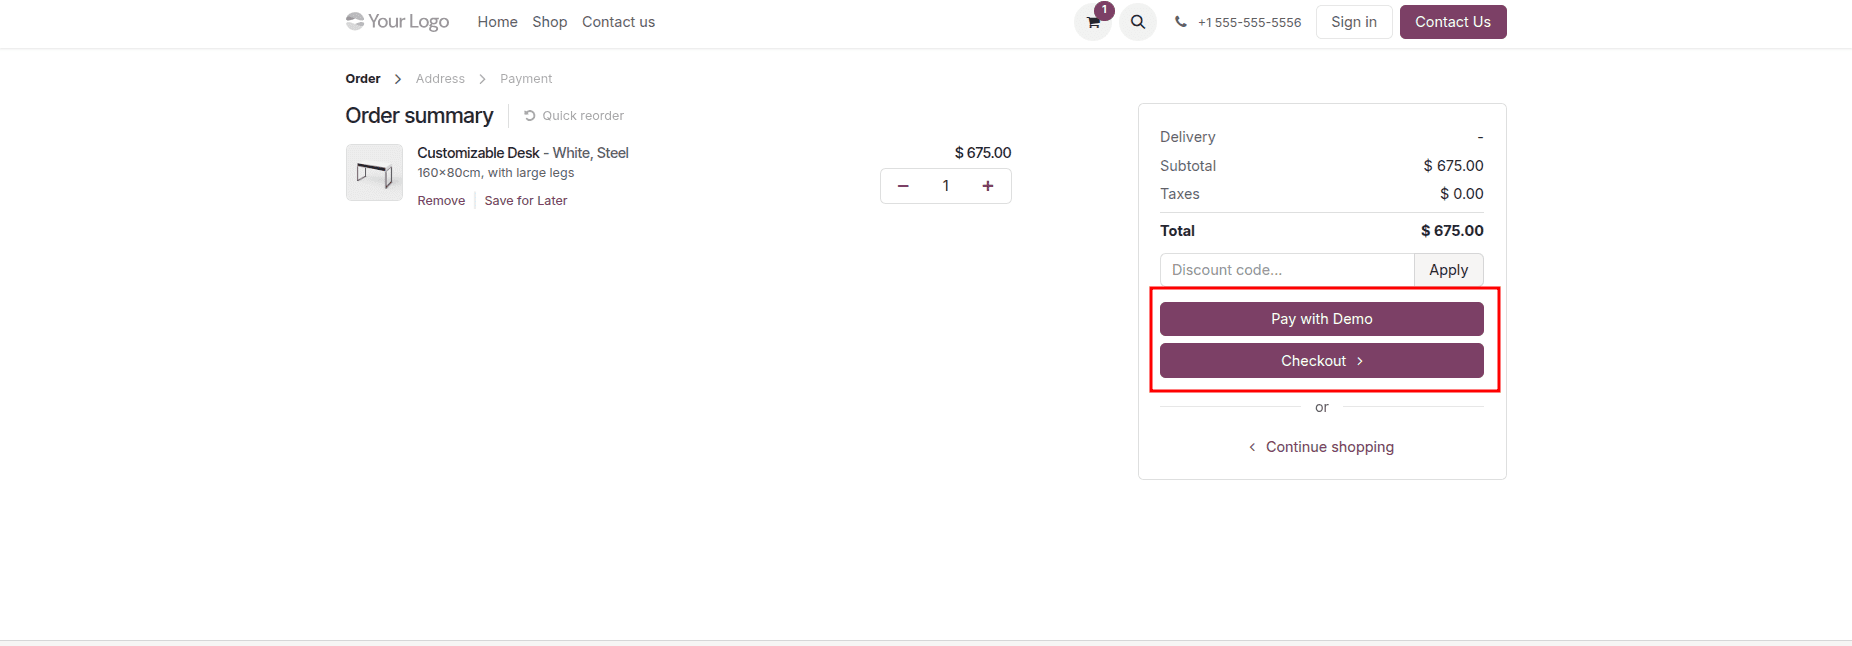
Upon clicking the Checkout button, a new page will load where the customer can fill in their personal details. Unlike the Optional sign-in/up setting, no sign-in prompt will be displayed on this page, as the Disabled (Buy as Guest) option removes the login option entirely from the checkout process.
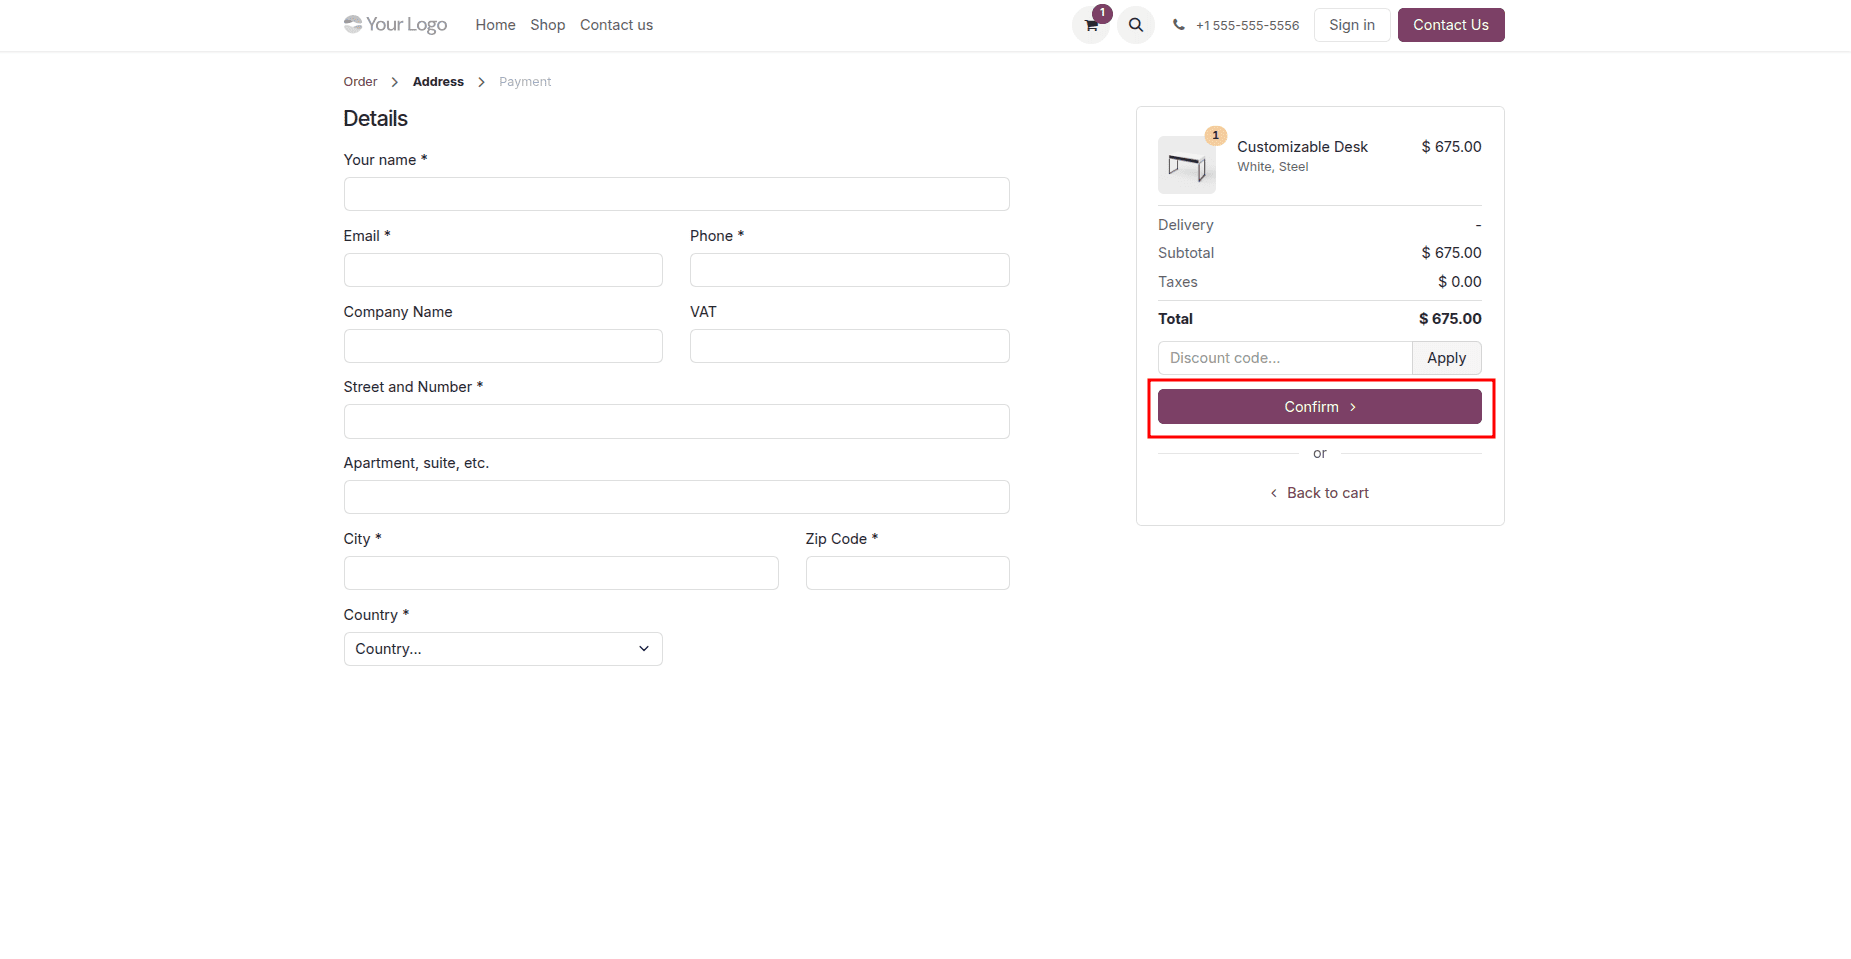
On this page, customers can enter the necessary details and click the “Confirm” button to proceed with completing their purchase.
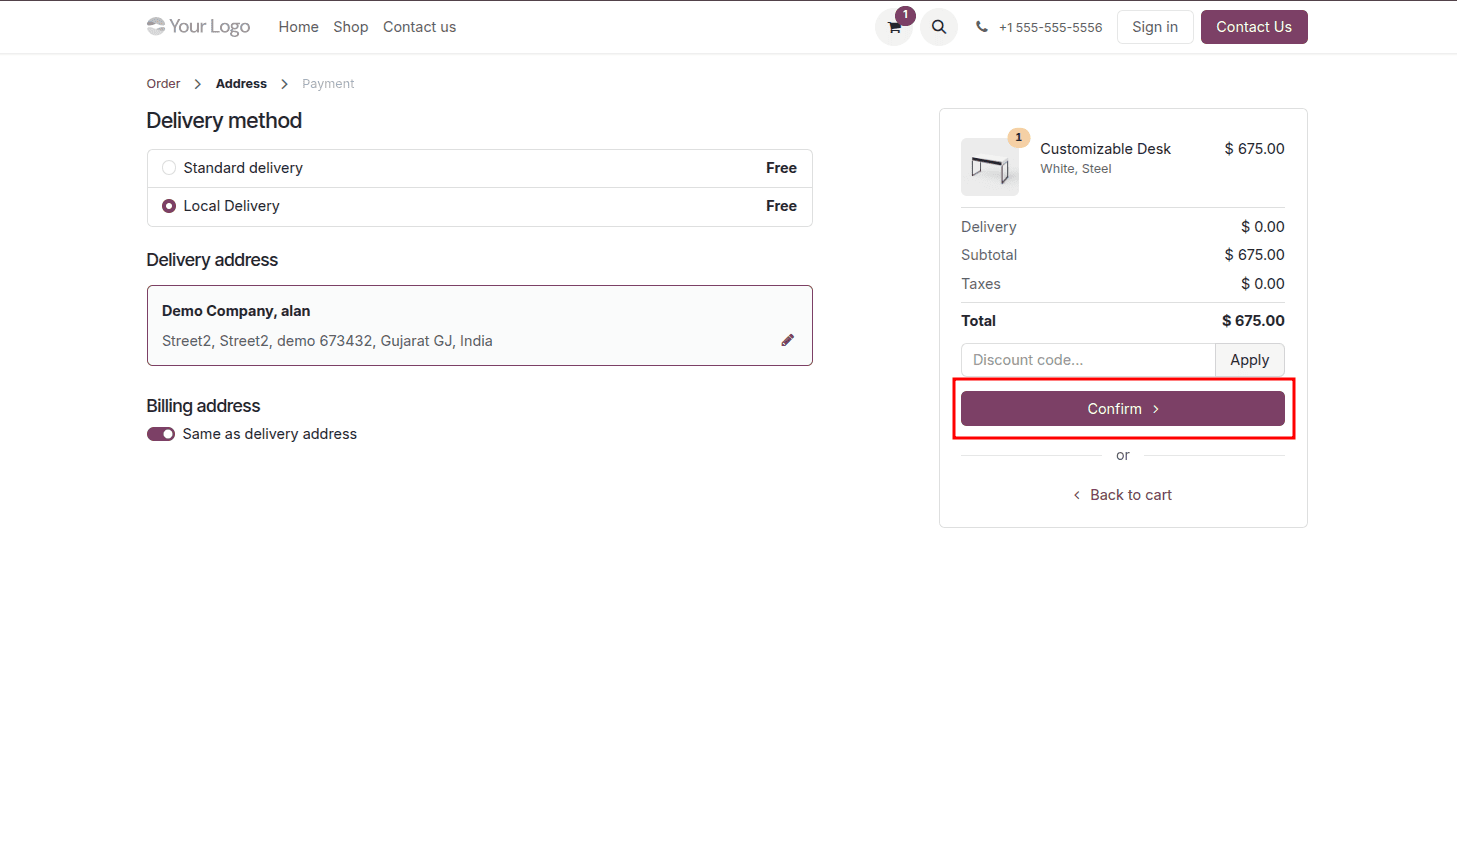
The following page will display the delivery address, selected delivery method, and a complete order summary. Once all the details have been checked and confirmed, the customer can click the “Confirm” button to continue with the checkout process.
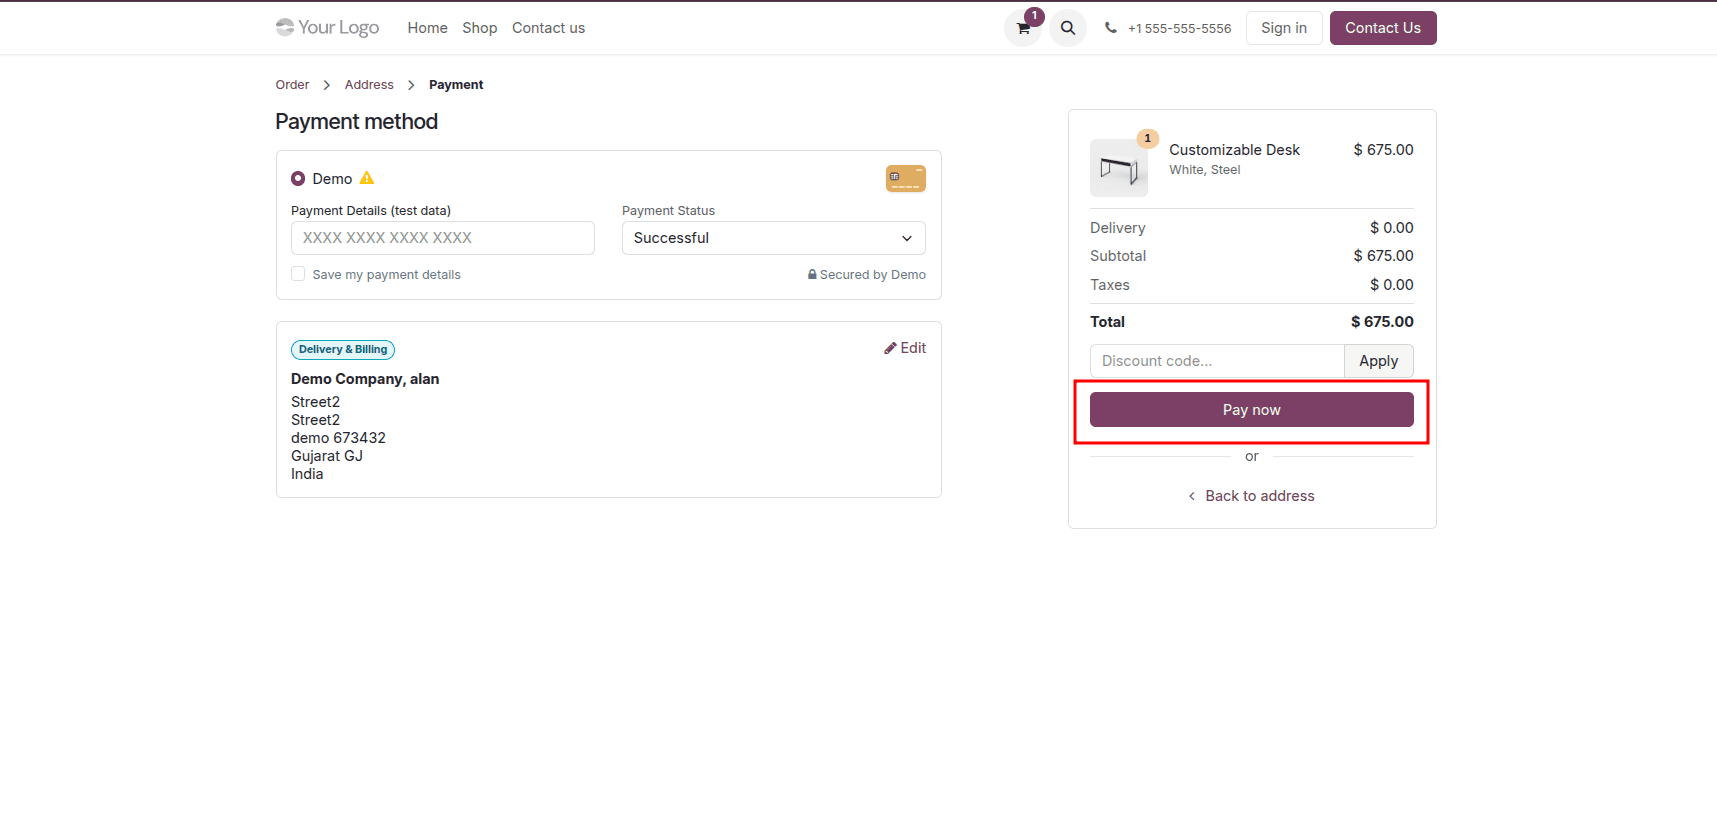
In addition to that, the page will show all the available modes of payment, details regarding the total amount that needs to be paid, and an area where one can input the coupon code if there is one. After the completion of everything, the user can now tap on the "Pay Now" button to finalize their payment process. In this mode, the customers will be able to do shopping and check out from their cart through the Odoo 19 website without the requirement of logging in.
Enabling Guest Checkout with Mandatory (No Guest Checkout) Sign In/Up in Odoo 19
In case the Sign in/up at Checkout is set as “Mandatory” in Odoo 19, the customers are forced to sign into the existing account or create a new account. The guest checkout is not allowed in this case. This ensures that all orders belong to the registered user, which is especially helpful for those companies that work with order tracking, loyalty programs, or subscriptions. It is recommended for use in case the company works with customers’ accounts for purchase management. To configure the mandatory sign in/up at checkout, go to the website configuration settings and activate the “Mandatory (No Guest Checkout)” option for your website.
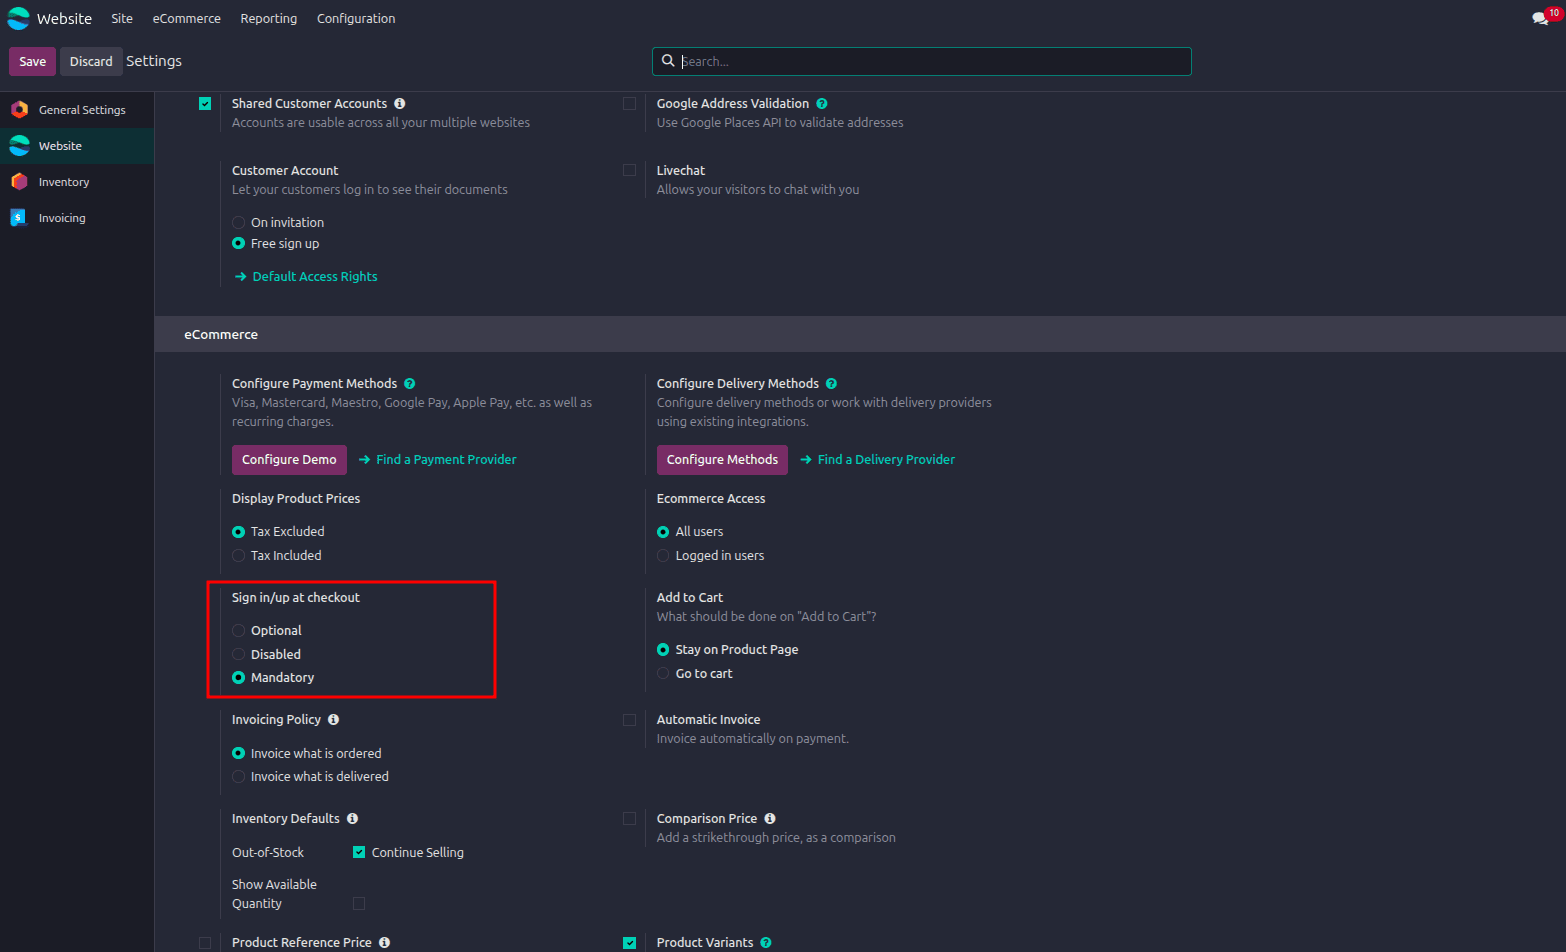
Next, visit the e-commerce store without logging in to an account and browse through the available products to select the one you wish to purchase.
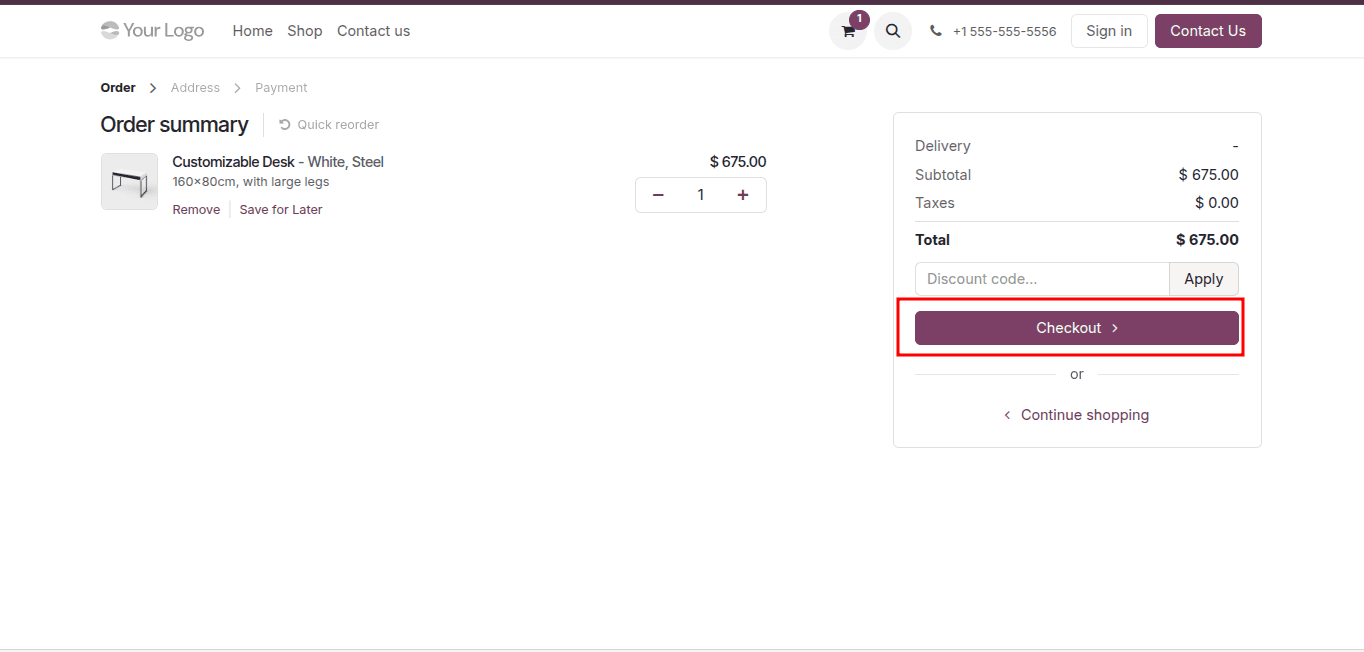
Once the product is added to the cart, the customer has the option to keep browsing the store or proceed with the checkout process. Upon clicking "Checkout", the customer will be automatically redirected to the sign-in page. Only after successfully signing in or registering an account can the customer move forward to the next steps of the checkout and payment process.
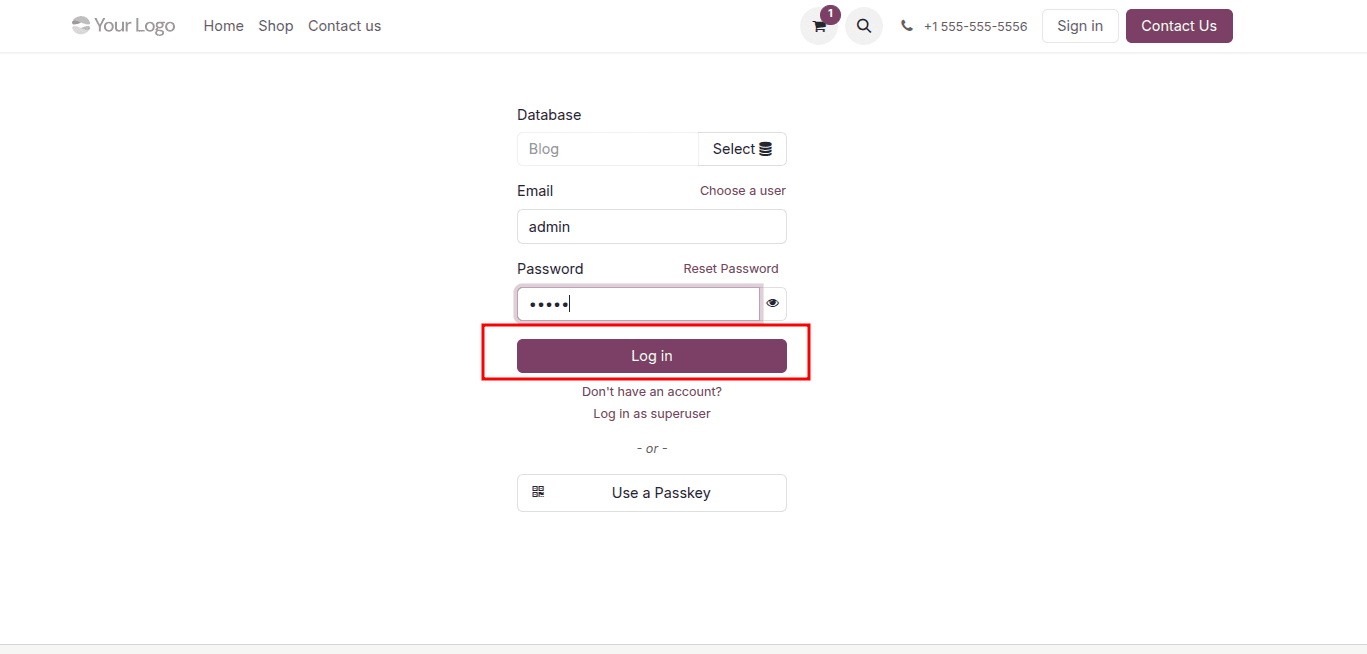
The customer can enter their account details, including email and password, to complete the sign-in process. In Odoo 19, an additional option is available directly on the login page, where a user account can be selected from the list, and Odoo will automatically populate the corresponding email address.
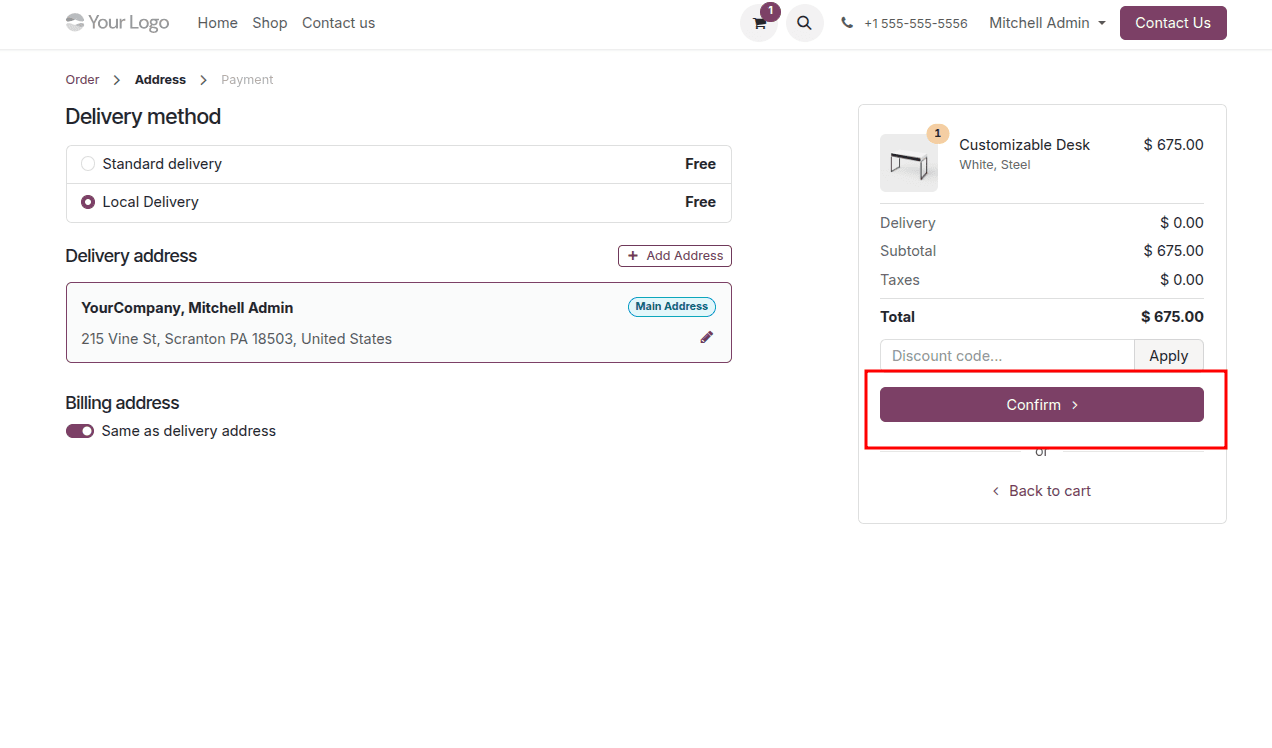
Once the login credentials have been entered, the customer can proceed to complete the remaining steps of the checkout process. By clicking the “Confirm” button, the customer can review the order details and finalize the confirmation.
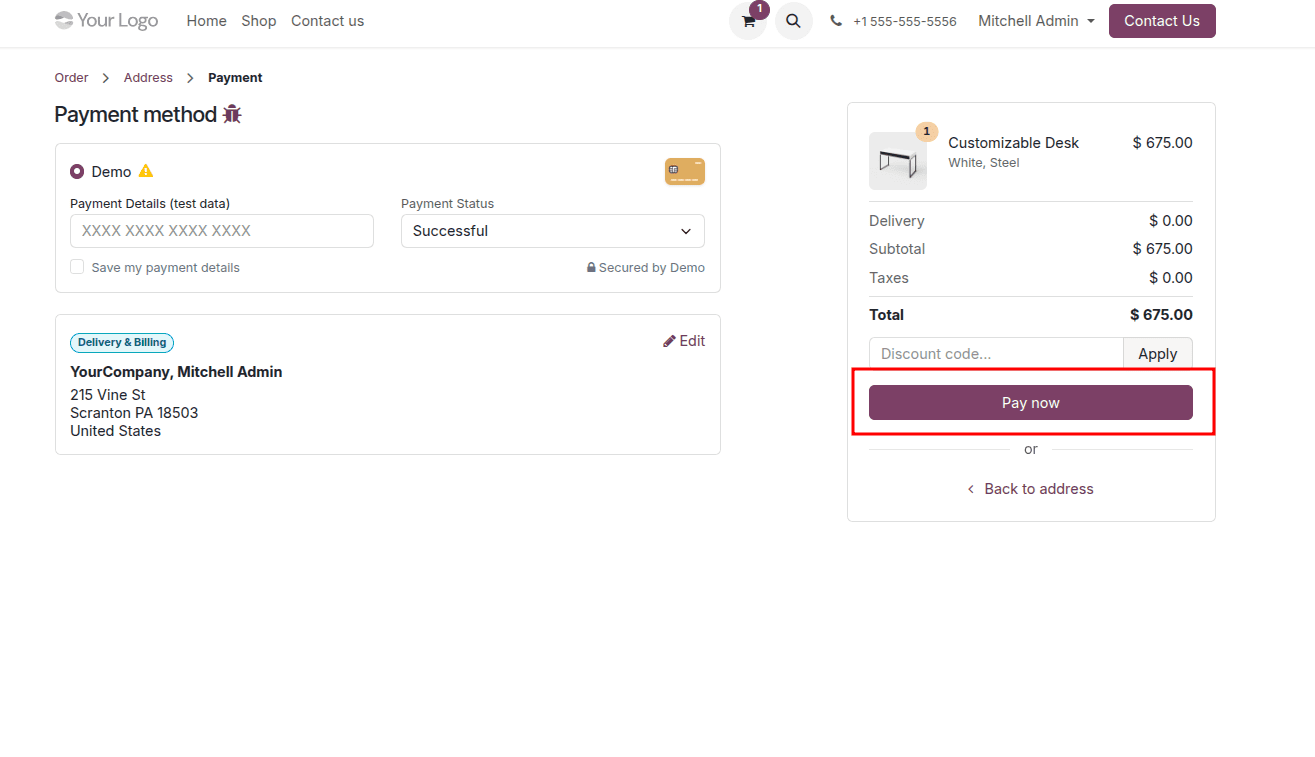
After this step, they can proceed with the payment process to complete the purchase. Odoo 19 offers a variety of payment methods to choose from. The customer can choose their preferred payment method and click the “Pay Now” button to complete the payment and finalize the purchase.
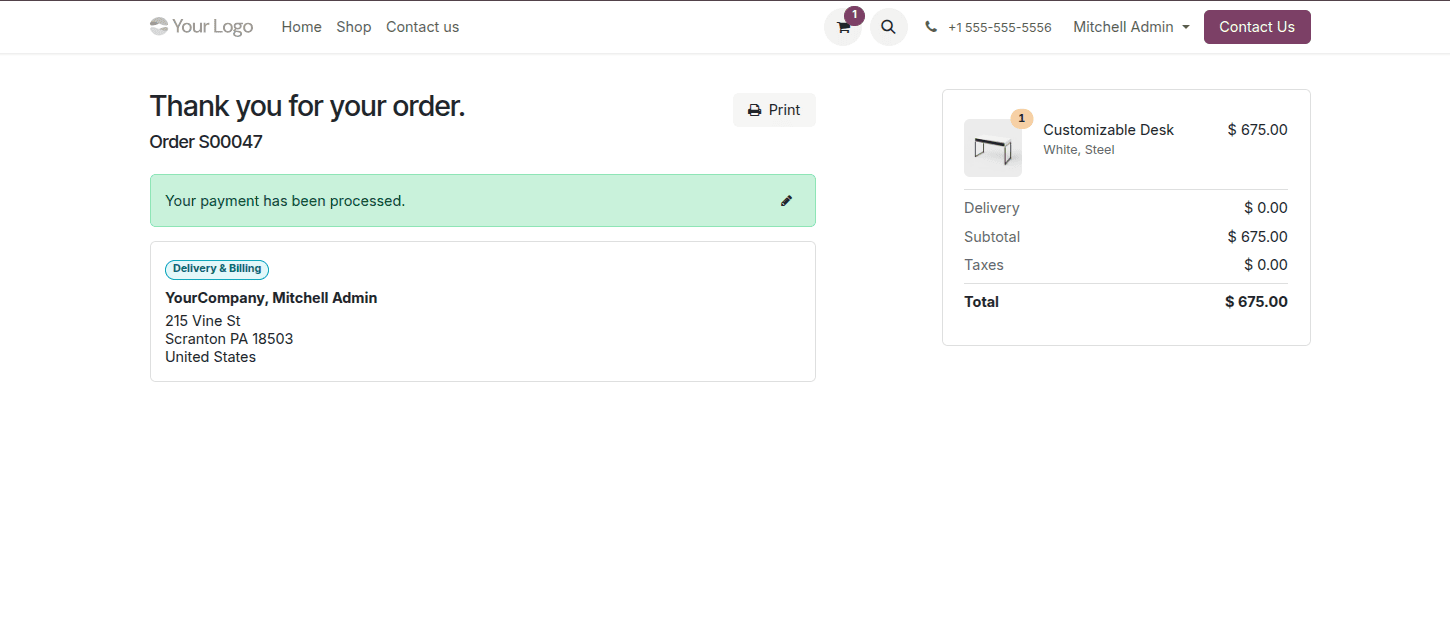
The Sign in/up at Checkout feature in Odoo 19 enables businesses to have the option of choosing the mode of checkout according to their sales and customer policies. If you select the modes of Optional, Disabled (Buy as Guest), or Mandatory (No Guest Checkout), then the three options will serve three different purposes as per your business requirements.
If you want to offer your clients an easy way of making purchases without any delays, then you should opt for a guest checkout method. If you want your customers to log into their accounts, then the mode should be mandatory because you would need them for other purposes such as delivery, subscription, and loyalty programs.
To read more about Overview of the Guest Checkout Process in Odoo 18 Websites, refer to our blog Overview of the Guest Checkout Process in Odoo 18 Websites.