MyFatoorah is one of the prominent regional payment gateways that provides its users with local payment options such as KNET, BENEFIT, Mada, and also the most popular payment solutions like Apple Pay, Google Pay, Visa, and MasterCard. Making localized and streamlined payment options is essential to improving your conversion rate, especially in the region of the GCC and Middle East.
For the owners of an e-commerce website on Odoo 18, implementing the integration with the MyFatoorah Payment Gateway makes it possible for them to process payments in an easy way, handle multi-currency transactions, and provide instant feedback to their customers.
Key Features
- Regional and local payments: full compatibility with payments such as knet (kuwait), benefit (bahrain), mada (saudi arabia), stc pay, apple pay, google pay, and credit cards.
- Test or live mode: built-in test mode for testing and verification purposes.
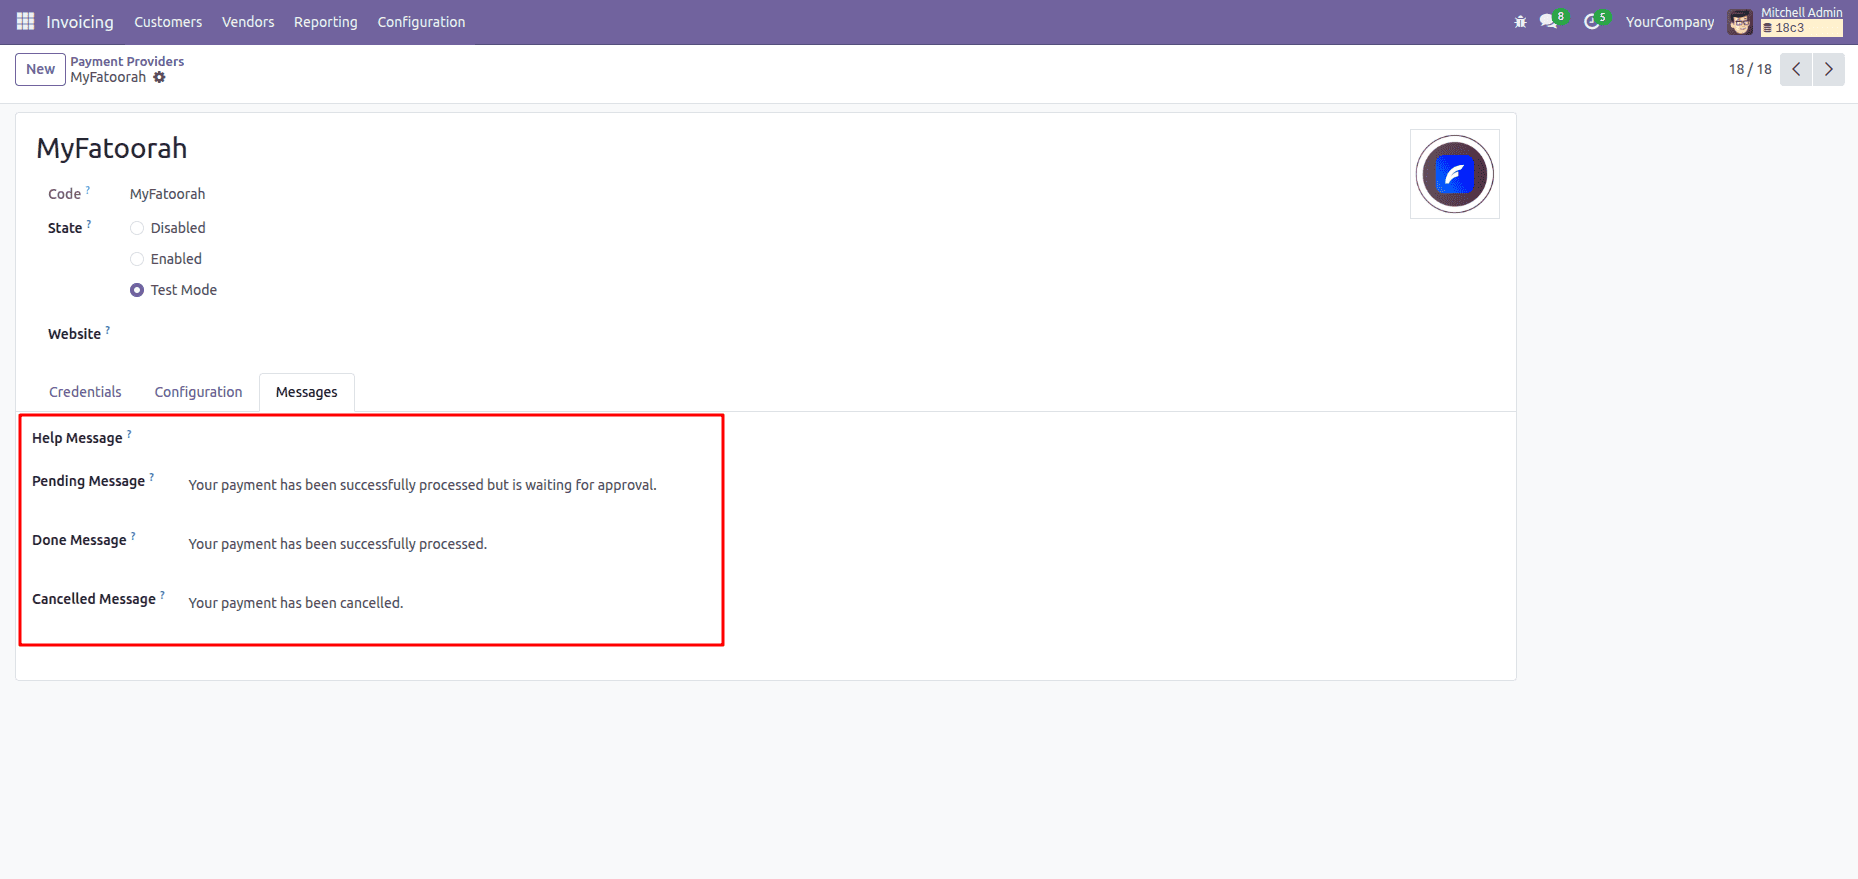
- Customizable messages: easy customization of pending, success, and cancel messages from the payment configuration page.
- Checkout integration: automatic redirection of customers to the MyFatoorah checkout page and autosyncing of status to Odoo.
Step 1: Activating the Payment Provider
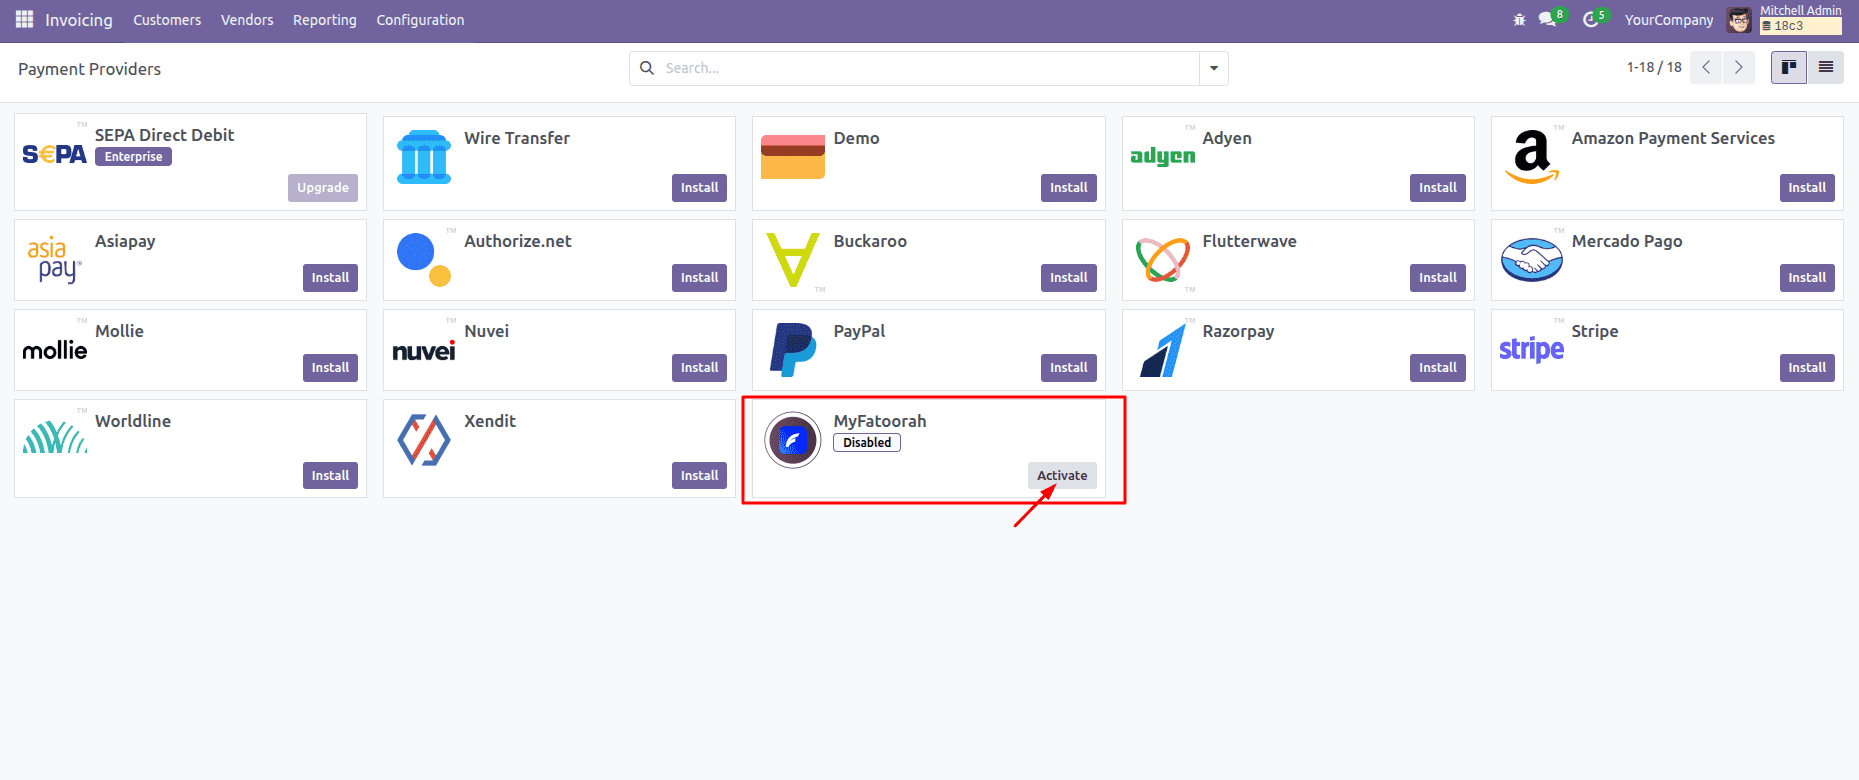
- Navigate to Invoicing (or Website) > Configuration > Payment Providers.
- Locate MyFatoorah and click Activate.
Step 2: Retrieving API Credentials
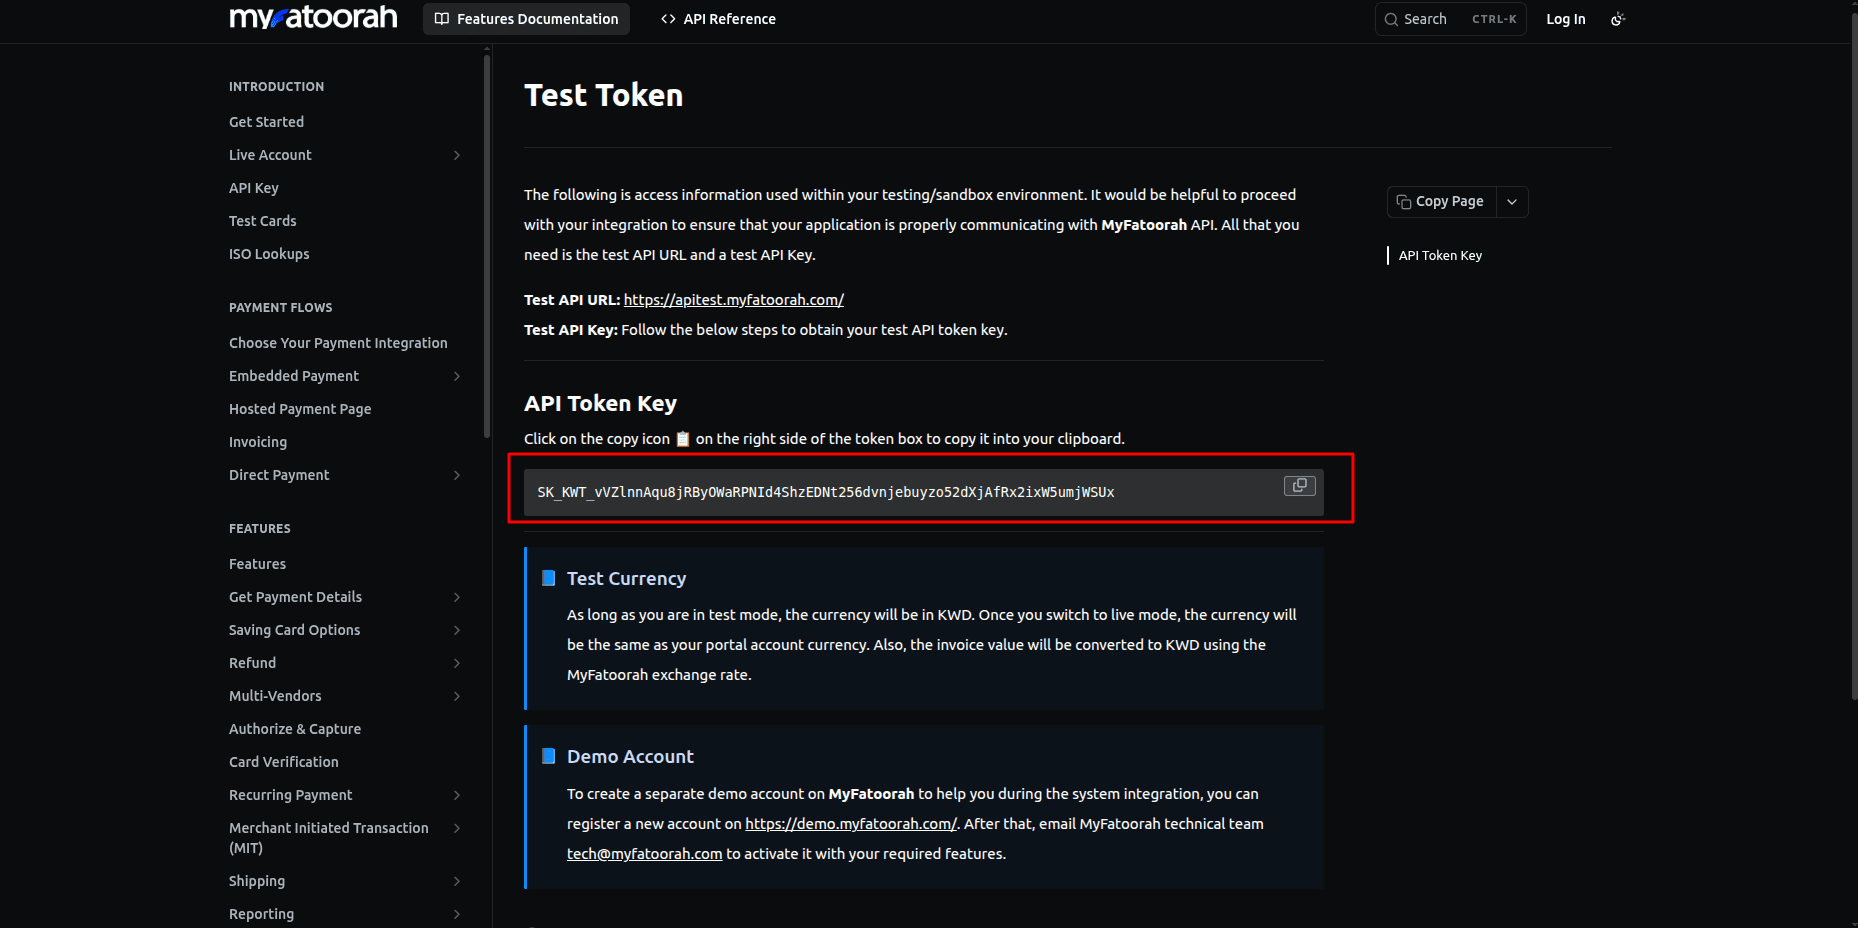
- Log in to your MyFatoorah Portal (or the MyFatoorah Developer Documentation/Sandbox Portal for testing).
- Under API Key / Test Token, copy the generated API Token Key.
Step 3: Configuring Credentials in Odoo
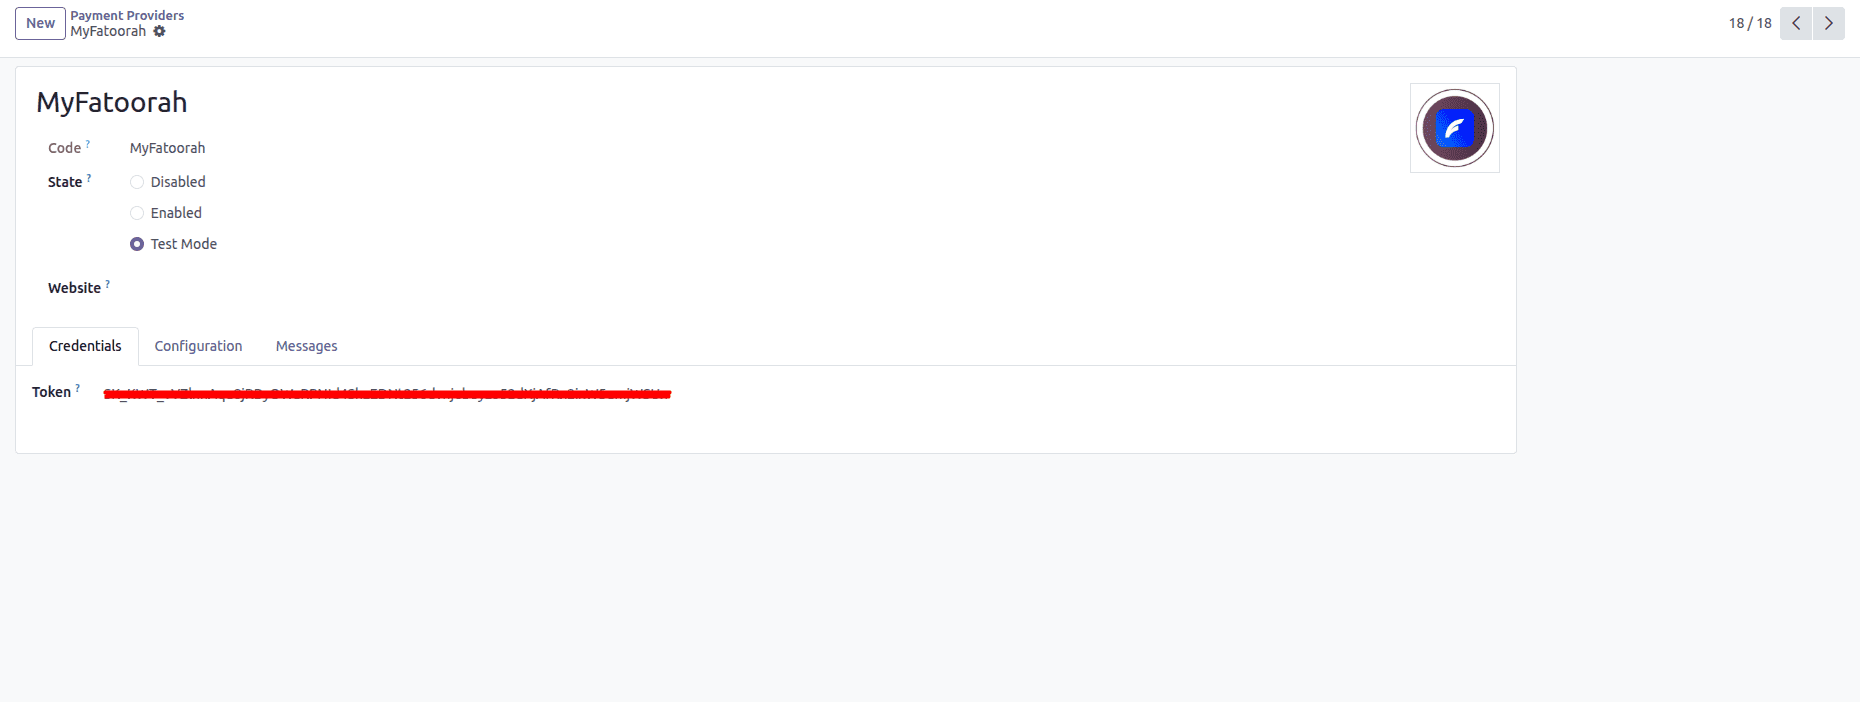
- Navigate to the MyFatoorah provider page from Settings > Invoicing > Configuration > Payment Providers > MyFatoorah.
- Set the State to Test Mode for sandbox testing and as Enabled for live production.
- Enter your token within the Token field under the Credentials tab.
Step 4: Configuring Availability and Payment Form Options
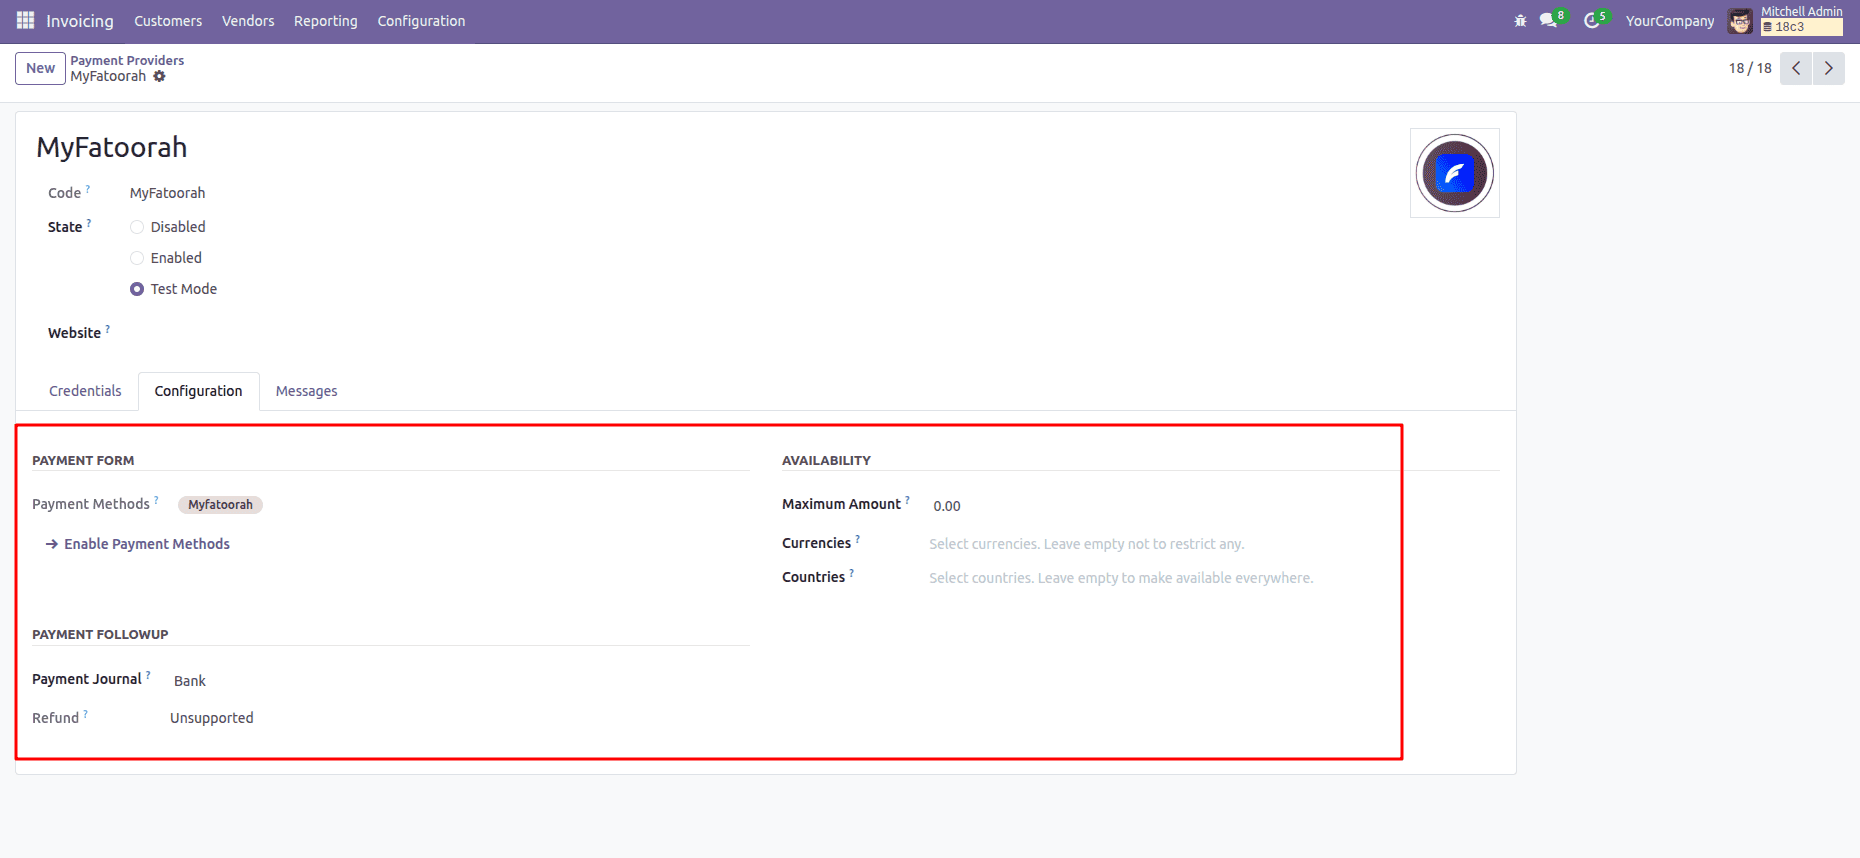
Go to the configuration section to set the payment availability settings:
- Payment Follow-up / Journal: Choose the desired Payment Journal (for example, Bank).
- Availability: Set Maximum Amount, Currency, and Country of restriction, if any.
Step 5: Setting Custom User Messages
From the “Messages” section, you have the ability to set custom messages for your customer checkout page depending on the payment status:
- Pending Message: Appears when payments are pending.
- Done Message: Appears when the payment process is completed successfully.
- Cancelled Message: Appears when the checkout is cancelled by the user.
Step 6: Customer Checkout Experience
With the above configuration out of the way, we can go ahead and test the complete process of checkout for the customer.
1. Selecting MyFatoorah on Checkout
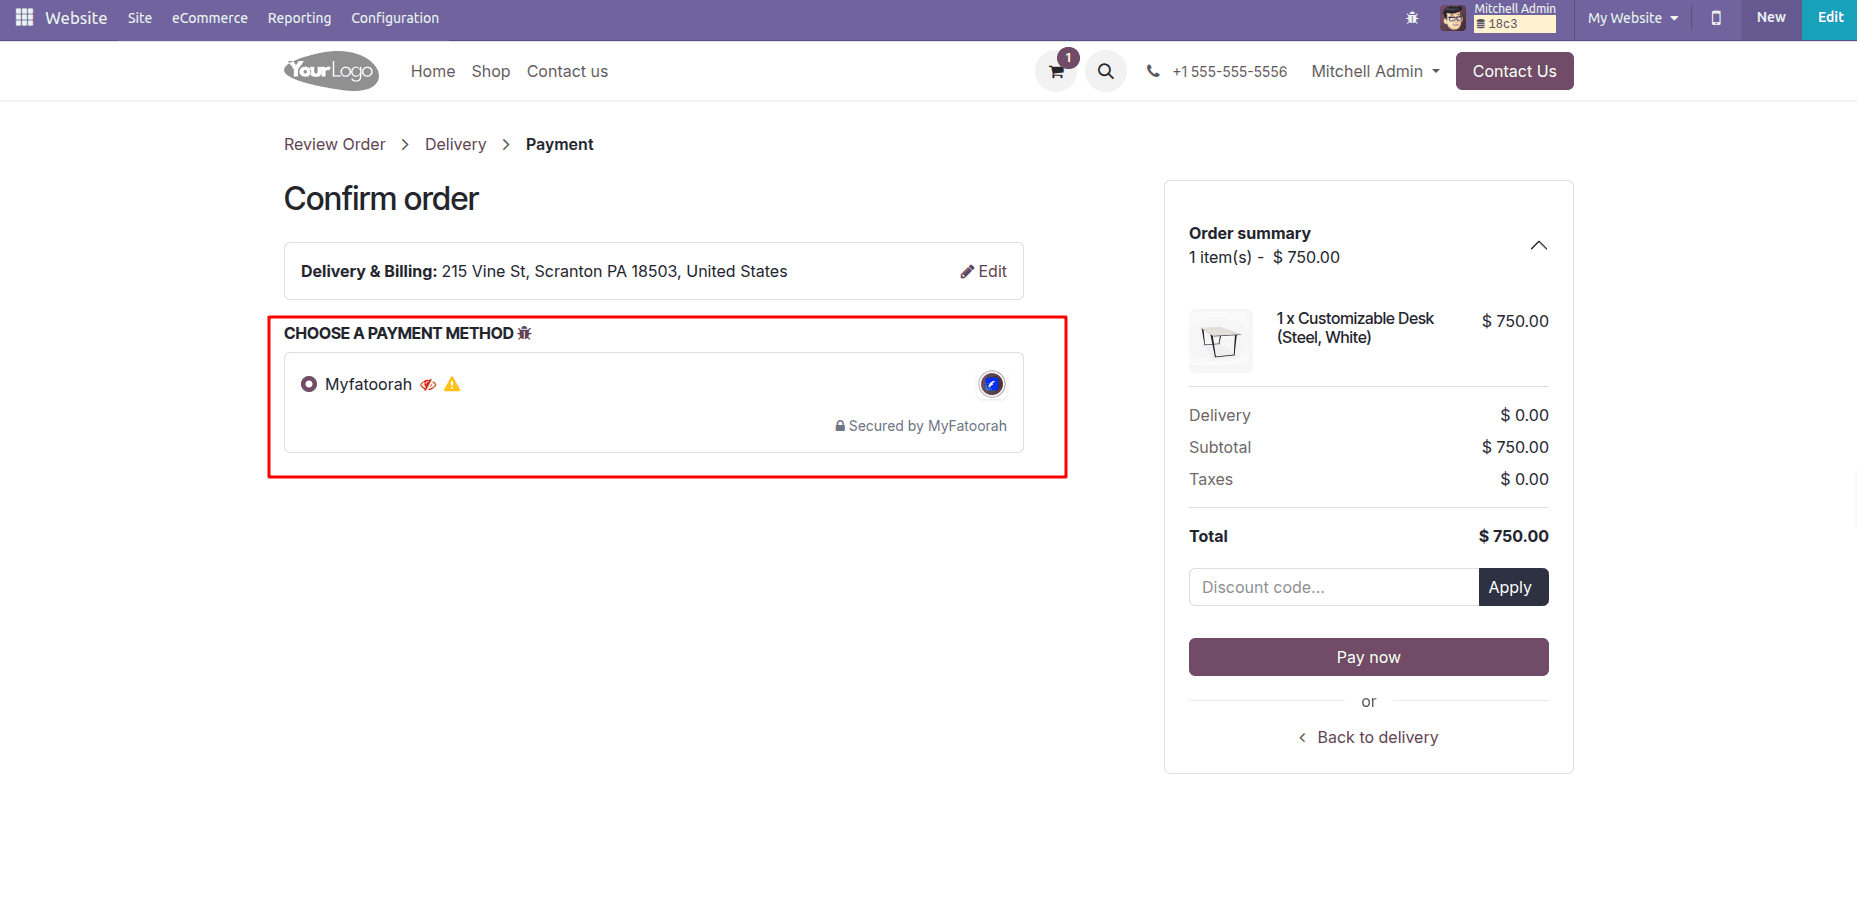
While viewing details of the order on the e-commerce site, you will see that MyFatoorah comes up as one of the primary payment options in Choose a Payment Method. By clicking on the Pay Now button, you will be redirected to the payment gateway page.
2. Validating Customer Information
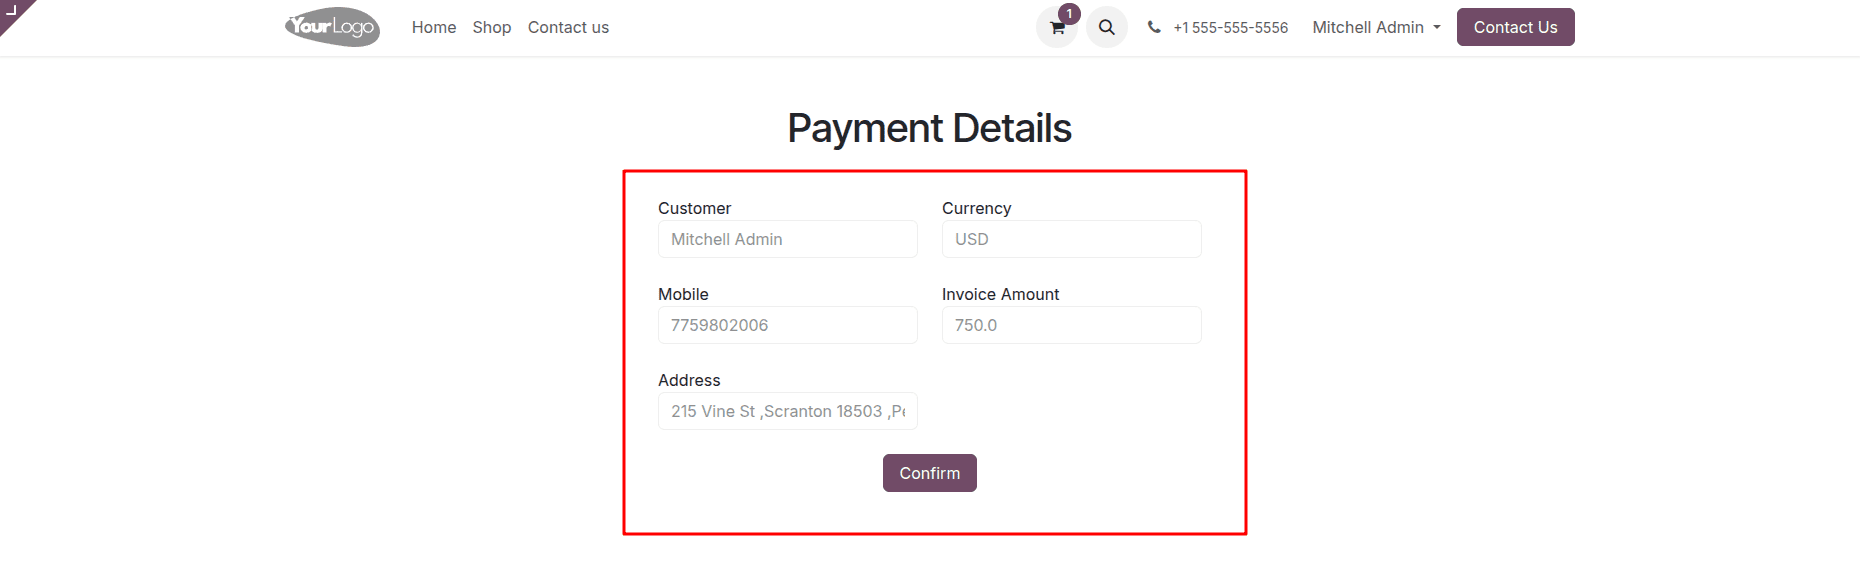
You will get an intermediary confirmation window showing information such as customer name, currency type, invoice amount, mobile number, and billing address. Upon clicking the confirm button, you can start the payment gateway session.
3. MyFatoorah Hosted Payment Gateway
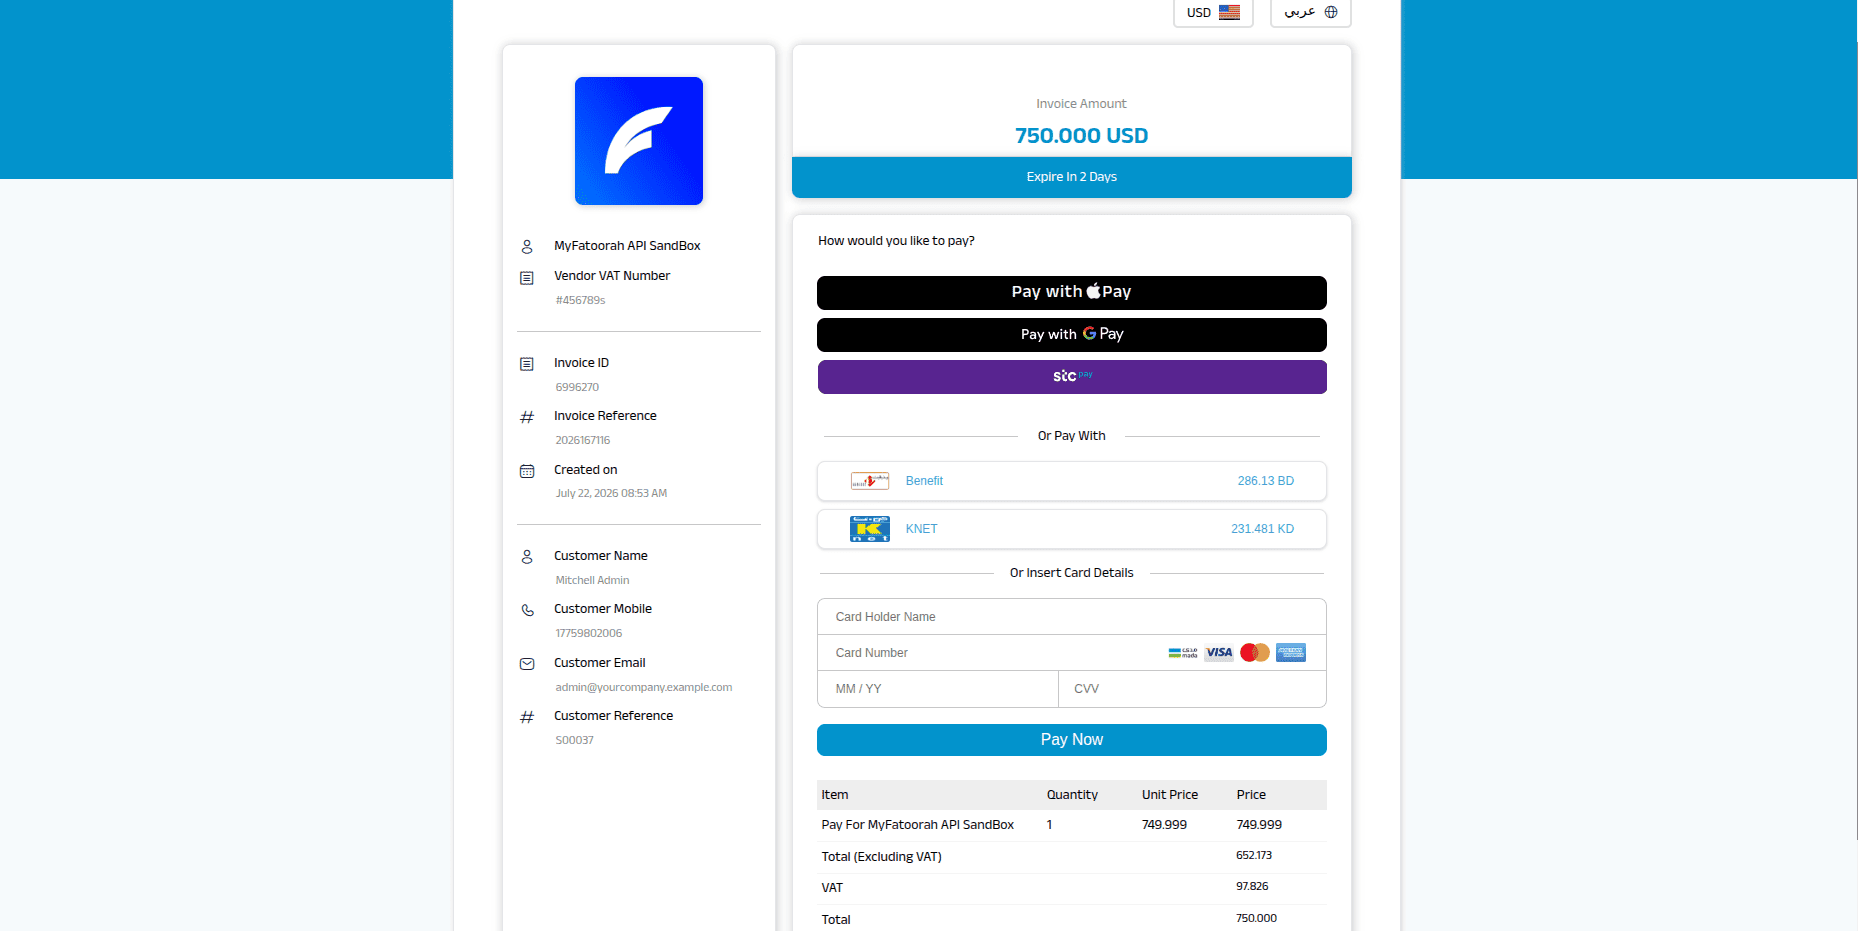
The customer will be redirected to the MyFatoorah hosted gateway page. From this page, the customer can select one of the regionally available gateways (Apple Pay, Google Pay, STC Pay, KNET, Benefit) or directly type their credit card details.
4. Successful Order Completion
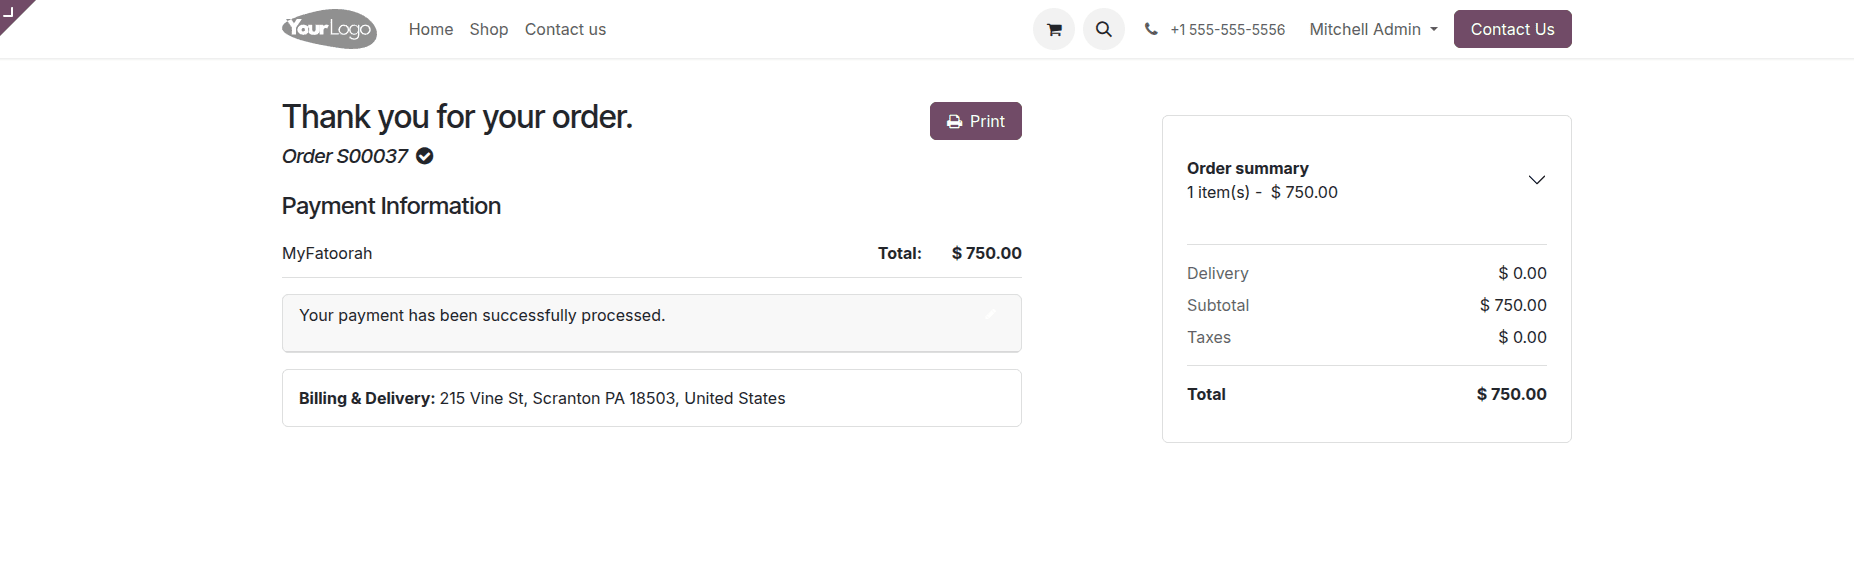
On completion of the transaction, the customer is redirected to the Odoo portal with an immediate success screen that will show the processed payment message along with order details.
By integrating MyFatoorah Payment Gateway with Odoo 18, you will offer localized payment methods to your customers while ensuring that your accounting and sales processes remain fully automated within Odoo. Following the above-stated procedure, you can set up a secure multi-currency checkout process in no time.
To read more about How to Connect Mailercloud with Odoo Using the Mailercloud Connector V19, refer to our blog How to Connect Mailercloud with Odoo Using the Mailercloud Connector V19.