Accounting is demanding for every firm, large corporation, and even small business. A lack of appropriate accounting causes the failure of a company. As a result, proper financial management of an organization is critical. However, dealing with the accounting part is challenging because it involves numerous debit, credit, expense, etc.
Odoo makes it easier for us to keep track of our company's finances. Odoo 15 accounting is a complete solution for managing our accounting functions. This is connected with a few more modules to assist us in operating the process appropriately without interrupting the flow.
In a sale, customer invoicing is quite essential. When we sell a product to a customer, we must generate an invoice. A client invoice is just a bill to the customer notifying them of the purchased items and the quantity and pricing. So, based on an invoice, the customer knows how much money they want to pay to the company.
In Odoo, there are two invoicing policies. The first is to create an invoice for the quantity that was ordered, and the second is to create an invoice for the amount that was delivered. The first is to automatically generate an invoice for your products from inventory. In the second case, we create an invoice only after the goods have been delivered from inventory. In some circumstances, such as online shopping, we will place an order and pay for it online if we like a product. As a result, we must generate an automatic invoice in the company in such situations.
As a result, Odoo 15 added the Automatic Invoice feature; by using this, if a sales quotation is generated, and the buyer pays it through the customer portal, an automatic invoice is generated, and the sales quotation becomes a sale order.
In this blog, we discuss Automatic Invoice generation in the Odoo platform.
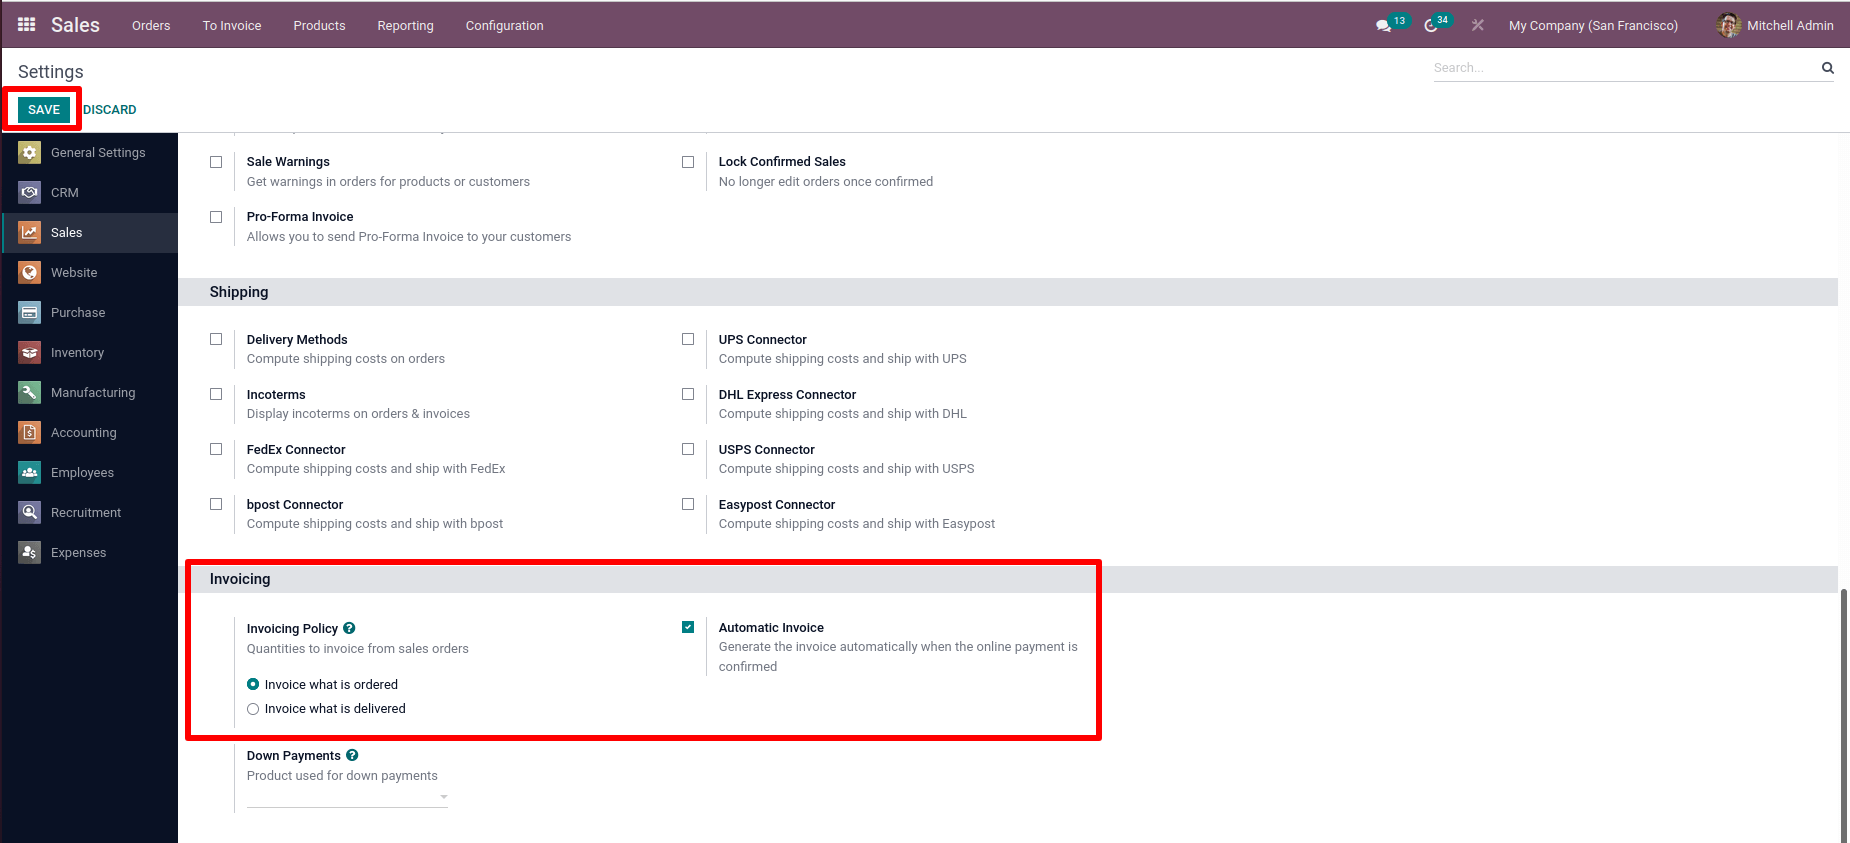
For this, select the Sales module. And go to Configuration > settings Enable Automatic Invoicing. The Invoicing Policy must be for Ordered Quantity and, after enabling, save the changes.
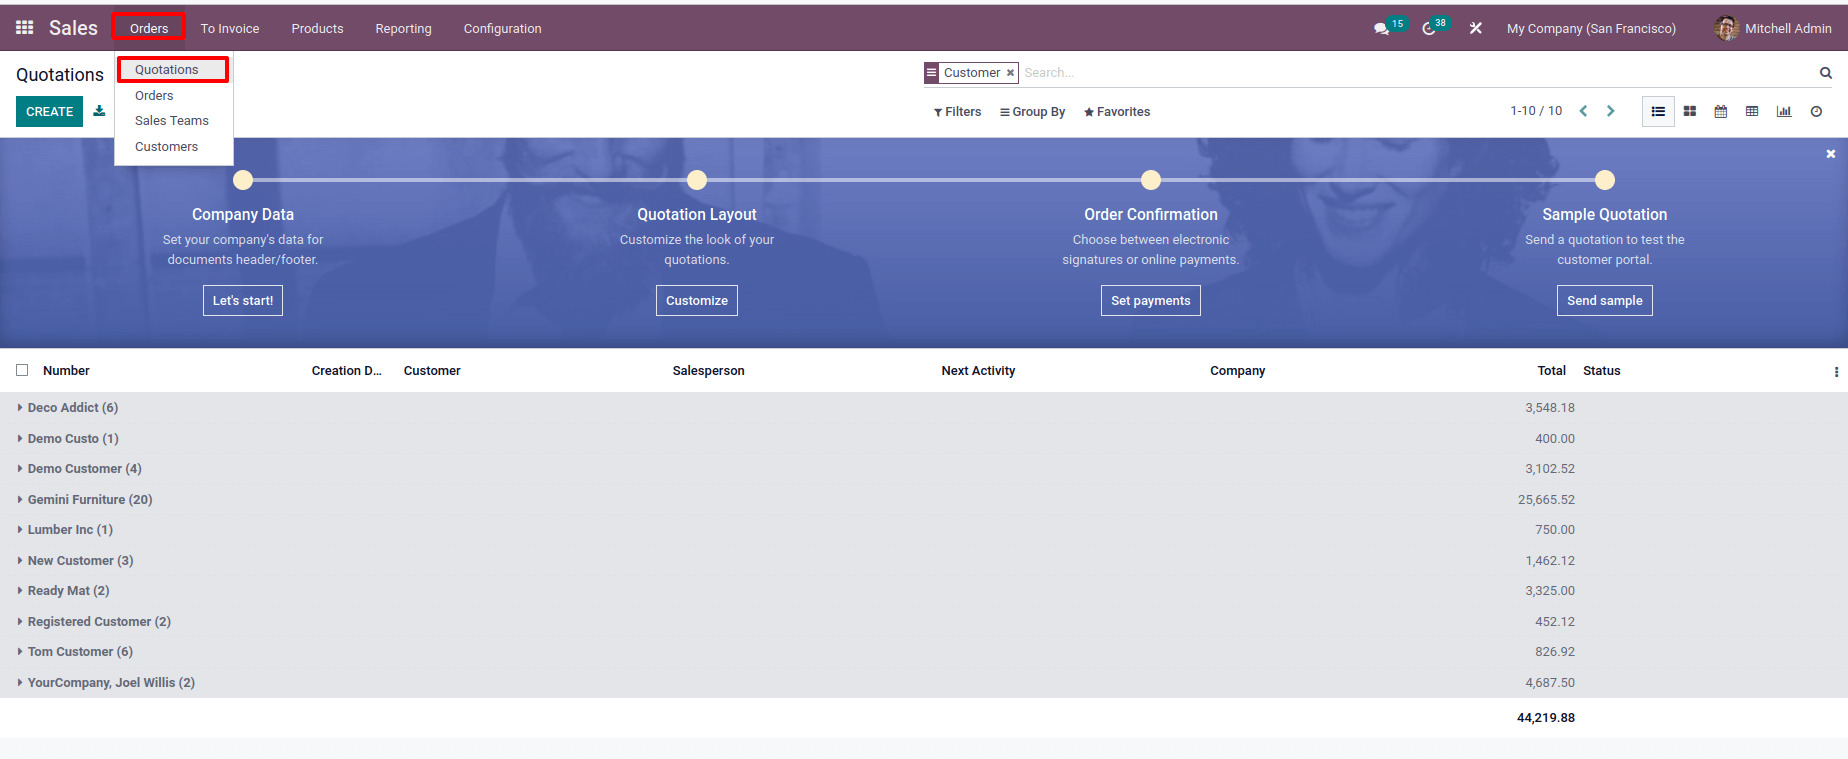
Create a Sales Quotation for a customer; after that, go to Orders and select Quotation from there. We can see all the previously created sales quotations. We can create a new one by clicking the Create button.
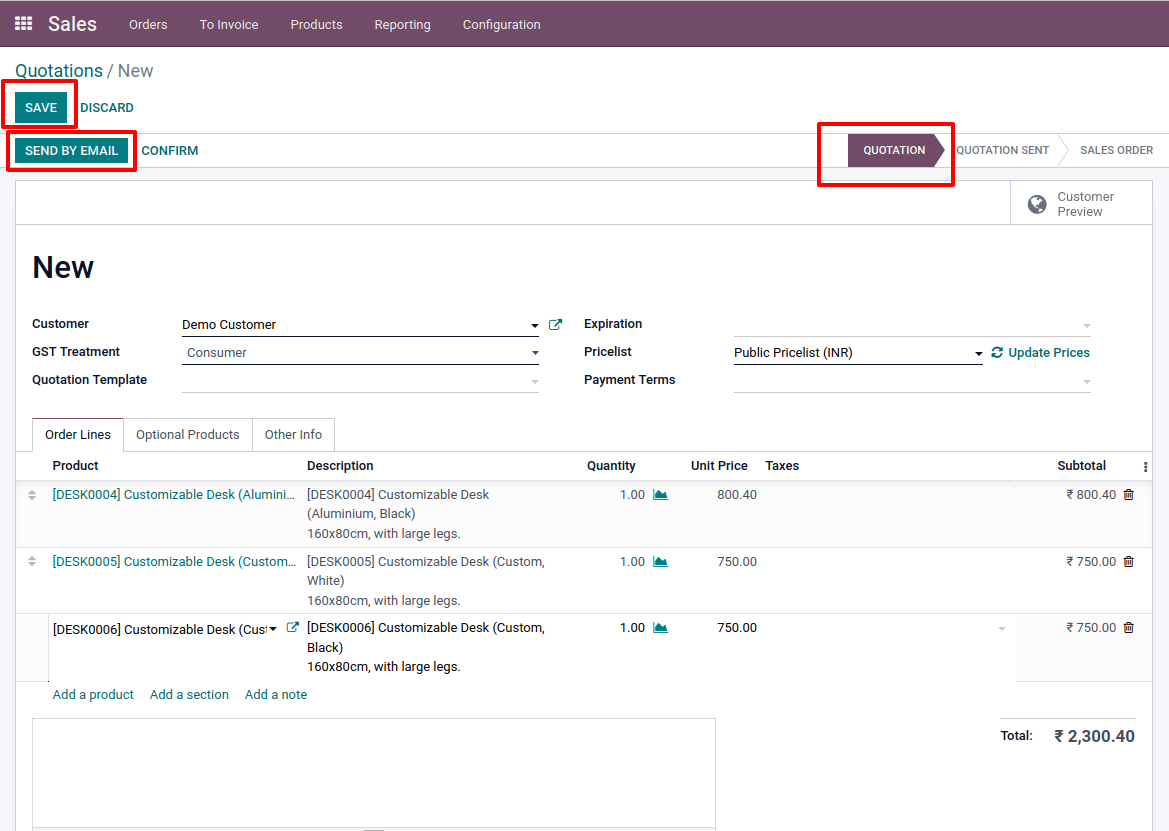
Here, generating a new quotation for a Demo Customer. In the product line, including the items they purchased.
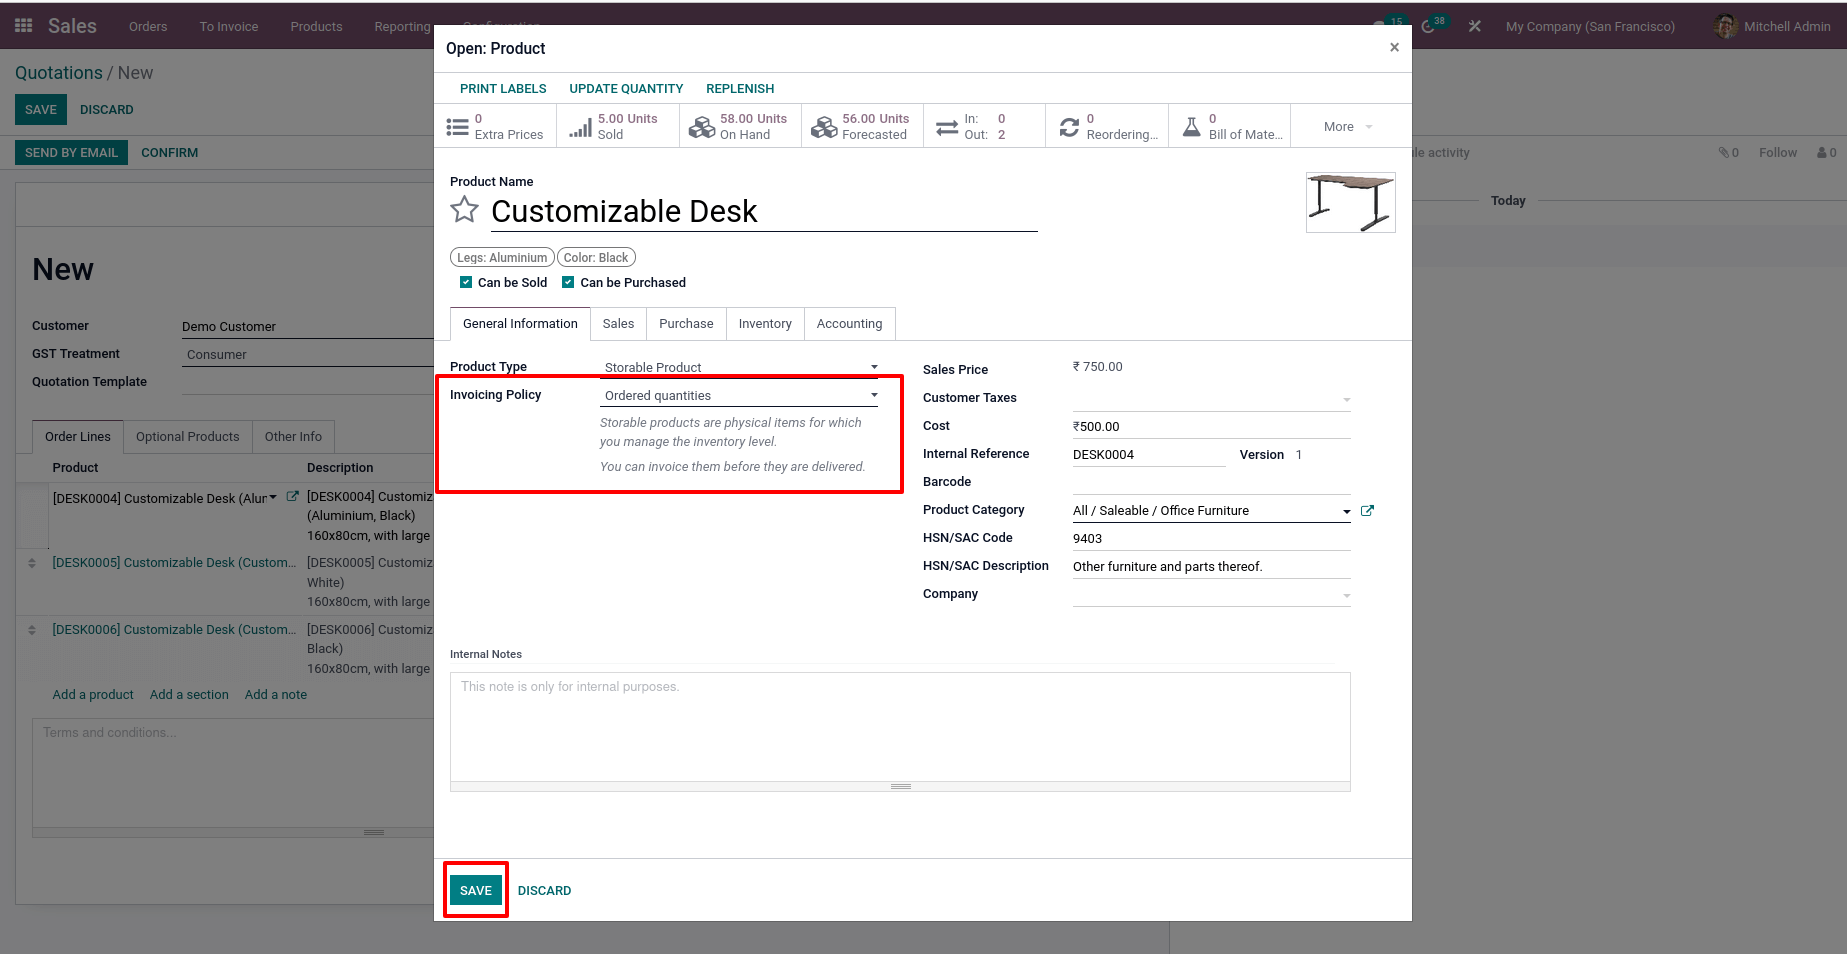
Ensure that all sold products' invoicing policies are based on the quantity requested, which means Ordered Quantity. The quotation will then be saved.
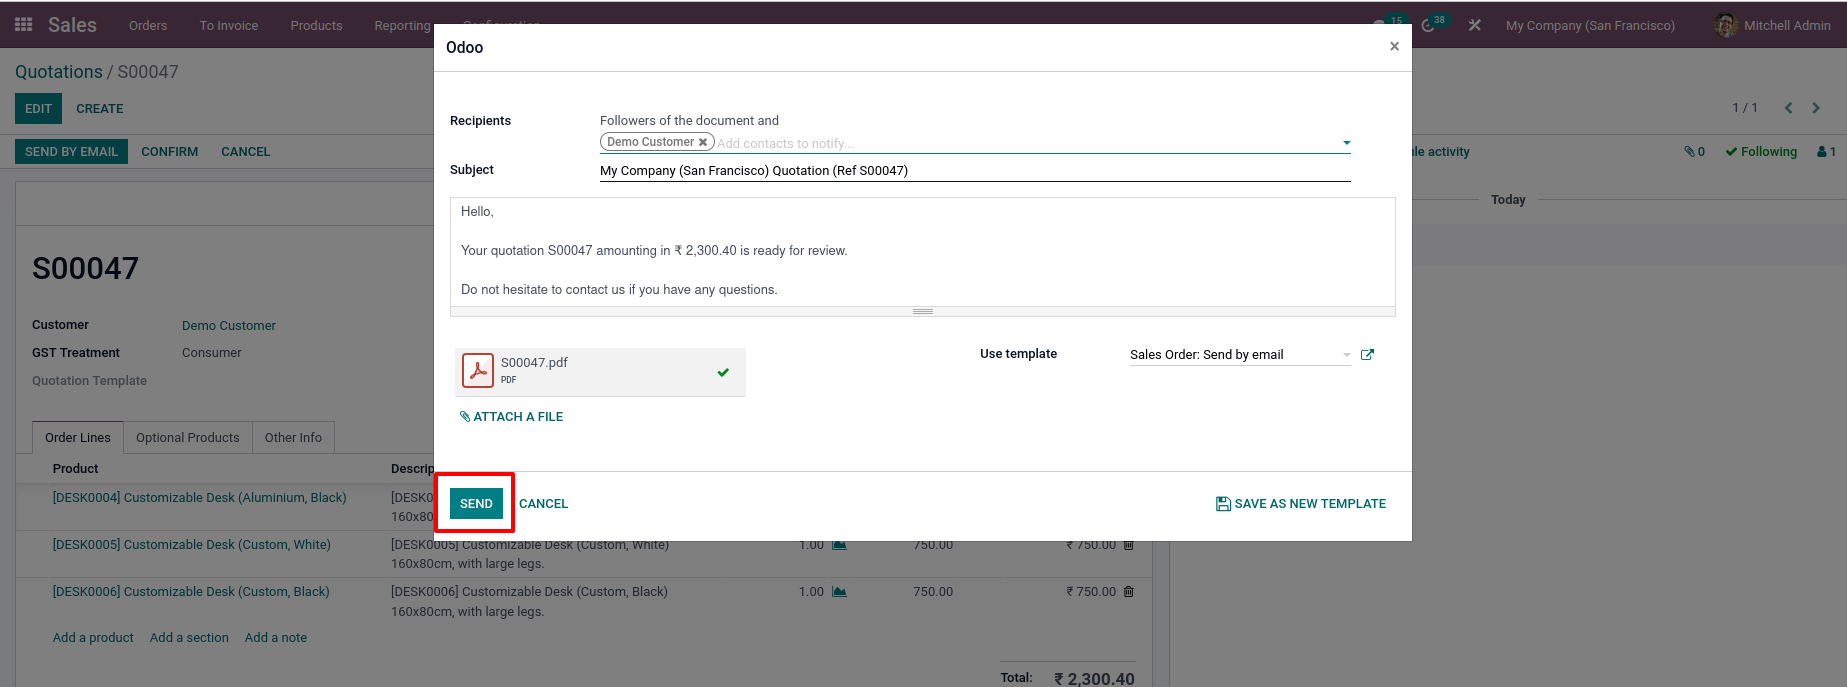
This quotation can be sent to our customer from here. The quotation is sent to the customer by tapping the Send By Email option. A new window appears, displaying the customer's email address. The Recipients may be seen as our customers, and the email text can be seen, if you want to send an email, click the Send button; if you don't, click the Cancel button.
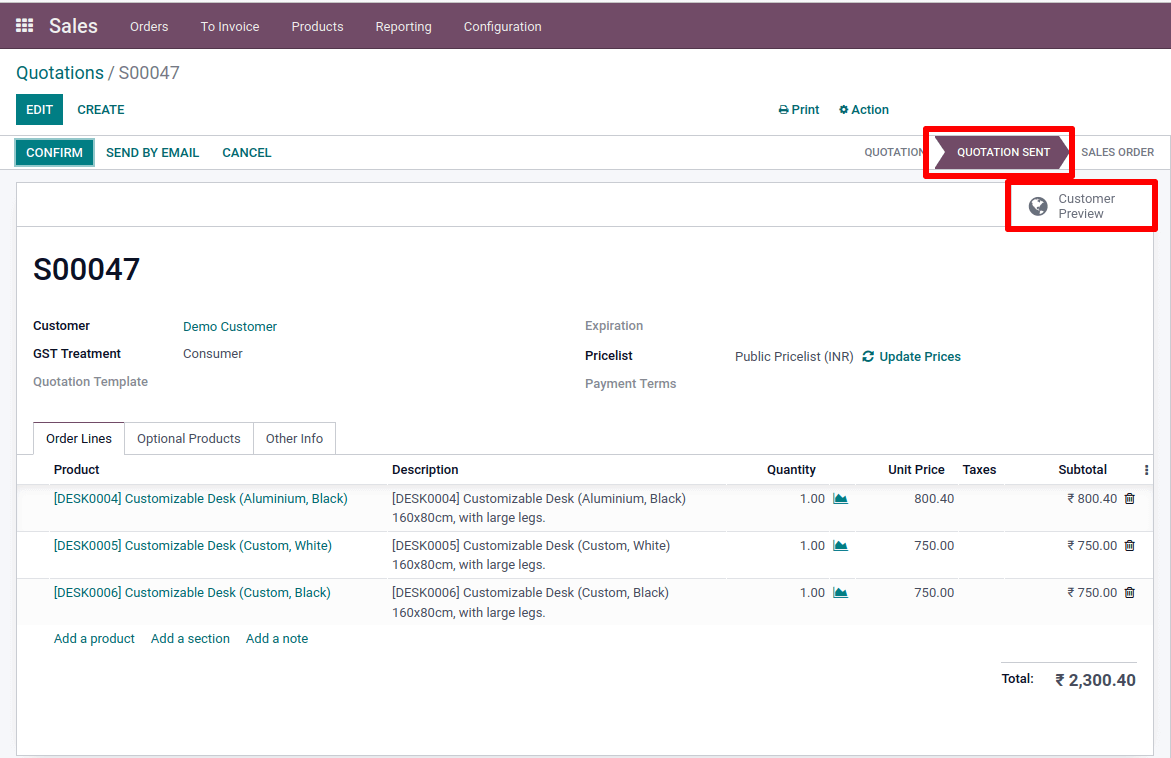
This changed the stage from quotation to Quotation Sent after sending an email. Then there's a smart tab called Customer Preview, which we may select to see a view from the customer portal.
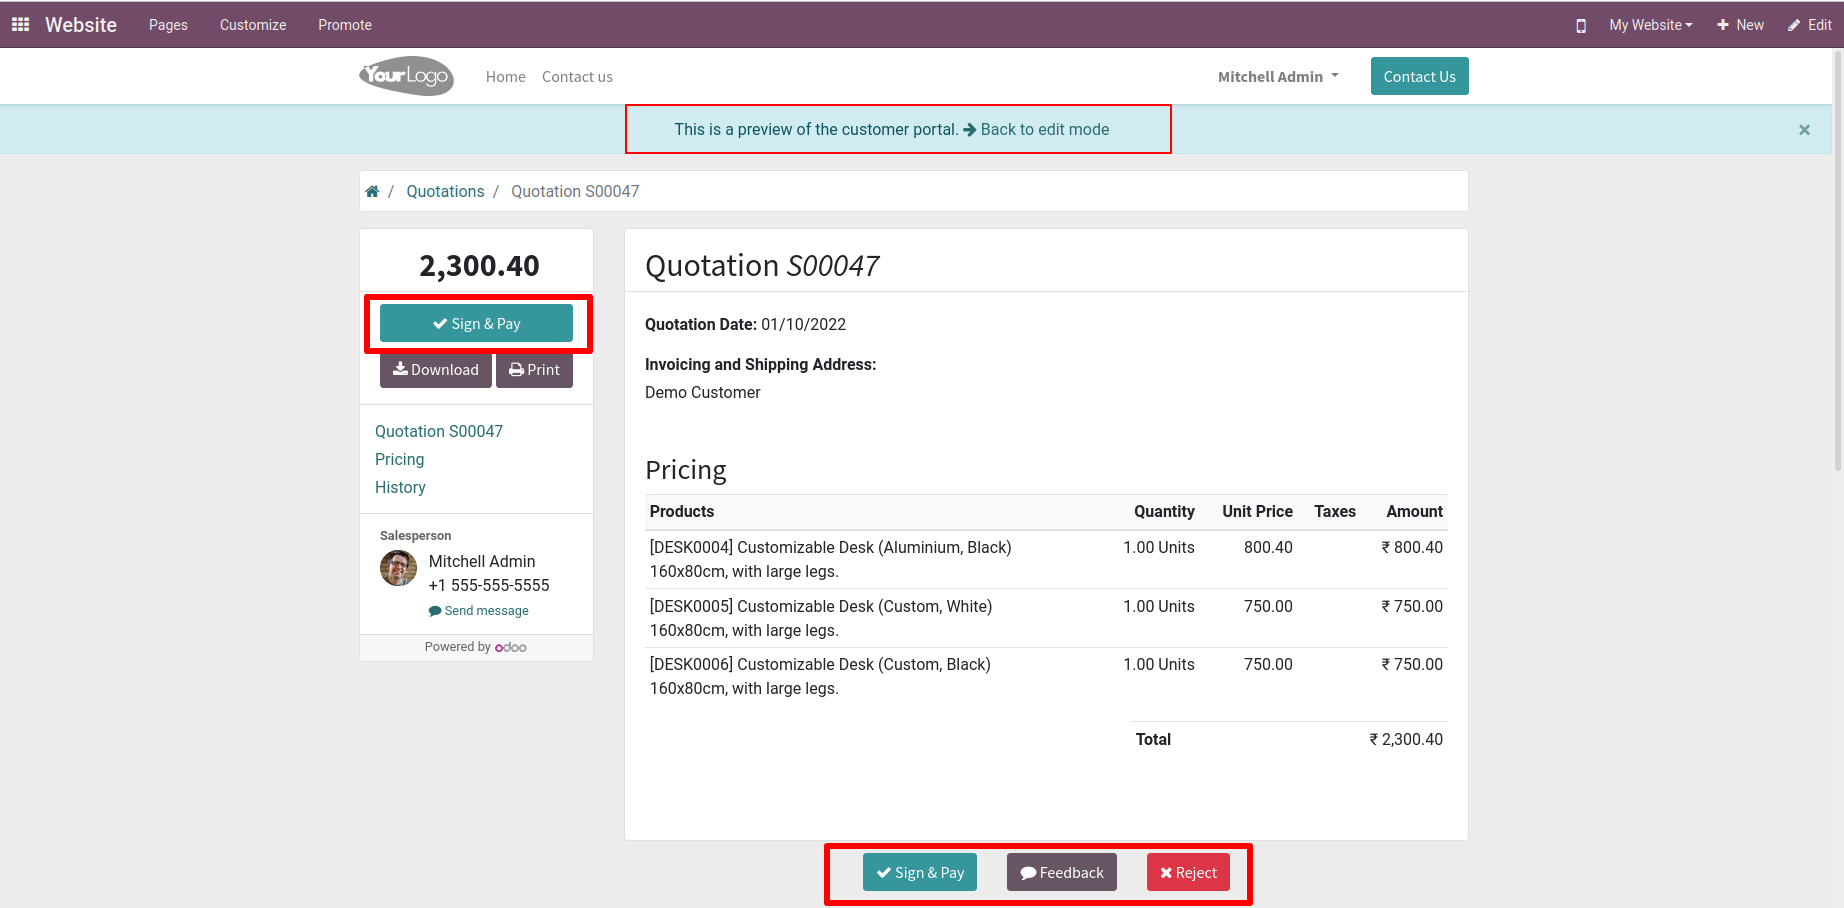
A customer can sign on the quotation from the customer portal and make payment. There's also an option for him to send his feedback to the company, as well as the option to reject the quotation.
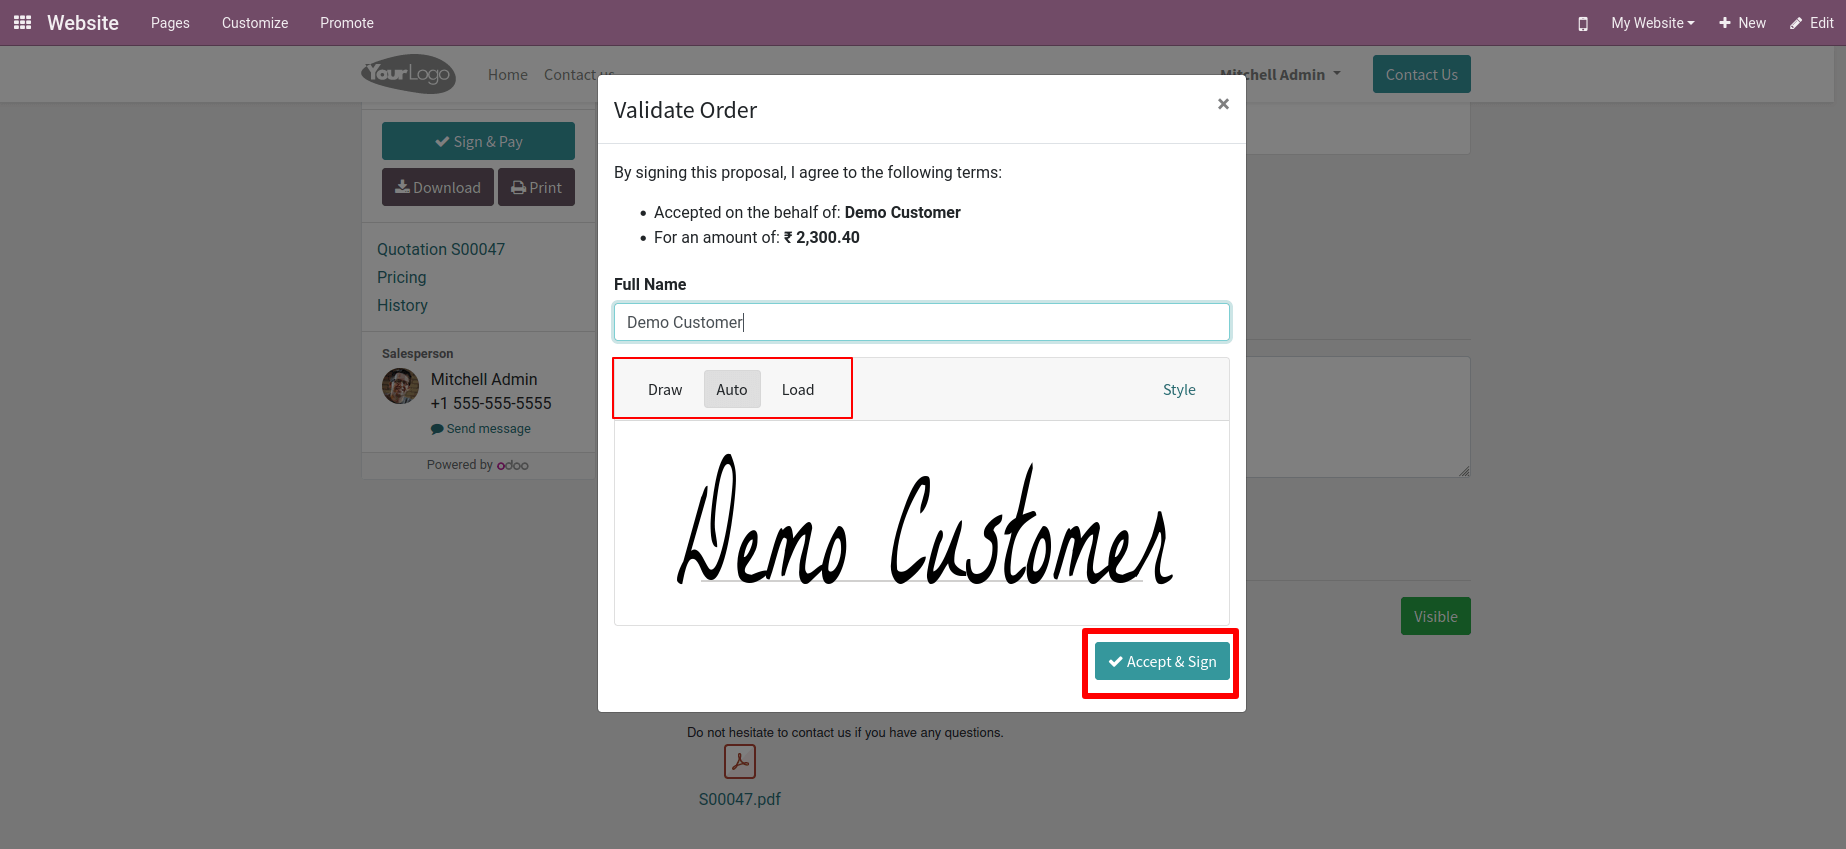
A new window appears when you click the sign and pay button. We can then add the customer's signature. Customer signatures can be added in three ways: draw, auto, and load.
By selecting the option draw, we can create a customer signature. Select the auto option to have your signature added automatically. Also, by selecting the load option, we can upload signatures from our file; after adding the sign, click on Accept & Sign.
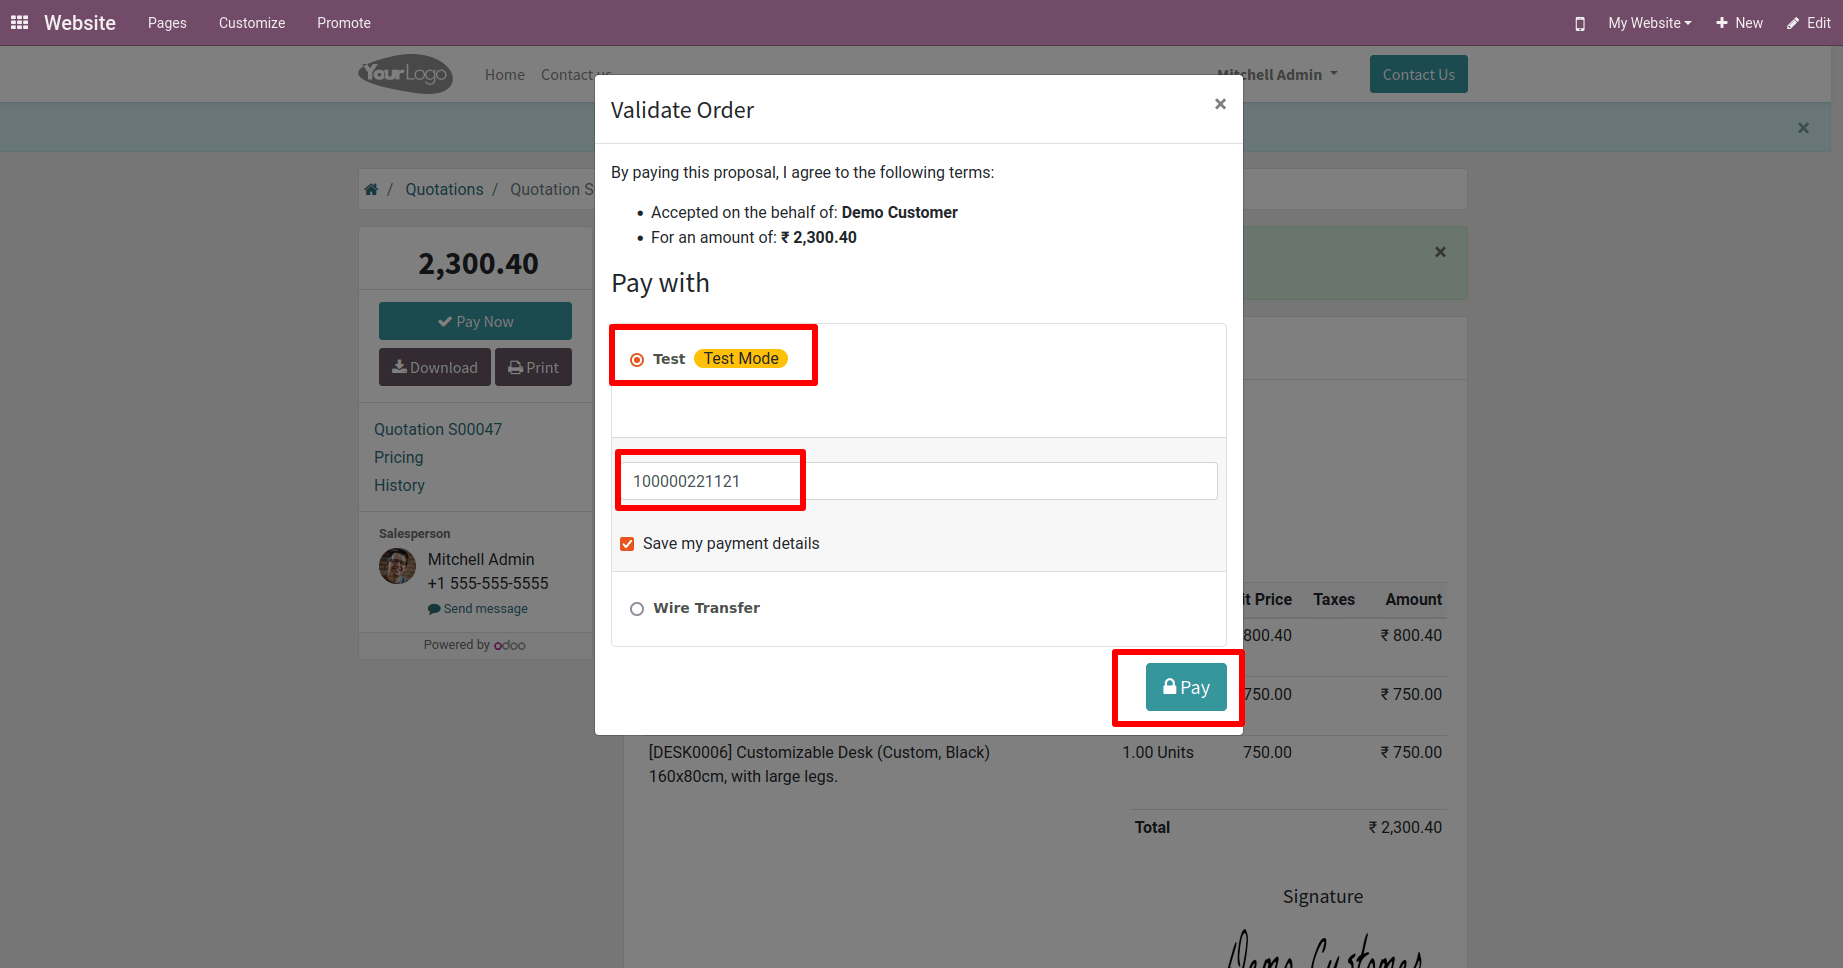
Then a new window for payment appears. We can then choose our Payment Acquirers, automatically generating an invoice in the blanks with the card's information, such as the secret code.
If we have to save the current payment details, check the box to save my payment information.
After entering all of your information, click the "Pay Now" button.
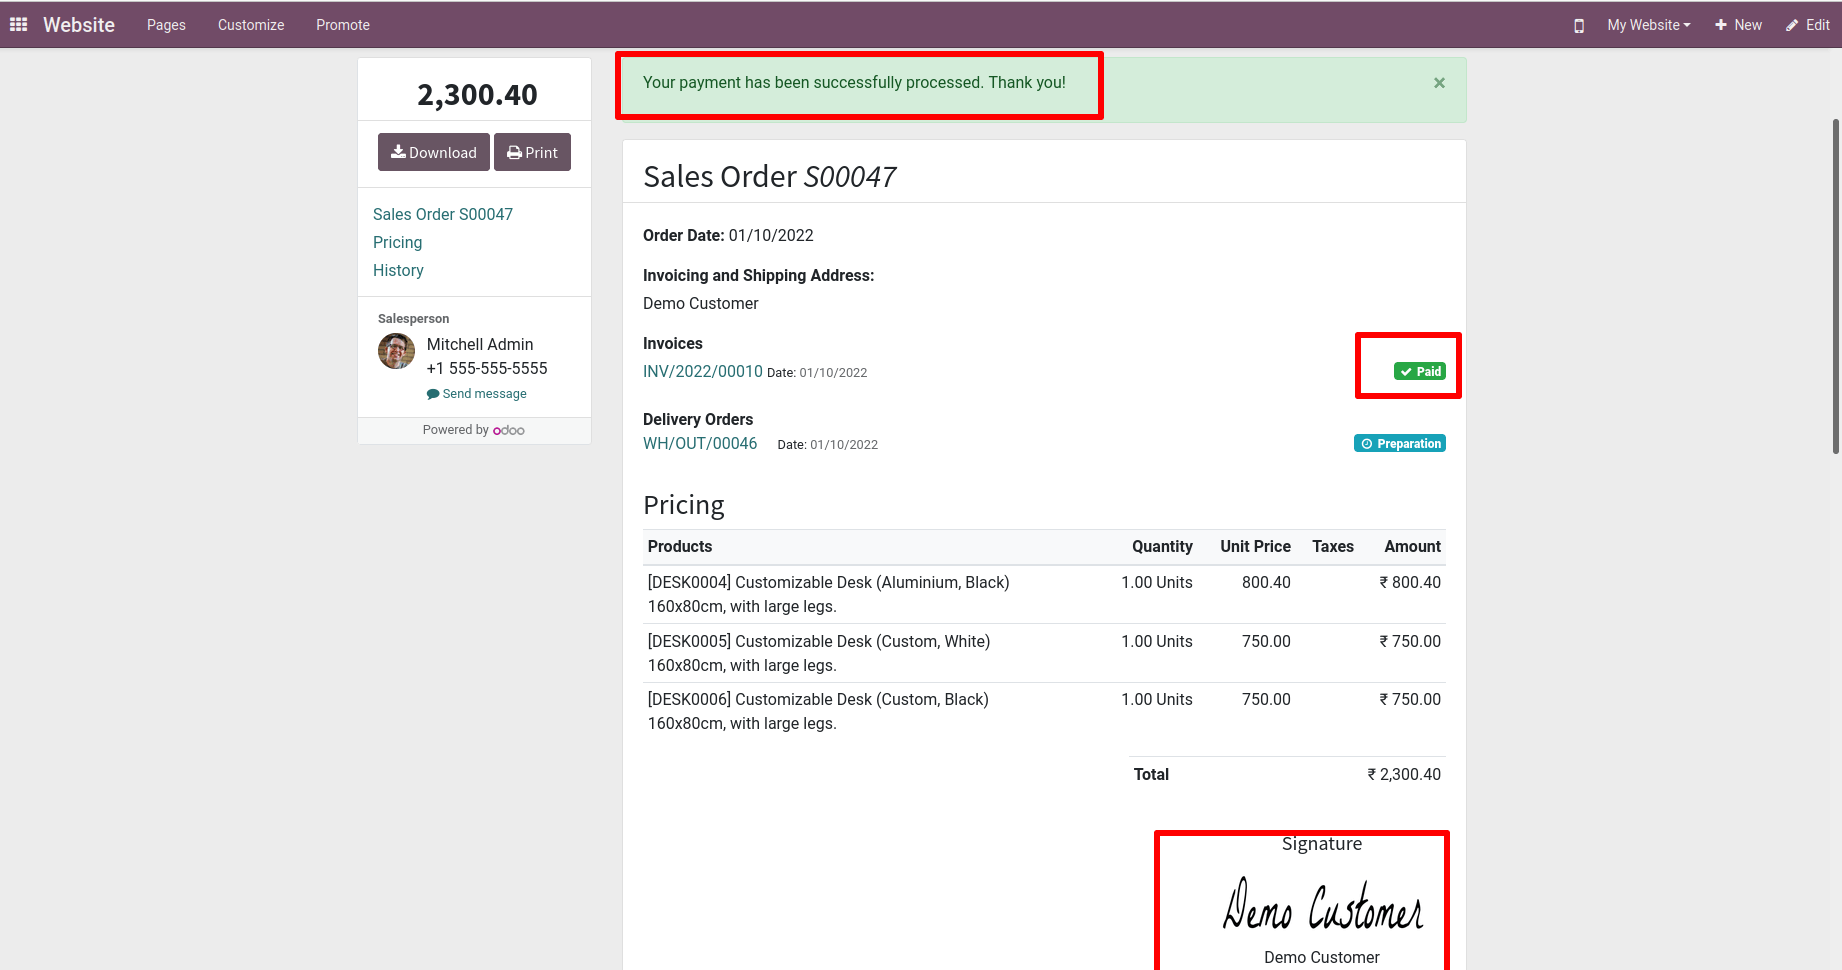
Then the payment was made successfully. We can see the message says the prayment is successful and customer signature from there.
We then return to our quotation. The quotation has progressed from the quotation sent to the sale order, as can be seen. Two new smart tabs were developed. One is for delivery, and the other is for invoicing.
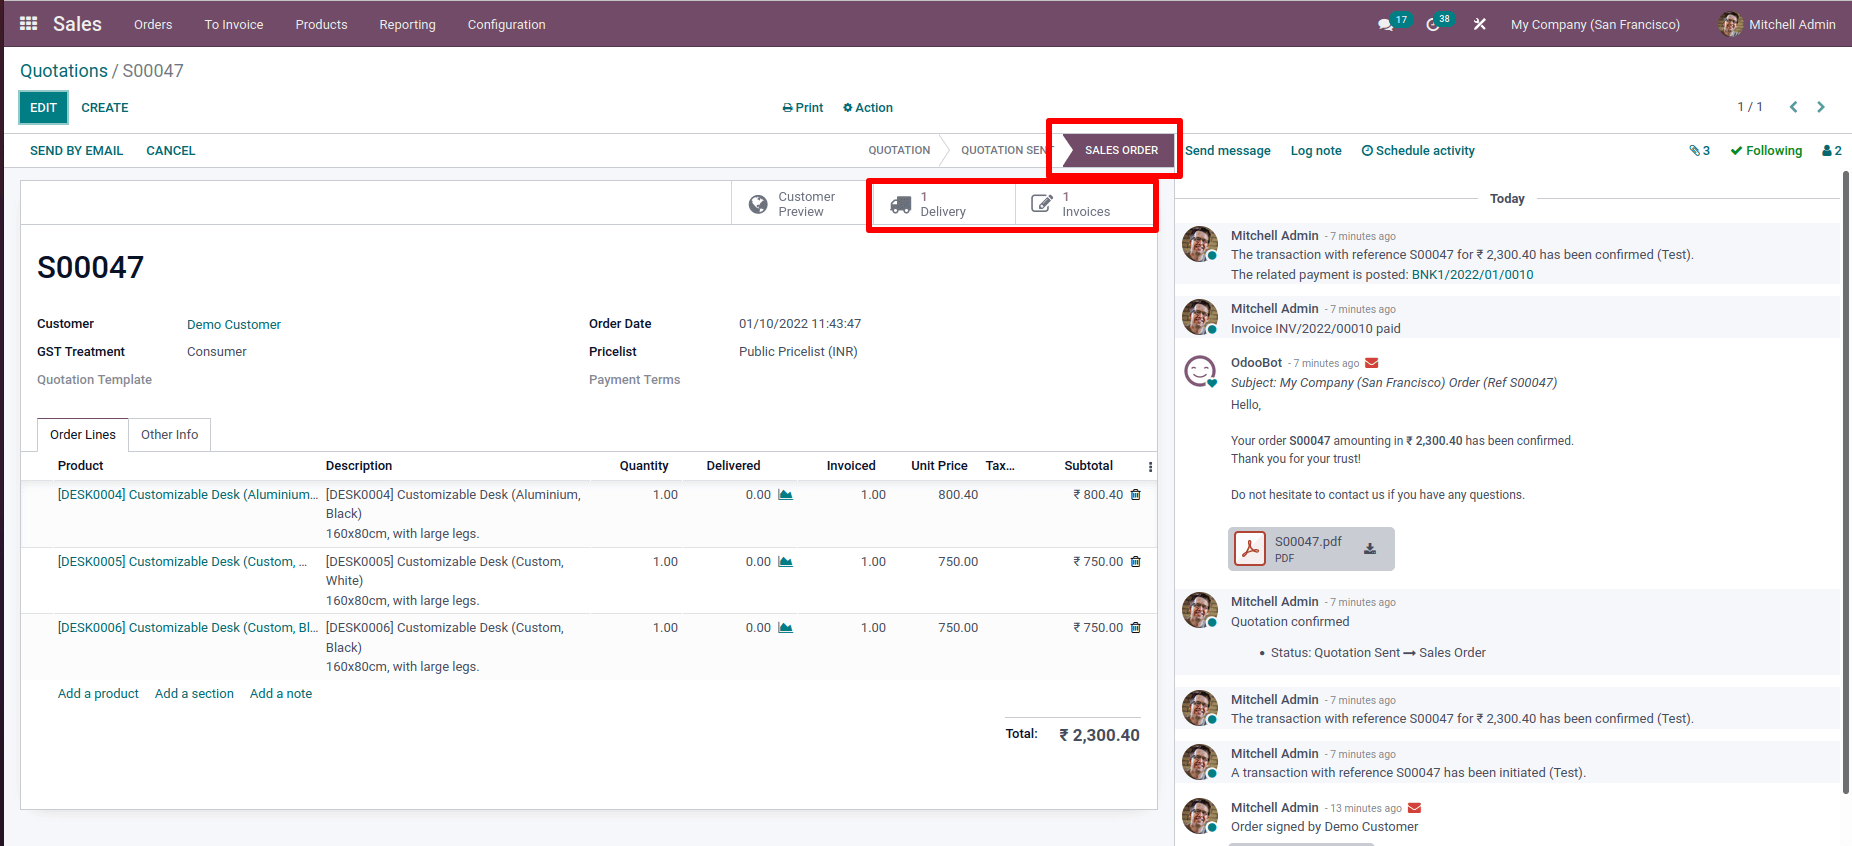
After a customer makes a payment through the portal, the quotation is converted to a sale order, and an invoice is generated automatically.
Now open the invoice in the smart tab. We can see the created invoice and that the invoice is in the In Payment stage.
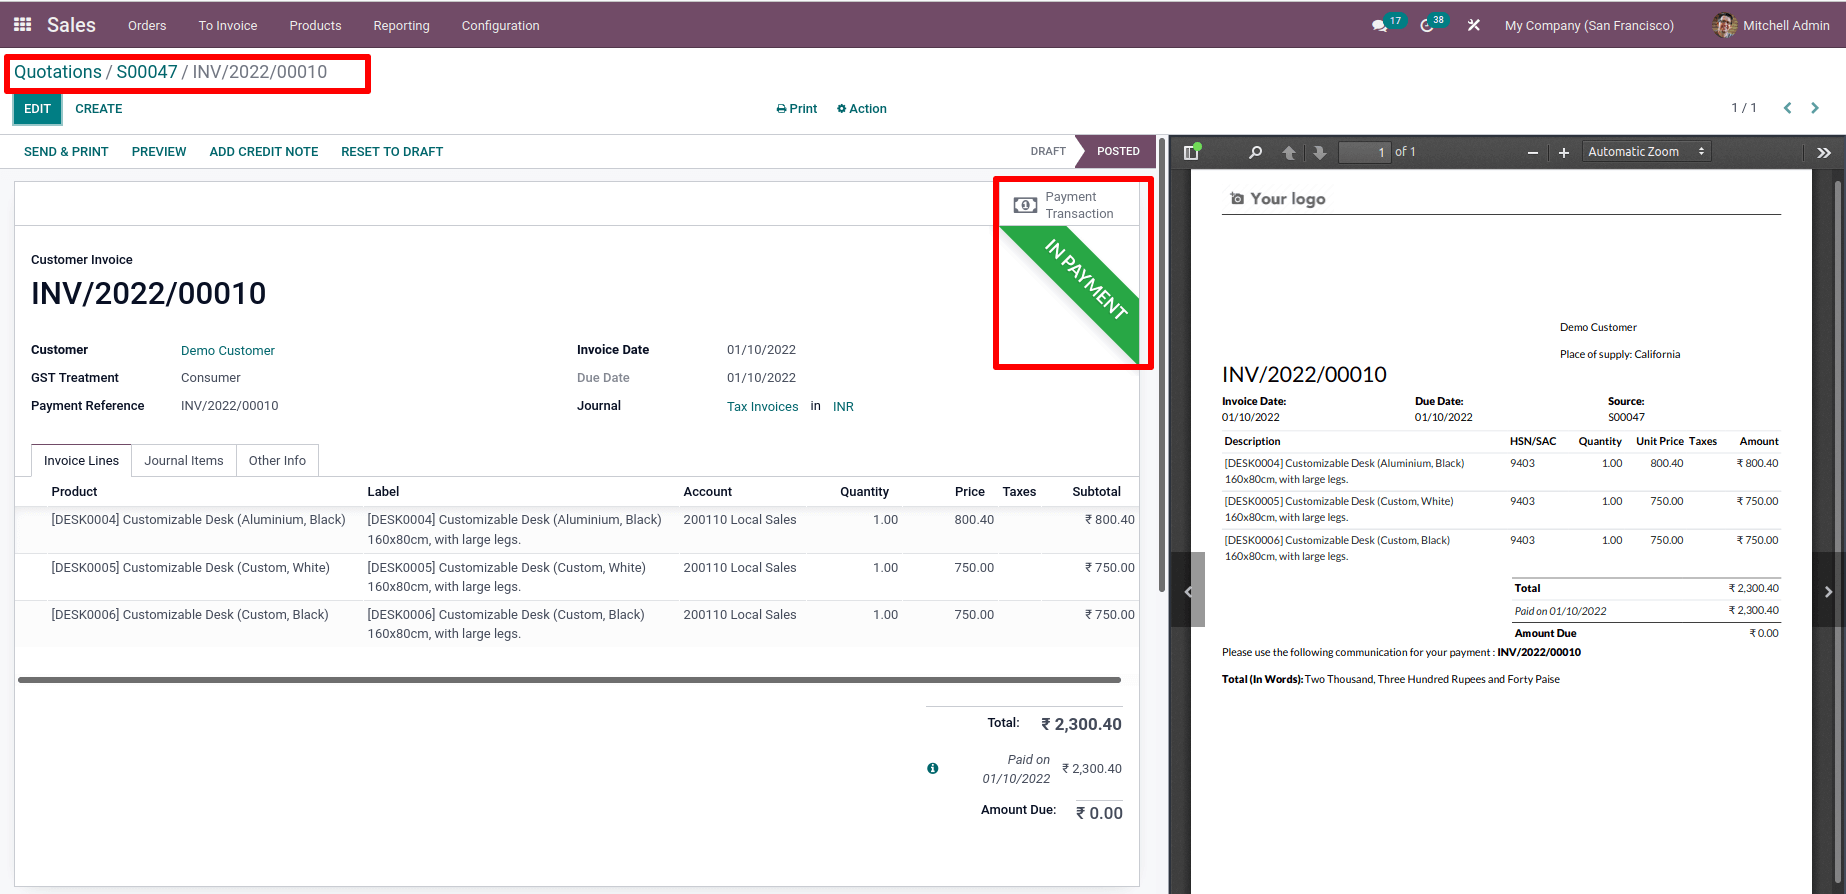
A smart tab is created where there is Payment Transaction. From there we get all details about the payment.

Here we have discussed Automatic Invoicing in Odoo, and how we can generate and implement this feature are explained here.