This blog will discuss adding custom fields to existing views in Odoo v15.
Here we will add a new field/custom field in the ‘product.template’ model.
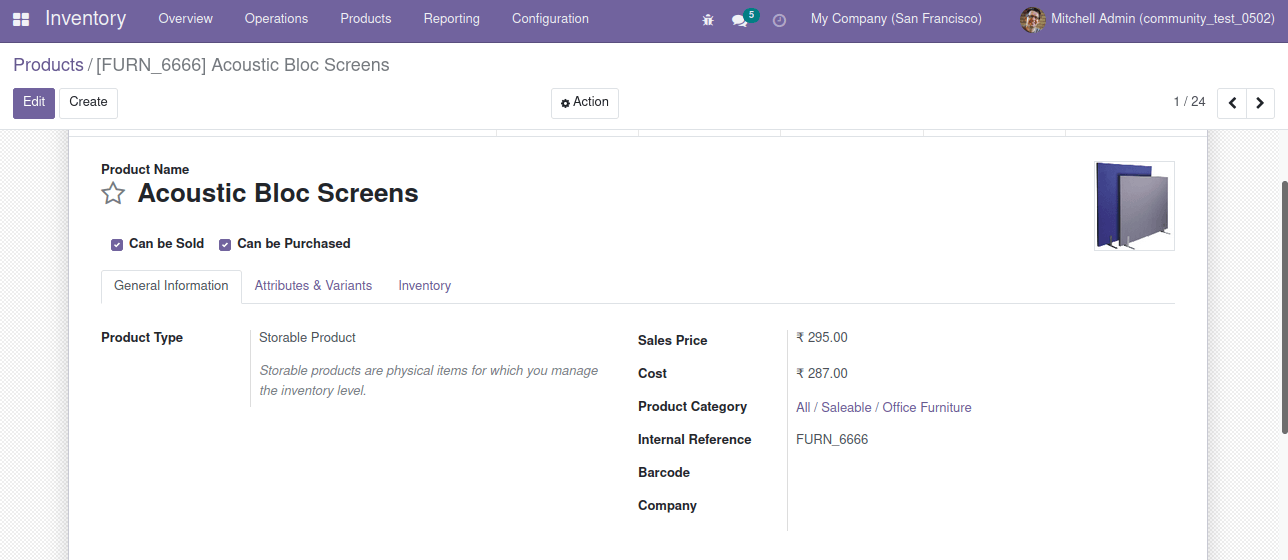
This is the current form view of the ‘product.template’ model. I would like to add a new field, ‘launch_date,’ above the ‘Product Type.’
To find out the model name, you can follow the following steps.
Activate the developer mode -> click on the debugger button -> select edit view: form
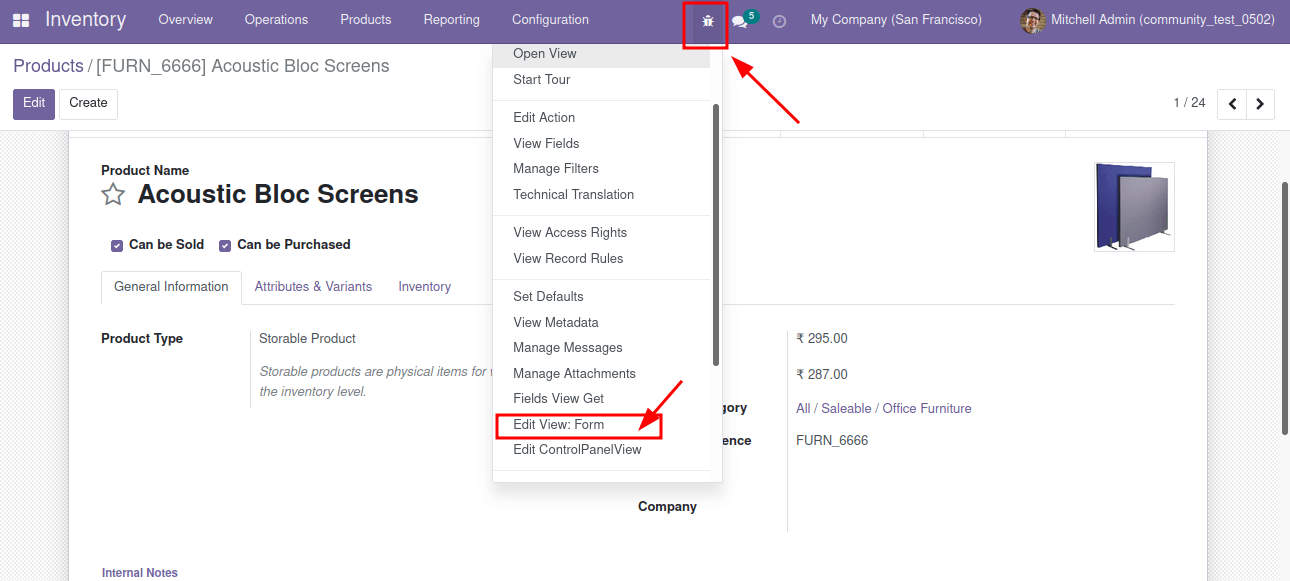
Upon clicking the edit view: form, we are redirected to the below wizard. From there, we can find/ identify the corresponding model of the form view.
Next, we will create a class and inherit this model in the python file.
# -*- coding: utf-8 -*-
from odoo import models, fields
class ProductTemplate(models.Model):
   _inherit = "product.template"
launch_date = fields.Date(string="Launch Date")
Always remember to add this py file in the __init__.py
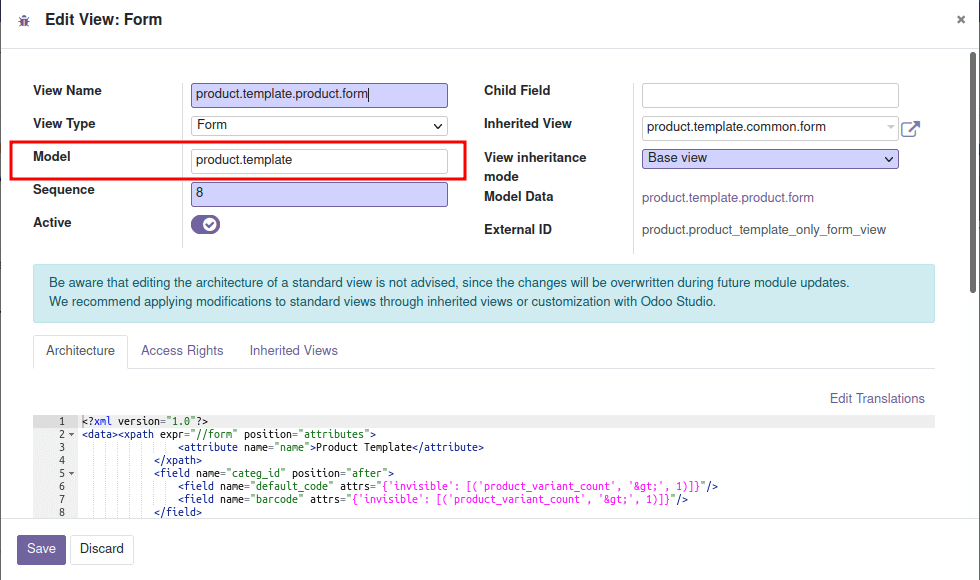
Next, we need to add this field into the current view. For that, we want the external ID of the corresponding view.
Activate the developer mode -> click the debugger button -> Select edit view: form
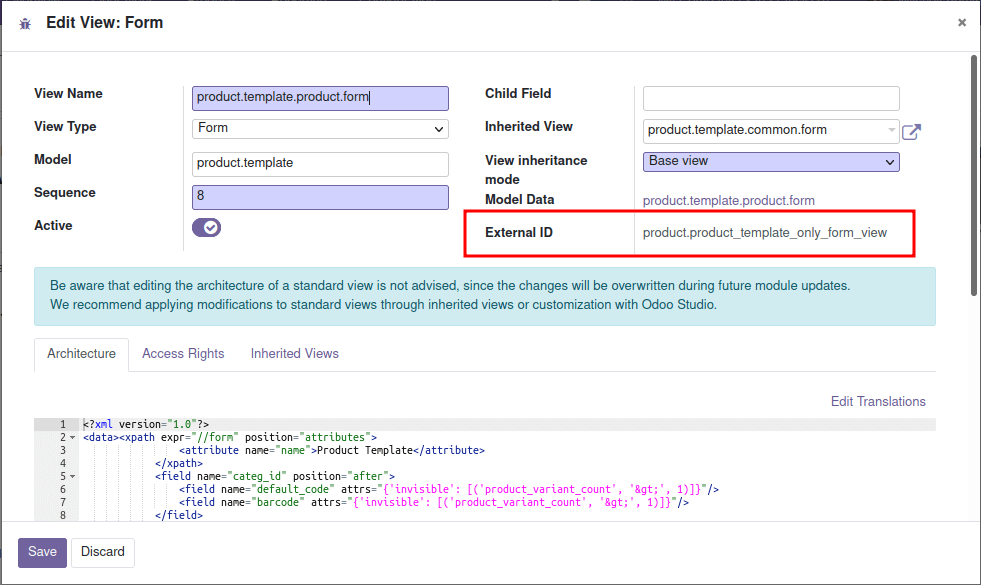
From this wizard, we get the external ID. So we will inherit this view and add the custom field in the XML file.
<?xml version="1.0" encoding="UTF-8"?>
<odoo>
   <record id="product_template_customizations_form" model="ir.ui.view">
       <field name="name">Launch Date in product.template form</field>
       <field name="inherit_id" ref="product.product_template_only_form_view" />
       <field name="model">product.template</field>
       <field name="arch" type="xml">
              <xpath expr="//field[@name='detailed_type']" position="before">
   		<field name="launch_date"/>
 </xpath>
       </field>
   </record>
</odoo>
The ID name can be defined as you need, and the model indicates where we want to add the field. And we are adding the external id of the view as a reference for the inherit_id.
Next, we want to add the ‘launch_date’ above the ‘Product Type.’ The technical name of ‘Product Type’ is ‘detailed_type.’ After activating developer mode and hovering over the field, we get the technical name of the area. We can add the position attributes as per the need.
In the above code, we use XPath elements to specify where we want to make changes. The “expr” attribute contains the actual path of the reference field(matched node). The “Position” attribute helps define the required position to add our field. We can use after, before, inside, replace as position values.
Inside: The field is appended inside the matched node.
After: The field is added after the matched node.
Before: The field is added before the matched node.
Replace: The field will replace the matched node.
This file will add the ‘launch_date’ on the ‘product.template’ form view. Furthermore, you should add this XML file to the manifest and upgrade the corresponding module
