In the dynamic landscape of retail, managing a shop efficiently requires a robust and user-friendly Point of Sale (POS) system. The most recent iteration of the well-known open-source ERP, Odoo 17, has a strong point-of-sale (POS) module that may help you optimize your retail business.
In this blog post, we'll delve into a comprehensive guide on how to configure your retail shop using Odoo 17 Point of Sale.
Let's take a quick look at what Odoo 17 Point of Sale has to offer before getting started with the configuration procedure. Odoo's POS module is designed to provide a seamless and integrated experience for retailers.
Overview of Inventory Management
* Product Administration: Managing your product catalog is made simple with comprehensive information that includes pricing, stock levels, and photos.
* Sales Processing: Efficiently process sales transactions, whether it's a straightforward cash sale or a more complex invoice for corporate clients.
* Real-time inventory management to reduce shortages or excess inventory.
* Client database for customized support and focused advertising.
* Detailed reporting and analytics for sales trends and inventory turnover insights.
* Handles several payment methods with ease for client flexibility.
Starting with the Odoo 17 PoS Module
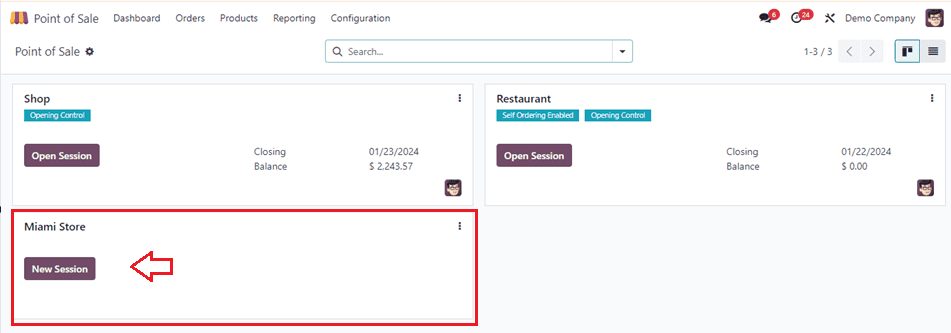
Ensure that you have the latest version of Odoo 17 installed. Depending on your company's needs, you may select either the community version or the enterprise edition. Access the Odoo dashboard and activate the Point of Sale module. Navigate to the 'Apps' menu, search for 'Point of Sale,' and install the module. Opening the Point of Sale module will take you to the ‘Dashboard’ widow, as you can see from the screenshot below.
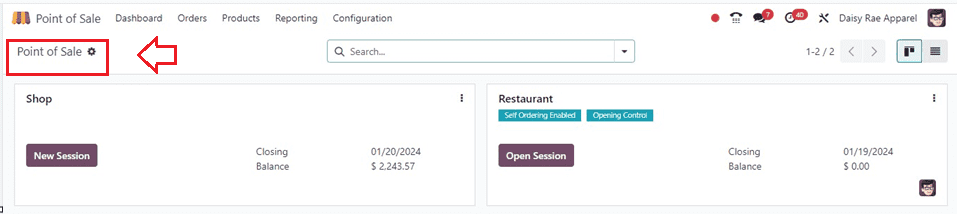
You can start a new PoS session by clicking on the ‘New Session’ button provided on the shop Kanban view. Also, this can be done through the ‘Settings’ window of the ‘Configuration’ menu. Here, you can see the ‘New Shop’ button, which can be used to create a new retail shop as per your requirements. You can also change the shop owner using the nearby space.
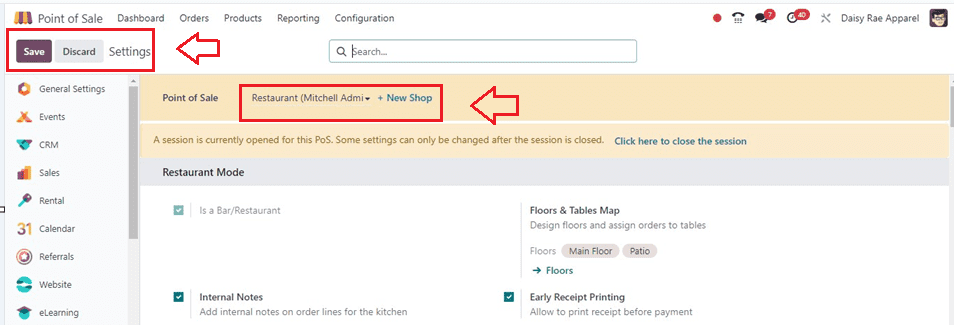
Clicking on the ‘New Shop’ button will open a setup wizard, where you can provide the Point of Sale / Shop name and Bsr/Restaurant mode activation, as shown below.
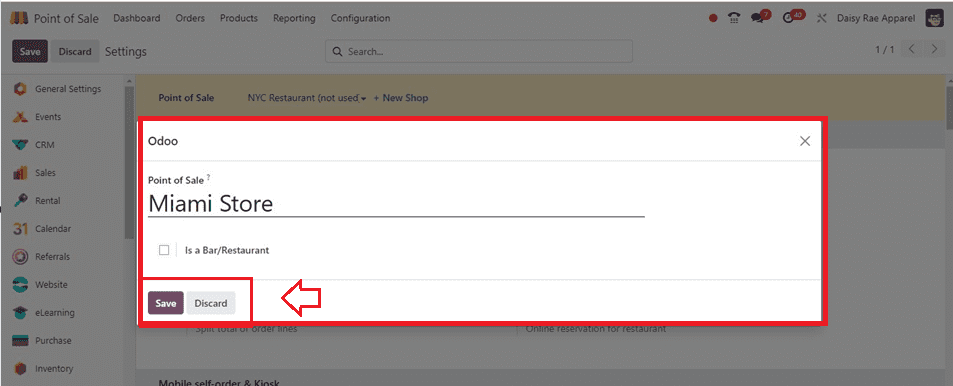
Here, we are creating just a retail shop, so there is no need to activate the ‘Is a Bar/Restaurant’ button.
After naming the shop, save the data using the ‘Save’ button provided on the settings page and go back to the ‘Point of Sale’ window of the ‘Dashboard’ menu to see the new shop data.
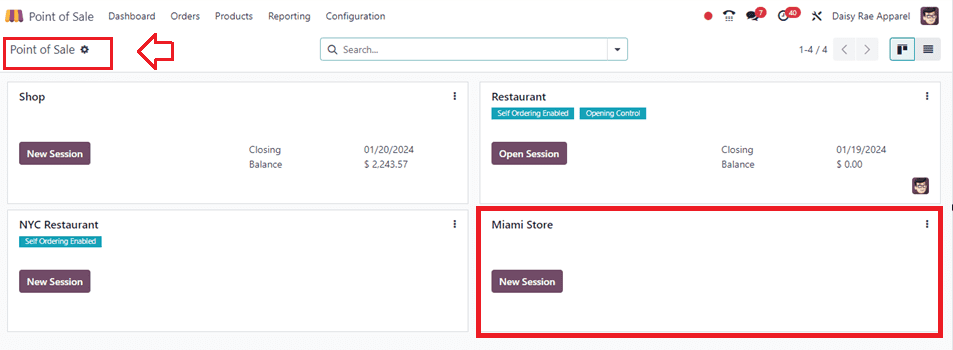
The restaurant session will then open when you click the "New Session" button. However, we must specify a few of the fundamentally necessary configuration parameters before initiating the PoS sales in the newly formed shop session. Let's explore the configuration choices now.
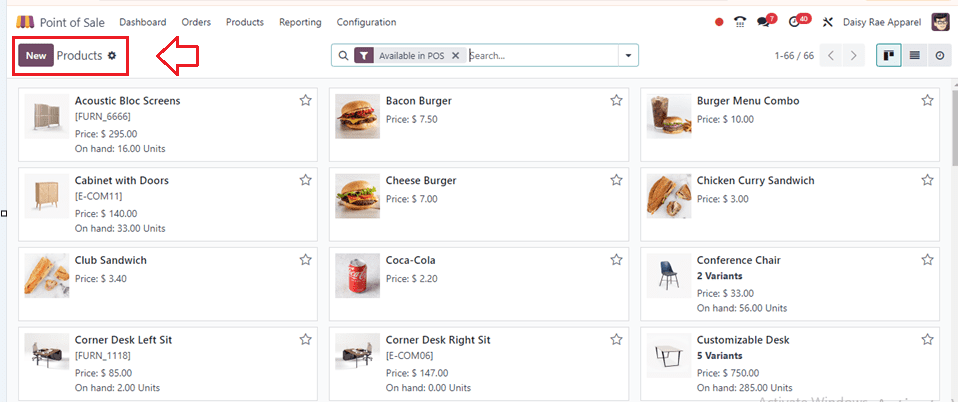
1. Setting Up Products
Add pertinent information such as the name, description, category, and cost of the product. To improve the visual depiction, you may also submit photographs. This procedure can be similar to the product configuration process within the sales and other Odoo applications.
Go to the ‘Products’ menu, choose the ‘Product’ window, and decide or create customized products required for this restaurant.
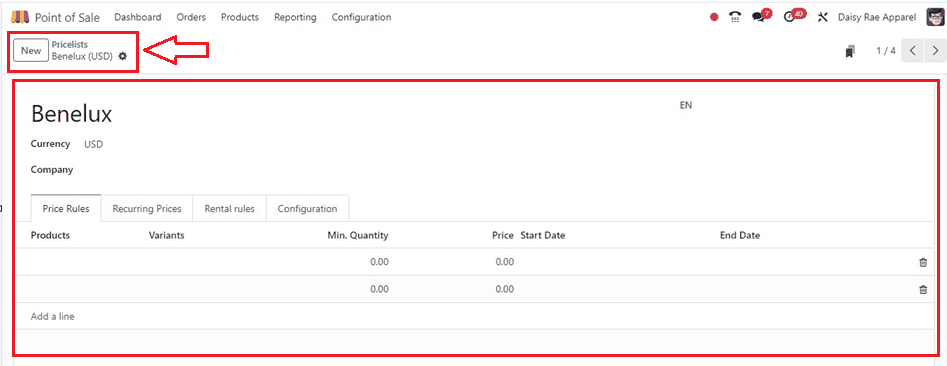
2. Configuring Price Lists
Odoo allows you to set up different price lists for various customer segments or promotional periods. Define your price lists based on factors like customer type, quantity discounts, or seasonal promotions.
To generate or select a pricelist on which to sell the items for your restaurant business, navigate to the "Pricelists" area of the "Products" menu in Odoo. Here, I am choosing the Benelux USD as the pricelist.
3. Product Variants
Product variations are essential for companies to meet the varied demands of their customers, streamline processes, and adjust to changing market conditions. In addition to increasing revenue and satisfying consumers, these acts also help the business succeed overall. Using the "Product Variants" box under the "Product" menu, you may make several variations of a single product.

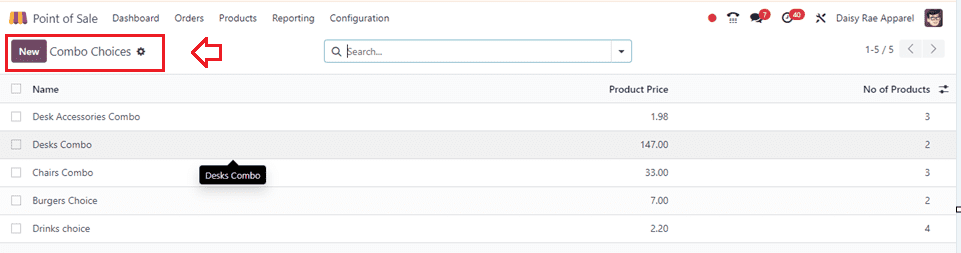
4. Product Combos
Bundled products, also known as product combinations, are important for sales organizations because they provide a number of advantages that boost profits, satisfy clients, and advance the company's objectives.
Odoo provides a new feature to create product combinations through its ‘Product Combos’ session inside the ‘Products’ menu.
5. Setting Up Payment Methods
Integrate your preferred payment methods with Odoo 17 POS. You can set up the system to make payments easier, whether you're using cash, credit cards, or mobile money. You can simply select the patent methods from the ‘Payments’ tab of the ‘Settings’ window, as shown below.
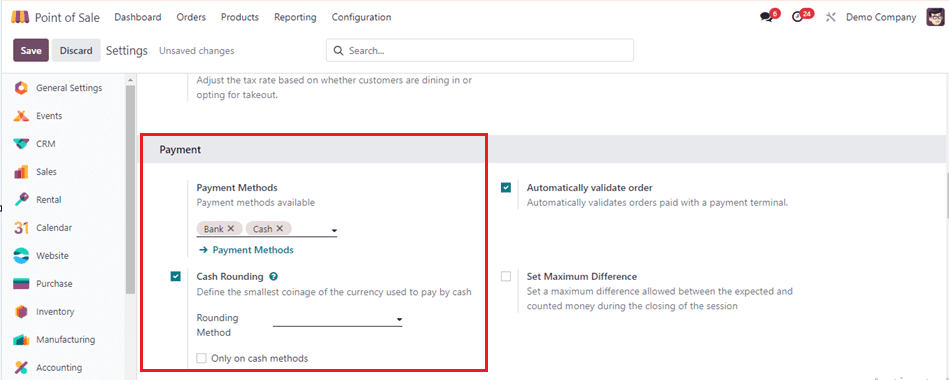
Also, you can create customized payment methods using the ‘Payment Methods’ link provided under the field.
6. Cash Rounding
The application offers a ‘Cash Rounding’ facility, allowing users to set the smallest coinage for cash payments, and the Set Maximum Difference feature, establishing the maximum acceptable gap between expected and actual cash. Users can also control the opening and closing of the game with the Coins/Bills feature, allowing them to choose their preferred coins and bills.
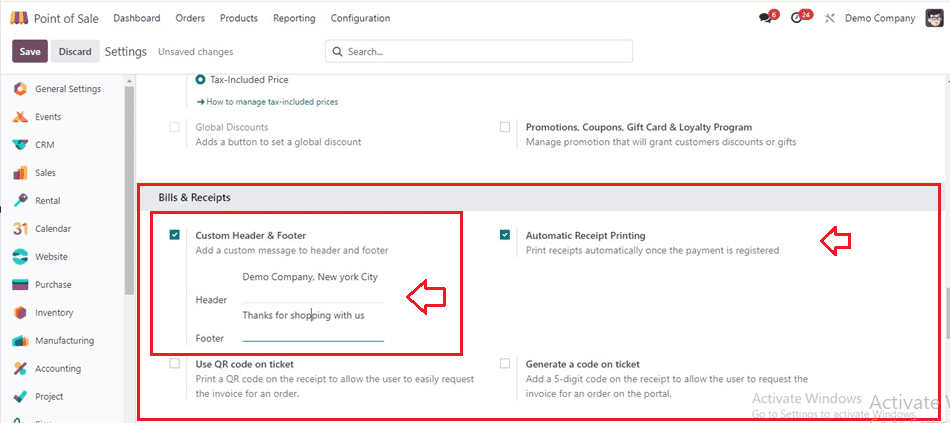
7. Customizing Receipts
Add your company's logo, contact information, and any other pertinent facts to make your sales receipts unique. This enhances brand visibility and professionalism. This can be done from the ‘Bills & Receipts’ section of the configuration ‘Settings’ window, as shown below.
8. Defining Sales Taxes
Ensure adherence to regional tax laws by configuring sales tax rules. Odoo allows you to set up tax codes and rules that apply to specific products or locations from the software backend as well as directly from the ‘Accounting’ tab of the ‘Settings’ window, as shown below.
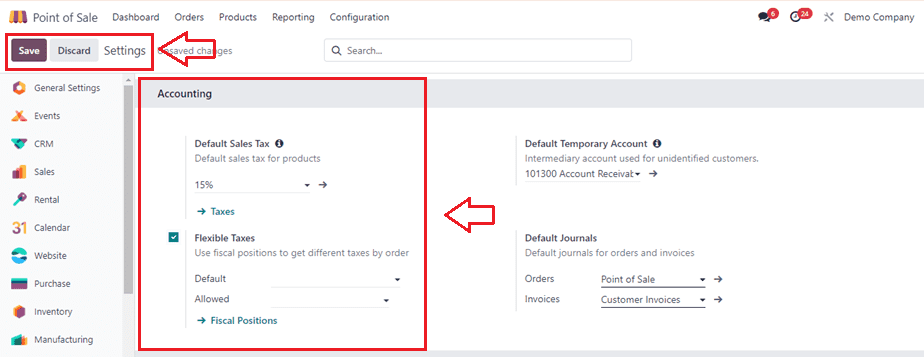
You can set the Default Sales Tax, Flexible Taxes, and Fiscal Positions using this Accounting tab area as per the sales requirements.
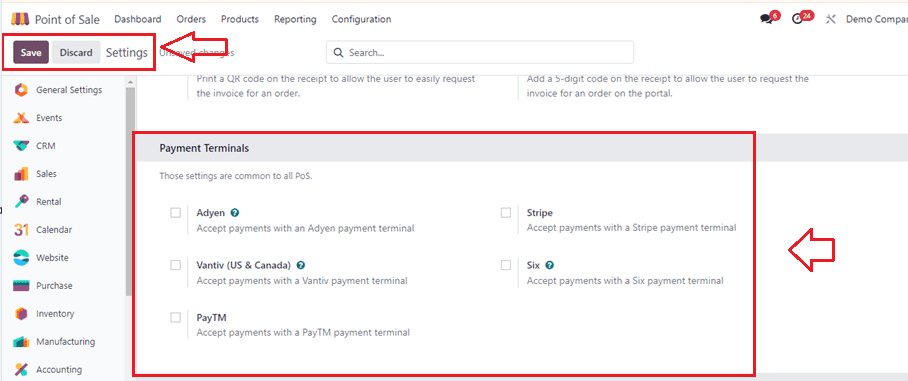
9. Choose Payment Terminals
The incorporation of payment terminals into your Point of Sale (POS) system facilitates the acceptance of diverse payment methods, including various debit and credit cards. This integration contributes to heightened payment efficiency, particularly for companies such as Adyen, Vantiv, Paytm, Stripe, and Six. Access to these services is available through the Point of Sale module ‘Settings’ window, as illustrated below.
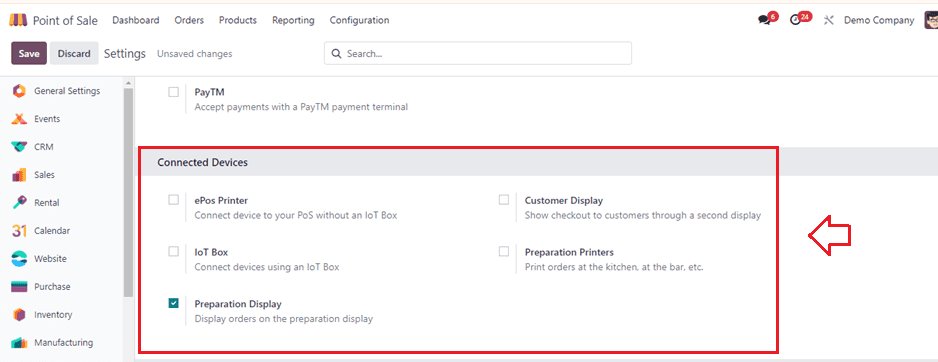
10. Configuring Hardware
If your retail shop utilizes hardware such as barcode scanners, receipt printers, or cash drawers, configure these devices to work seamlessly with Odoo 17 POS. Odoo supports a wide range of hardware integrations for enhanced efficiency. Before fully deploying the system, conduct thorough testing to identify any potential issues. Make sure all of your employees have received thorough training so they can operate the Odoo 17 POS system with confidence.
Through a second display, the user may show clients the checkout process while connecting a device to PoS with or without an IoT Box that can be configured from the ‘Connected Devices’ tab of the ‘Settings’ page.
11. Employee Access and Permissions
Manage employee access by setting up user accounts with appropriate permissions. Define roles and restrictions to ensure that each staff member has the necessary access without compromising security.
Opening the Retail Store and Managing Orders
Now, go to the ‘Dashboard’ window and choose the ‘New Session’ button provided inside the Kanban view of the particular retail store to start a new sales session and the sales management to handle orders inside your PoS application.
After opening the new PoS session, you will see the store interface. So, get ready to dive into the slick order interface, showcasing products flaunting their names, prices, and intriguing images, as illustrated in the screenshot below.
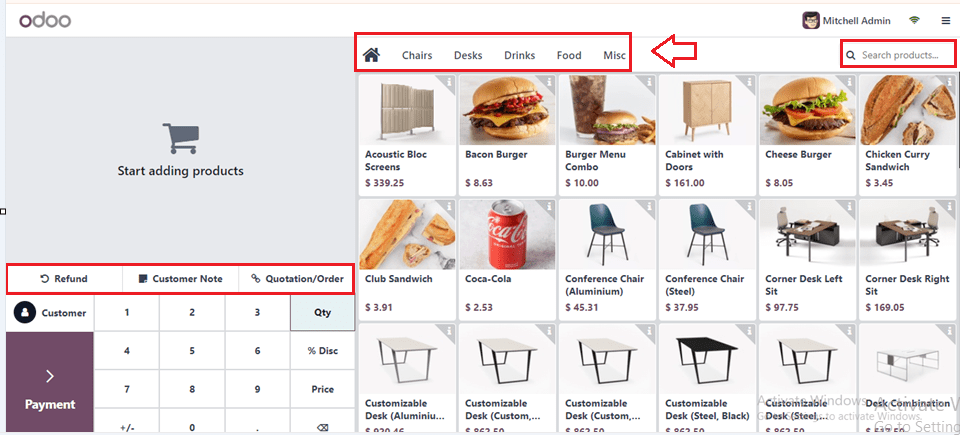
From the category section of the products, take your pick from a variety of categories such as Chairs, Desks, Drinks, Foods, and other Miscellaneous things, as shown in the above screenshot.
Ordering Items
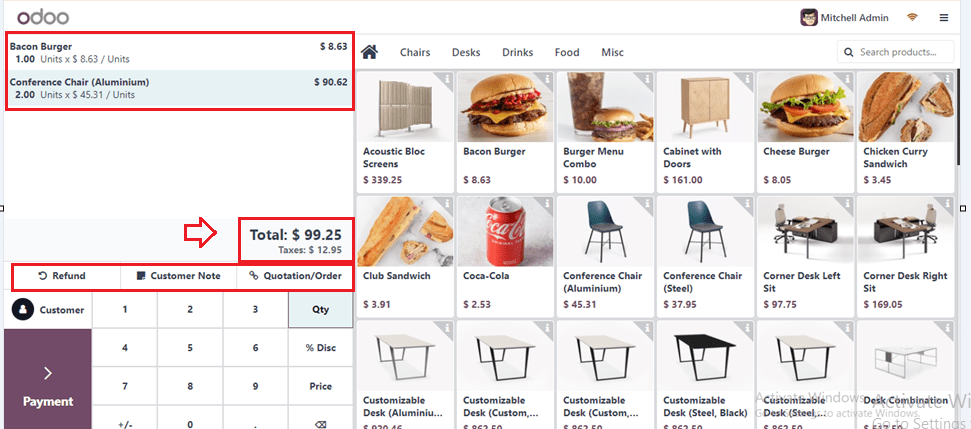
Once you've built your dream order, check out the left side where the magic happens – order details, unit prices, quantities, and the grand total all laid out. And that's not all; the order summary spills the tea on subtotals and taxes. Feel the power as you flip on Customer Notes for those special instructions and hit Refund for those boss-level returns. You will also get the order summary, subtotal, and taxes to get collected details about a PoS sales order.
Payments and Invoices
To pay with cash, a bank account, or a customer account, click the ‘Payment’ button to get to the payment screen. To validate the payment, generate an invoice by clicking on the ‘Invoice’ button found on the right side of the page, as shown below.
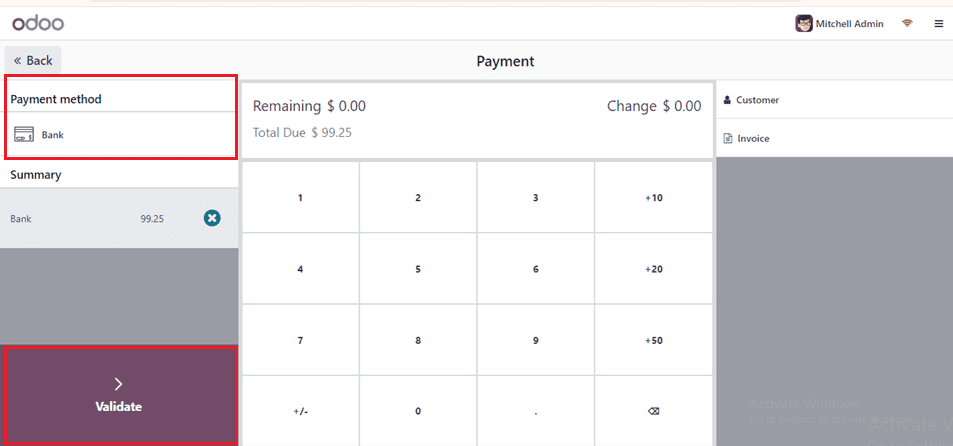
Then, input the amount being paid by the client using the keypad, and then click the ‘Validate’ button.
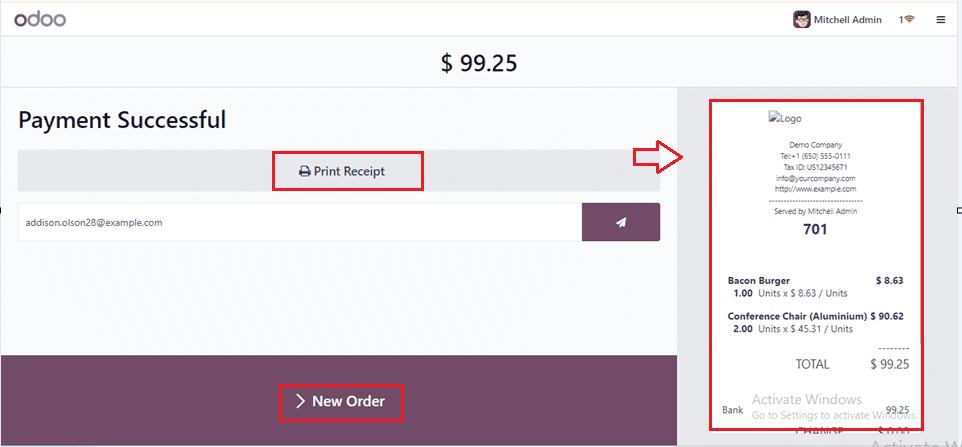
Print Invoices
Utilize the ‘Print Receipt’ button to print or email the receipt to the specified email address, which is shown on the right side of the screen. Click the ‘New Order’ option to create another order quickly without manually going back to the retail shop window.
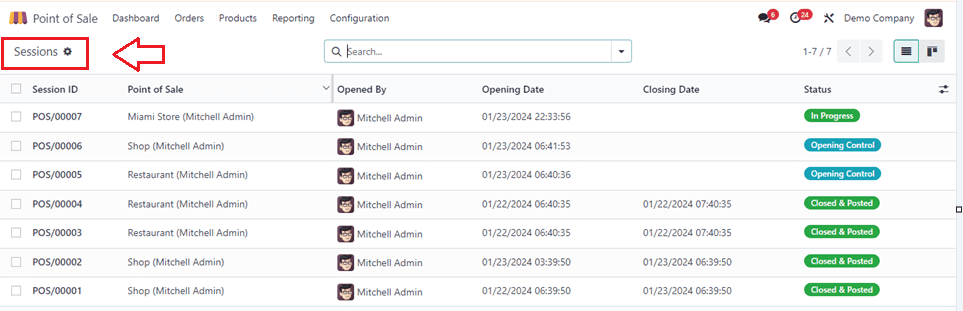
Sessions Management
The management of retail shops entails the oversight of sessions. In Odoo, the retrieval of session information is accomplished by selecting the "Sessions" option within the "Orders" tab. This action opens the point-of-sale dashboard, providing visibility into existing points of sale. Subsequently, users can peruse the list of sessions along with their respective details, as illustrated in the screenshot below.
Configuring your retail shop with Odoo 17 Point of Sale can significantly enhance your operational efficiency and customer experience. By following the step-by-step guide outlined above, you can tailor the system to meet the specific needs of your business. Odoo's flexible and intuitive POS module ensures that you can adapt to changing market demands and stay ahead in the competitive retail landscape. Change the way you run your retail operations by embracing Odoo 17's capabilities.
To read more about configure retail shop management in Odoo 16 POS, refer to our blog How Configure Retail Shop Management in Odoo 16 POS