Voice over Internet Protocol (VoIP) software allows users to make voice and video calls as well as send messages over the Internet. These applications leverage the power of the internet to transmit voice and multimedia data, making it a cost-effective alternative to traditional telephone services. Here are some popular VoIP software options:
Asterisk is an open-source VoIP platform for developers and businesses to build customized VoIP solutions. It's highly flexible and extensible.
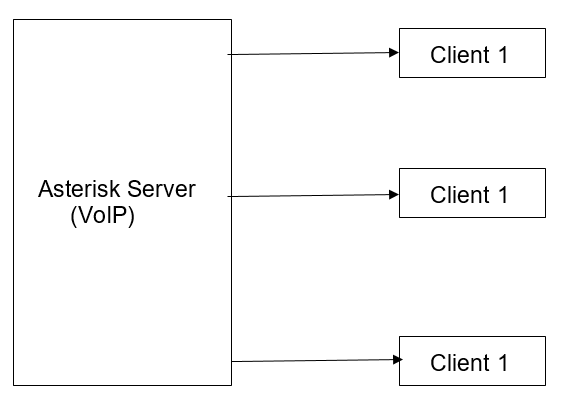
In this blog, we are going to install the Asterisk VoIP server locally, add two clients inside the configuration, and make a call between them.
1. Install Dependencies
Before installing Asterisk server, install following dependencies,wget
* gcc
* g++
* ncurses-devel
* libxml2-devel
* sqlite-devel
* libsrtp-devel
* libuuid-devel
* openssl-devel
* pkg-config
To install libsrtp, you can use the package manager on your system. For example, on a Debian-based system like Ubuntu, you can run the following command:
cd /usr/local/src/wget http://srtp.sourceforge.net/srtp-1.4.2.tgz
tar zxvf srtp-1.4.2.tgz
cd /usr/local/src/srtp./configure CFLAGS=-fPIC -prefix=/usr/local/lib
make && make install
2. Install Asterisk server
Firstly, you need to update your system by running the following commands:
sudo apt-get update -y
Then install Asterisk software
sudo apt-get install asterisk -y
sudo asterisk -r
Navigate to the /etc/asterisk/ directory, where you will find configuration files such as sip.conf, extensions.conf, voicemail.conf, and http.conf. Editing these files allows you to tailor the behavior of your Asterisk PBX, enabling customization and fine-tuning of telephony features to meet specific requirements.
To open the sip.conf file for editing, you can use a text editor of your choice. For example, you can use the nano text editor with the following command:
sudo nano /etc/asterisk/sip.conf
Edit and save the file:
[general]
context=internal
allowguest=no
allowoverlap=no
bindport= 8088
bindaddr= 0.0.0.0
srvlookup=no
disallow=all
allow=ulaw
alwaysauthreject=yes
canreinvite=no
nat=yes
session-timers=refuse
localnet=0.0.0.0
[7001]
type=friend
host=dynamic
secret=7001
context=internal
username= 7001
encryption=yes
avpf=yes
icesupport=yes
context=default
directmedia=no
transport=udp,ws
force_avp=yes
dtlsenable=yes
dtlsverify=yes
dtlscertfile=/etc/asterisk/keys/asterisk.pem
dtlsprivatekey=/etc/asterisk/keys/asterisk.pem
dtlssetup=actpass
[7002]
type=friend
host=dynamic
secret=7002
context=internal
encryption=yes
encryption=yes
avpf=yes
icesupport=yes
directmedia=no
dtlsenable=yes
dtlsverify=yes
dtlscertfile=/etc/asterisk/keys/another_certificate.pem
dtlsprivatekey=/etc/asterisk/keys/another_private_key.pem
dtlssetup=actpass
In the ‘ sip.conf’ file, locate the ‘bindaddr’ and ‘localnet’ settings and replace them with the IP address of your system. Additionally, you can configure SIP clients by adding entries for clients such as 7001 and 7002, allowing Asterisk to recognize and manage these extensions within your telephony system. After making these adjustments, save the changes to the ‘sip. conf’ file to apply the new configuration.
Now, open the ‘extensions.conf’ by using the following command
sudo nano /etc/asterisk/extensios.conf
Now, edit the file and save the changes.
[internal]
exten => 7001,1,Answer()
exten => 7001,2,Dial(SIP/7001,60)
exten => 7001,3,Playback(vm-nobodyavail)
exten => 7001,4,VoiceMail(7001@main)
exten => 7001,5,Hangup()
exten => 7002,1,Answer()
exten => 7002,2,Dial(SIP/7002,60)
exten => 7002,3,Playback(vm-nobodyavail)
exten => 7002,4,VoiceMail(7002@main)
exten => 7002,5,Hangup()
exten => 8001,1,VoicemailMain(7001@main)
exten => 8001,2,Hangup()
exten => 8002,1,VoicemailMain(7002@main)
exten => 8002,2,Hangup()
Now open voicemail.conf and edit the following lines.
sudo nano /etc/asterisk/voicemail.conf
[main]
7001 => 7001
7002 => 7002
Open http.conf
sudo nano /etc/asterisk/http.conf
bindaddr=0.0.0.0
bindport=8088
To configure Asterisk to listen on a specific IP address and port, replace the ‘bindaddr’ setting in the ‘sip.conf’ file with your desired IP address. Additionally, replace the default port with the port number you want Asterisk to listen on. After making these changes, save the modified ‘sip.conf’ file to ensure that Asterisk uses the updated configurations.
Now reload the server
sudo asterisk -r
To see the clients we added, enter the following command:
sip show peers
Upon completion of the setup, Odoo will provide a list of the added users along with their connection status, indicating whether they are currently connected to the Asterisk PBX or not. This status overview allows for convenient monitoring and management of the VoIP users within the system.
Name/username             Host                                    Dyn Forcerport Comedia    ACL Port     Status      Description
7001/7001                 (Unspecified)                            D  Yes        Yes            0        Unmonitored
7002                      (Unspecified)                            D  Yes        Yes            0        Unmonitored
2 sip peers [Monitored: 0 online, 0 offline Unmonitored: 0 online, 2 offline]
Install any voice sip software, for example, Microsip or Mizudriod.
To set up VoIP calling for clients in Odoo, begin by entering the domain information in the settings menu. This initial configuration step allows Odoo to establish the necessary parameters for VoIP functionality and ensures seamless communication with clients.
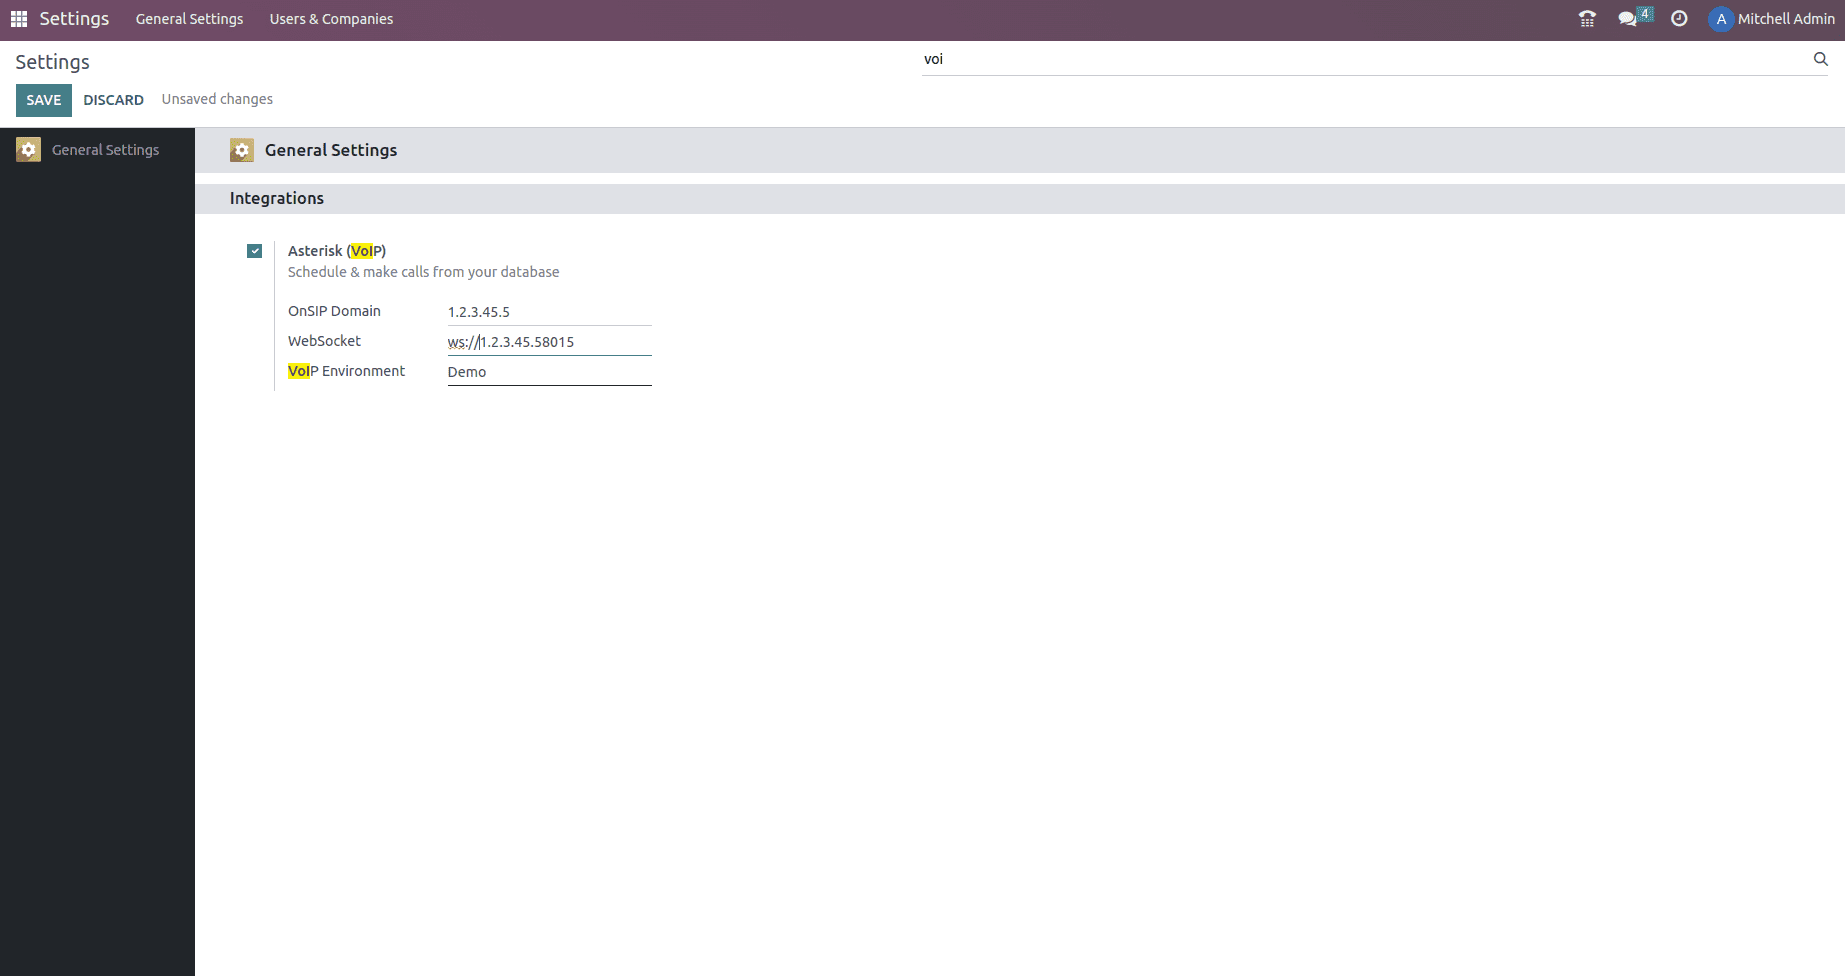
Ensure that the PBX Server IP matches the IP address specified in the ‘http. conf’ file. For WebSocket configuration, set it as ‘ws://localhost:xxxx/ws,’ where "localhost" should align with the previously defined IP, and "XXXX" should match the port specified in the ‘http. conf’ file. This consistency ensures proper communication and connectivity for your setup.
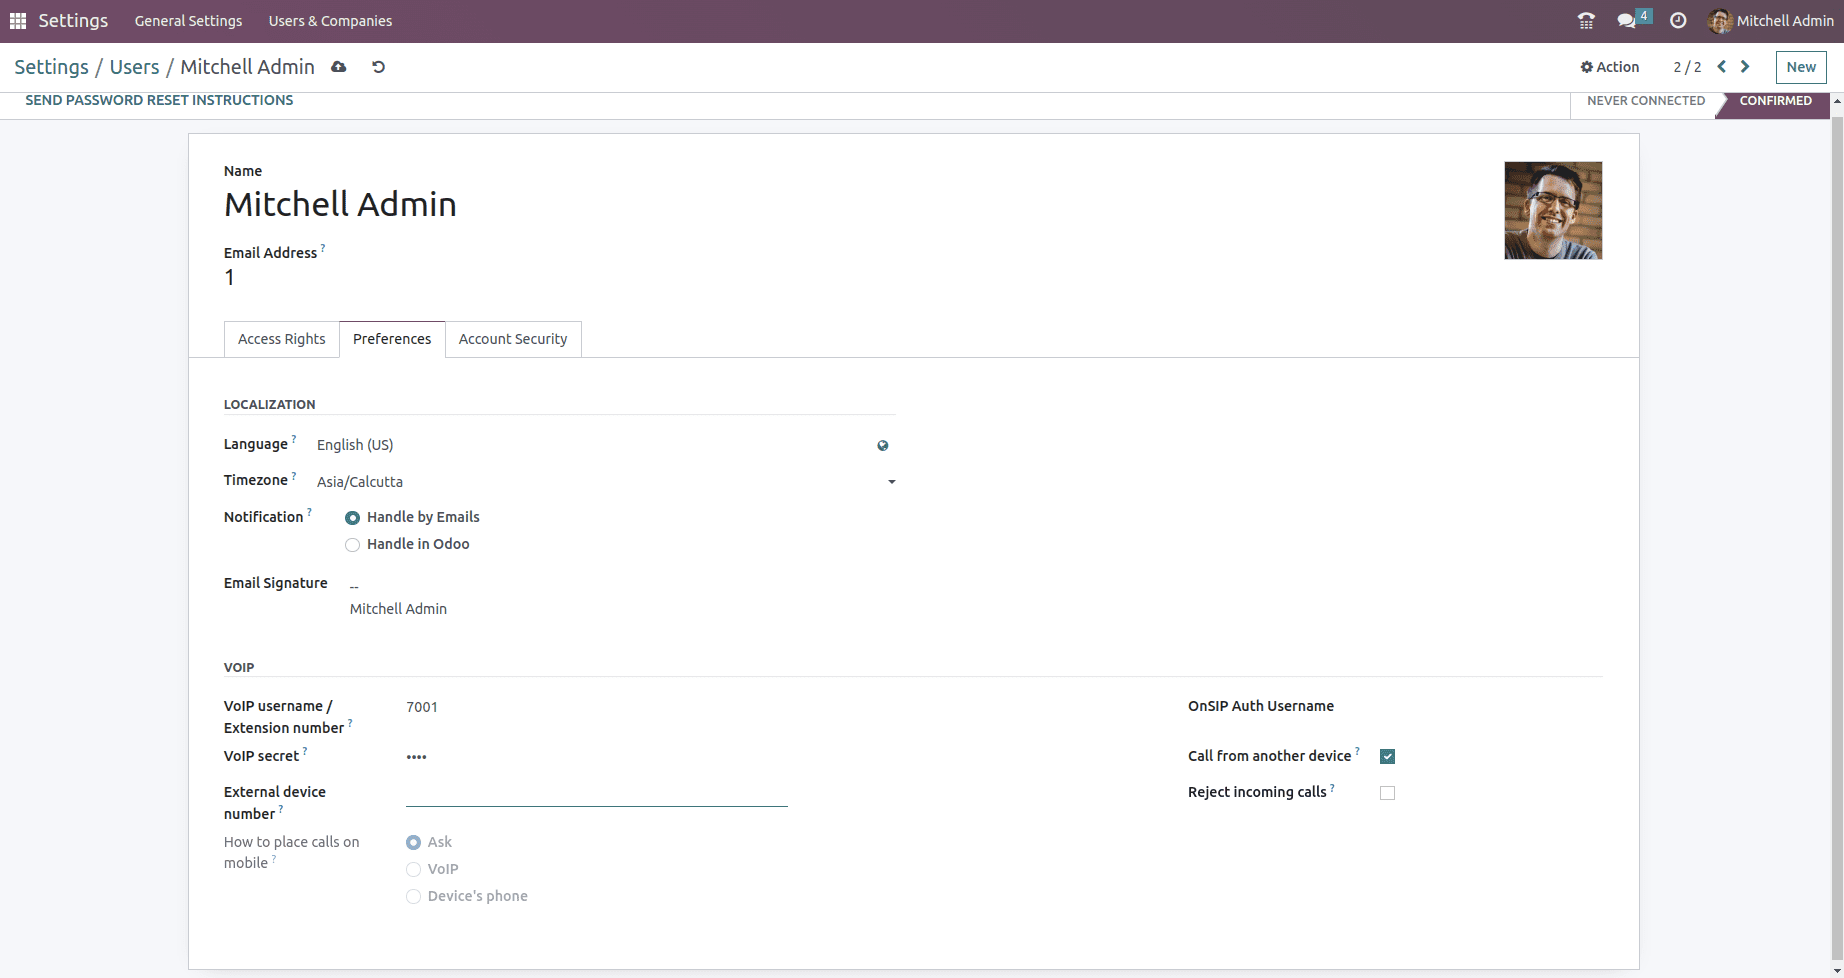
In Odoo, incorporate the Asterisk username and corresponding secret key for the user. Specify the SIP Login/Browser's Extension as the assigned number configured in the ‘sip.conf’ file, such as 7001 in our example. The SIP Password should match the secret key chosen for the user in the ‘sip. conf’ file, establishing the necessary credentials for successful integration with Asterisk.
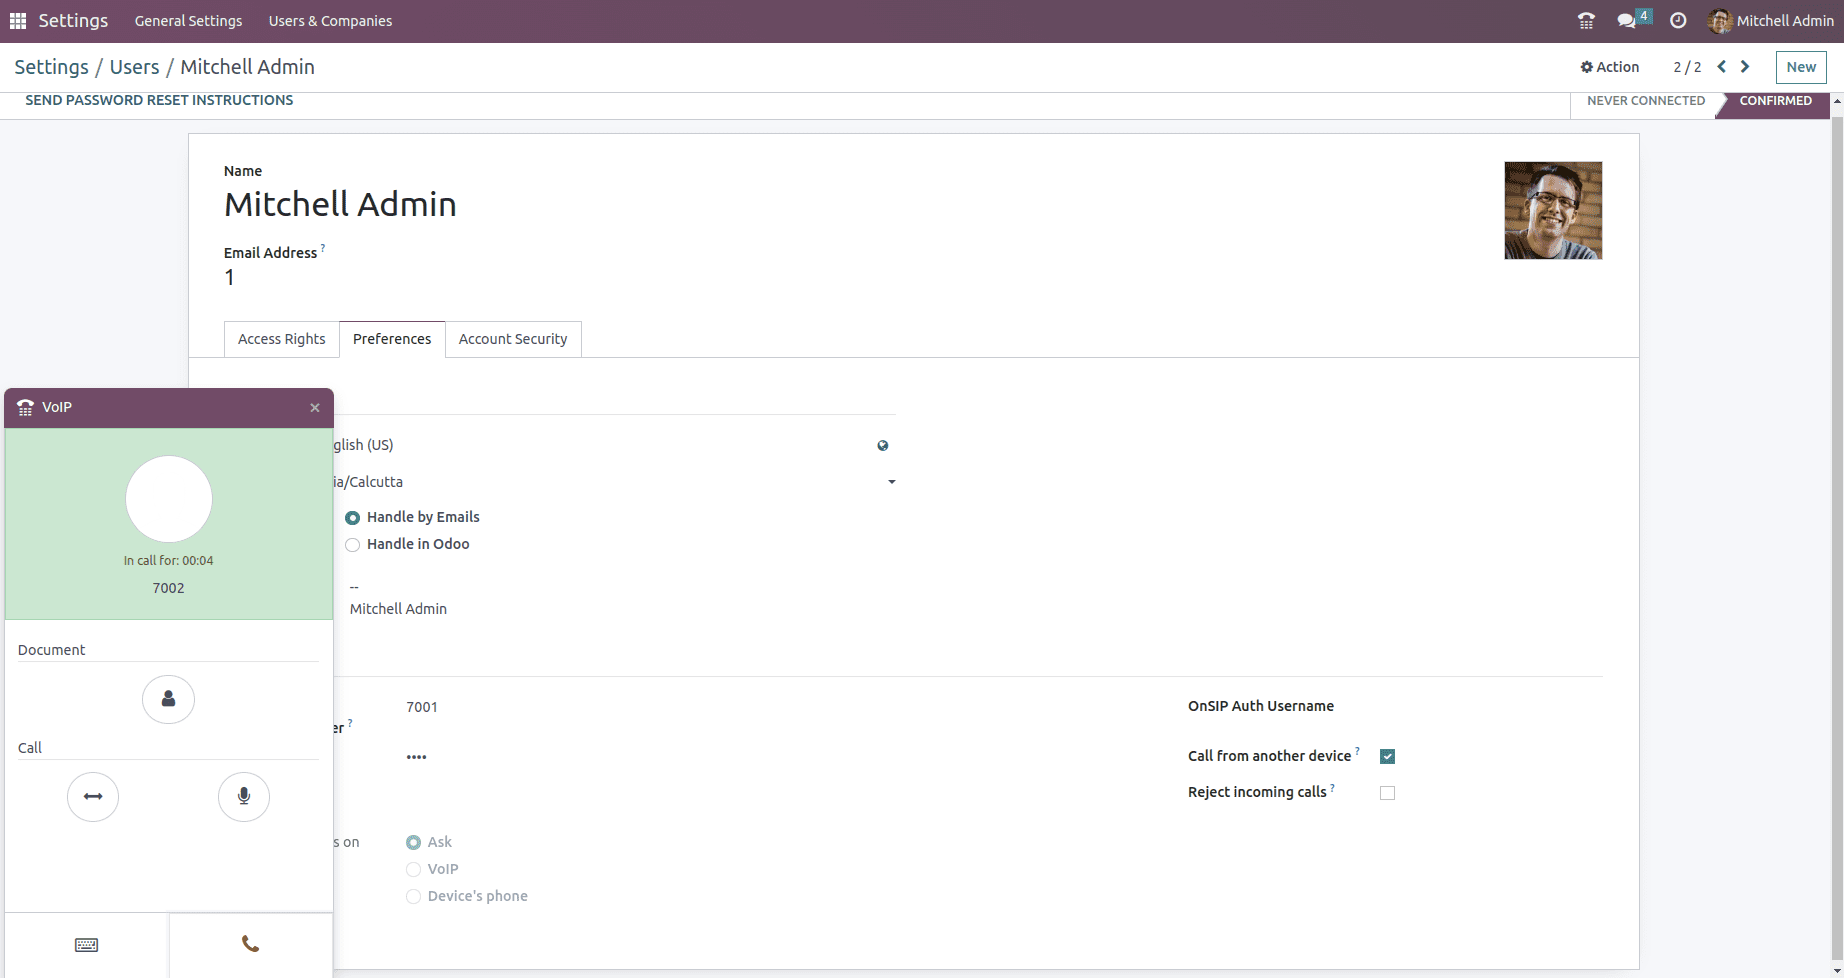
Add 7002 users in the Mizudriod application on the phone. Now users can make calls to 7002.
Asterisk acts as a VoIP gateway, enabling communication between traditional PSTN (Public Switched Telephone Network) and VoIP networks. It can convert analog signals to digital and vice versa.
To read more about configuring OnSIP VoIP services in Odoo 16, refer to our blog How to Configure OnSIP VoIP Services in Odoo 16