The Odoo Events module is a detailed event management solution that makes it easier to handle different event types from beginning to conclusion. Every facet of event planning, from ticketing to publicity and visibility, may be handled using this program, from small to large-scale events. Users have the option of creating a wide range of events, including webinars, conferences, exhibits, seminars, festivals, and charitable occasions. Users can simply organize event content using the module, make event schedules, and filter results by date, location, tags, and speakers.
Online users may manage registration and ticketing processes, choosing options such as whether to start an event with free entry or enable guests to purchase tickets straight from the event website. Credit cards, discounted ticket rates, member perks, and multi-level booking possibilities can all be used to specify payment methods.
Users of Odoo Events may also manage existing and future sponsors and offer merchandise for sponsorship online. Users may advertise events and programs through SMS and direct mail, and the system comes with ready-to-use SEO tools that don't need any setup. All marketing tools from Odoo have Google Analytics built in, giving users a thorough perspective and total outlook of a company. The Odoo Events module integrates with a number of programs, including CRM, websites, blogs, and email marketing.
We can see how to set up new events in the Odoo 16 Event Module here on this blog.

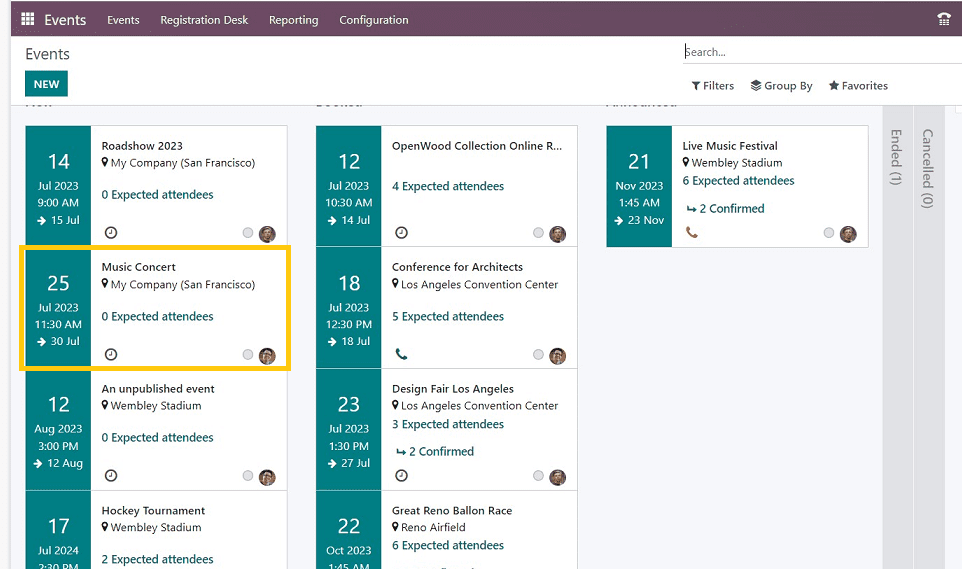
The main window of the Events module is a dashboard of various events created using the Odoo Events platform and arranged in Kanban Views.
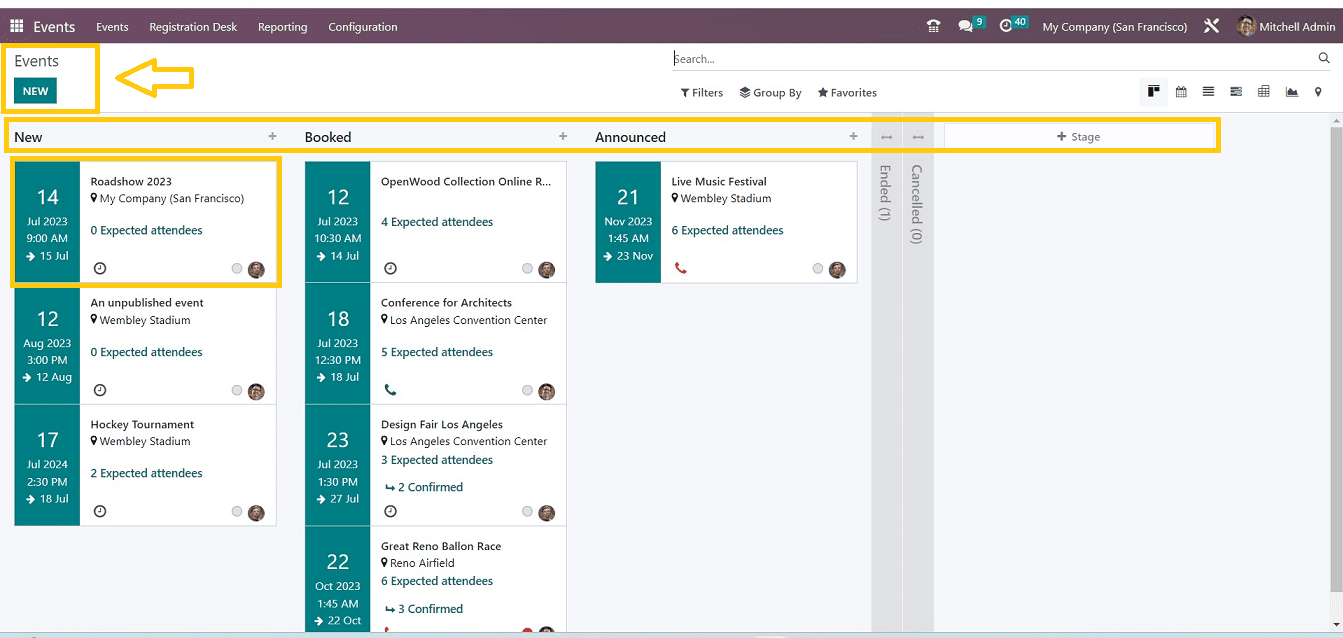
Here, the events are arranged based on their various stages like “New,” “Booked,” “Announced,” etc. You can generate a Pivot table, Gantt chart, Calendar, List, or Map of the Events dashboard view using the events view. On both finished and postponed events, information is provided. By using the “+ Stage” option on the right side of the page, users can add additional stages. New events can also be included, as depicted in the above screenshot.
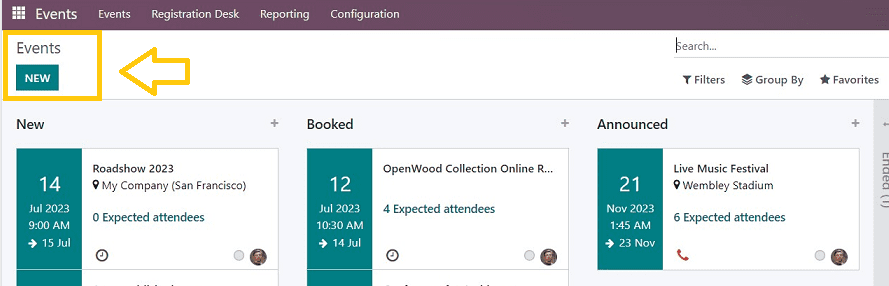
Each Kanban board displays information about the event, including its Name, Location, Date, Number of Attendees, and the person or company organizing it. Clicking on the “New” button will help you to add new events.
You can configure the event details from the emerged configuration form.
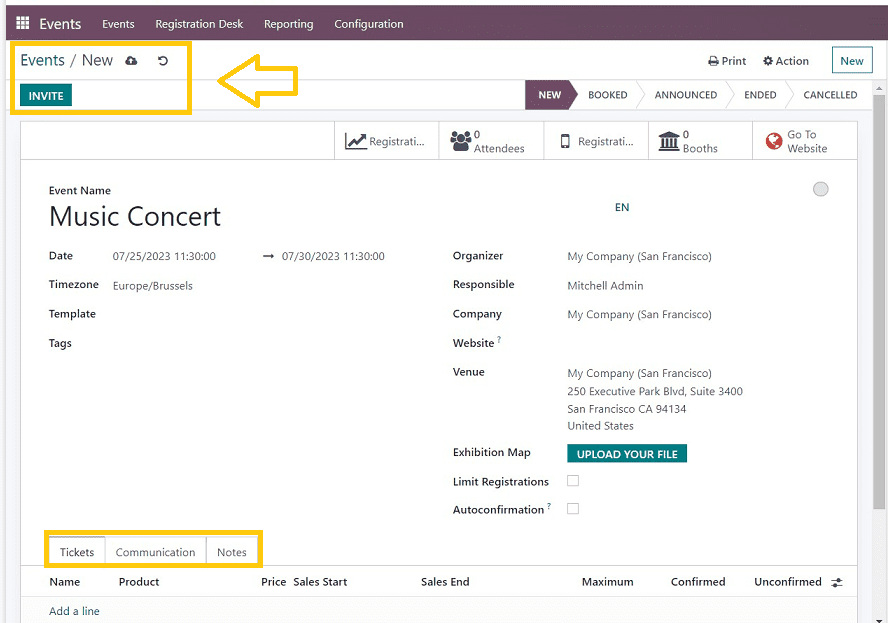
On the displayed form window, we can add an “Event Name” like Conferences, Campaigns, Festivals, and Exhibitions using the Odoo events form by entering the event's specifics available in the dropdown section. In addition to selecting a “Timezone” from a list of time zones across the world, you can choose the required option. You have to select the “Date” and time period they want to work with from a calendar dropdown option. If necessary, you can also choose an appropriate “Template.”Events are categorized using “Tags” according to their types, such as conference, charity, music, sport, or cultural event.
Registrations may be customized by including the “Organizer,” “Responsible” person, or party. Fill in the details of the “Company,” “Venue,” and “Website” regarding the event. A file or document with the address and location of the event site can be included in the "Exhibition Map" section, which can be extremely helpful for the attendees to understand the location. The number of registrations that are allowed can be limited by choosing the “Limit Registration” field, and “Auto Confirmation” for new accounts can be enabled. Registrations are also instantly confirmed when they are created.
This form window consists of some tab sections titled “Tickets,” “Communication,” and” Notes.”
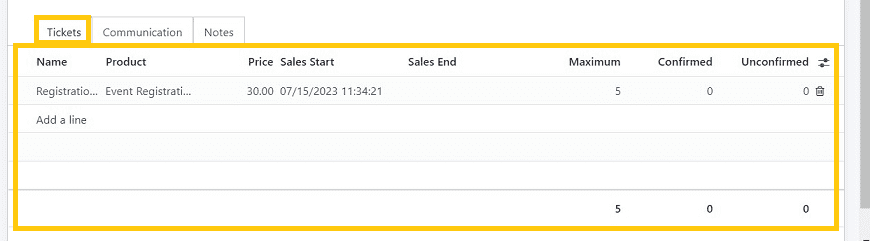
Tickets Tab
We must provide information about a ticket, such as the registration Name, Product name, Price, Sales Start date, Sales End date, the Maximum number of tickets, Confirmed tickets, and Unconfirmed tickets. This procedure can be done by clicking on the “Add a line” link available in the Tickets tab columns. You can add multiple ticket entries using the same procedure.
Communication Tab
A user can configure an email notification system to notify them when a customer registers. Therefore, upon the completion of the registration, a mail alert will be delivered. The time when mail will start to be sent can be specified using this tab section.
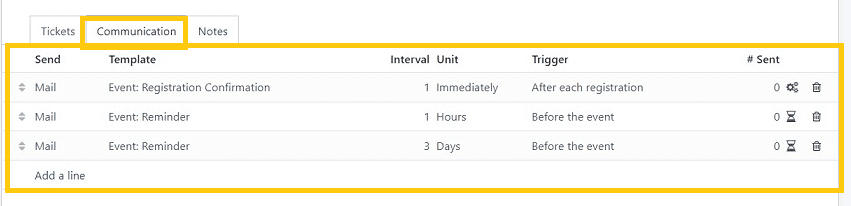
In these tab columns, you can see various preconfigured communication details available with their Sent type, Template, Interval, Unit, Trigger, and number of communications sent. Either you can select one of them or customize the communication details and triggers by clicking the “Add a line” link available at the end of the column. You can add multiple communication settings using this tab section.
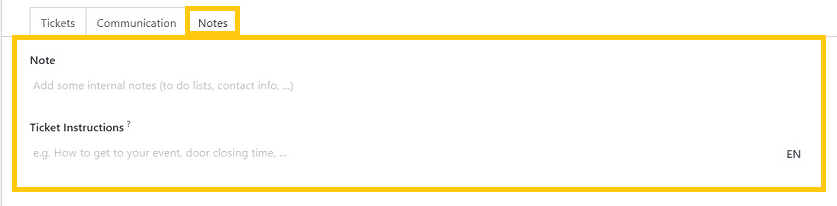
Notes Tab
You can give any Notes or Descriptions regarding the events, registrations, or any instructions using the “Note” and “Ticket Instructions” sections provided in this tab section as illustrated in the screenshot below.
After you've finished editing your event information, don't forget to save them. The newly formed event's details will be stored in the Odoo Events database after being saved.
Then, we can move on to the next steps, which include inviting attendees, configuring website pages, publishing, registration configuration, etc.
Inviting Attendees and Scheduling Invitation mails
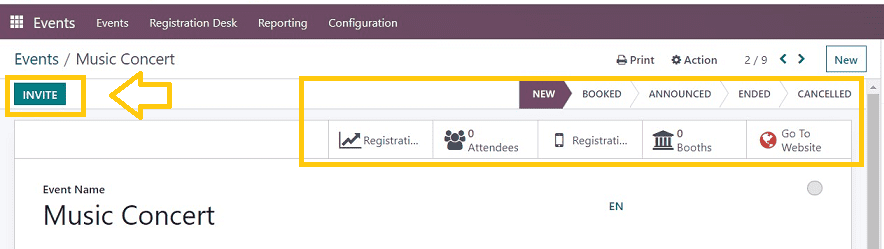
From the Events Configuration Page, you can invite people using the “INVITE” button.
When you click the "INVITE" button, a mailbox will open where you may modify and send messages to clients.
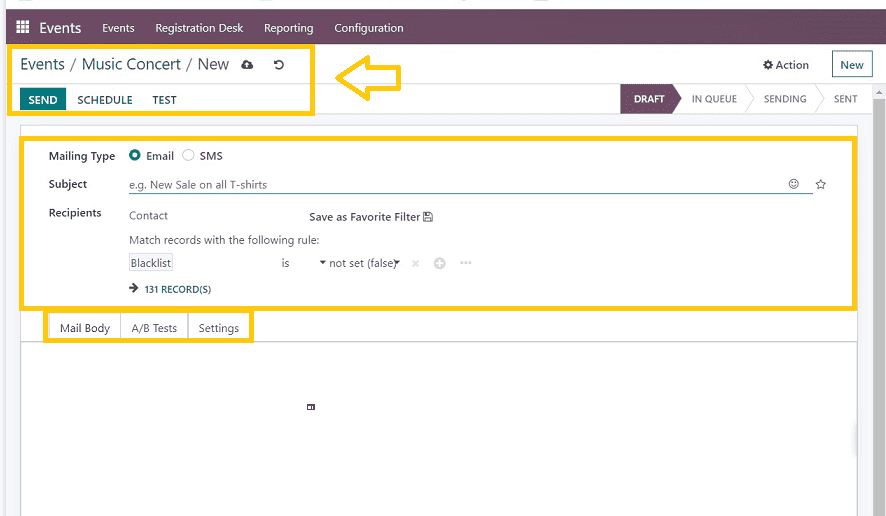
In this configuration form, you can manage the mailing components like “Mailing Type,” “Subject,” “Recipients,” “Mail Body,” “A/B Tests,” and other email “Settings.”
Scheduling Mails
After providing the mailing Type and Subject, you can configure the “Recipients” as per the requirement. You can choose the recipients from your contacts, choose a group of contacts or customize your own recipients by setting conditioning rules, as you can see from the above screenshot.
Mail Body Tab:
The “Mail Body” tab will help you to configure the email body and edit the invitation body with customized templates.
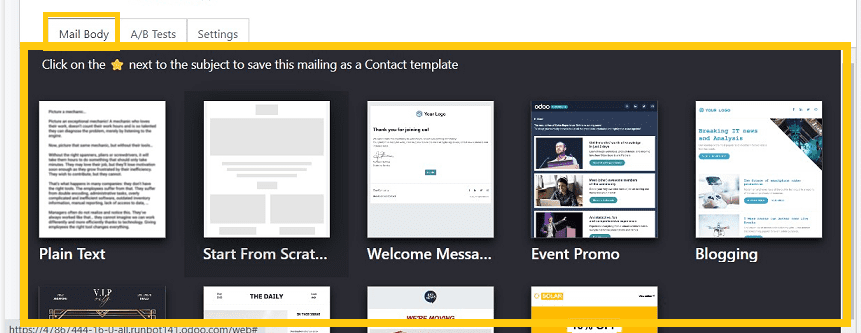
You can select an email body template and edit them according to your desire with appropriate event details.
A/B Tests Tab:
Users can schedule the customer invitation messages, as illustrated below. Consequently, the messages will be delivered at that time. You can publish two versions of the same page simultaneously using Odoo A/B testing and compare their performance. Users can activate or disable this function by ticking the box corresponding to the “Allow A/B Testing” option, as seen in the illustration below.
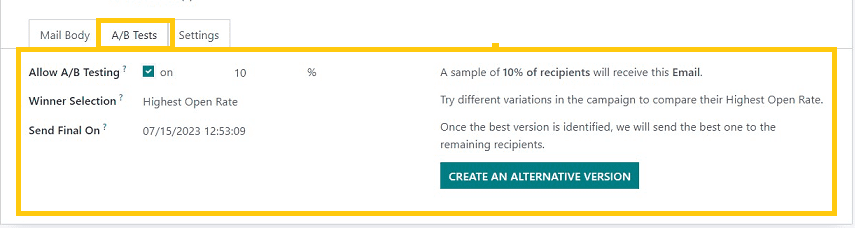
You are able to choose from a range of options for the "Winner Selection" procedure from the field's drop-down list when you enable the A/B testing feature, including Manual, Highest Open Rate, Highest Click Rate, Leads, Quotations, and more. You may pick the day the receiver will get the mail informing them of the winner in the "Send Final On" data box. Use a different letter body design as an alternative. A new mail setup form is opened when you click the "CREATE AN ALTERNATIVE VERSION" button. Similar to the procedure we covered before, you can generate a second invitation mail from that form.
Settings Tab:
The settings tab section of the Odoo 16 Email Marketing Module allows users to change the email's tracking parameters and content.
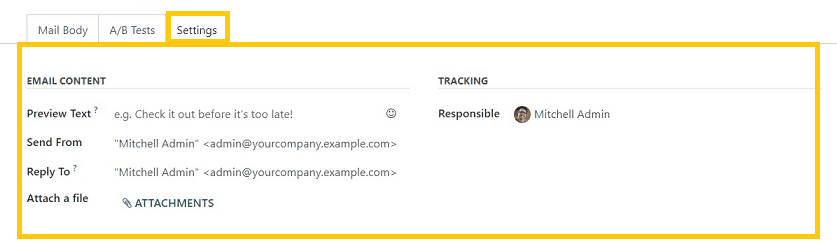
This tab section has features including “Preview Text,” “Send From,” “Reply-To,” choices. You can add file and document attachments using the “ATTACHMENTS” option link. Additionally, you can reveal the person who is in control of this event by mentioning them in the "Responsible" field.
Save the procedure details and use the save icon to save the details. Send the email using the "SEND" button or postpone it using the "SCHEDULE" button from the menu section of the event configuration form, as illustrated below.
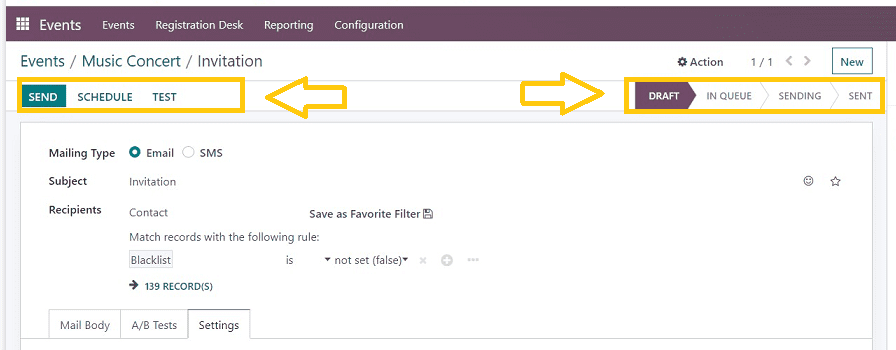
A pop-up window will appear when you click the "SEND" button. Use the "SEND TO ALL" button to carry out the sending operation, or you can cancel it altogether. I've provided a later date for the start of event registration here so that we can schedule the mail according to our timetable. The "SCHEDULE" button can be used for this. You can see the scheduled date and time from the invitation configuration form itself, as shown in the image below.
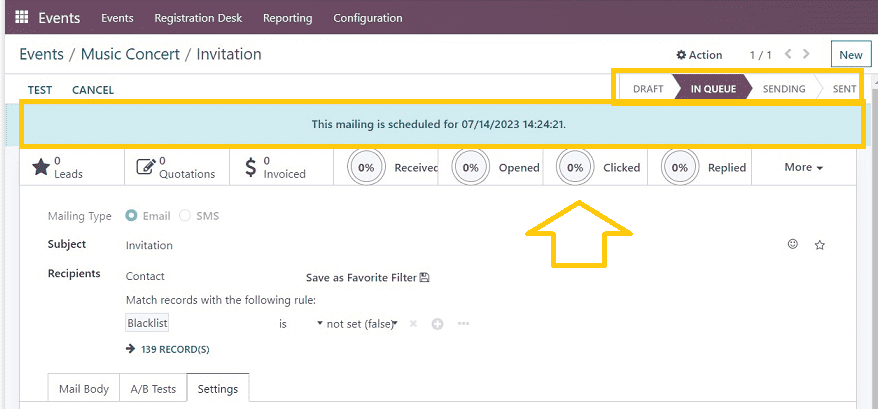
Some smart buttons will show up in the Configuration form when you schedule the email. Once the mail is sent to the clients, you can see the number of “Leads,” “Quotations,” “Invoiced,” “Received,” “Opened,” “Clicked,” “Replied,” and more from the smart button section of the form.
You are able to understand the status of the invitation emails from the status menu buttons as “DRAFT,” “IN QUEUE,” “SENDING,” and “SENT.” Then come back to the event configuration form.
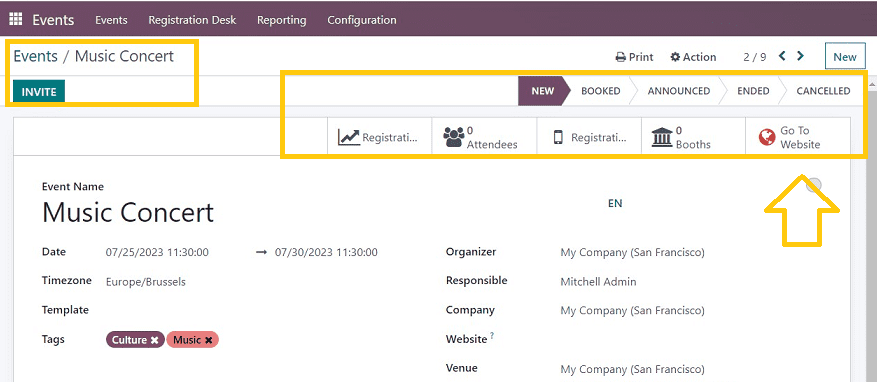
You can see the status of your event from the menu section of the event configuration form like “NEW,” “BOOKED,” ANNOUNCED,” “ENDED,” and “CANCELED.” Also, the smart button section will give you an overview of the “Registration,” Number of “Attendees,” and “Booths.” You can click on the smart buttons to understand the detailed overview of the above-denoted factors of the event.
Website Preview and Registration Processes
We can view and edit the website preview or the customer portal using the “Go To Website” smart available in the event configuration form after completing all the event creation procedures.
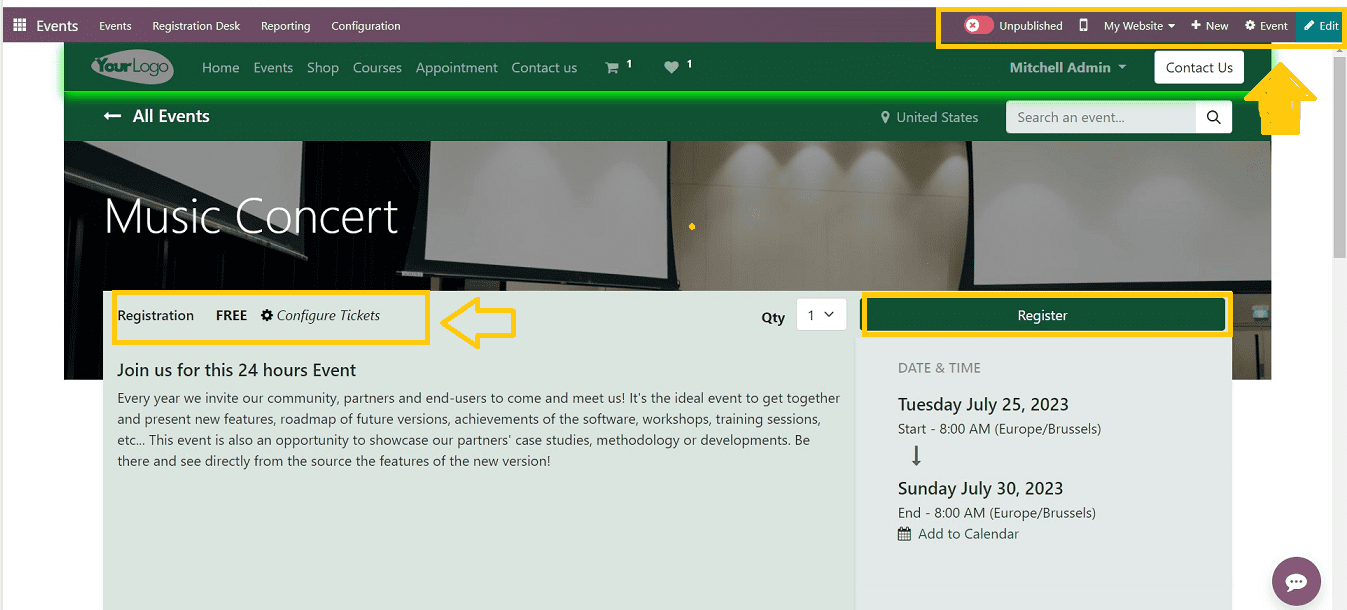
You will be landed on the event website page immediately after pressing the ‘Go To Website” smart button. From this web preview, admin users can edit the website settings, Templates, and Designs using the “Edit’ menu available on the menu section of the website page, as illustrated in the above screenshot. Also, you can publish the event on the website using the “Publish & Unpublish” button.
Users can register for the events using the “Register” button available on the website, and also they can view the event details from the page itself. Admin users can configure the event tickets for the attendees using the “Configure Tickets” settings option available on the page, as illustrated above.
Clicking on the “Register” button from the right side of the webpage will help the visitor users to make event registration and payment procedures.
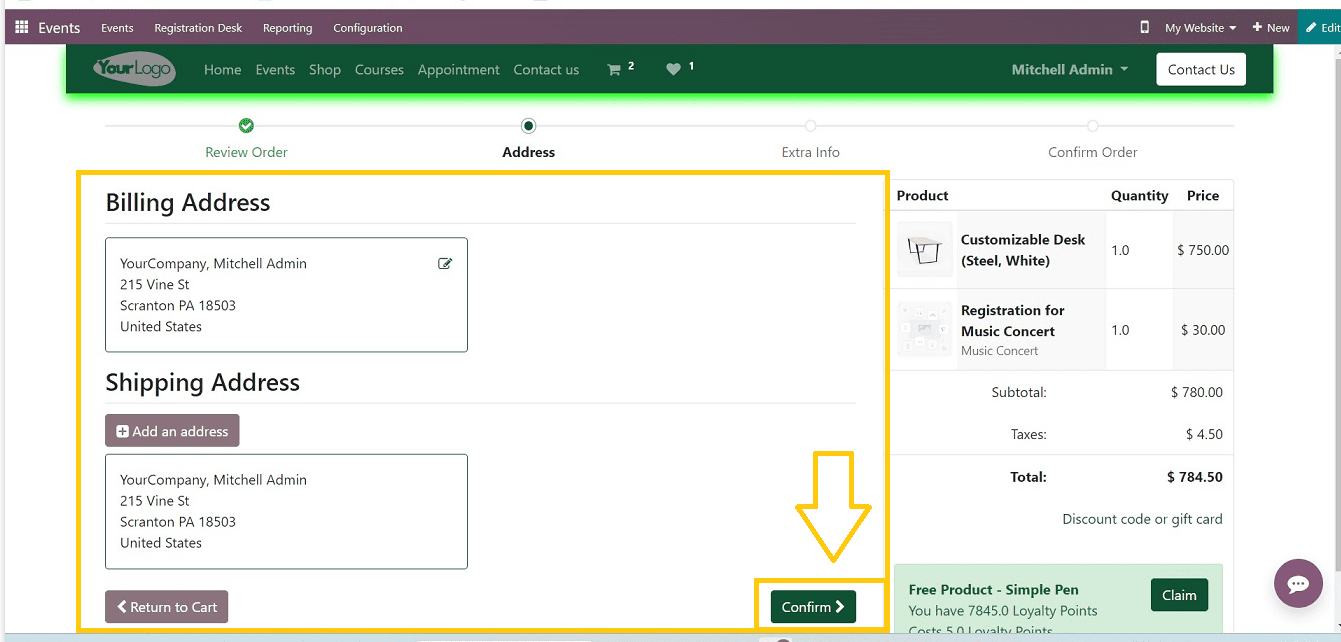
After clicking the “Register” button, you will be led to the review order page where you can edit the “Billing Address” and “Shipping Address” and proceed with the registration payment by ensuring with the “Confirm” button. Then an additional page will be open to adding “Extra Info” regarding the Reference, Feedback, etc, as shown below.
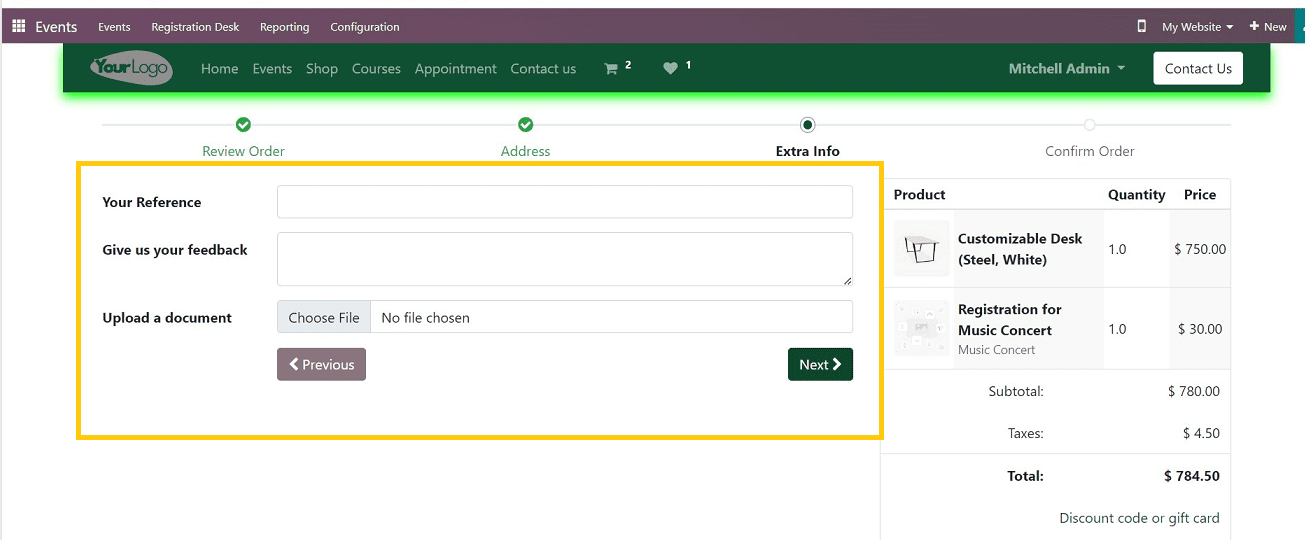
To continue with the payment options, click the "Next" button. This will reveal the "Confirm Order" box, as seen in the image below.

You can finish the payment procedure by clicking the "Pay Now" button and then entering your bank account credentials after choosing the appropriate payment provider service.
These are the overall functions involved in the configuration and management of a new Event within the Odoo 16 Events Module. This software system can manage all aspects of event planning, from tickets to publicity and visibility, for both small-scale and large-scale events.
To read more about registering & publish an event in Odoo 16, refer to our blog How to Register & Publish an Event in Odoo 16 Events Module