The modules add new business logic to Odoo or any updates to the existing workflows. Every change in Odoo starts and ends with a module. Here, we will create a basic module and explain a module's models, views, security, and installation in Odoo 15.
Before creating a module, we must provide our working directory in the .conf file’s addons_path. You can add multiple locations using a comma. Odoo will take the modules from these locations. So you have to create your modules in these locations.
Module Structure
An Odoo module has its structure to keep the elements inside a module. A basic module contains the following structure.
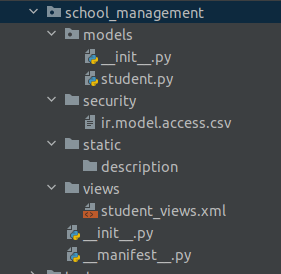
Here, we are creating a school management module for understanding. To create the structure of a module, you can use the scaffold command. This will automatically create an empty structure of a module.
./odoo-bin scaffold module_name custom_addons_location
Let’s take a look at the module contents. Models, Here we put the python files that define a module's models and objects.
Security: In this directory, we place the security-related file
Static: This folder contains static resource files like CSS and javascript. Module icons take automatically if we provide an icon inside the static folder with the following location description/icon.png. The icon name should be named icon.png.
View: Here, we place the XML files which define the user interface.
We also have other modules' folders like data, reports, controllers, and demos. These folders are for different purposes. For the basic module, we don’t need this directory now. Other than this folder module contains 2 python files __init__.py and __manifest__.py
Let's check an example of the __manifest__.py file, It contains a single python directory, where each key provides module information
{
    'name': "A Module",
    'version': '1.0',
    'depends': ['base'],
    'author': "Author Name",
    'category': 'Category',
    'description': """
    Description text
    """,
    # data files always loaded at installation
    'data': [
        'views/mymodule_view.xml',
    ],
    # data files containing optionally loaded demonstration data
    'demo': [
        'demo/demo_data.xml',
    ],
}name: Name of the module which is to be defined
version: The Version of the Module
description - The Extended description for the module which is being created
author - Name of the author and the creator of the module
website - Website URL for the module author who has defined it
depends - The supporting module on which it is dependent. When a definite module is being installed, all dependencies of the respective module are installed before it.
data - Path of the data files that must be installed or updated at the module installation or update.
demo - Path of data files which has to be installed as demonstration data
auto_install - To auto-install the module, all the dependencies are installed.
For e.g., the module sale_crm depends on Sales and CRM. So it has to be auto-installed.
Application - To know whether the module is full-fledged or technical.
Installable - Whether a user of the platform is capable to install the module from the Web UI or not.
This is a brief about __manifest__.py. Given below is the manifest of the school management module.
# -*- coding: utf-8 -*-
{
  'name': 'School Management',
  'version': '15.0.1.0.0',
  'category': '',
  'author': 'Cybrosys Techno Solutions',
  'website': "https://www.cybrosys.com",
  'company': 'Cybrosys Techno Solutions',
  'maintainer': 'Cybrosys Techno Solutions',
  'summary': 'Record Student Details',
  "description": """To manage School""",
  'depends': ['base'],
   'data': [
   ],
  'qweb': [],
  "license": "AGPL-3",
  'installable': True,
  'auto_install': False,
}
Next, we move on to __init__.py
We have 2 init files, In the main __init__.py, we have to import all the directories from the custom module, which contains python files. The main init of the school_management is given below,
# -*- coding: utf-8 -*-
from . import models
Here we have only a single python directory i.e. models.
Also, there will be another init in the python directories, whereas we have to import all the python files in it. It contains an init as given below
# -*- coding: utf-8 -*-
from . import student
The name of the python file should be the name related to the functionality of the custom module, here we are going to create the student record. So the python file name should be student.py. Similarly, for the views, the name is student_views.xml
Here student.py is the python file in the models. So we import it in the init.
Now let us discuss how to store data in a database. In the python file. i.e student.py we have to create a model let’s say student.student. When you create and define a model, a table is also created in the database. To store values, we have to define different fields. There are different types of fields such as char, int,many2one,one2many, date, etc
In the school management, we need a name, age, photo, gender, student_dob, and student_blood_group
student.py as shown below,
# -*- coding: utf-8 -*-
from odoo import models, fields
class StudentStudent(models.Model):
   _name = 'student.student'
   name = fields.Char(string='Name', required=True)
   age = fields.Integer(string='Age')
   photo = fields.Binary(string='Image')
   gender = fields.Selection([('male', 'Male'), ('female', 'Female'), ('others', 'Others')], string='Gender')
   student_dob = fields.Date(string="Date of Birth")
   student_blood_group = fields.Selection(
       [('A+', 'A+ve'), ('B+', 'B+ve'), ('O+', 'O+ve'), ('AB+', 'AB+ve'),
So in the above code block shows, you can see different types of fields are defined.
Now we have a table and fields to store values.
To view the created fields in the user interface, we have to define a view for the model. In Odoo we use XML files to define the views.
First, we need a menu and a sub-menu. XML file to create a menu and sub-menu is given below,
?xml version="1.0" encoding="UTF-8" ?>
<odoo>
   <data>
        <!--Parent Menu School Management-->
        <menuitem id="school_management_menu_root"
            name="School Management"
            sequence="7"/>
       <!--Menu School Management-->
       <menuitem id="school_management_menu"
          name="School"
          parent="school_management.school_management_menu_root"
          action="action_school_management"
          sequence="0"/>
    </data>
</odoo>
Here you can see a menu, School Management, and a sub-menu Student is created. Since Student is a sub-menu of the parent School management, it has to be specified as a parent in the sub-menu. Also, the sequence is the order of the sequence in which the menu has to appear in the system. This is applicable when you have more than one menu.
On clicking the menu, there has to be an action that should occur. For that, we have to add an action for the model.
<!--School Management Action-->
<record id="action_school_management_tree" model="ir.actions.act_window">
   <field name="name">School Management</field>
   <field name="res_model">student.student</field>
   <field name="view_mode">tree,form</field>
   <field name="help" type="html">
       <p class="o_view_nocontent_smiling_face">
           Create Student Record
       </p>
   </field>
</record>
From the above code blocks, we define an action for the model student.student. res_model is the model name that we defined in python. view_mode is a mode of viewing, there are different modes like kanban, pivot, calendar, tree, form, etc. Currently, we are using tree and form. Also, we need a view where initially it should load a tree view. So we gave in the ordered tree, form. In the help, one can give the help text for the model. Which will appear only when no records are there in the model.
After defining the action, we have to add action to the menu. Now student_views.xml is as given below,
<?xml version="1.0" encoding="UTF-8" ?>
<odoo>
   <data>
       <!--School Management Action-->
      <record id="action_school_management_tree"              model="ir.actions.act_window">
        <field name="name">School Management</field>
        <field name="res_model">student.student</field>
       <field name="view_mode">tree,form</field>
       <field name="help" type="html">
         <p class="o_view_nocontent_smiling_face">
           Create Student Record
         </p>
      </field>
    </record>
    <!--Parent Menu School Management-->
    <menuitem id="school_management_menu_root"
         name="School Management"
         sequence="7"/>
     <!--Menu School Management-->
     <menuitem id="school_management_menu"
         name="School"
         parent="school_management.school_management_menu_root"
         action="action_school_management"
         sequence="0"/>
   </data>
</odoo>
Here for the sub menu we have given the action.
Now one has a default tree and form view. If you need a customized tree and form view, it can be defined as given below,
Form view,
<!--School Management Form View-->
<record id="school_management_view_form" model="ir.ui.view">
   <field name="name">student.view.form</field>
   <field name="model">student.student</field>
   <field name="arch" type="xml">
       <form string="School">
           <sheet>
               <group string="School Management">
                   <group>
                       <field name="name"/>
                       <field name="photo"/>
                   </group>
                   <group>
                       <field name="age"/>
                       <field name="gender"/>
                   </group>
                    <group>
                   </group>
                   <group>
                       <field name="student_dob"/>
                       <field name="student_blood_group"/>
                       <field name="nationality"/>
                   </group>
               </group>
           </sheet>
In the above code, we have added a form and styled it according to the need. One can define more styles to the form.
Similarly, one can define a tree view as given below
<!--School Management Tree View-->
<record id="school_management_view_tree" model="ir.ui.view">
   <field name="name">student.tree</field>
   <field name="model">student.student</field>
   <field name="arch" type="xml">
       <tree>
           <field name="name" string="Name" required="1"/>
       </tree>
   </field>
</record>
Here you could find a tree tag that is used to define a tree.
Now the student_views.xml is as given below,
<?xml version="1.0" encoding="UTF-8" ?>
<odoo>
   <data>
       <!--School Management Form View-->
       <record id="school_management_view_form" model="ir.ui.view">
        <field name="name">student.view.form</field>
        <field name="model">student.student</field>
        <field name="arch" type="xml">
       <form string="School">
           <sheet>
               <group string="School Management">
                   <group>
                       <field name="name"/>
                       <field name="photo"/>
                   </group>
                   <group>
                       <field name="age"/>
                       <field name="gender"/>
                   </group>
                    <group>
                   </group>
                   <group>
                       <field name="student_dob"/>
                       <field name="student_blood_group"/>
                       <field name="nationality"/>
                   </group>
               </group>
           </sheet>
         </form>
      </field>
  </record>
       <!--School Management Tree View-->
<record id="school_management_view_tree" model="ir.ui.view">
   <field name="name">student.tree</field>
   <field name="model">student.student</field>
   <field name="arch" type="xml">
       <tree>
           <field name="name" string="Name" required="1"/>
       </tree>
   </field>
</record>
       <!--School Management Action-->
<record id="action_school_management" model="ir.actions.act_window">
   <field name="name">School Management</field>
   <field name="res_model">student.student</field>
   <field name="view_mode">tree,form</field>
   <field name="help" type="html">
       <p class="o_view_nocontent_smiling_face">
           Create Student Record
       </p>
   </field>
Once you create the view, the path of the XML file has to specify in the manifest,
# -*- coding: utf-8 -*-
{
  'name': 'School Management',
  'version': '15.0.1.0.0',
  'category': '',
  'author': 'Cybrosys Techno Solutions',
  'website': "https://www.cybrosys.com",
  'company': 'Cybrosys Techno Solutions',
  'maintainer': 'Cybrosys Techno Solutions',
  'summary': 'Record Student Details',
  "description": """To manage School""",
  'depends': ['base'],
   'data': [
      'security/ir.model.access.csv',
      'views/student_views.xml',
  ],
  'qweb': [],
  "license": "AGPL-3",
  'installable': True,
  'auto_install': False,
}
In the data, one should add the path of the XML file ie, student_views.xml.
Now we have a table and data from the python and user interface views from the XML. With these two things, one can install the module. But you can not find the created menus in the system. This is because of the access rights. Users should be given the access right to read, write, create and delete the records from the model.
To set access rights, we need a directory with the name security and file in the name ir.model.access.csv. Which is a CSV file, as the name indicates it gives the user access to the model.
id,name,model_id:id,group_id:id,perm_read,perm_write,perm_create,perm_unlink
access_student_student_user,student.student,model_student_student,base.group_user,1,1,1,1
We have to specify the model and the user to which the access is permitted. Here from the above code, we give access to the base.group_user, which is considered an internal user.
Once you add the file ir.model.access.csv, Its path has to be added to the manifest. And the manifest will be as follows,
# -*- coding: utf-8 -*-
{
  'name': 'School Management',
  'version': '15.0.1.0.0',
  'category': '',
  'author': 'Cybrosys Techno Solutions',
  'website': "https://www.cybrosys.com",
  'company': 'Cybrosys Techno Solutions',
  'maintainer': 'Cybrosys Techno Solutions',
  'summary': 'Record Student Details',
  "description": """To manage School""",
  'depends': ['base'],
   'data': [
      'security/ir.model.access.csv',
      'views/student_views.xml',
  ],
  'qweb': [],
  "license": "AGPL-3",
  'installable': True,
  'auto_install': False,
}
Similar to the XML files, the path of the CSV also has to add to the manifest
Now restart the odoo service and switch to developer mode. Go to -> Apps -> Update App List -> Update
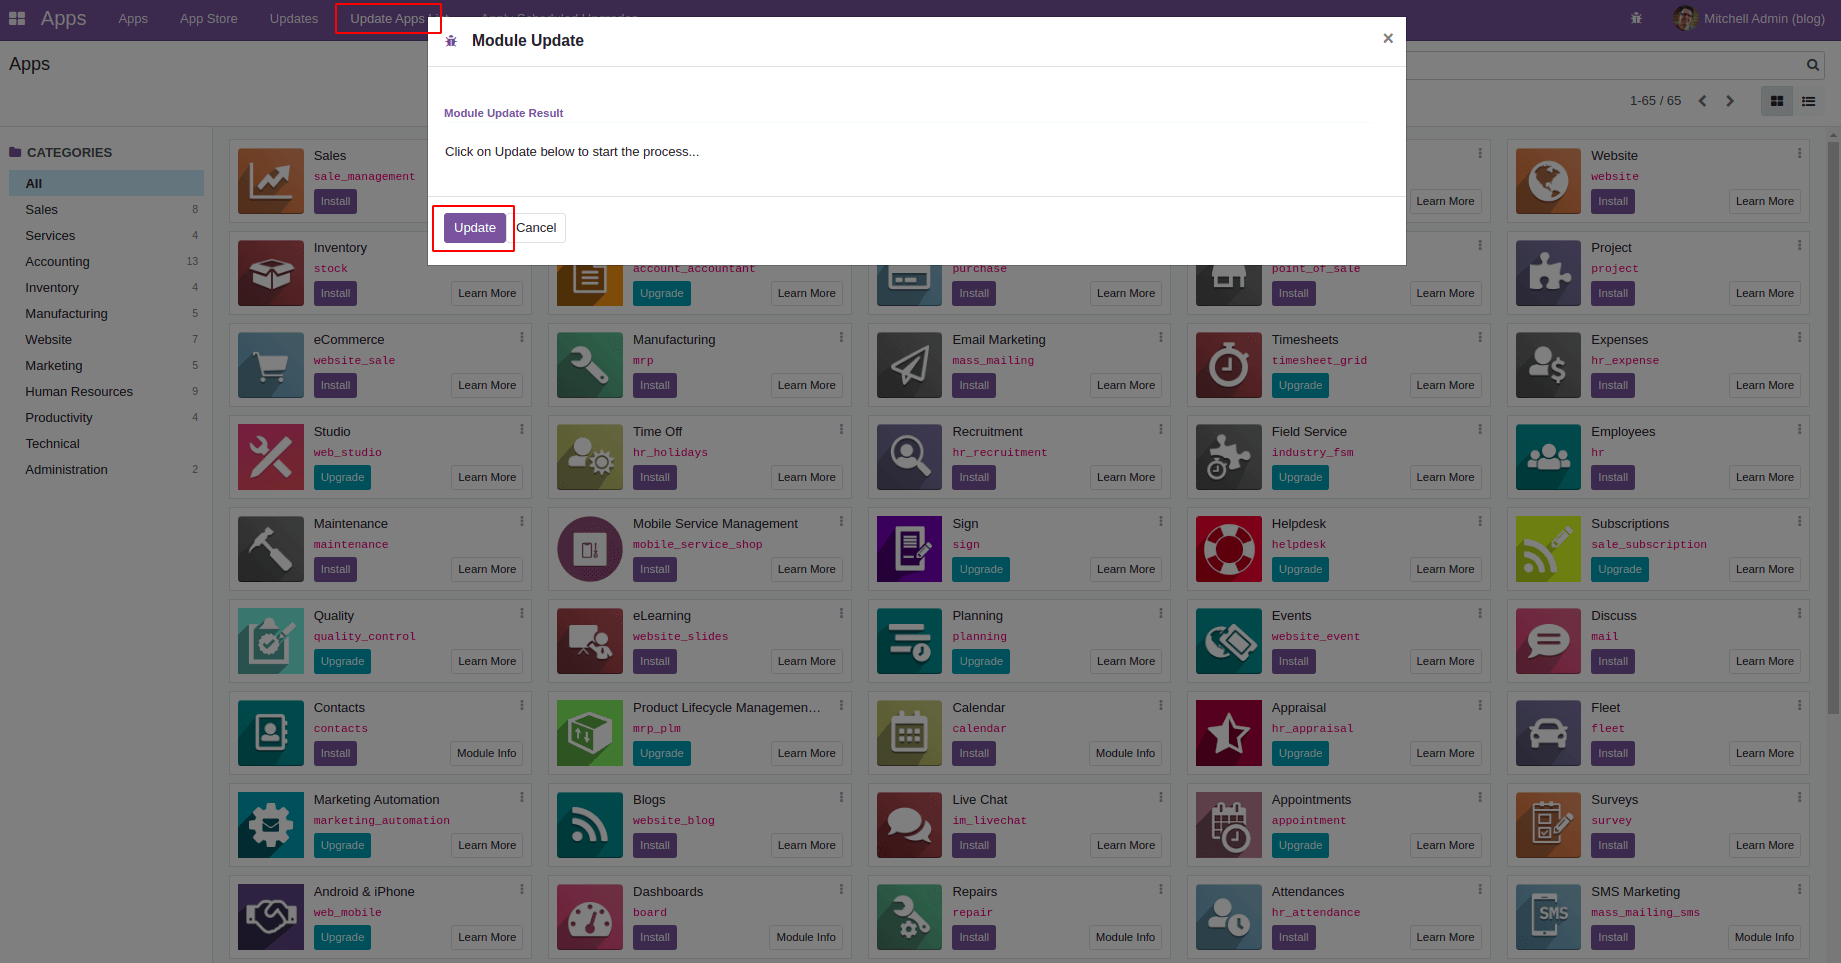
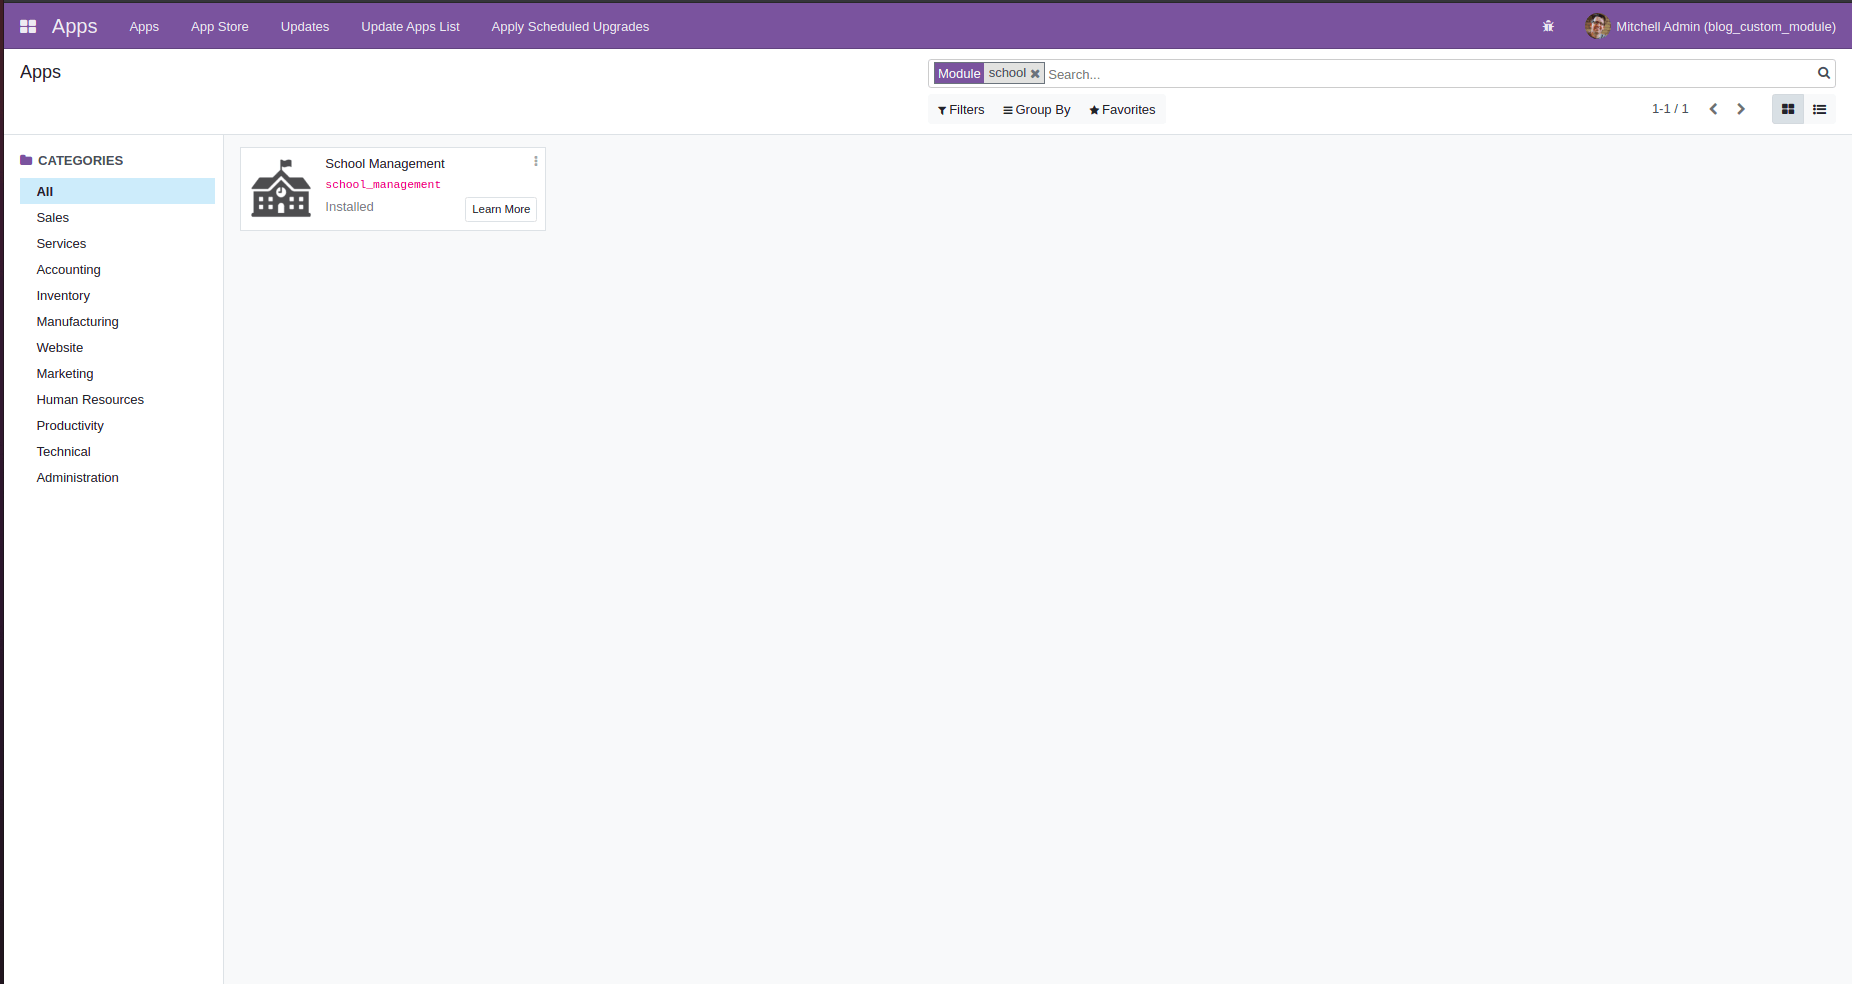
Once you update the app list, the school_management module will be visible in the app list as given below
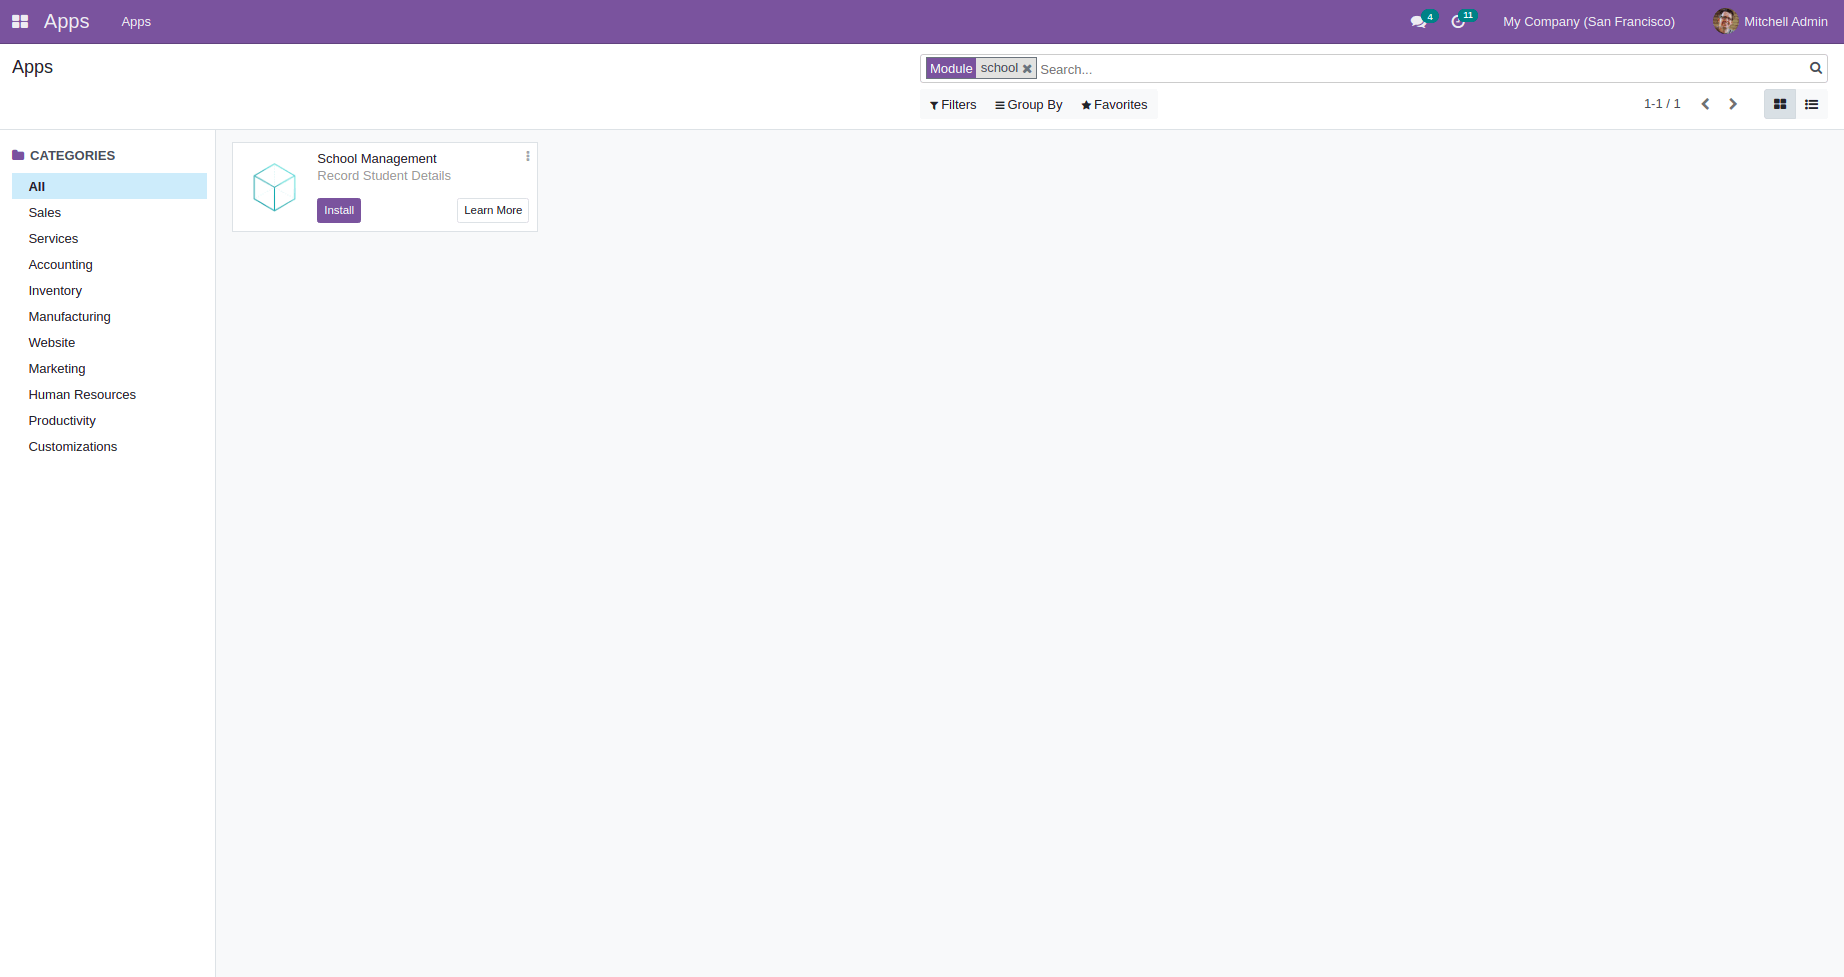
Click on install to install the module.
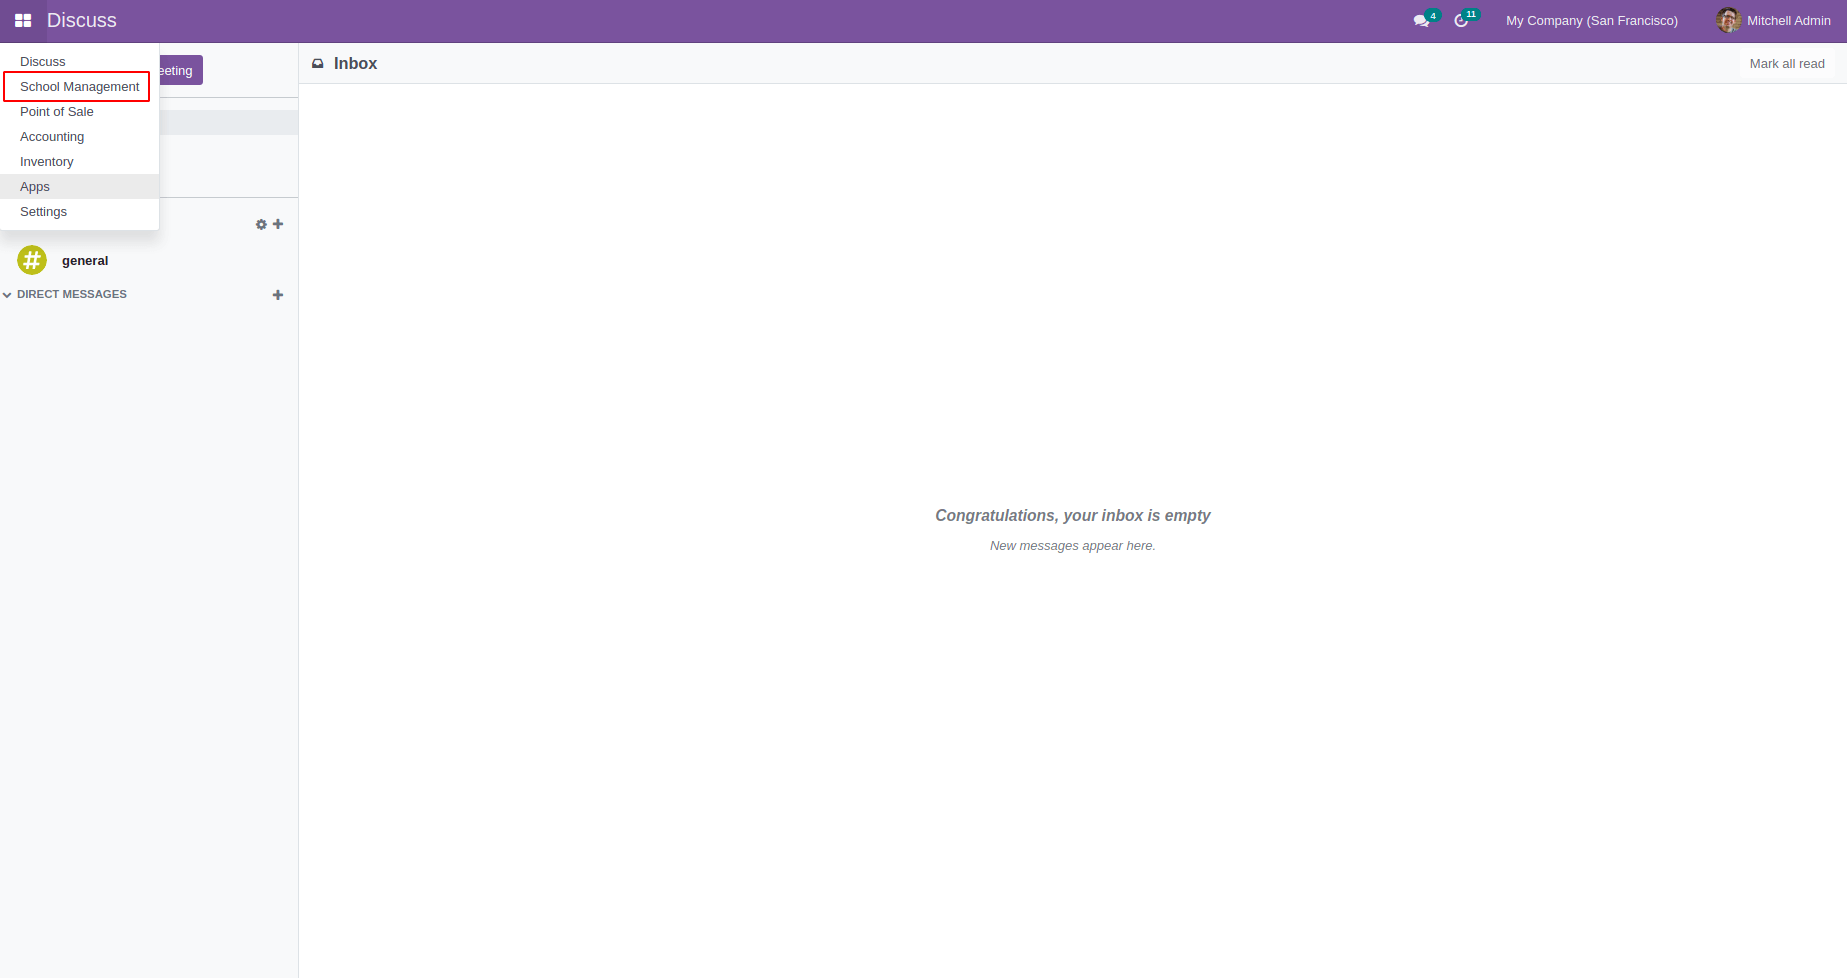
Once the module has been installed you can see the parent menu, the School Management.
Click on School management.
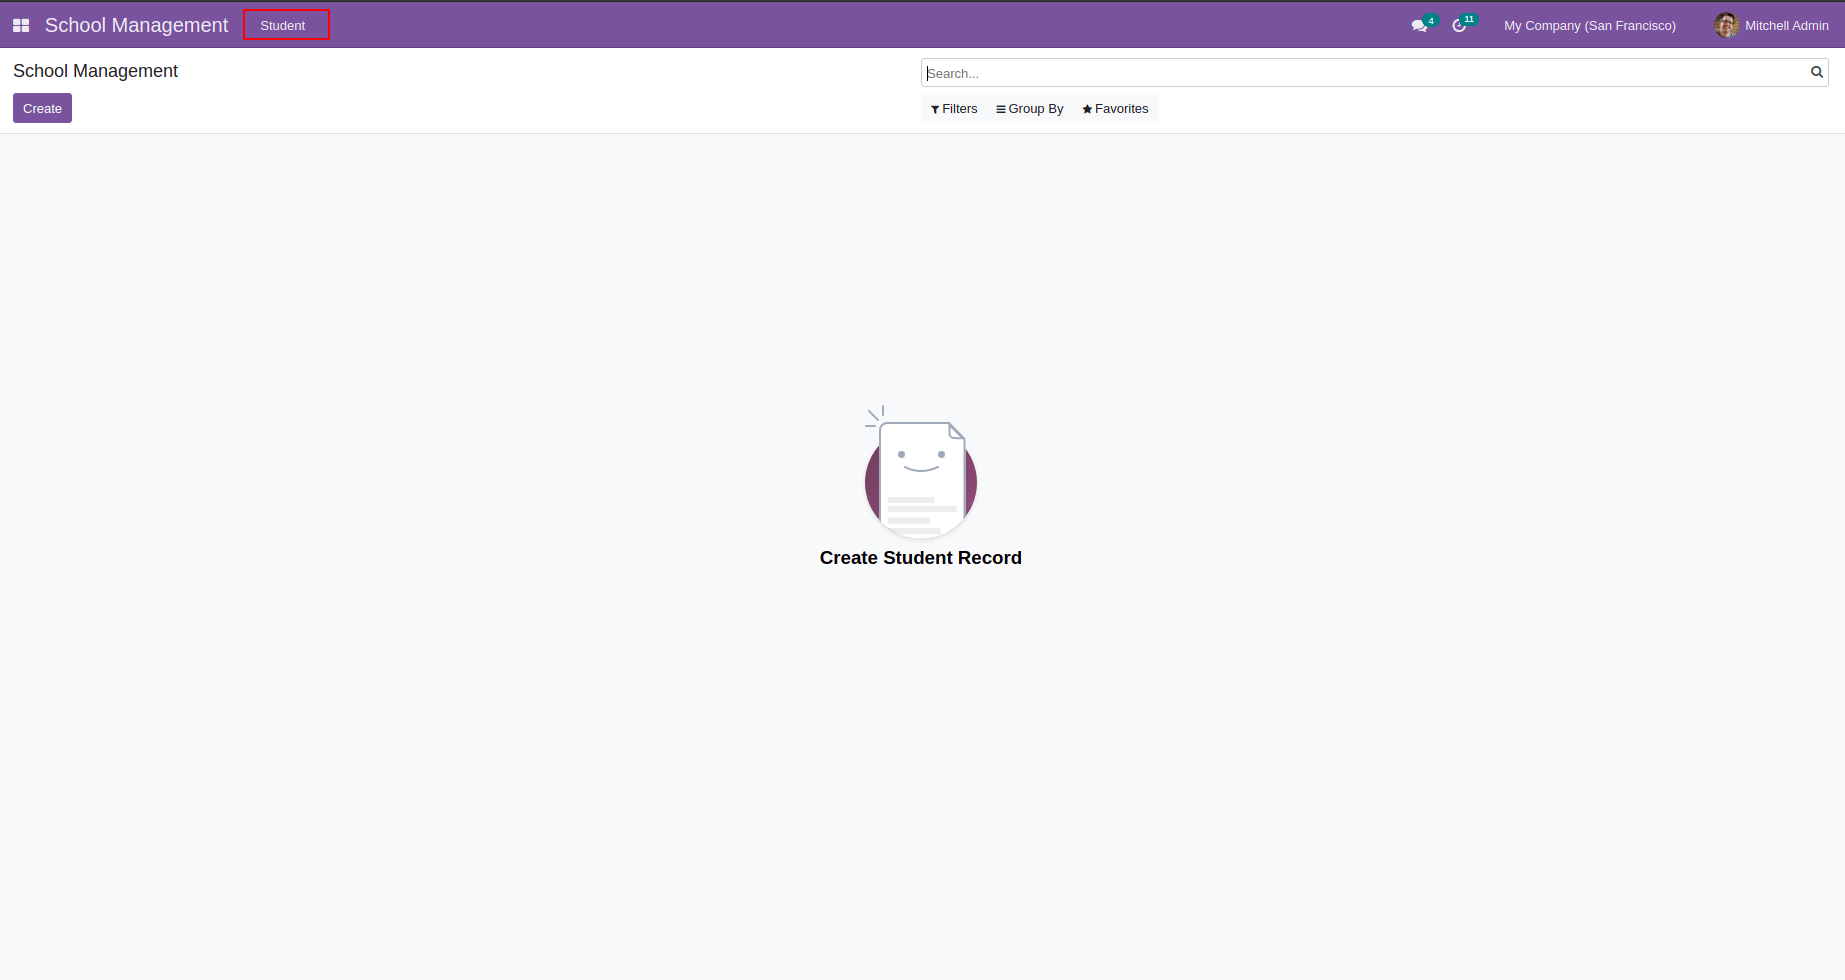
Here you can find the submenu Student, also you could see the help text given in the action.
Now one can create the student record,
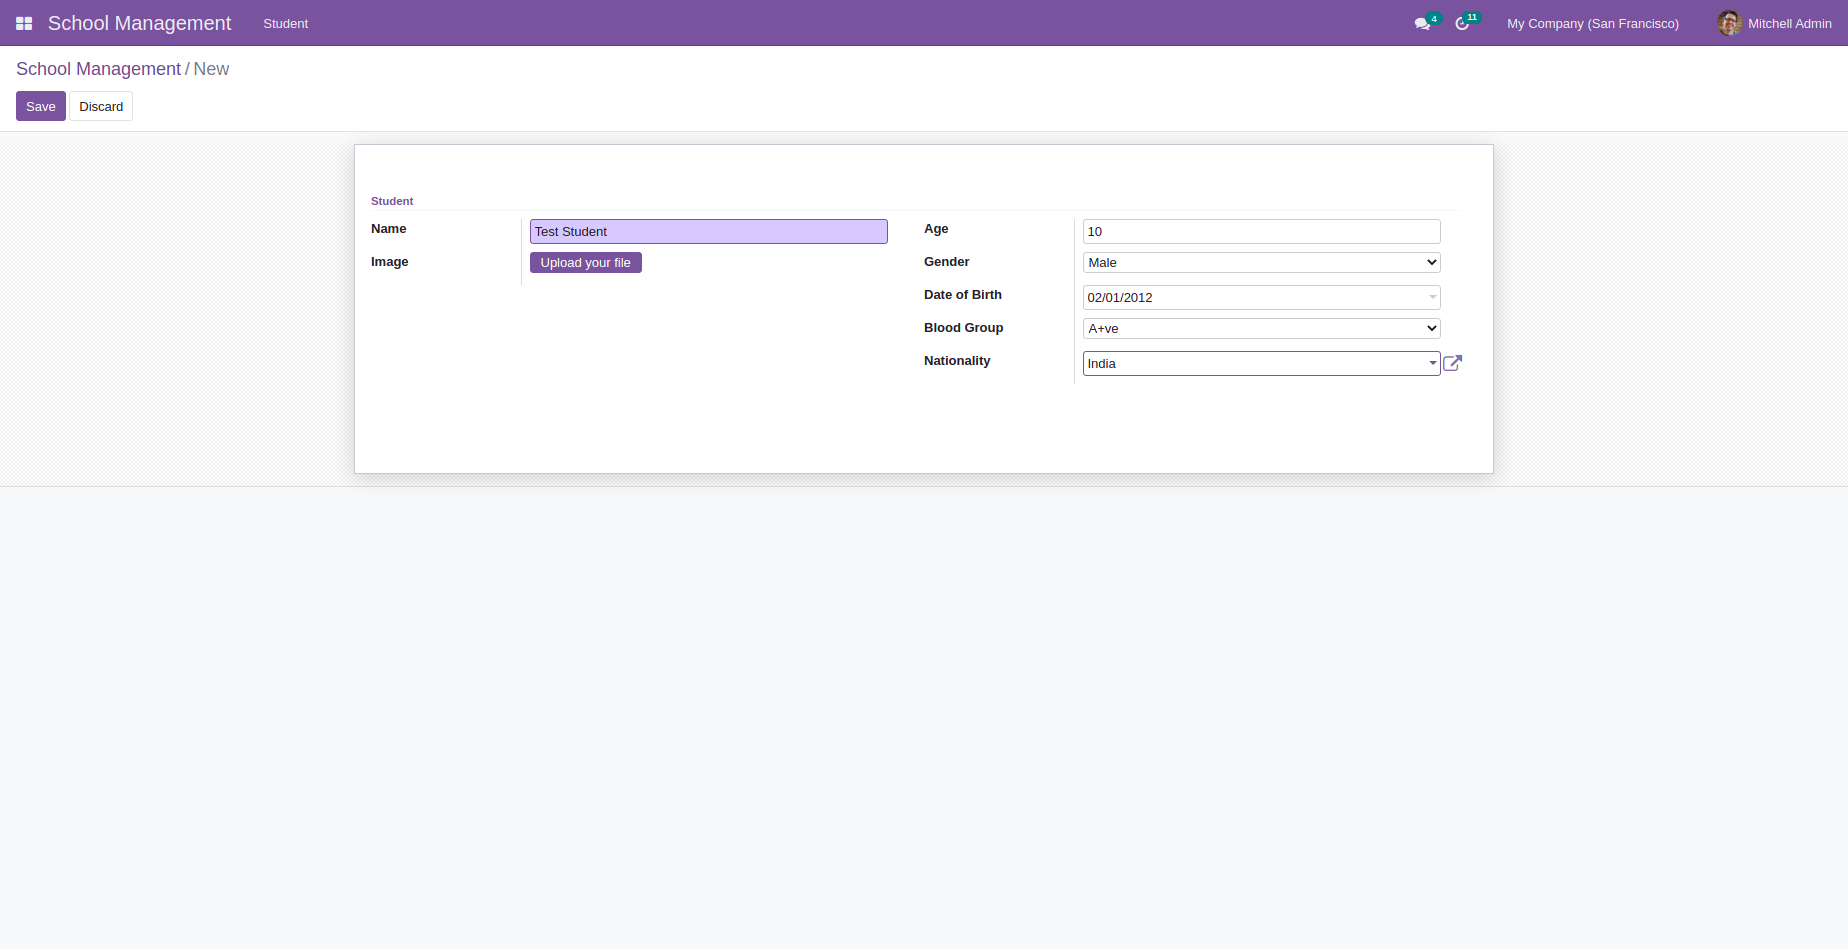
You can see all the fields which are defined.
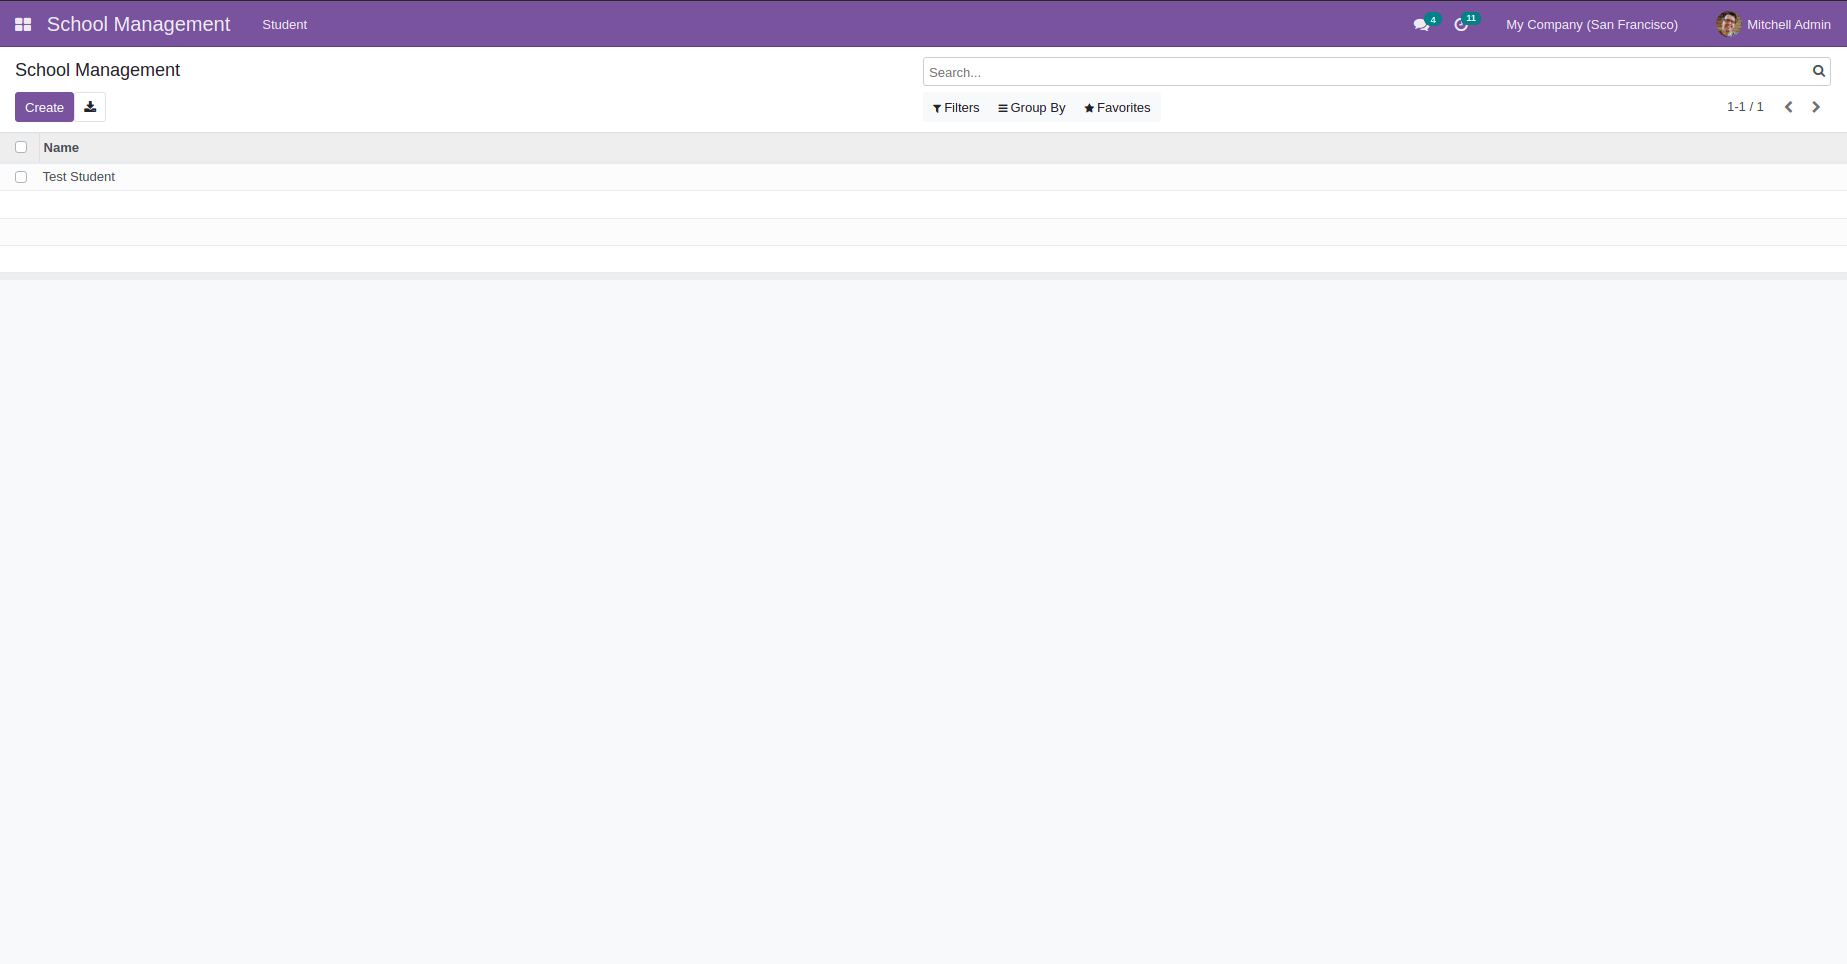
Once you create the record, by default, when you click on the menu School Management, you can find the default view as a tree.
Each time you make changes in the XML file, you will need to upgrade the module. When you make changes in the python file, make sure that you restart the service.
To upgrade, check module-info and click on the kebab menu below.
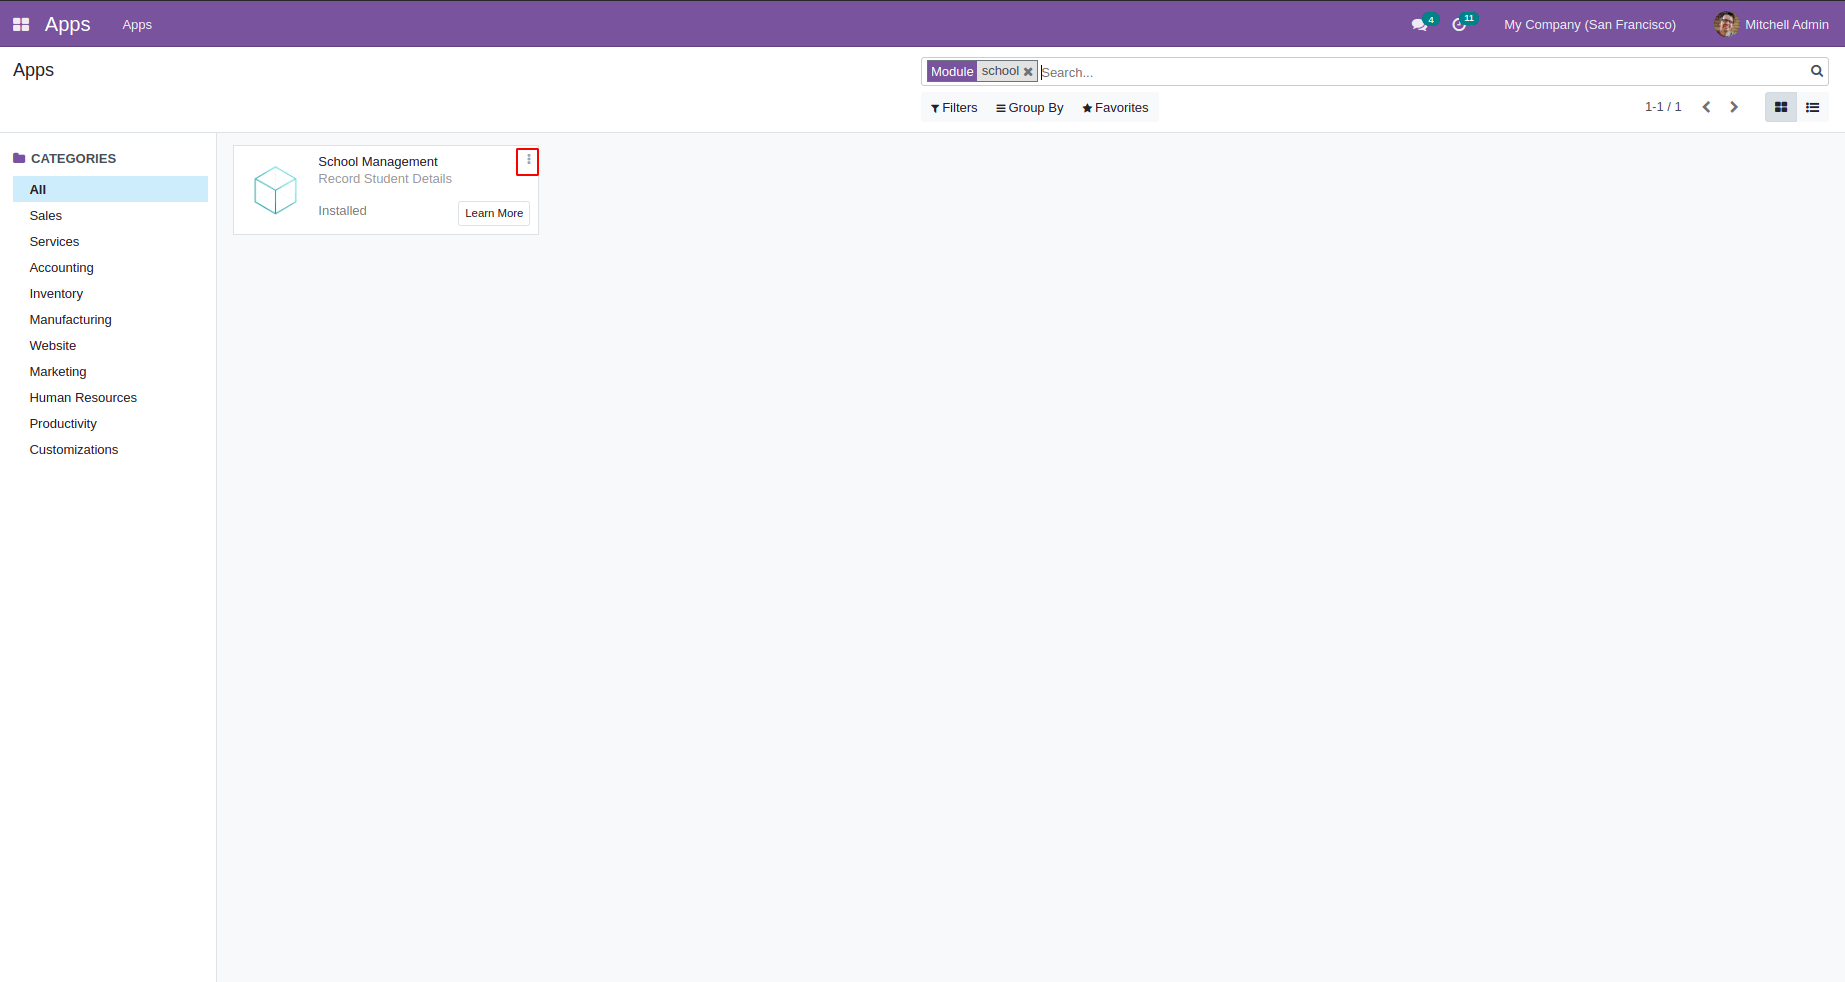
Once you click, you can find options to upgrade, module-info, learn more, uninstall.
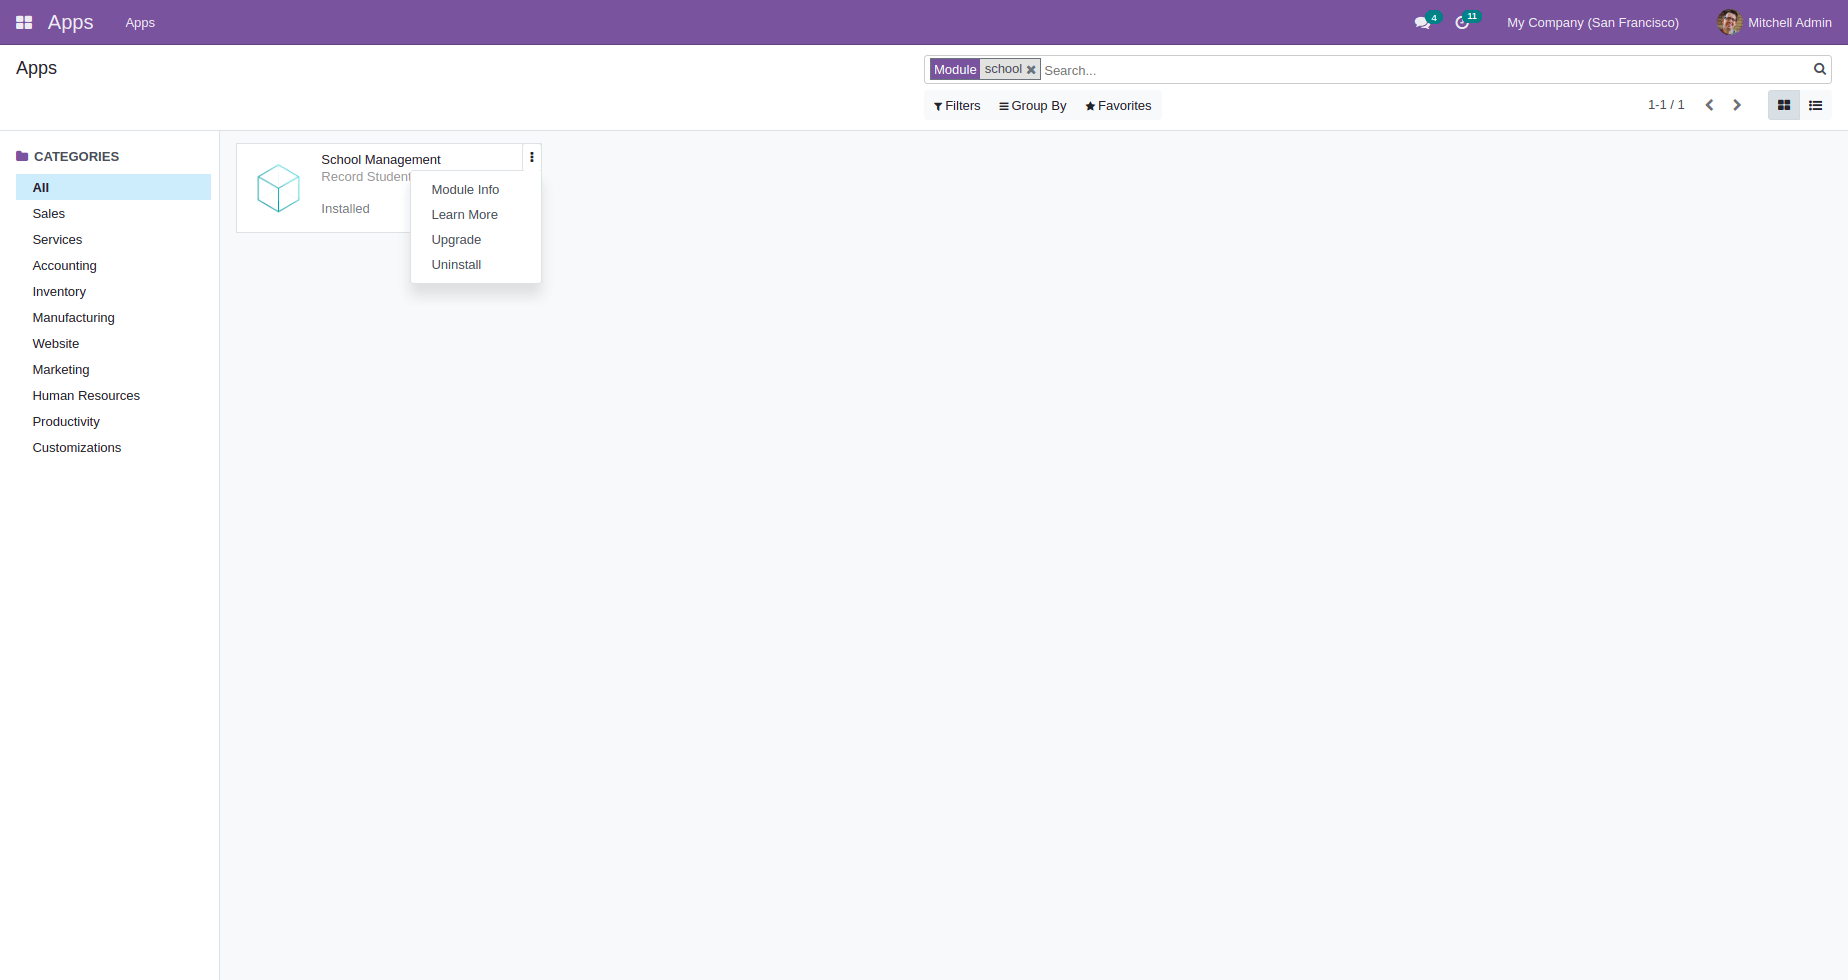
In the module info, you could see the module information given in the manifest,
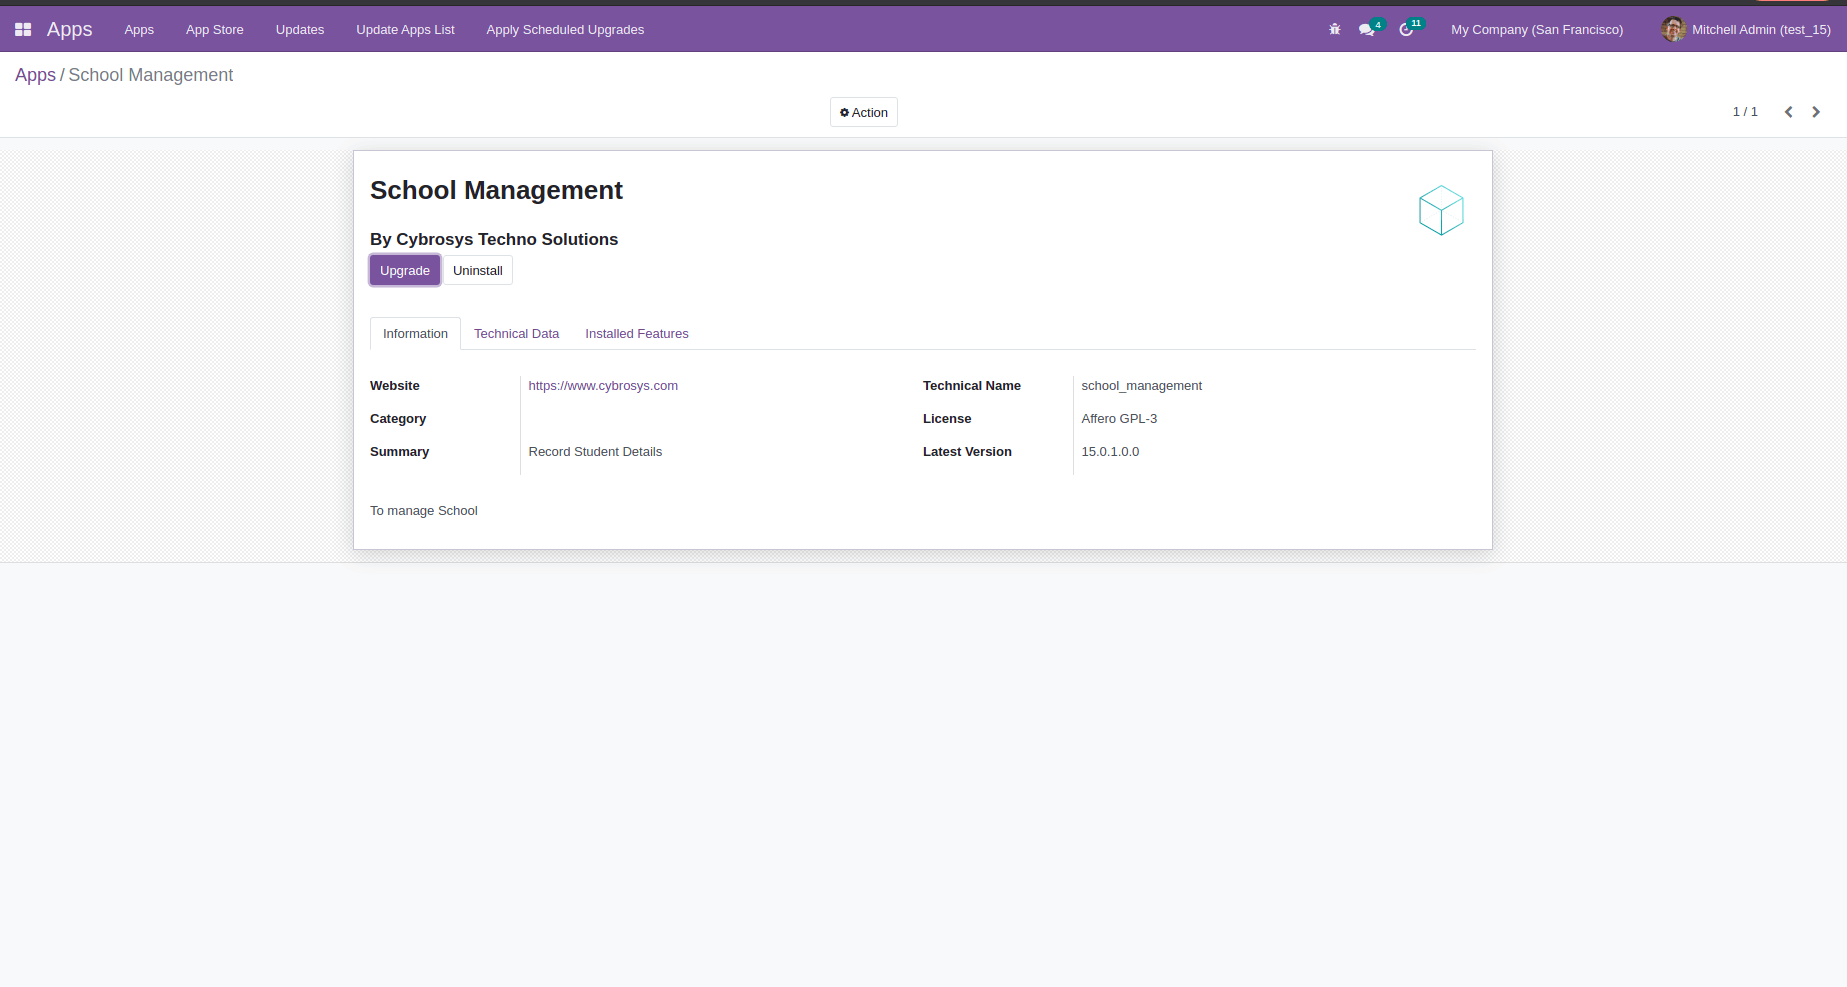
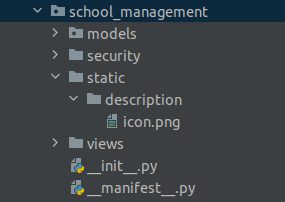
Now let us discuss how to add an icon for the module. To add a module icon, create a directory named static, create another directory description in the fixed and add the icon.png. The name of the image should be an icon, and it should be in png format.
Now restart the service Go to Apps -> Update App List -> Update. Now the icon will be updated in the module.
In this manner, you will create and craft exceptional modules in the Odoo platform.
Happy Coding!