In the realm of business communication, emails play a pivotal role, serving as a vital channel connecting businesses with their customers and partners. Odoo 17, a robust enterprise resource planning (ERP) platform, simplifies this communication process by allowing the creation and utilization of email templates. These templates prove invaluable in saving time and maintaining consistency in the information shared with various stakeholders.
Module Dependencies
Before delving into email template creation, ensure your custom module has the necessary dependencies. Open the __manifest.py__ file and include 'mail' and 'contacts' in the 'depends' list. This ensures that your module inherits essential functionalities from the mail module.
'depends': ['mail', 'contacts', 'sale_management']
Email Template Construction
Odoo email templates are crafted using XML, Jinja2, and Python. To initiate this process, create a new record in the XML file, specifying essential details about the email template.
<?xml version="1.0" encoding="UTF-8" ?>
<odoo>
    <data>
        <!--Template to send demo mail template for the customer-->
        <record id="mail_template_blog" model="mail.template">
            <field name="name">Email Template For Blog</field>
            <field name="model_id" ref="test_app.model_test_model"/>
            <field name="email_from">{{ object.company_id.email }}</field>
            <field name="email_to">{{object.partner_id.email}}</field>
            <field name="subject">Mail Template: Demo Mail</field>
            <field name="body_html" type="html">
                <div style="margin: 0px; padding: 0px;">
                    <div style="justify-content: center;background-color: #714B67; padding:0.6rem;padding-left: 35px;text-decoration: none; color: #fff; border-radius: 5px; font-size:13px;width:40%">
                        <h2>
                            Hi,
                            <t t-out="object.partner_id.name"/>
                        </h2>
                        <div>
                            <h3>
                                This is demo mail send to you for checking the
                                mail template.
                            </h3>
                        </div>
                    </div>
                    <br/>
                    <br/>
                    Regards,
                    <br/>
                    <t t-out="object.company_id.name"/>
                    <br/>
                </div>
            </field>
        </record>
    </data>
</odoo>
Understanding the Fields
1. id: The external ID for the generated record.
2. model: The email template model, is consistent across all templates.
3. name: A recognizable name for the email template.
4. ref: Values needed from a model that requires sending.
5. email_from: The sender's email address.
6. email_to: The recipient's email address.
7. subject: The title of the email.
8. body_html: The email content is constructed using Jinja2.
Python Function for Email Sending
To facilitate the utilization of the email template, create a Python function to invoke the template. For that, add a button in the required model and add an action for that button, from that function, we can call our email template using the following code:
Adding a button in the Form view:
<?xml version="1.0" encoding="utf-8"?>
<odoo>
<record id="sale_order_view_form" model="ir.ui.view">
<field name="name">sale.order.view.form</field>
<field name="model">sale.order</field>
<field name="inherit_id" ref="sale.view_order_form"/>
<field name="arch" type="xml">
<xpath expr="//button[@name='action_quotation_send']" position="after">
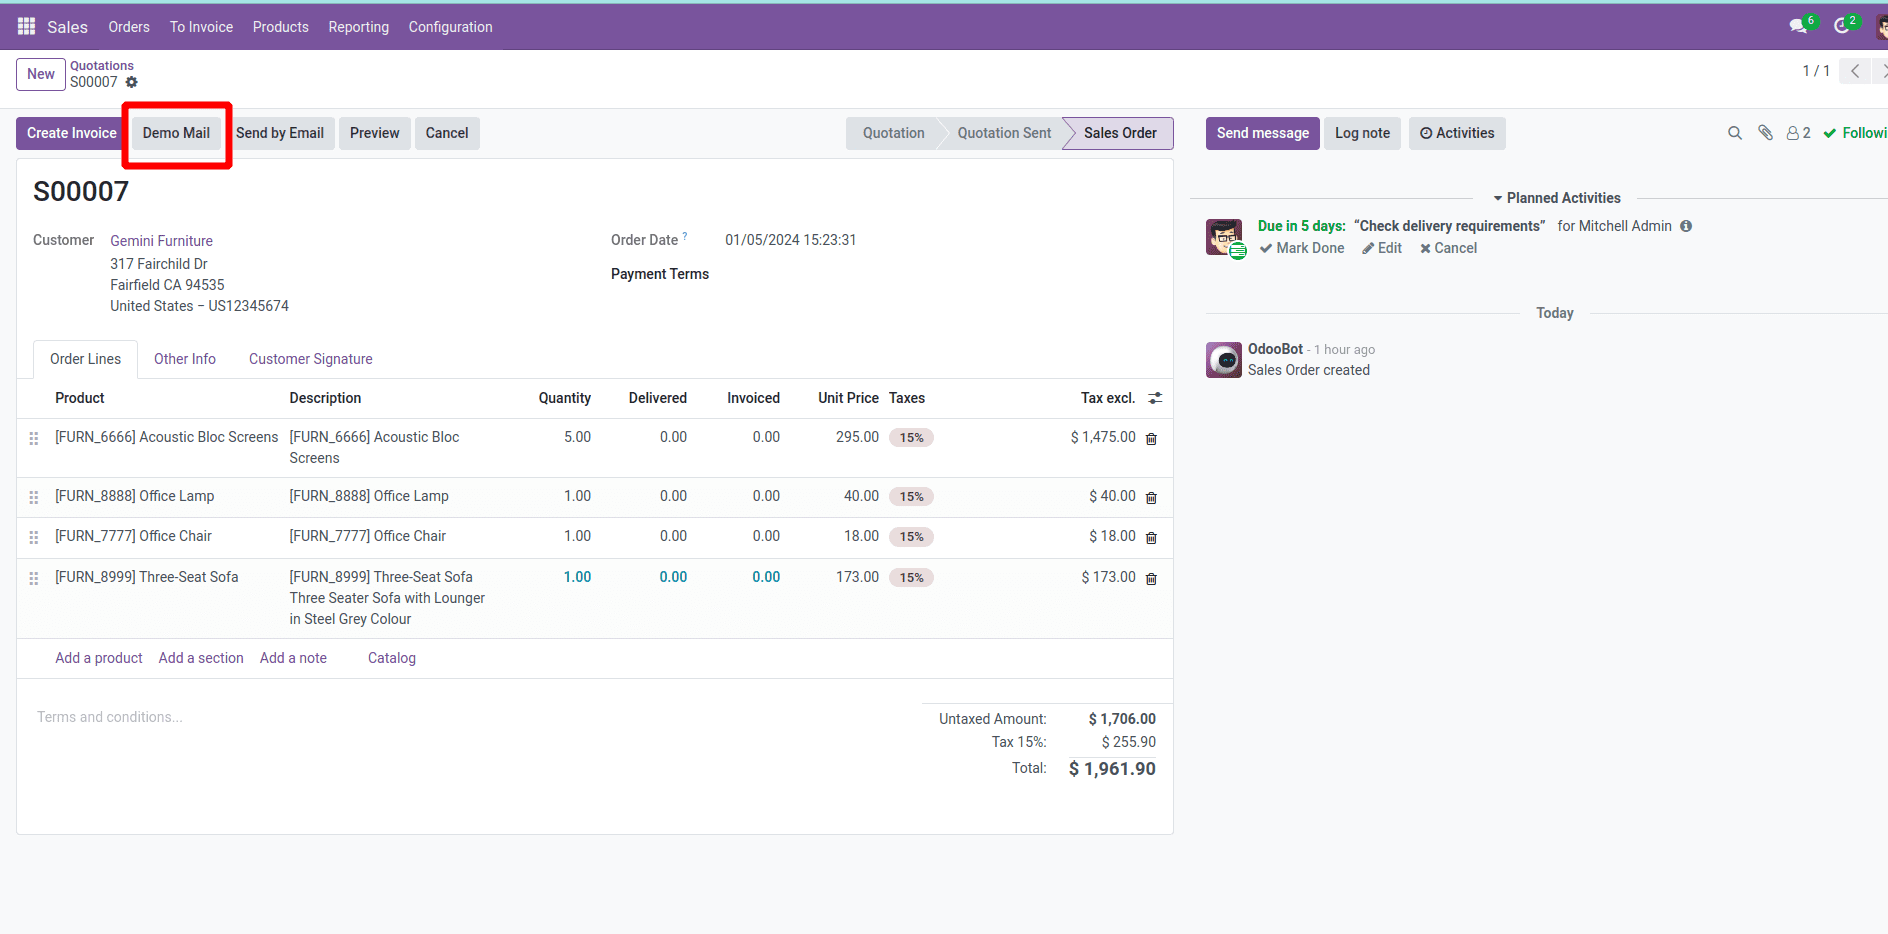
<button name="send_mail" type="object" string="Demo Mail" class="oe_stat_button"/>
</xpath>
</field>
</record>
</odoo>
In the backend view, you can see a button like this:
The Python code for the button action:
def action_send_email(self):
   mail_template = self.env.ref(“test_app.mail_template_blog”)
   mail_template.send_mail(self.id, force_send=True)
After configuring the mail servers, you can see the mail will be sent to the respective receivers when triggering the mail function through a button click.
At the receiver end, we can see that the mail will look like this:

By following these comprehensive steps, businesses can ensure not only a consistent and professional communication approach but also significant time savings in the process. Odoo 17 empowers organizations to navigate the complexities of modern business communication with efficiency and ease, making it a valuable asset for businesses of all scales and industries.
To read more about creating an email template in Odoo 16, refer to our blog How to Create Email Template in Odoo 16