Deliver Content by Email Once Invoice is Validated in Odoo 16 Sales
An invoice for specific products purchased by the customer is necessary for a business. Firms create a Sales order when a buyer shows interest in various commodities. At the end of a transaction, an invoice is generated for a customer once the item is delivered. Additionally, it is possible to email the customer regarding the invoice details. Most companies face difficulties in forwarding a large number of emails to individuals. Using ERP software, we can lessen the work pressure and send emails after affirming invoices to the people smoothly. Odoo 16 Sales module is an effective way to manage your invoice data of commodities and maintain a considerable count of emails.
This blog ensures users deliver content by email once validating the invoice in Odoo 16 Sales module.
The digital copies, such as the warranty or manual of a product, are sent to the customer through email after invoice confirmation. So, a person knows all the details of using an item. Odoo 16 Sales module assist you in managing bulk emails regarding product data after verifying invoice.
Activate Deliver Content by Email feature in Settings
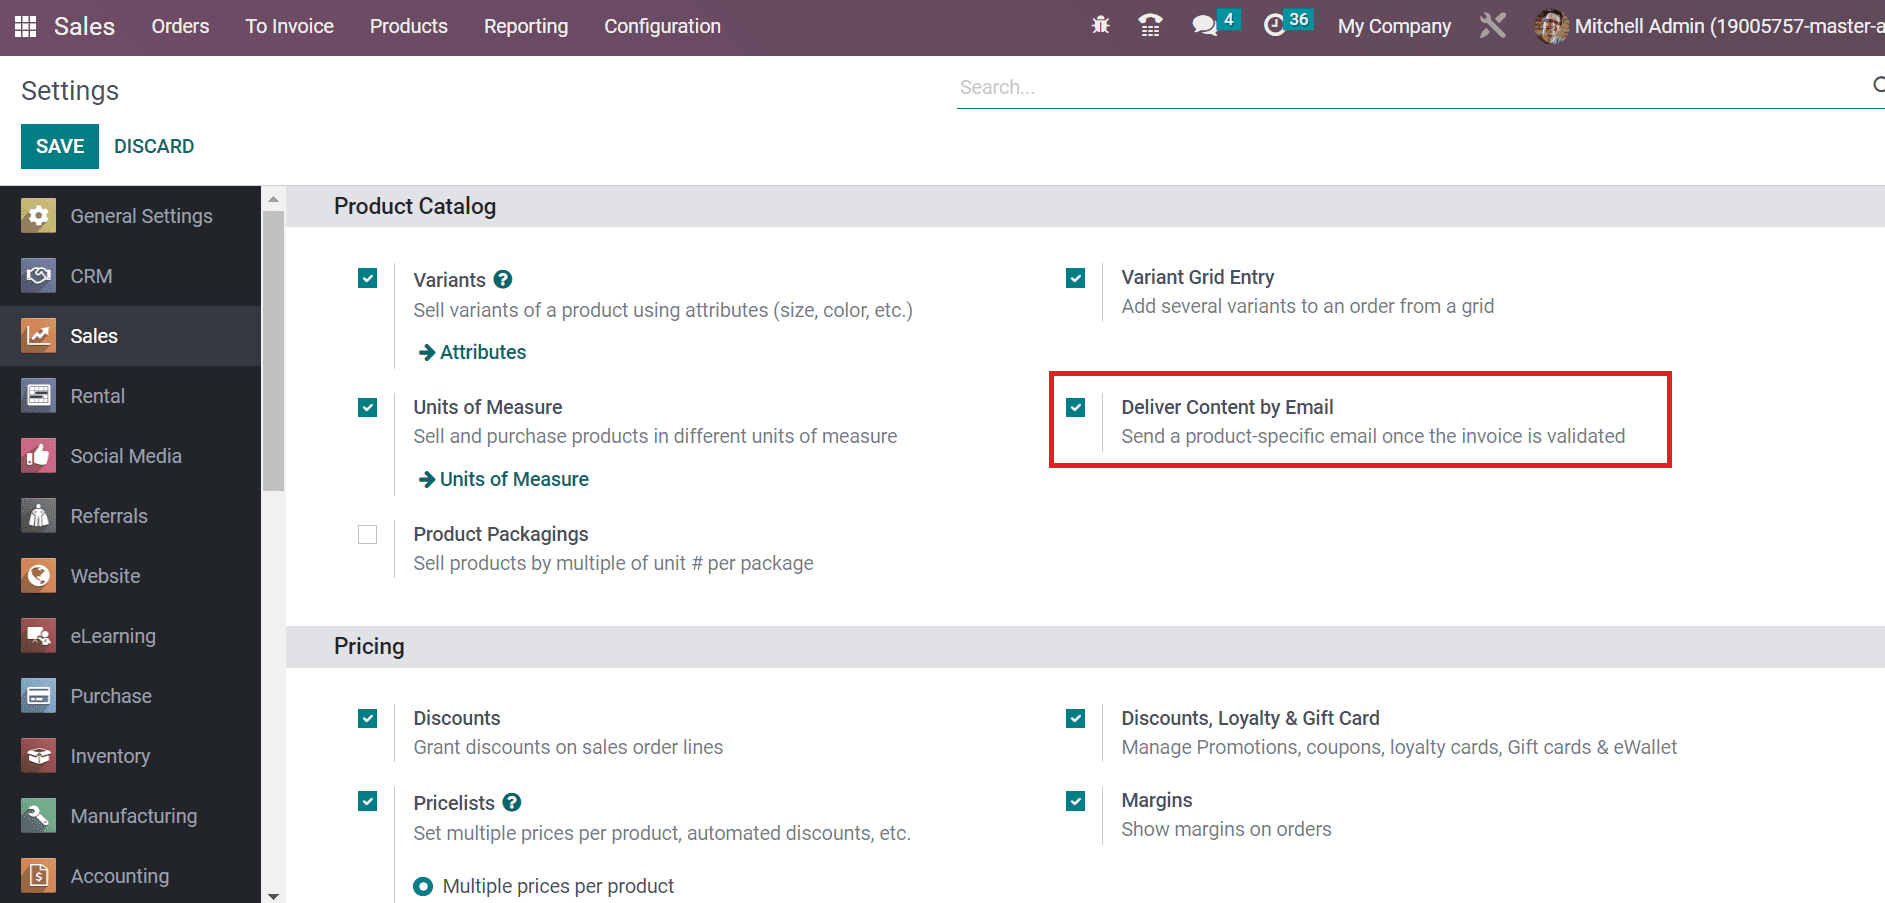
To send emails to customers, we need to enable the Deliver Content by Email option in the Odoo Settings. You can access the Settings menu in Configuration, and a Product Catalog section is viewable. Activate the Deliver Content by Email option below the Product Catalog section as defined in the screenshot below.
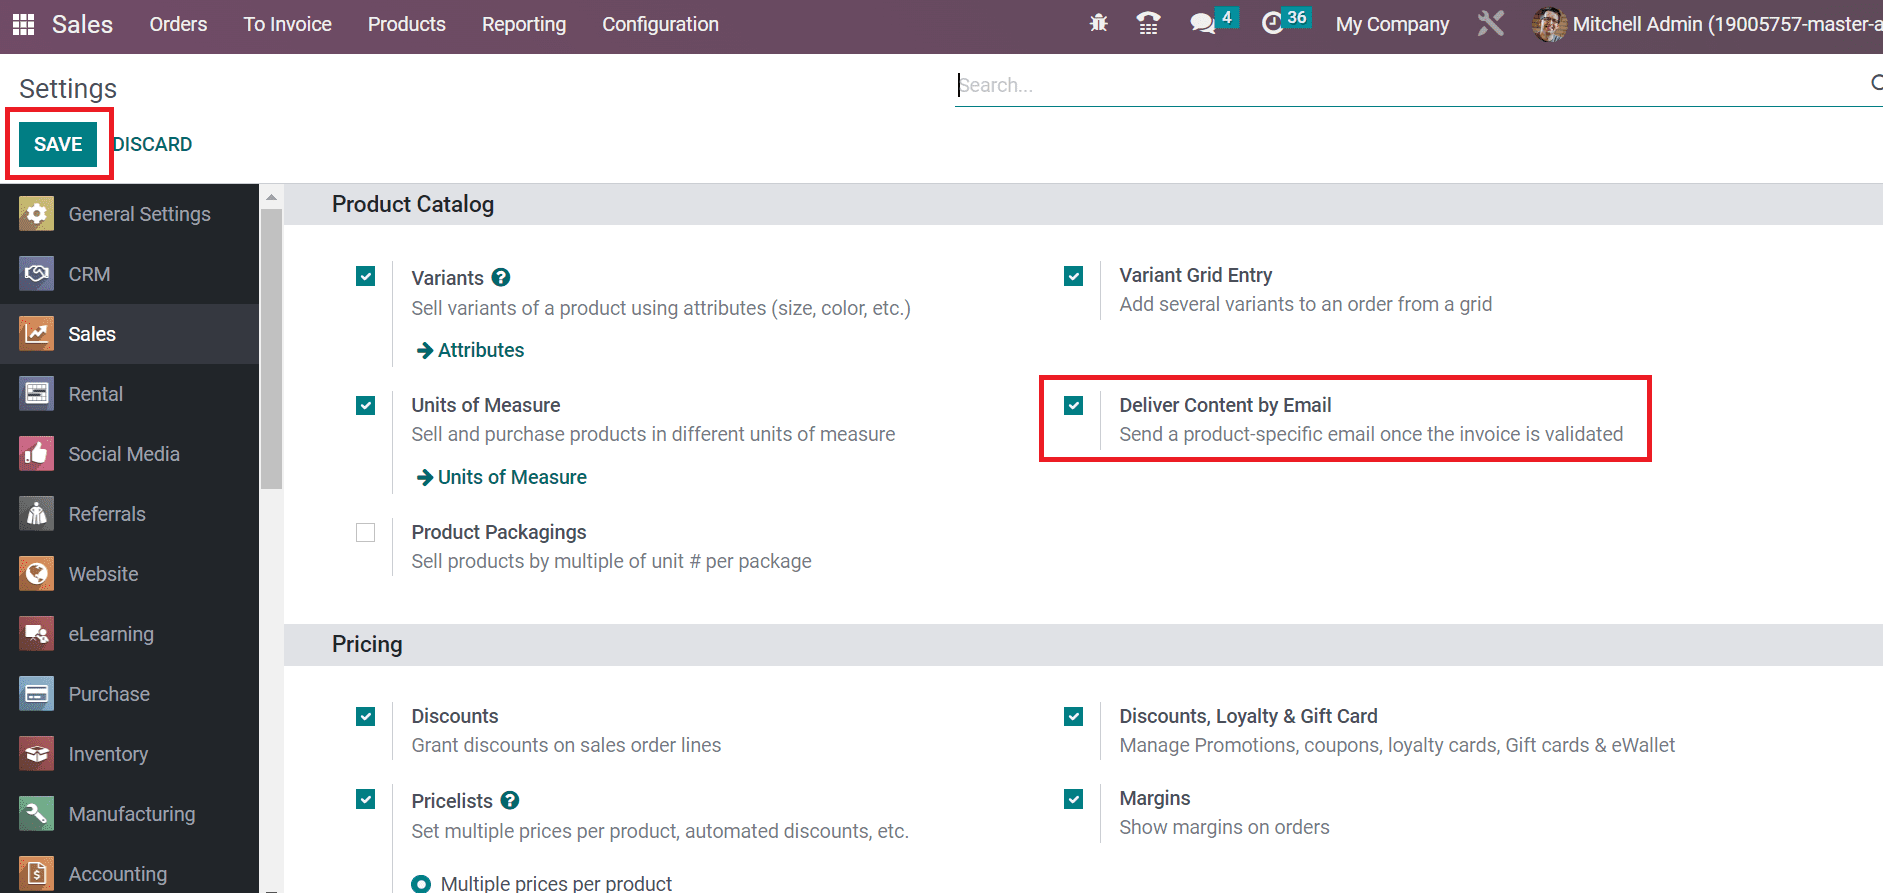
Users can forward an email containing product information once authenticated the invoice by enabling the Deliver Content by Email option. After enabling this option, click the SAVE button on the Settings page, as symbolized in the screenshot below.
Next, let’s create an invoice after formulating a sales quotation for the product.
To Create an Invoice after Formulating a Sales Quotation in Odoo 16
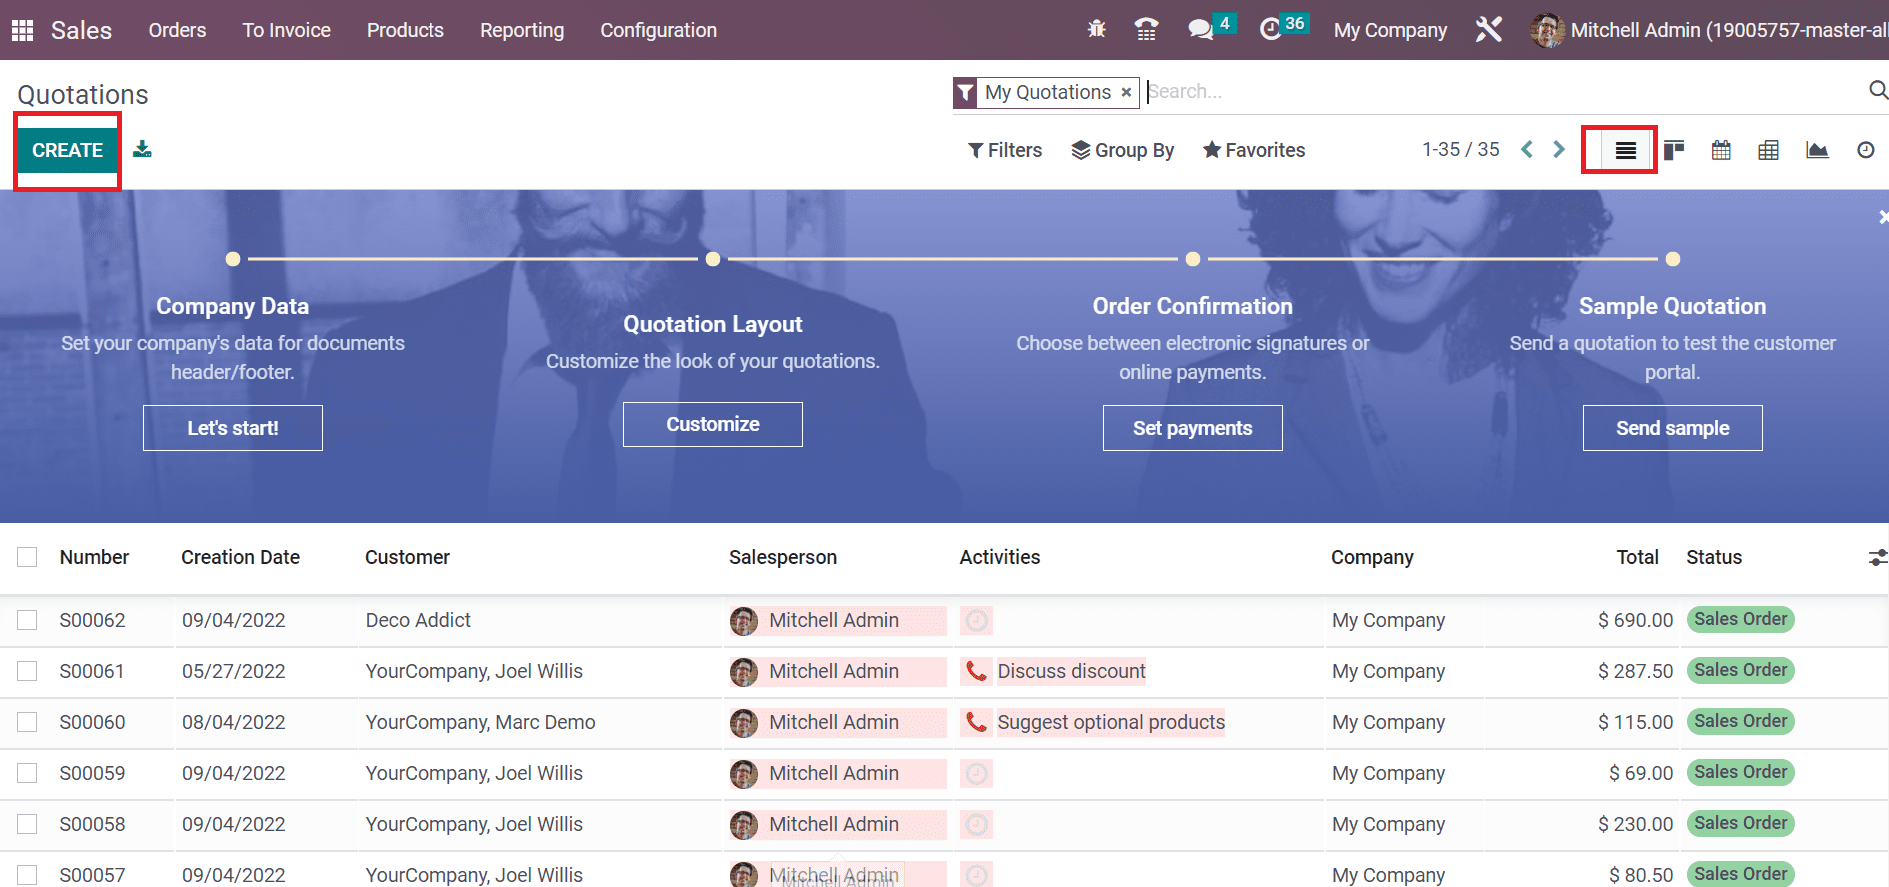
Before processing an invoice, we must develop a Sales Quotation in Odoo 16. Choose the Quotations menu in the Orders tab, and the record related to all created quotations is approachable to a user. In the List view, you can see the feature of each quotation, including Creation Date, Status, Salesperson, Number, Customer, etc. To define a recent quotation, press the CREATE icon on the Quotations screen, as demonstrated in the screenshot below.
In the new screen, pick your client in the Customer option, and the Invoice/Delivery address is clear to the user dynamically.
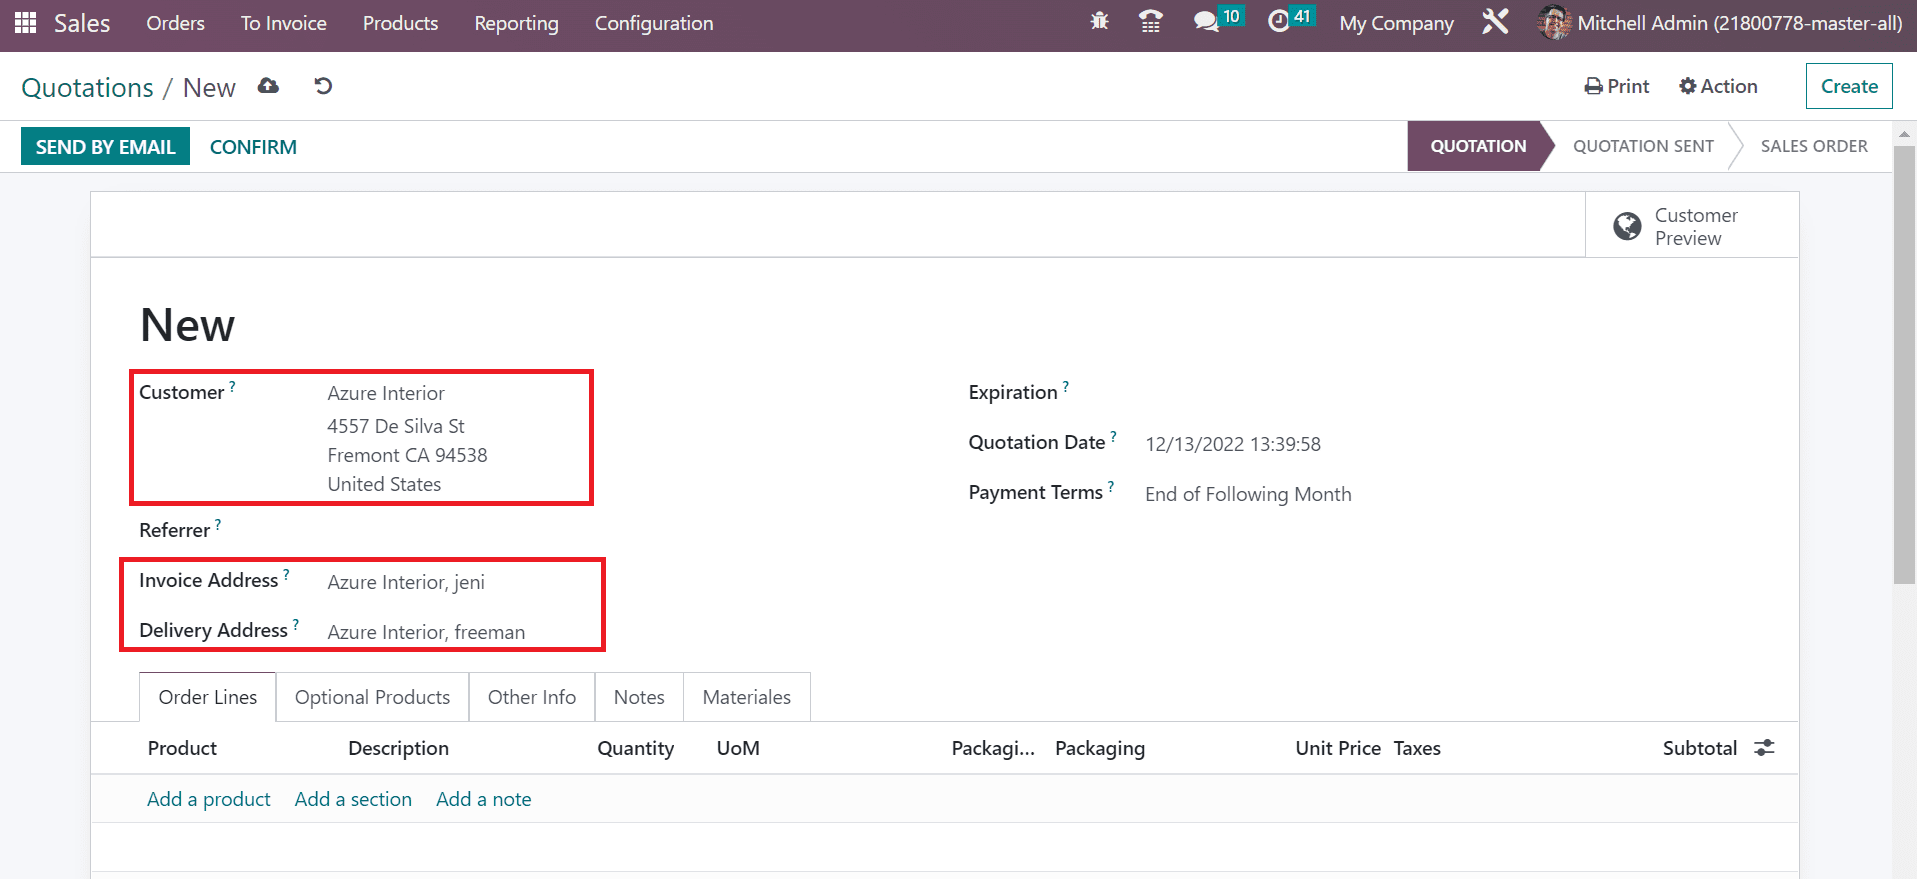
The official address of the buyer is considered an Invoice Address. On the other hand, the address for delivering goods or services to customers is a Delivery address. Moreover, users can select a template for sales quotations within the Quotation Template field. Later, specify the validation date in the Expiration field, as mentioned in the screenshot below.

Apply the creation date of the order inside the Quotation Date field and select the Pricelist as the current price for your product. The period defines payment installments for a specific date, known as Payment Terms. Users can pick a particular payment term for their item within the Payment Terms field, as specified in the screenshot below.
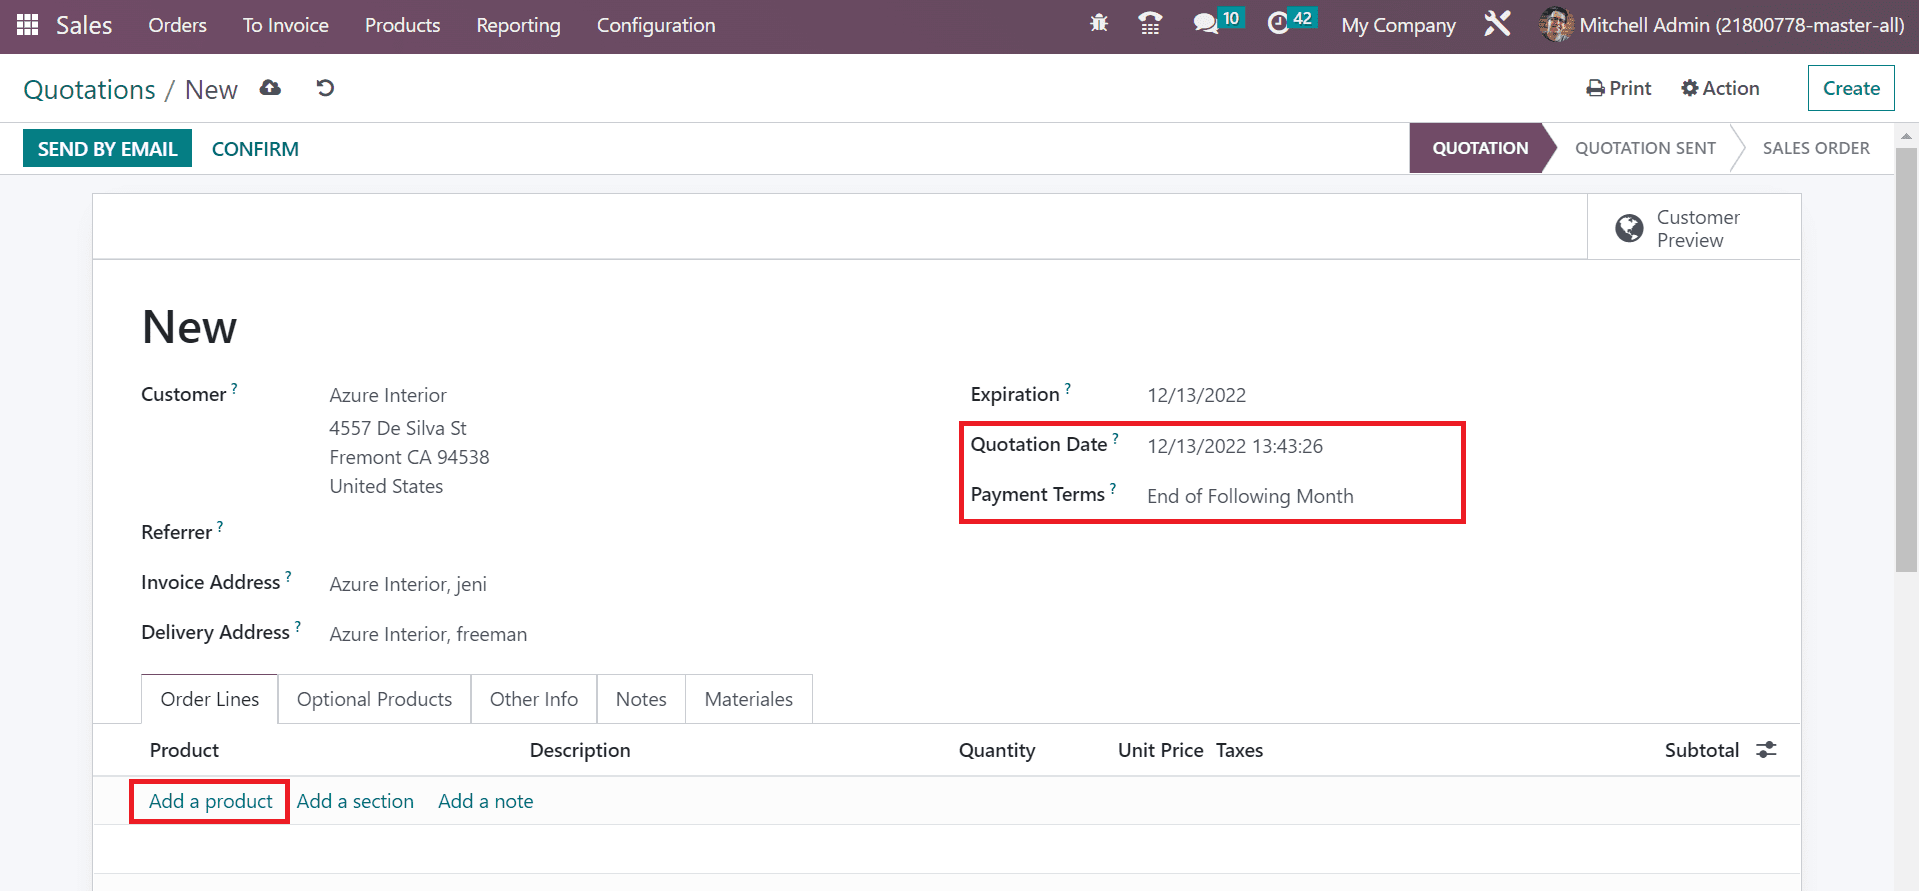
Here, we select the End of the Following Month within the Payment Terms field. Later, the user can choose a material by selecting the Add a product option beneath the Order Lines tab, as marked in the screenshot above. A new space appears inside the Order Lines tab, and select your item as indicated in the screenshot.
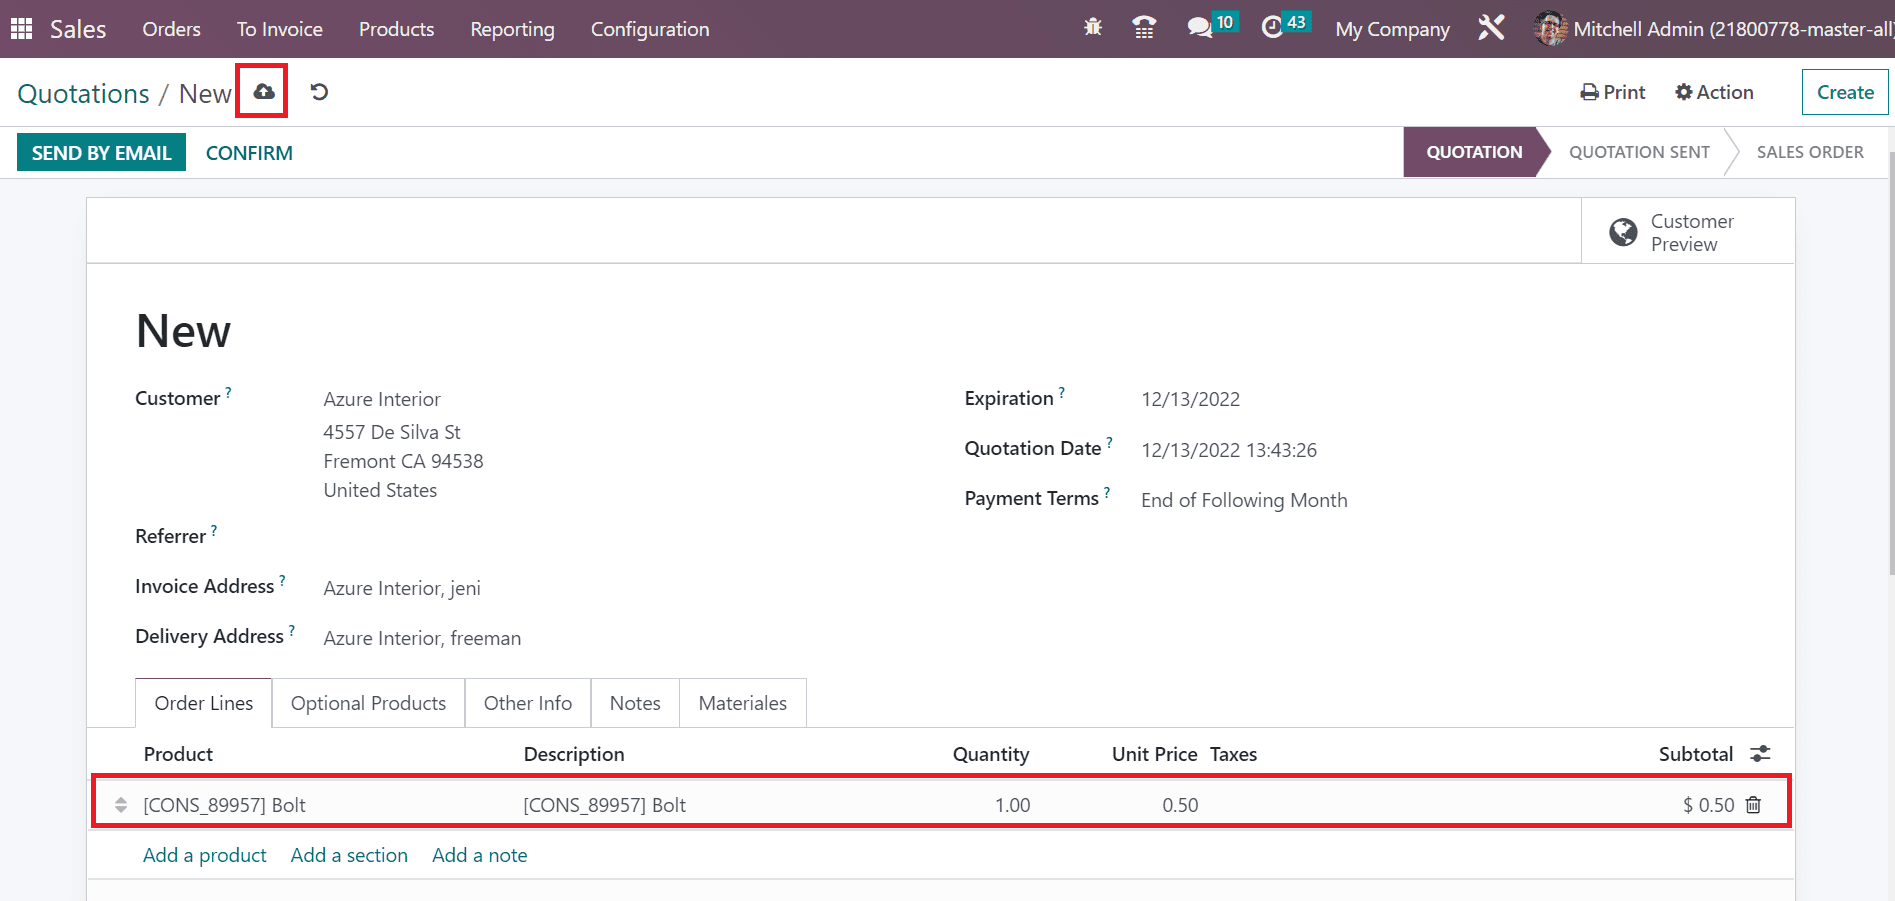
Here, we choose one Bolt quantity for customers and click the save manually icon to secure your data. After saving the details, we can send the quotation by clicking on CONFIRM icon in the Quotations window.
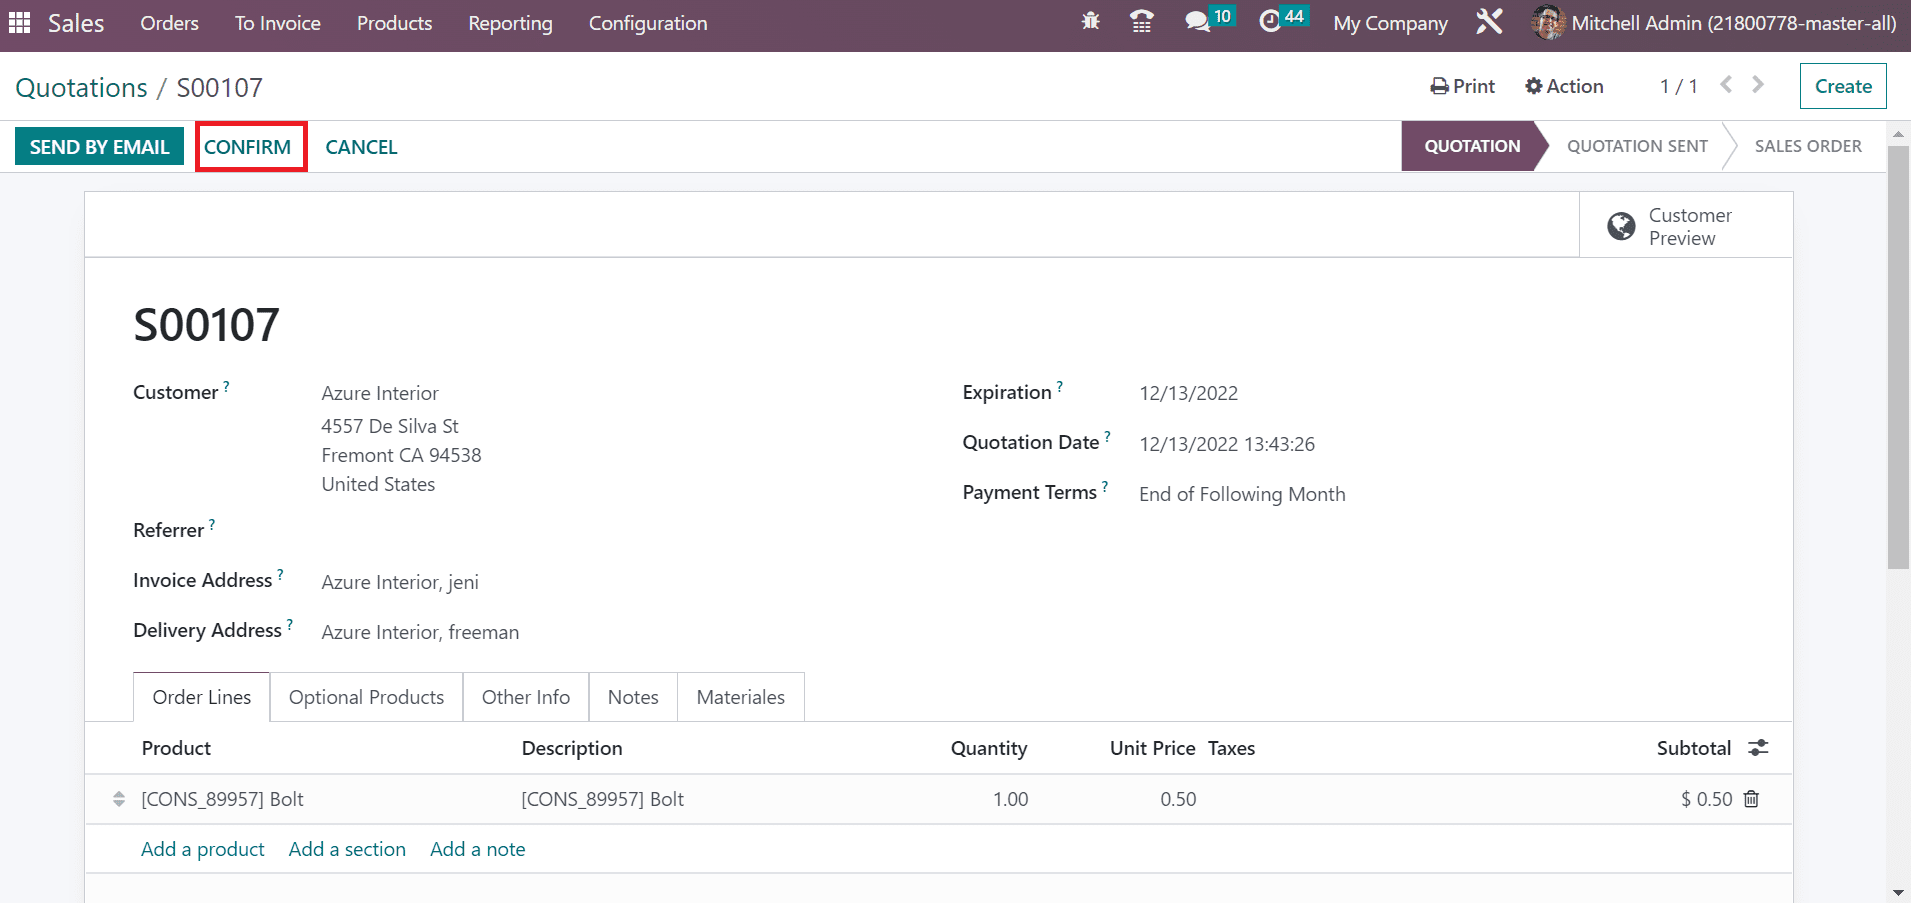
We can see that the QUOTATION stage is changed to SALES ORDER in the Quotations window. Also, the user can develop an invoice after verification by selecting the CREATE INVOICE button, as cited in the screenshot below.
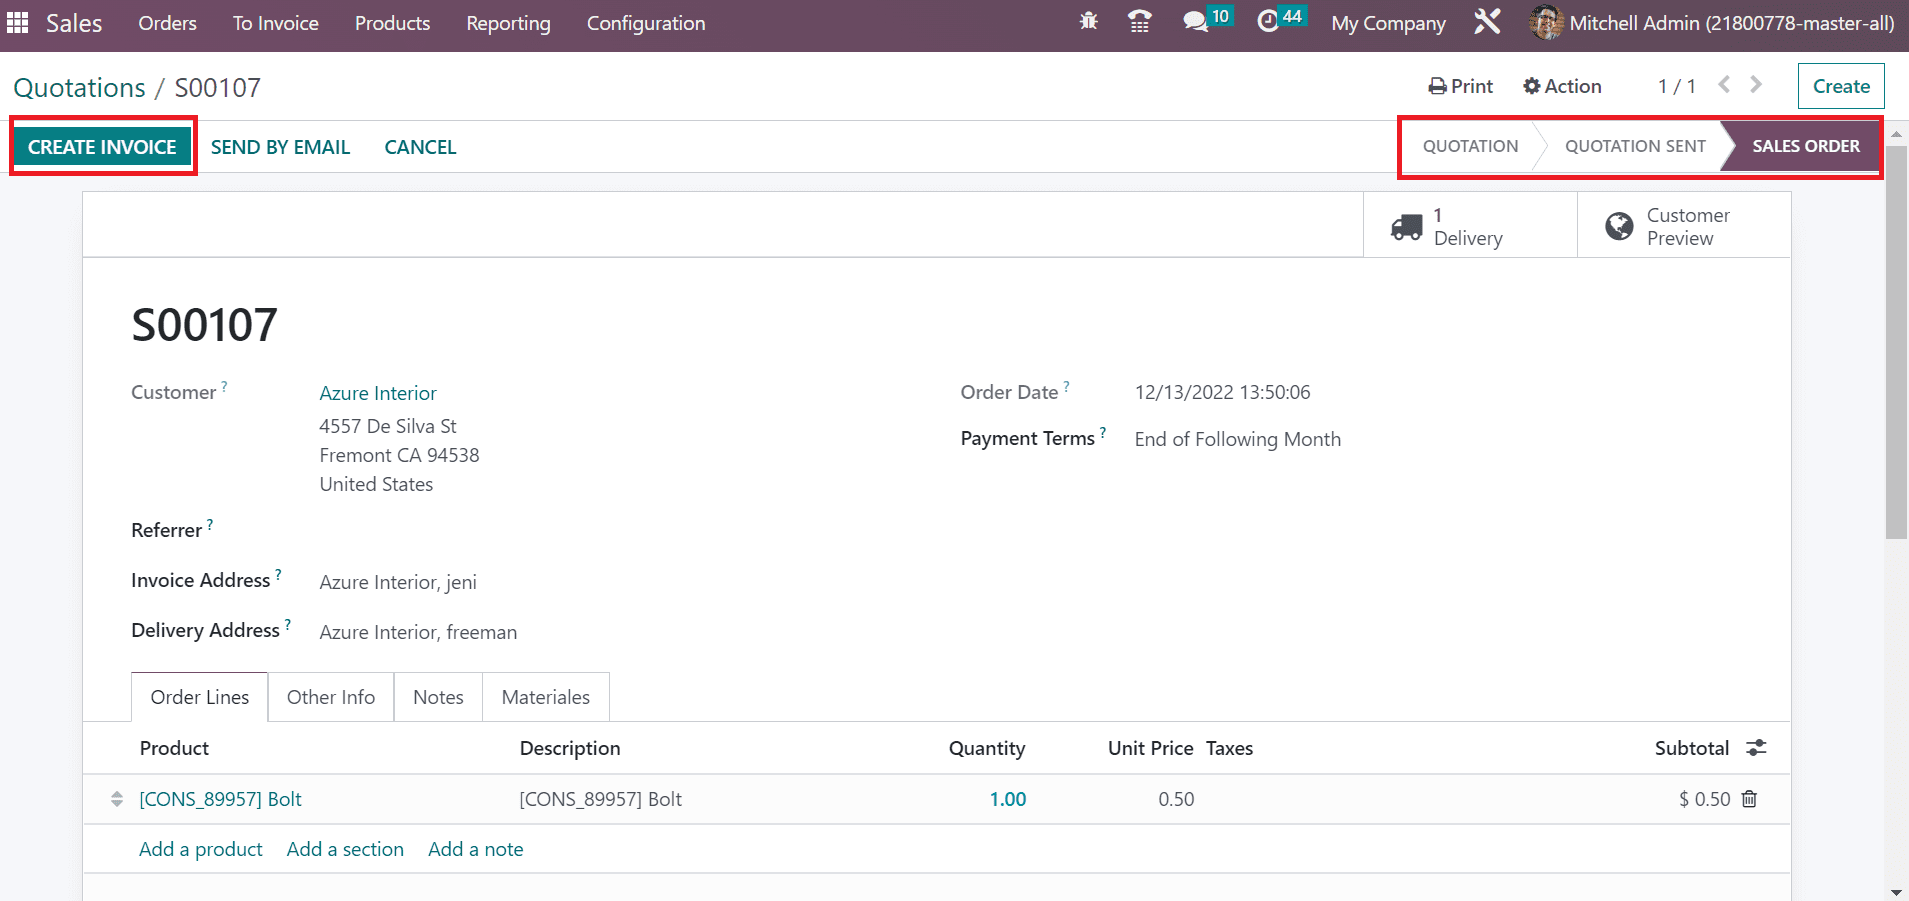
In the Create Invoice window, the user can develop an invoice through three methods: A down Payment in a Fixed Amount or Percentage and a Regular Invoice. We enable the Regular invoice option in Create Invoice field for generating an invoice.
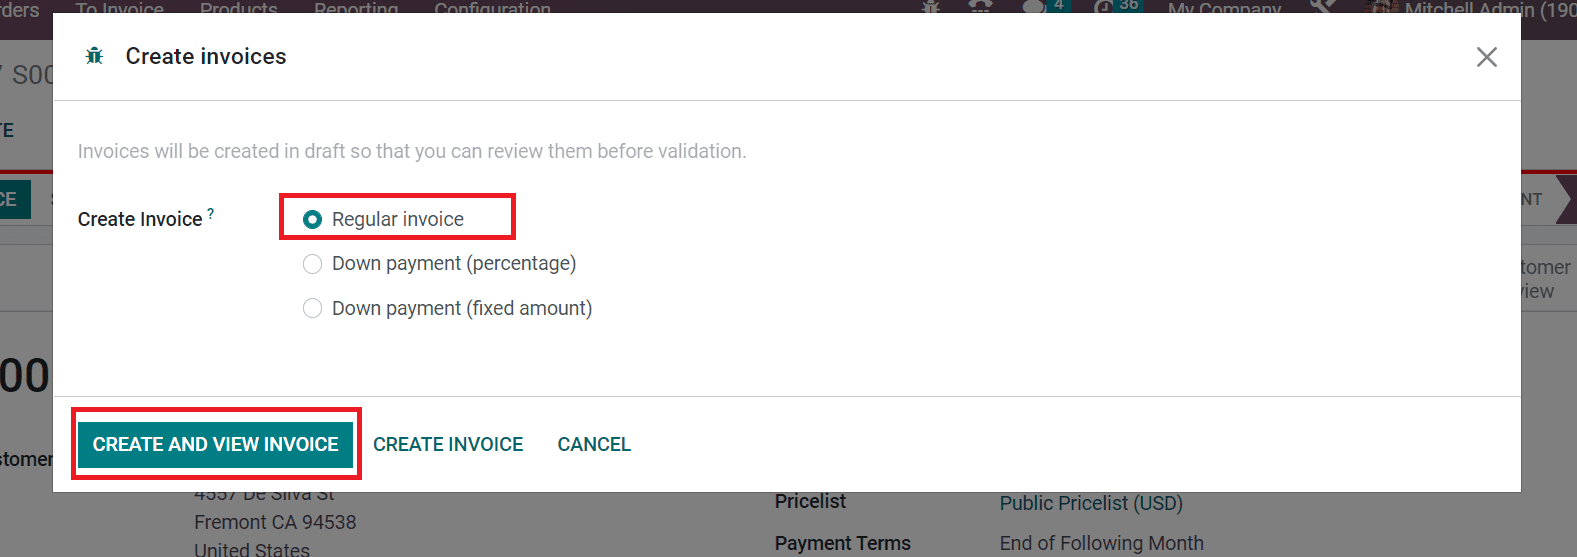
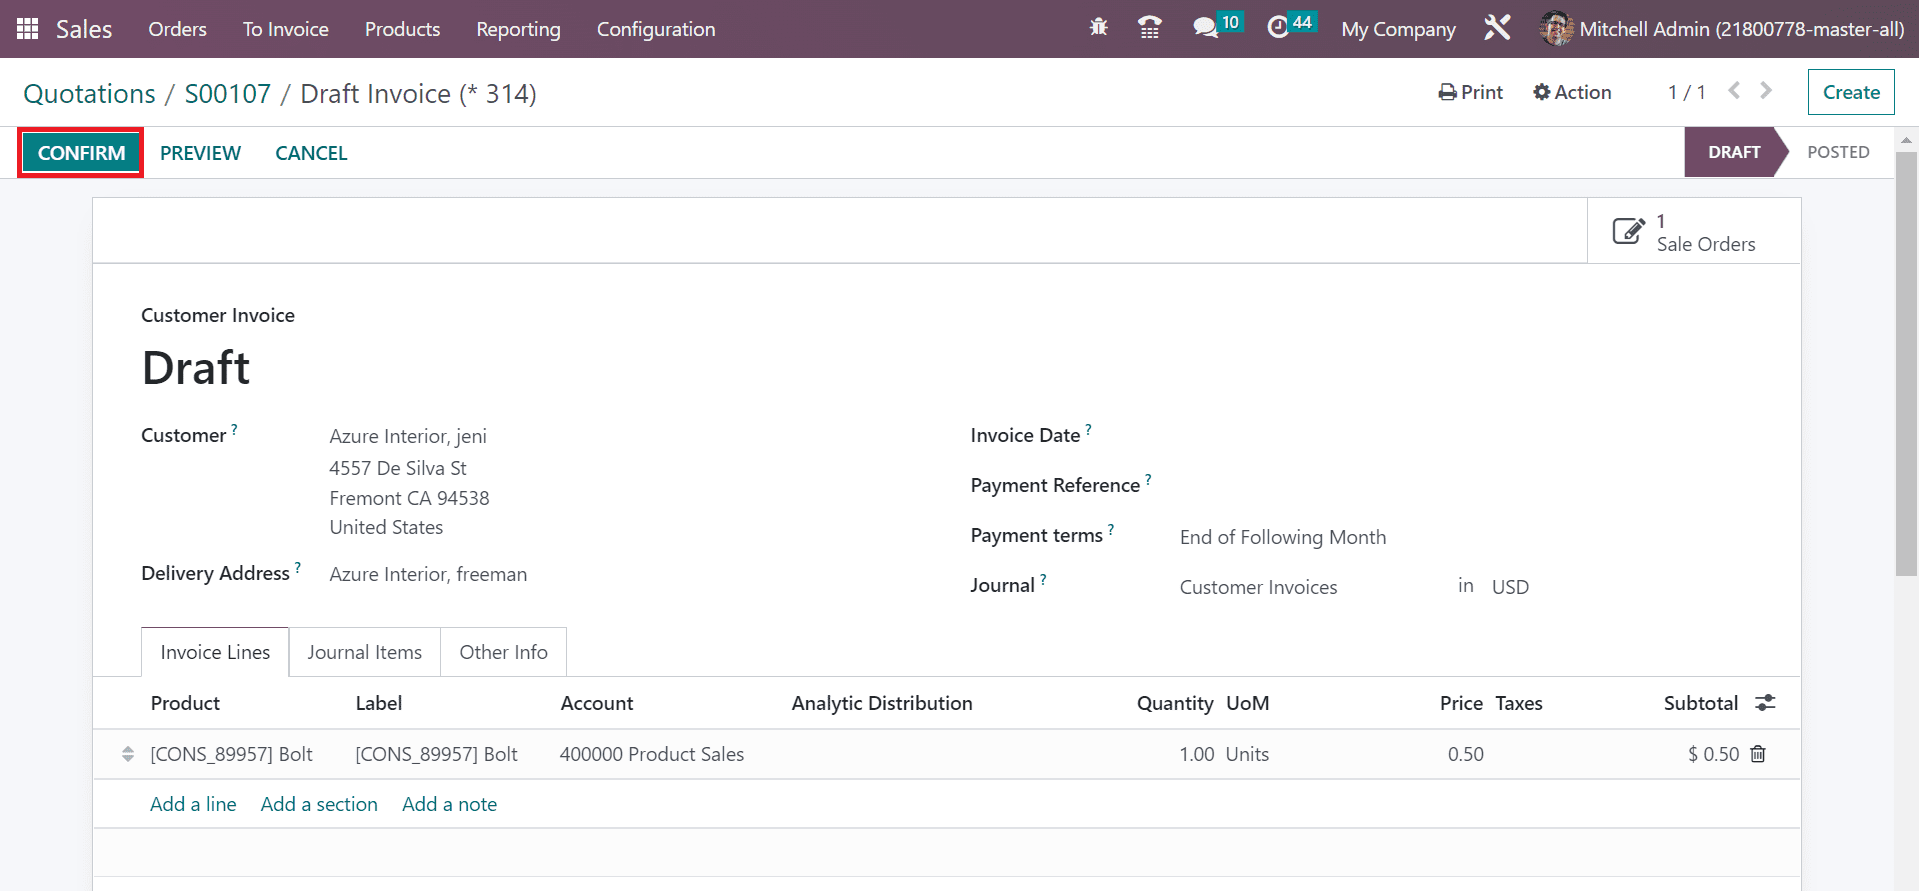
Pick out the CREATE AND VIEW INVOICE button for processing the regular invoice. All created invoice is set as a draft, and we can review them before confirmation. Click the CONFIRM icon in the Draft Invoice window to move with invoicing details.
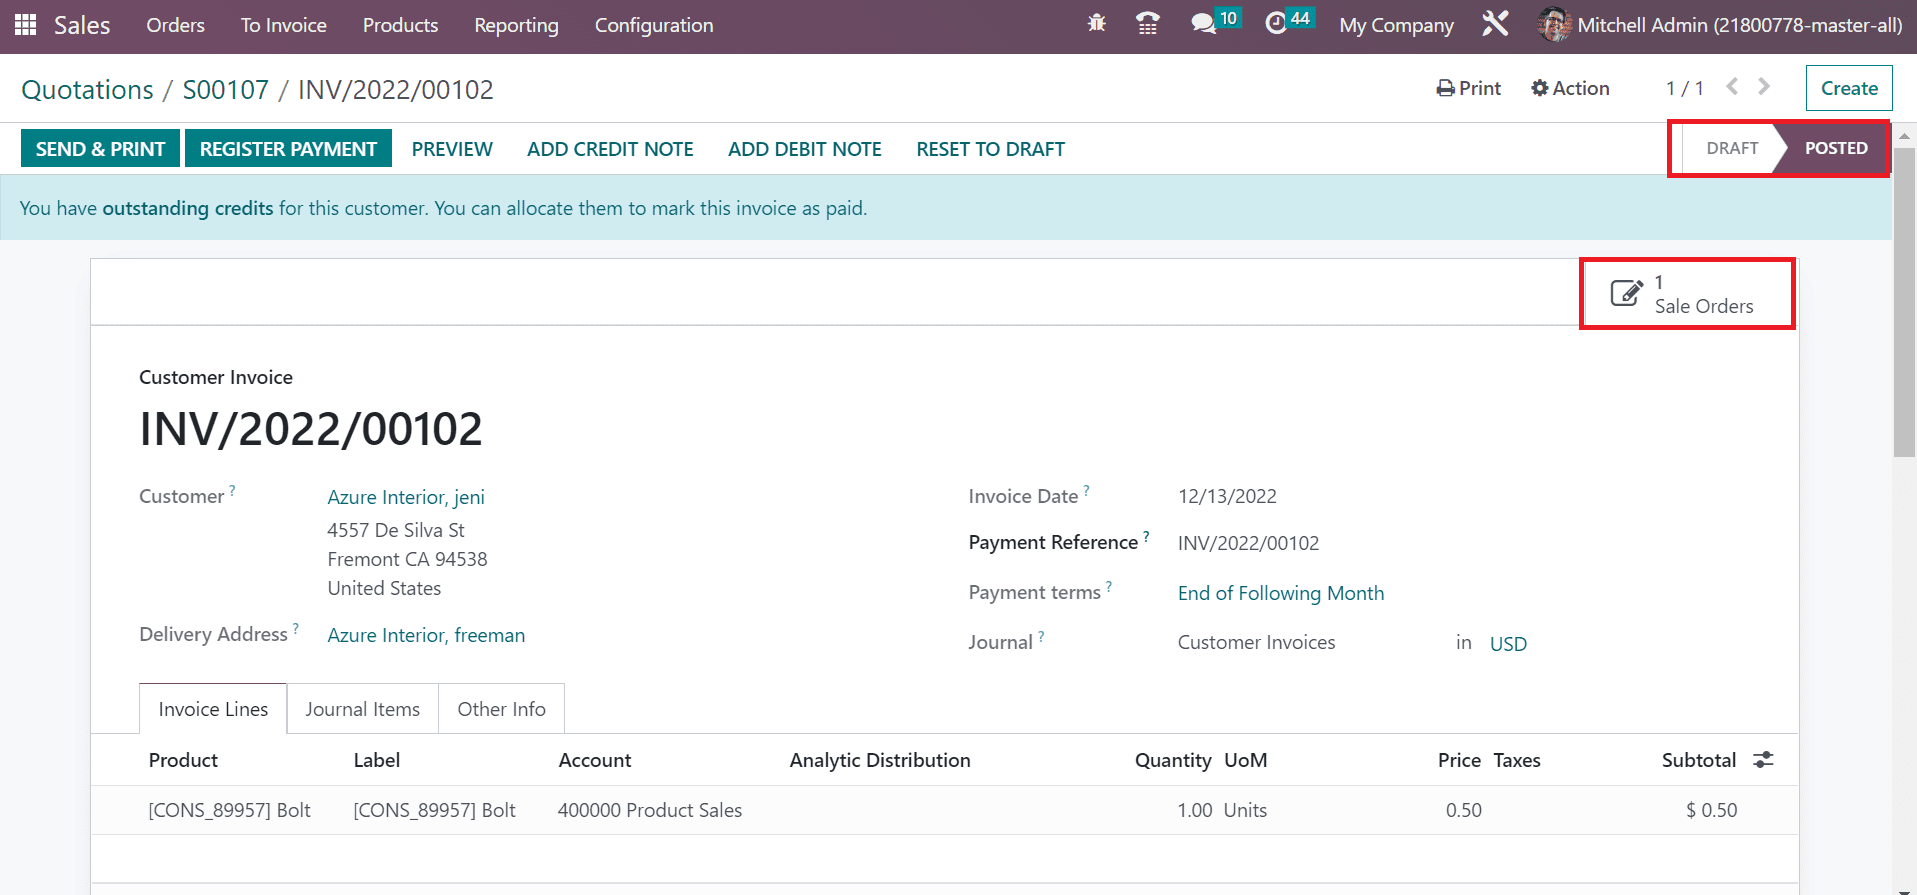
Here, the user can obtain the customer details, Due Date, and Delivery Address. Below the Invoice Lines tab, we can see the product name, quantity, price, subtotal, and more. After confirming the invoice, we can see that one sales order was created, and the stage changed to POSTED, as signified in the screenshot below.
Next, we can efficiently deliver product content through email to customers after confirming the invoice.
How to Send an Email to the Buyer following Invoice Confirmation?
Users can send emails to customers after invoice validation of a quotation. In the Quotations window, click the SEND BY EMAIL icon to forward product information to individuals. A new window unlocks before the user clicks on the SEND BY EMAIL button. Choose followers to send emails in the Recipients option, and the email Subject automatically appears, as illustrated in the screenshot below.
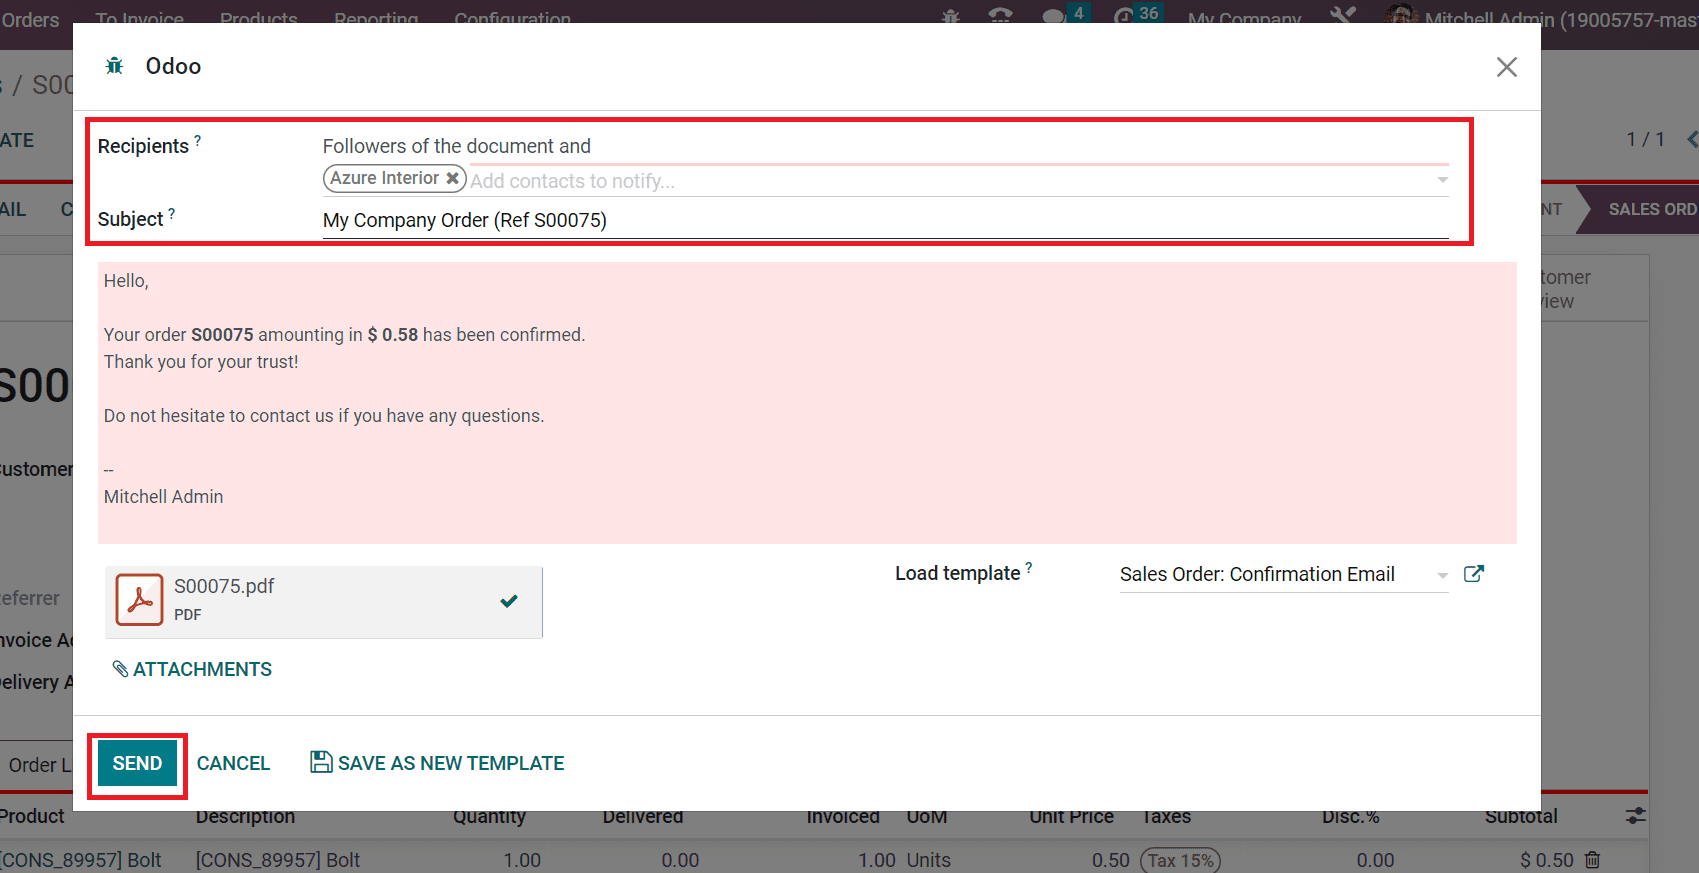
Users can access the details of sales orders of products inside the body section of the email. Moreover, you can attach documents concerning the information on goods by choosing the ATTACHMENTS icon. We can also set a template for the forwarded email from the Load Template option. After entering the accurate data of a product, press the SEND icon, as pointed out in the screenshot above. Hence, we can forward emails to the respective persons regarding the sales order of a product.
Delivery associated with product-specific documentation sent to the customer after the order confirmation is made easy using Odoo 16 Sales module. Managing invoices and orders of company products or services is an easy step when running an Odoo ERP in your system. Business profit arrives to you by using effective ERP software.