Odoo 18 represents the newest evolution of the robust open-source business application suite, continuing to transform how organizations handle their operations. With a modular design, user-friendly interface, and enhanced performance, this version offers a more refined user experience and greater flexibility for developers. Key improvements span across various modules, including Purchase, Accounting, CRM, Sales, Inventory, Website, and many others.
A particularly notable enhancement is the Website module, which empowers users to create fully integrated, dynamic websites. In this blog post, we’ll explore a hands-on example that demonstrates how to generate backend records through custom-built website forms in Odoo 18.
Here, the process of creating backend records directly from website forms is explored using a simple example of adding a customer (res.partner) record from a public-facing form.
Create the Website Form & Menu:
To create a QWeb template with input fields for customer details in Odoo 18, start by defining an XML file inside your custom module, for example, views/customer_form.xml. This file contains an HTML form wrapped in Odoo’s QWeb syntax, allowing you to render the form on the website. The form typically includes fields like name, email, and phone, and posts the data to a custom controller URL for backend processing.
xml:
<?xml version="1.0" encoding="utf-8"?>
<odoo>
    <data>
        <!-- Customer Create Form Template -->
        <template id="customer_form_template" name="Customer Form">
            <t t-call="website.layout">
                <section class="container py-5">
                    <div class="row justify-content-center">
                        <div class="col-md-6 col-lg-5">
                            <div class="card shadow rounded-3 border-0">
                                <div class="card-body p-4">
                                    <h3 class="mb-4 text-center">Create New Customer</h3>
                                    <form action="/website/customer/create" method="post">
                                        <div class="mb-3">
                                            <label class="form-label">Name</label>
                                            <input type="text" name="name" required="required" class="form-control"/>
                                        </div>
                                        <div class="mb-3">
                                            <label class="form-label">Email</label>
                                            <input type="email" name="email" class="form-control"/>
                                        </div>
                                        <div class="mb-4">
                                            <label class="form-label">Phone</label>
                                            <input type="text" name="phone" class="form-control"/>
                                        </div>
                                        <input type="hidden" name="csrf_token" t-att-value="request.csrf_token()"/>
                                        <div class="d-grid">
                                            <button type="submit" class="btn btn-primary">Submit</button>
                                        </div>
                                    </form>
                                </div>
                            </div>
                        </div>
                    </div>
                </section>
            </t>
        </template>
        <!-- Success Page -->
        <template id="customer_success_template" name="Customer Created">
            <t t-call="website.layout">
                <div class="container">
                    <h3>Customer Created Successfully!</h3>
                </div>
            </t>
        </template>
        <!-- Website Menu Record -->
        <record id="menu_customer_form" model="website.menu">
            <field name="name">Create Customer</field>
            <field name="url">/website/customer/form</field>
            <field name="parent_id" ref="website.main_menu"/>
            <field name="sequence" type="int">60</field>
        </record>
    </data>
</odoo>
In addition to the form template, it's important to provide feedback to the user and ensure easy access to the form that is mentioned in the above code. A dedicated success template is defined to display a confirmation message once a customer is successfully created. This template is rendered by the controller after processing the form submission. To make the form accessible from the website, a new menu item is also added under the main website navigation. This menu entry links to the form’s URL (/website/customer/form), making it easy for users to find and use the form directly from the website interface.

This setup will create a menu item named "Create Customer", as shown in the figure above, which loads the customer form view on the website. To handle the form submission and display other related pages, custom controllers are required which we’ll cover in the next section.
Create the Website Controller:
To make the form work, we need to create a custom controller in Odoo 18. This controller will show the form when someone visits the page and handle the data when the form is submitted. It collects the name, email, and phone from the form and creates a new customer record in Odoo using the res.partner model. The controller also checks the CSRF token for security. Once the customer is created, the user is redirected to a success page that confirms the record was added.
Python controller code:
from odoo import http
from odoo.http import request

class WebsiteCustomerForm(http.Controller):
    @http.route(['/website/customer/form'], type='http', auth="public", website=True)
    def customer_form(self, **kw):
        return request.render('custom_module_name.customer_form_template')
    @http.route(['/website/customer/create'], type='http', auth="public", methods=['POST'], website=True, csrf=True)
    def create_customer(self, **post):
        request.env['res.partner'].sudo().create({
            'name': post.get('name'),
            'email': post.get('email'),
            'phone': post.get('phone'),
            'customer_rank': 1,
        })
        return request.render('custom_module_name.customer_success_template')
After adding the controller in your custom module, clicking the "Create Customer" menu on the website will load the customer form page as shown in the figure below. You can then enter the name, email, and phone number, and click the Submit button to create the record.

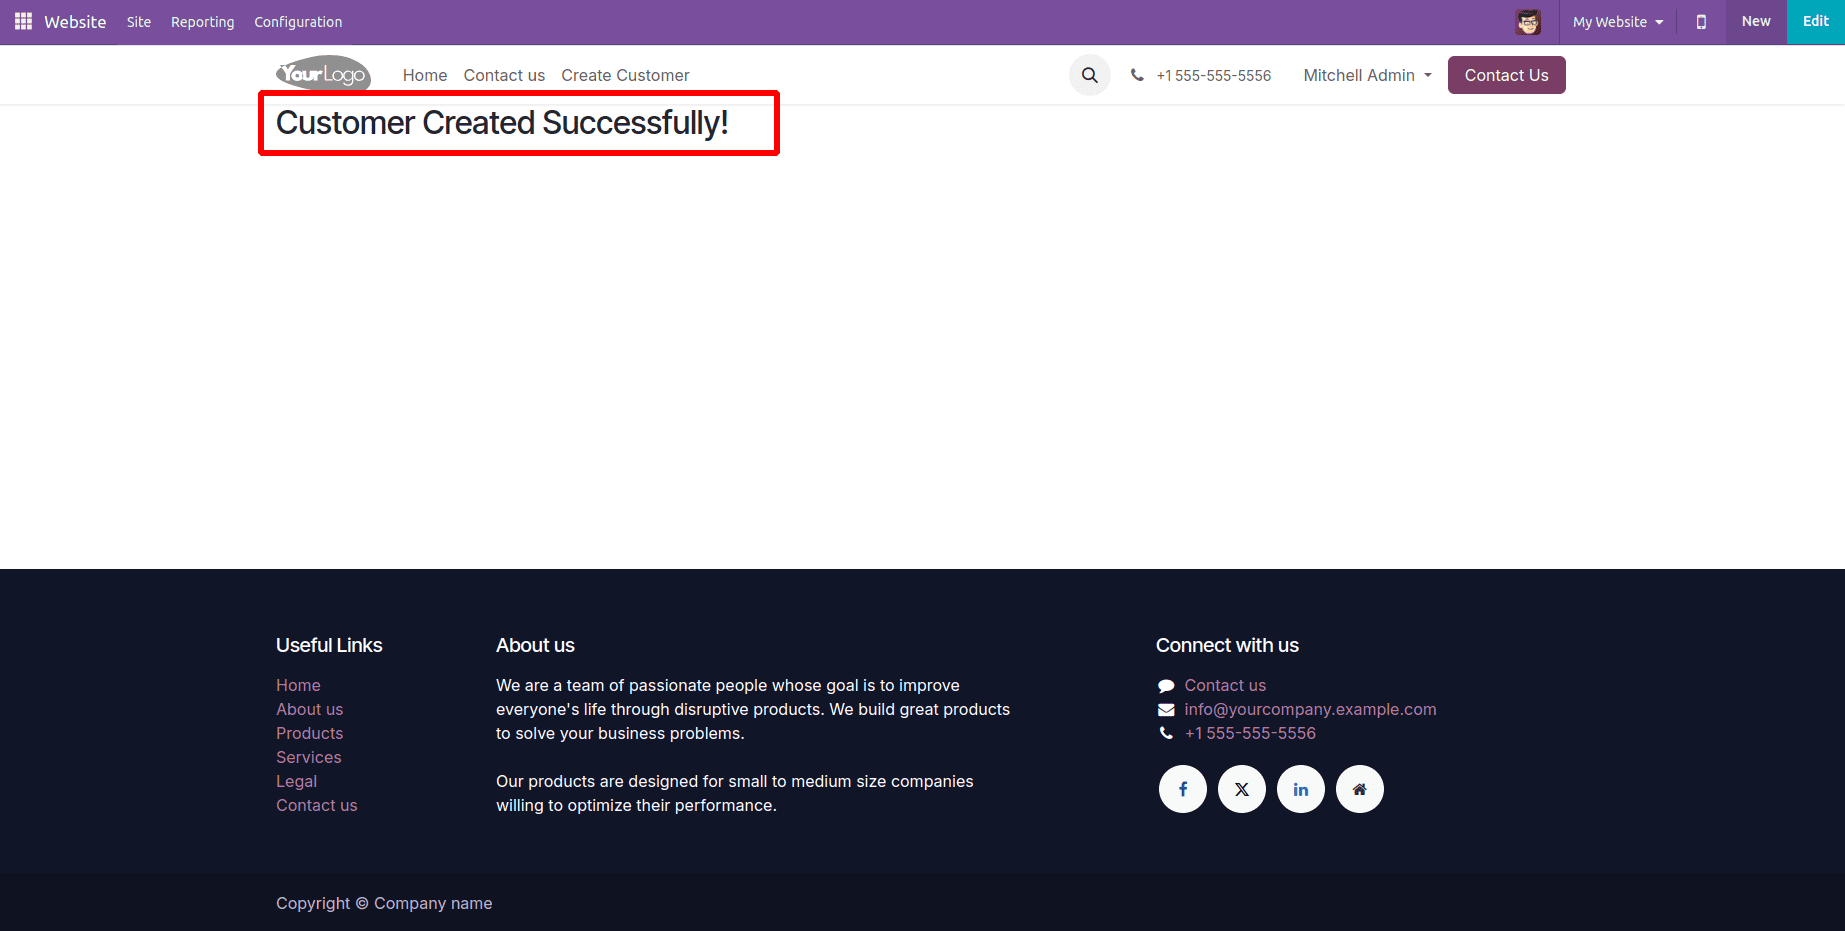
After submitting the form, the page redirects to a success message page as shown in the figure below , as defined in the controller logic.
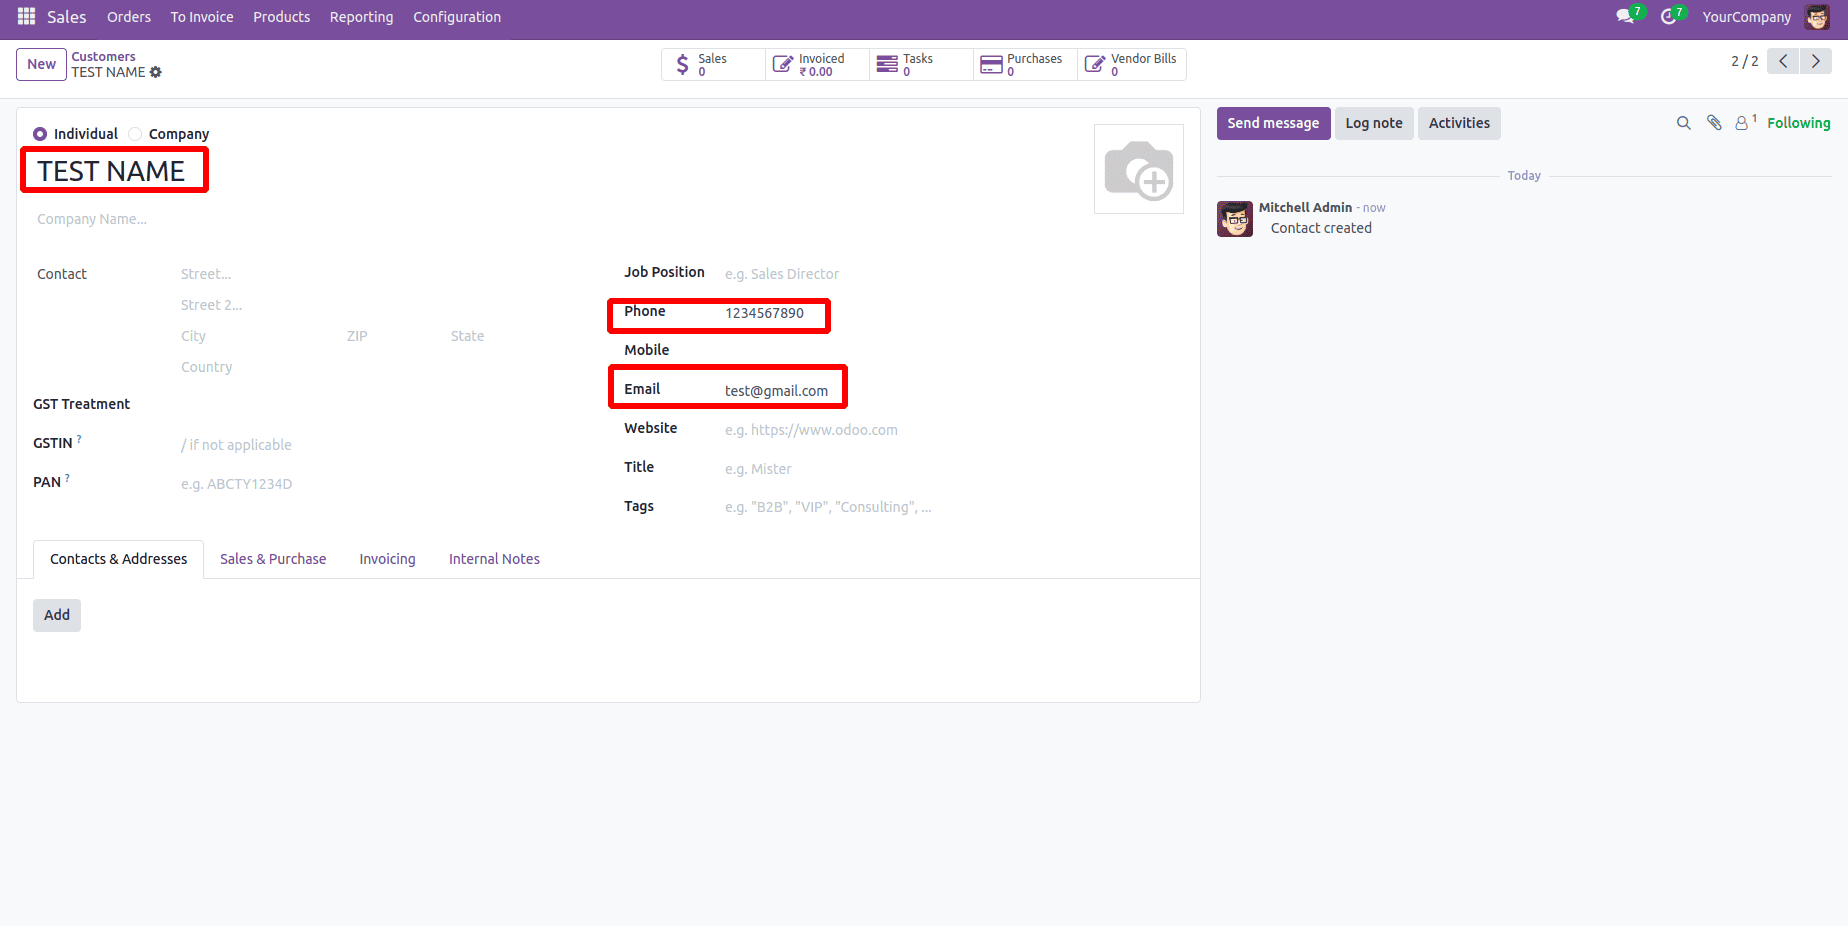
At the same time, the submitted data is used to create a new customer record in the backend. This process is handled by the controller, which receives the form data, validates it, and creates the record in the res.partner model. As a result, the customer details entered on the website are instantly reflected in the backend system as shown in the figure below.
Creating backend records from website forms in Odoo 18 is a powerful way to connect your front-end user interactions with real-time data management. By using QWeb templates, custom controllers, and the built-in models like res.partner, you can easily collect and store data submitted through your website. This approach not only streamlines data entry but also ensures that all records are managed within Odoo’s unified environment, offering a seamless and efficient workflow for both users and administrators.
To read more about How to Create a Custom Web Form View in Odoo 17, refer to our blog How to Create a Custom Web Form View in Odoo 17.