ERD, or Entity Relationship Diagram is a graphical representation or a type of flow chart that illustrates the relationship between entities like objects, concepts, etc. It is often used in designing or debugging relational databases based on several fields. ERD, also known as the Entity Relationship Model, uses a defined set of symbols, such as ovals, rectangles, diamonds, etc., to depict the interconnections between the entities, their relationships, and attributes.
ERDs can be used in different cases, such as database design, database troubleshooting, business information systems, business process re-engineering, and in educational and research fields.
Let us focus on how to generate the ERD for our Odoo models or tables.
ERDs can be generated using different tools like SchemaSpy, Lucid Chart, Vertabelo, ERD Plus, SqlDBM, Drawsql, etc. In these cases, online ERD tools are also available. Here in this blog, we are going to discuss creating the ERD diagram of the Odoo tables using Schemaspy which is an offline tool where we can download the package and use some command codes to generate the ERD. The time consumption will be based on the number of tables and the number of rows in the tables.
Schemaspy is a single executable jar file, which we can download from Schemaspy or from Github. Before we can start with the schemaspy, we need to install two things in our system. One is Graphviz, and the other is Java 8, as schemaspy is a jar file. Graphviz is no longer required from version 6.1.0 as we can use embedded viz.js by adding the command line argument vizjs.
To easily download Graphviz, we can download the msi package from Graphviz. And Java 8 can be downloaded and configured from Java 8.
Once all the packages are installed, we can run the Schemaspy using the command.
java -jar schemaspy.jar -t dbType -dp pathToDrivers -db dbName -host hostName -port portNumber [-s schema] -u user [-p password] -o outputDirectory
After the command "java -jar schemaspy.jar," we can see the parameters given for running the schemaspy. The parameters can also be pre-configured on some files where it will be searched by schemaspy. Basically, schemaspy will search for the configuration file automatically from the current directory like <current-dir>/schemspy.properties. To use an alternative configuration file, we can run the Schemaspy with the parameter.
java -jar schemaspy.jar -configFile path/to/config.file
Configuration file example:
# type of database. Run with -dbhelp for details
schemaspy.t=mssql
# optional path to alternative jdbc drivers.
schemaspy.dp=path/to/drivers
# database properties: host, port number, name user, password
schemaspy.host=server
schemaspy.port=1433
schemaspy.db=db_name
schemaspy.u=database_user
schemaspy.p=database_password
# output dir to save generated files
schemaspy.o=path/to/output
# db scheme for which generate diagrams
schemaspy.s=dbo
The parameters given in the command line will override those on configured in schemaspy.properties file. Now let us move to the parameters added on the command line.
The java -jar command is used to run the jar file, followed by which we can add the path to the jar file of our schemaspy.
-t dbtype: to specify the type of the database where we can specify the database type at dbtype and it is defaulted to ora. Use -dbhelp for a list of built in types.
-db dbName : Name of the database
-u user: Valid database user who has the read access, and if -sso is specified, we don’t need to provide the user here.
-s scheme: schema of the database and this is optional if it's the same as the user or it is not supported by the database.
-p password: User password associated with the specified user.
-o outputDirectory: specify the directory where we need to store/write the generated HTML or graphs.
-dp pathToDrivers: add the path to the driver of the database we are using and it will be provided by the database vendor. These are usually contained in .jar or .zip file format.
-host hostName: hostname or IP address to connect to if required by database type.
-port portNumber: port that the database management system listens to.
-sso: stands for single sign-on and is used when -u and -p (user and password) should be ignored.
Not all these; we have several more parameters that can be used on the command line while running the schemaspy for several options and features. The above explained are the common and most used ones.
Let’s move on to generate an ERD for our Odoo database. Here I'm taking Odoo 15 as an example. After all the setup and configuration of schemaspy and the related packages, we can try the below command on the terminal
java -jar Downloads/schemaSpstgreSQLJdbcDriver/postgresql-42.4.0.jar -db test_schemaspy -host localhost -port 5432 -s public -u odoo15 -p root -o Downloads/
After clicking enter, it will load the generations and write all the HTML and graphs to the directory we specified in the command line; here it is Downloads.

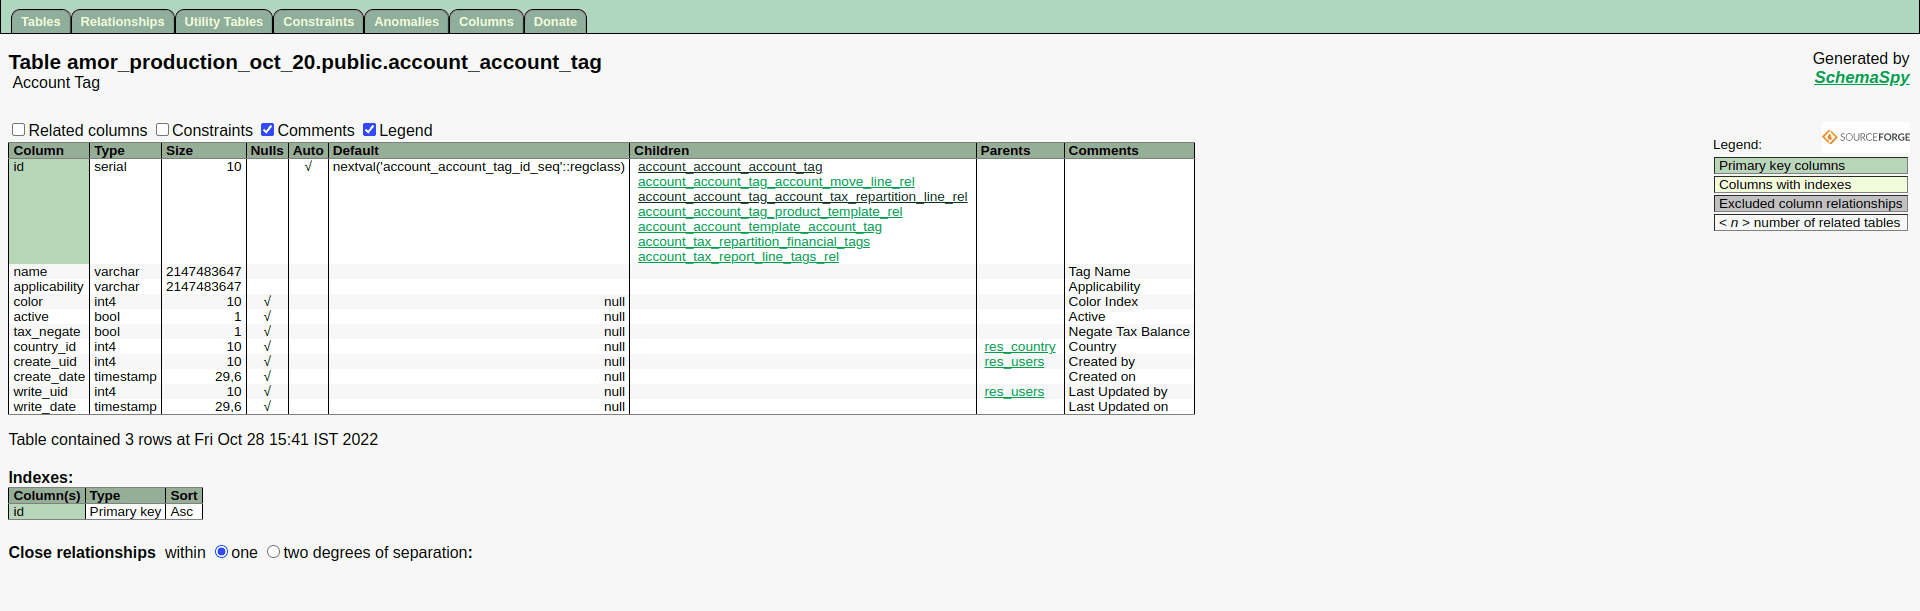
On completing the generation, when we move back to our Downloads directory, there will be multiple directory for things like tables, diagrams, etc. In the table directory, we will have all the table details from the database.
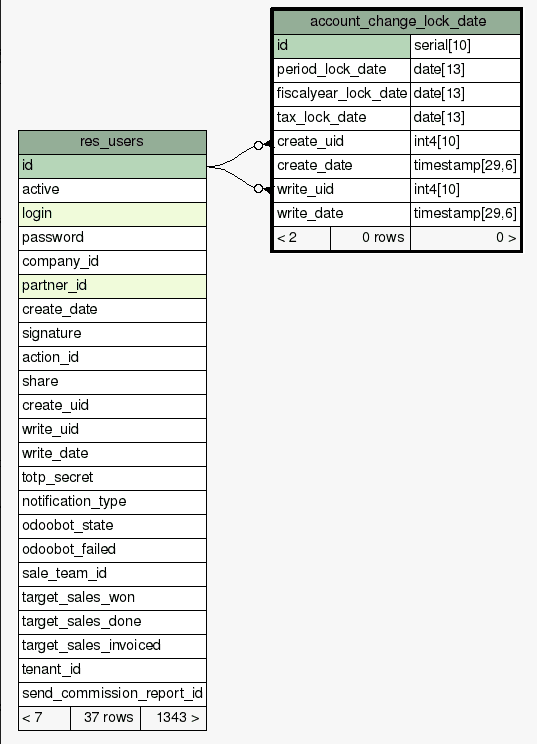
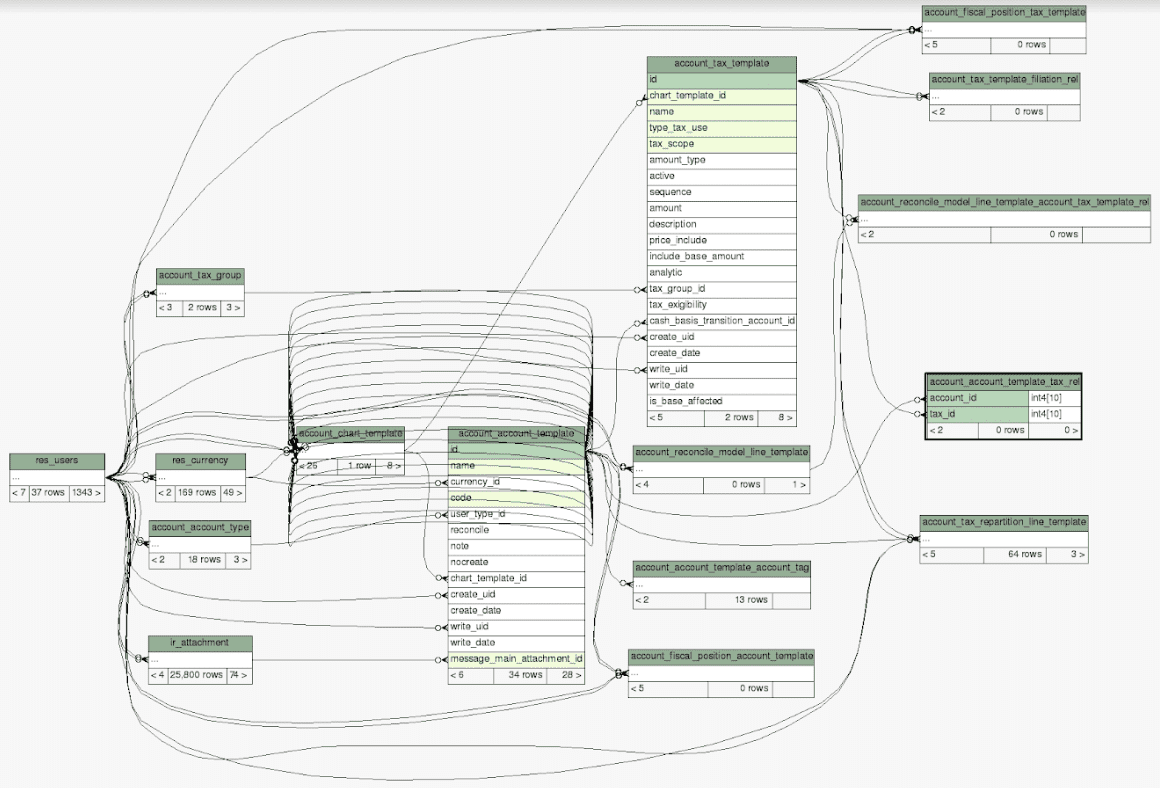
And in the diagrams directory, we will have all the one-degree and two-degree entity relationship diagrams for all the tables in our database.
The one-degree ERD looks like the above image.
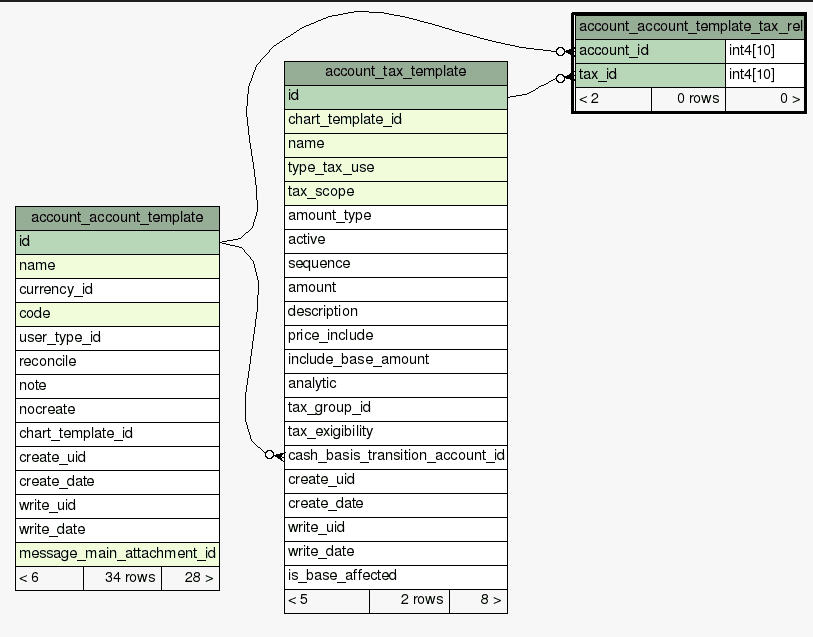
The above image depicts the two-degree ERD of a table.
While using the database parameter, we will get the ERD of all the tables within the database, and it will take so long to generate the ERD if the number of tables is large. There are parameters available to include and exclude the tables from generating the ERD. Let’s look at these cases.
-i includeTableRegex: to specify the regular expression to include the tables in analysis for generating the ERD and documentation, defaults to match everything in the database.
-I excludeTableRegex: can specify the regular expression to exclude the tables from the analysis, and this one defaults to exclude the table containing $ in its name, this can be overridden by using -I “".
-X excludeColumnRegex: will exclude the columns from the diagrams, and this has defaulted to nothing.
-x excludeIndirectColumnsRegex: To exclude the columns from the diagrams where columns aren’t directly referenced by the focal table, and this has also defaulted to nothing.
And that’s how we create ERD using schemaspy for our Odoo database. Not from schemaspy itself, there are a lot of tools that can be used to generate ERD online and offline.