Reports are essential documents for a firm for interchanging information. Odoo has reports like
Purchase, sale, and invoice reports. Odoo defines some report layouts. Some of them are external_layout_standard, external_layout_striped, external_layut_bold. Odoo reports are written using html/qweb. We can customize the header footer for a report by creating a new layout or inheriting the existing layout.
Here, let us take a look at how we can customize the header and footer by inheriting an existing layout.
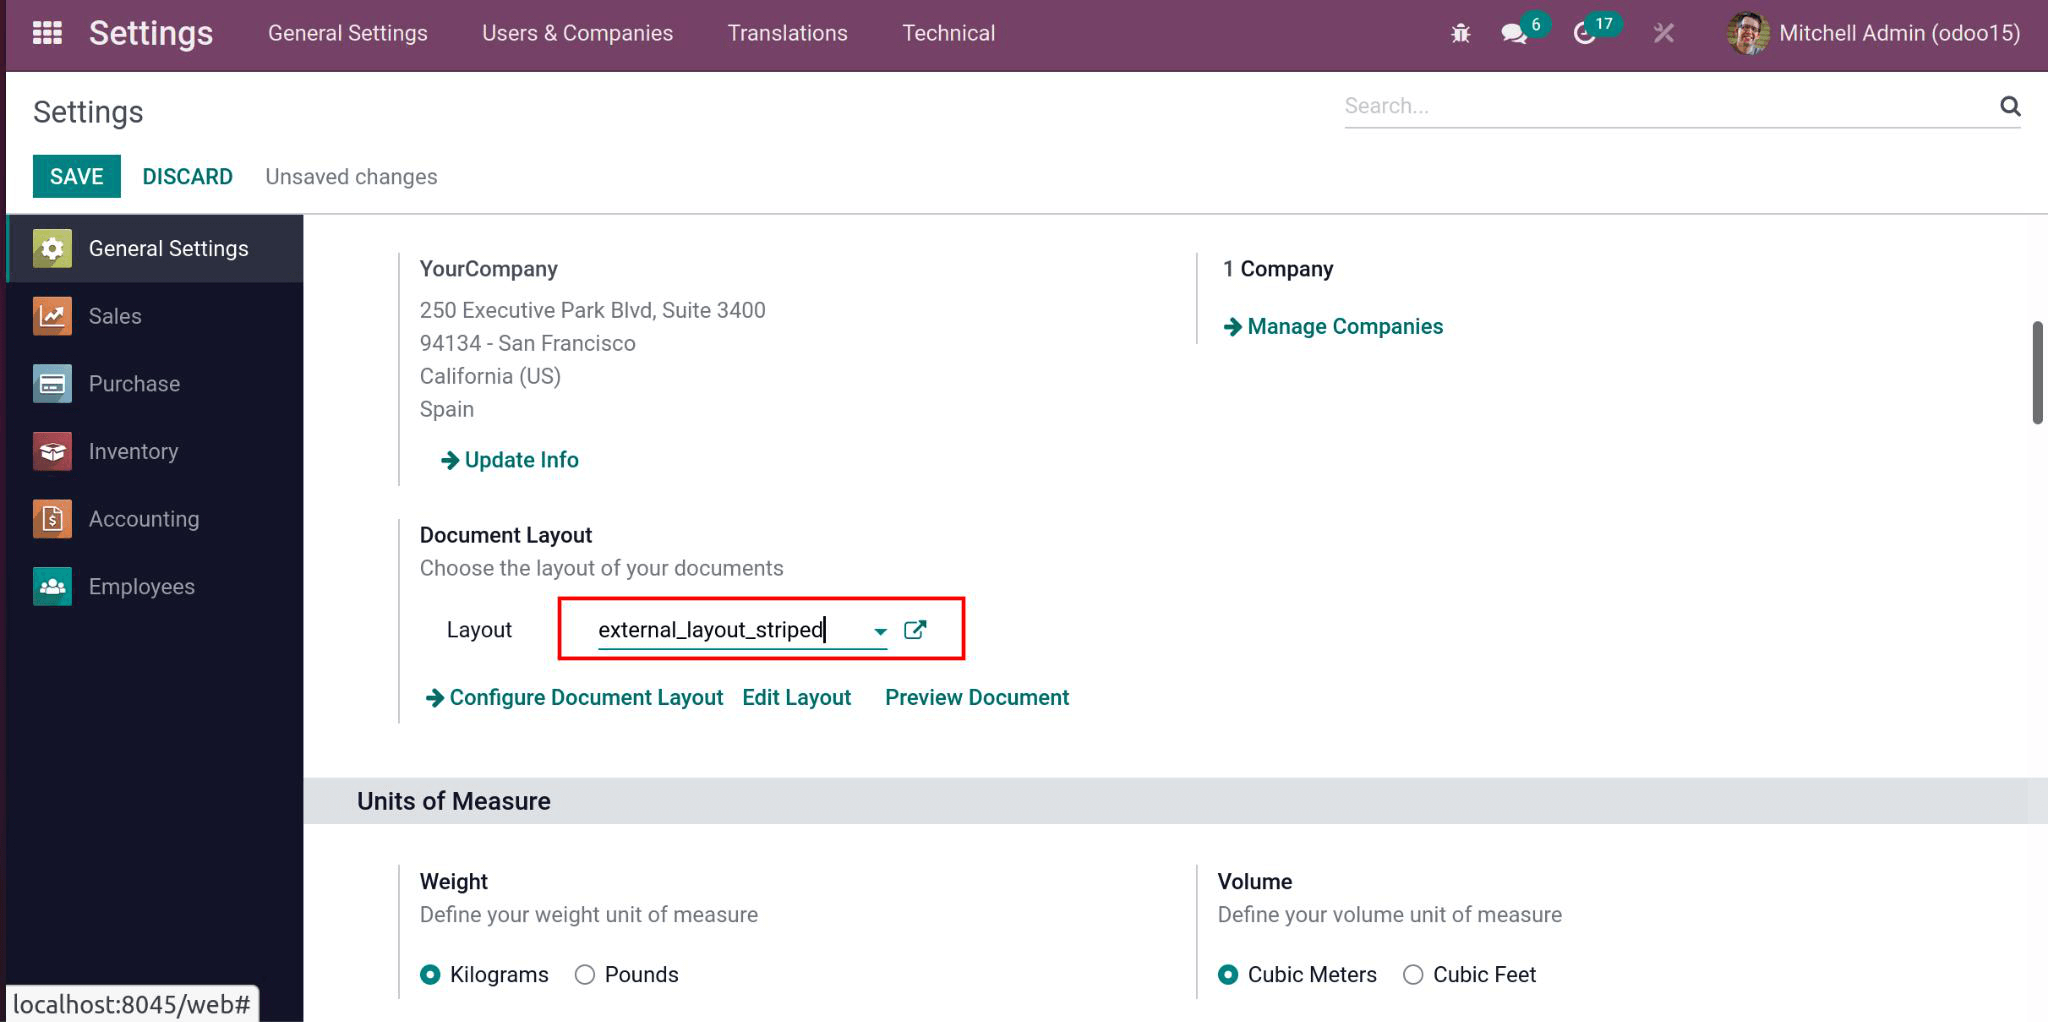
When enabling the debug mode, we have an option for choosing the layout for our document.
Here I have chosen ‘external_layout_striped’.
We can inherit the template from the front end by clicking the edit layout->inherit view, then create the inherit view, and also we can inherit the layout by using backend code. In this blog, we can discuss how to inherit the layout from the backend code.
Now We can inherit a template by mentioning the inherit_id.
<template inherit_id=”module_name.layout name” id=””>
Here, I have inherited the external_layout_striped because this is the default one now.
<template id="custom_purchase_header_footer"               inherit_id="web.external_layout_striped">
<xpath expr="//div[1]" position="replace">
   <div t-attf-class="o_company_#{company.id}_layout header" t-att-style="report_header_style">
     <div class="o_background_header" style="position:absolute;">
       <div class="float-right">
            <h3 class="mt0 text-right" t-field="company.report_header"/>
       </div>
        <div class="header_content float-right">
            <div class="logo" style="">
          <img t-if="company.logo" style="max-width:260px;max-height:89px;"
                      t-att-src="image_data_uri(company.logo)"
                      class="float-left" alt="Logo"/>
           </div>
          </div>
             <div class="float-left">
               <div class="details">
                 <table class="table_partner" style="width:120%;">
                   <tr>
                   <td><b style="color:black;"> CLIENT Details:</b></td>
                   </tr>
                   <tr>
                     <td>
                       <b>
                           <span style="color:black;" t-if="company"
                                 t-esc="o.partner_id.name"/>
                       </b>
                         <br></br>
                       <t t-if="o.partner_id.street">
                           <span  t-esc="o.partner_id.street"/>
                           <br></br></t>
                       <t t-if="o.partner_id">
                           <span t-esc="o.partner_id.city"/>
                           <br></br>
                       </t>
                      </td>
                   </tr>
                 </table>
               </div>
             </div>
     </div>
     </div>
</xpath>
<xpath expr="//div[hasclass('text-center')]" position="replace">
 <center>
     <h5 style="color:black;"><b><t t-esc="o.company_id.name"/></b></h5>
     <h6 style="color:black;">Your company details</h6>
     Page: <span class="page"/> / <span class="topage"/>
 </center>
</xpath>
 </template>
After inheriting the template we can write our XML code for the custom header footer by using the XPath expression. Depending on our customization, we can use the replace, after, or before position values.
<xpath expr=”//div[1]” position=”replace”>
Here, I have replaced the first div, which contains the header in external_layout_striped, and added the customized header with some client details.
<xpath expr=”//div[hasclass(‘text-center’)]” position=”replace”>
Similarly, using the XPath also replaces the footer block and adds a custom footer.
Here ‘company name’ and “page no” are added to the footer
<span class=”page”/>
<span class=”topage”/>
These two span classes provide the page number information to our pdf report, and we can use this class inside both the header and footer class.
We can also get the corresponding model on the variables ‘o’ or from ‘docs’ and can use the dotted path like ‘o.partner_id.name’ to access other models from the existing model. Using ‘t-field’ or t-esc, we can print the values stored in the variables.
<Span t-esc=”o”> or <span t-field=”o”>
Using the t-call, we can call other layouts to our inherited layouts. This will help to reduce the need to design the same layout again. Instead, we can use this t-call.
<<t-call="module_name.layout_name">
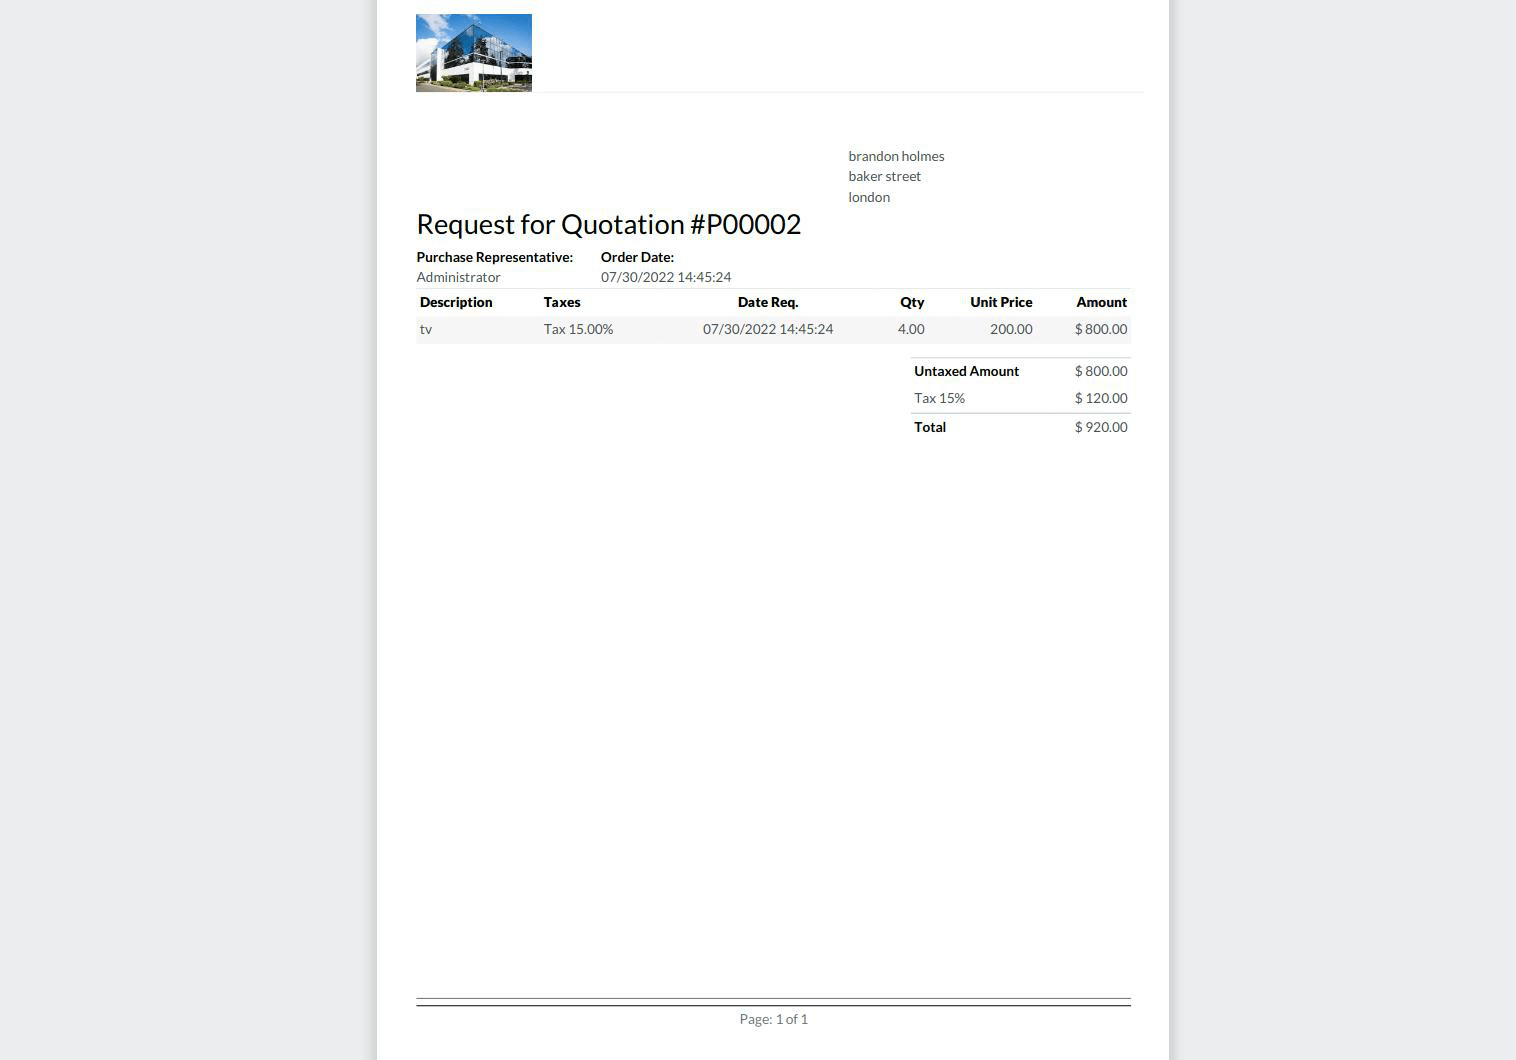
The normal header footer for the external_layout_striped contains the ‘logo’ on the header and page no. on the footer. Here I have printed the purchase order.
After customization of the header footer, the report layout for the purchase order looks like in the image below.
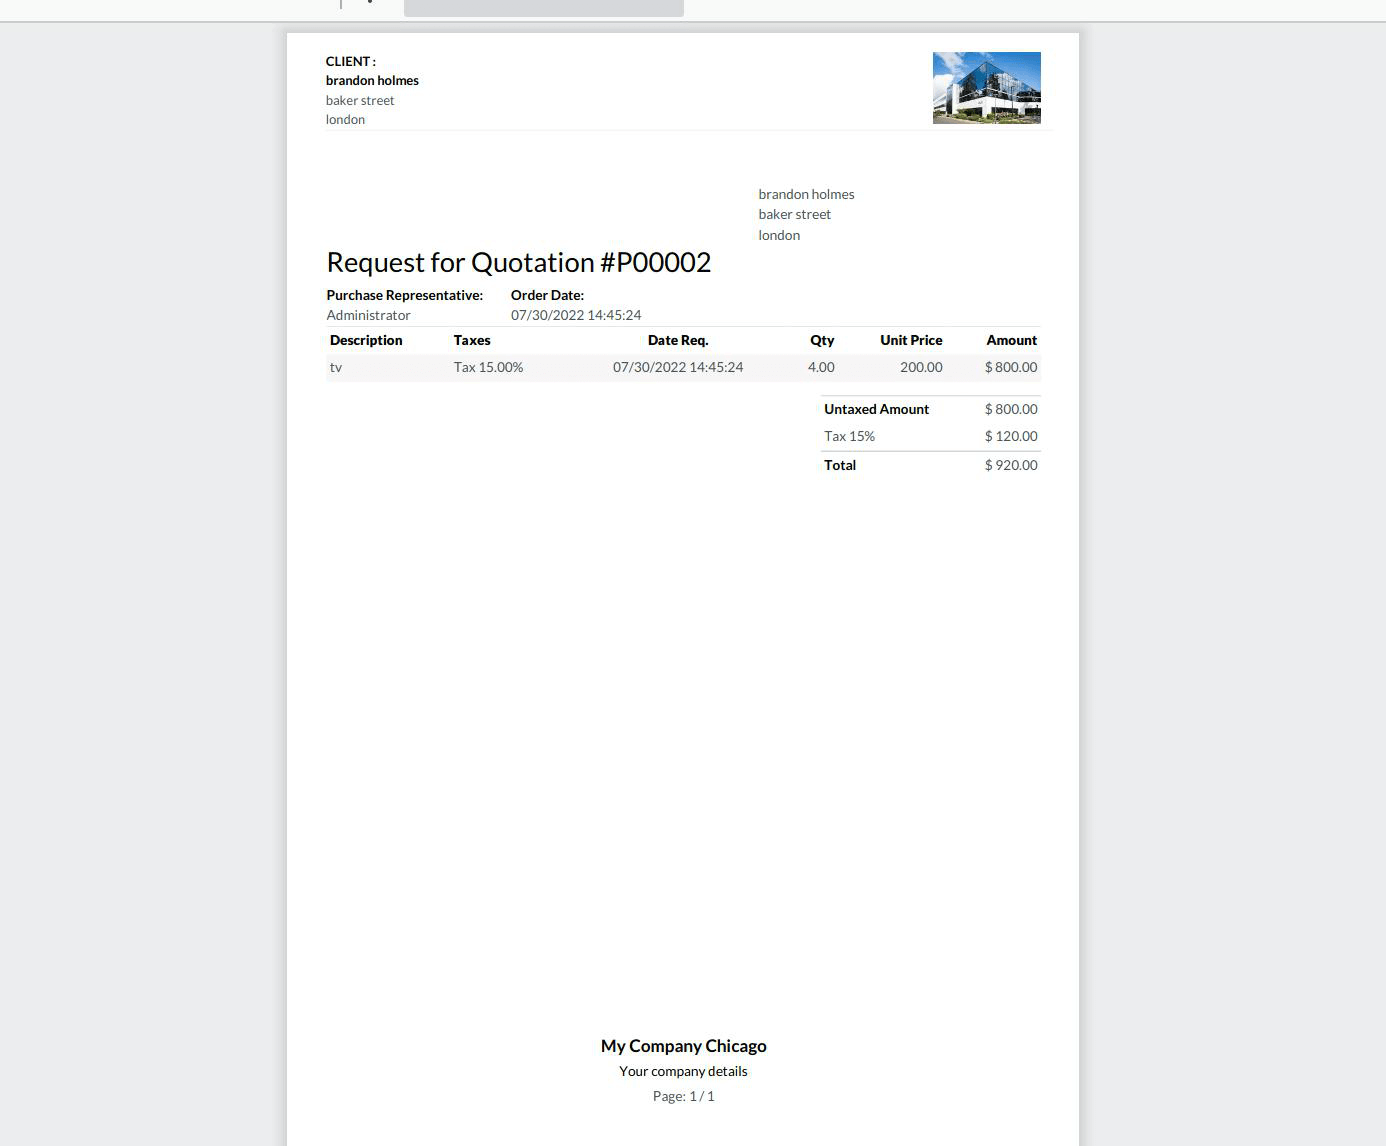
Now we have completed the customization. In this way, we can do the customization of the header footer for all reports by inheriting the existing layout.