In Odoo, importing sale orders and purchase orders can be incredibly useful for businesses looking to streamline their data entry processes or migrate data from another system. When we want to migrate bulk data, manually entering each record is not an effective method. In such cases, Importing data allows us to add multiple records quickly and efficiently, saving time compared to manual entry.
Importing Sale Order in Odoo 17
To import the sale order, the sale order import template needs to be downloaded first. After downloading, we can add the data, update the template, and upload it into the Odoo database.
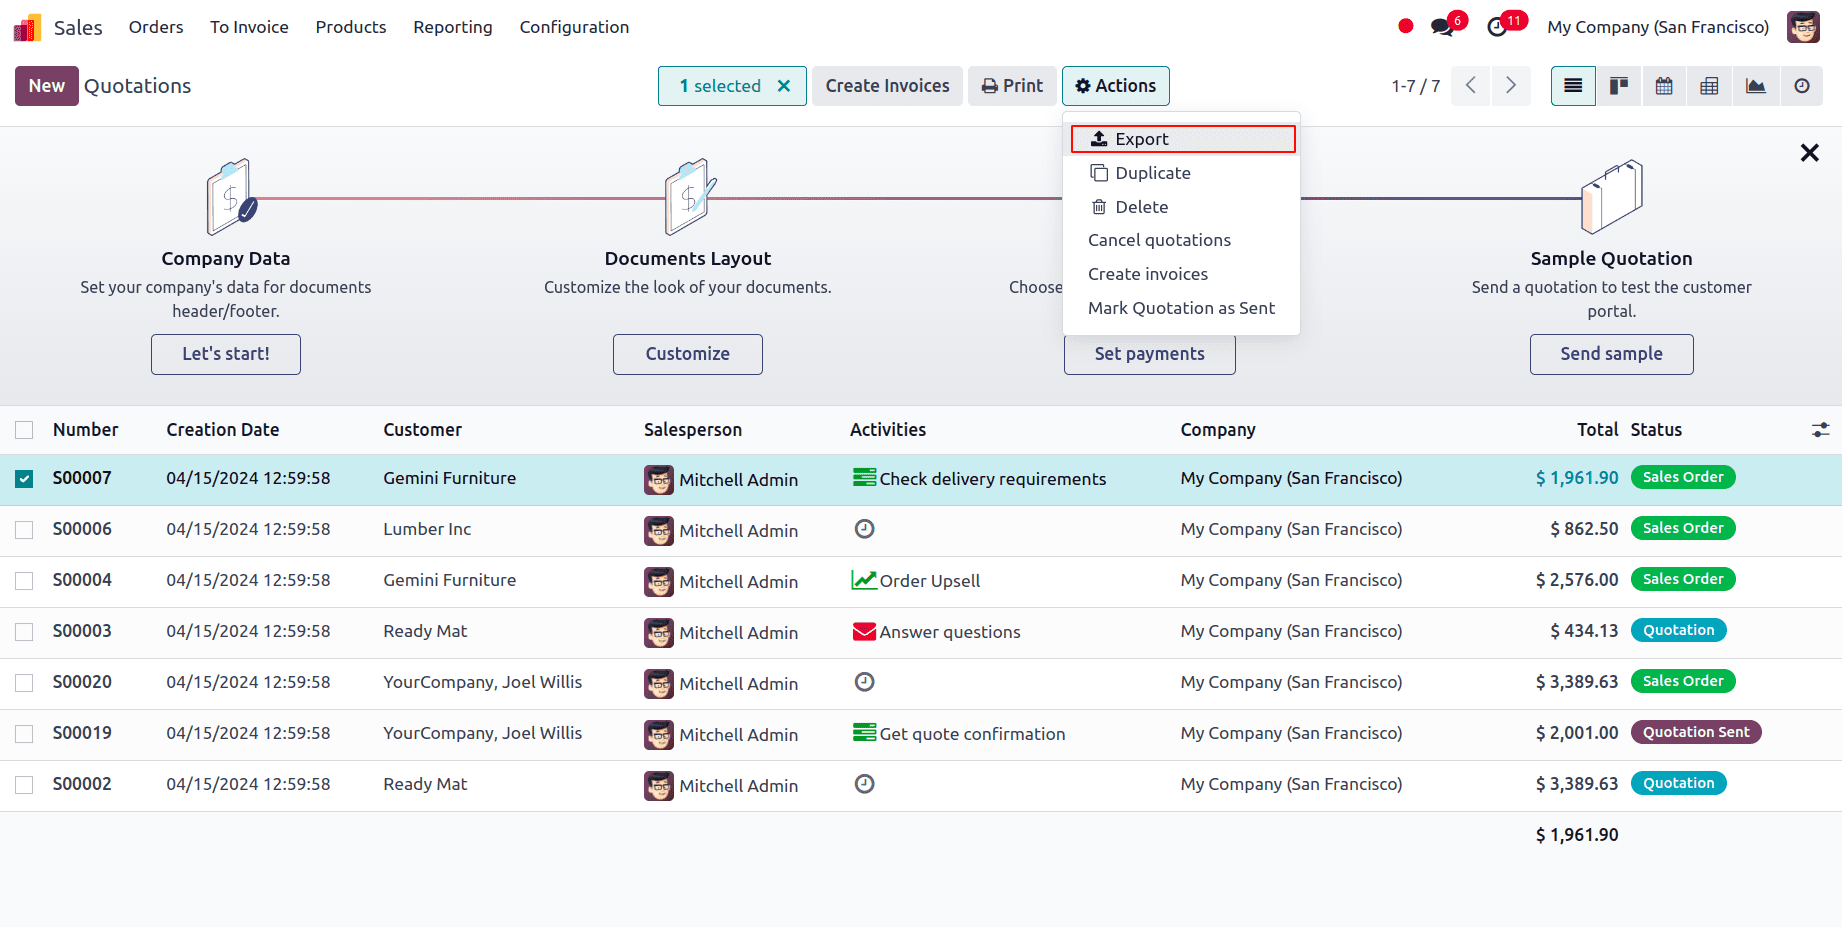
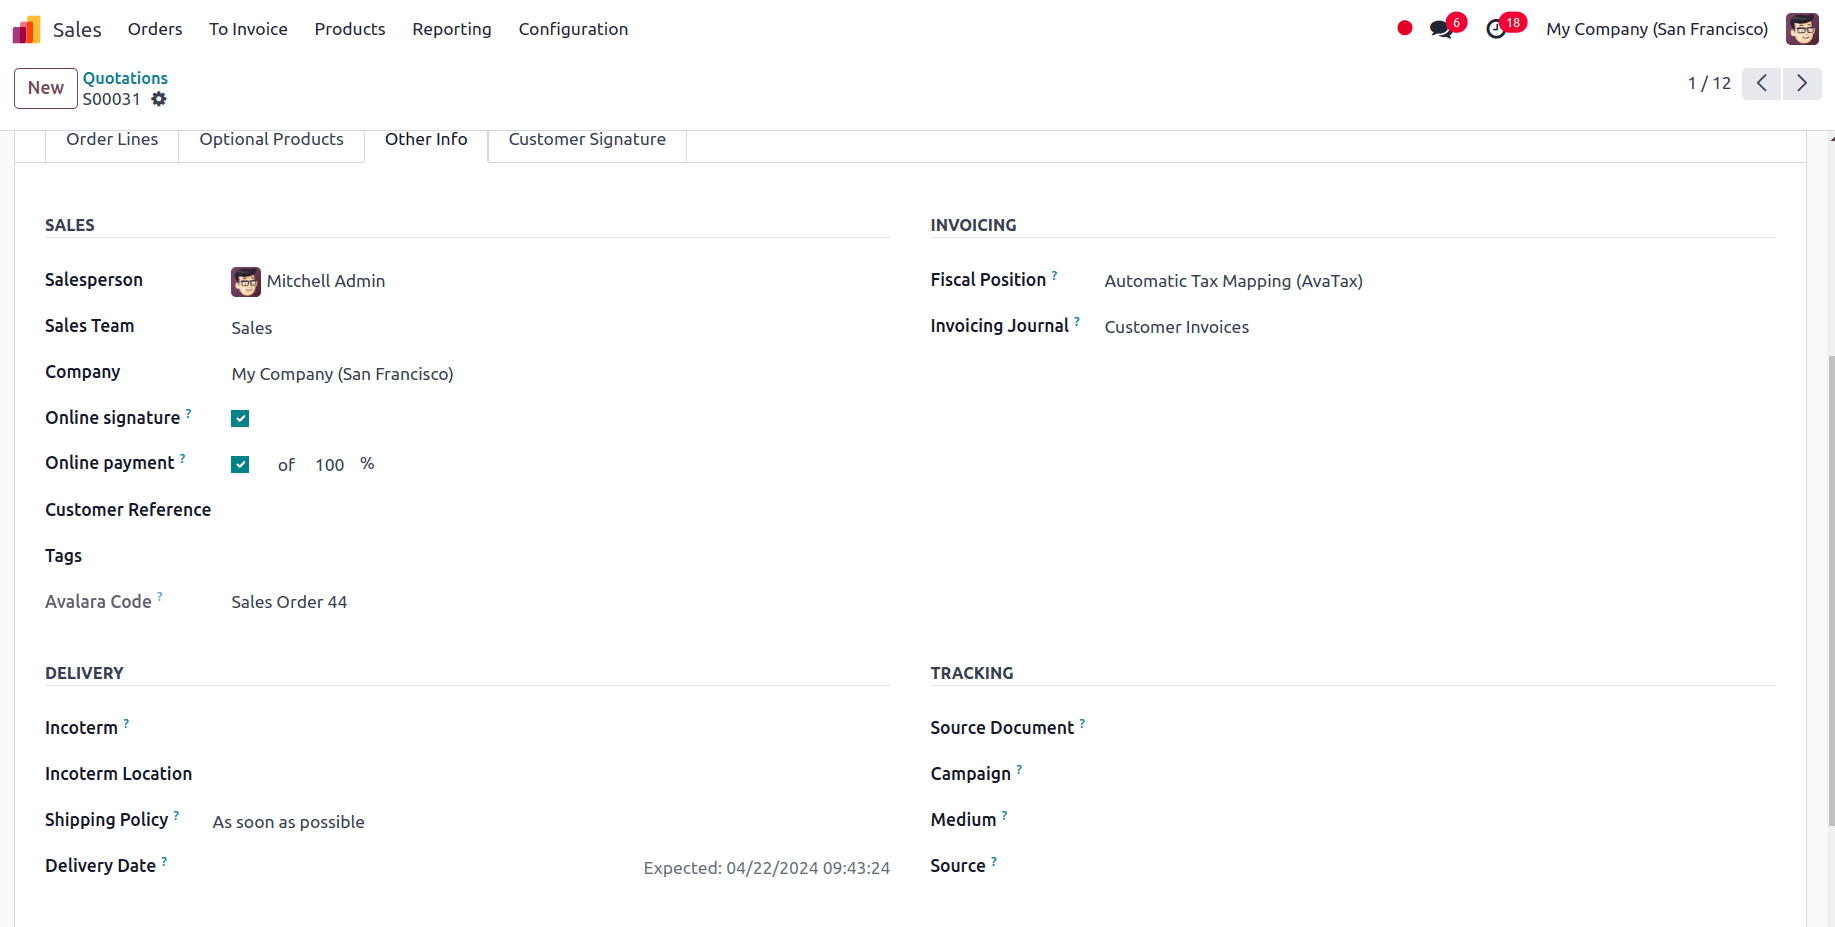
To import the sale order in Odoo 17, first, we have to navigate to the Sales app ? Orders ? Quotations. We can create a template first. For that firstly, select a record for exporting, and click the actions button to reveal the export option.
Click on Export and a new window appears with available fields on the left and fields to export on the right. From the ‘available fields’, we can add the fields that we want to export to the ‘fields to export’ section by clicking on the + icon. A name can be provided for the template to save the template in that name and we can use this template if we are exporting the data multiple times.
An option called, I want to update data (import-compatible export) is also available. If we check that option, the fields that can be imported are only shown. If we want to update the record, we can use the external id of the record to update a record without duplicating the data, the external id will uniquely identify the record. Another advantage is that while we export with the external id, the first row in the exported sheet appears with the heading which will be easily able to map to the odoo fields.
When the box is left unchecked, all of the fields are displayed, not only the ones that can be imported, giving you a lot more field options.
When exporting, there is the option to export in two formats: .csv and .xlsx. With .csv the items will be separated by a comma, while in .xlsx , it holds information about all the worksheets in a file, including both content and formatting.
The > (right arrow) icon can be clicked to display more sub-field options for each field, and the search bar can be used to find specific fields. We can also drag the fields to arrange them in the order we want in the exported file and use the trash icon to delete unnecessary fields.
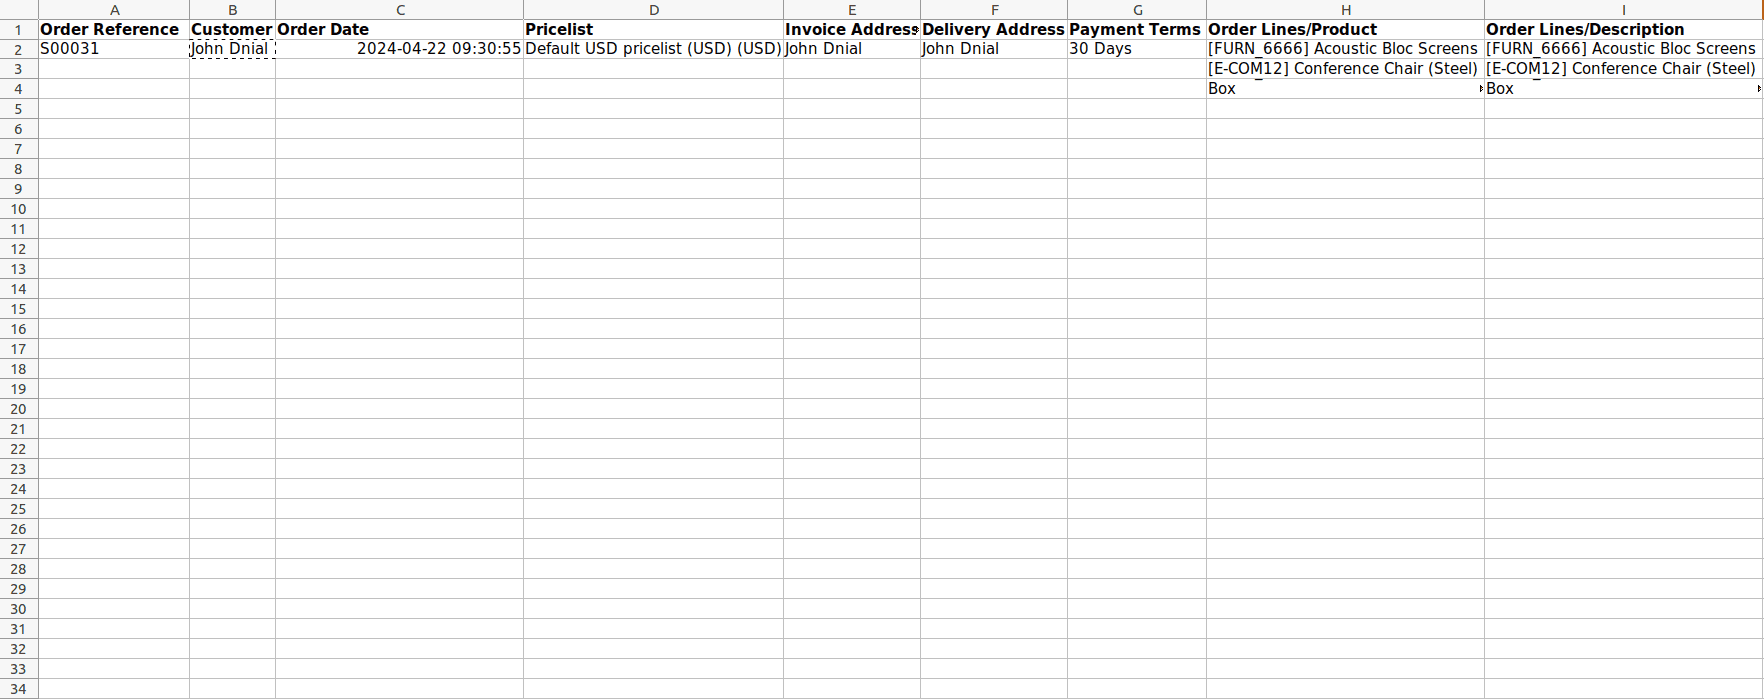
Here, we are adding the following fields to export:
* Order reference: It refers to the unique reference ID of the order.
* Customer: Customer to whom the sale order is being created.
* Order Date: It refers to the date on which the sale order is created.
* Pricelist: It is the predefined list of prices for products and services offered by the company.
* Invoice Address: It is the address to which the invoice for the sale will be sent.
* Delivery Address: It is the address to which the products or services purchased in the sale order will be delivered to.
* Payment terms: Clearly states all terms associated with a sales payment to assist clients in making accurate and timely payments.
* Order Lines/Product: Product that needs to be added to the sale order.
* Order Lines/Description: Description of the product.
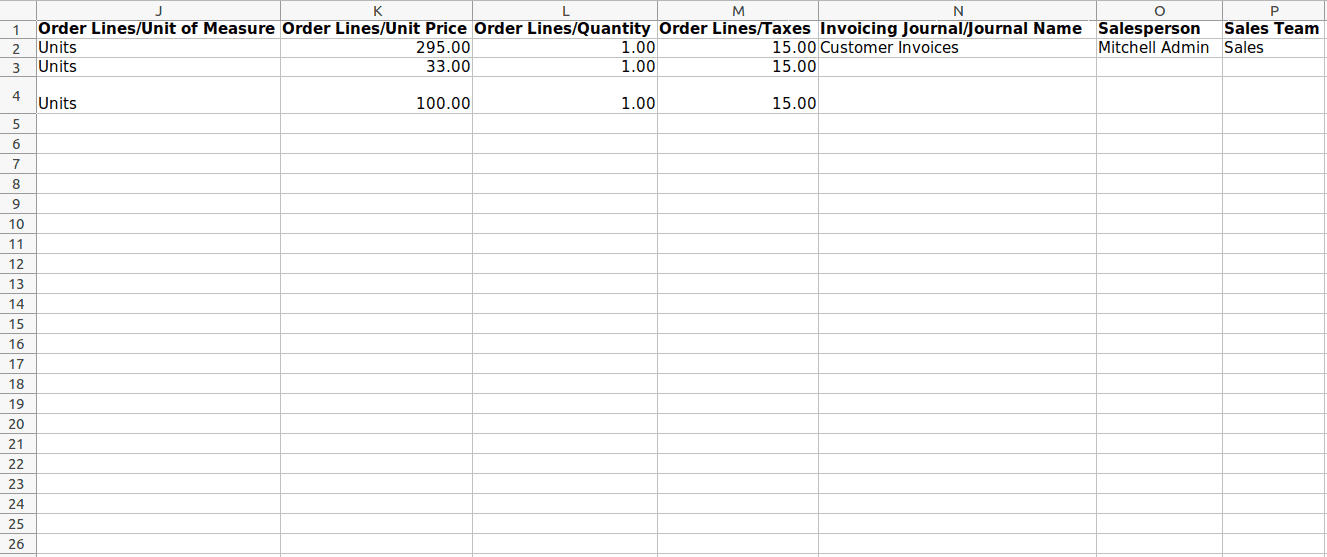
* Order Lines/Quantity: Quantity of the product
* Order Lines/Unit of Measure: UoM of the product.
* Order Lines/Unit Price: Unit price of the product.
* Order Lines/Taxes: refers to the tax amount that is attached to each order line.
* Invoicing Journal/Journal Name: It is the record-keeping entity used to keep the accounting records of the invoice.
* Salesperson: refers to a specific individual who is responsible for managing sales-related activities.
* Sales Team: this refers to a specific group of individuals who is responsible for managing the sales-related activities.
* Fiscal Position: refers to a set of rules or configurations that define how taxes and accounting entries should be managed for specific customers or vendors based on their fiscal or financial situation.
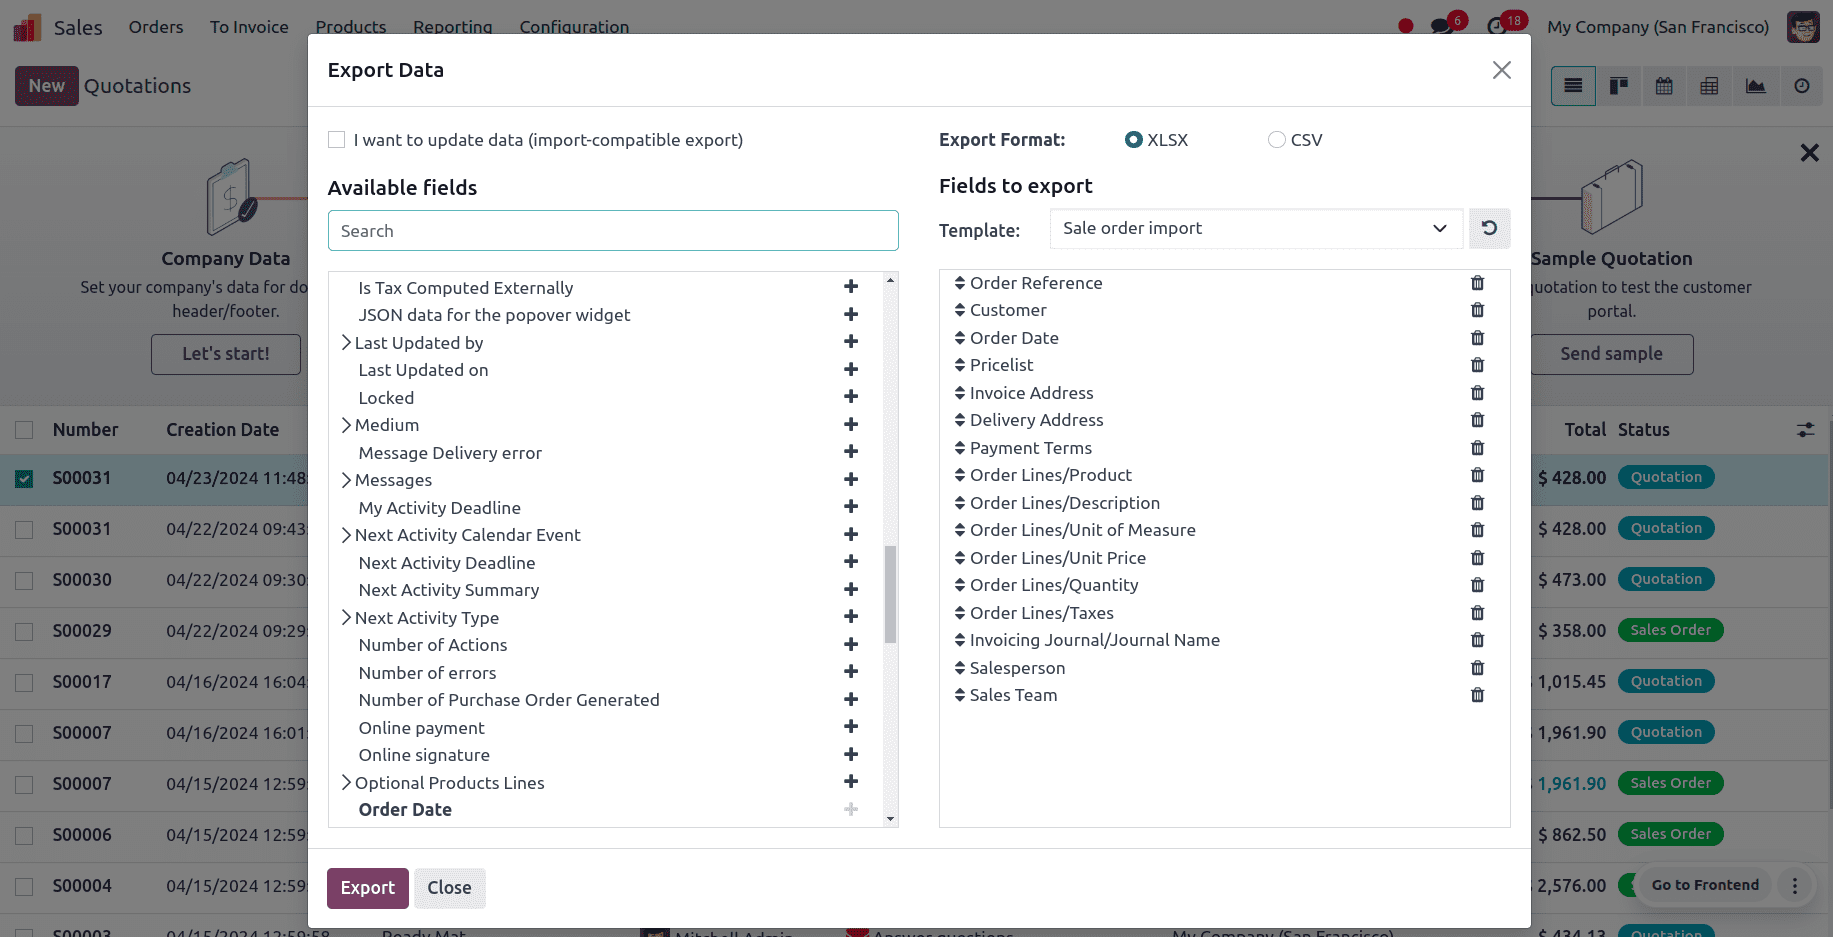
After adding all the fields to export, we can click on the Export button to export the template and update the template according to the need.
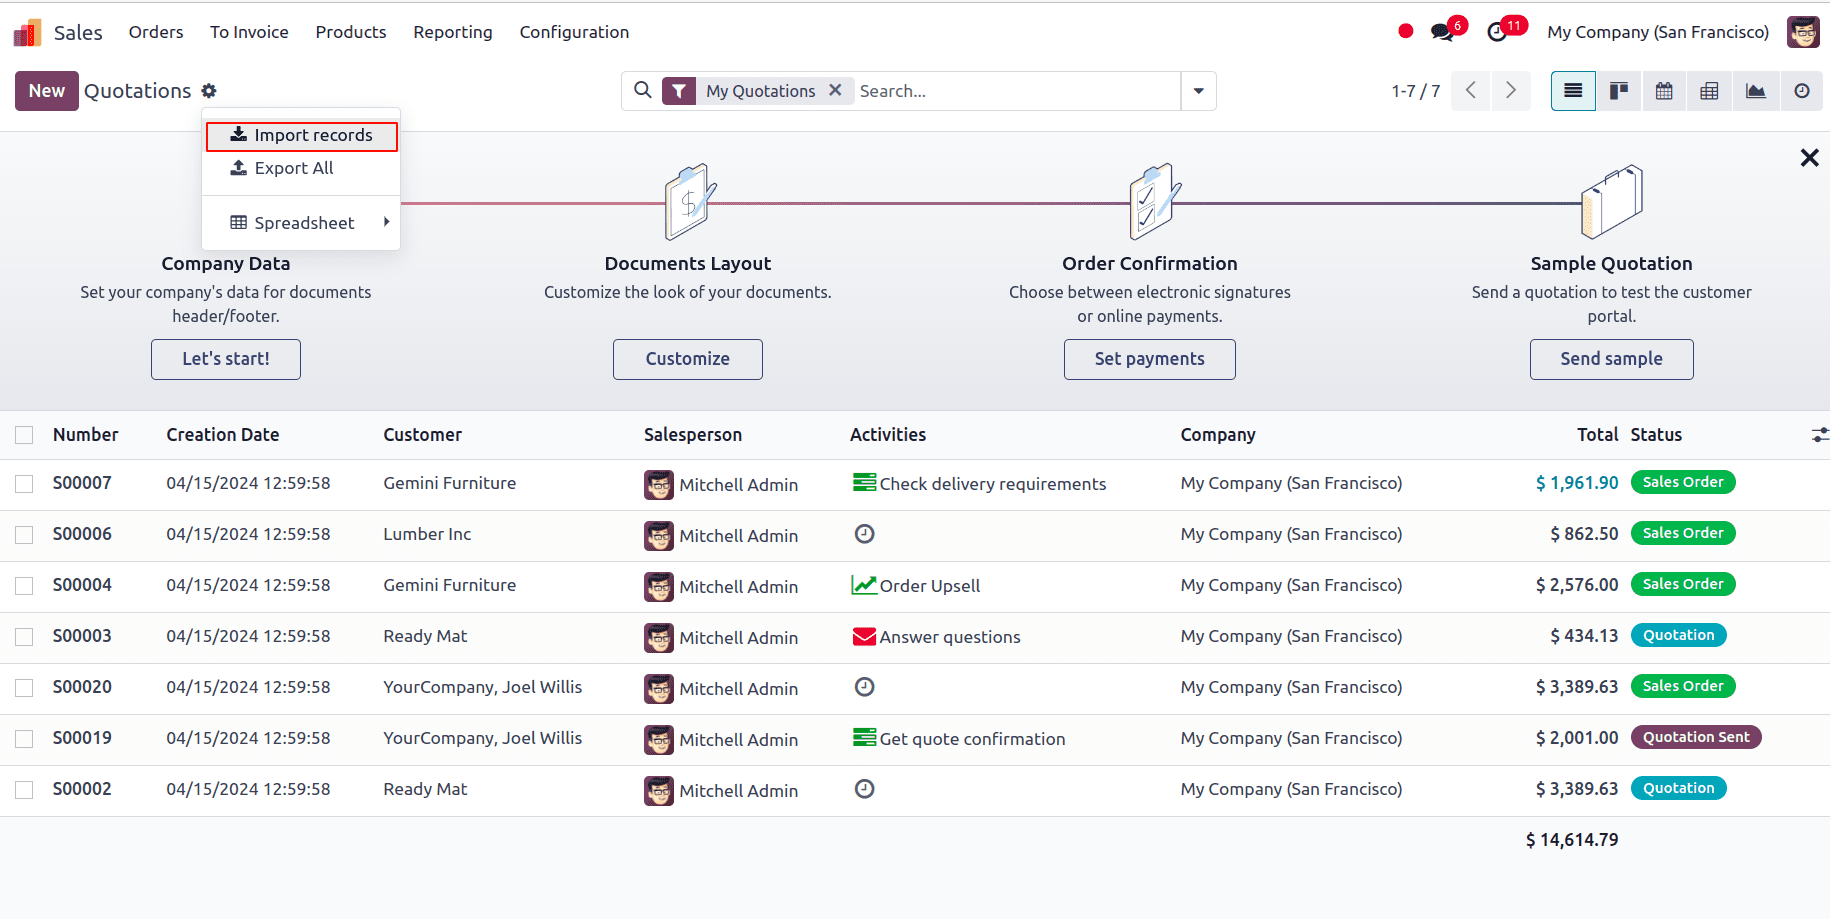
After updating the sale order template spreadsheet we can go back to the quotations page, click on the gear icon ?? at the upper left corner of the quotations page, and select Import records.
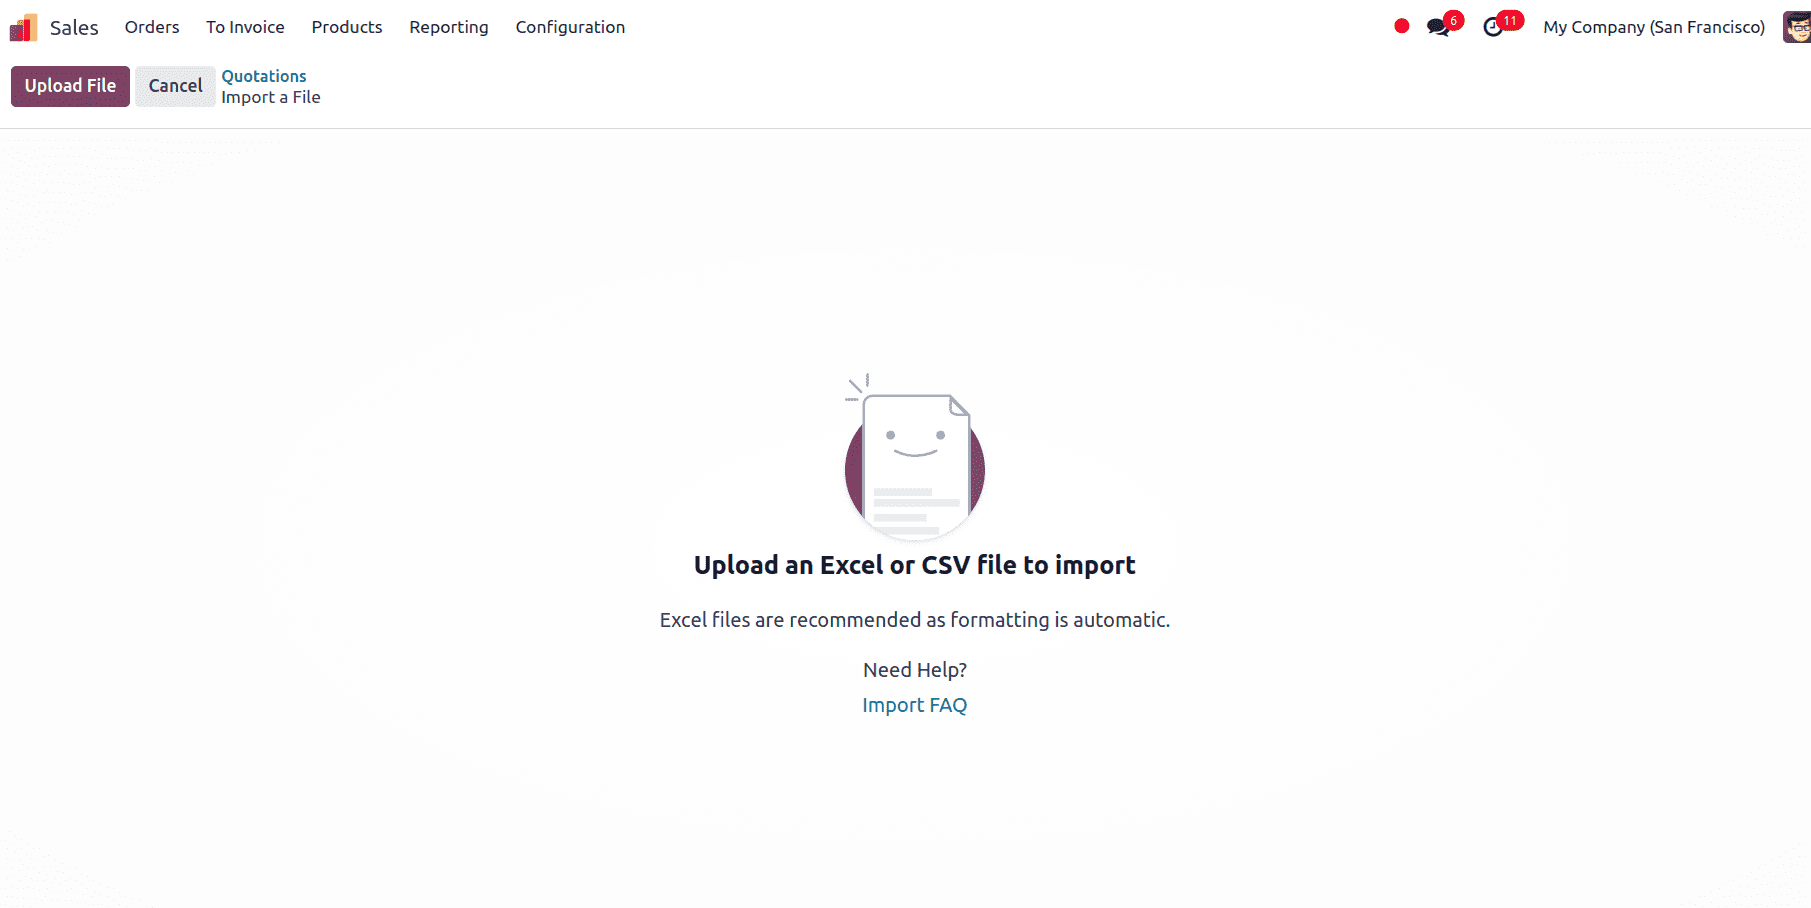
At the top left, we have the option to Upload a file to Upload a file from our system.
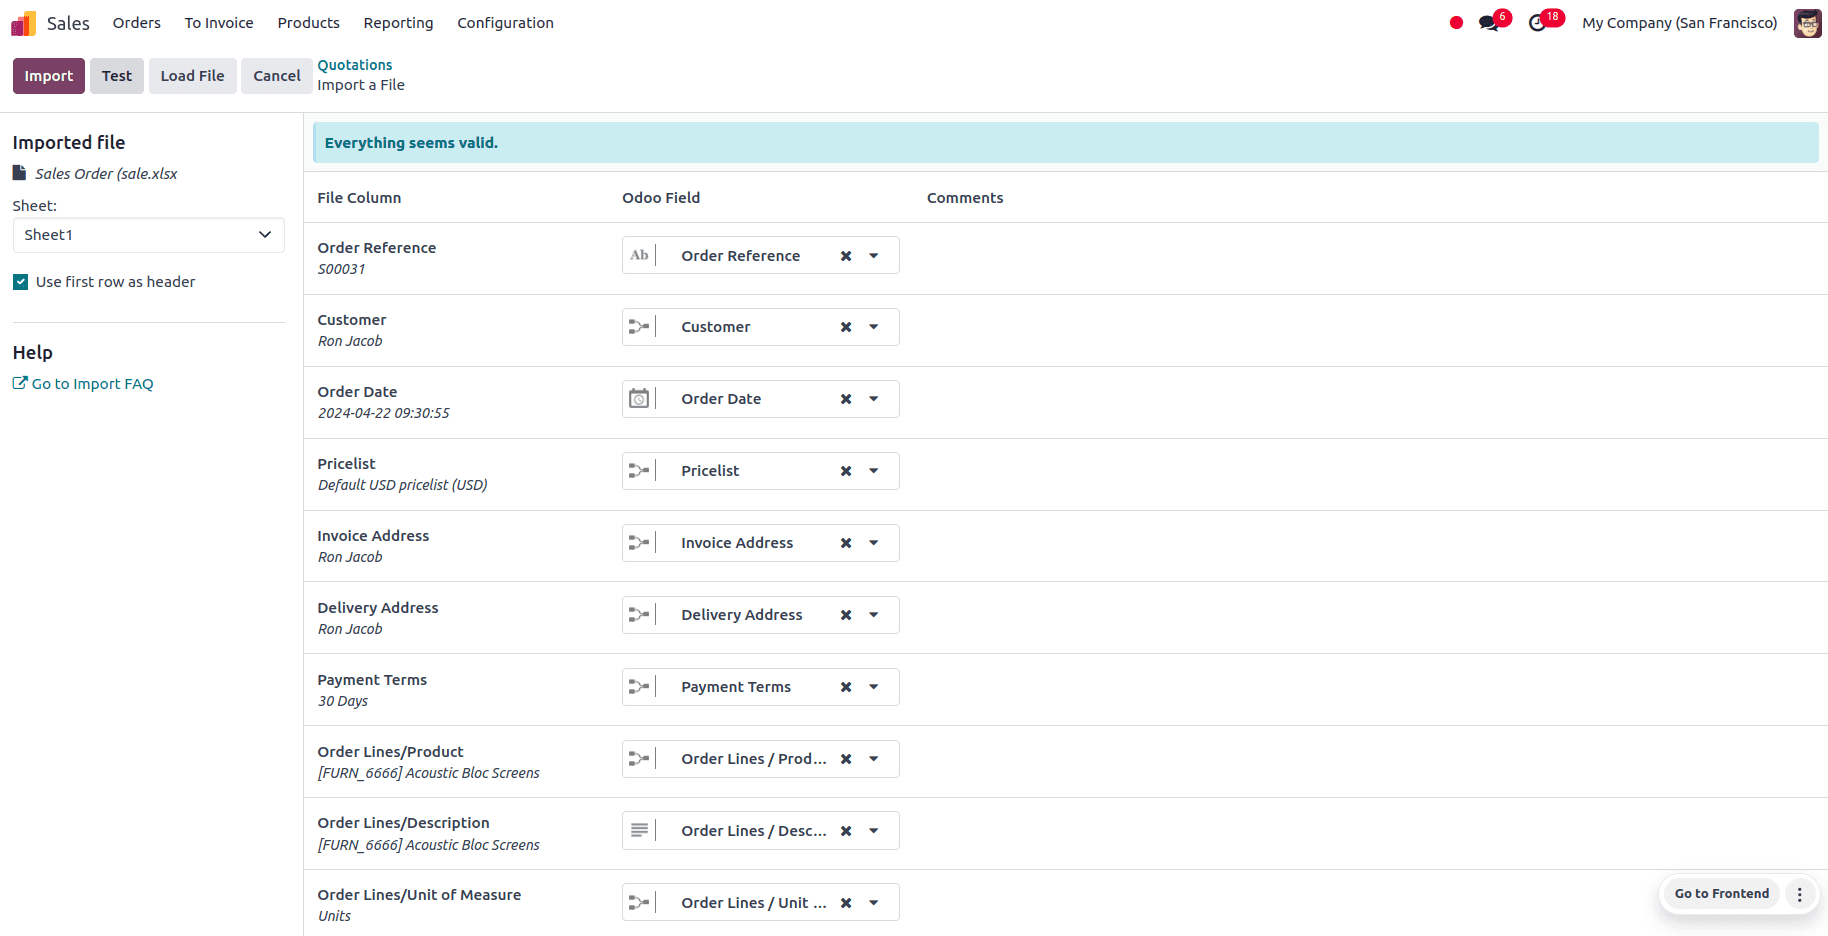
After uploading the file, a page showcasing all the elements of the newly configured sale order template spreadsheet, separated by File Column, Odoo Field, and Comments appears.
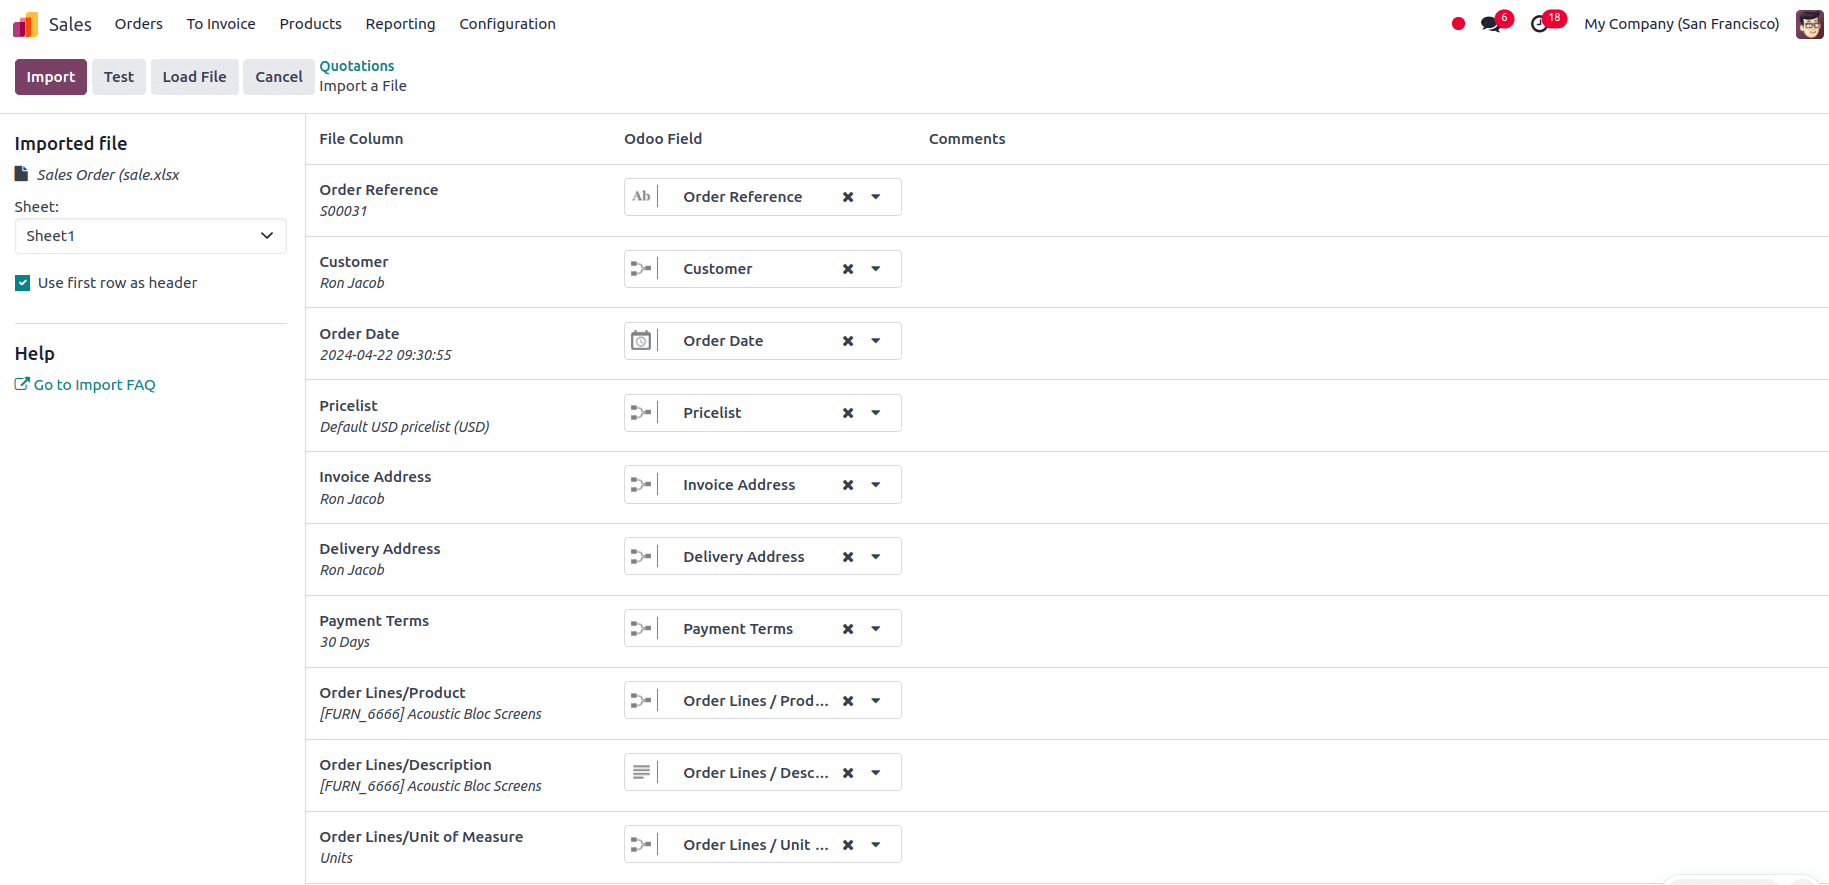
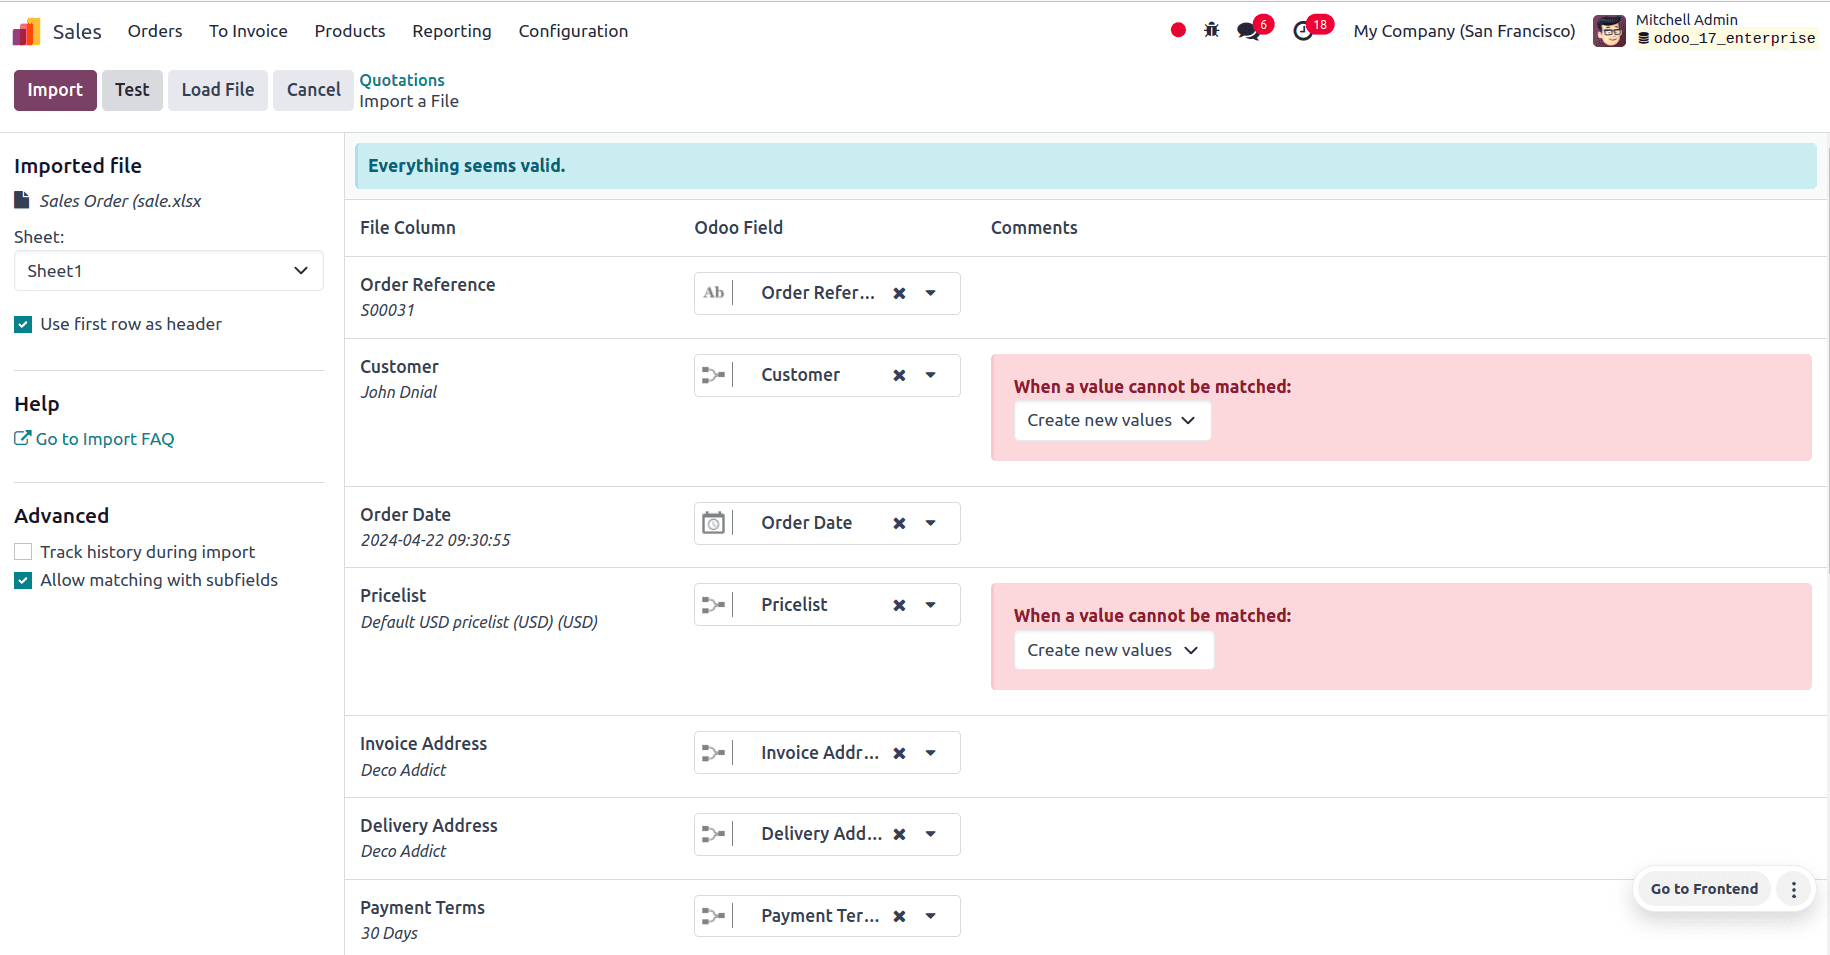
From here, the file column can be manually assigned to the Odoo Field if necessary and we can click on the Test button in the upper-left corner to check if every columns and fields are lined up in a right manner. If everything is correctly applied, then a blue banner is revealed at the top of the page informing the user that Everything seems valid.
If there are any errors, a red banner is revealed at the top of the page, with instructions on where to locate the specific issues and how to fix them.
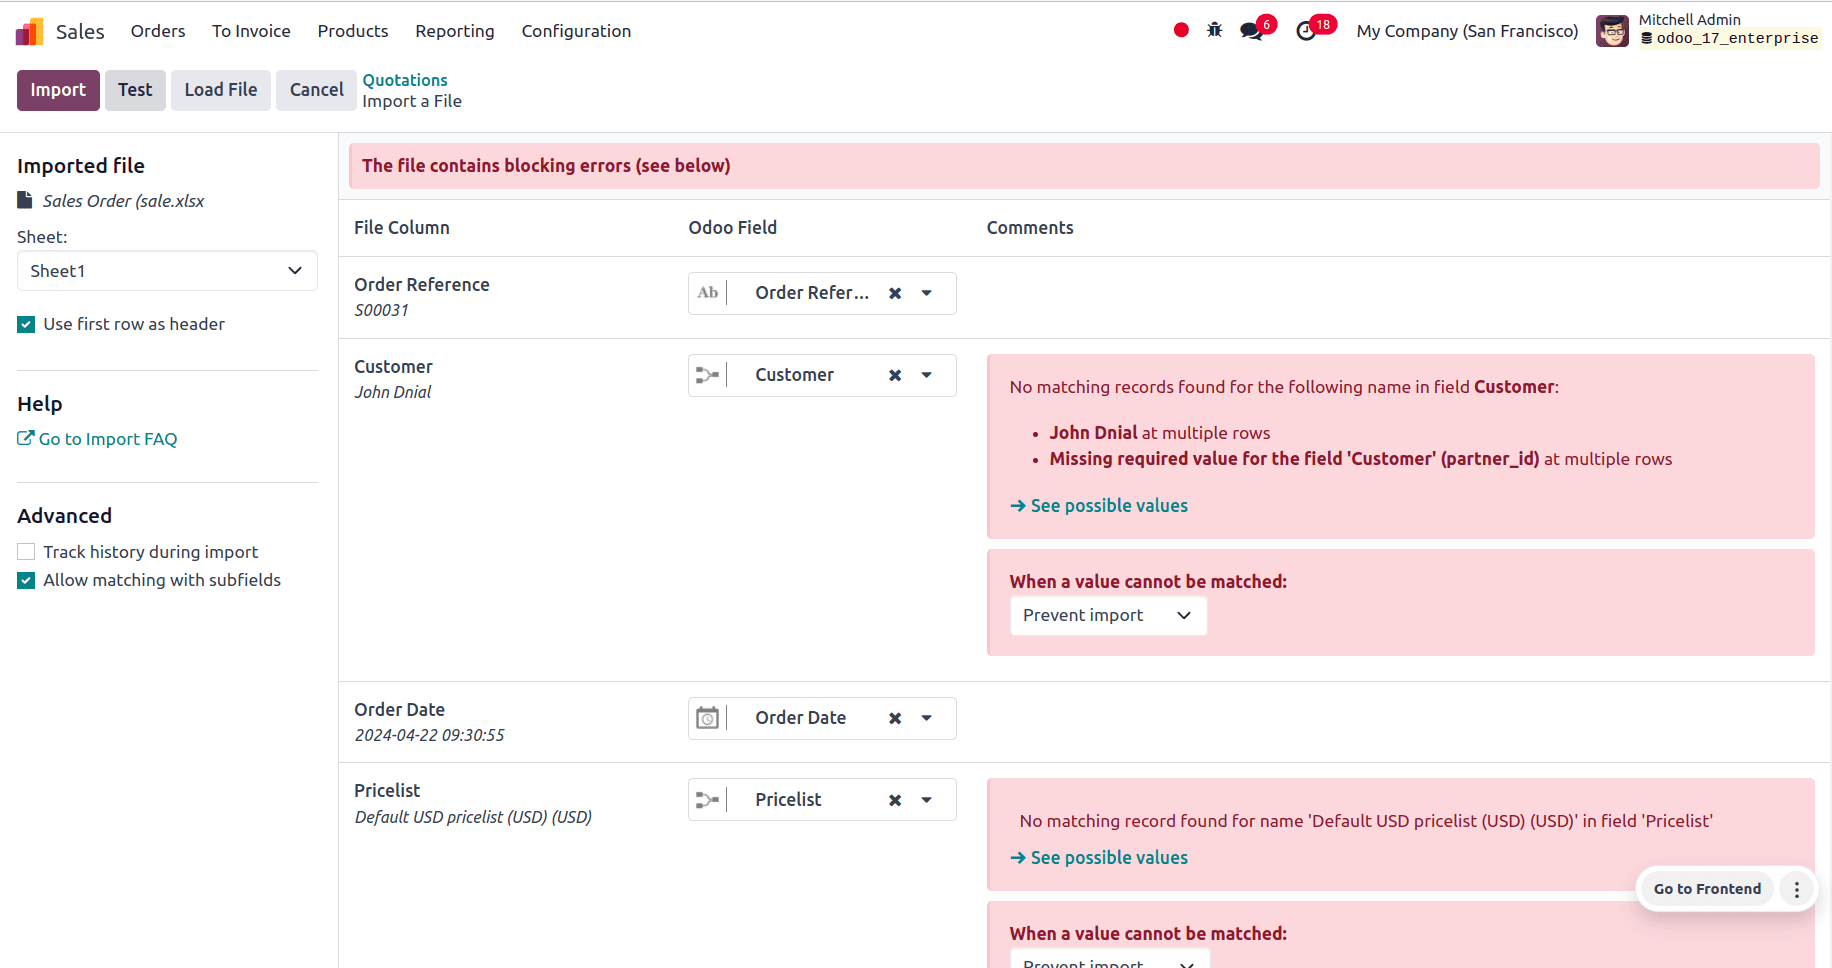
In the above screenshot, we can see the error that no matching records are found for the following name in the field ‘customer,’ so here we can either prevent the importing of that field or we can select create new values and continue the importing.
Once all the errors are fixed, we can click on the test button and then on the Import button to import the records. When the records are imported, a pop-up message in the upper-right corner appears, which informs the user how many quotations were successfully imported.
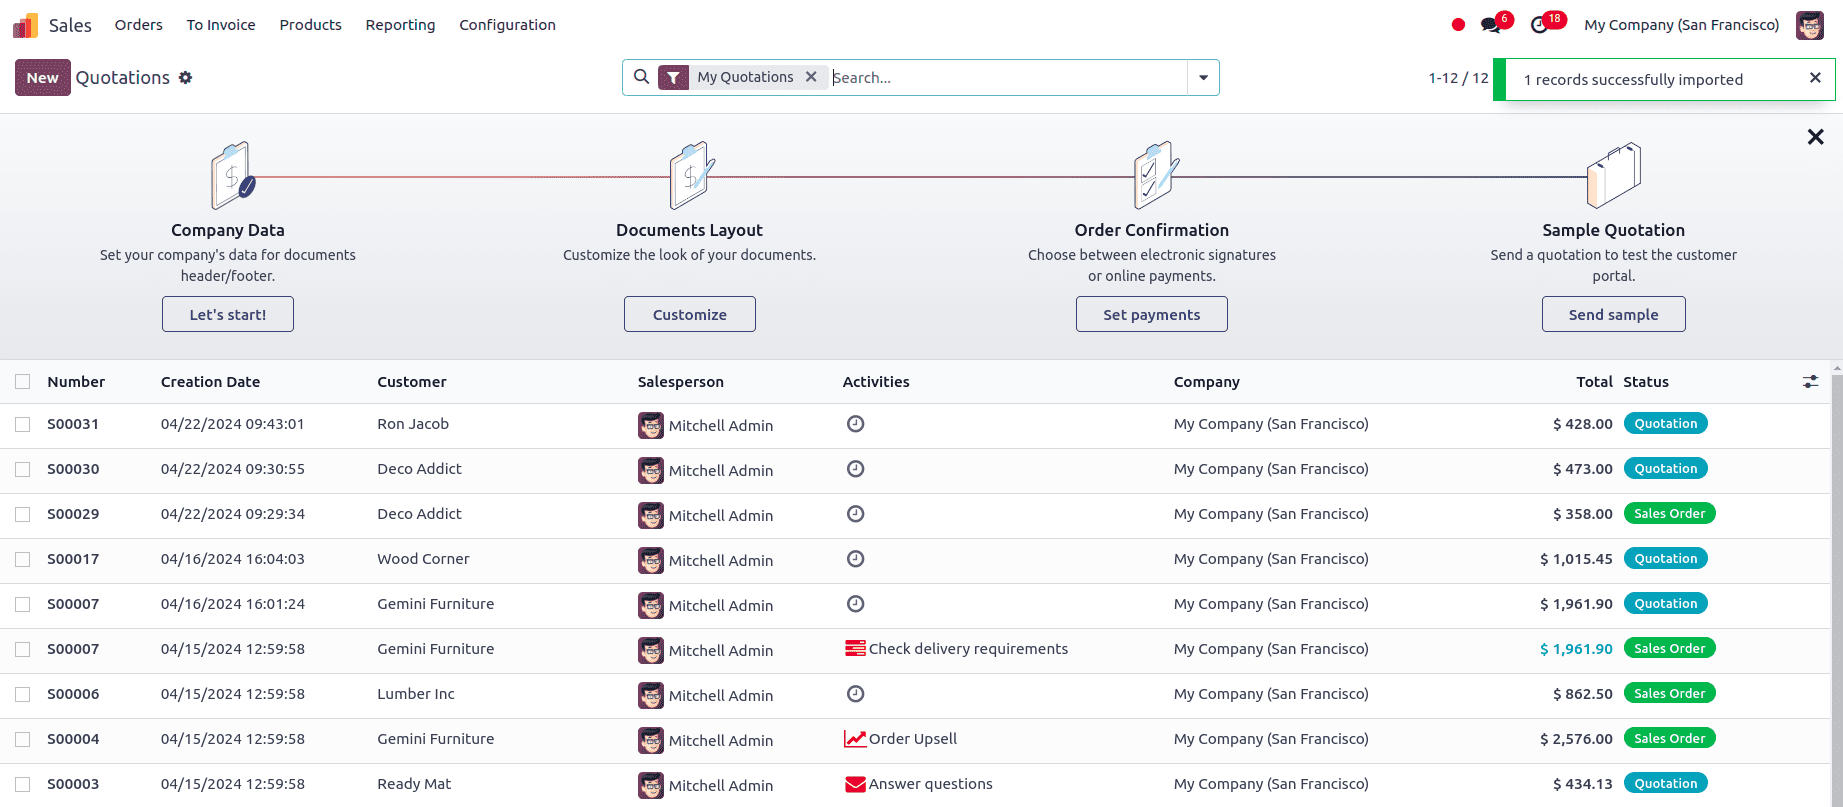
Now, we will be able to view the imported quotations, and we can access and edit them from the quotations page in the sales app.
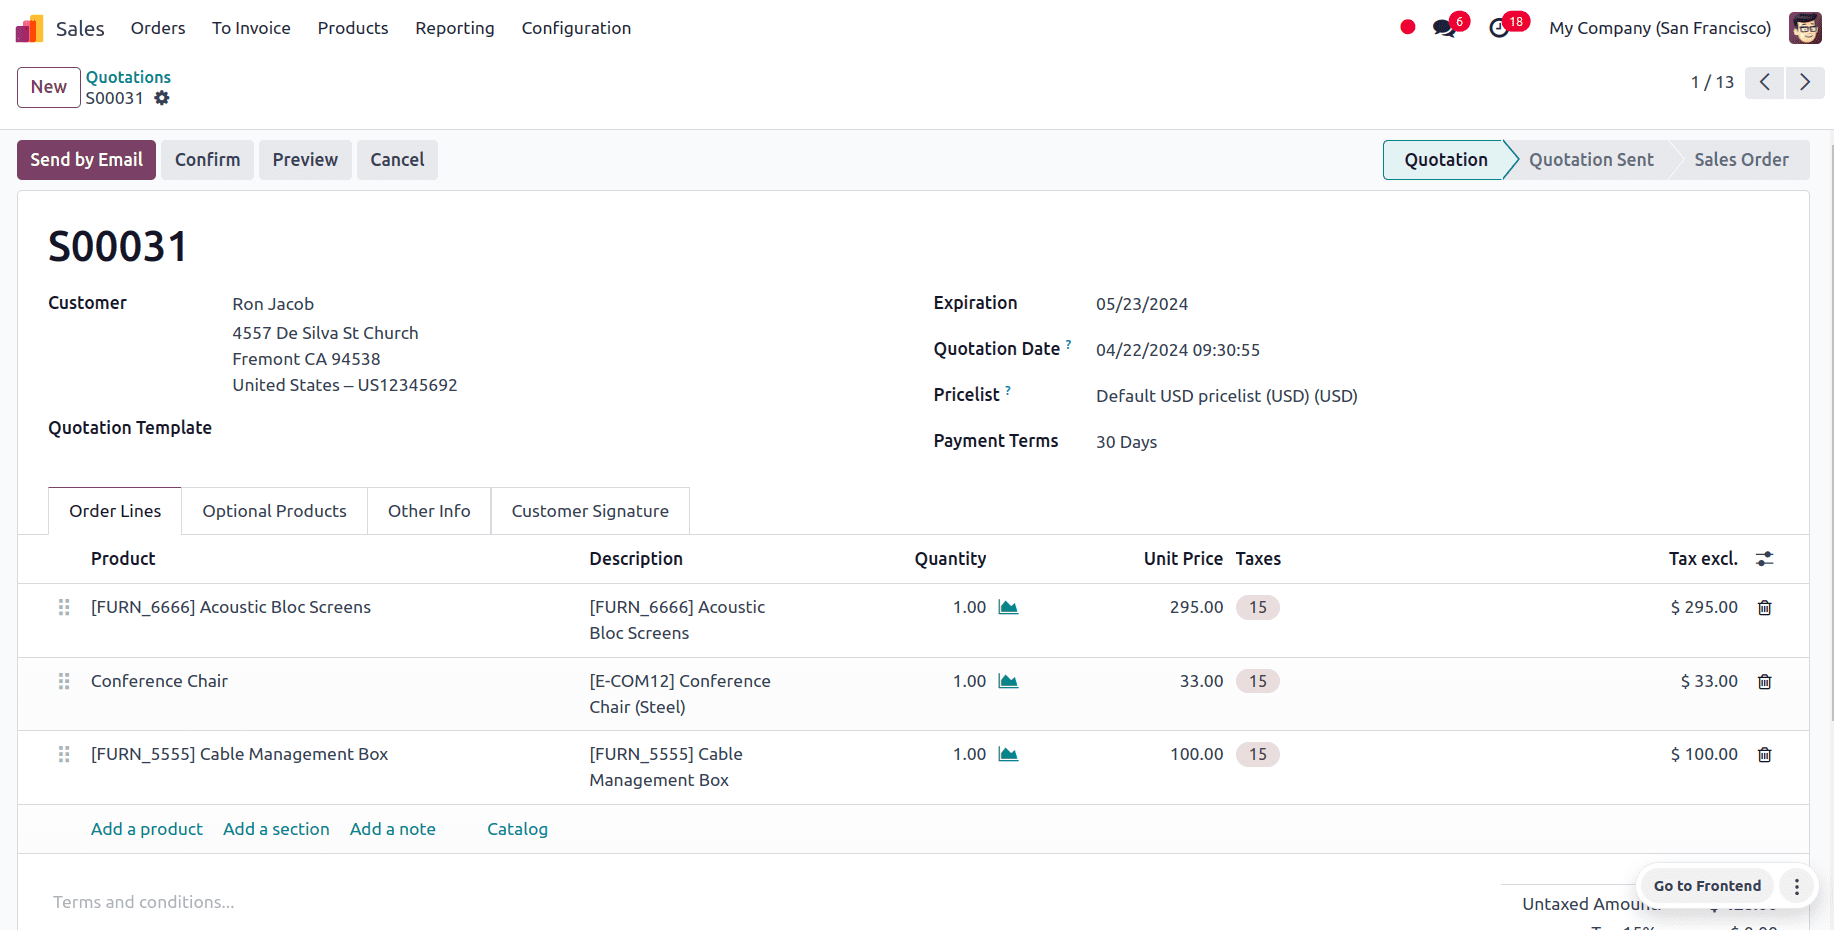
All the fields in the sheet are imported to the respective fields in the sales quotation.
Importing Purchase Orders in Odoo 17
In order to import the purchase orders in Odoo, the purchase order import template needs to be downloaded first. After downloading, we can modify and update the template and upload it into the Odoo database.
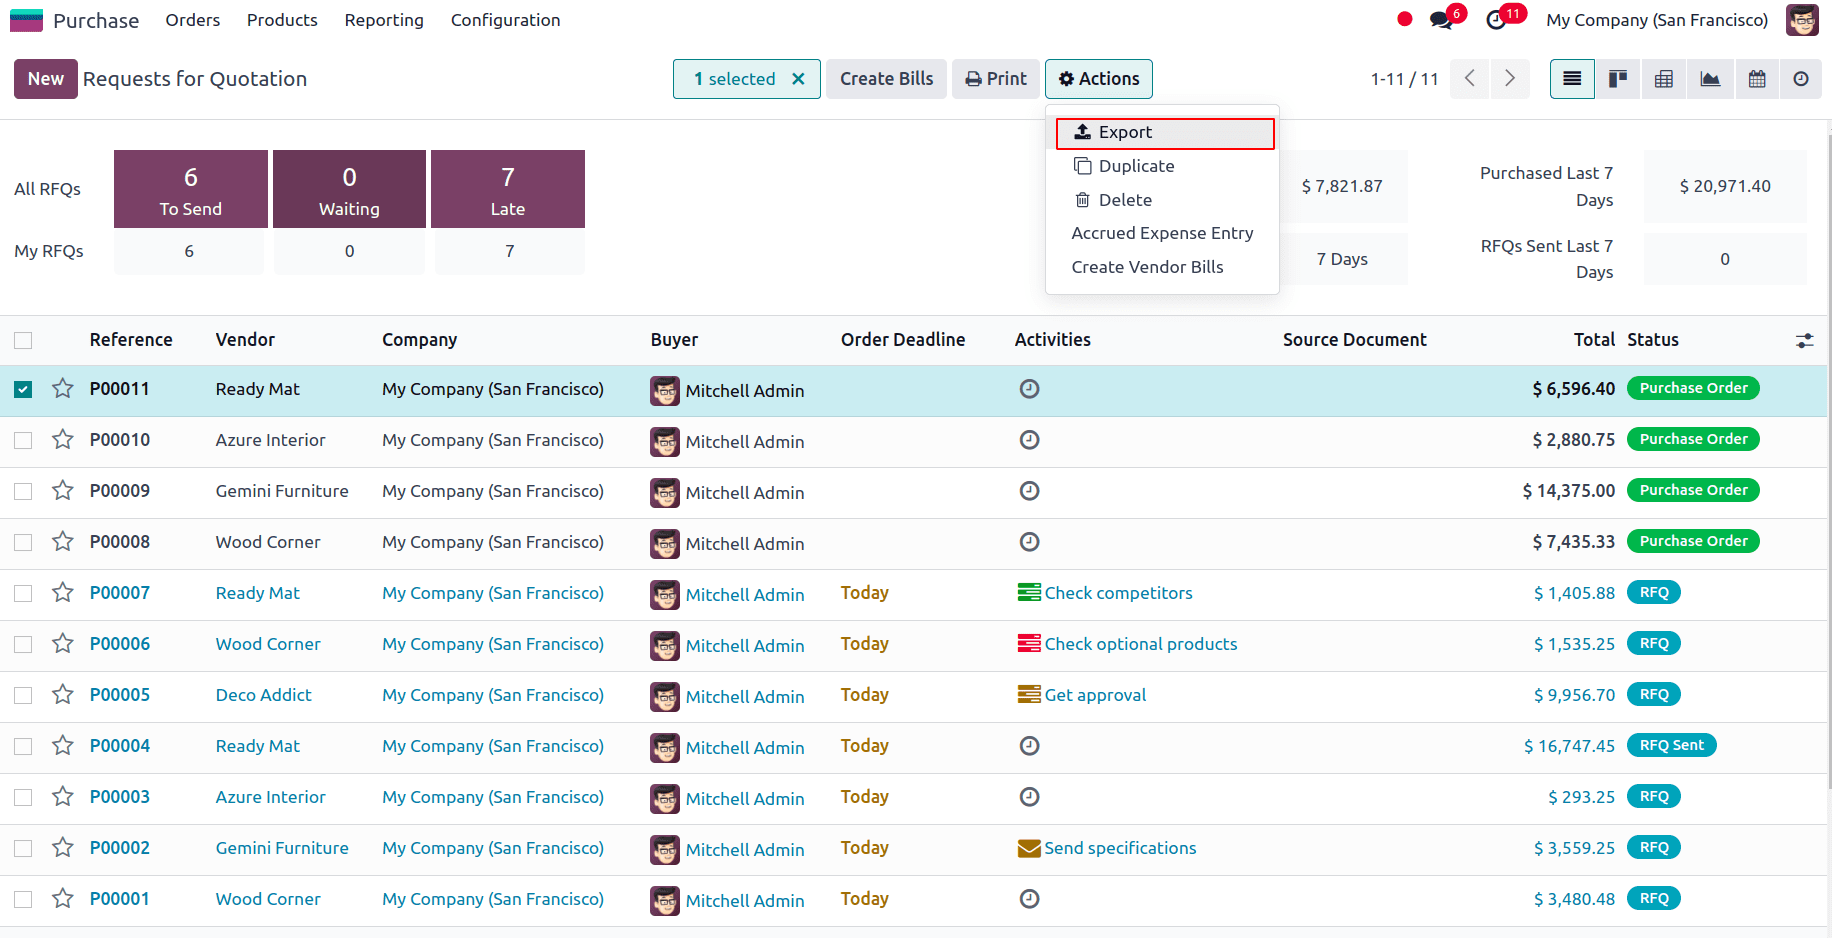
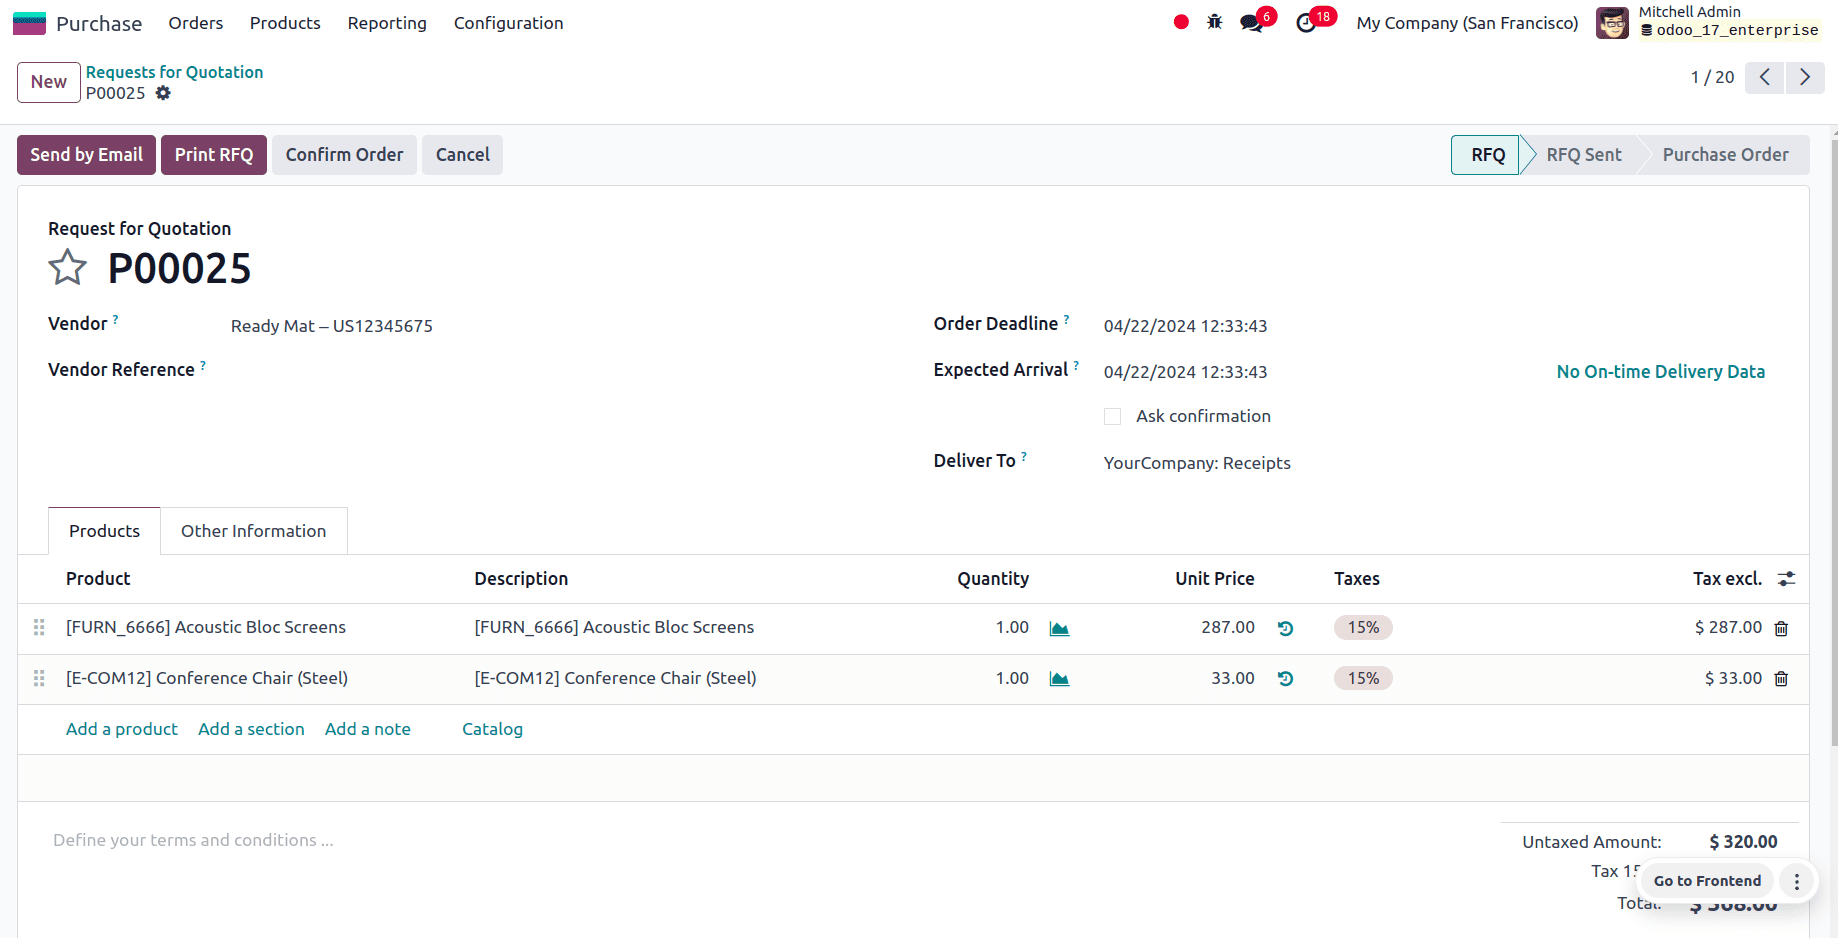
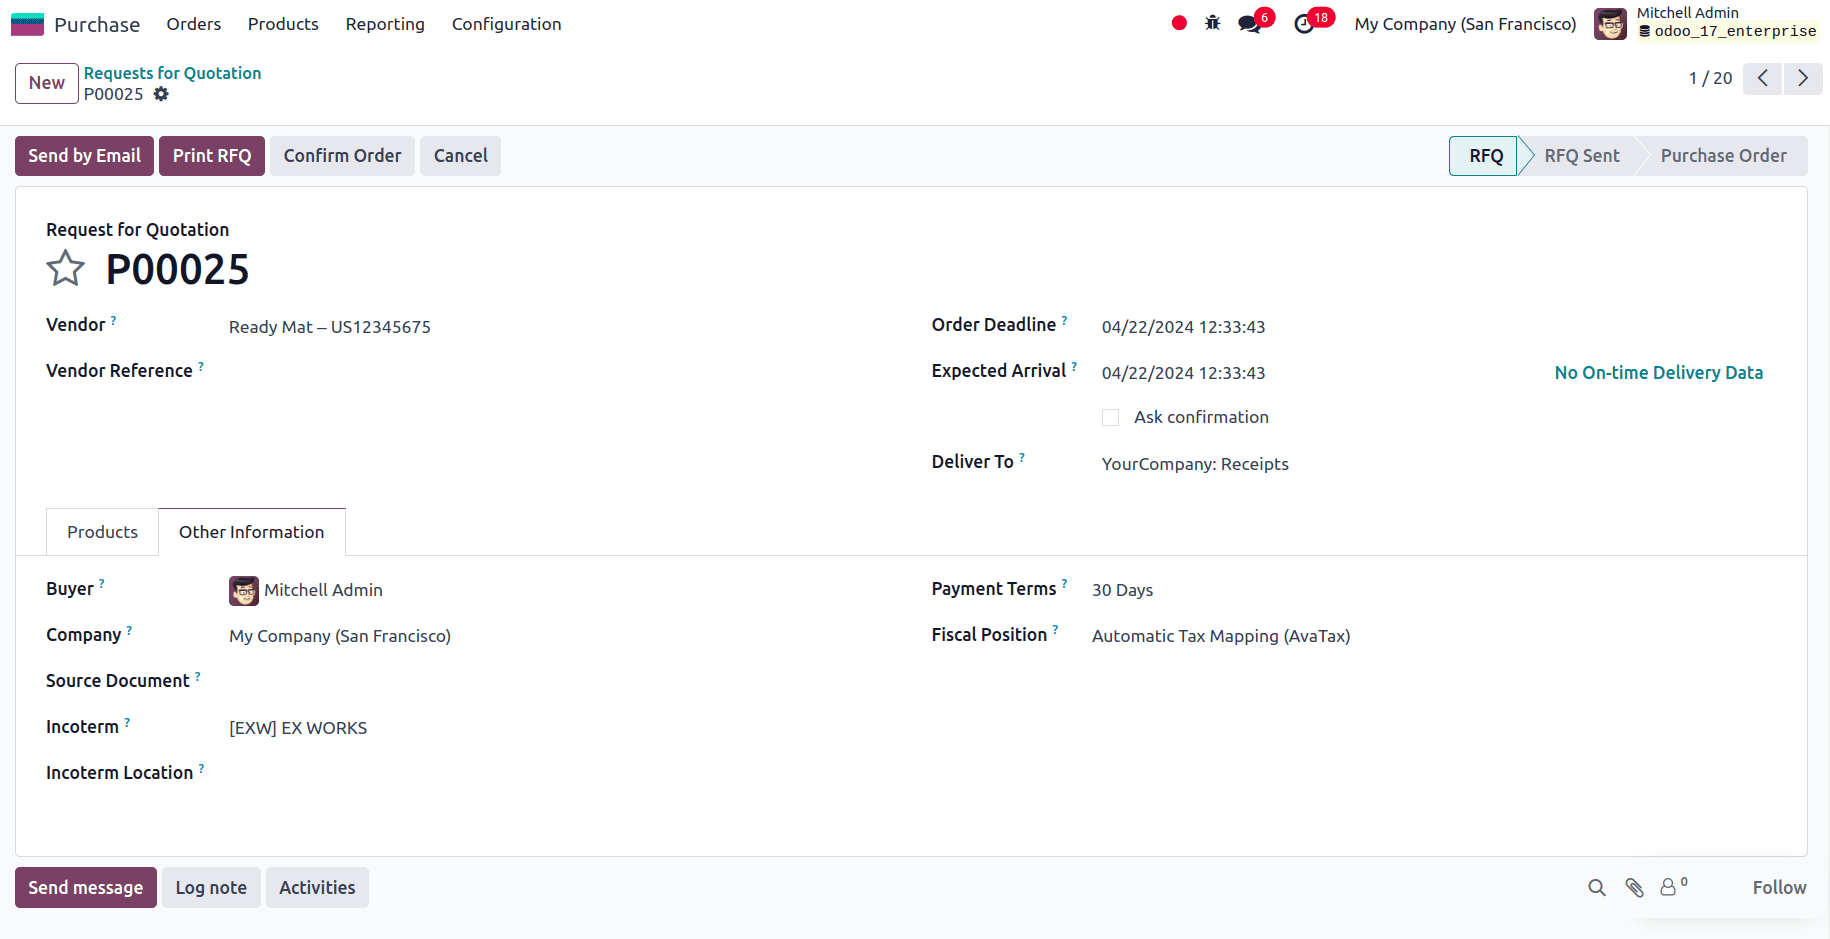
To download the necessary import template, navigate to Purchase app ? Orders ? Request for quotations. From the request for quotations page, we can select a record for exporting, and click the actions button to reveal the export option.
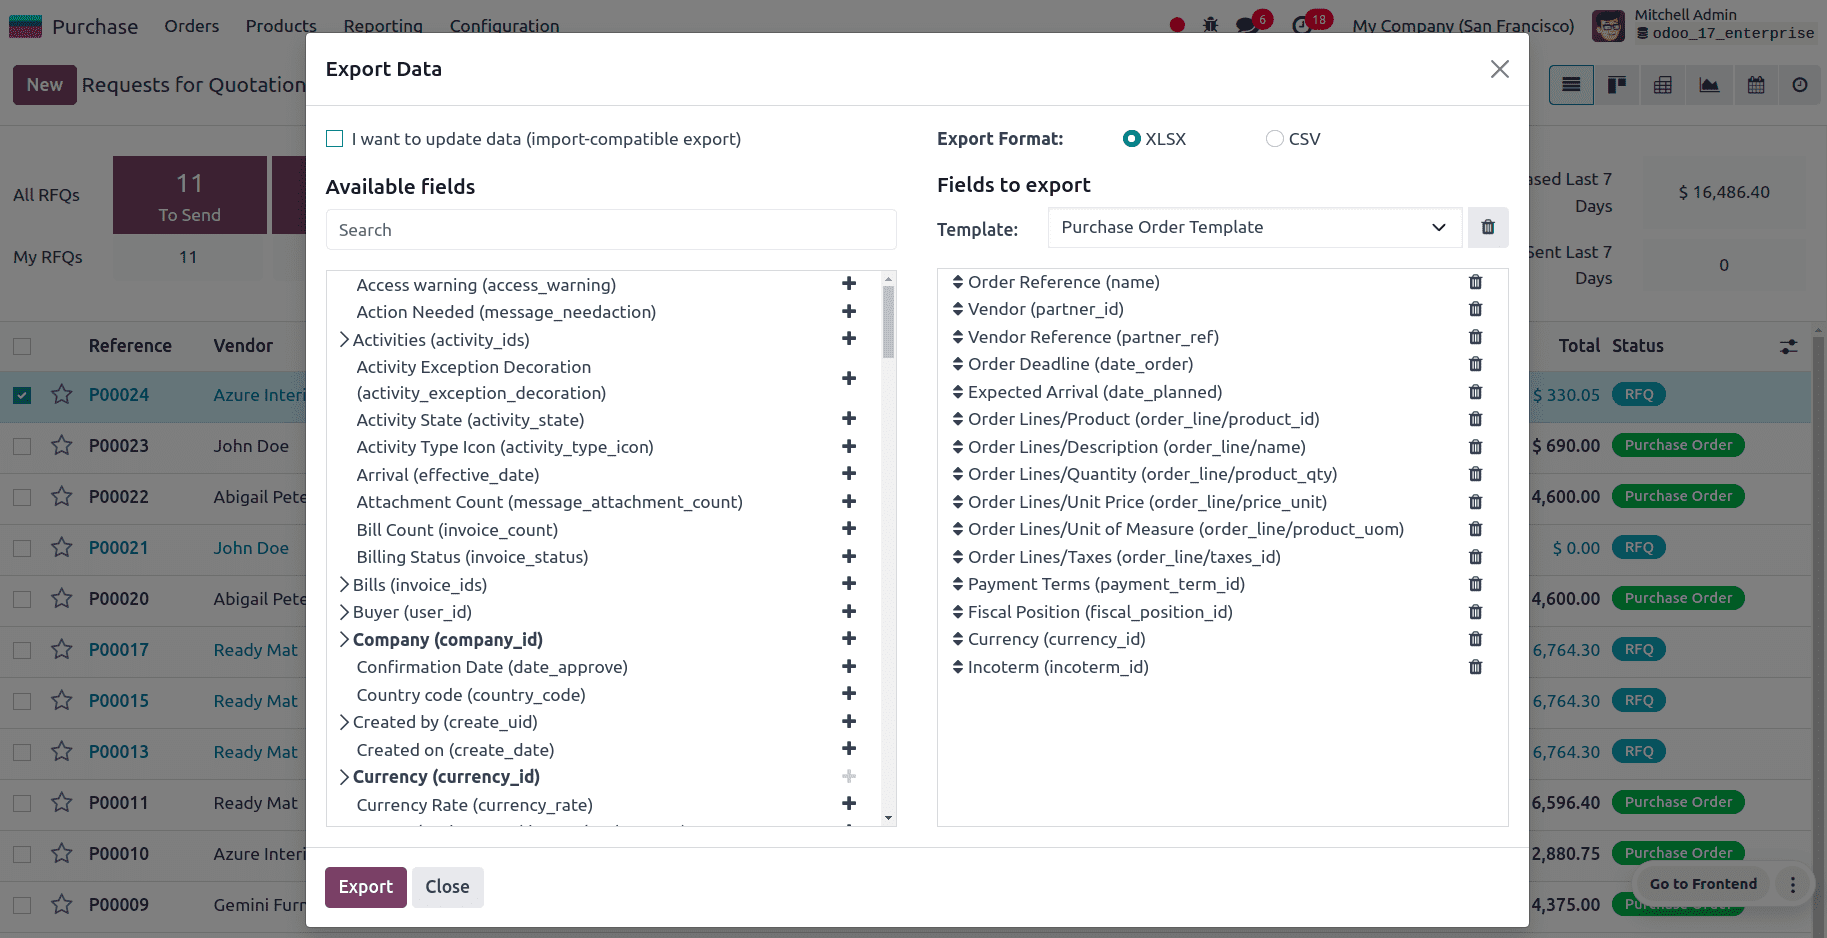
Click on Export and a new window appears with available fields on the left and fields to export on the right. From the available fields, we can add the fields which we want to export to fields to export section by clicking on the + icon. A name can be provided for the template to save the template in that name and we can use this template if we are exporting the data multiple times.
An option called, I want to update data (import-compatible export) is also available. If we check that option, the fields that can be imported are only shown along with the external id. The external id helps to uniquely identify a record and hence this will be helpful in updating an imported record easily without creating any duplicates. Also, while we exporting files with external id, the sheet we will get with the first row (heading) will be in the form which is easily able to map to odoo fields while importing records.
When the box is left unchecked, all of the fields are displayed, not only the ones that can be imported, giving you a lot more field options.
When exporting, there is the option to export in two formats: .csv and .xlsx. With .csv the items will be separated by a comma, while in .xlsx , it holds information about all the worksheets in a file, including both content and formatting.
The > (right arrow) icon can be clicked to display more sub-field options for each field, and the search bar can be used to find specific fields. We can also drag the fields to arrange them in the order we want in the exported file and use the trash icon to delete unnecessary fields.
Here, we are adding the following fields:
* Order Reference: It refers to the unique reference Id of the order.
* Vendor: Vendor for whom the purchase order is being created.
* Vendor Reference: It is the reference of the sale order or bid that is sent by the vendor. It is used to do the matching when you receive the products as this reference will be written on the delivery order that is sent by the vendor.
* Order Deadline: This refers to the deadline for confirming the request for quotation and converting it into a purchase order.
* Expected Arrival: It is the date on which the ordered items are expected to arrive.
* Order Lines/Product: Product that needs to be added to the sale order.
* Order Lines/Description: Description of the product.
* Order Lines/Quantity: Quantity of the product
* Order Lines/Unit Price: Unit price of the product.
* Order Lines/Unit of Measure: UoM of the product.
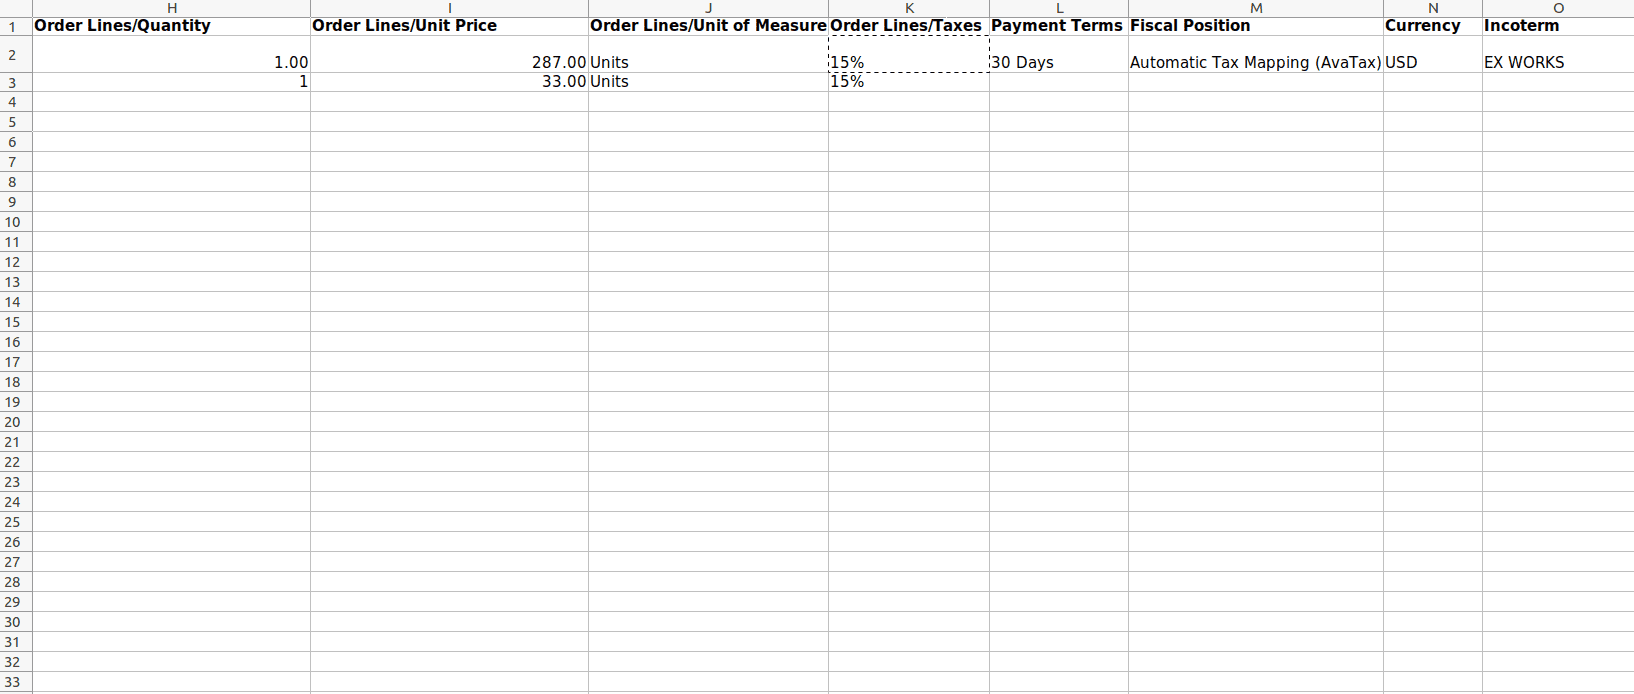
* Order Lines/ Taxes: refers to the tax amount that is attached to each order line.
* Payment Terms: Clearly states all terms associated with a sales payment to assist clients in making accurate and timely payments.
* Fiscal Position: refers to a set of rules or configurations that define how taxes and accounting entries should be managed for specific customers or vendors based on their fiscal or financial situation.
* Currency: It is the monetary unit in which the transactions take place.
* Incoterm: refers to International Commercial Terms, which are standard trade terms that are predetermined and used in contracts for international sales to divide expenses and responsibilities between the seller and the buyer.
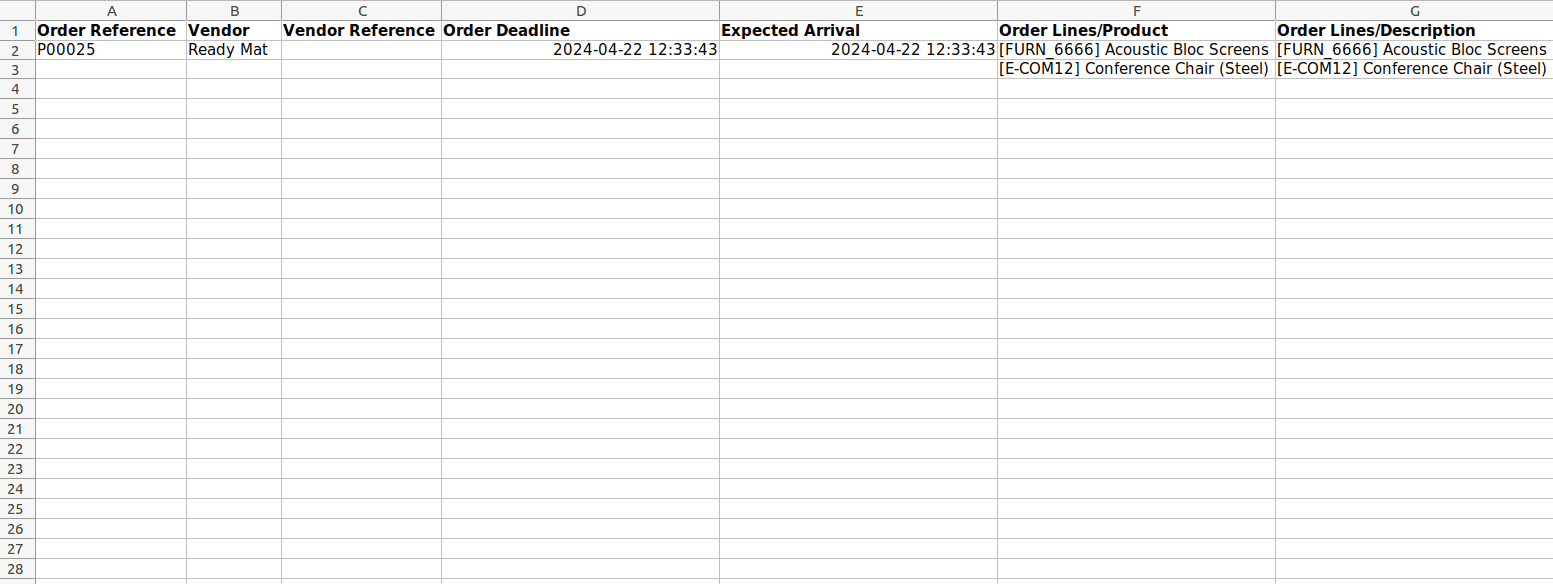
After adding all the fields to export, we can click on the Export button to export the template. And update the template according to the need.
After updating the purchase order template spreadsheet, we can click on the gear icon ?? at the upper left corner of the request for quotations page and select Import records.
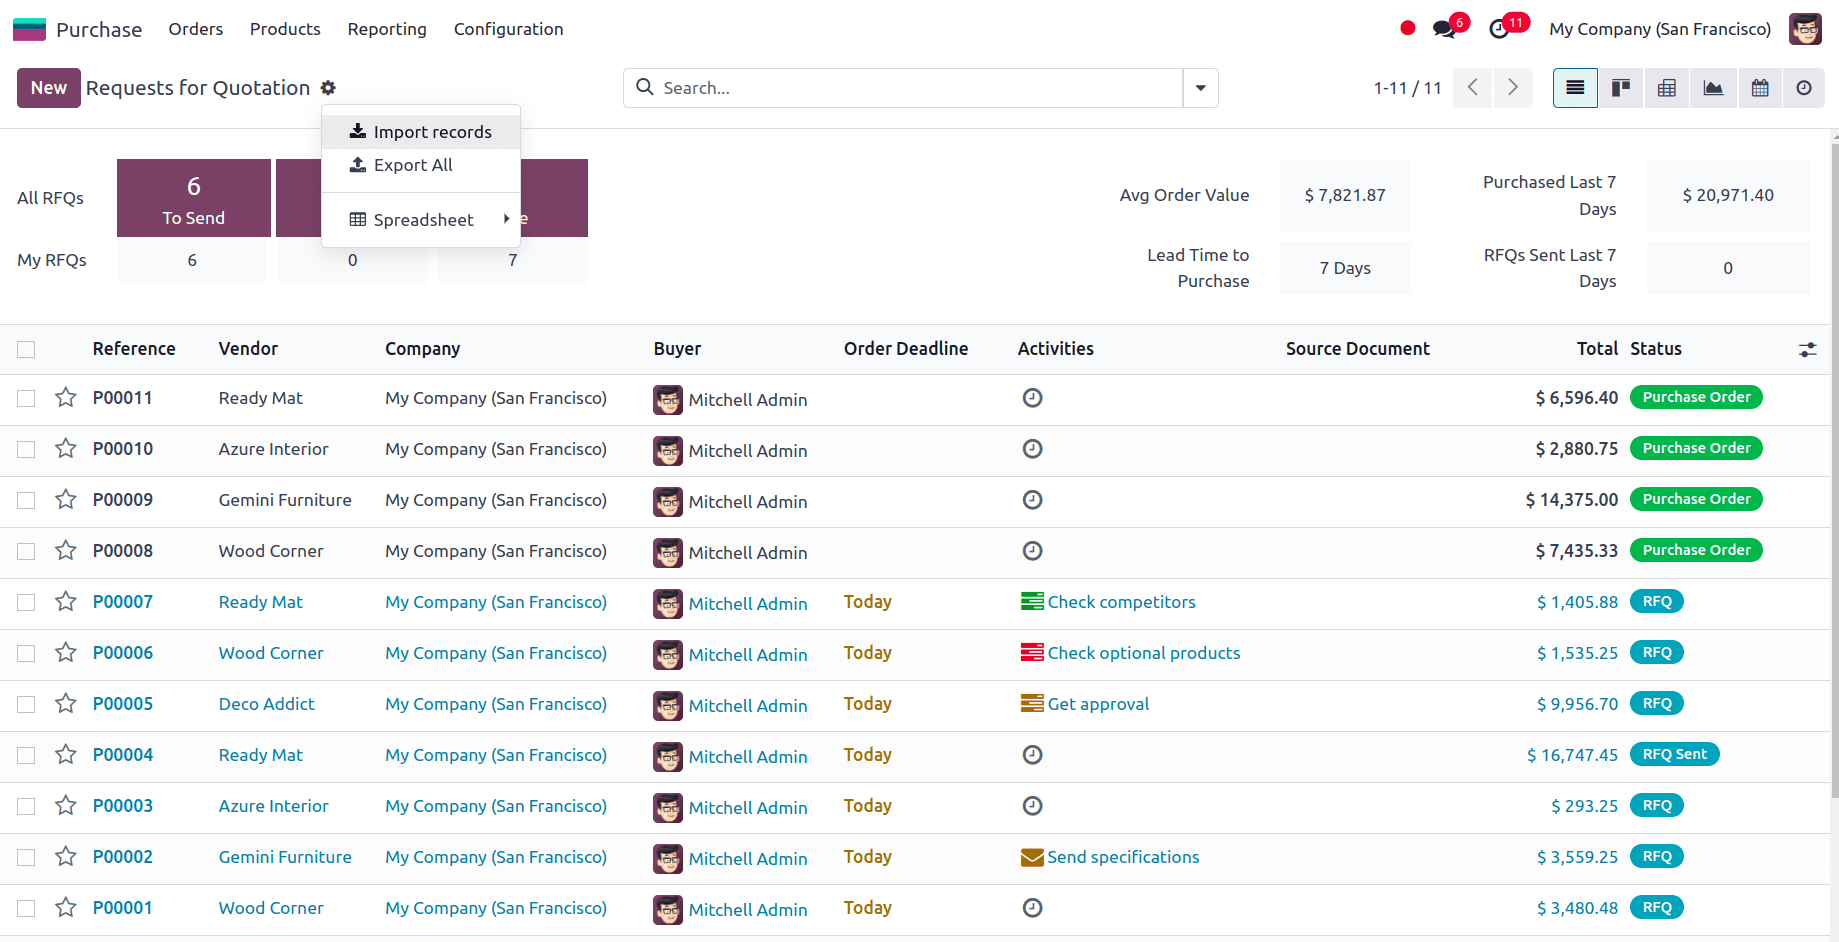
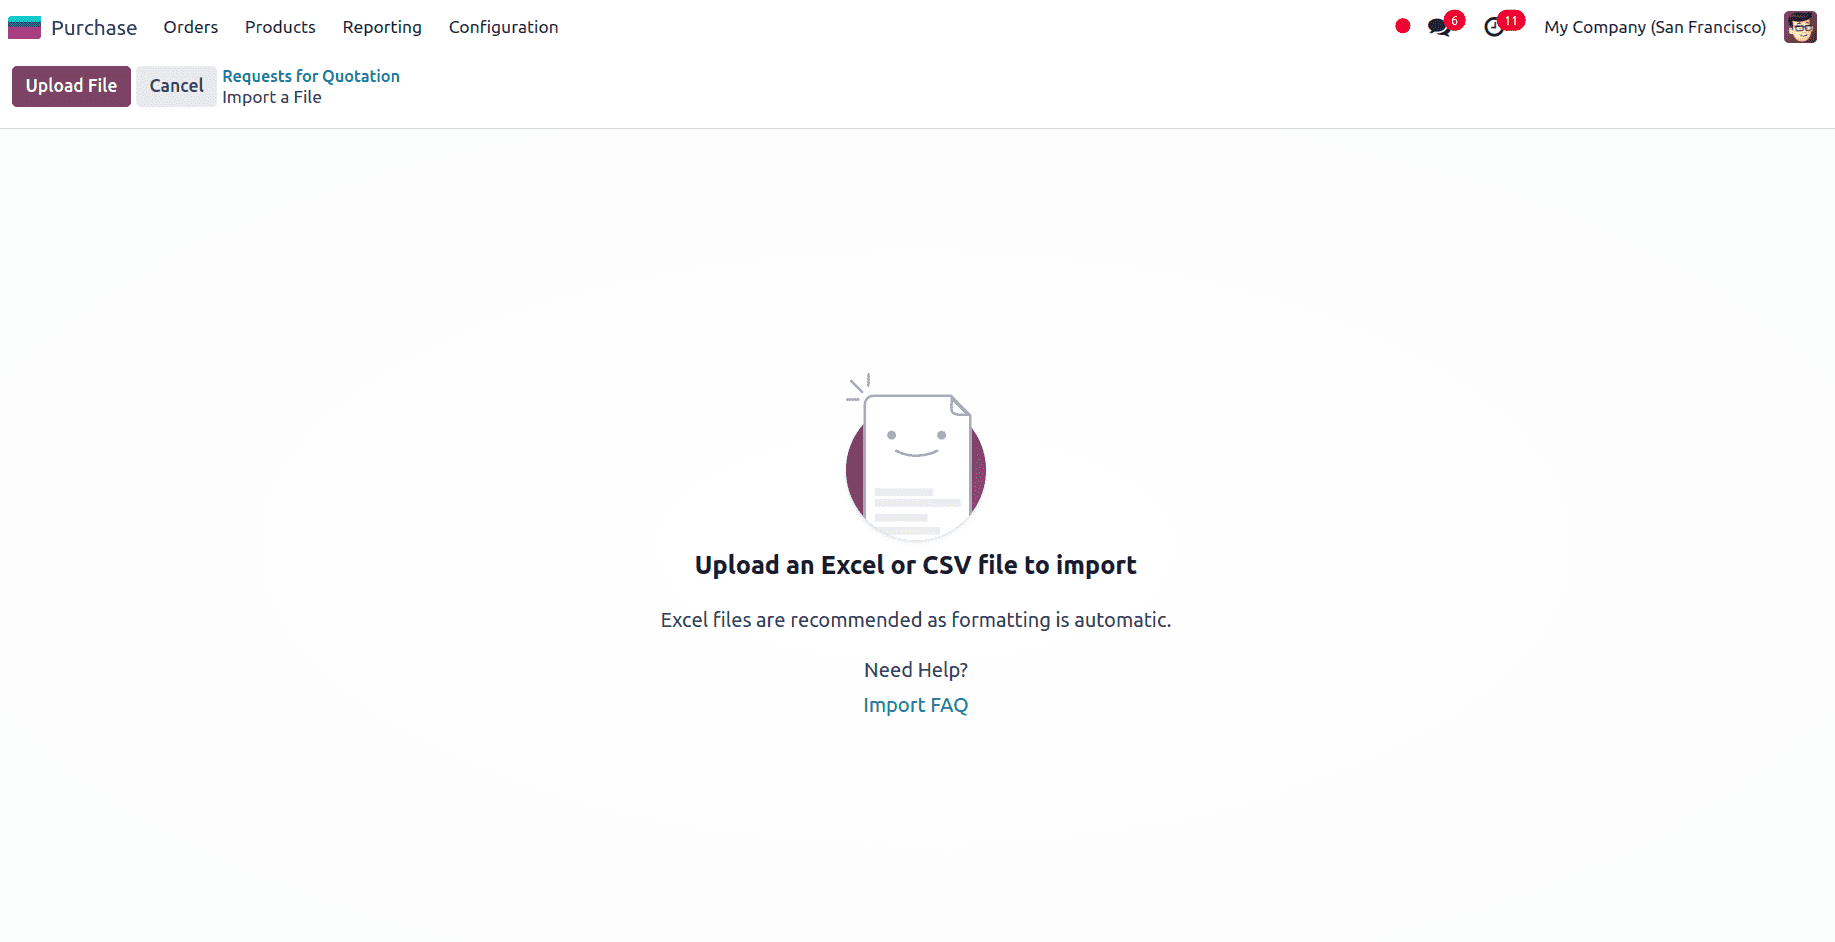
At the top left, we have an option to upload the file from our system.
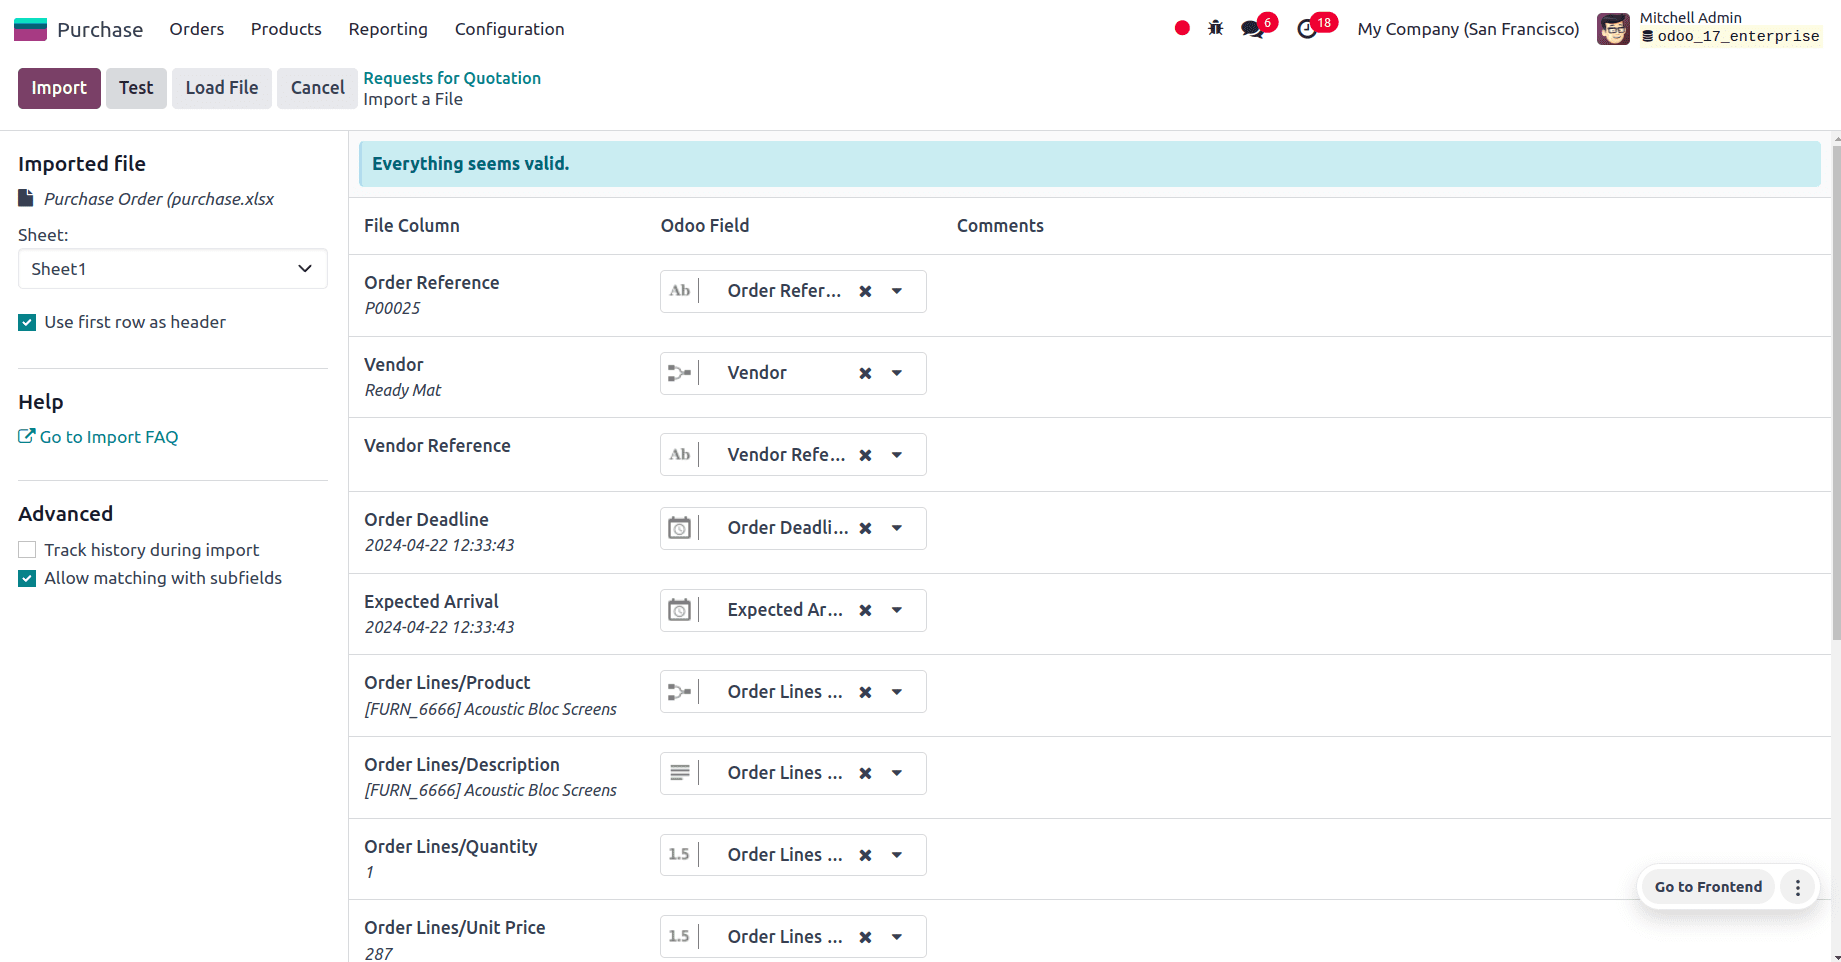
After uploading the file, a page showcasing all the elements of the newly configured purchase order template spreadsheet, separated by File Column, Odoo Field, and Comments appears.
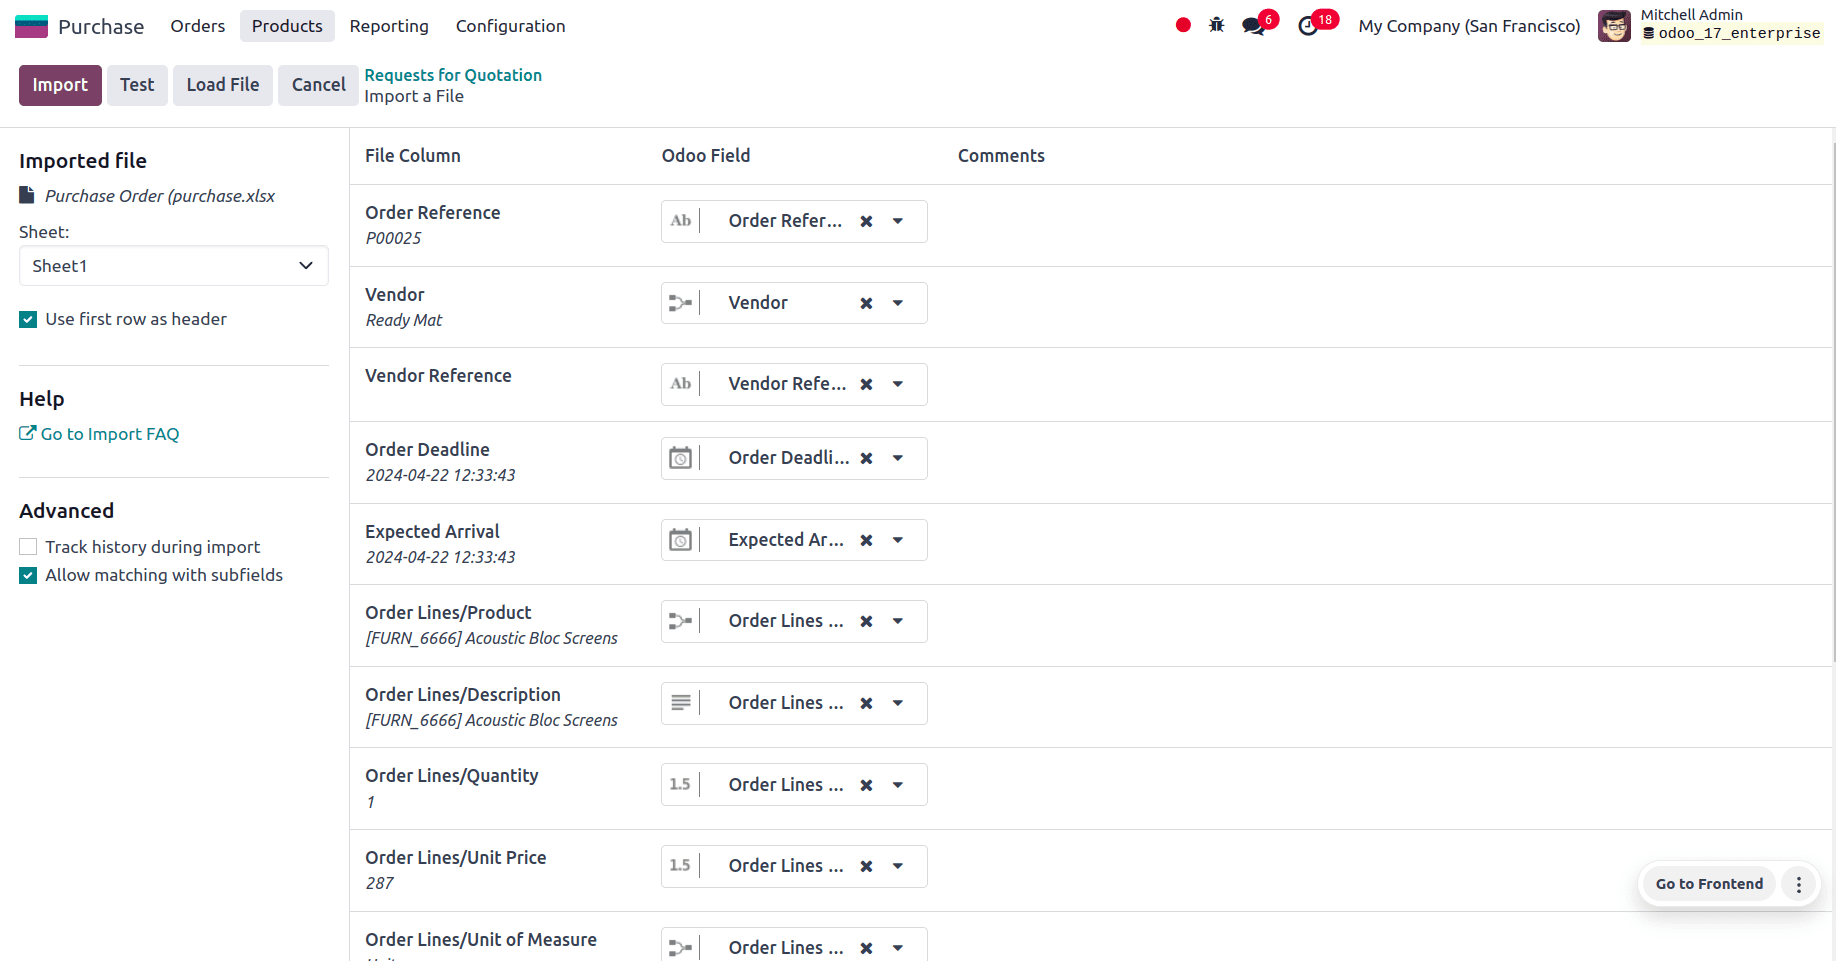
From here, the file column can be manually assigned to the Odoo Field if necessary and we can click on the Test button in the upper-left corner to check if every columns and fields are lined up in the right manner. If everything is correctly applied, then a blue banner is revealed at the top of the page informing the user that Everything seems valid.
If there are any errors, a red banner is revealed at the top of the page, with instructions on where to locate the specific issues, and how to fix them.
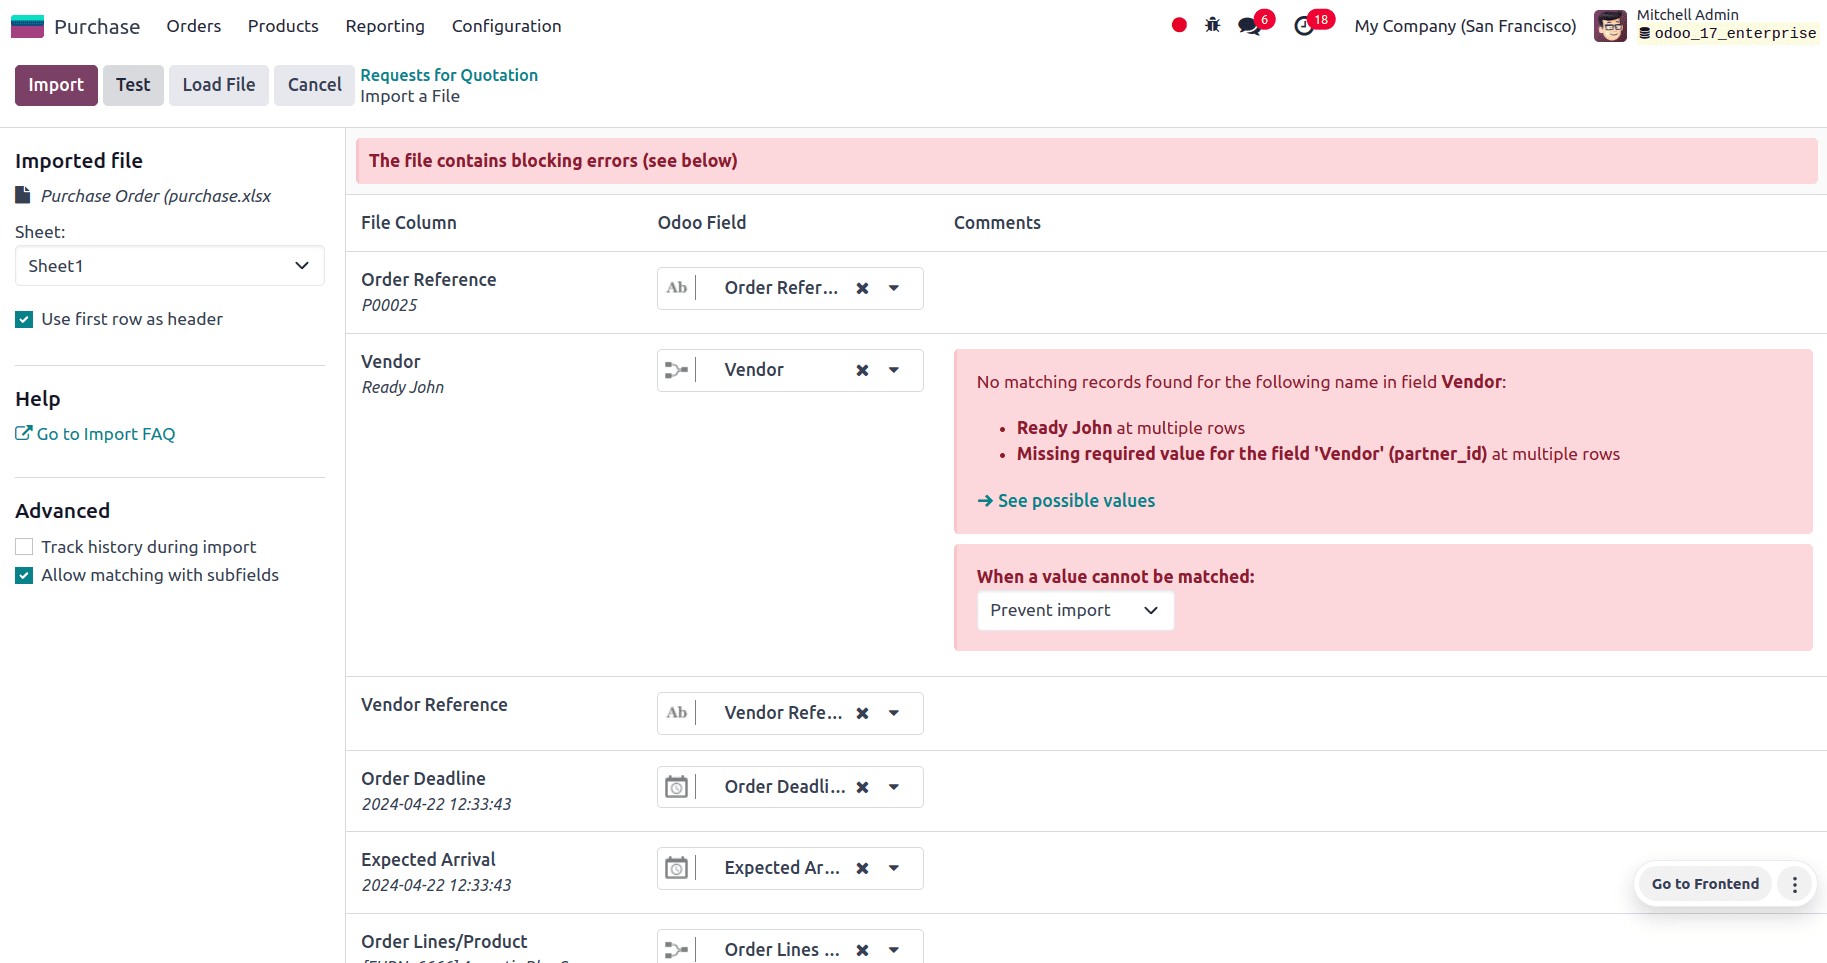
In the above screenshot we can see the error that no matching records were found for the following name in the field vendor, so here we can either prevent the importing of that field or we can select Create new values to create that value and continue the importing.
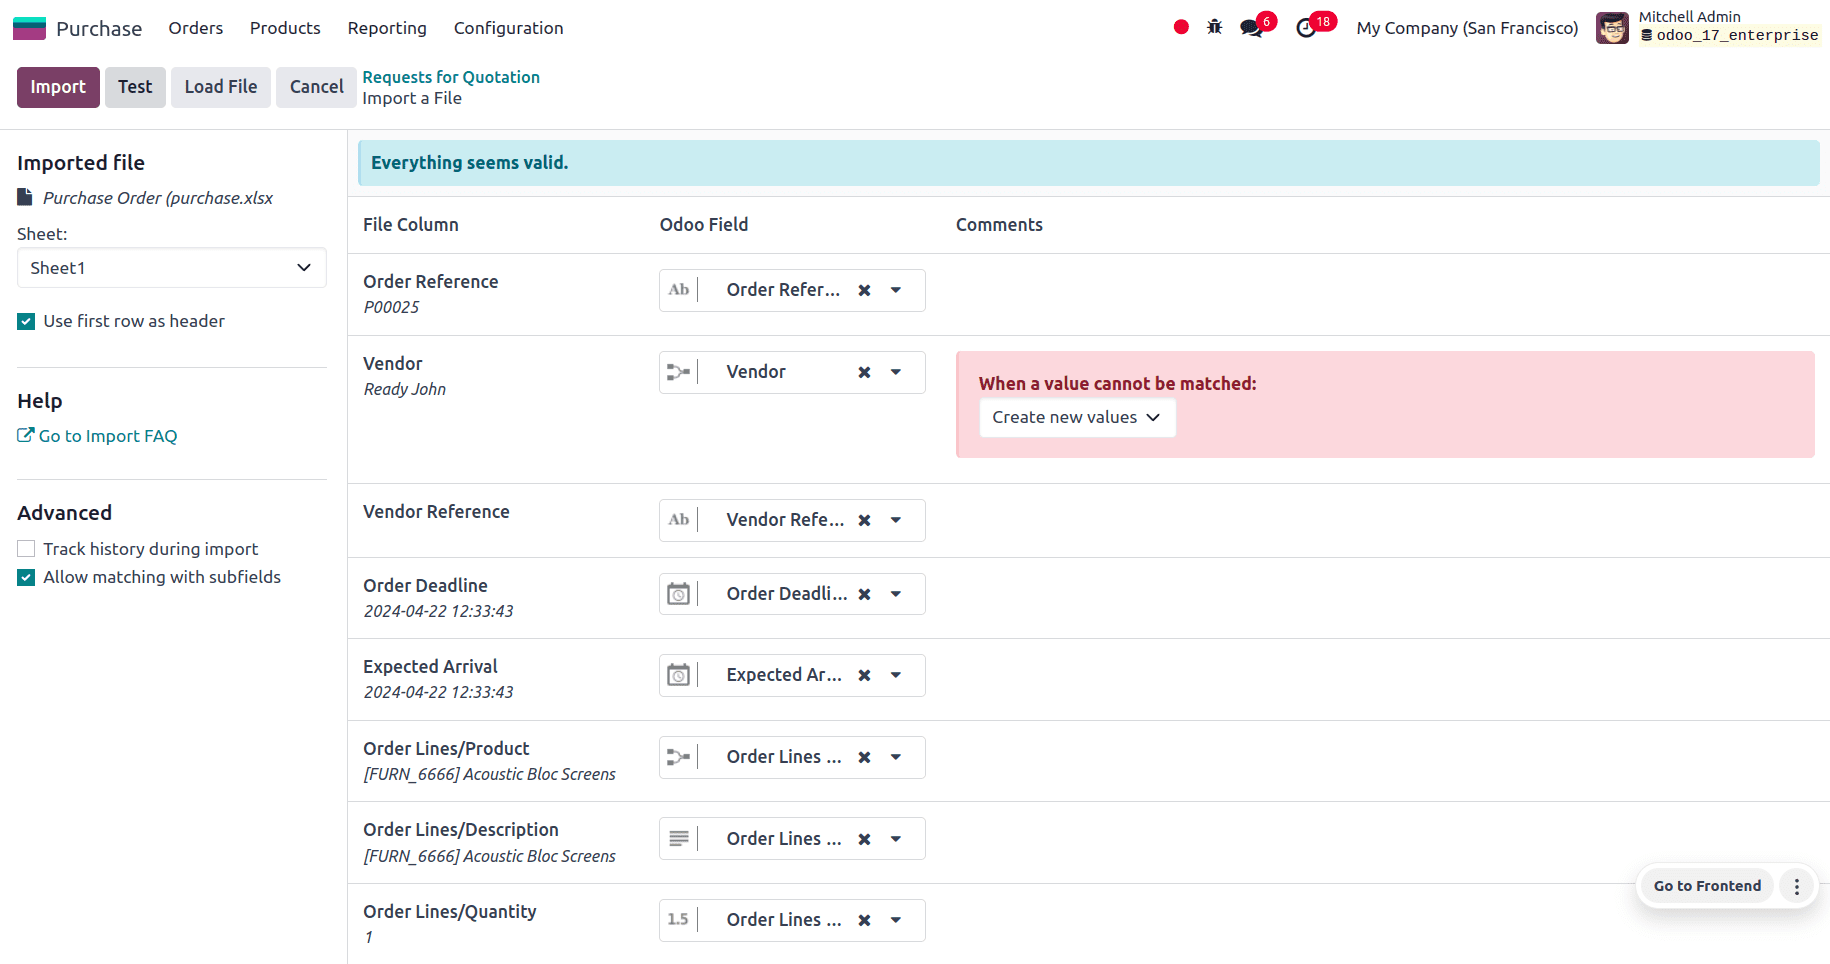
Once all the errors are fixed we can click on the test button and then on the Import button to import the records. When the records are imported, a pop-up message in the upper-right corner appears which informs the user how many purchase orders were successfully imported.
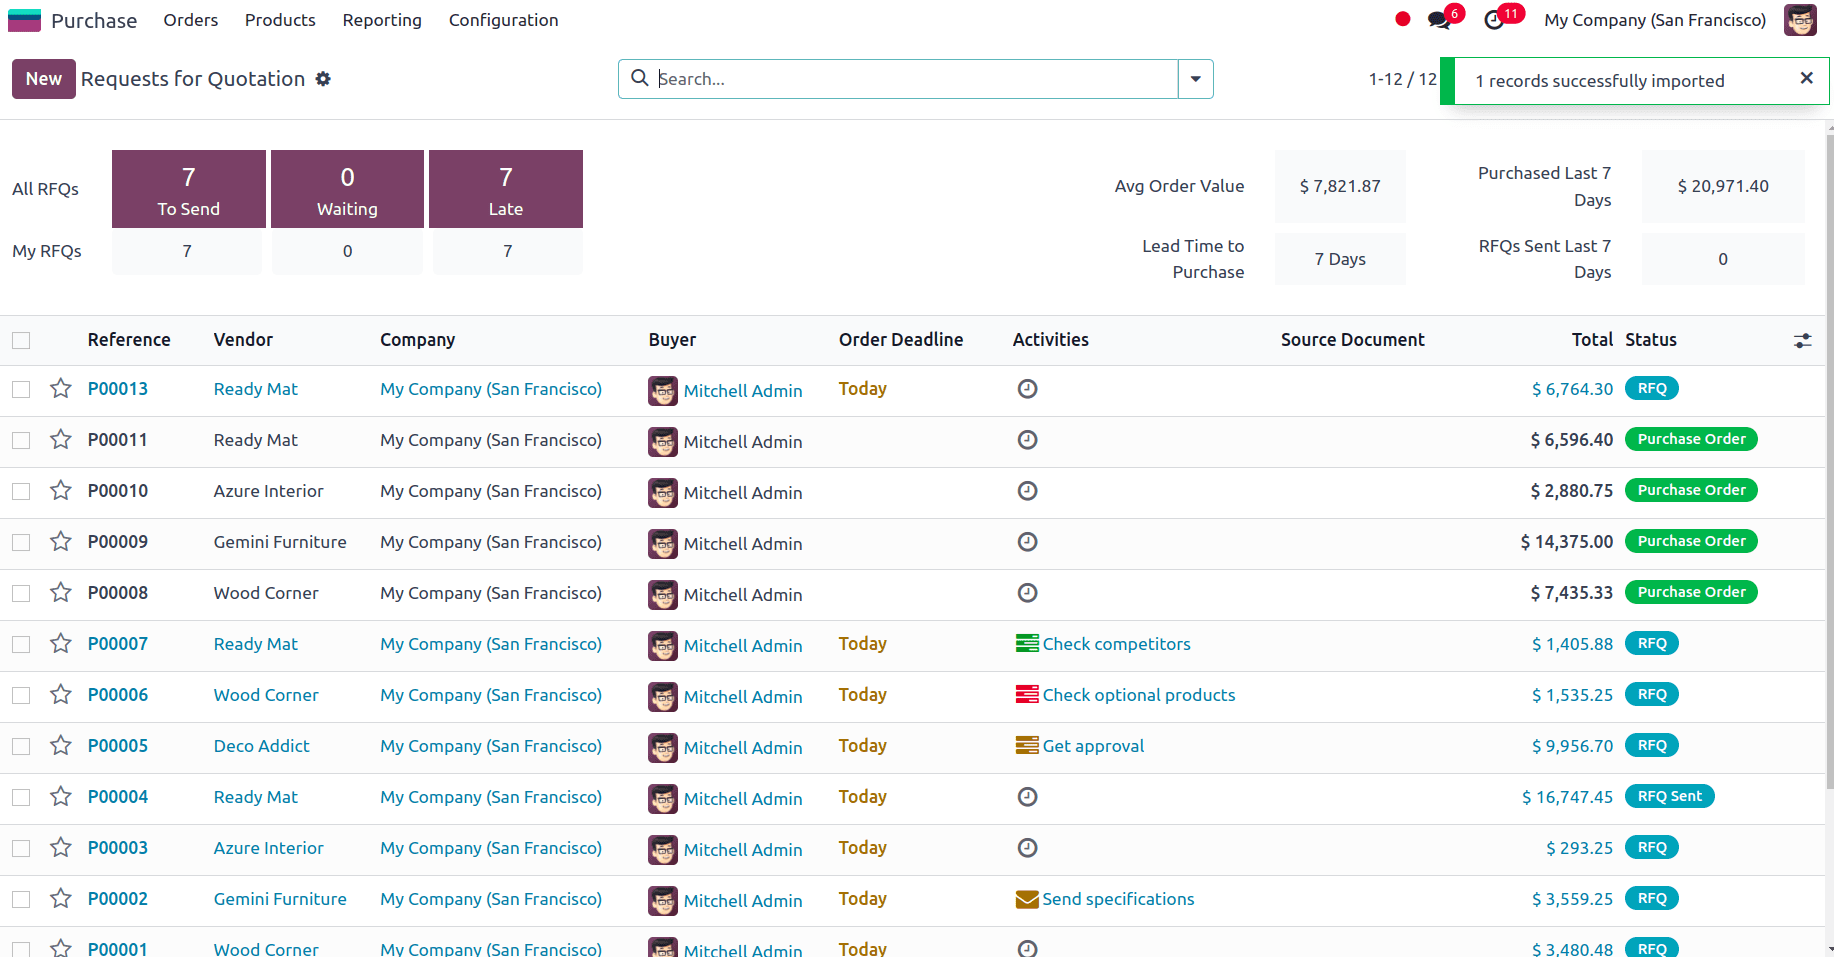
Now we will be able to view the newly-imported RFQ and we can access and edit them from the RFQ’s page.
All the imported fields are correctly mapped with purchase quotation fields in Odoo 17.
So we have seen the importing of sale orders and purchase orders in Odoo 17. This is an effective method for adding bulk data to the database all at once rather than manually adding the data one by one to the Odoo 17 database.
To read more about How to Create New Purchase Order in Odoo 16 Purchase Module, refer to our blog How to Create New Purchase Order in Odoo 16 Purchase Module