Odoo, the open-source business management software suite, empowers businesses with a wide range of applications for managing various aspects of their operations. While Odoo is often associated with Linux environments, installing it on Windows is a straightforward process that brings the power of this robust ERP system to Windows users.
Why Odoo on Windows?
While Linux is a popular choice for hosting Odoo due to its stability and performance, many users prefer the familiarity of the Windows operating system. Installing Odoo on Windows allows businesses and developers to leverage the capabilities of Odoo without the need for a Linux server setup. This flexibility makes Odoo accessible to a broader audience, including those who primarily use Windows for their daily tasks.
Step-by-Step Installation Guide:
1. Python installation.
2. PostgreSQL Installation
3. pgAdmin4 and PSQL Configuration.
4. Installation of the C++ kit using Visual Studio Tools.
5. Getting Odoo 17 from Github.
6. Pycharm Installation
7. Configuring Odoo17 Development environment in Pycharm
Step 1: Python installation
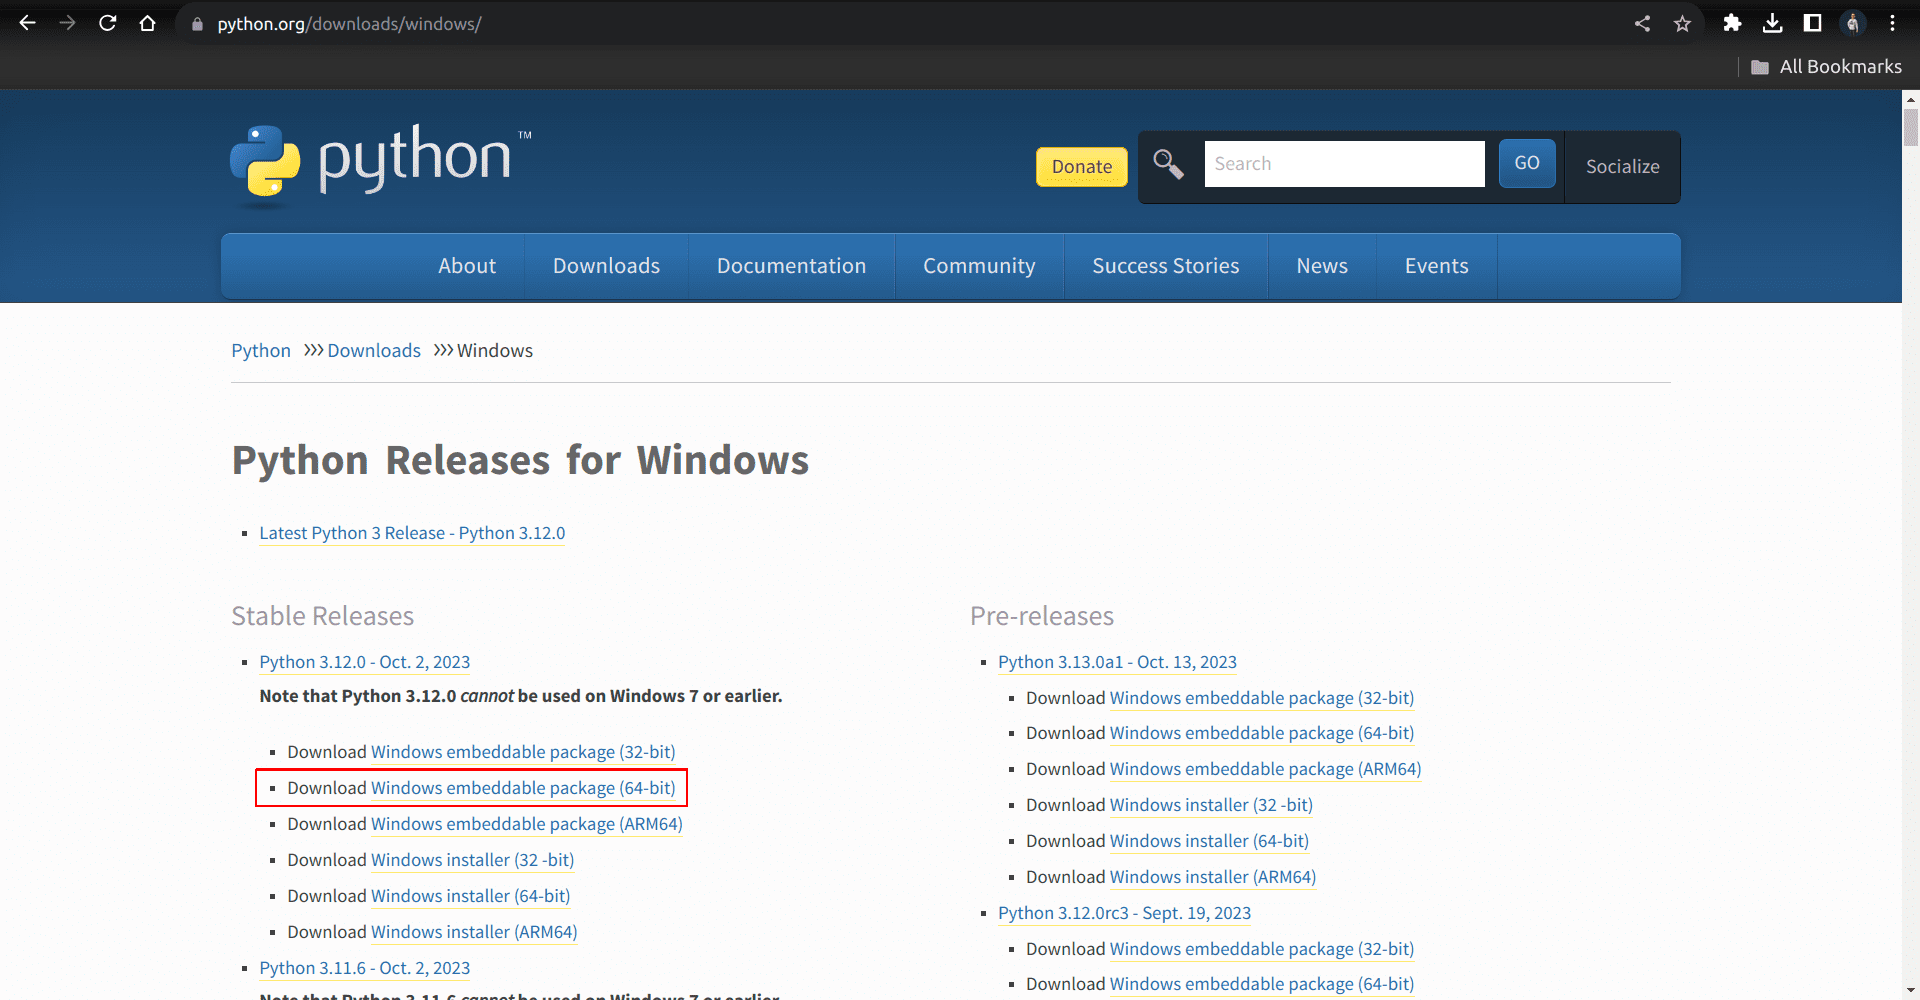
Ensure Python is not already installed on your system before proceeding with the installation. Try the "Python-version" command on the command prompt. If python is installed on your device, it will show some version number, like “Python 3.xx.x.” Otherwise, you will get an error message saying something like “'python' is not recognized as an internal or external command, operable program, or batch file.” For Odoo 17, we need Python 3.10 or the latest. If your version is below 3.10 or your machine doesn't have Python, then download Python from the official website: [https://www.python.org/downloads/].
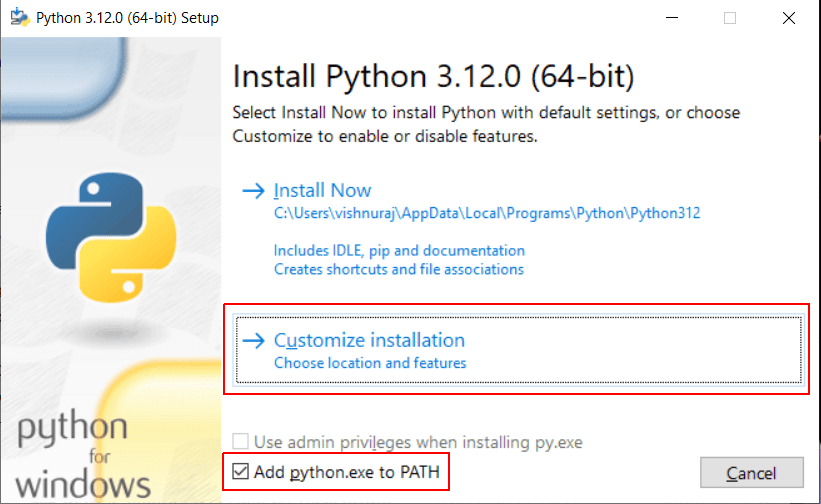
While installing the downloaded.exe package, choose the ‘Custom Installation’ option and also check the “Add Python 3.12 to PATH” box.
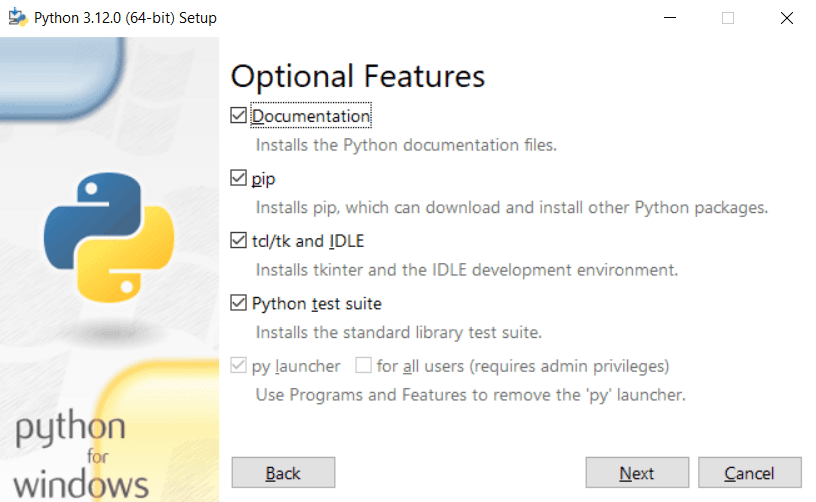
On the optional page, check all checkboxes and click "Next“.
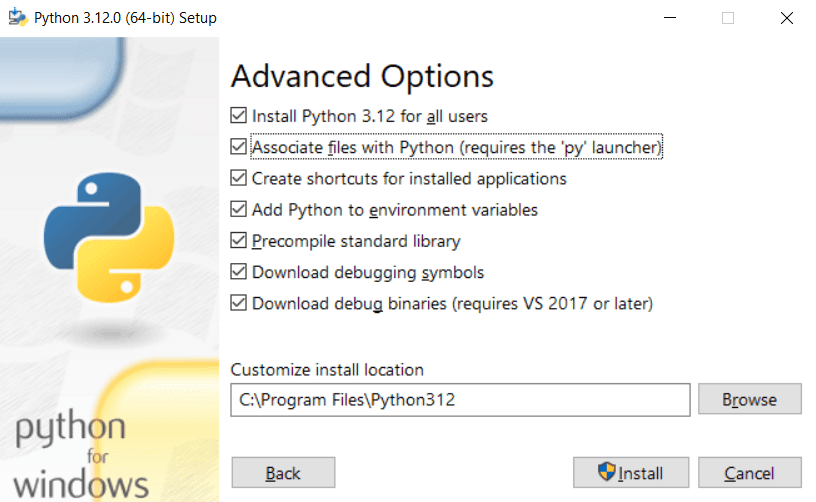
On the Advanced page, check the first five check boxes, then “Install.”
Step 2: PostgreSQL Installation
To install PostgreSQL on your machine, directly download and install PostgreSQL from the official website of PostgreSQL – [https://www.enterprisedb.com/downloads/postgres-postgresql-downloads].
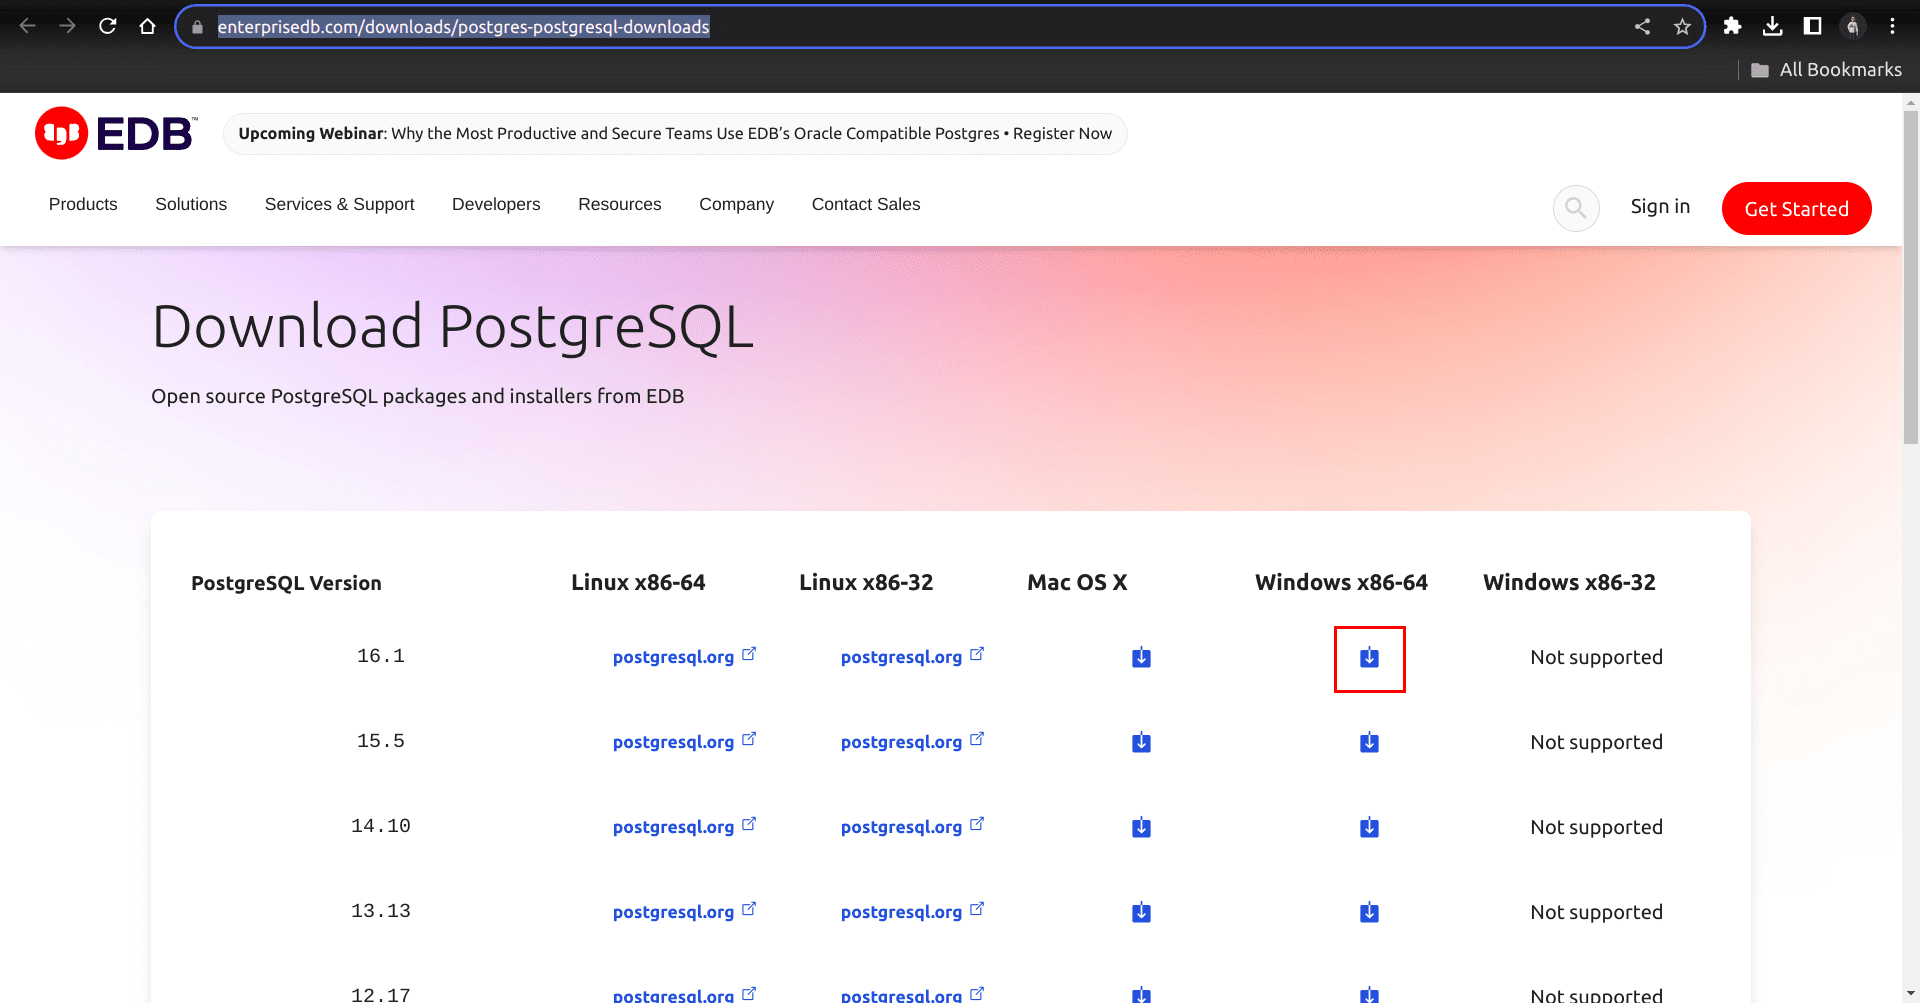
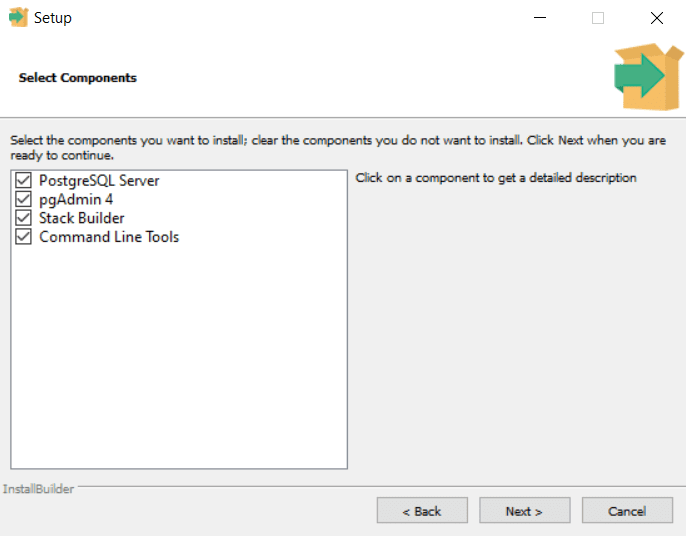
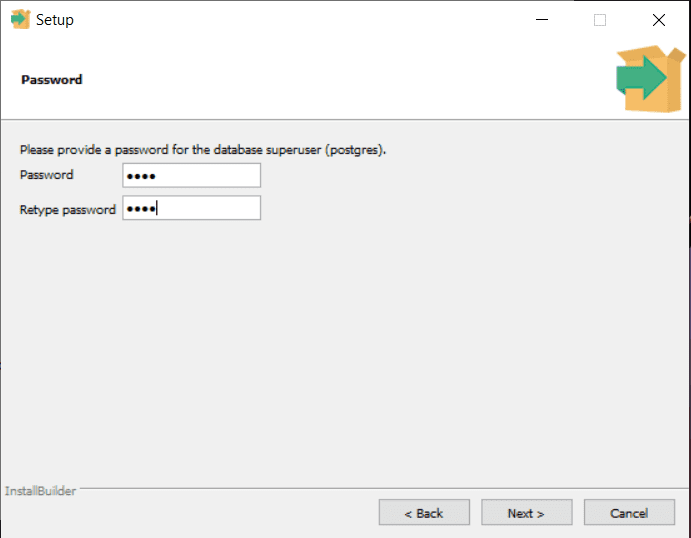
Version 13 or later is desirable, so click the download icon under “Windows x86-64” option. Then install the package. While installing, check all component’s checkboxes on the “select components” page of the installer, and provide a super user password on the “Password” page. Keep all other configurations the same.
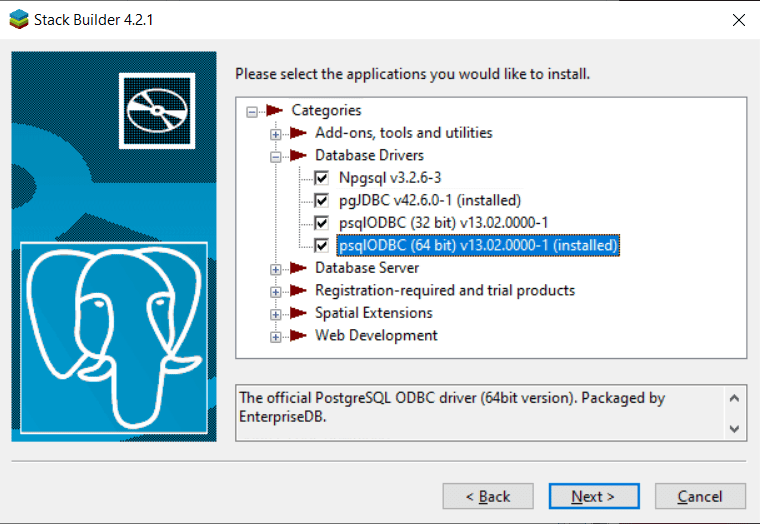
After the PostgreSQL installation, there will be a Stack Builder wizard for installing additional components for PostgreSQL. In the wizard, select all the applications under the “Database Drivers” Category, then complete the wizard.
Step 3: pgAdmin4 and PSQL Configuration
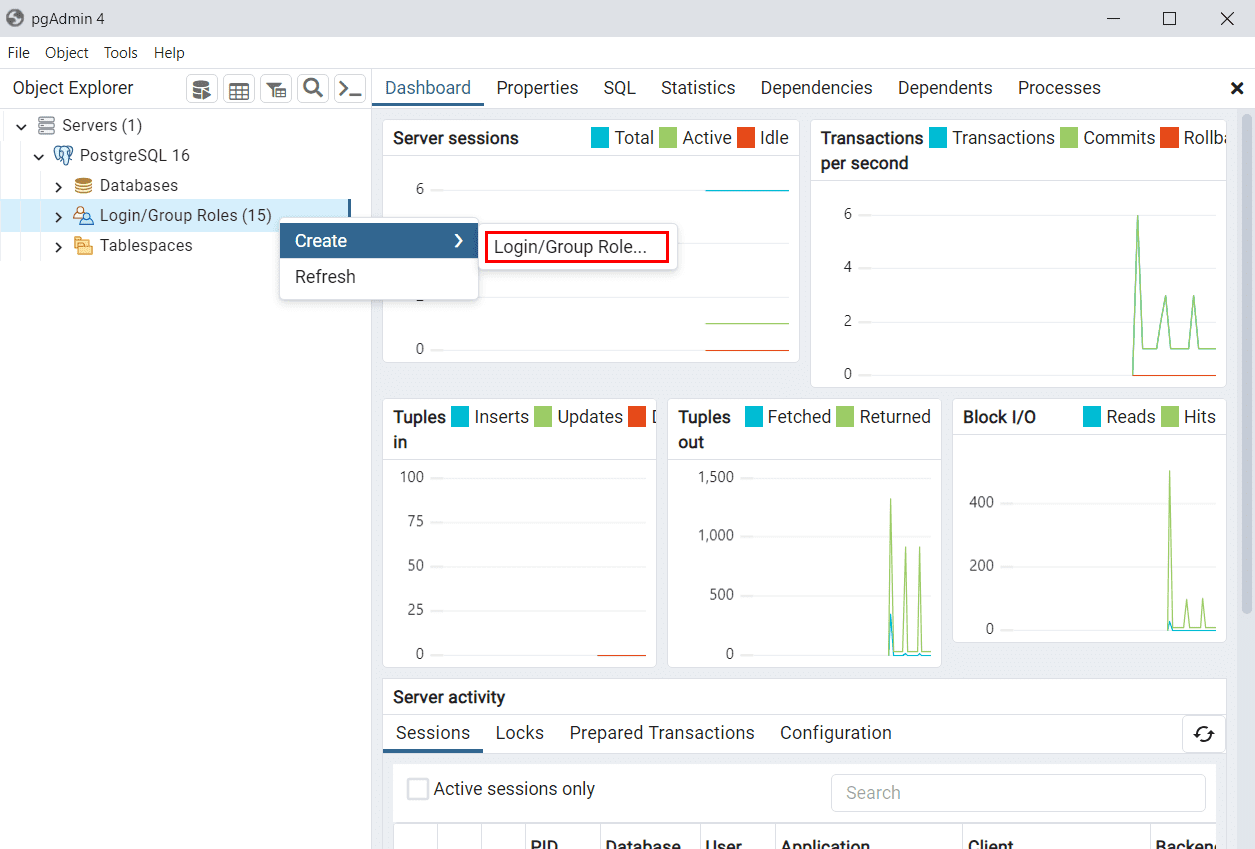
When installing PostgreSQL, we already selected pgAdmin4 to install on the select components page of the installer, so pgAdmin is already installed on your machine. Open it and expand "Servers" in Object Explorer (tab on the left side). Then you‘ll need to enter a password for secure pgAdmin. Under the Servers, expand the Postgres Object, and then you can see the option “Login/Group Roles”. Right-click on it and create a new role.
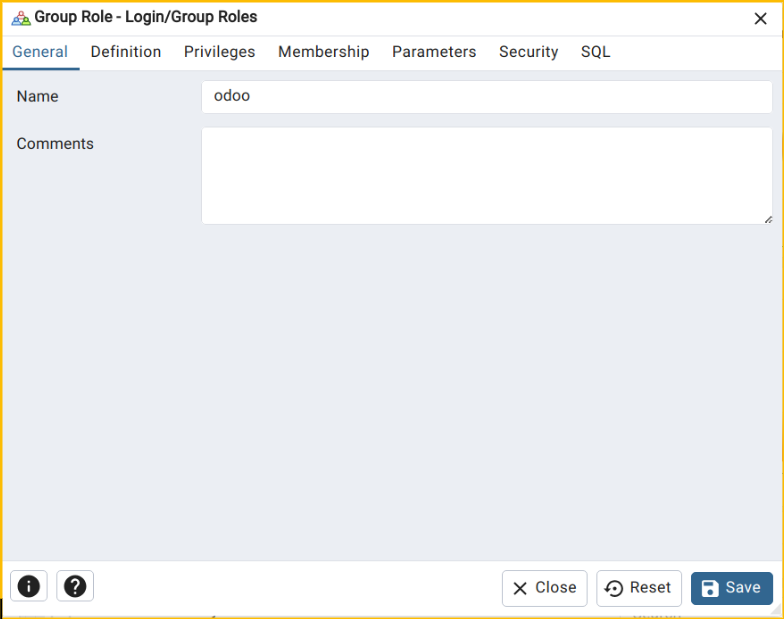
Give the name of the role from the “general” tab.
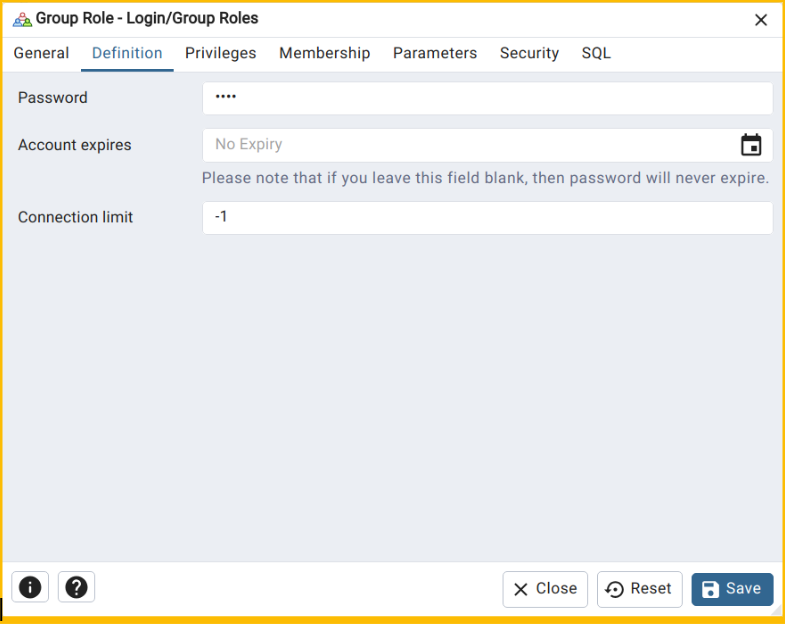
Set the password from the “Definition” tab.
Enable all options from the “Privileges” tab.
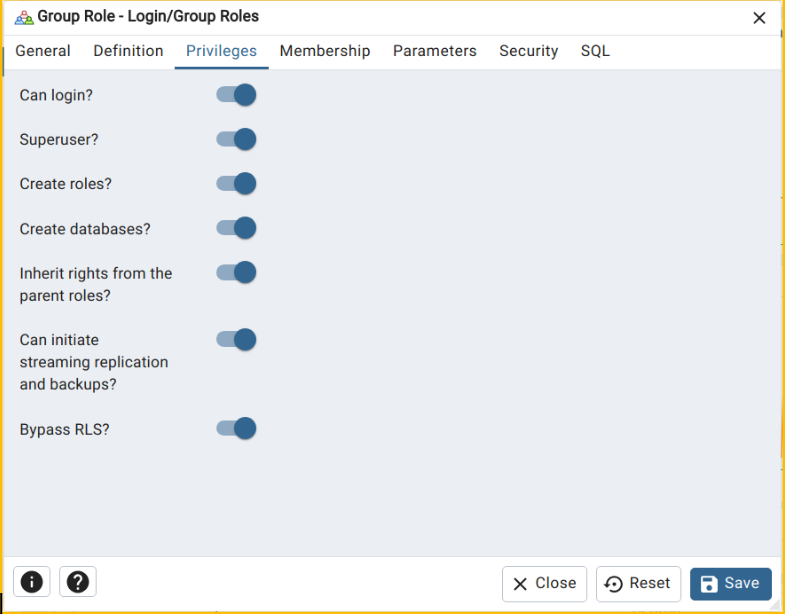
Then save it.
Step 4: Installation of C++ kit using Visual Studio Tools
C++ is a foundational language for Windows application development. Visual Studio provides a comprehensive set of tools and libraries that make it easier for developers to create Windows desktop applications, services, and components using C++.
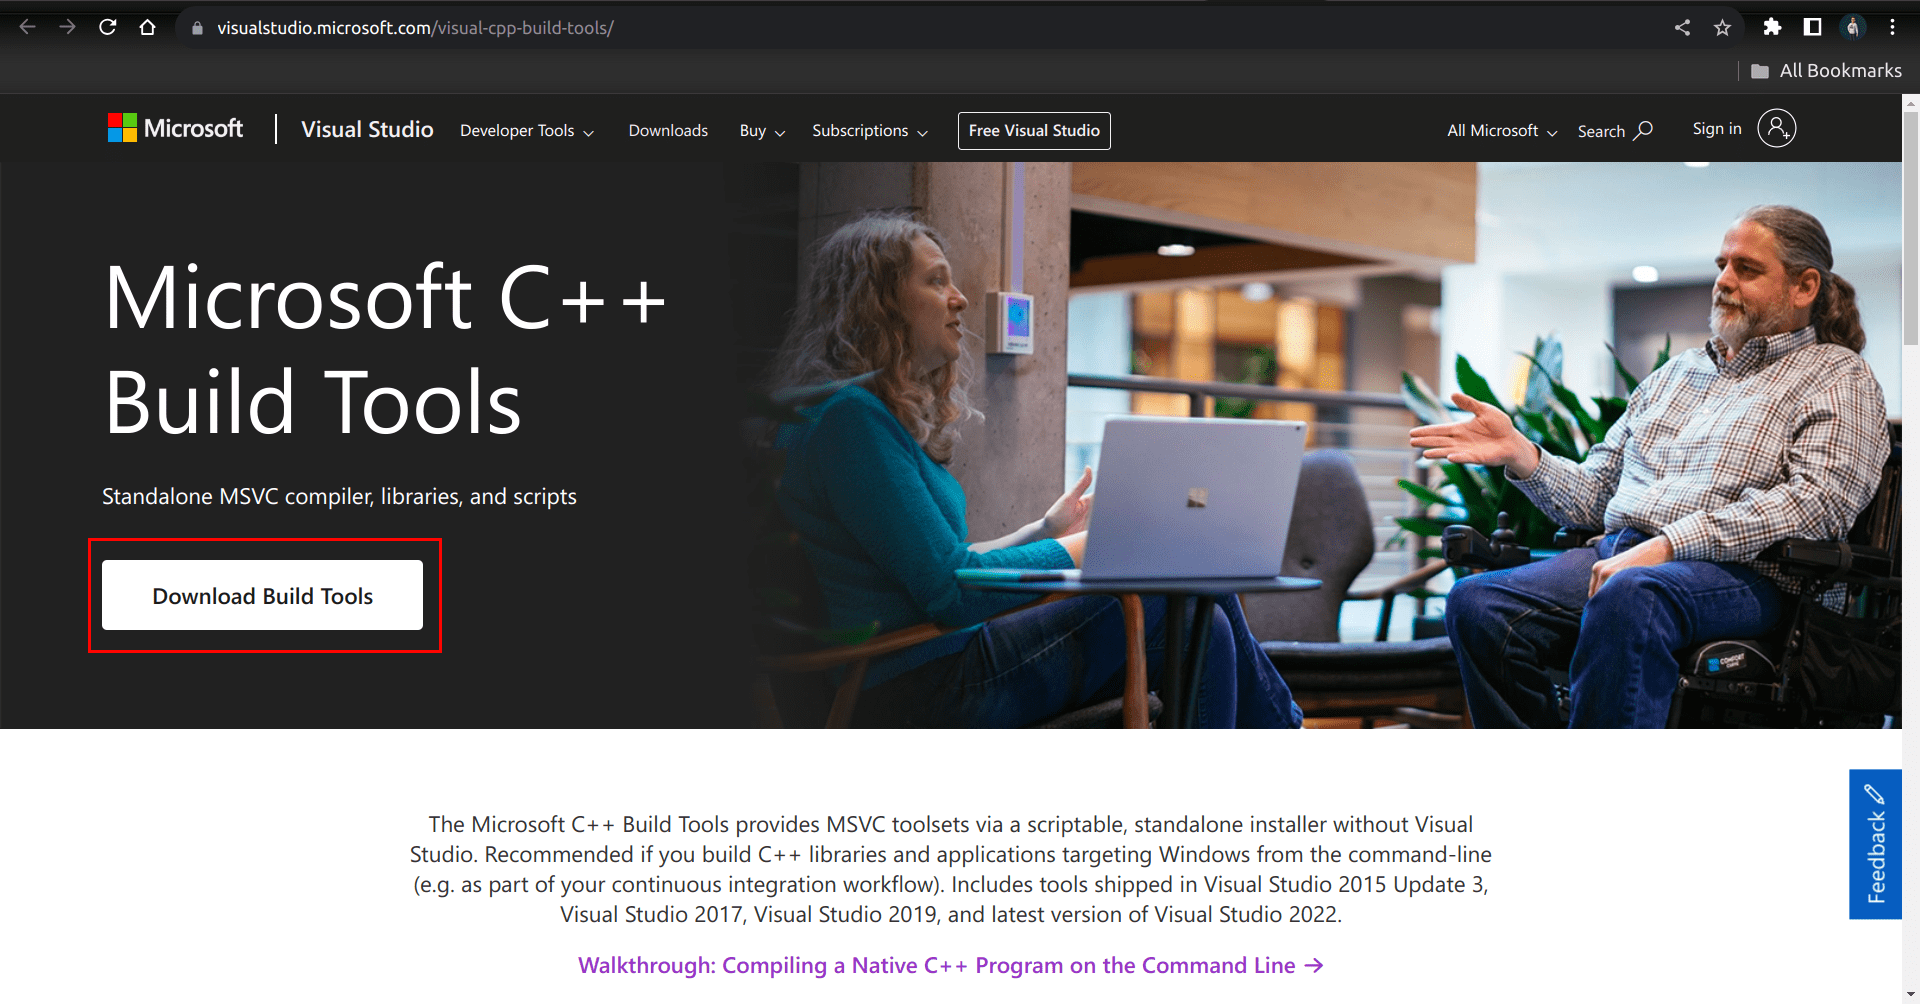
Download the C++ Built Tools installer directly from the official website– [https://visualstudio.microsoft.com/visual-cpp-build-tools/].
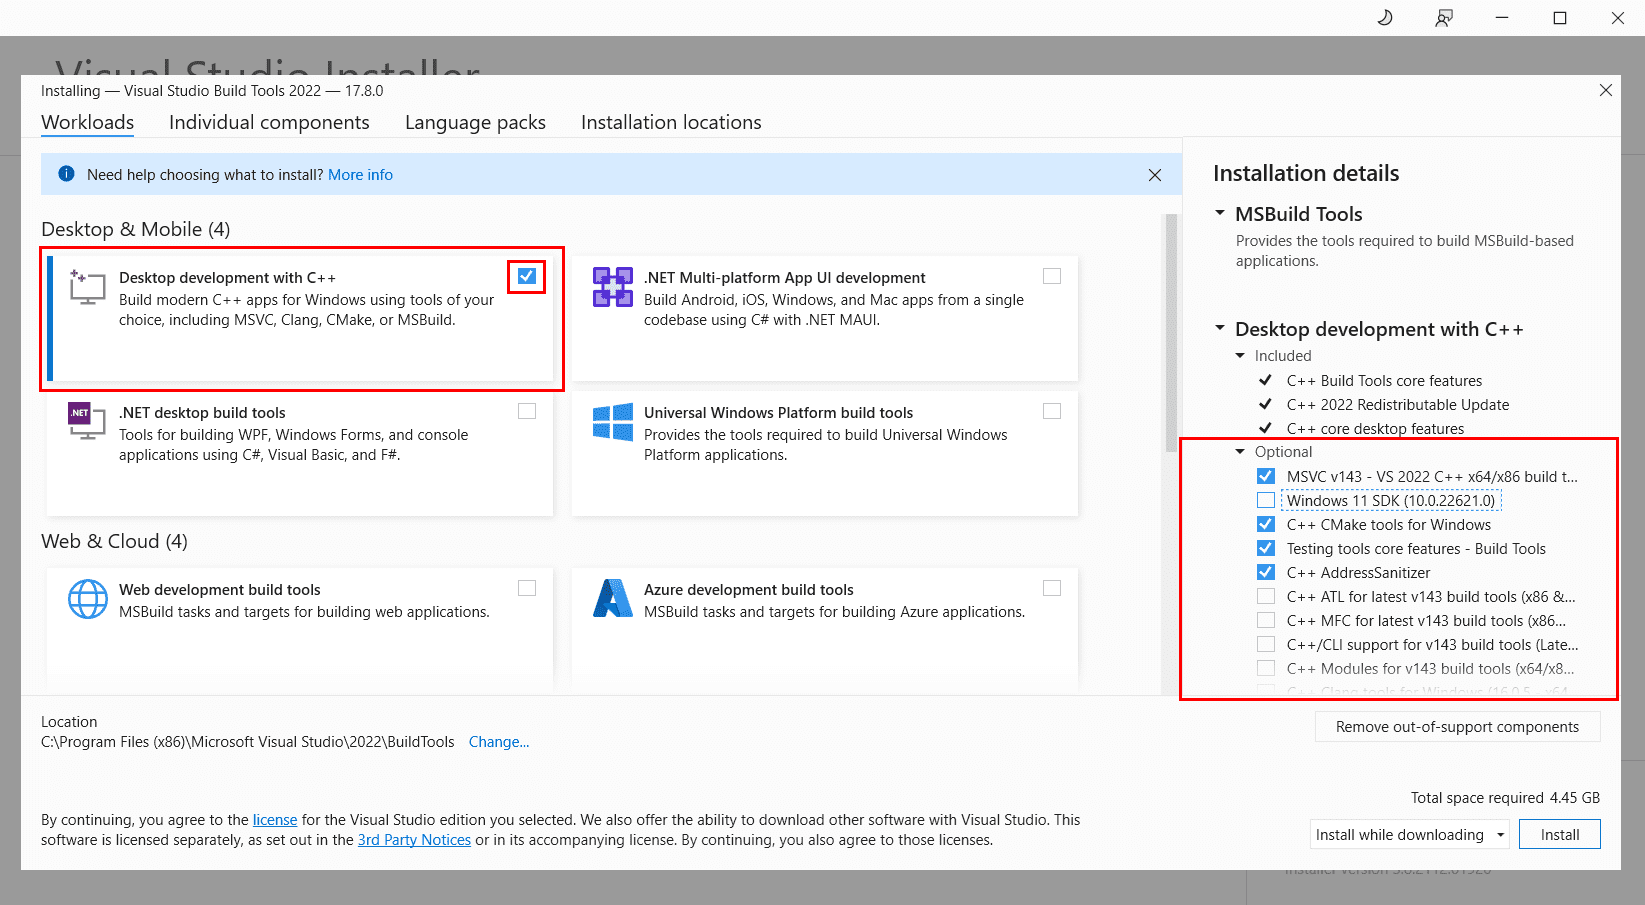
When installing the installer, check "Desktop Development with C++" and select optional components as shown in the figure.
Then complete the installation and restart your machine to make the changes.
Step 5: Getting Odoo 17 from Github
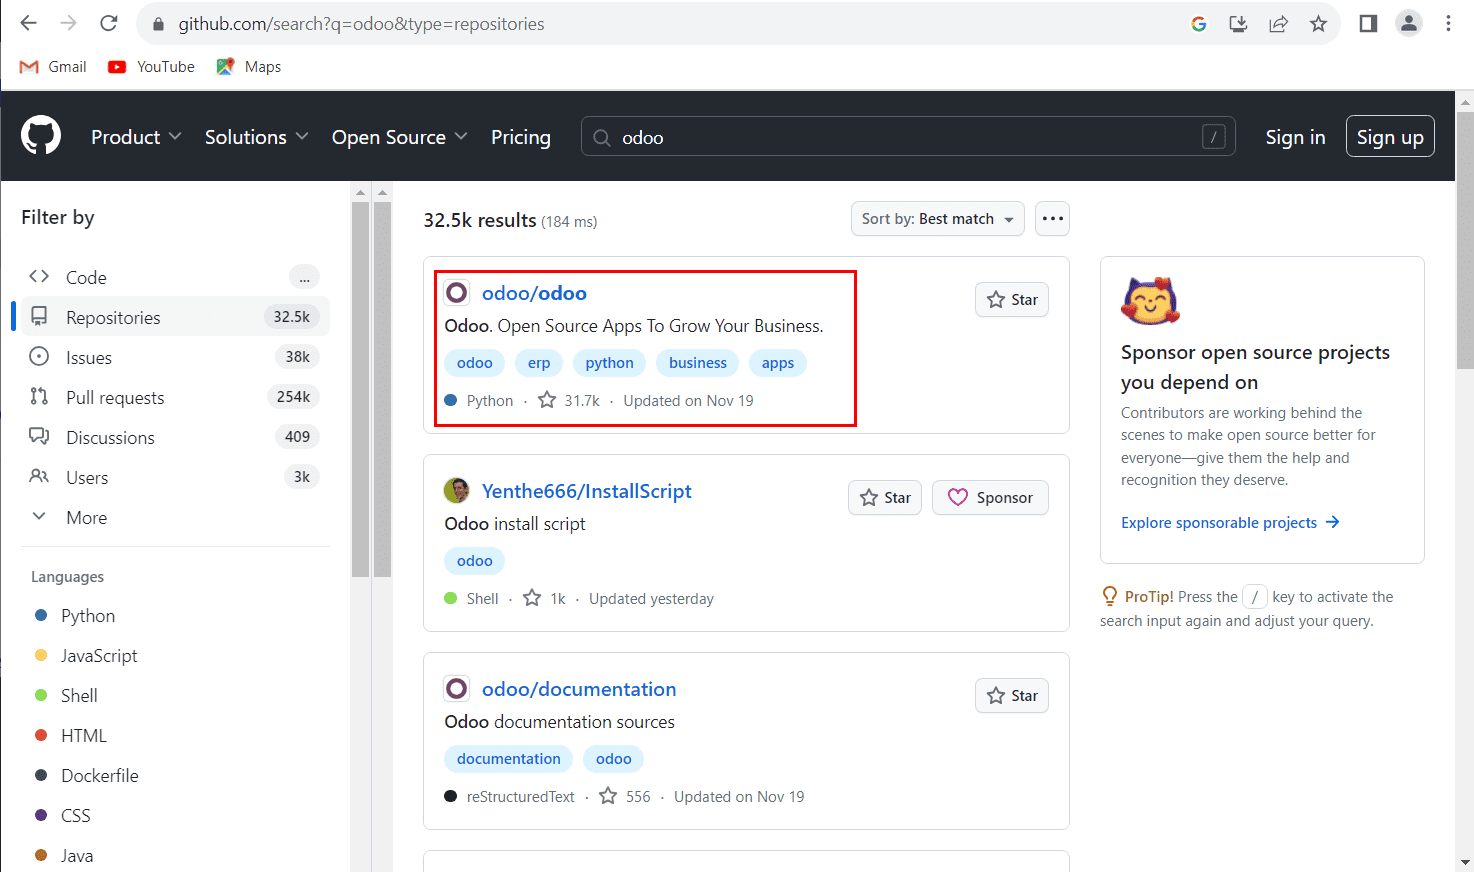
Downloading Odoo 17 from Github is an easy process. For that, go to the GitHub official website: [https://github.com/]. Then search Odoo and click on the first result that appears, as shown in the image below.
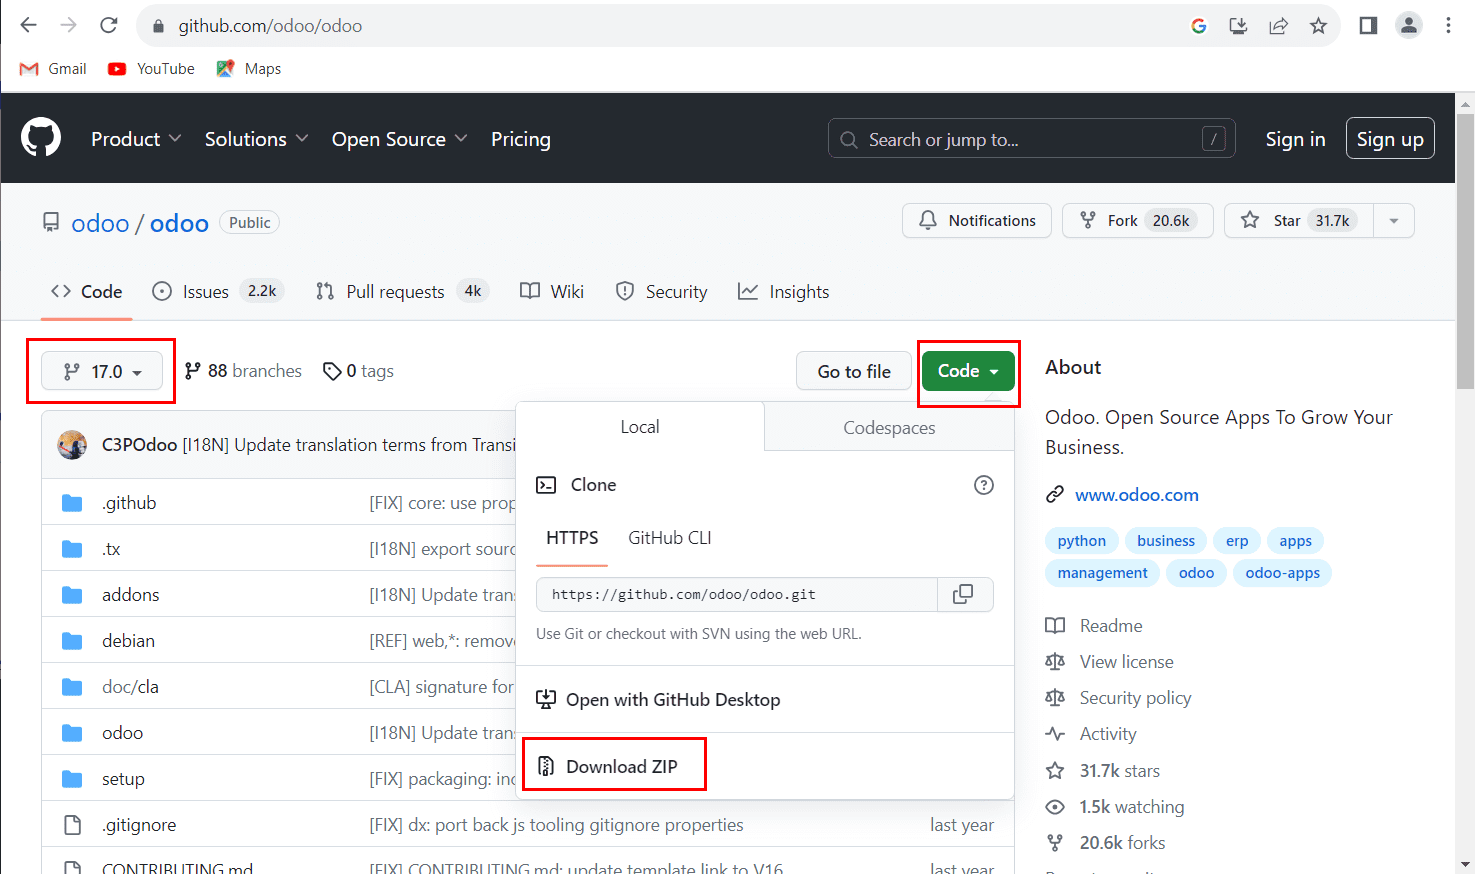
Then confirm the branch shown is 17, and click the “Code” button. Then, you can see the download zip option for Odoo 17.
Extract it and keep it in a safe location (better to keep it in the home directory).
Step 6: Pycharm Installation
Requirements for the pycharm installation:
Requirement Minimum
—--------------- —---------
RAM 4 GB of free RAM
CPU Any modern CPU
Disk space 3.5 GB
Monitor resolution 1024×768
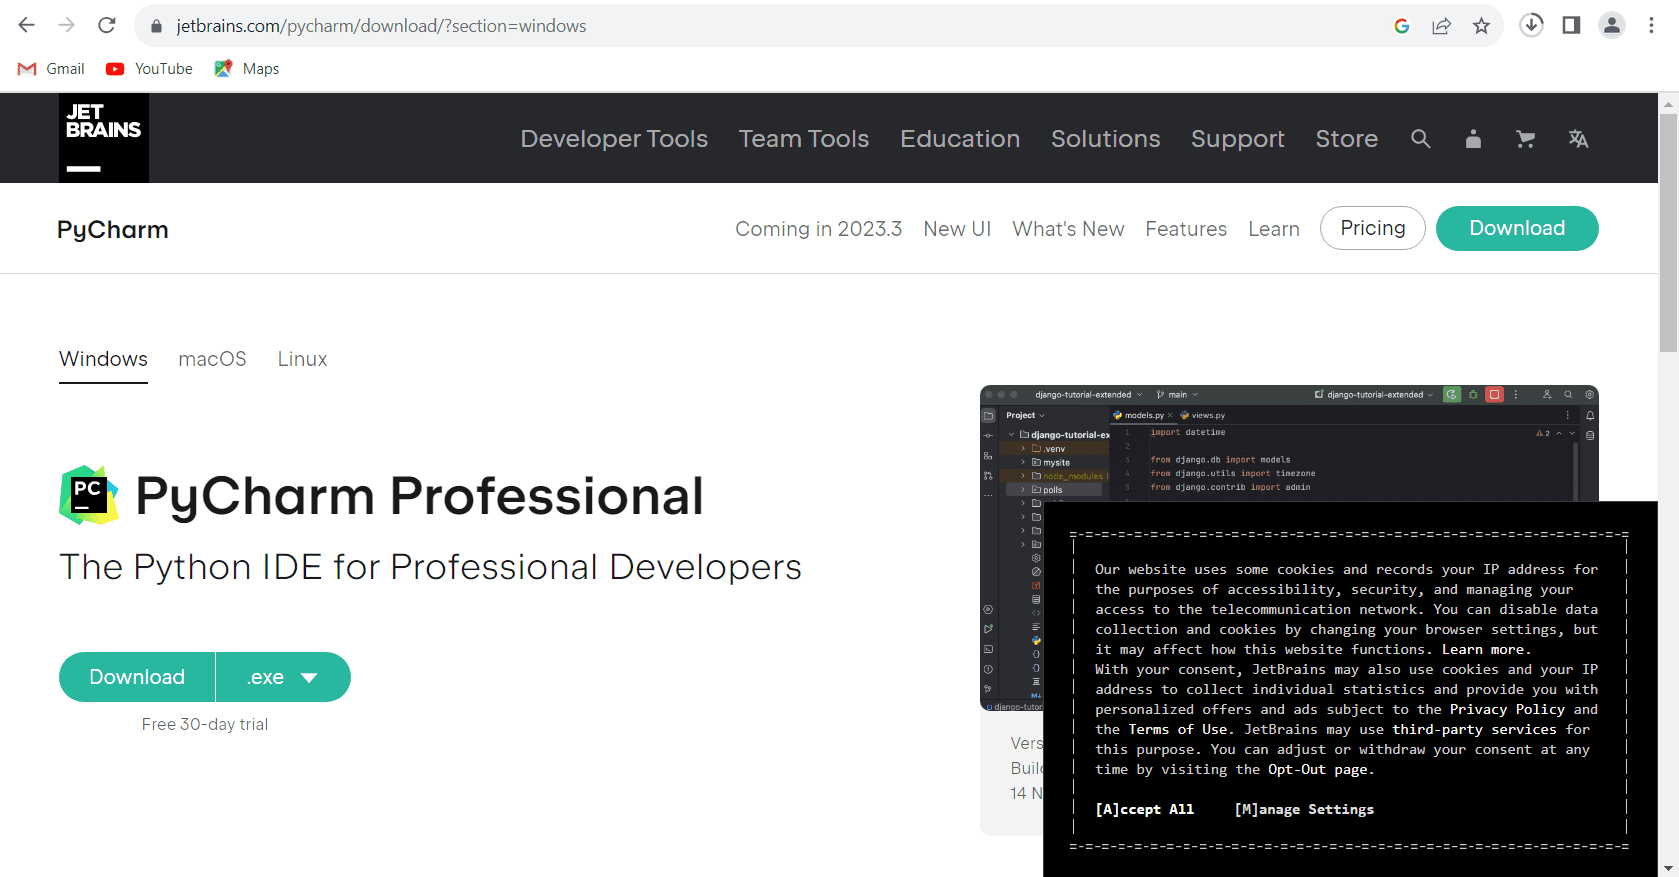
If your system meets these requirements you can download pycharm community from the official jetbrains website - [https://www.jetbrains.com/pycharm/download/?section=windows]
Select installation options while installing the pycharm like in the figure.
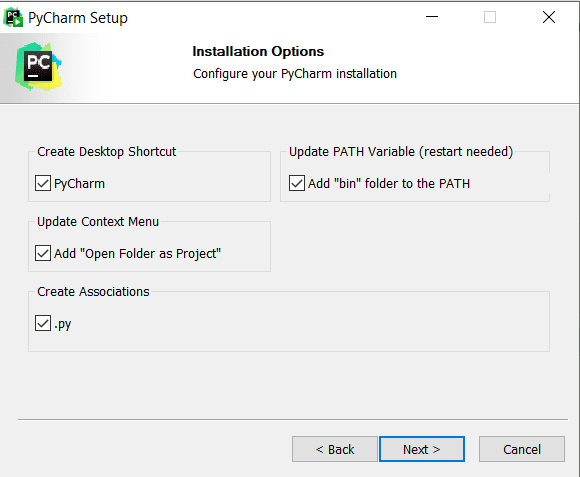
Complete the installation.
Step 7: Configuring Odoo17 Development environment in Pycharm
Now, the final step for the Odoo17 configuration, ie, Setting up the environment.
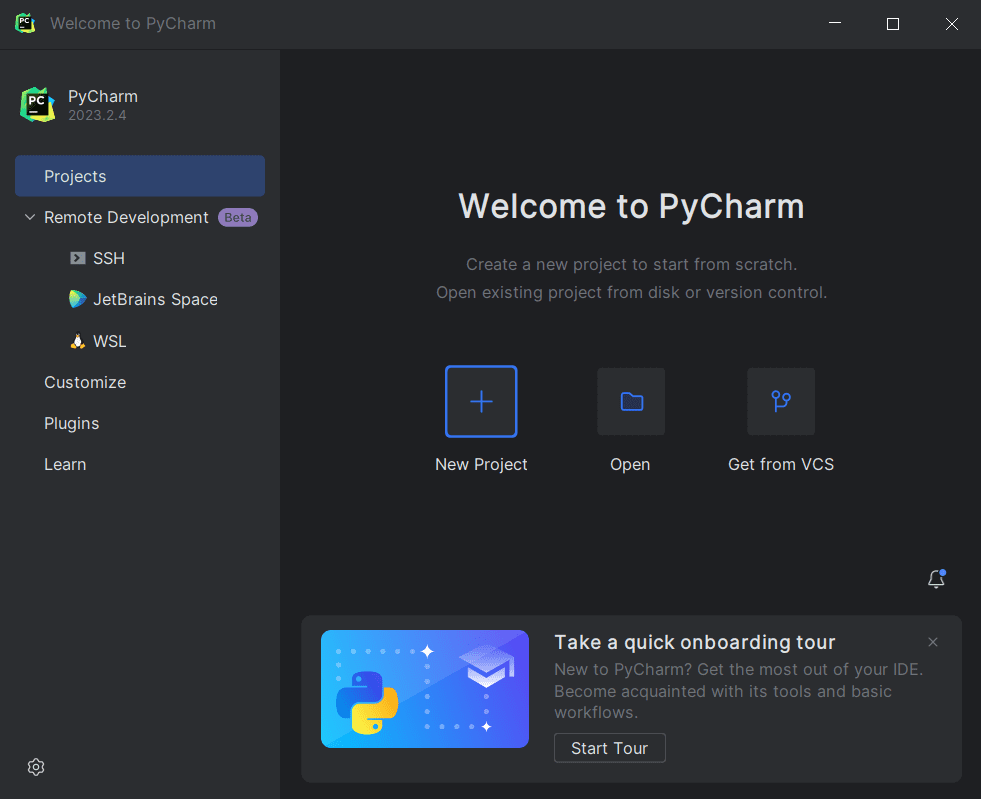
For that, open the pycharm from applications and click on the “Open existing project”.
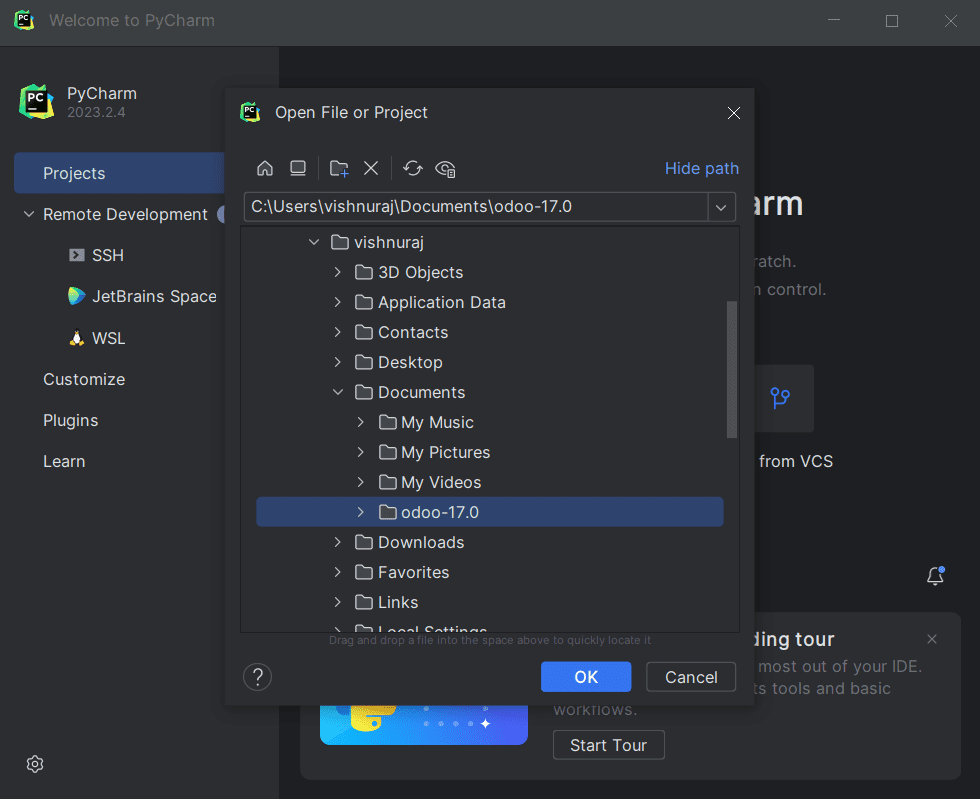
Choose the extracted Odoo17 folder and click ok.
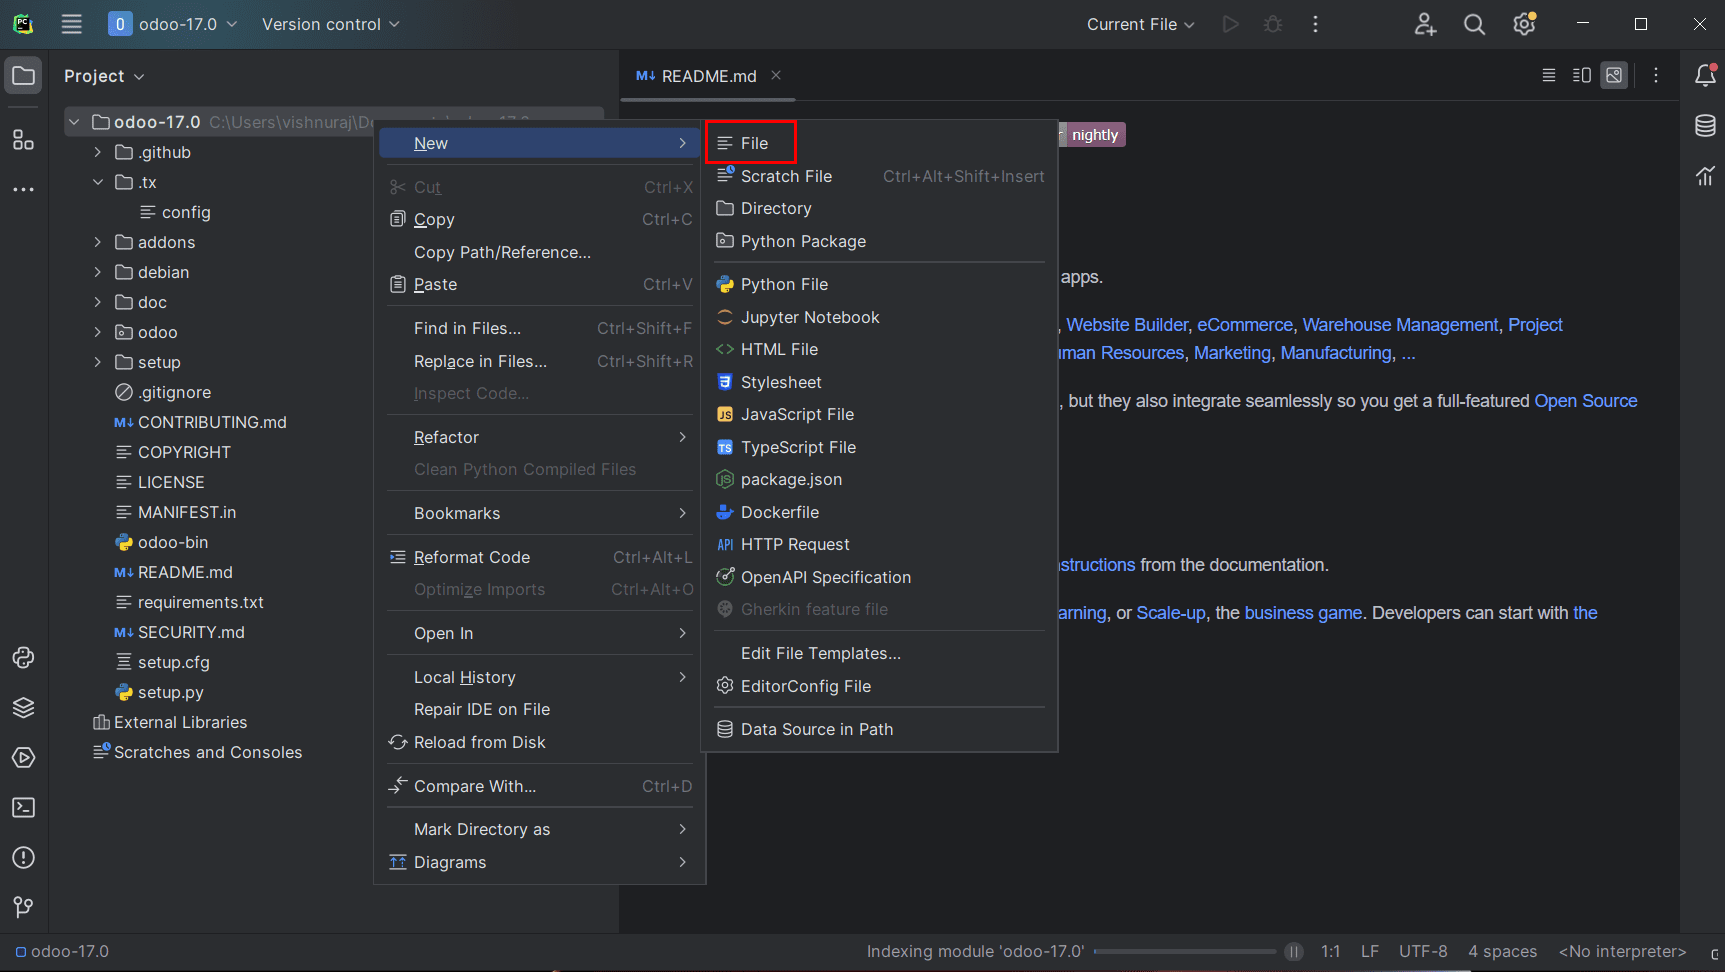
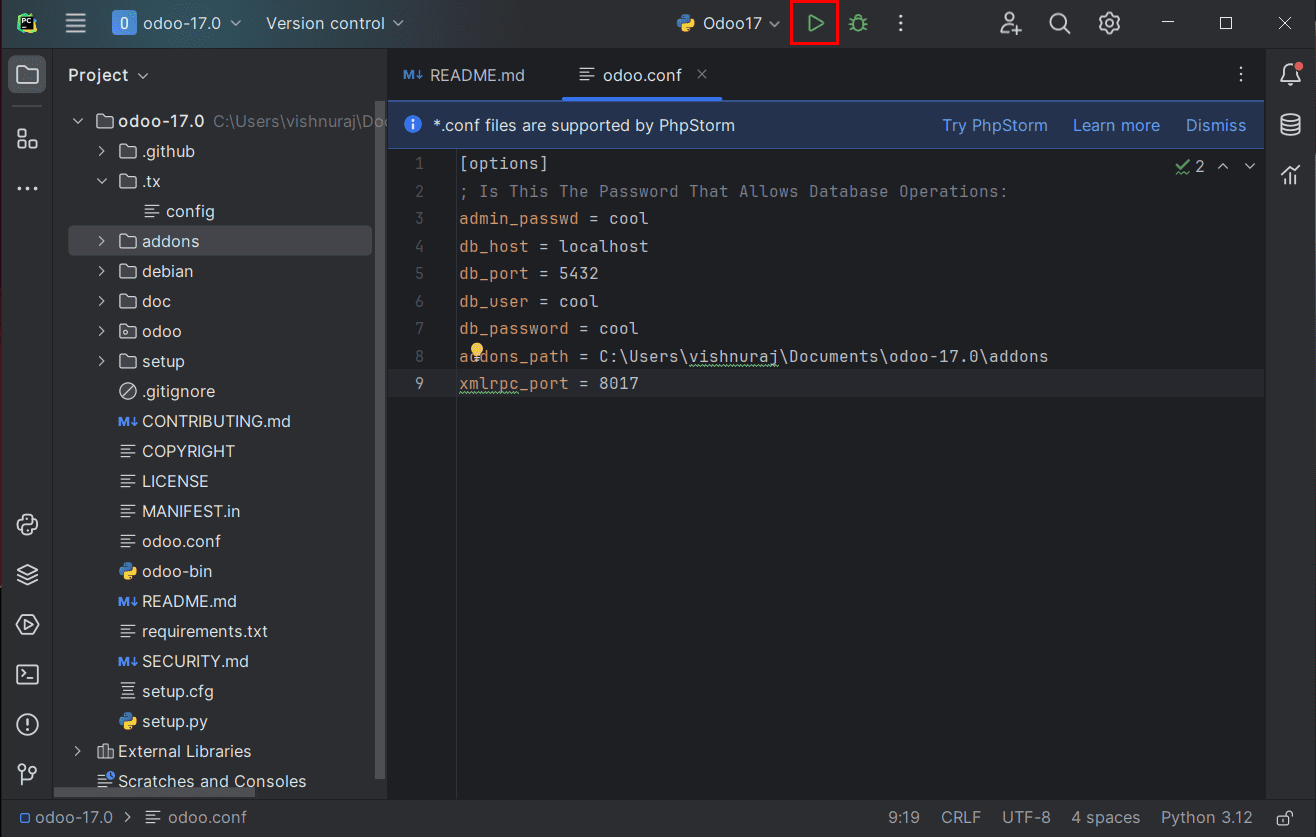
Create an odoo.conf file inside the directory by right clicking on the Odoo-17 folder from project tab (left side).
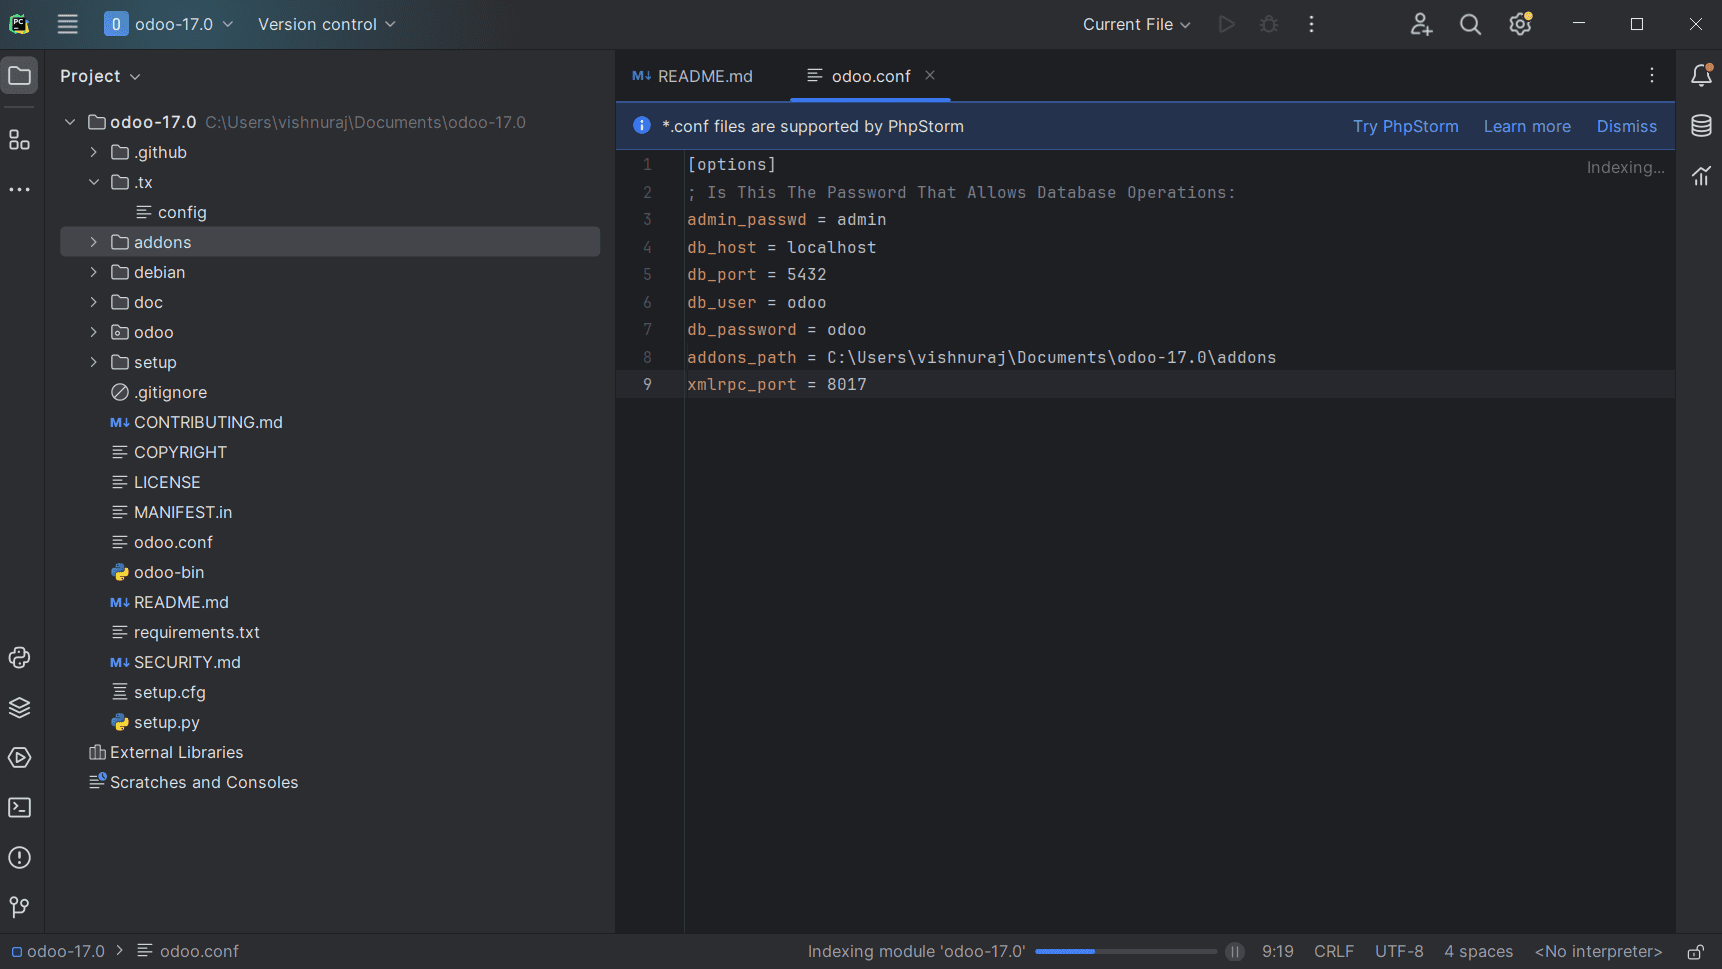
Paste these codes inside it.
[options]
; Is This The Password That Allows Database Operations:
admin_passwd = admin
db_host = localhost
db_port = 5432
db_user = odoo
db_password = odoo
addons_path = /home/user/odoo/addons
xmlrpc_port = 8017
Change the db_user and db_password which is set when configured PostgreSQL using pgAdmin. Also, change addons path to “addons” directory inside the extracted odoo-17.0 folder.
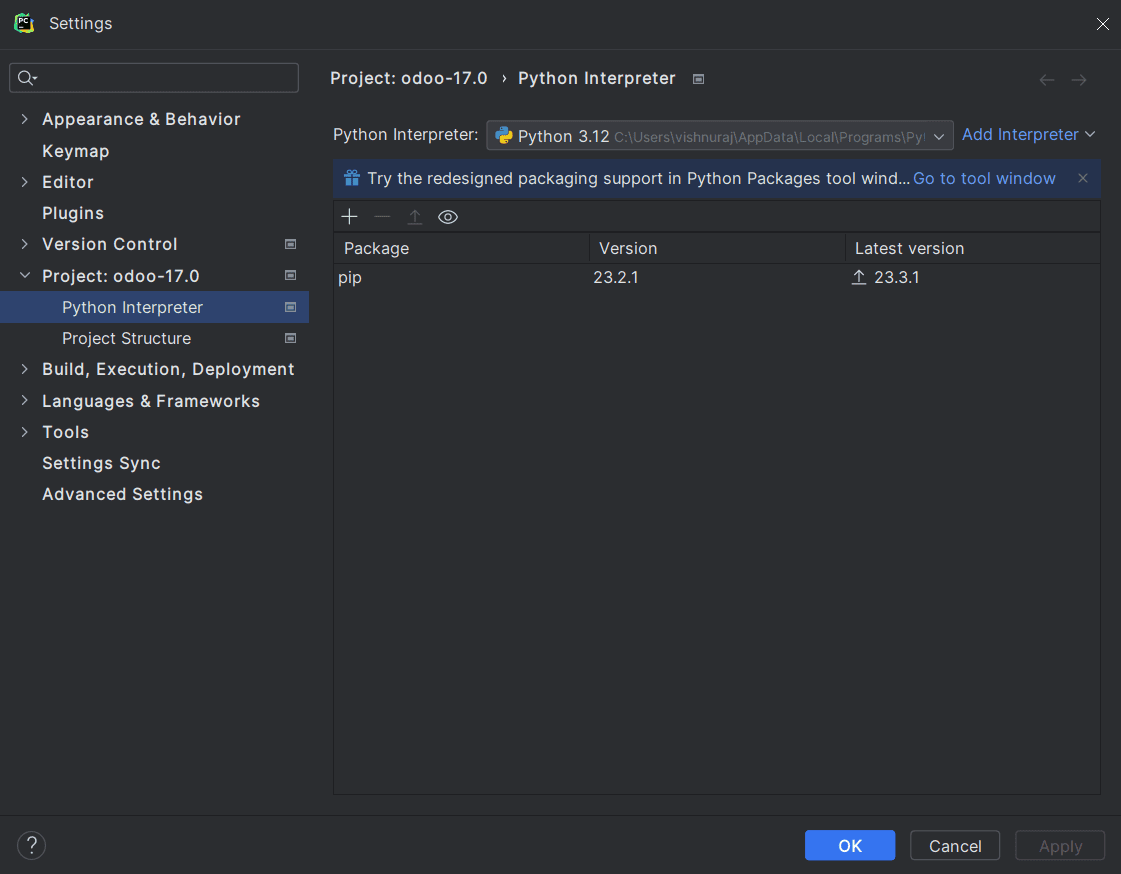
Next, we need to set up a Python Interpreter. For that, go to Settings -> Project Settings -> python Interpreter.
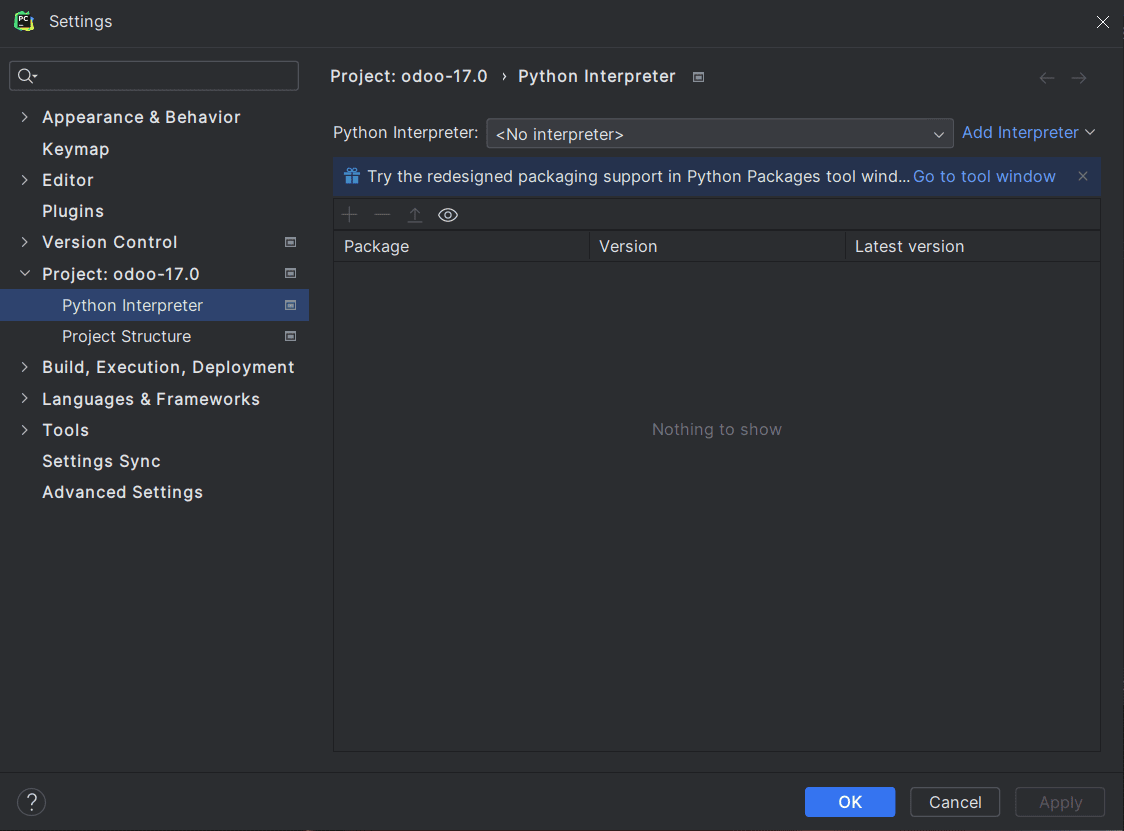
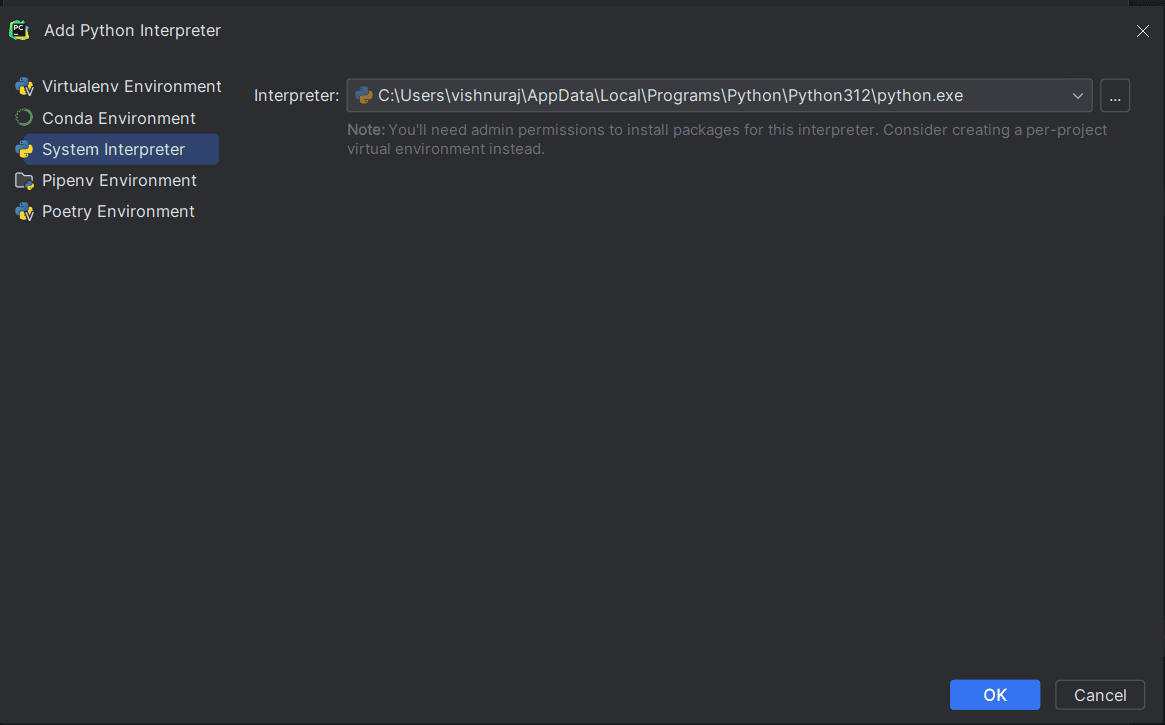
Click on “Add Interpreter” from the Python interpreter option.
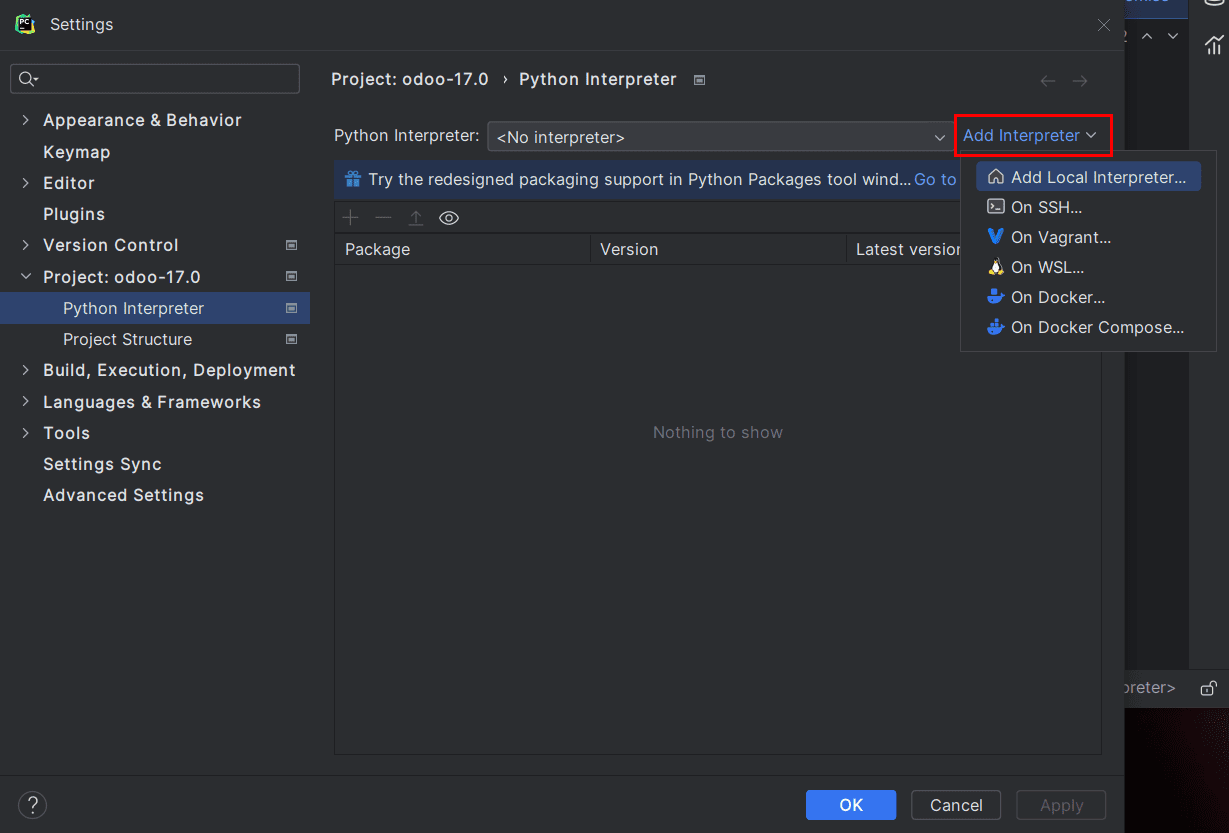
Now, choose the Interpreter as “System Interpreter” as shown in the figure then click OK.
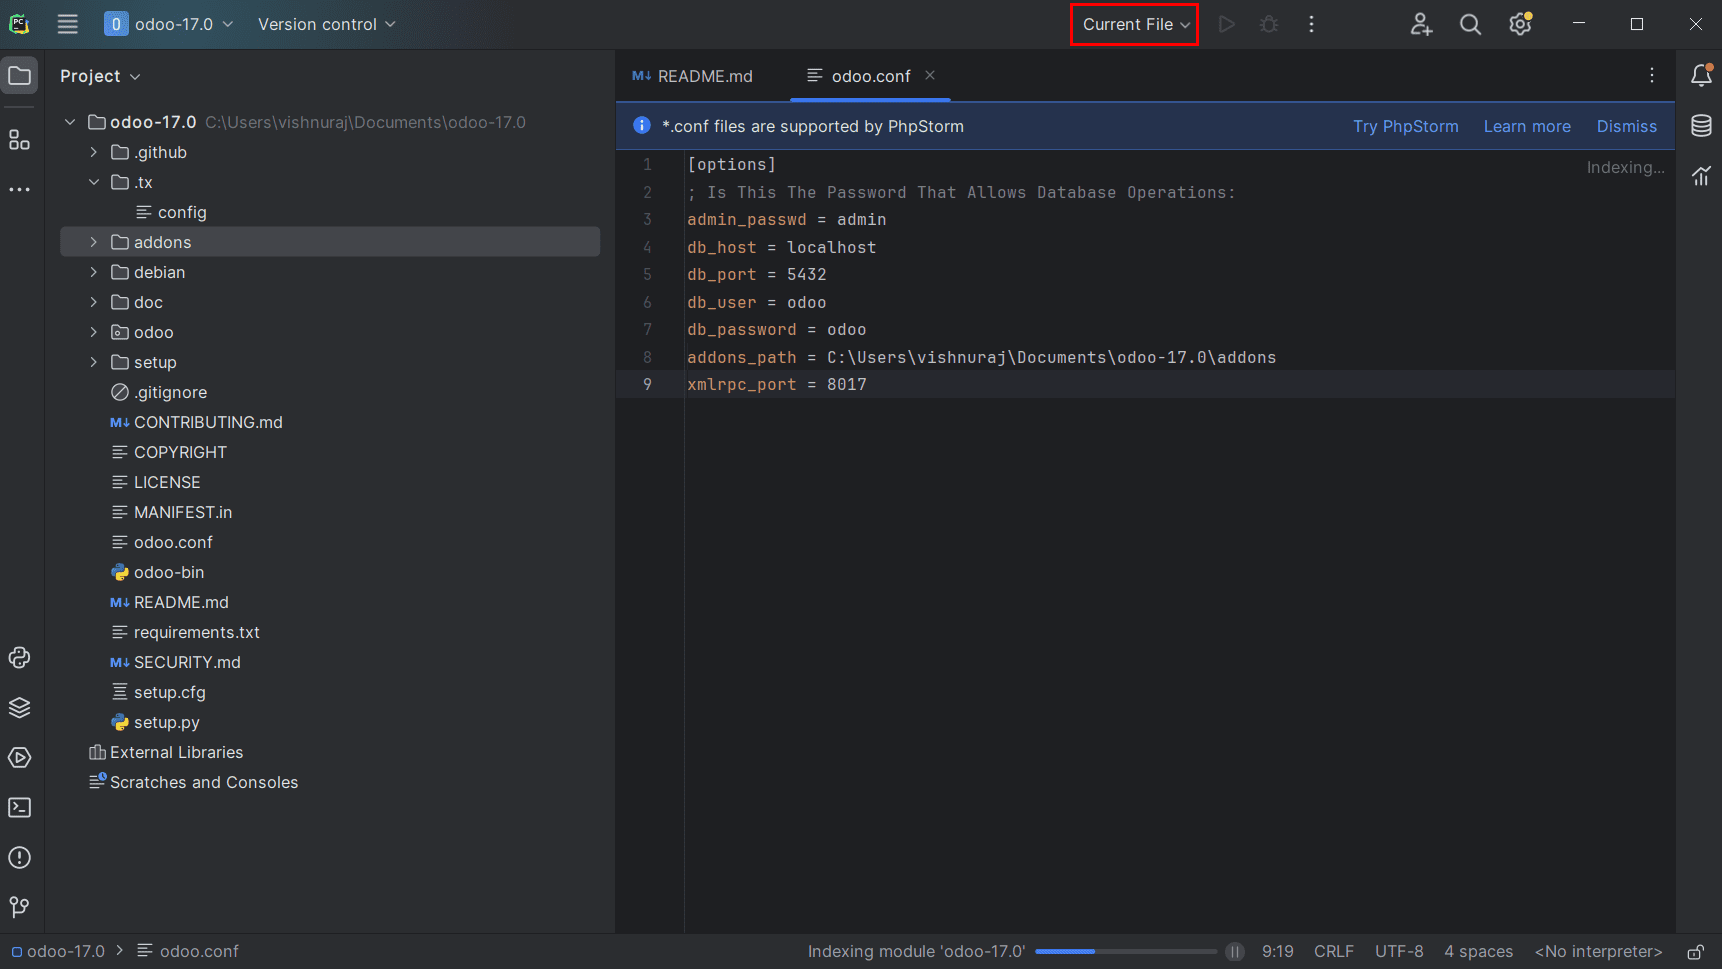
Finally, we need to create a configuration for running the Odoo17 instance. For that, under the “Current file” option select “Edit Configuration.”
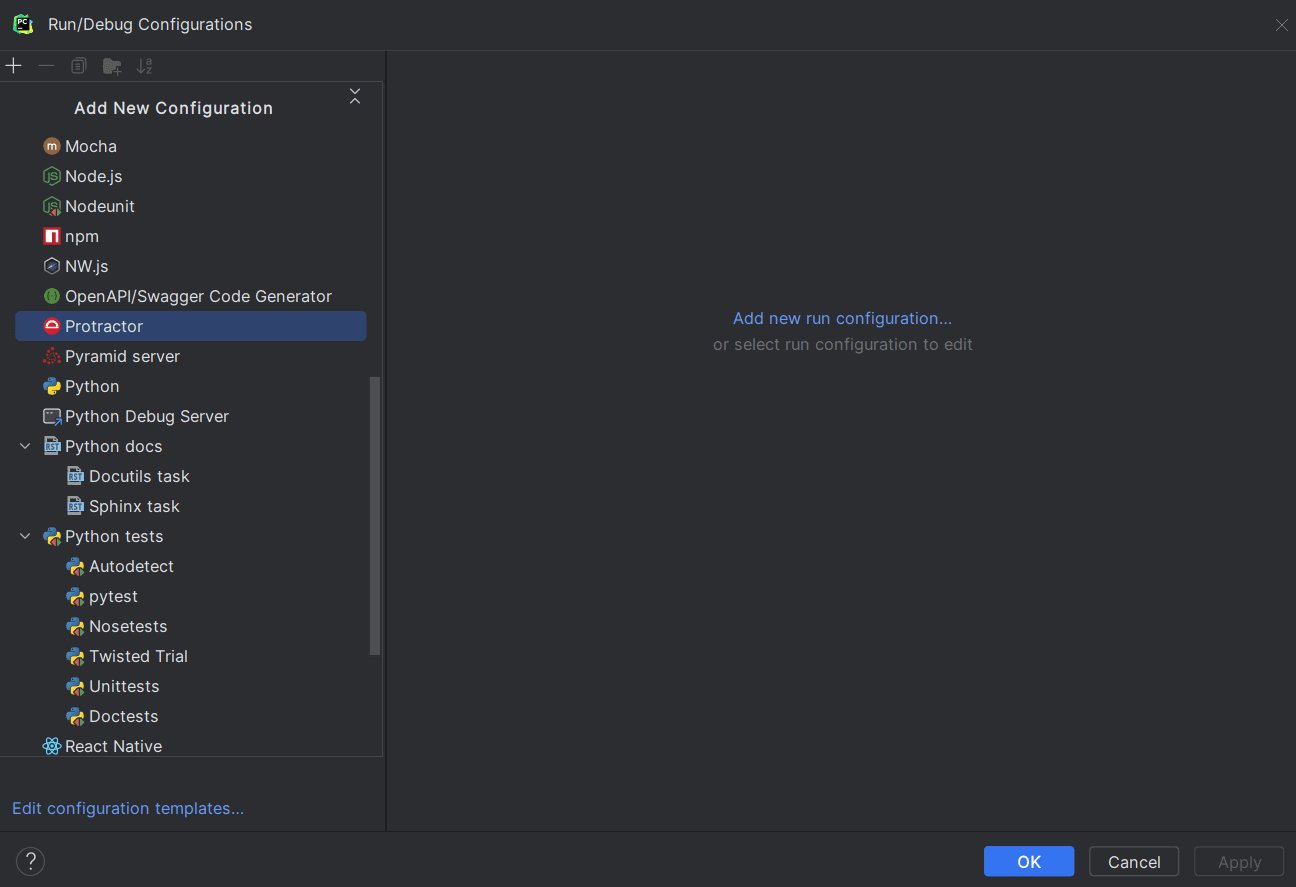
Add a new configuration using the Plus icon from the top left panel and choose Python from the options.
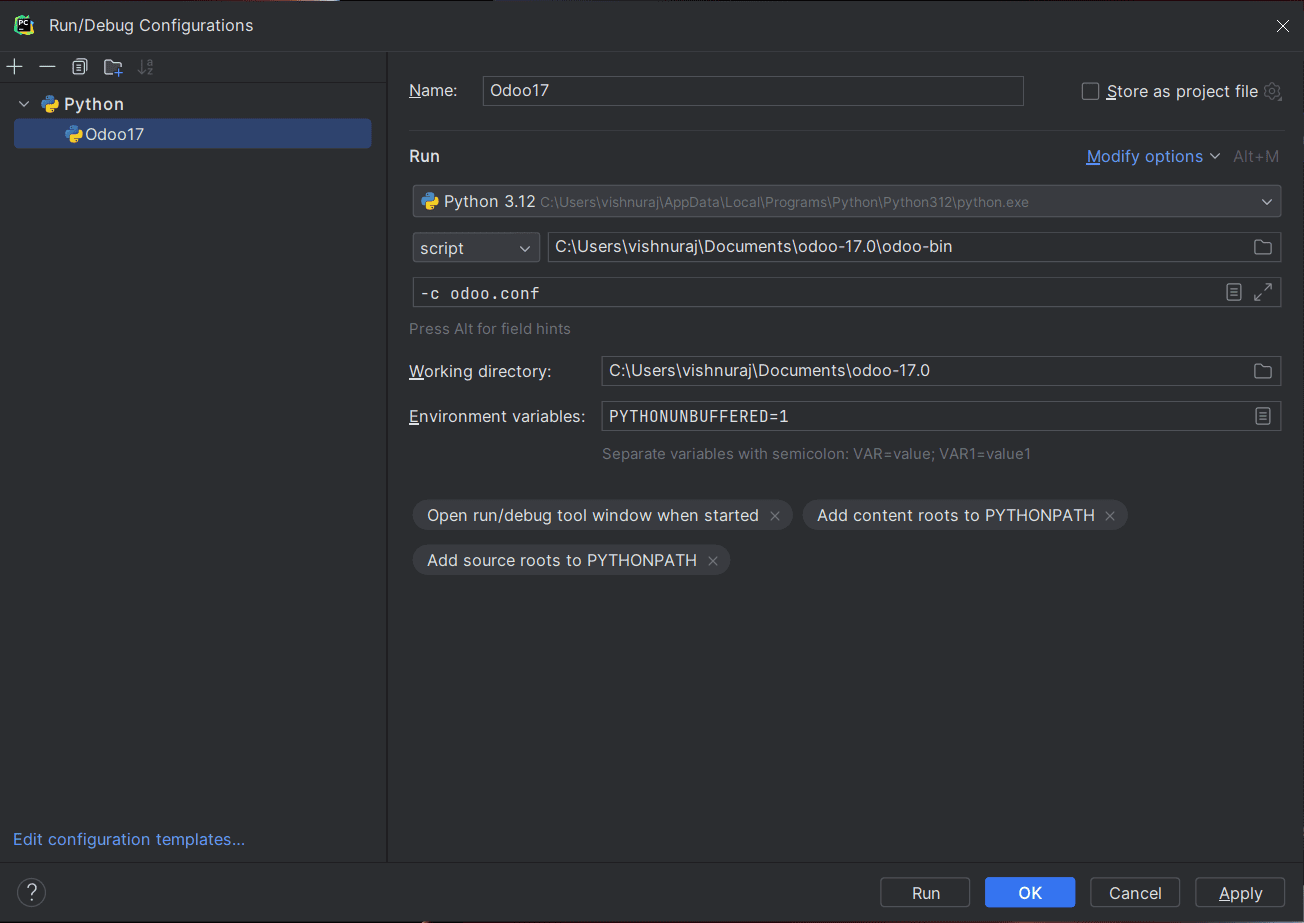
Fillup the necessary information on configuration as shown in figure.
+ Give a name for configuration
+ Select “Script path” as “odoo-bin” file from extracted Odoo-17 (Project Directory)
+ Set Python interpreter only if not already shown.
+ Working Directory choose the extracted project folder
+ Parameters: -c odoo.conf
then click Apply and OK.
Yeah, Now we can run our Odoo instance by clicking the play icon next to the configuration option or by Keyboard Shift+F10.
Maybe some Python packages will be missing on your Python interpreter, and then pycharm will show the missing packages. We can add it to the Python interpreter by adding it manually.
To add a package manually, go to interpreter settings then click the + icon above the packages. Paste the missing package name on the search bar and install the correct one.
Some packages need to be installed with alternate packages which are;
Missing package Alternate package for install
* psycopg2 psycopg2-binary
* PIL PIL-Tools
* dateutil dateutils
* Win32service pypiwin32
After adding the missing packages, run the instance once again open the browser and paste the “localhost:8017” address.
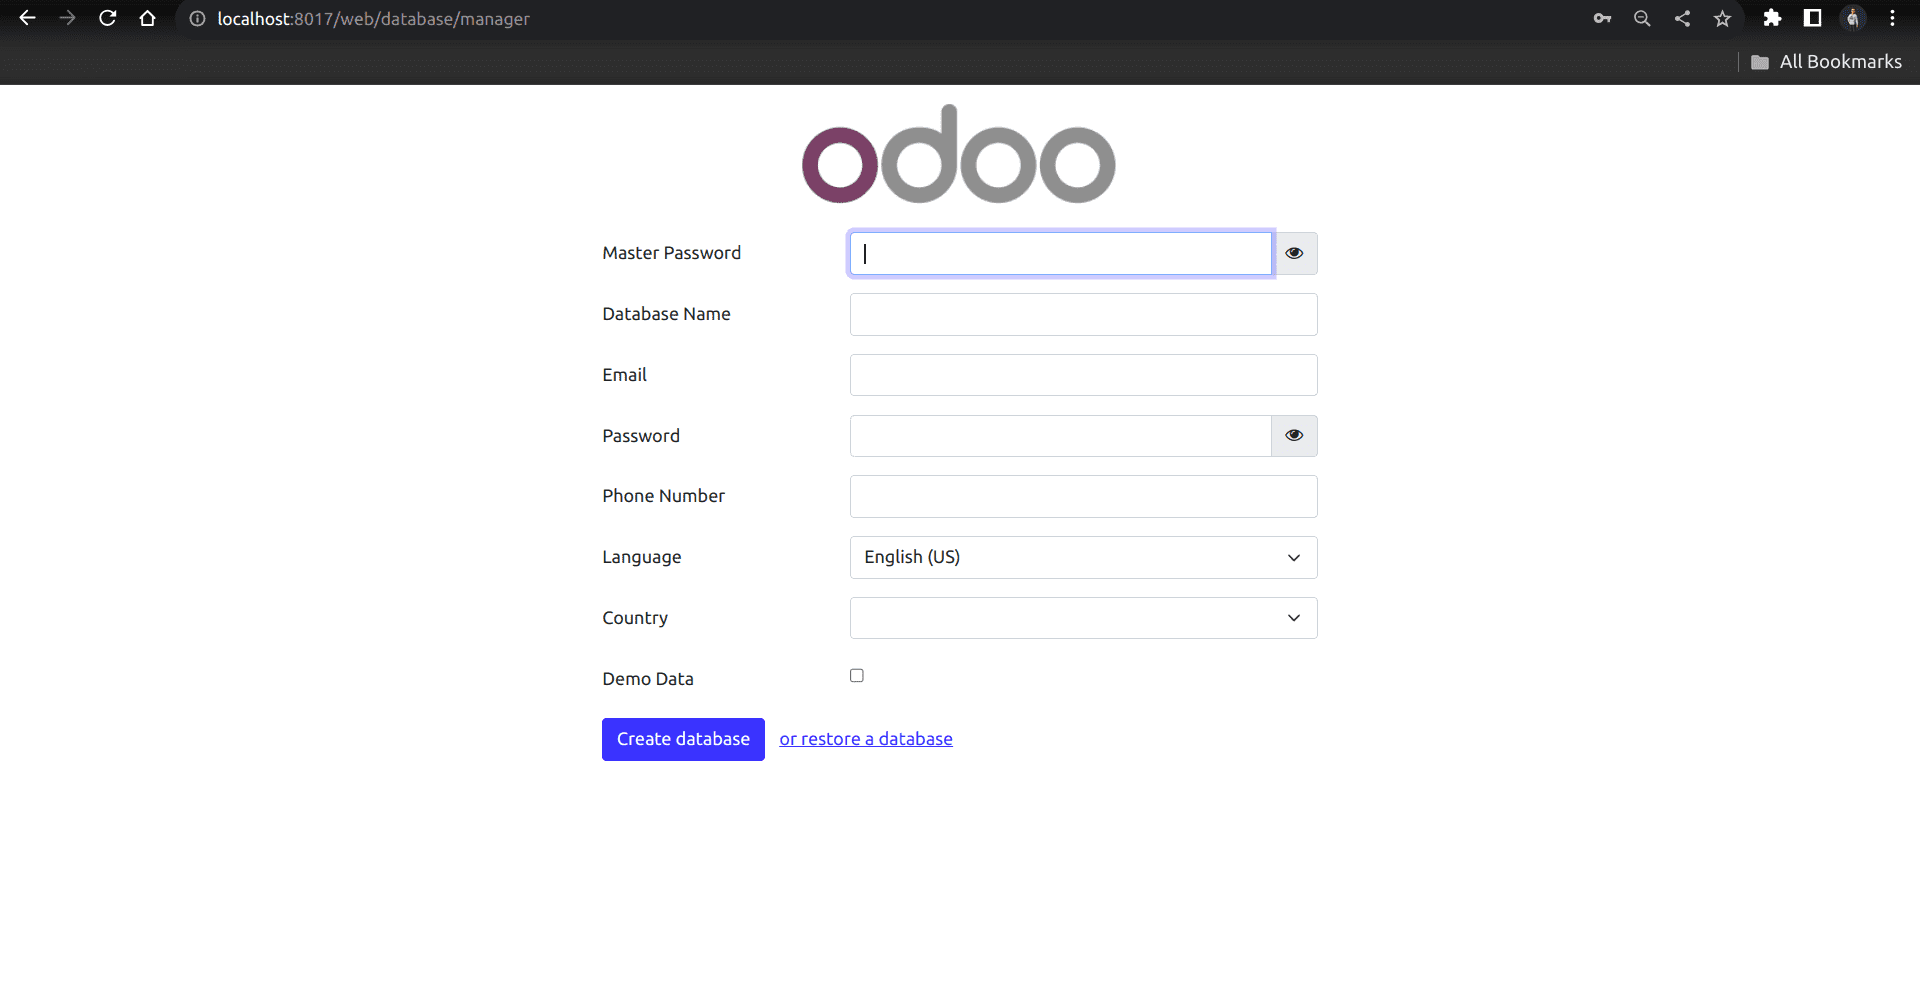
You can create a new database with your master password set on the configuration file by filling email and password.