Charging clients for expenses incurred by the business while rendering a service is known as expense re-invoicing. Firms that need to recover these expenses, such as consultancies, project-based firms, and service providers, can benefit from this.
By connecting expenses directly to sales orders and invoices, Odoo 19 simplifies this procedure. This guarantees clear billing and saves time. For instance, while an employee is working on a client's project, the consulting business covers their travel and lodging expenses. These expenses can be automatically added to the client's invoice using Odoo 19's expenditure re-invoicing feature, guaranteeing the firm is paid. This makes it simple to compensate an employee or client for expenses incurred on their behalf.
Set Up Re-Invoicing Expense Categories:
To ensure that expenses are re-invoiced to customers appropriately, each category of expenses should be associated with a suitable re-invoicing rule.
Go to Expenses > Configuration > Expense Categories, as shown below:
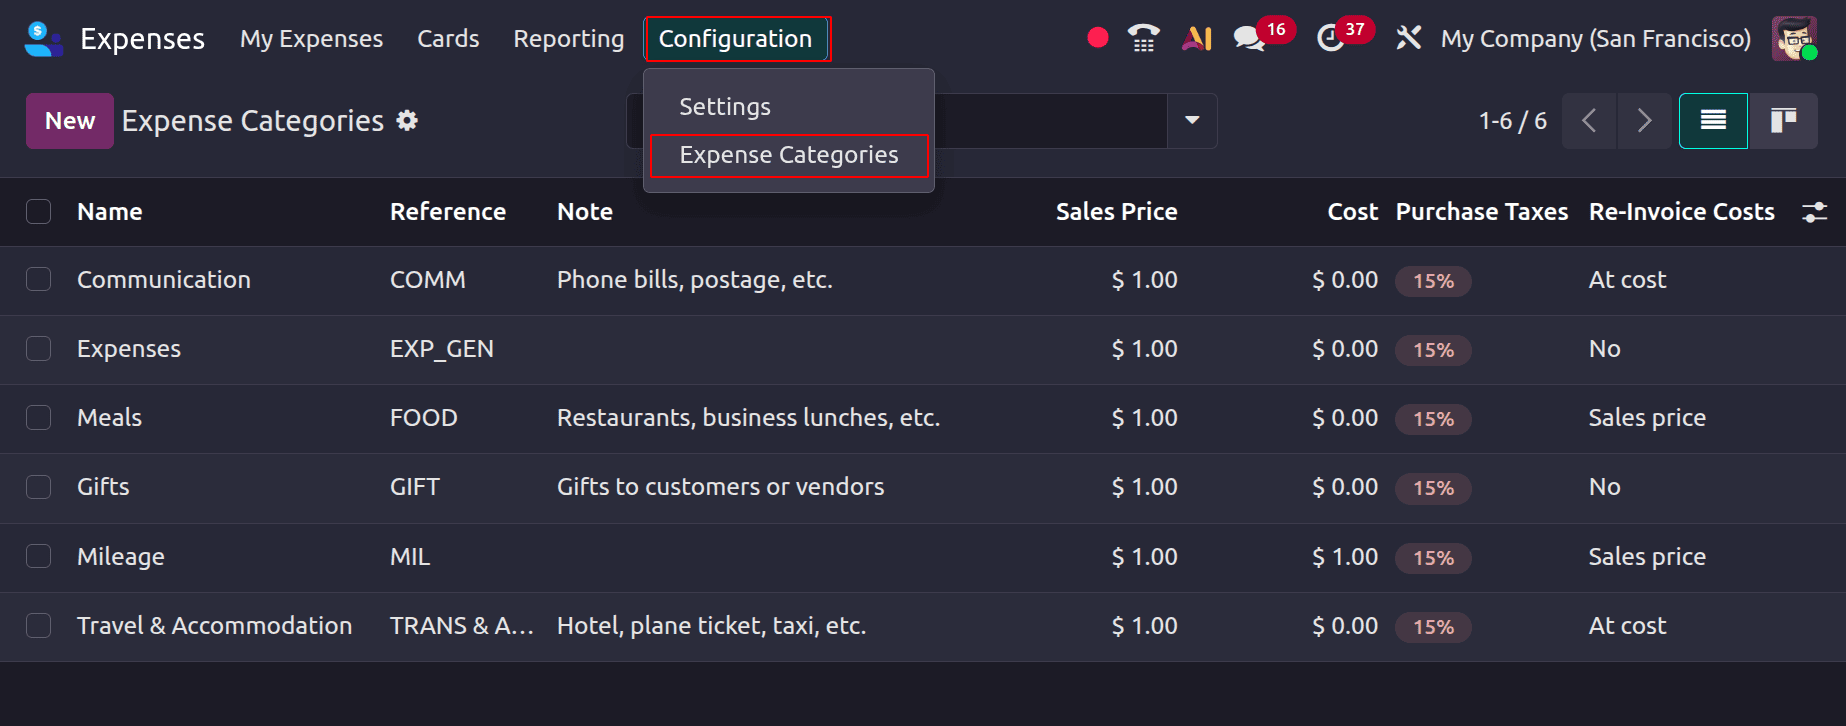
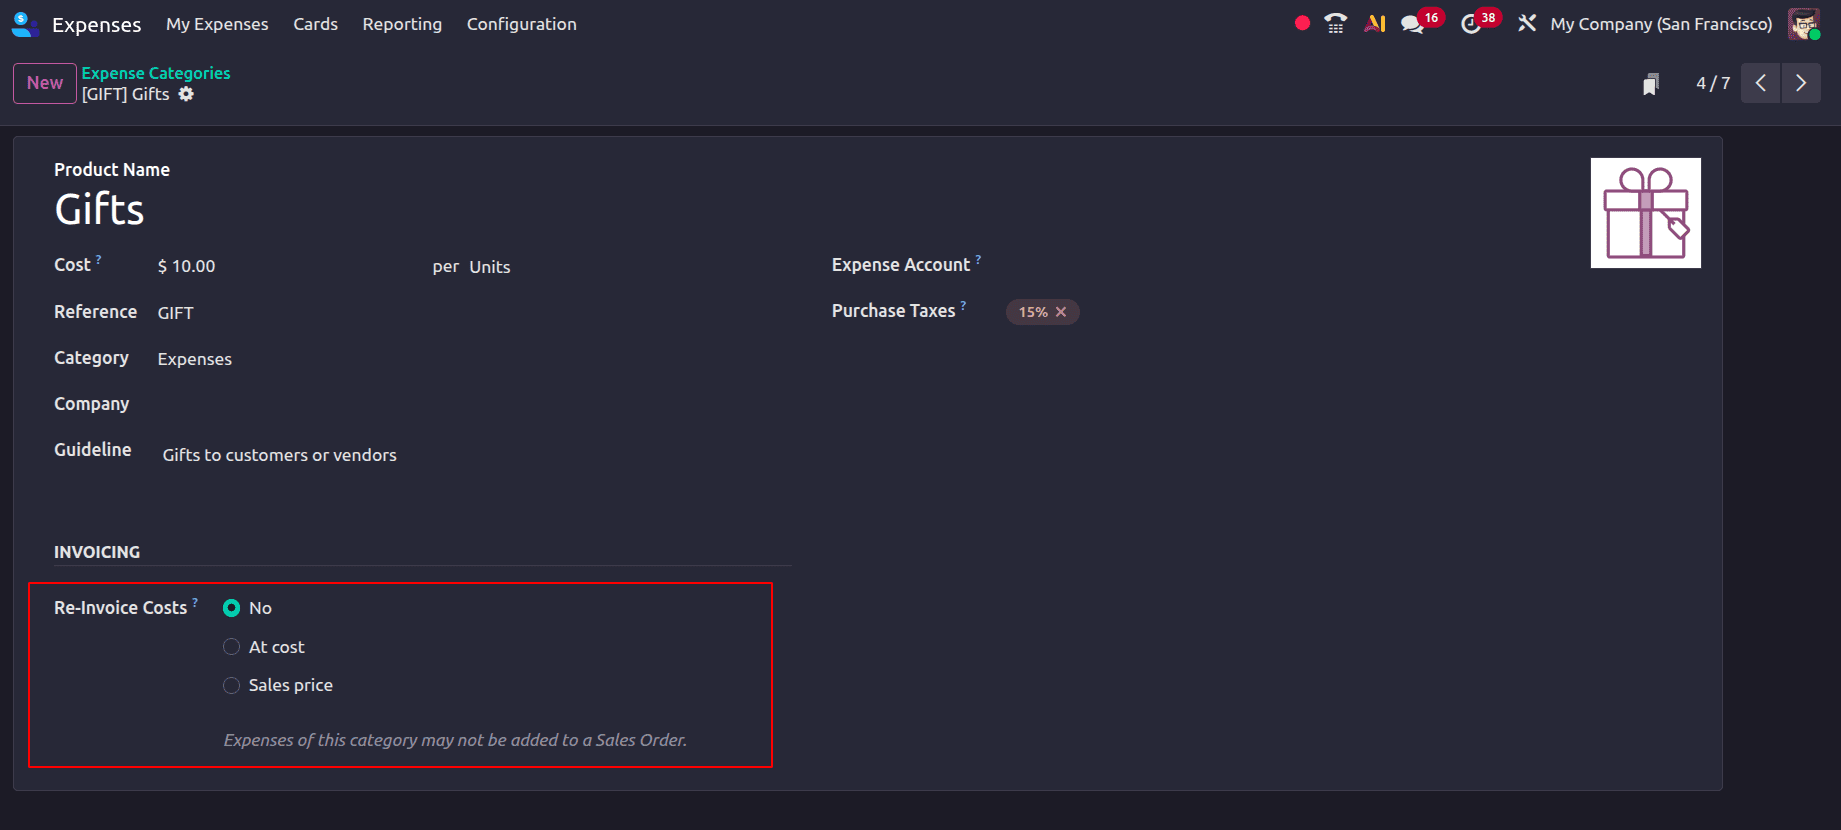
Then, either click New to create an expenditure category or edit an existing category that includes the expense requiring re-invoicing. Re-invoice Costs is an option under the Invoicing section that allows you to select how the costs will be reimbursed to the customer:
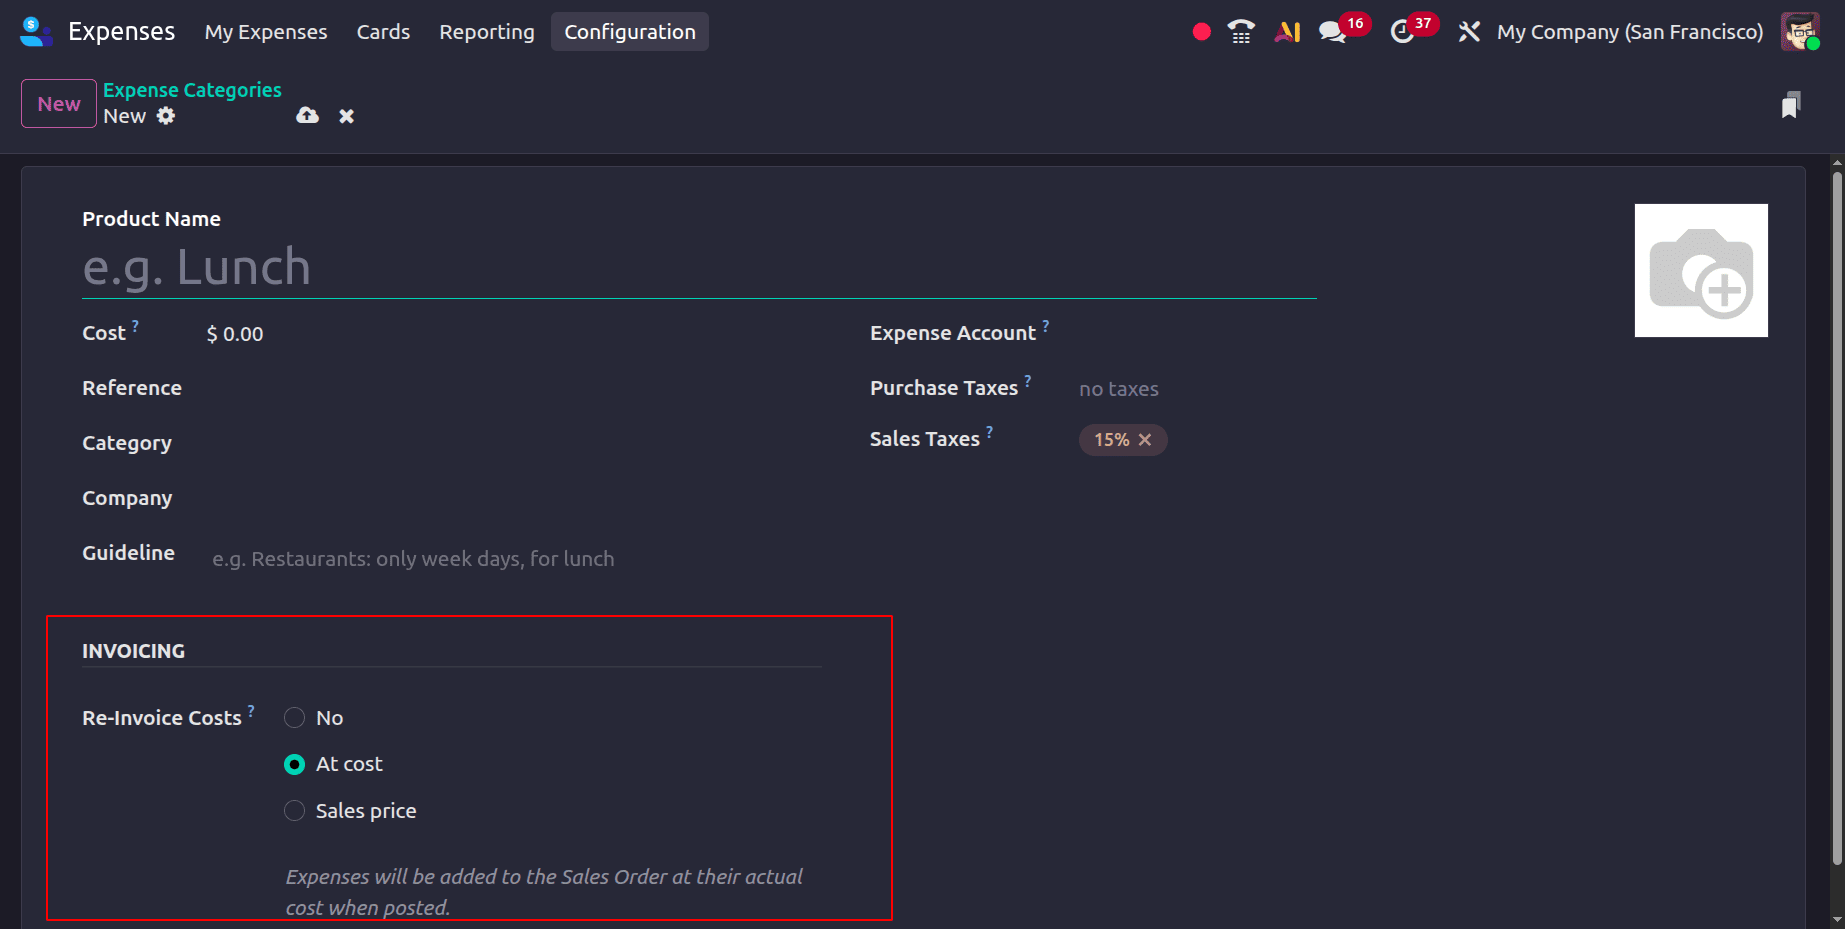
- No: The consumer is not billed for the expense even though it is documented. If this option is selected, the Customer to Reinvoice field is unavailable when creating an expense. As a result, you cannot assign a customer for re-invoicing.
- At Cost: The precise cost of the expense is charged. The amount specified as the total in the expenditure creation form is used to re-invoice the clients if the cost was entered as zero in the expense category form.
- Sales Price: When this re-invoicing option is selected, a Sales Price field becomes available in the expense category. The amount entered in this field is used as the invoiced amount when the expense is re-invoiced to the customer.
At Cost:
Businesses can reimburse staff expenditures to consumers in Odoo 19 expenditures without adding any markup by setting the Reinvoice Costs option to At Cost. Odoo automatically generates the relevant billable amount based on the precise expense cost when an expense is connected to a client project, task, or sales order. This keeps cost tracking clear, guarantees proper client billing, and assists businesses in recovering project-related expenses.
Choose "At cost" for the re-invoice costs.
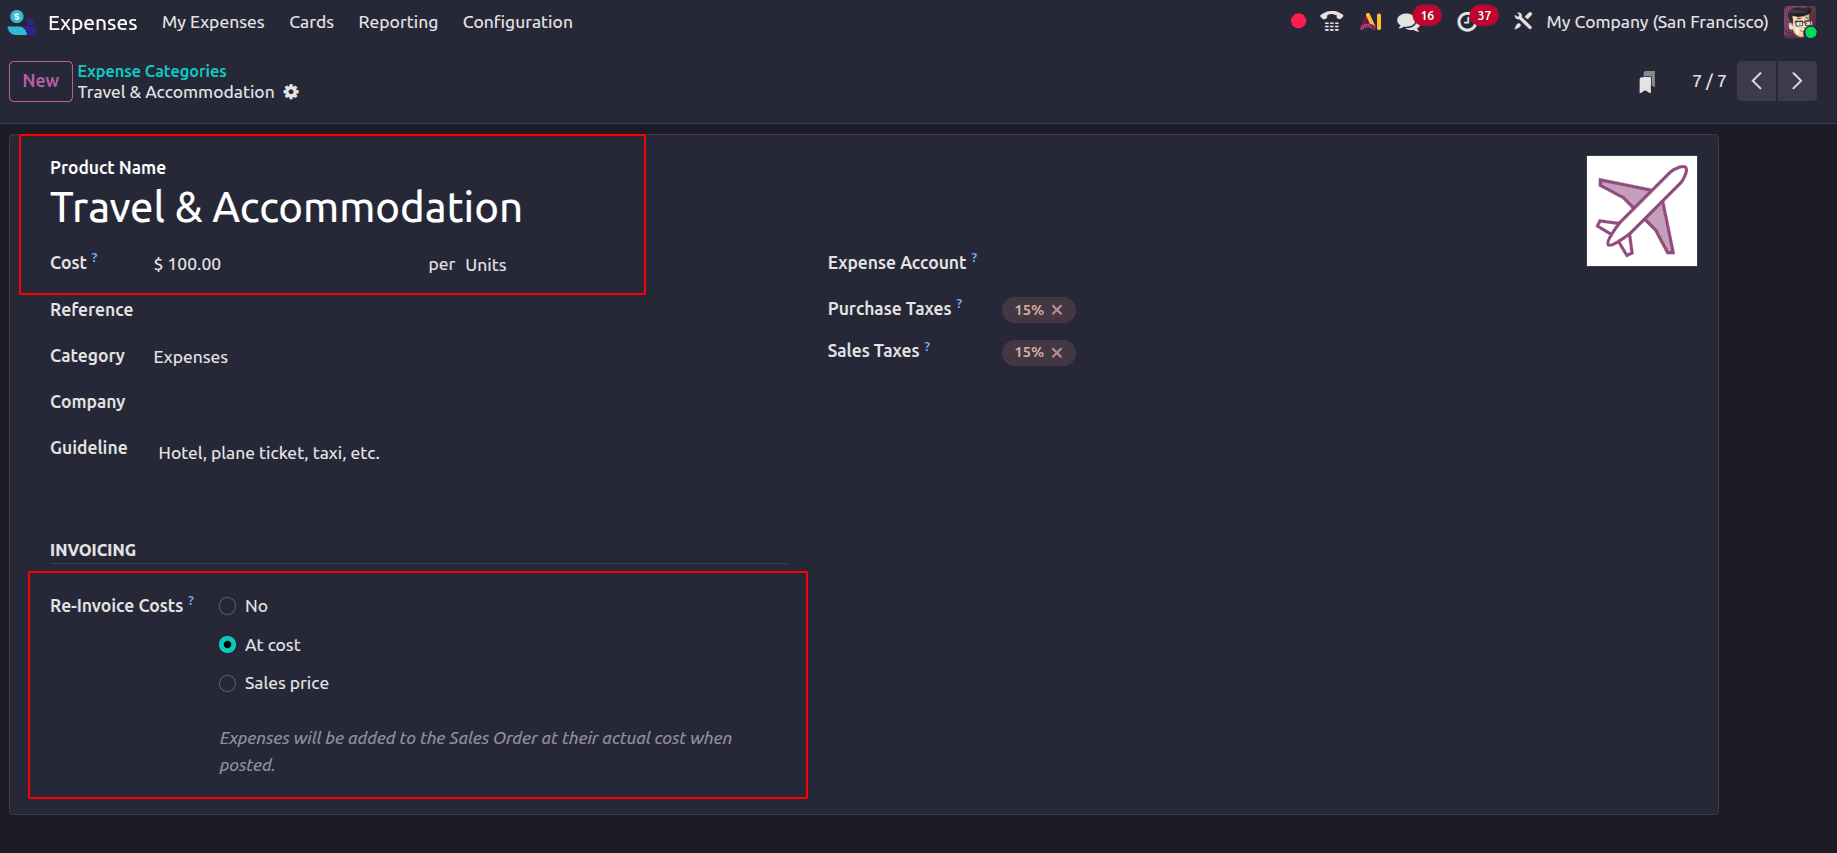
In the Cost section, enter the product's cost at which the customer needs to get a new invoice. If a cost greater than zero is specified for this product, the cost cannot be modified when creating or editing an expense.
Go to My Expenses > My Expenses to start creating an expense.
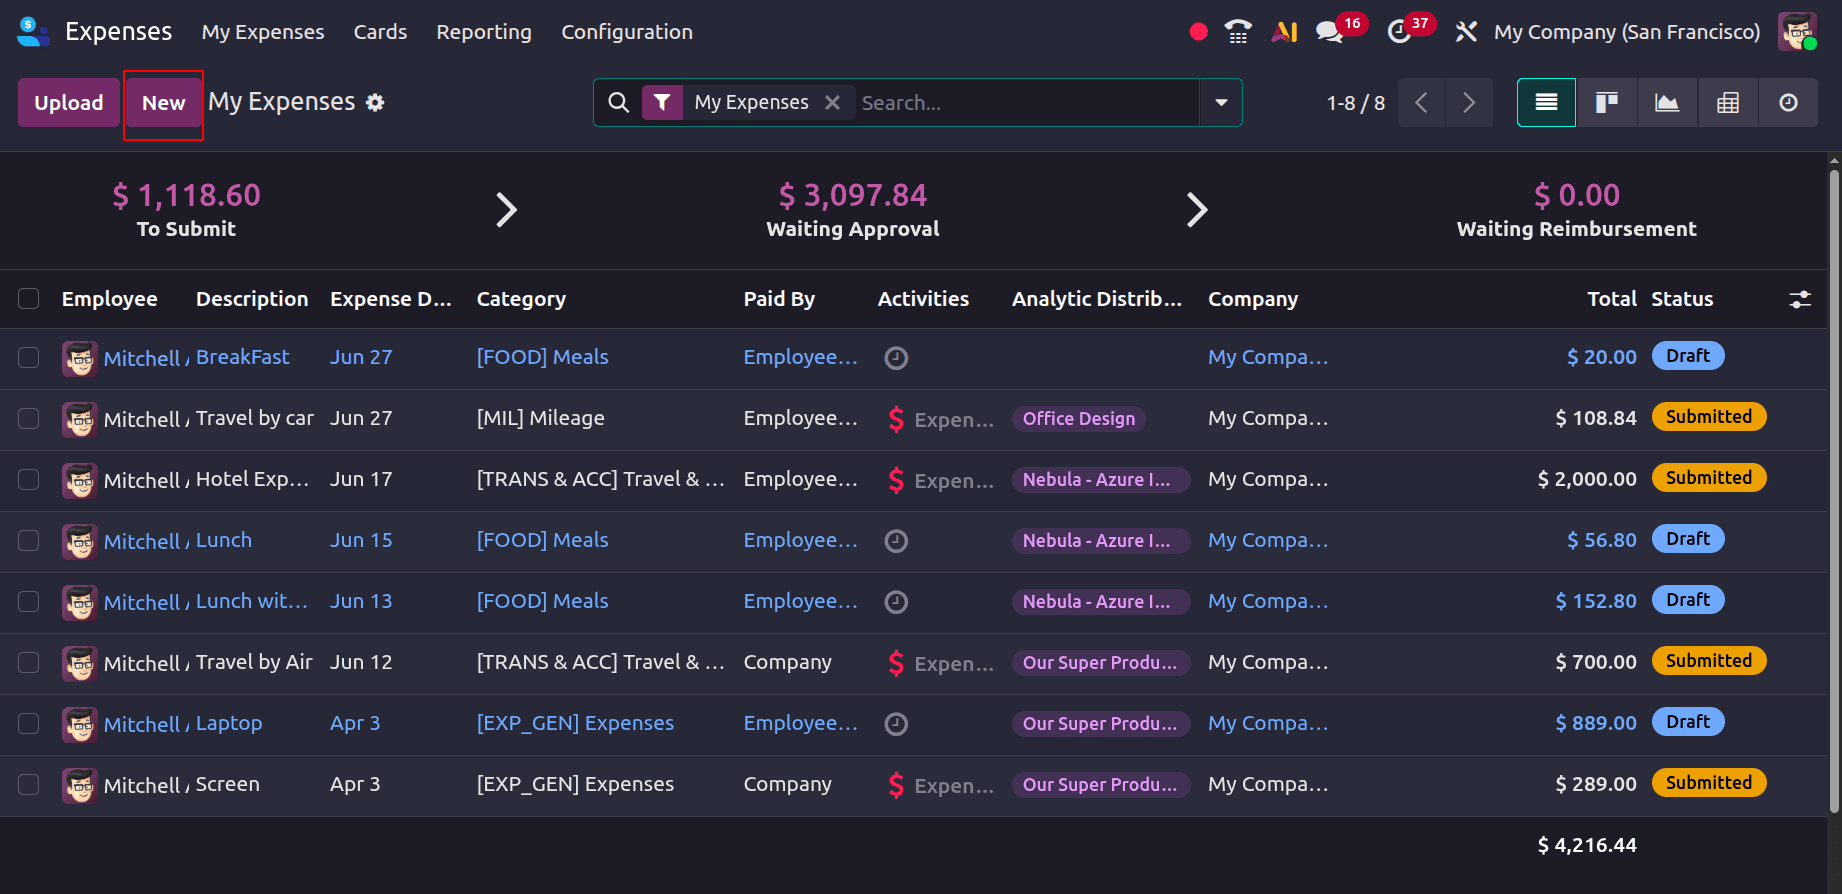
Click the New button to create a new expense.
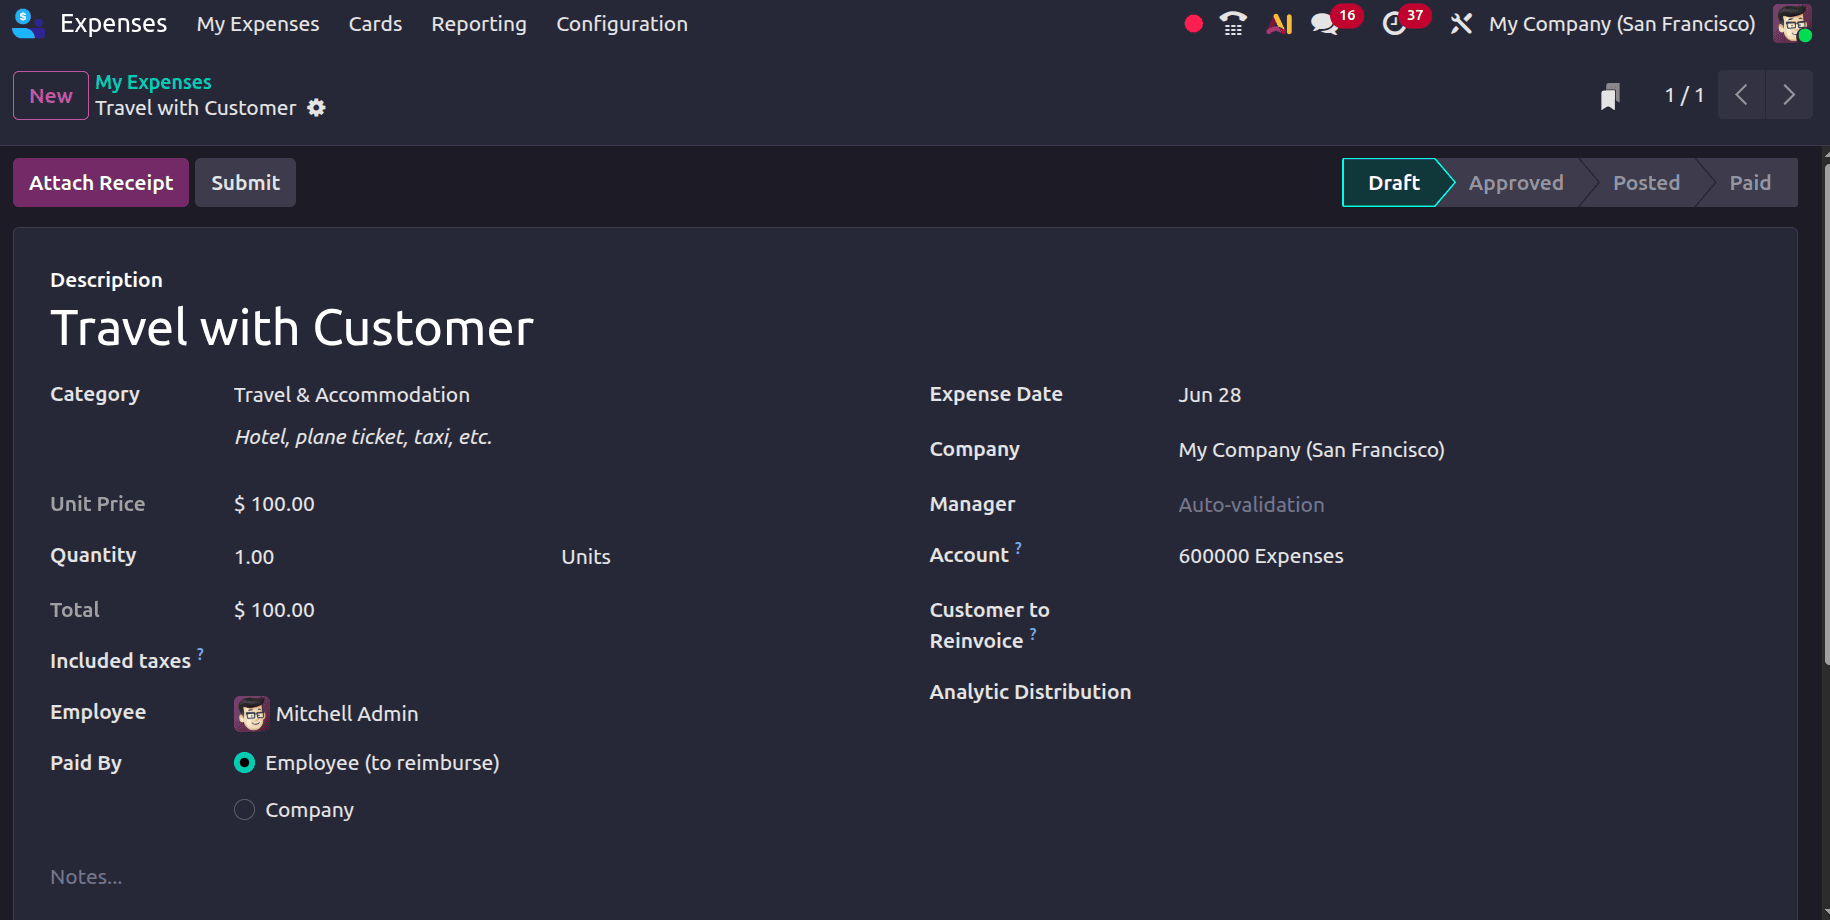
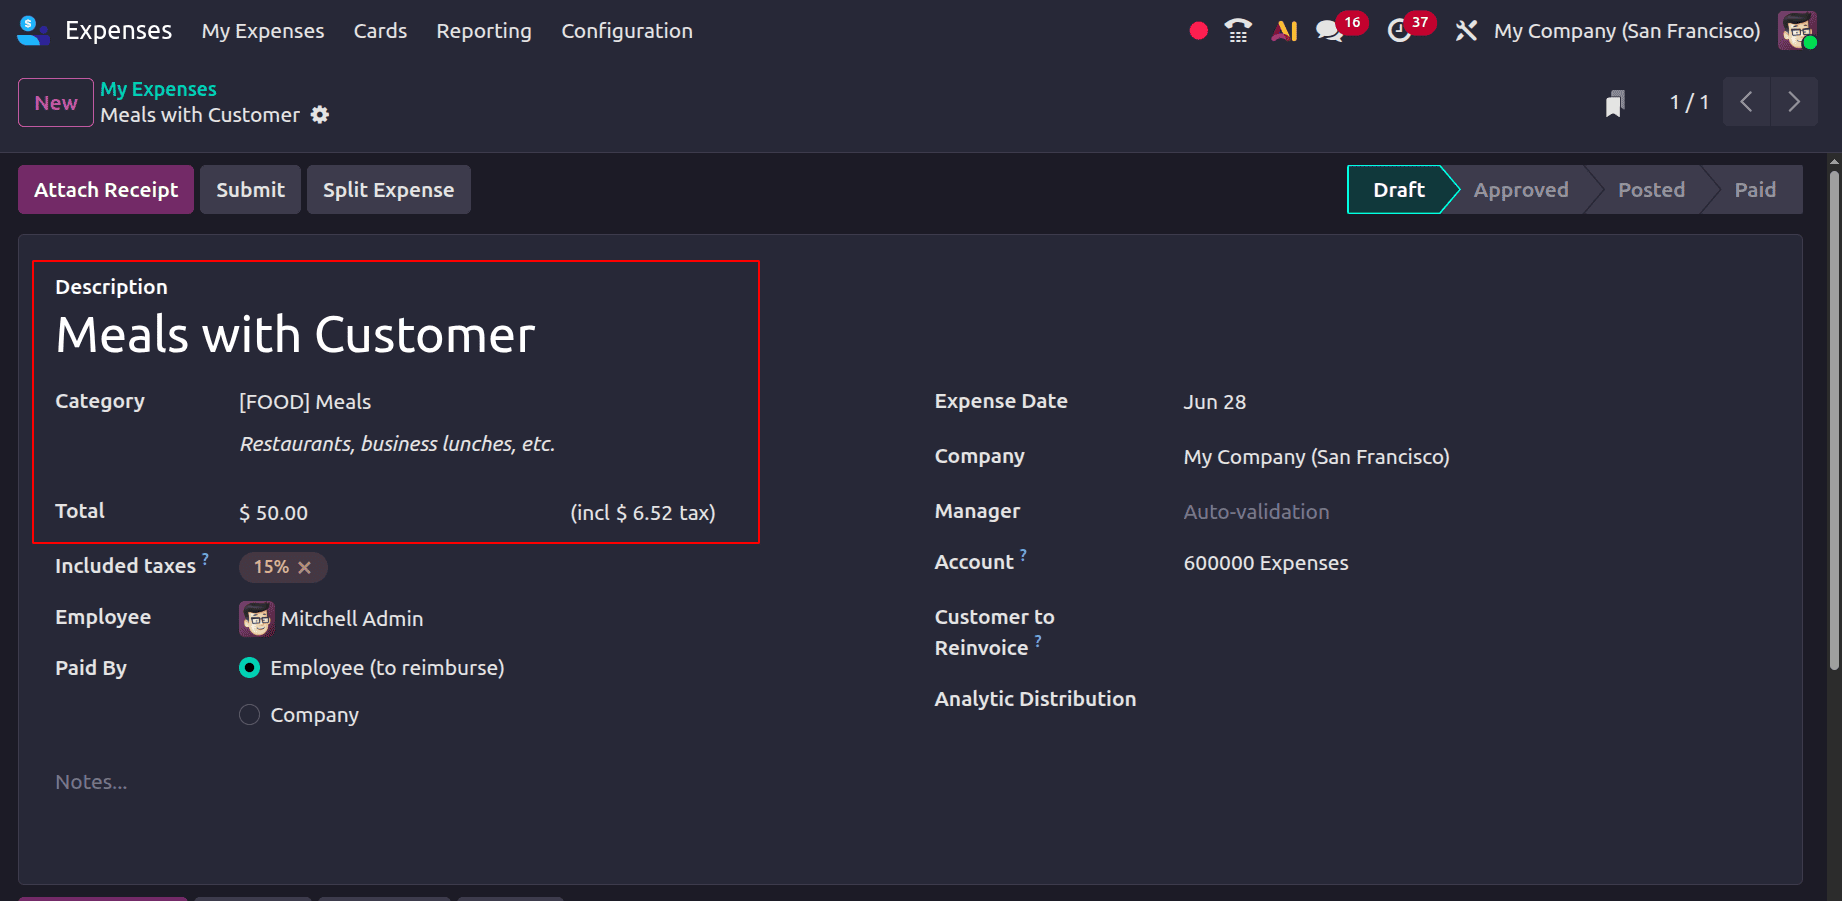
In Odoo 19, a new form for creating costs comes where users must provide the necessary expense details. While the Category field identifies the type of spending, such as travel, meals, or office supplies, the Description field offers a succinct description of the item, such as "Travel with Customer". The whole cost is recorded in the whole column, and the tax amount included in the total cost is shown in the Included Taxes field. Users must also select the Employee who submitted the expense and specify Paid By, indicating whether the expense was paid by the Employee (to reimburse), where the employee seeks reimbursement for an out-of-pocket payment, or by the Company, where the organization paid the expense directly. Additionally, the Expense Date records when the expense occurred, and the Account field determines the accounting account used to register the expense.
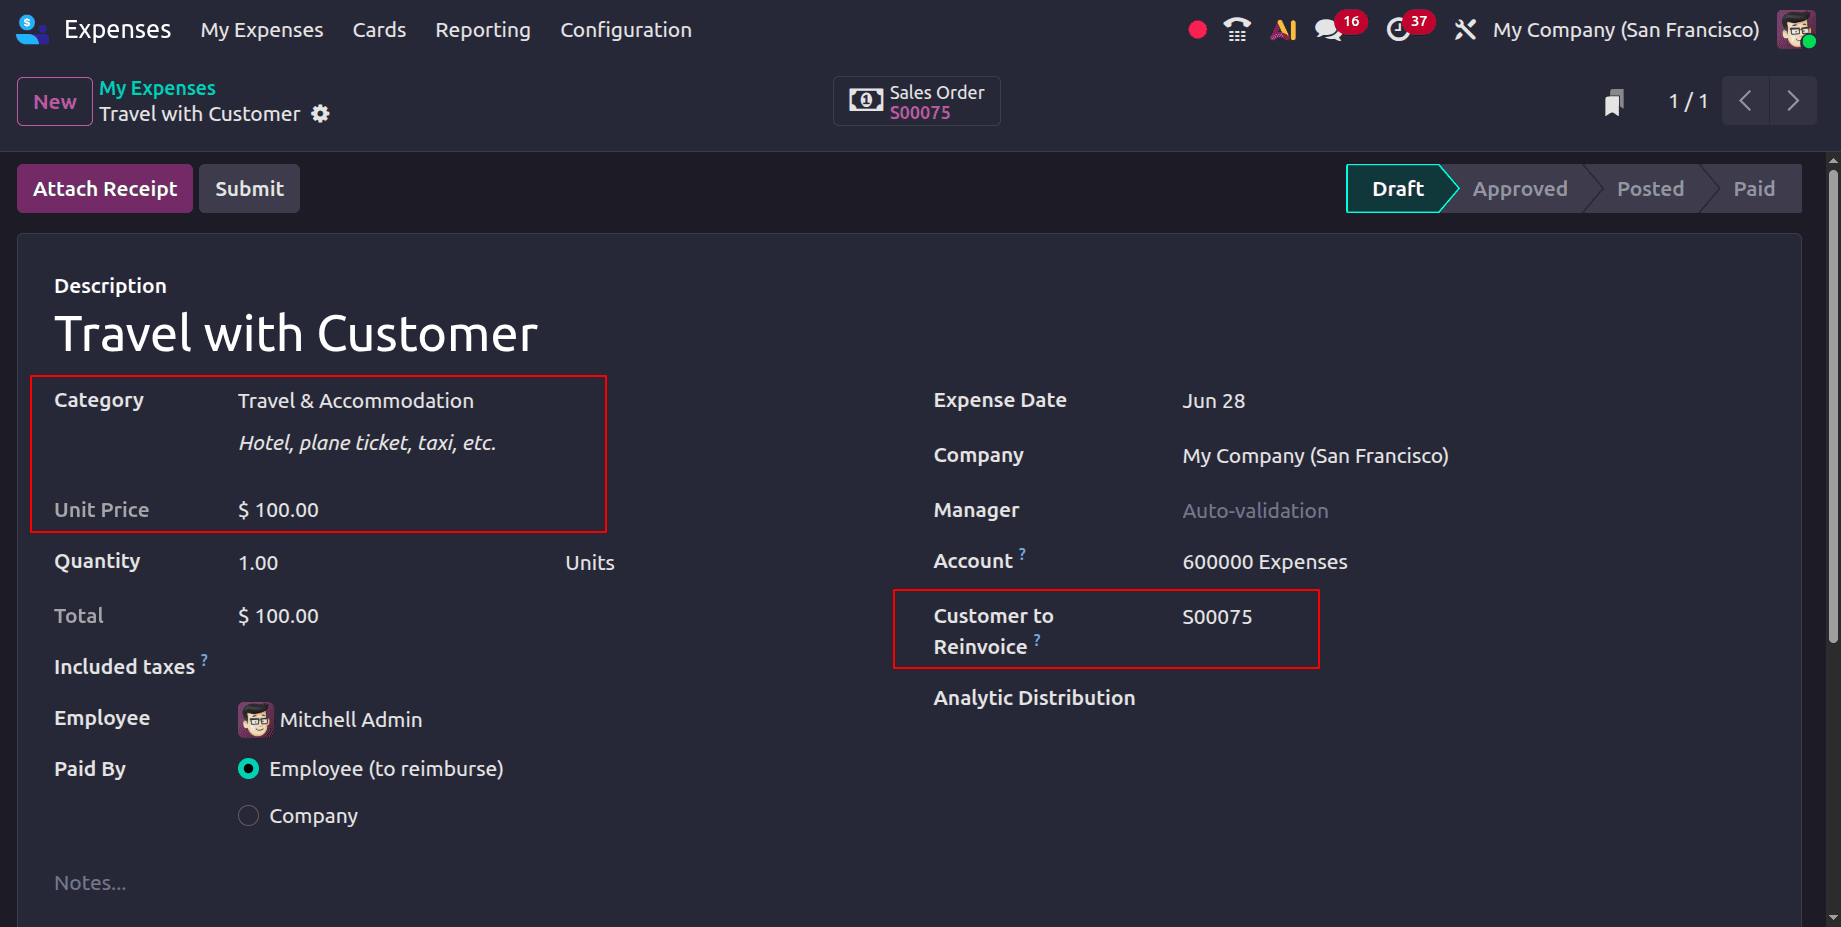
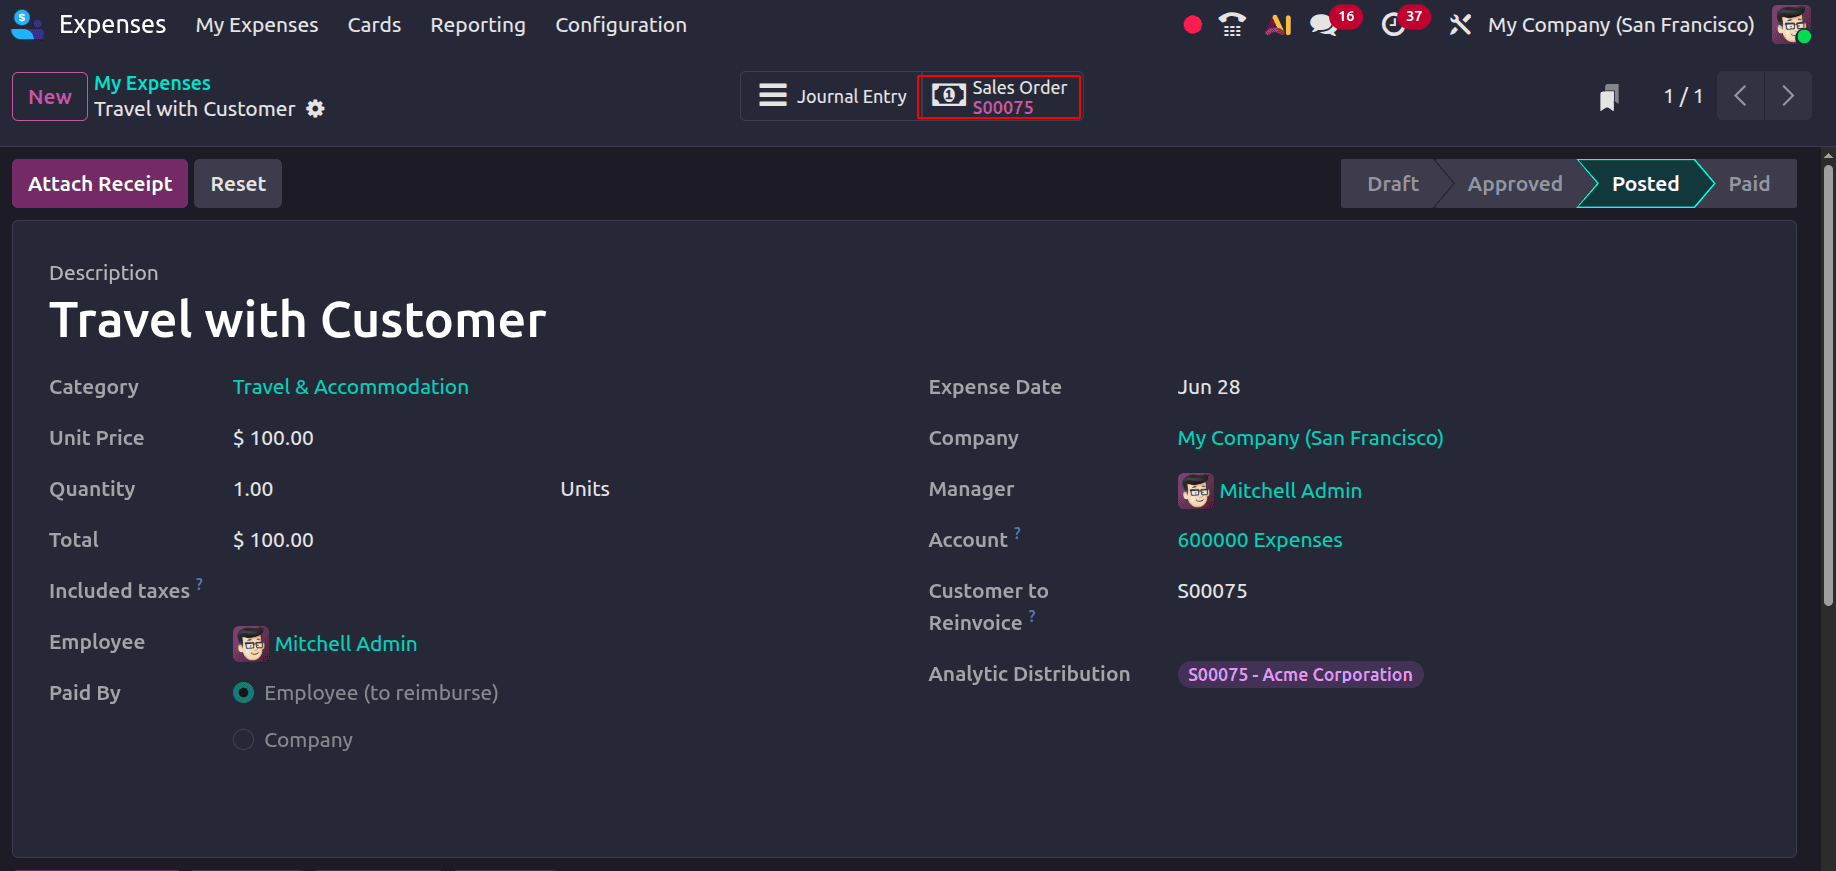
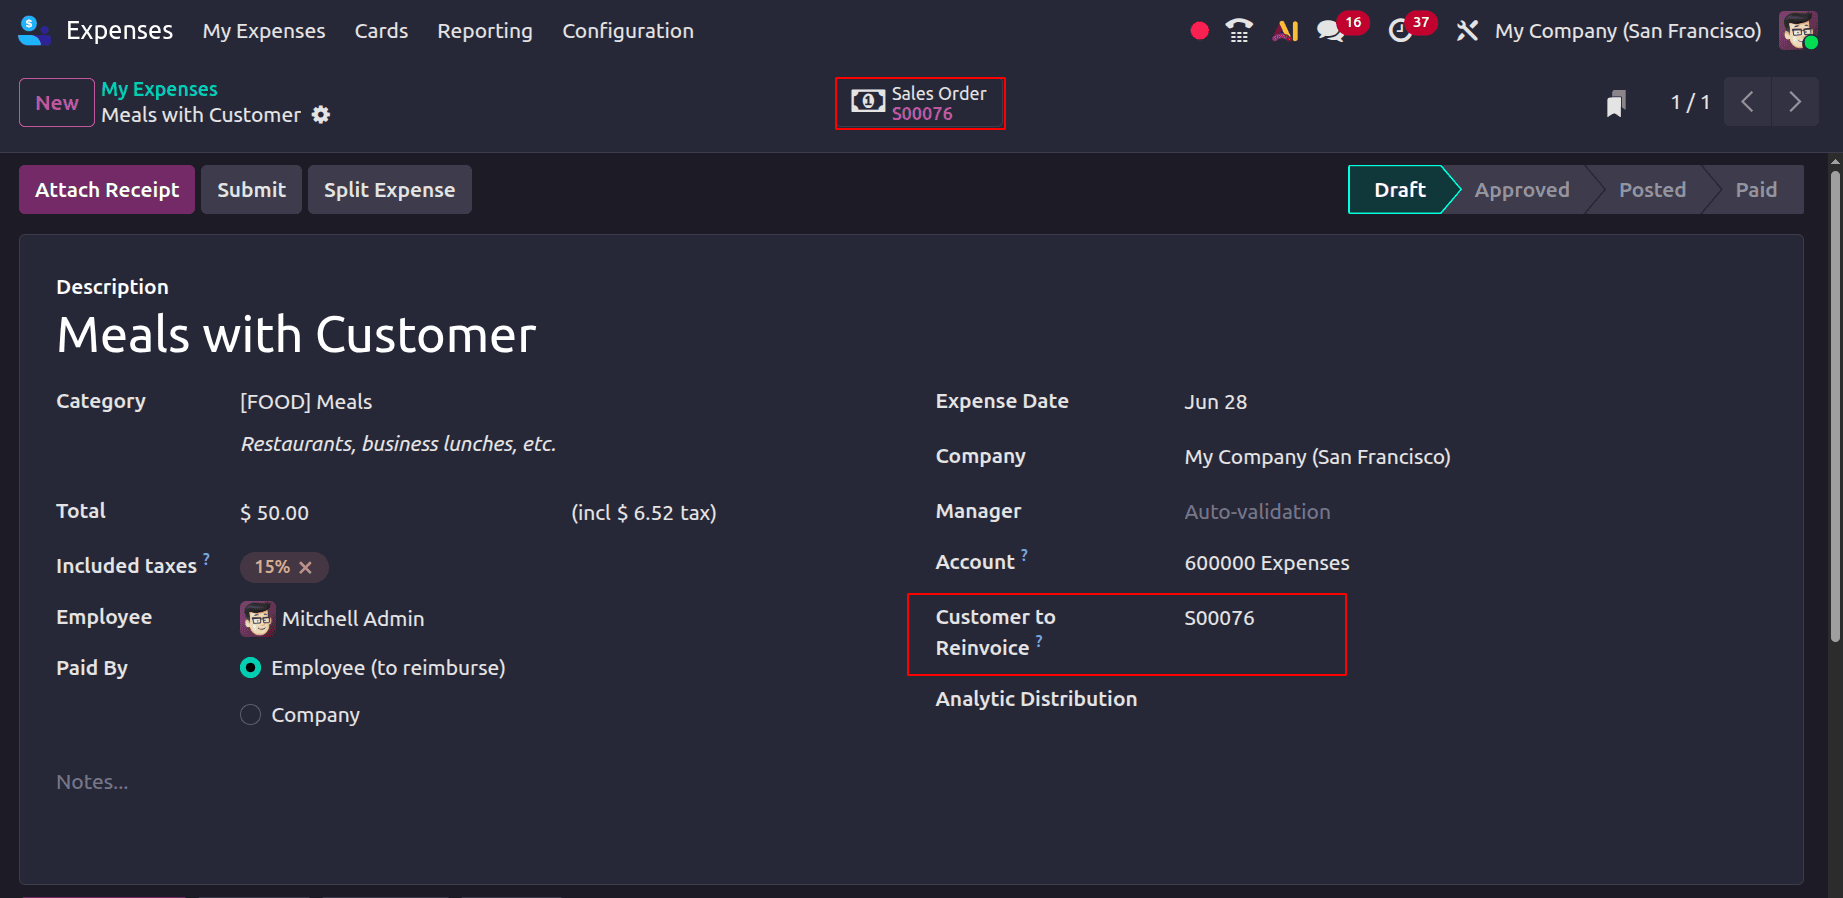
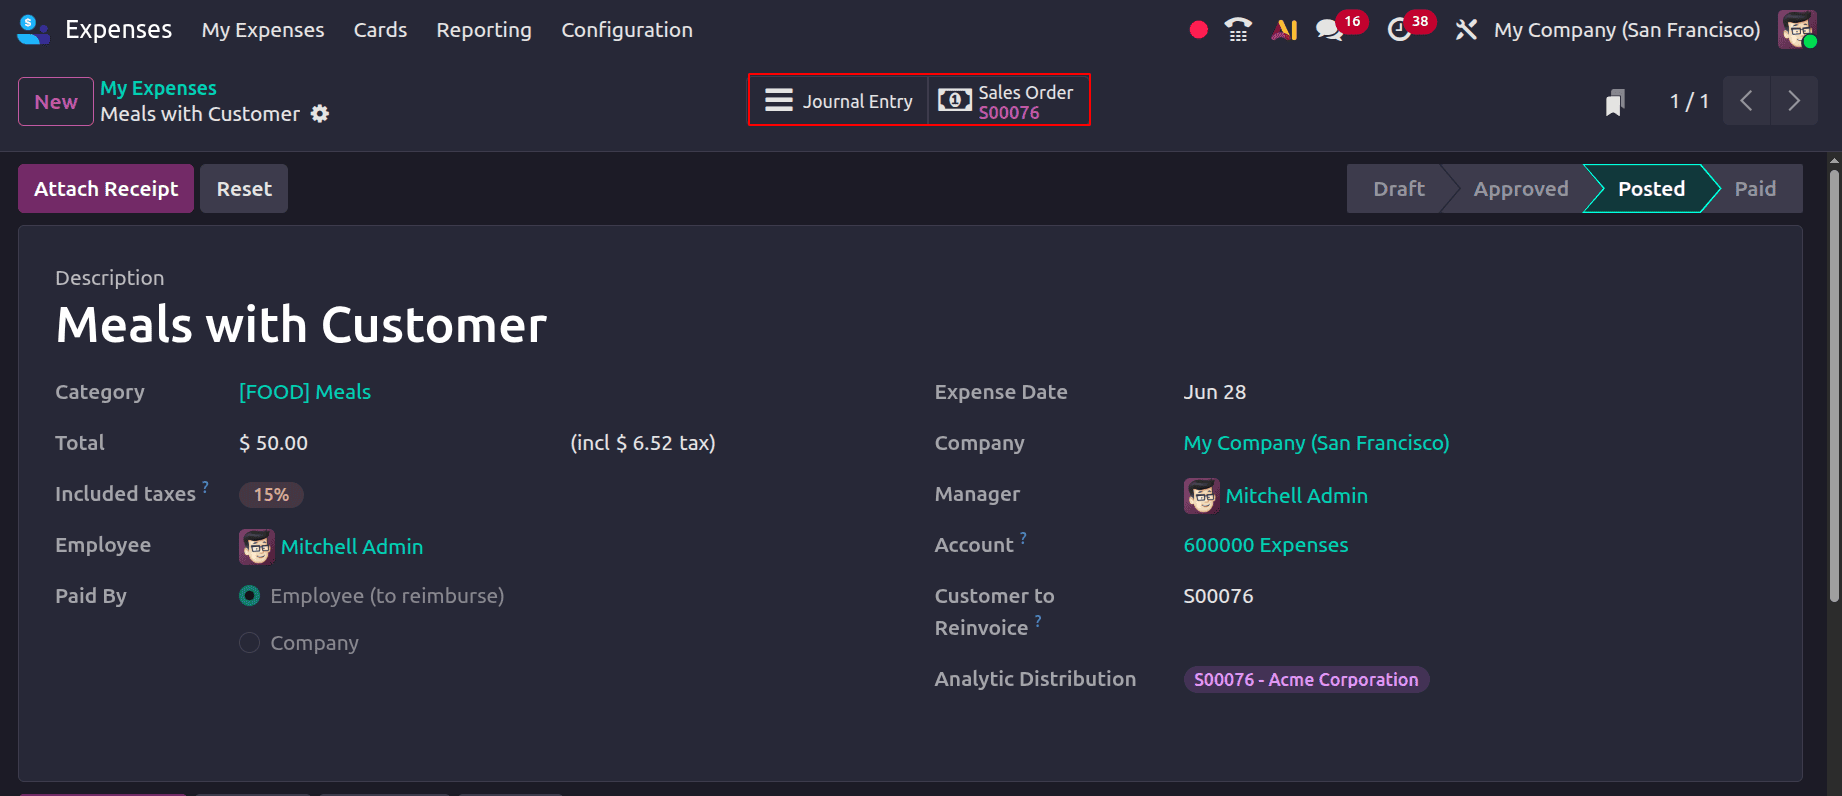
When creating the expense, select the sales order associated with the customer in the 'Customer to Reinvoice' field. After a sales order is selected, a Sales Order smart tab appears at the top of the form, providing quick access to the linked sales order.
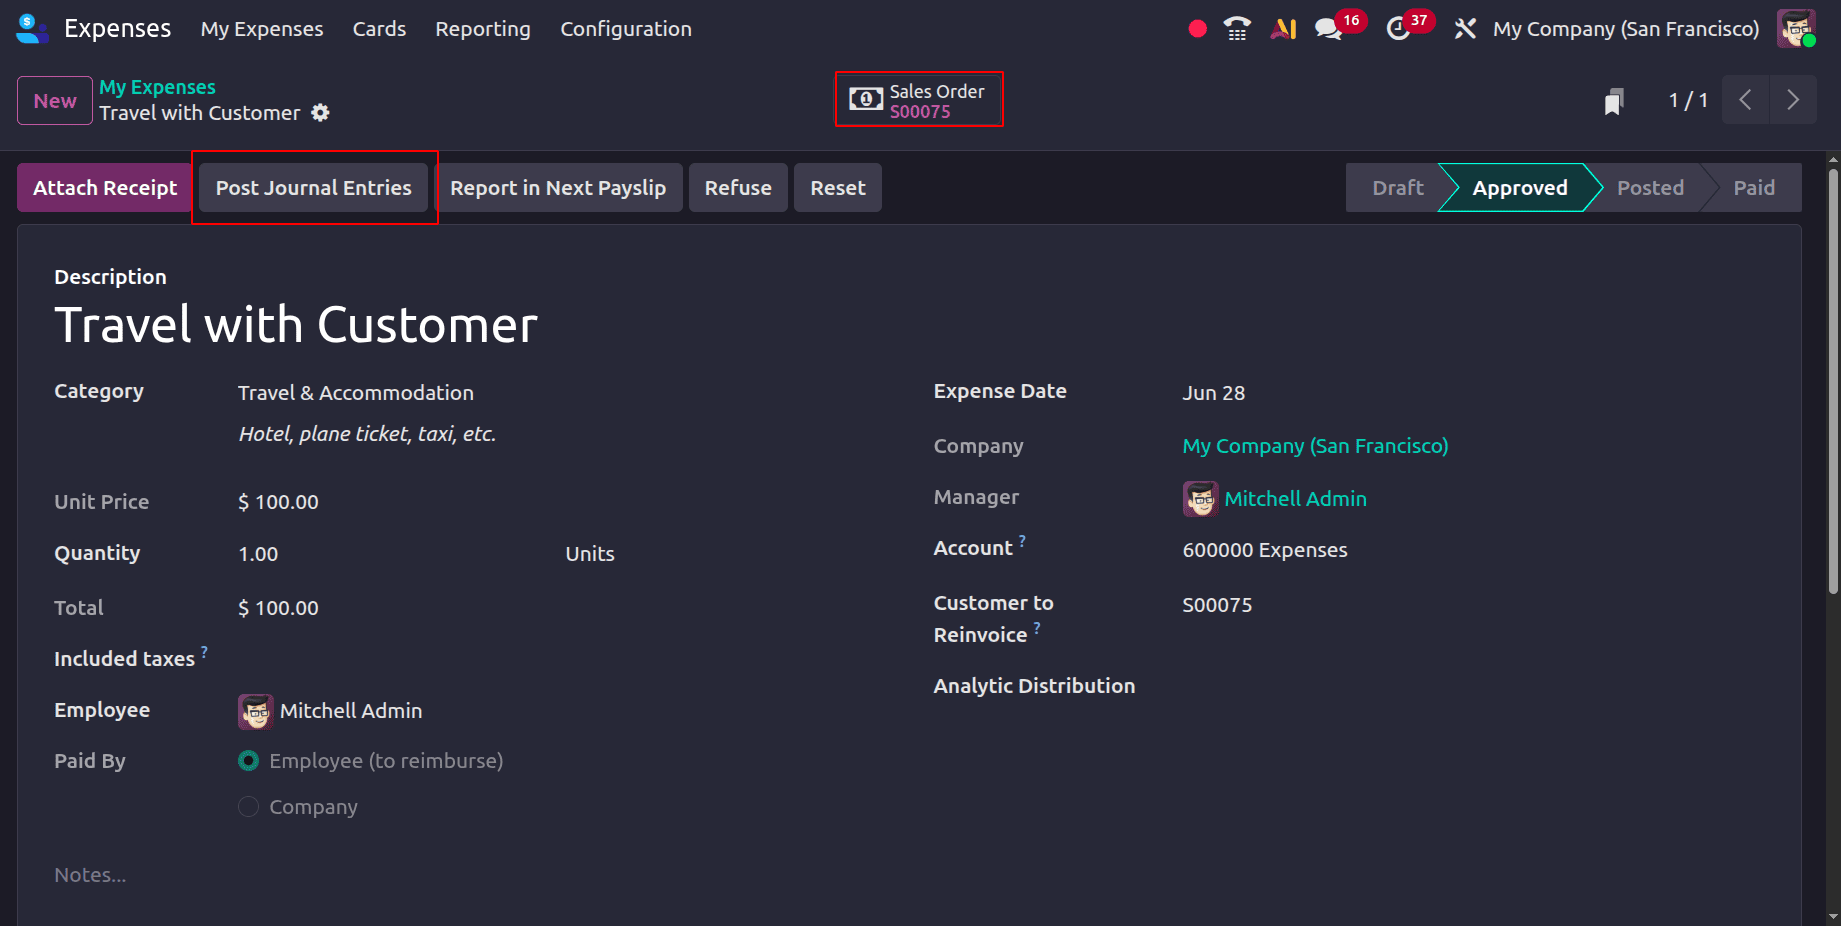
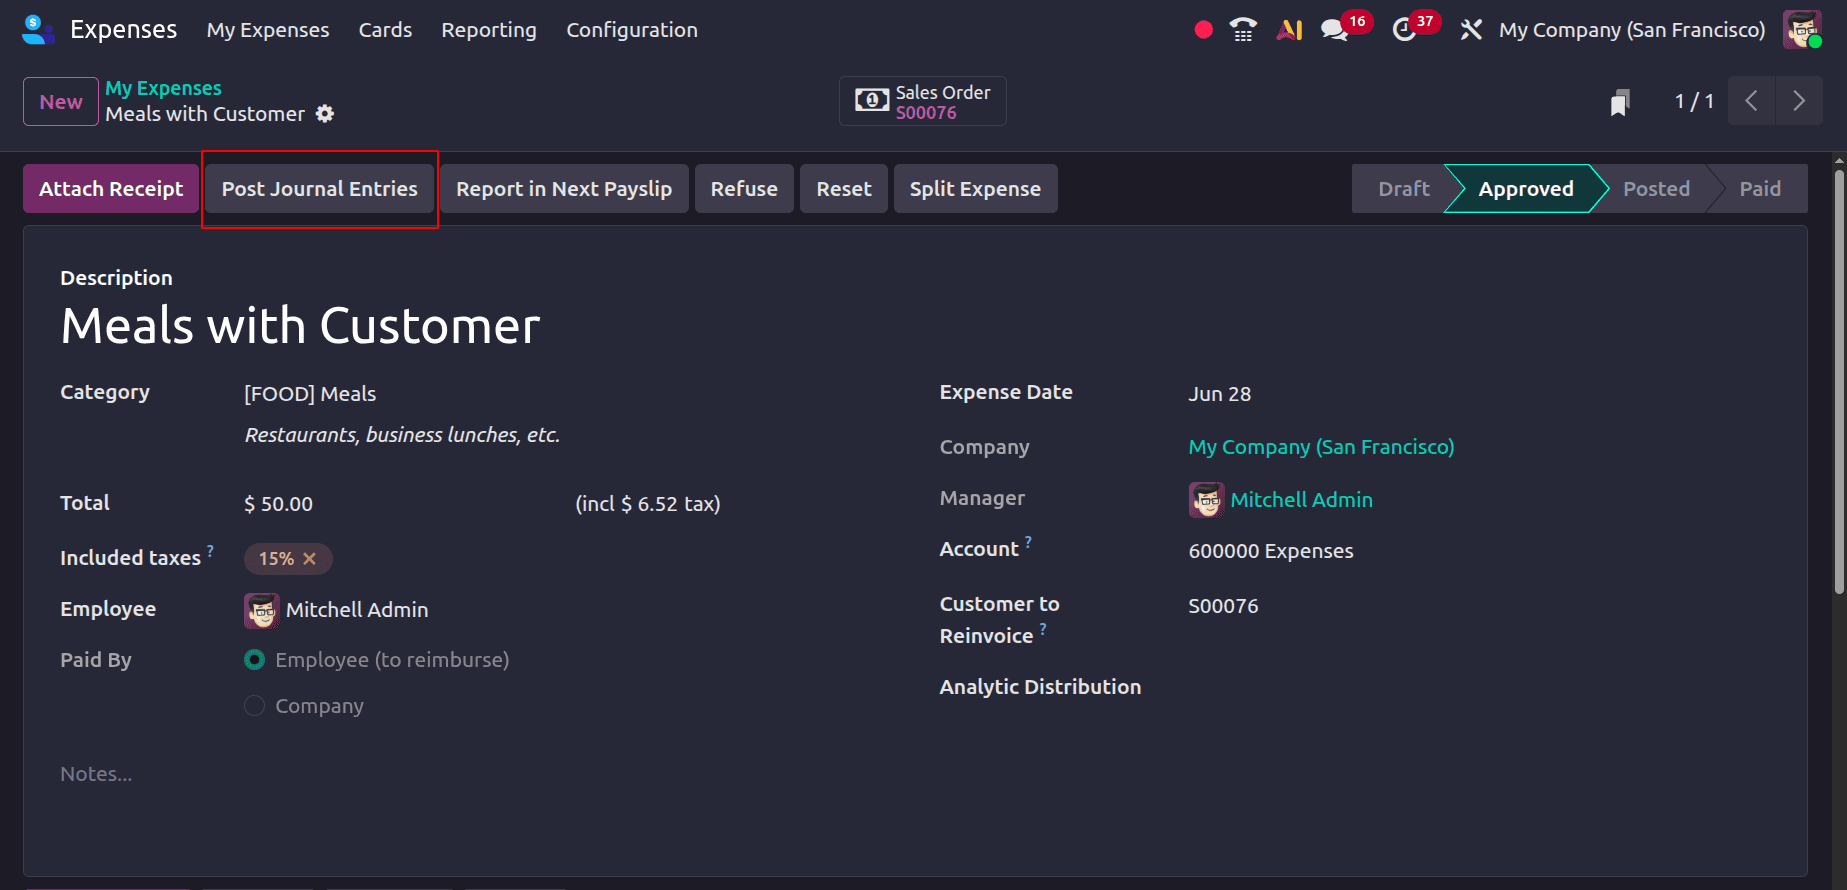
If no cost has been defined in the expense category, you can enter the expense cost in the expense form. Since the re-invoiced amount is based on the expense cost, the entered cost is billed to the customer. Once all the information has been added, click the Submit button to send the created expense to the manager, who may then evaluate and approve it. To submit the journal entries for the expense after it has been approved, click the Post Journal Entries option.
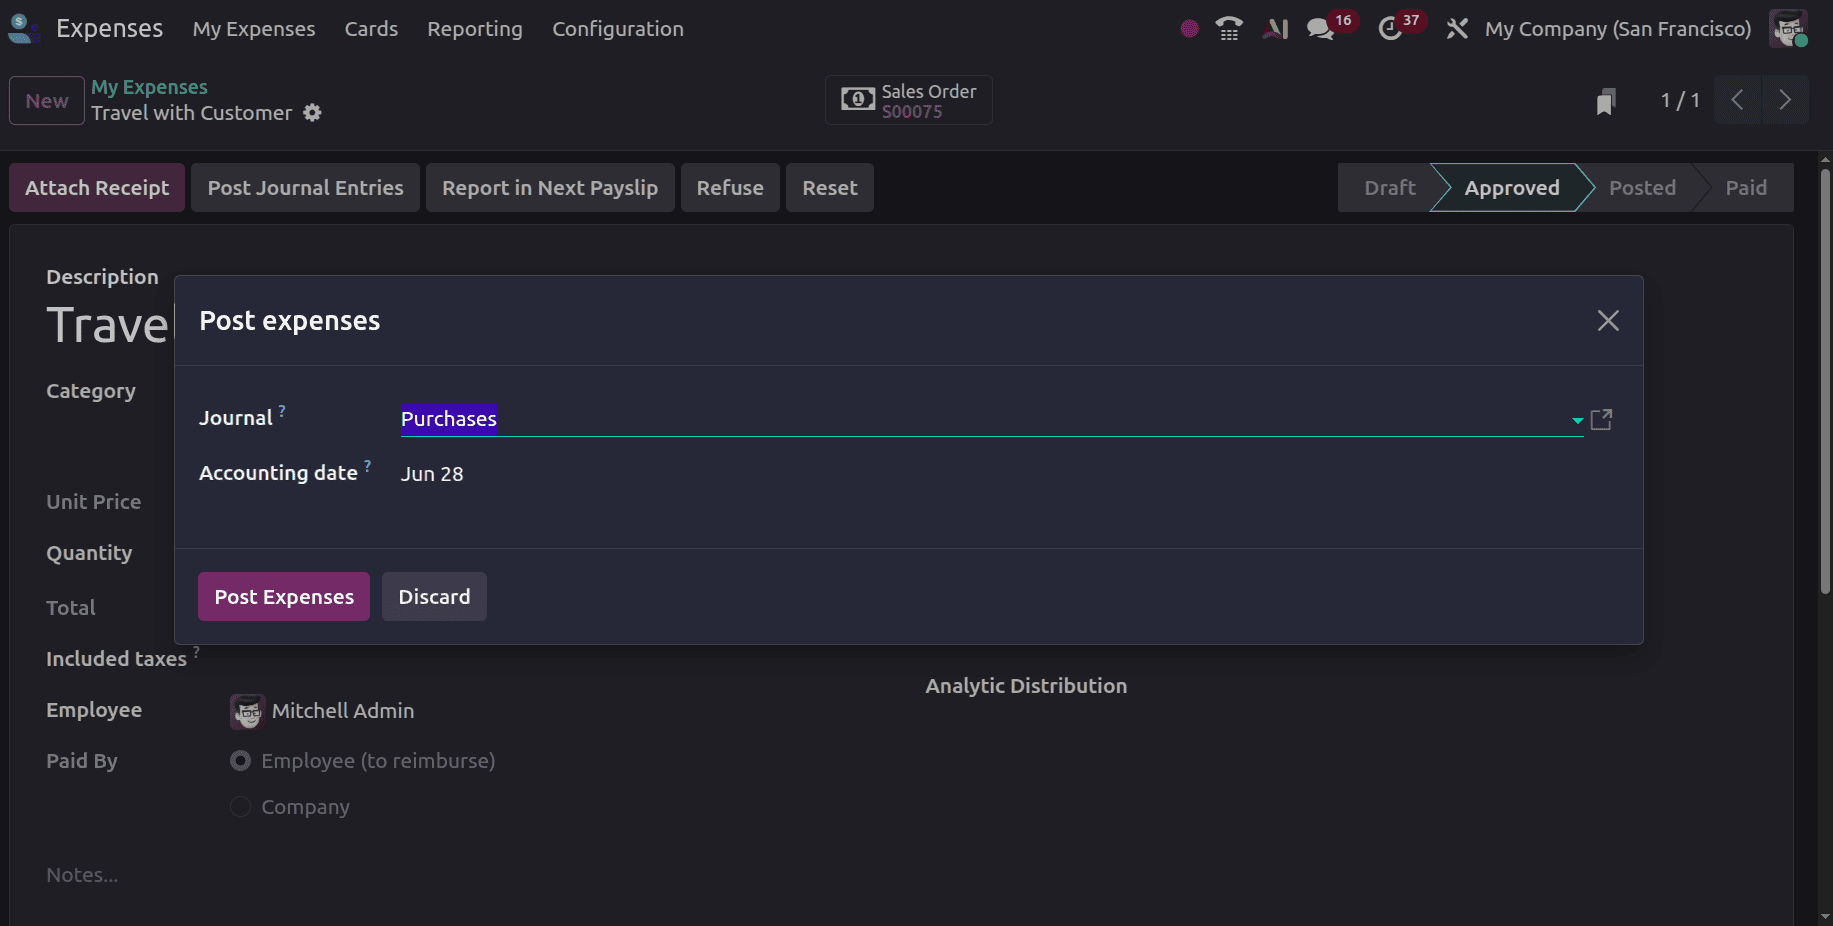
A pop-up screen will open where you can add the Journal and Accounting date, and click on the Post Expense button as shown below.
After the journal entry is posted, the expense is linked to the associated sales order. A Journal Entry smart tab then appears at the top of the expense form, allowing you to open the posted journal entry directly.
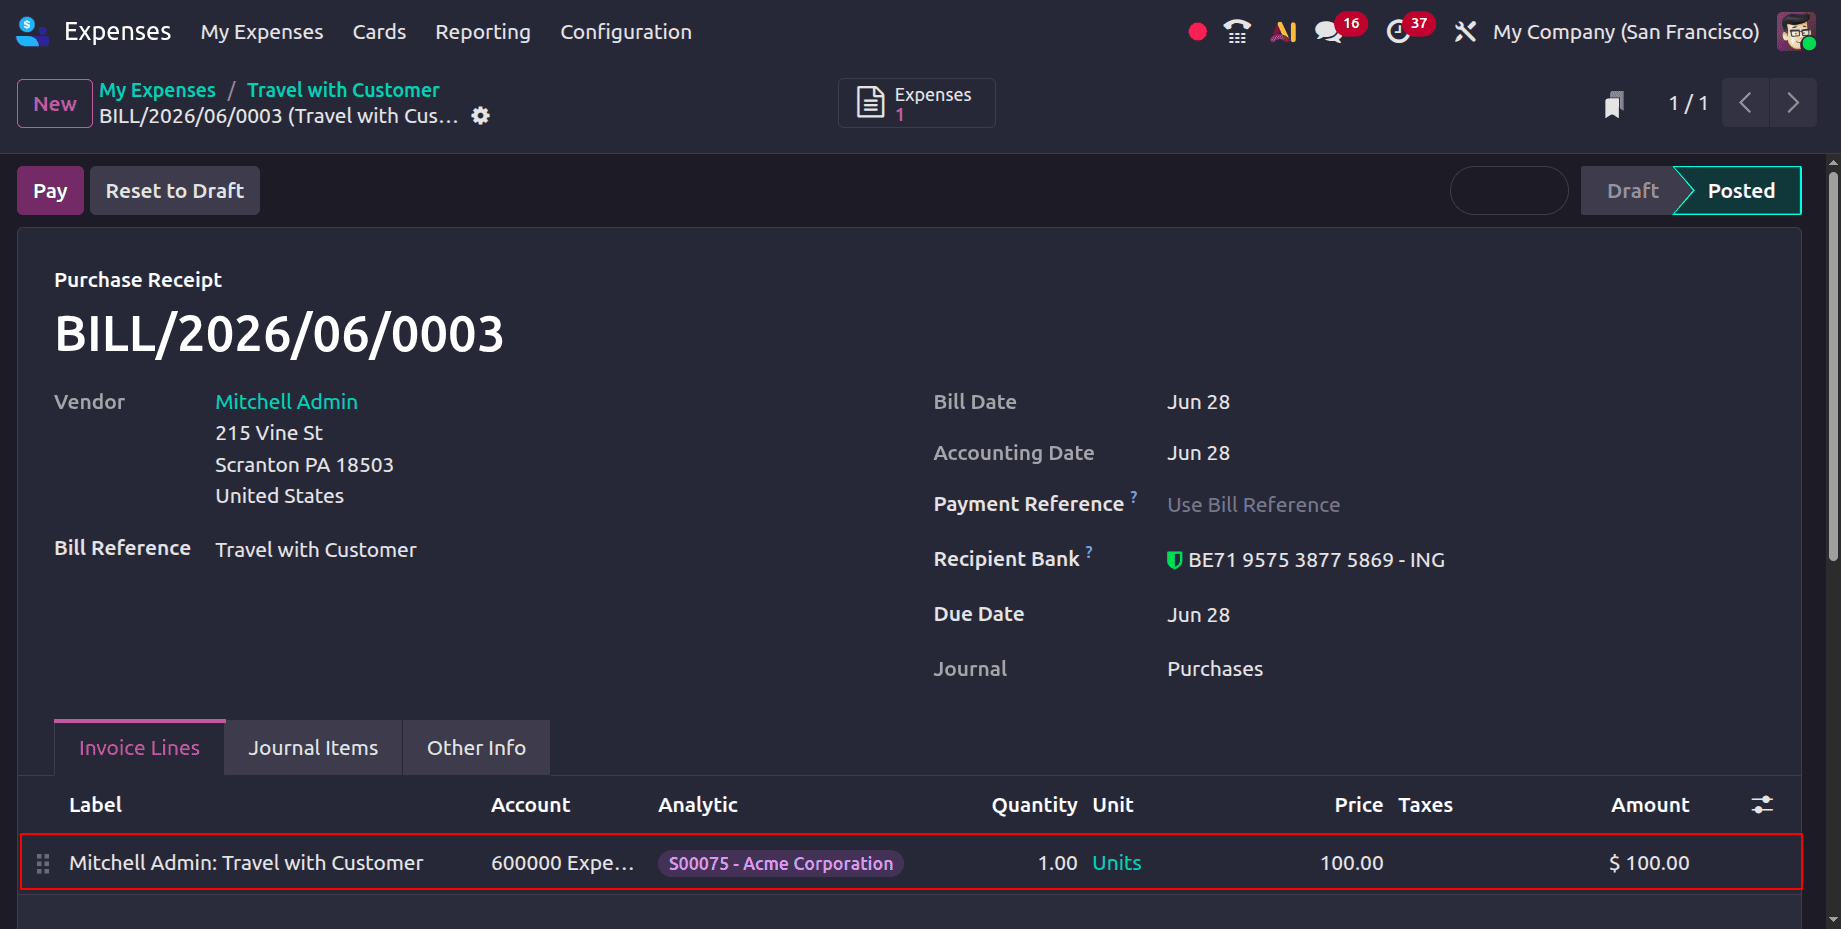
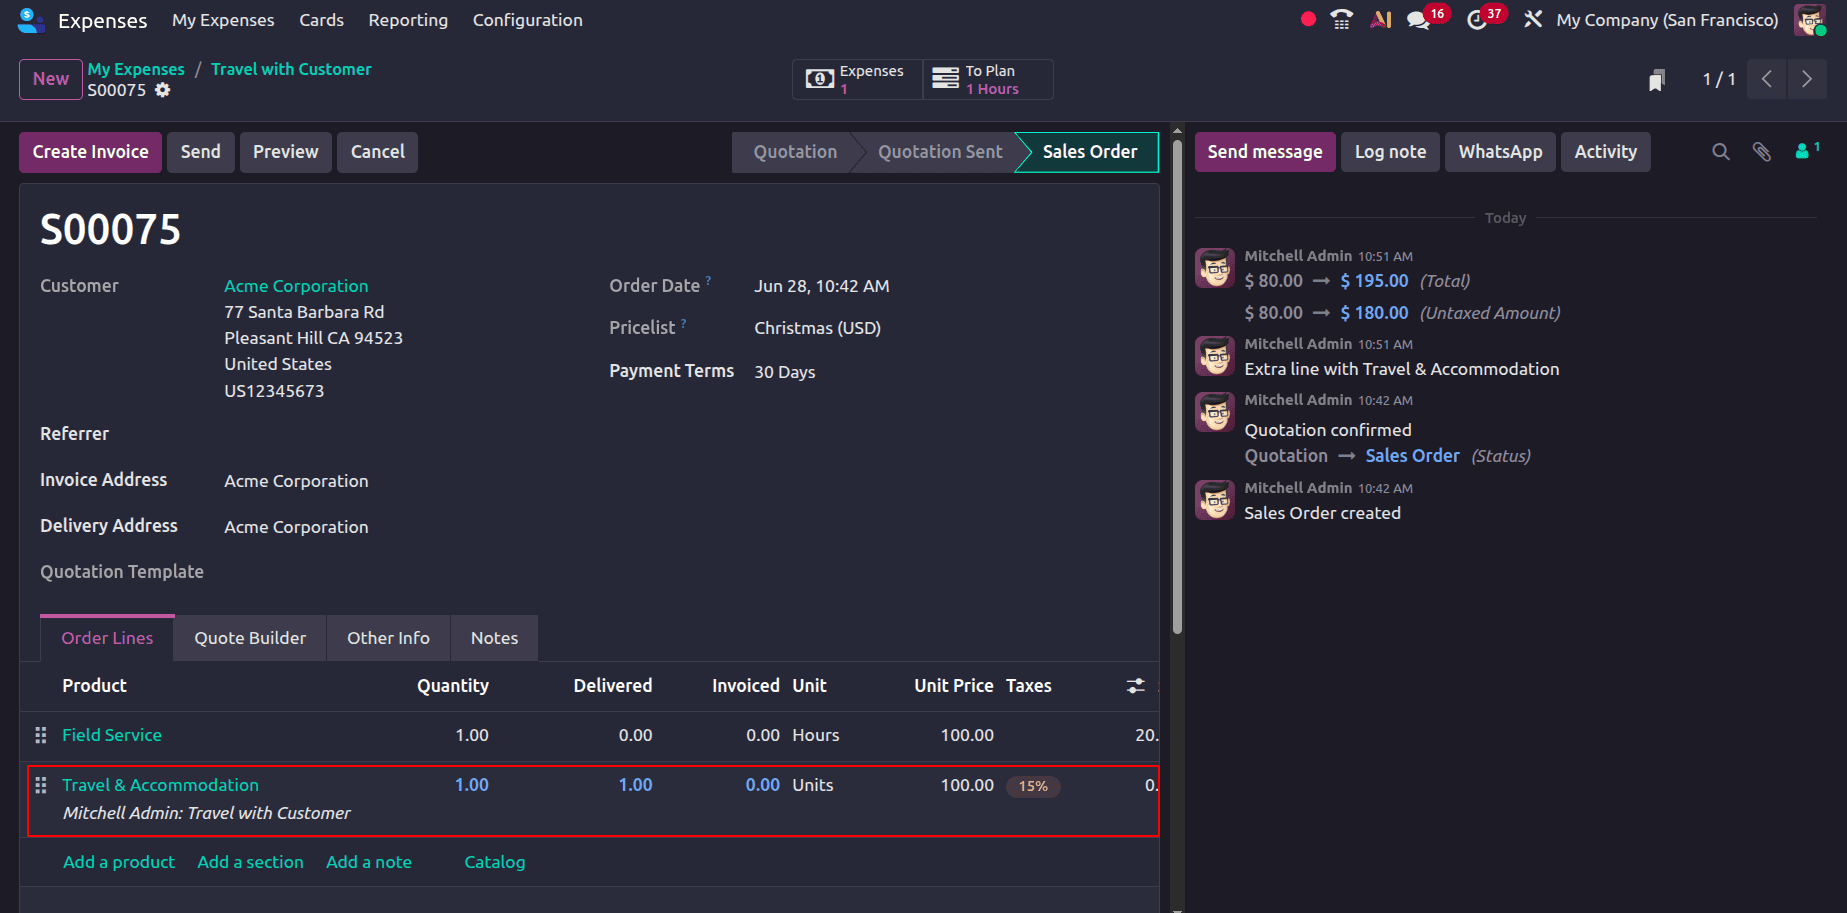
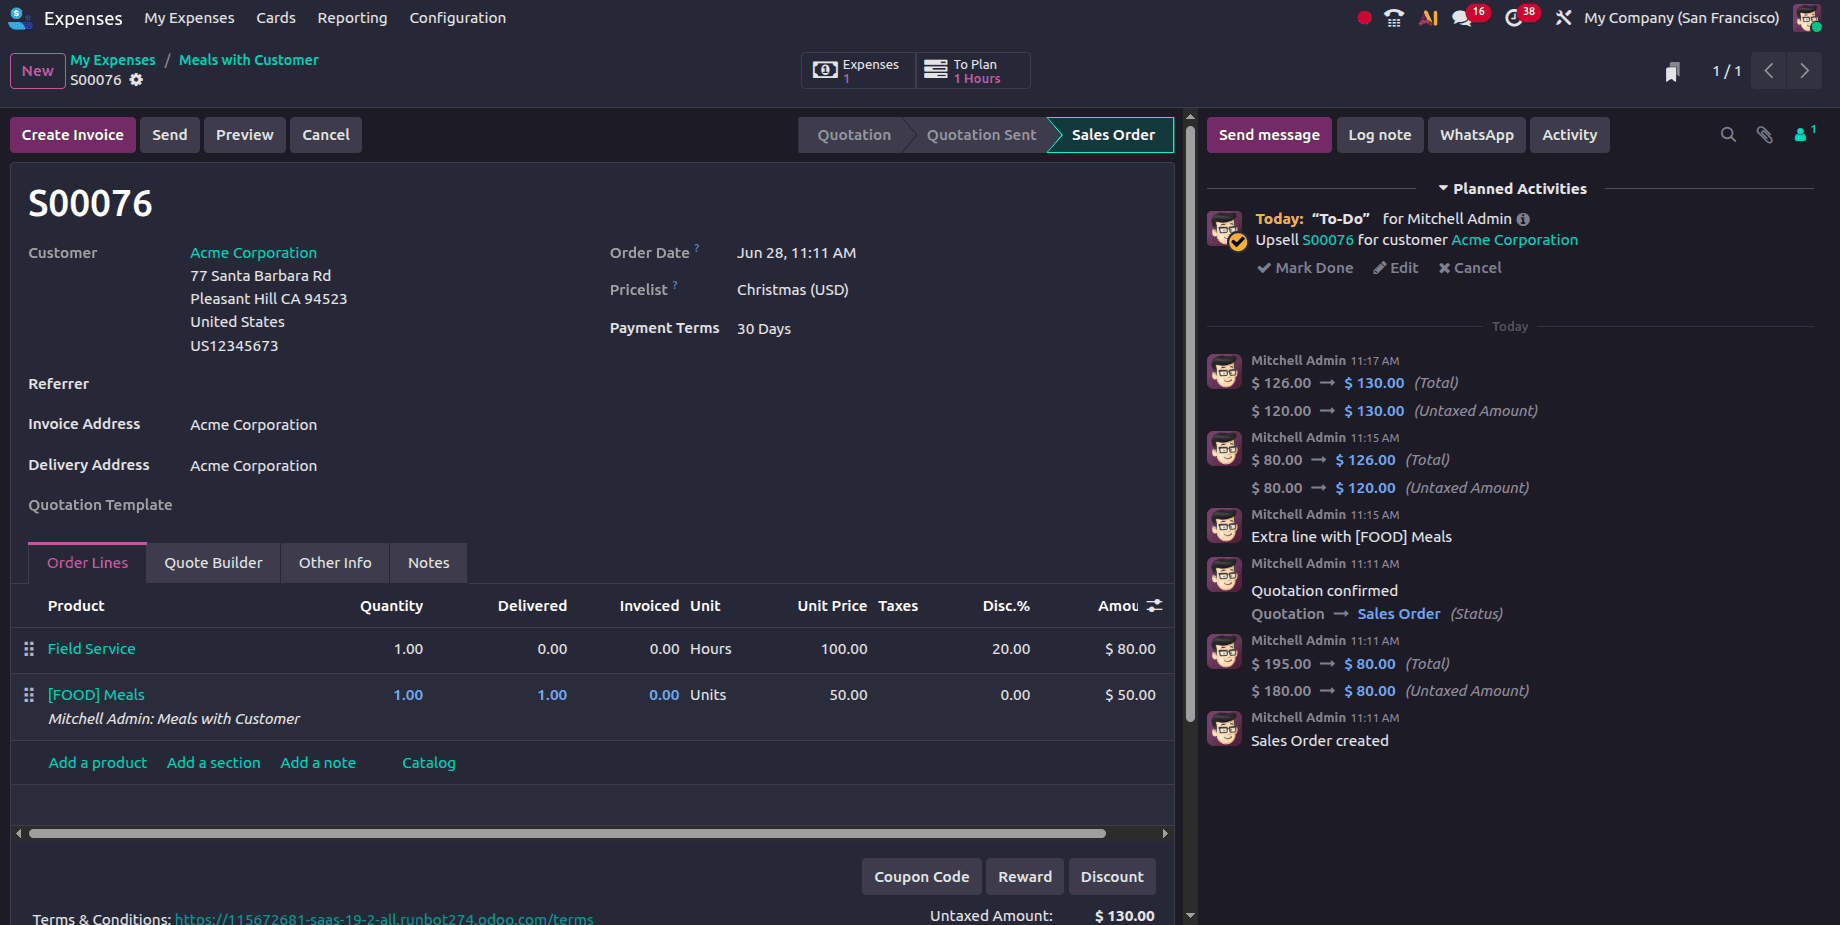
Click the Sales Order smart tab to open the associated sales order and verify that the expense has been added.
Verify that the expense has been added to the Order Lines section of the sales order. The Unit Price displayed for the order line matches the expense cost entered during expense creation. In order to reimburse the employee or business for the expense incurred on the client's behalf, an invoice can now be issued for the customer. Click the “Create Invoice” button.
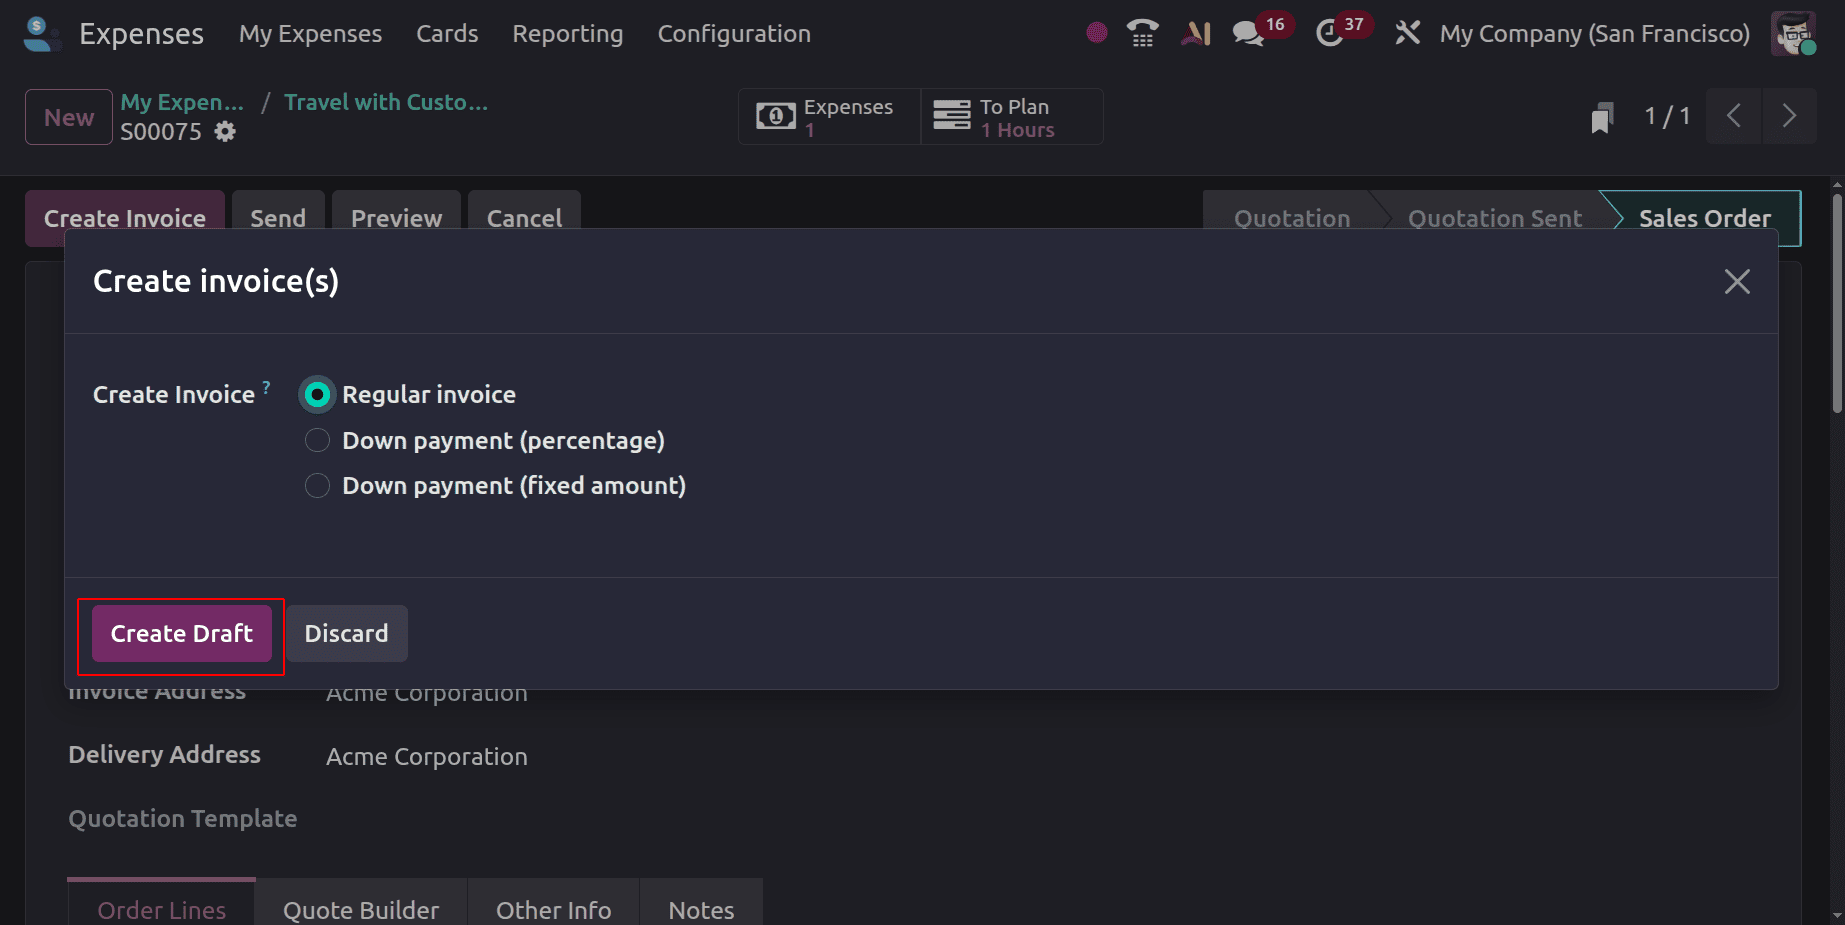
A pop-up window will appear with the available options: Regular Invoice, Down Payment (%), or Down Payment (Fixed Amount). To create a draft invoice, first select the type of invoice you want to generate. After making your selection, click the “Produce Draft” button to proceed. This will generate a draft based on the chosen invoice type.
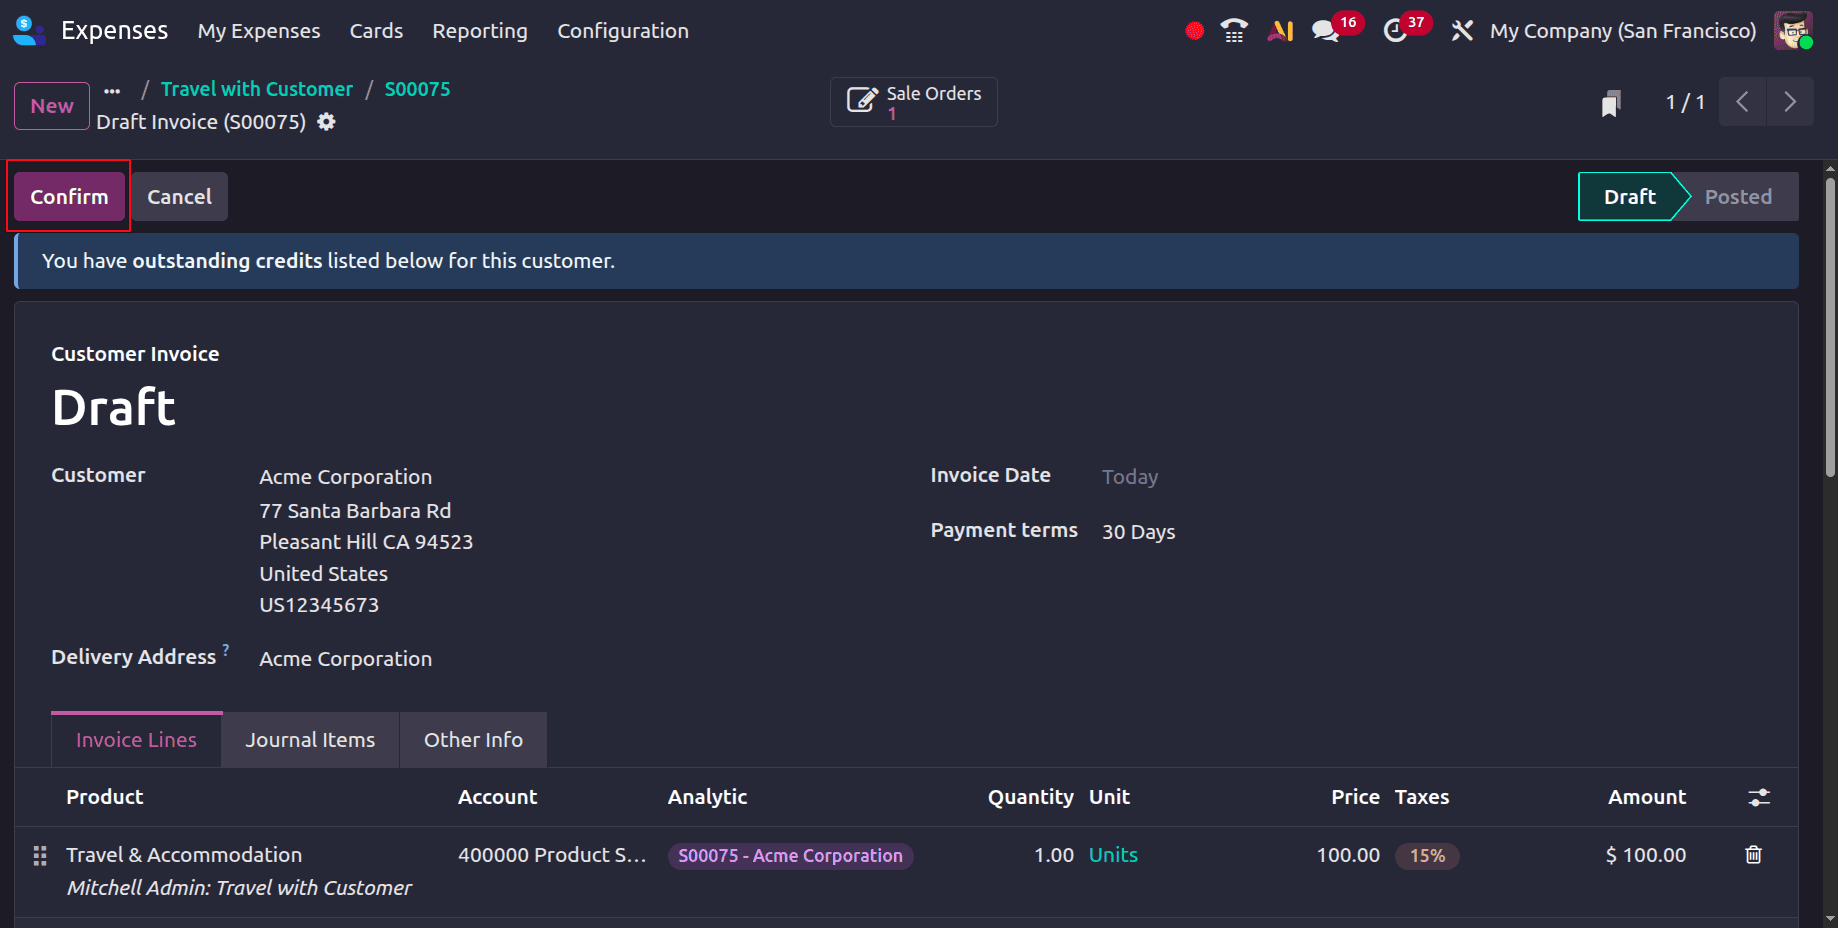
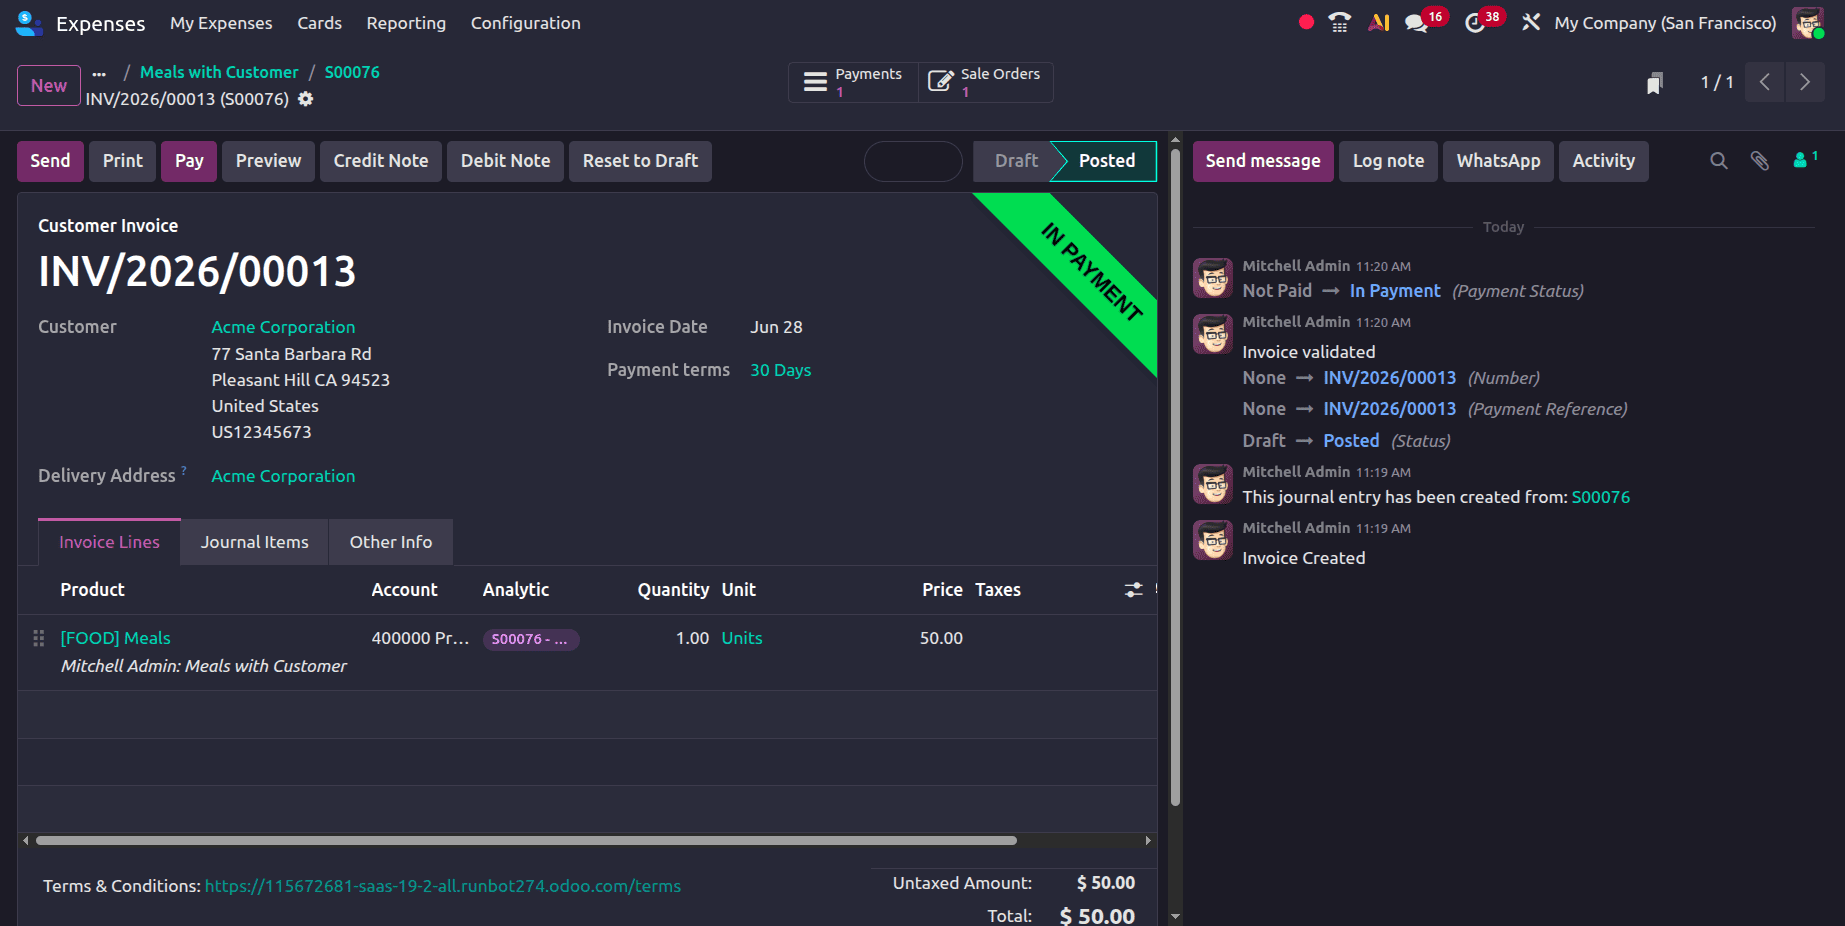
You can confirm that an invoice has been created for the expense by checking the related draft invoice. Therefore, the business or employee who made the payment on the customer's behalf may be compensated for the expense once the client has made the payment. Next, to validate the draft invoice, click the Confirm button.
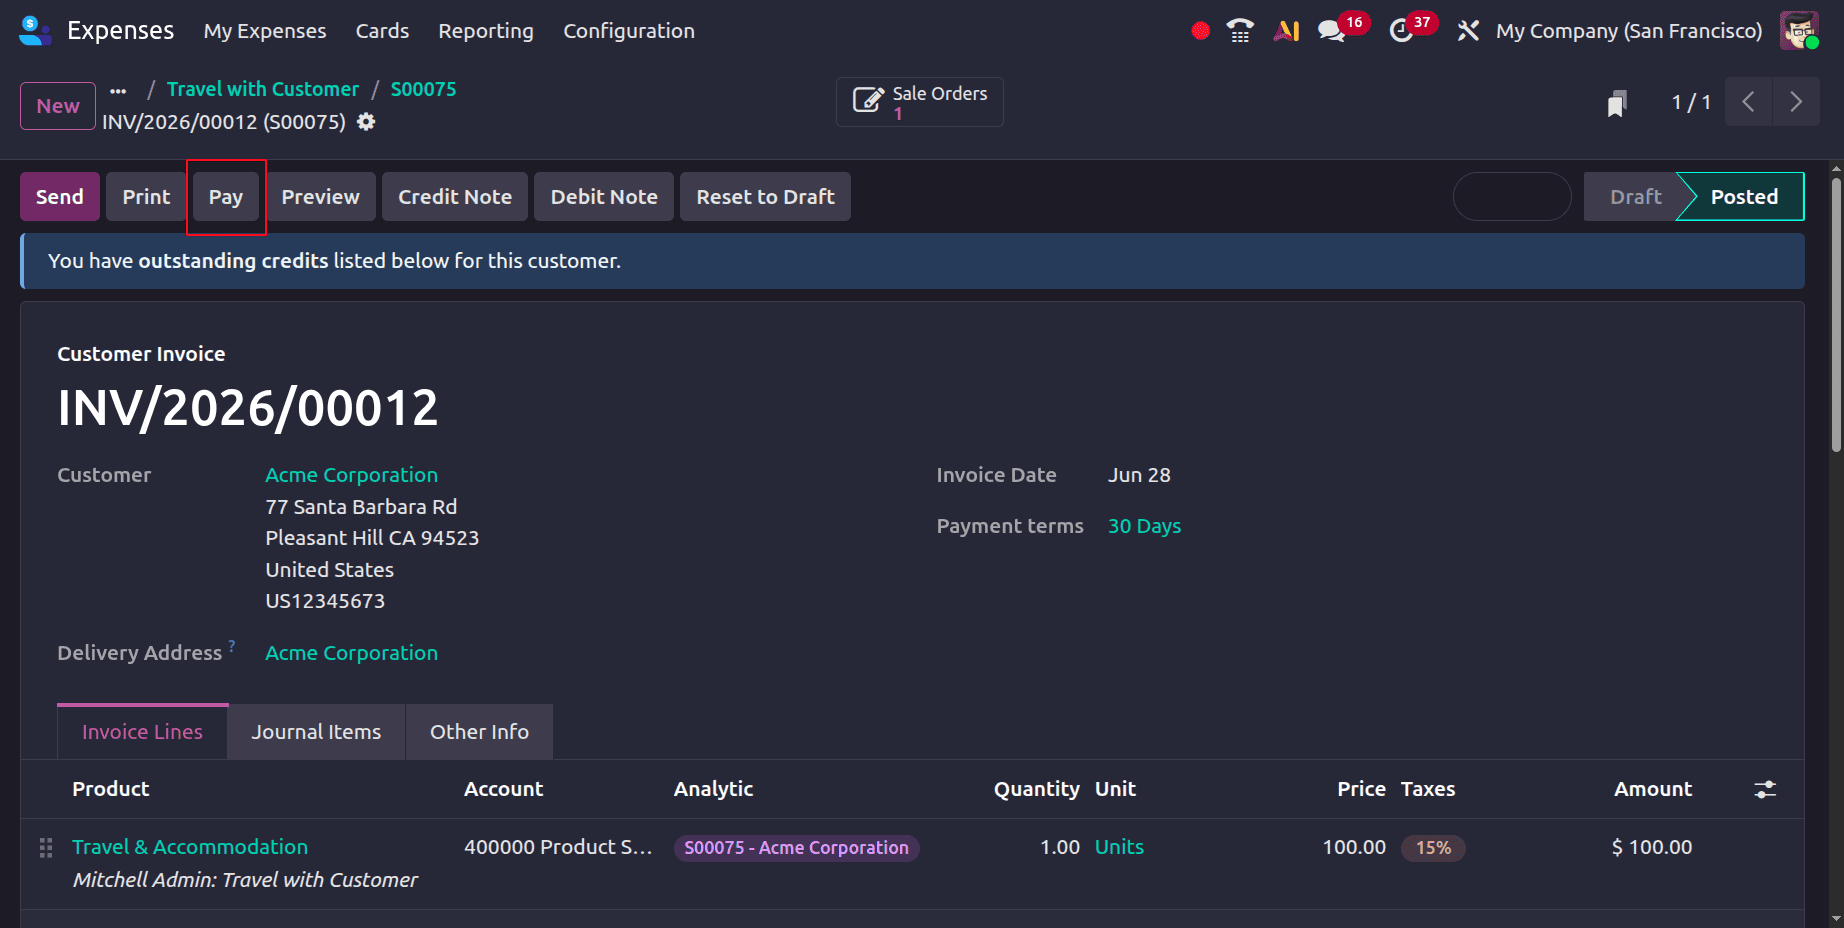
Payment is available only after the invoice has been posted. Click the Pay button, choose the payment journal, and then click Create Payment to accomplish this.
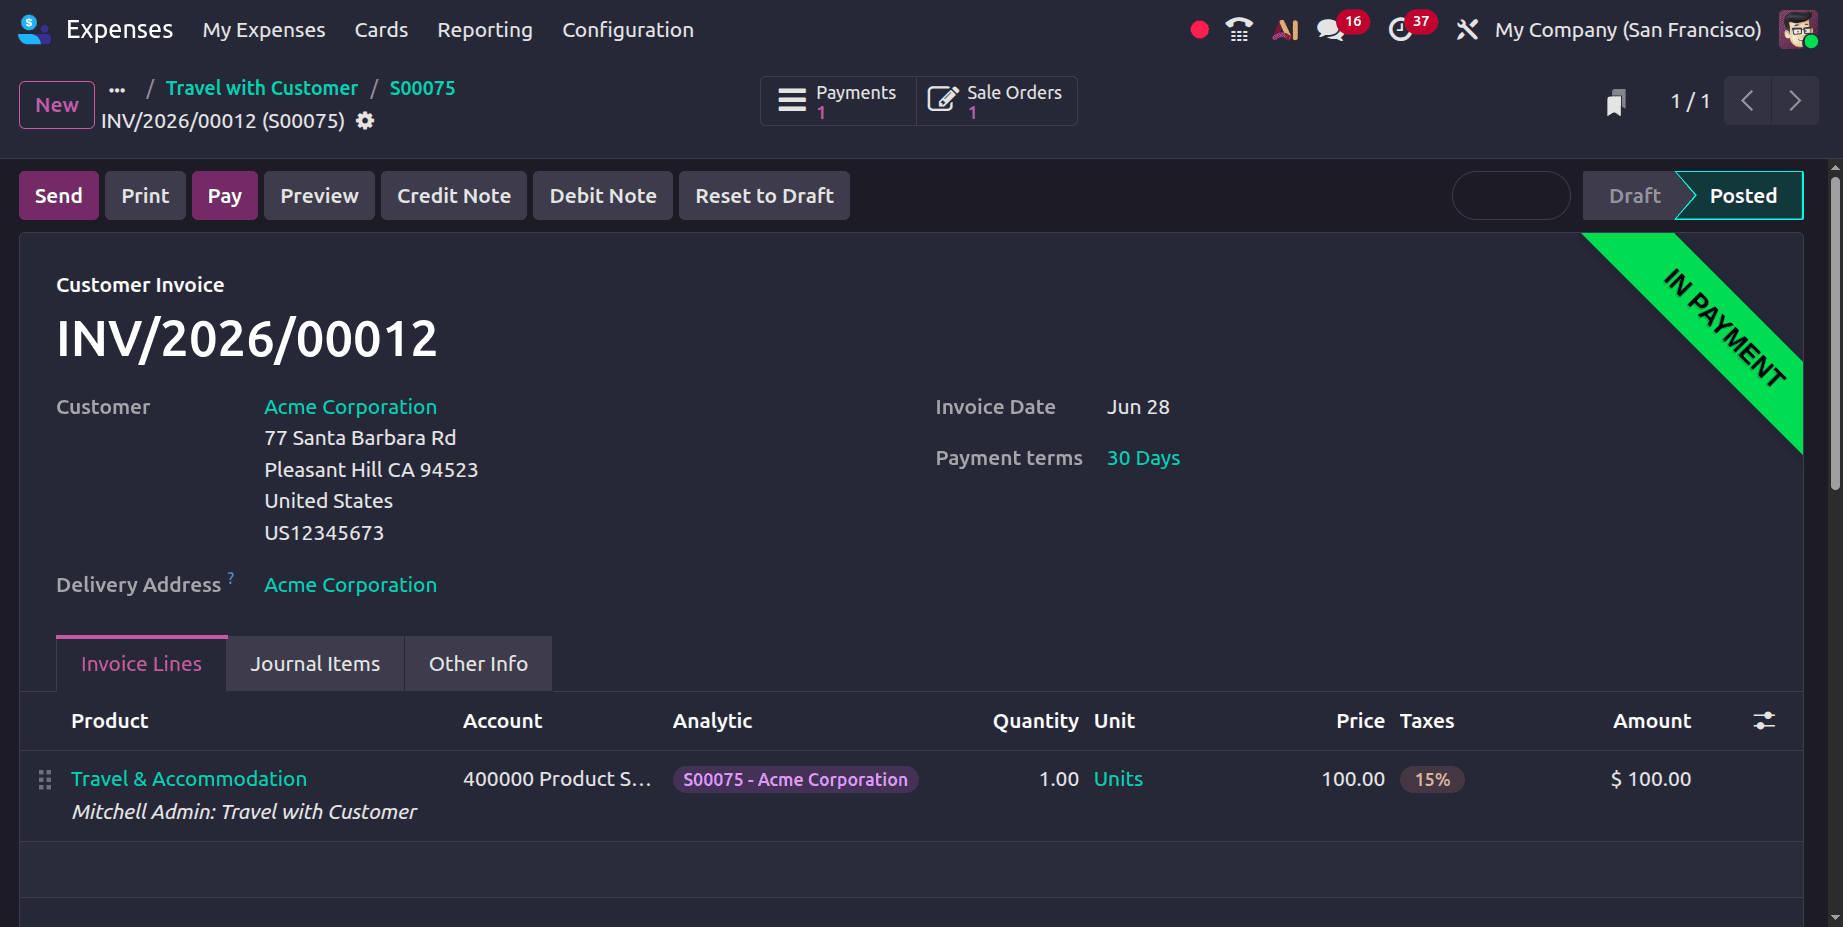
You can also complete the payment.
At Sales Price:
Businesses can reinvoice client expenses at a predetermined sales price rather than the real expense cost by setting the Reinvoice Costs option in Odoo 19 Expenses to At Sales Price. Odoo bills the customer depending on the sales price set for the associated service product when an expense is connected to a customer project, task, or sales order. This method assists companies in correctly tracking billable costs, applying a markup to expenses, and generating more revenue.
To re-invoice customers based on the sales price, the Re-Invoice Costs option under the relevant expenditure category must be set to Sales Price. After selecting the appropriate expenditure category for the expense, choose Re-invoice Costs: Sales Price.
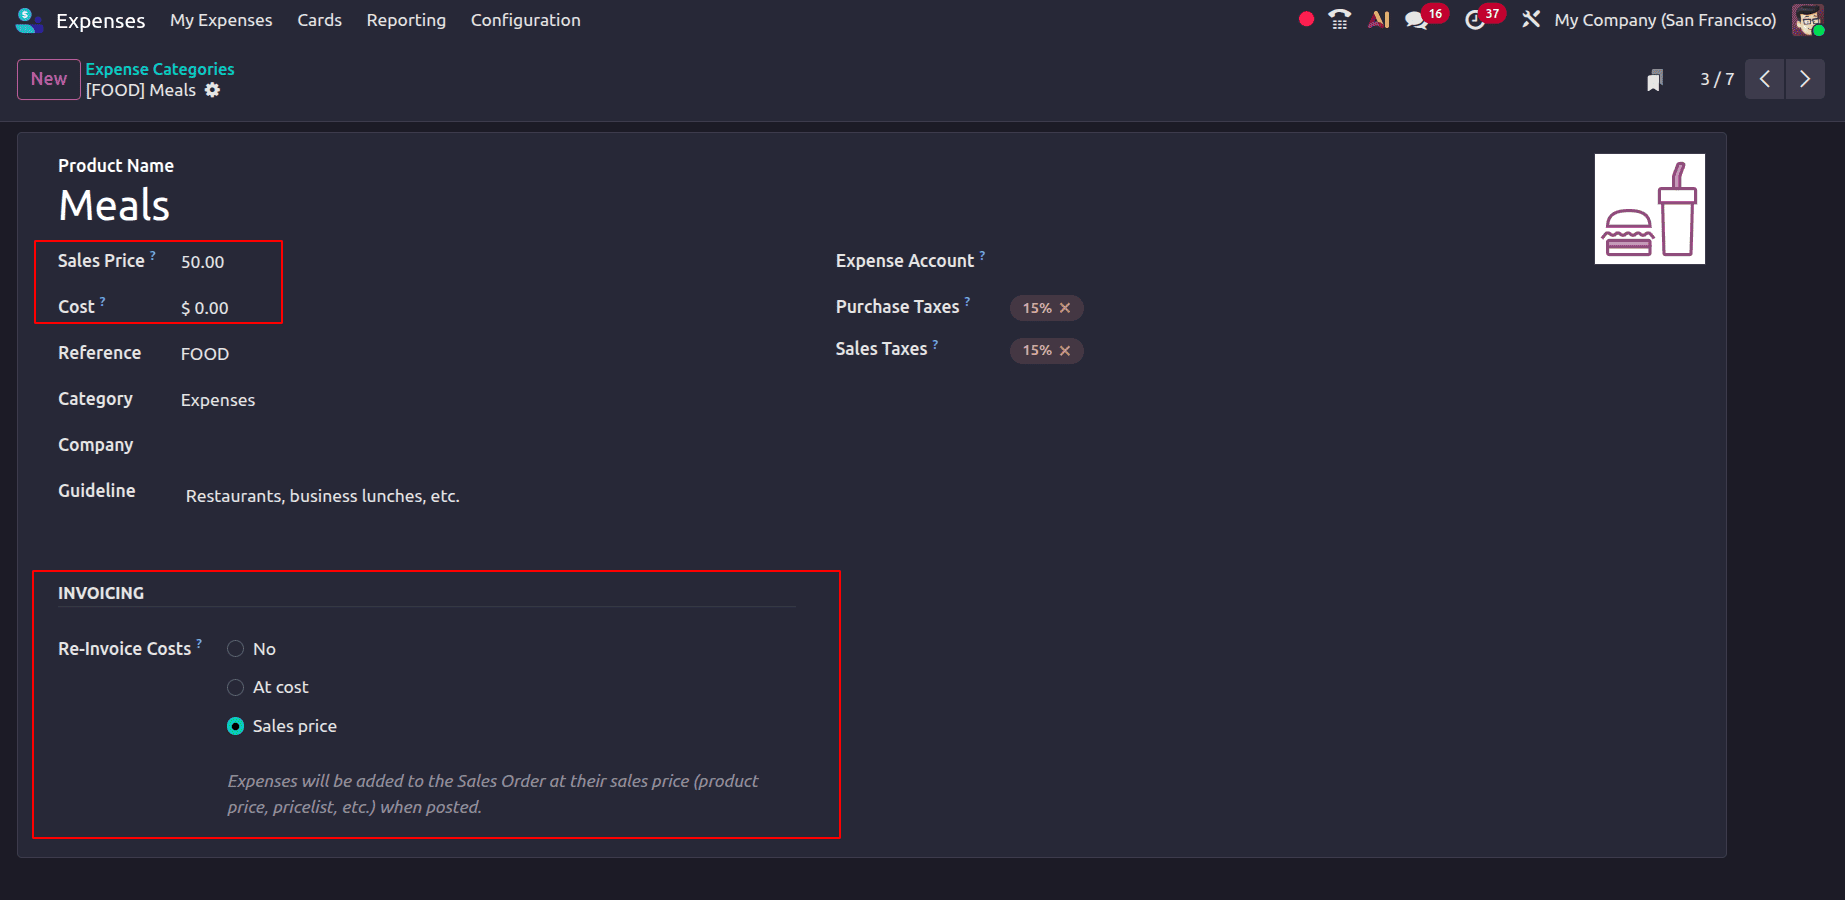
You can then enter the amount to be invoiced to the customer in the Sales Price field. In this setup, both the cost price and the sales price are set to two dollars. Therefore, when using this product, only the amount can be altered while incurring an expense because the cost price has already been determined.
Let’s make an expenditure. Click the New button after selecting My Expenses > My Expenses to accomplish this. The following fields appear on the expense creation form:
- Description: A succinct summary of the cost (such as "Lunch with Customer").
- Category: Indicates the kind of spending, such as office supplies, travel, or meals.
- Total: The sum of the expenses incurred.
- Included Taxes: Shows the tax amount that is part of the overall cost.
- Employee: The name of the worker who submitted the report on expenses.
- Paid By: Shows who paid the cost:
- Employee (Reimbursement Required): The employee is asking for reimbursement after making an out-of-pocket payment.
- Company: The expense was paid for directly by the company.
- Expense Date: The day the cost was incurred.
- Company: Identifies the business connected to the spending.
Add all the necessary fields and select Mileage as the category. The sales price is set at $50, and the expense has been marked for re-invoicing at the sales price. In the Customer to Reinvoice section, add the sales order linked to the customer who should be billed for the expense.
Additionally, the smart button for that related selling order shows at the top.
After entering all the required details, click the Submit button to send the expense for approval. The journal entries must be posted once the spending has been authorised. Click the Post Journal Entries button to accomplish this.
Once the journal entry is posted, the expense will be added to the sales order, enabling the customer to be invoiced.
Additionally, it can be read via the journal entry smart tab. To view the sales order, click the Sales Order smart tab.
The quantity entered in the expense form appears in the sales order, with the unit price reflecting the sales price defined in the expense category. This confirms that the expense has been successfully included.
Click the Create Invoice button to start creating an invoice for this.
A pop-up window will appear with options to create a Regular Invoice, Down Payment (%), or Down Payment (Fixed Amount). Select the appropriate option and click Create Draft to generate a draft invoice.
This confirms that an invoice has been created for the expense based on the defined sales price. To validate the draft invoice, click the Confirm button.
Click the Pay button to start the payment process.
You can also proceed with completing the payment.
At No:
When the Reinvoice Costs option in Odoo 19 Expenses is set to No, it means that a client cannot be paid back for the expense. Expenses documented with this option are not connected to sales orders or customer invoicing; instead, they remain internal business costs. This setting is appropriate for operational, administrative, or staff-related costs that are covered by the business instead of being billed to customers.
There is no need to bill consumers; just go to the expense categories and choose the expense that has to be made. Choose "No" in the Re-Invoice Costs section. Therefore, it is not possible to bill clients for expenses produced under this category.
In this instance, since the money has been spent, purchases of gifts or comparable things for clients should be documented as business expenses; however, consumers do not need to receive an invoice.
Navigate to My Expenses > My Expenses and click the New button to create a new expense and record it.
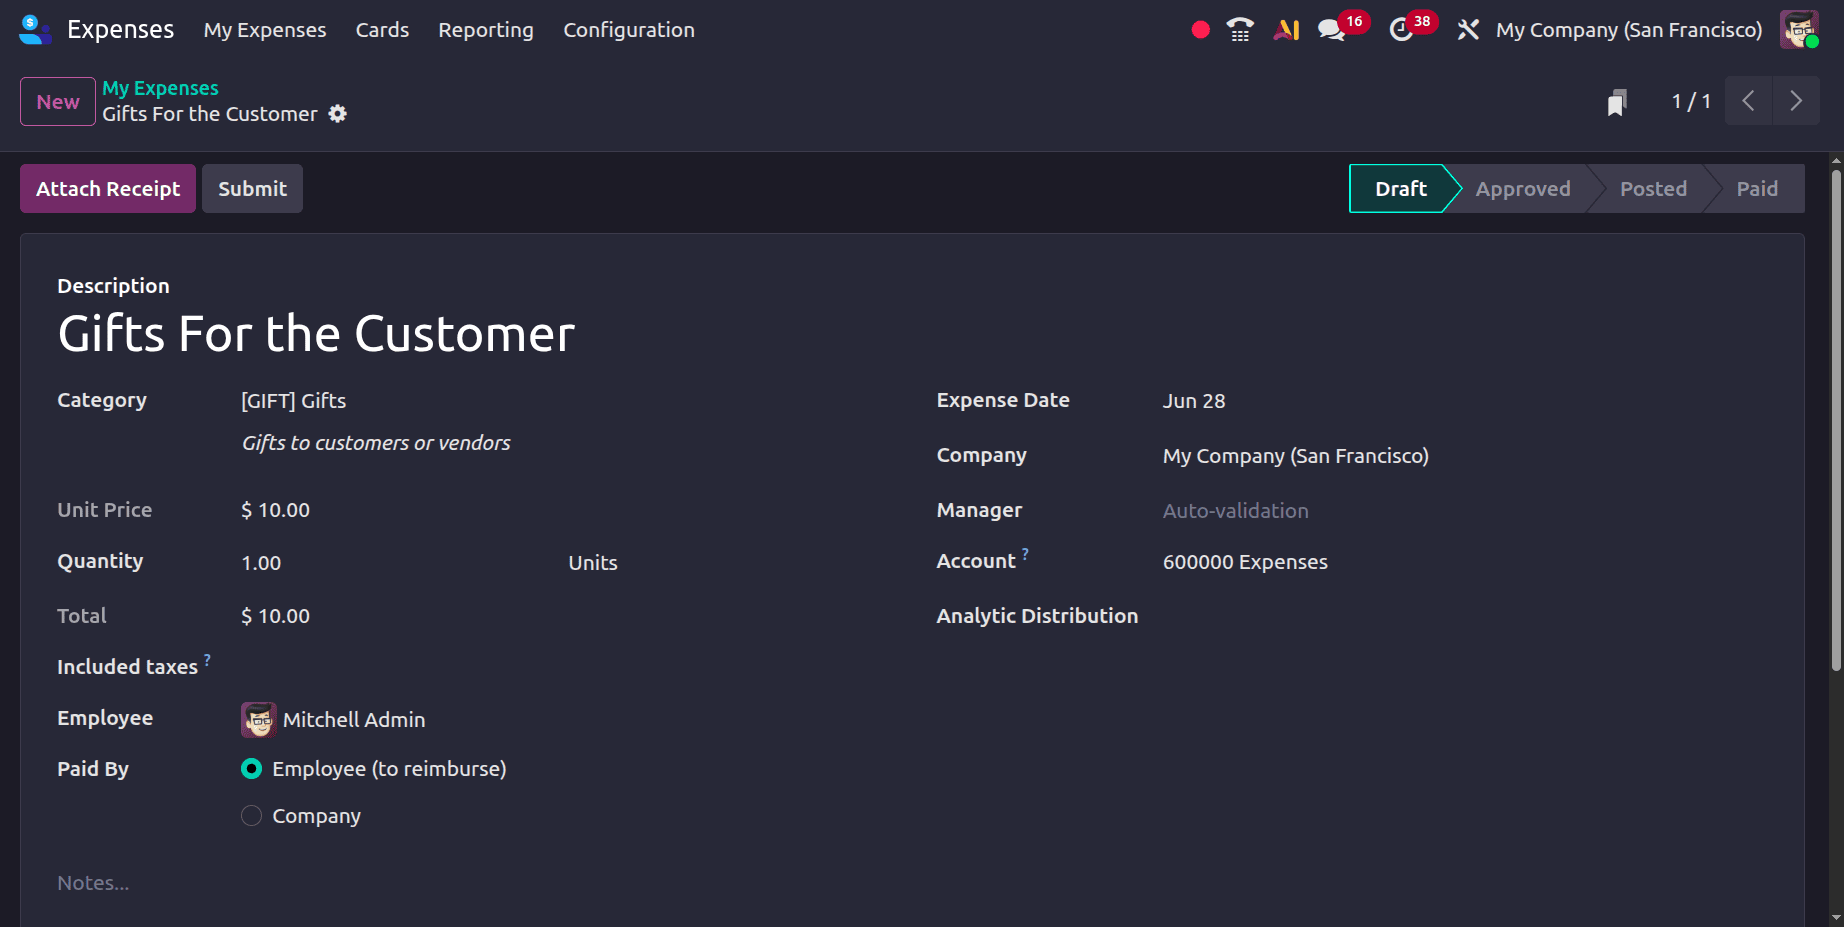
Add all necessary fields to the cost creation form, and be sure to choose the correct category. Since there is no requirement to bill the customers for the expense, there is no area for adding customers in this case.
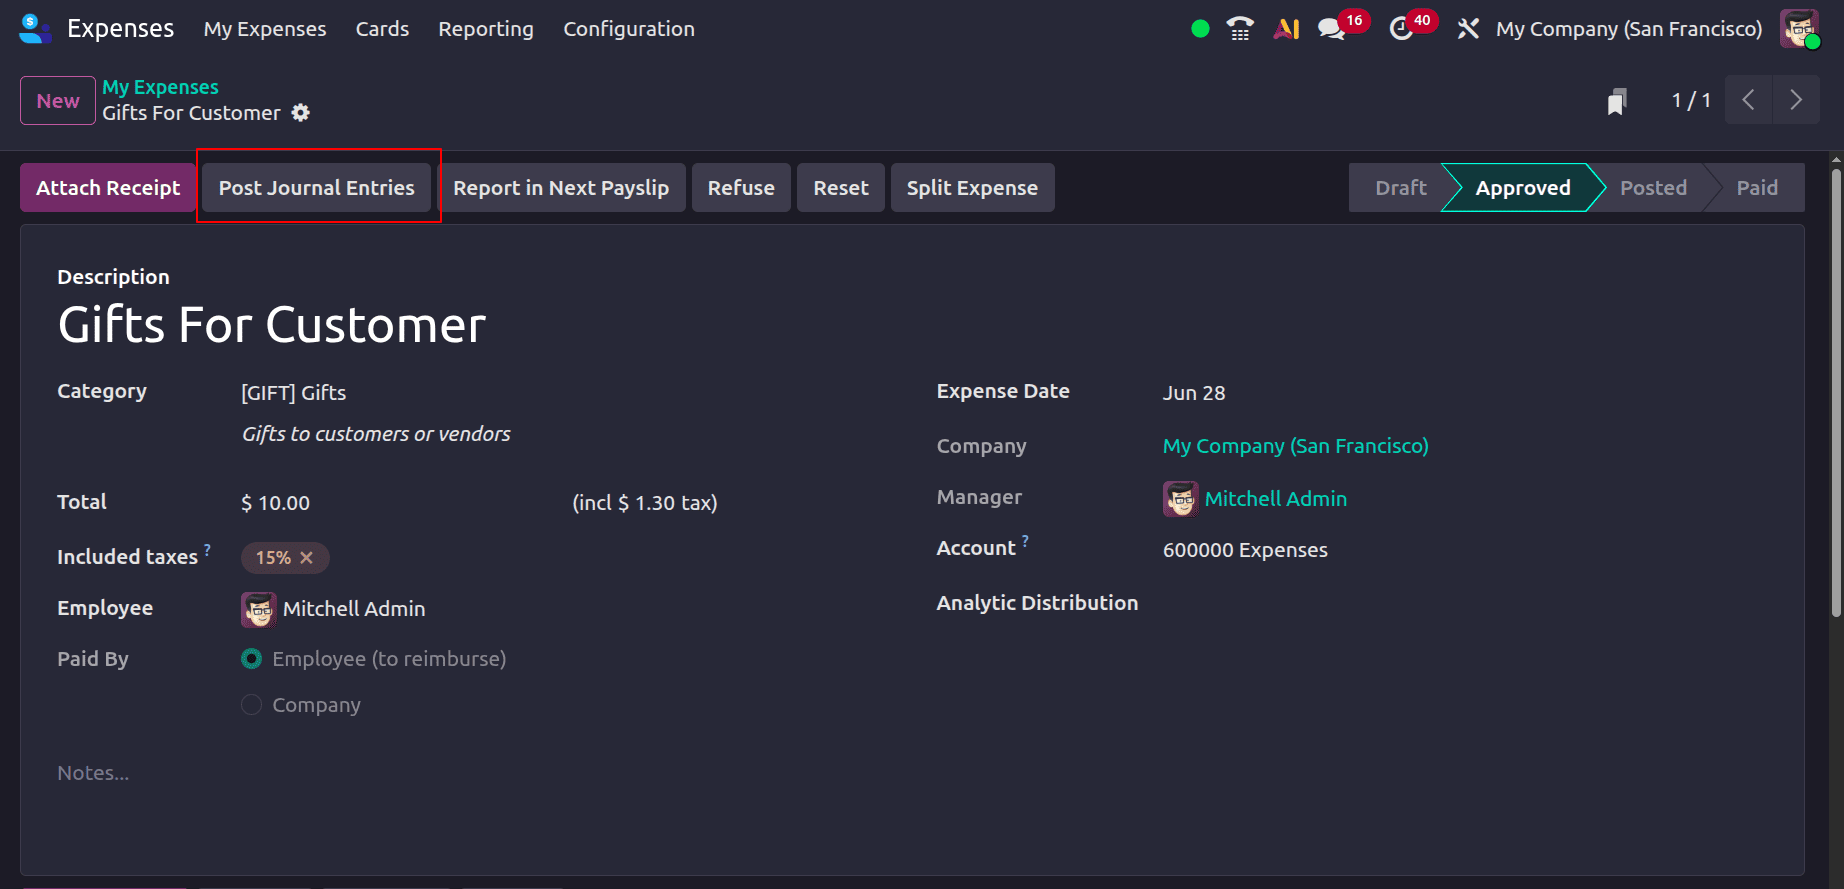
Once the expense has been created, click the Submit button to send it to the manager for approval. Clicking the Post Journal Entries button will post the journal entries for the expense once the manager has approved them.
The Journal Entry smart tab becomes visible once the journal entry has been posted.
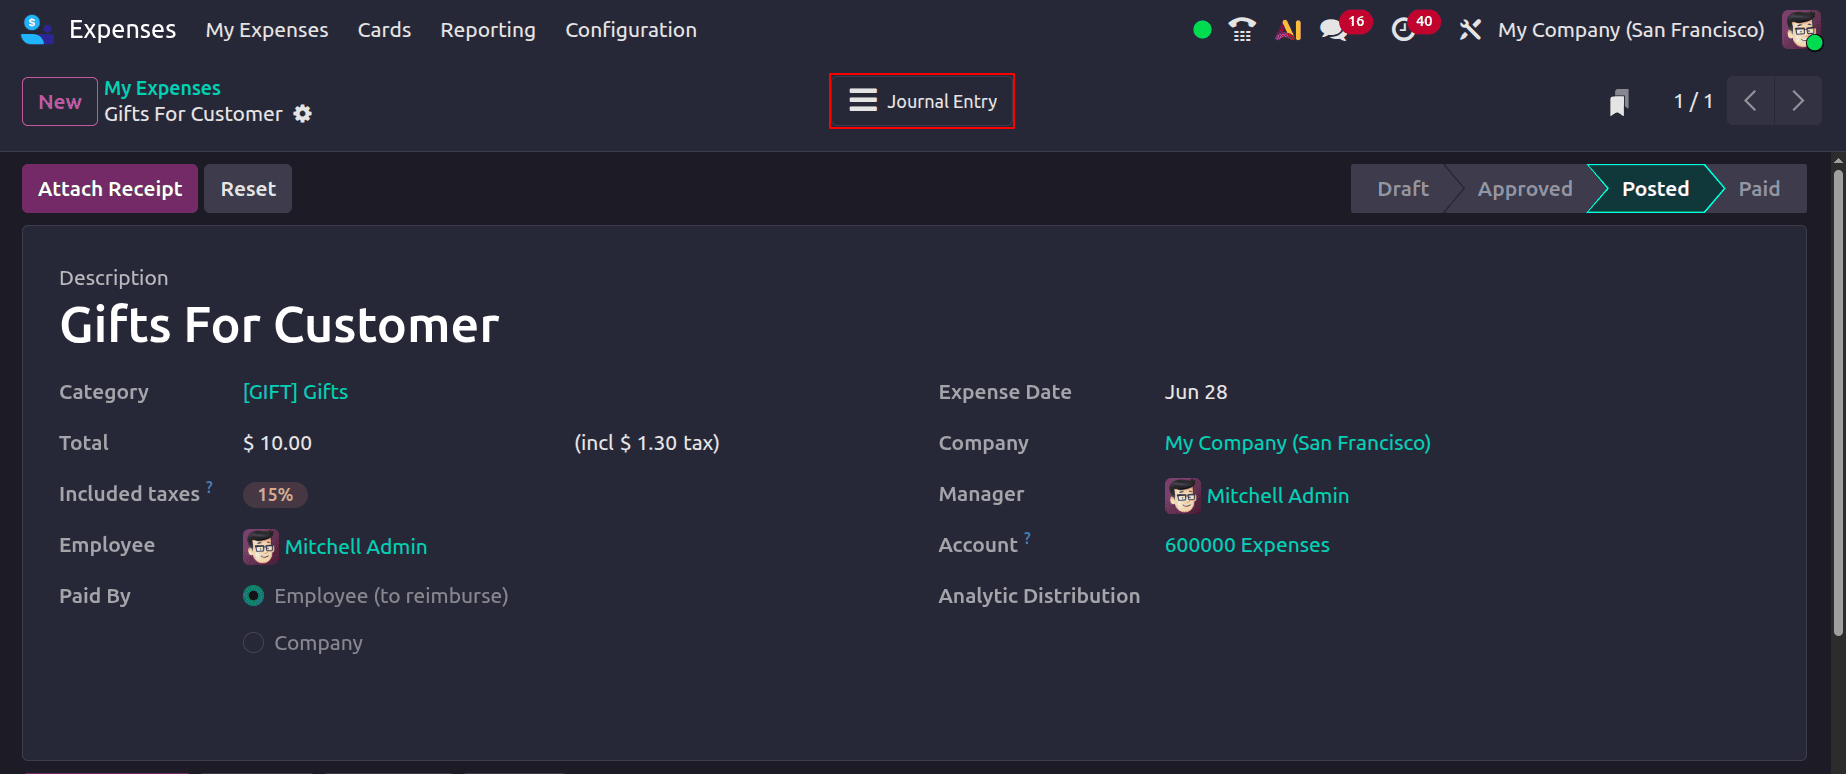
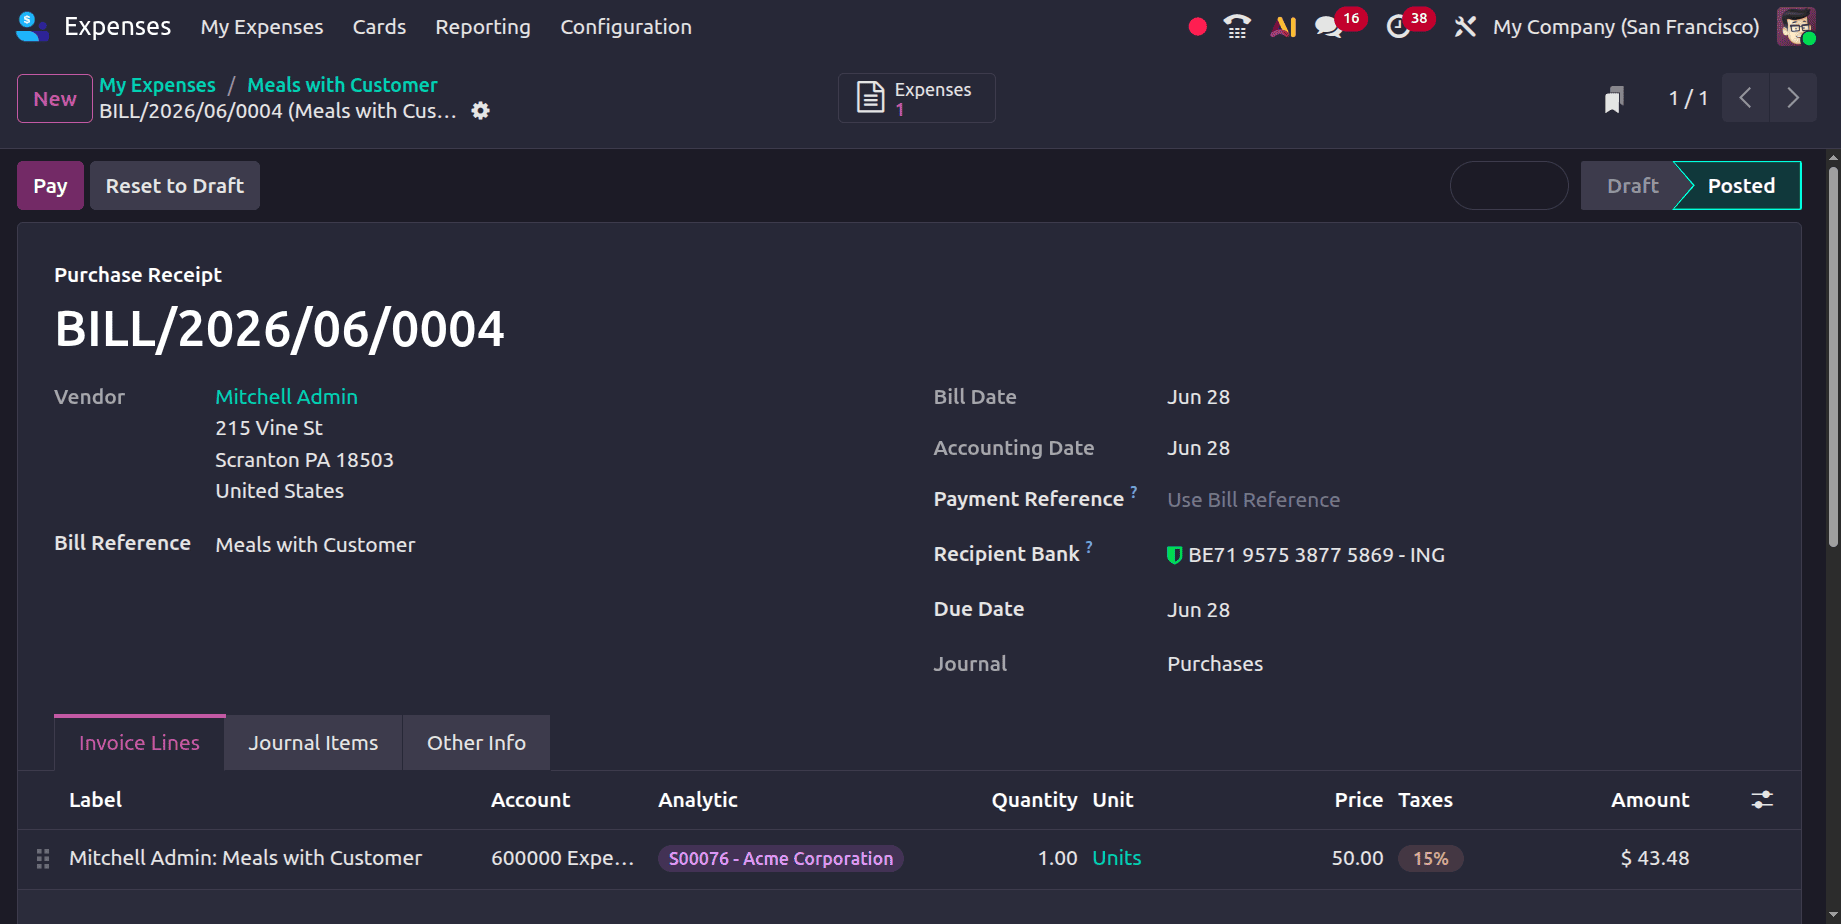
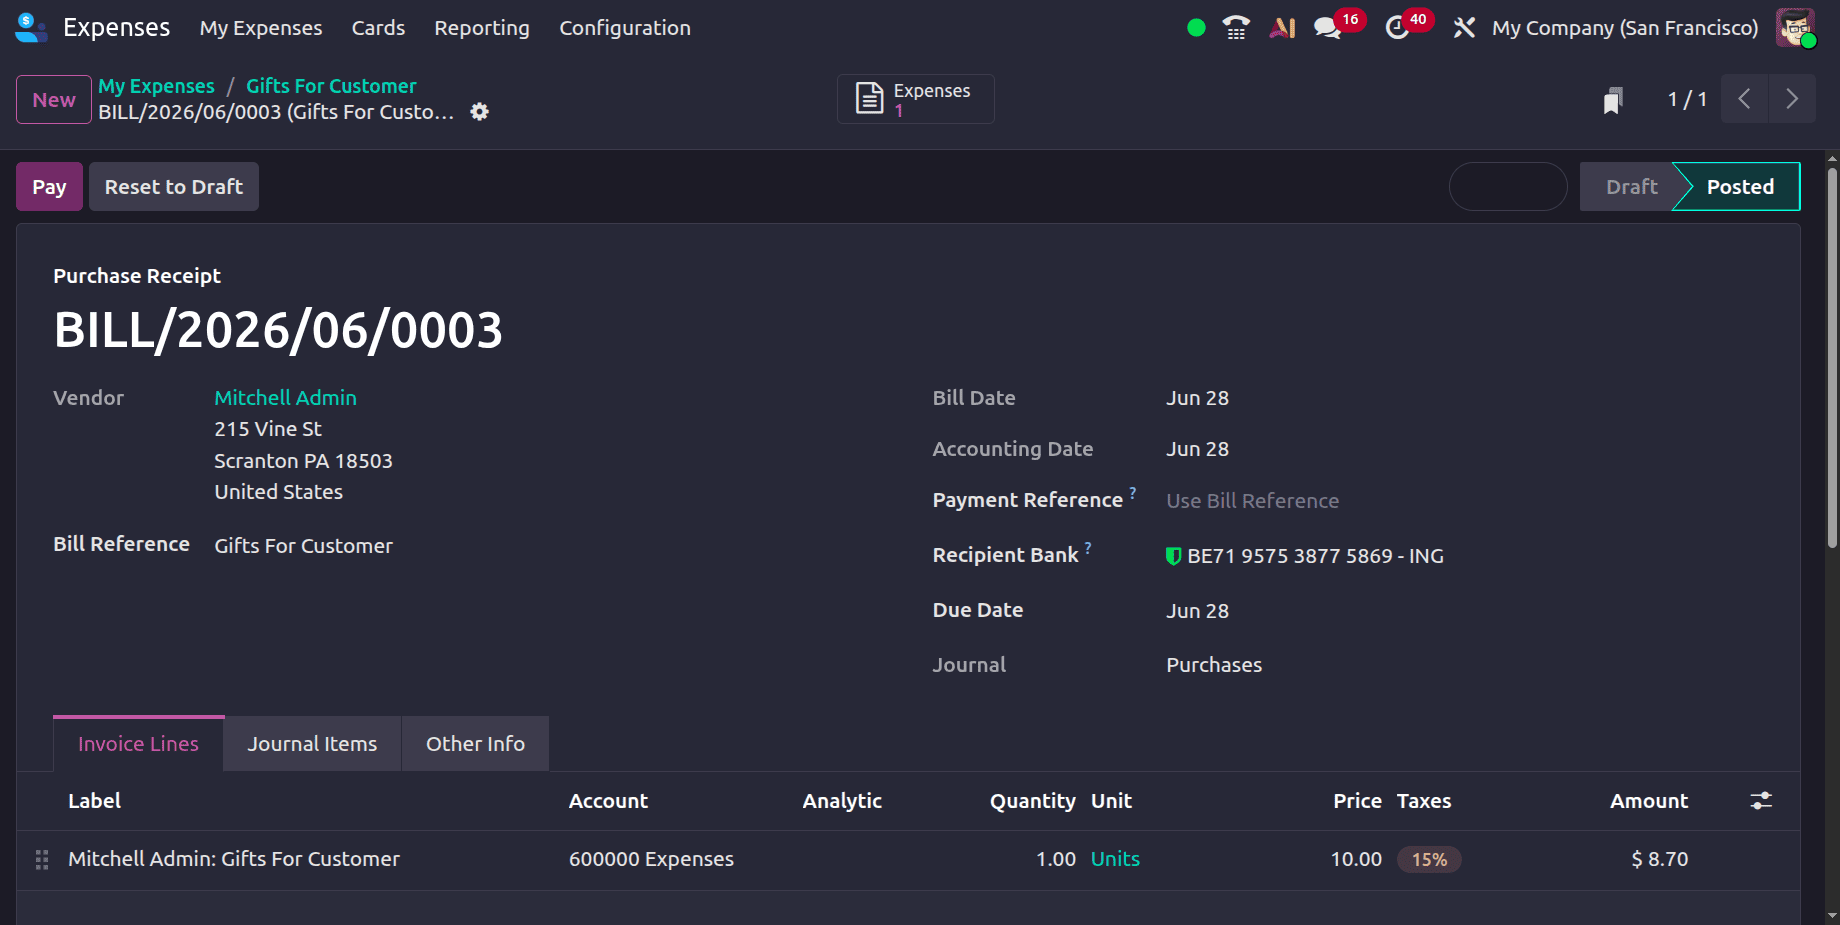
The vendor bill that was generated for the expense is displayed when that is clicked.
This feature makes it very simple to handle the re-invoicing of charges in Odoo 19, enabling companies to bill clients for the costs incurred.
To read more about How to Manage Customer Invoices in a Business with Odoo 18 Accounting, refer to our blog How to Manage Customer Invoices in a Business with Odoo 18 Accounting.