Odoo Website provides us with powerful templates and customization tools for building our own website. One of the ways to make your website more dynamic is to add interactive content that pops up without refreshing or redirecting the page. This blog will demonstrate the same and show the flexibility of the Odoo Website.
Step 1
First, let us add a new page to our website, so let's create a new XML file and add in the following code,
<?xml version="1.0" encoding="utf-8" ?>
<odoo>
   <data>
       <record id="menu_blog_website" model="website.menu">
           <field name="name">Blog</field>
           <field name="url">/blogexample</field>
           <field name="sequence" type="int">3</field>
       </record>
   </data>
</odoo>
This should add a new page to the website called ‘Blog’, and clicking on it will redirect to the URL mentioned in the above record.
Step 2
So now let's create content for the page by writing a controller function, first create main.py in the models folder of our module,
# -*- coding: utf-8 -*-
from odoo import http
from odoo.http import request
import logging
import base64
import markupsafe
_logger = logging.getLogger(__name__)
class BlogWebsite(http.Controller):
   @http.route('/blogmodule', type='http', auth='user', website=True)
   def show_all_bom_items(self, **kw):
       _logger.info("IT IS INFO")
       return request.render('blog_module_1.blog_example')
As you can see at the end of the controller function, we render the specific template we want to show on our new page.
So now let's define our new template, first create a new xml file for adding in the new template,
Step 3
Now let's define our template to something like this,
<template id="blog_module" name="blog_example view">
    <tr t-call="website.layout" id="layout">
   	 <div class="main_layout">
   		 <div class="dummy_div_3">
   			 <h3 class="change">Type In</h3>
   			 <input type="text" id="lname" name="lname"/>
   			 <br/>
   			 <button type="button" class="show_class" t-on-click="_showtext">Show</button>
   			 <t t-call="blog_module_1.show_text"/>
   		 </div>
   	 </div>
    </tr>
</template>
As you can see, we first call in the main website layout using <t-call=”website.layout”> . This calls in the main website layout, from where we can make our required modifications.
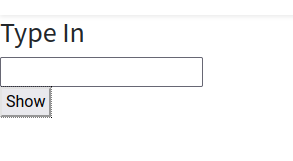
Step 4
So now let's add a simple input box and a button and attach a click function to it.
As you can see, after defining the button, we also load in a secondary template, which will show our dynamic content. Lets us define this secondary template.
<template id="show_text" name="Blog Text">
<h3 id="text1">
<t t-if="text" t-esc="text"/>
</h3>
</template>
Step 5
Now let's write a javascript function for adding in the dynamic content, so let's create a javascript file in the static/src/js directory.
odoo.define('blog_module_1.blog_widget', function(require) {
   'use strict';
   var rpc = require("web.rpc");
var publicWidget = require('web.public.widget');
var utils = require('web.utils');
var wSaleUtils = require('website_sale.utils');
publicWidget.registry.BomWidget = publicWidget.Widget.extend({
       selector: '.dummy_div_3',
   events: {
       'click .show_class': '_showtext'
   },
_showtext:function(ev) {
console.log("ssdad")
rpc.query({
           route: "/bomitems/item/update",
           params: {
               text: document.getElementById('lname').value
           },
       }).then(function (result) {
       $('#text1').empty().append(result);
       })
},
       });
           });
In our javascript file, we first have to set up a selector class, this class is the main class, and any class under it can be assigned events/triggers that we can execute.
So let's set the selector class as dummy_div_3 and set up the click event for the class show class. Here, we set the _settext function as the function to be triggered when we click on show_class.
In this function, we have to mention the controller route, which has to trigger to load in the dynamic content and also passes in the parameters.
As you can see in our javascript function, when we click on the show button, we take in the input from the input text box and passes it in as a parameter into our route,
So now let's define our route in our controller python file main.py in the controllers.py,
@http.route('/blog_module_1/item/update', auth='public', type='json',website=True)
def update_bomitem(self, text):
   print("Testing function call....",text)
   values = {
       'text': text,
   }
response= http.Response(template='blog_module_1.show_text', qcontext=values)
   print("response: ", response.render())
   return response.render()
As you can see at the end of the above function, we dynamically load the content, which in our case is the text from our input box, and now it goes back to our javascript function, which then empties our secondary template and then appends in the text to the template.
This is how we can load dynamic content into Odoo without refreshing the page.